Starter Guide: How to Create a Donation Form with Gravity Forms

If you run a nonprofit organization, then it is vital that you display an attractive and user-friendly donation form on your website, helping you to collect much-needed funds for your cause. Here at Gravity Forms, we are delighted that so many of our customers come from the nonprofit community, and we thrive to support each and every organization throughout their journey.
Gravity Forms is a natural fit for any nonprofit organization. Not only do we offer a wide range of integrations that can be used to help you create a unique donation experience for your contributors, but we are also known for our impeccable track record with security and reliability – a must for any reputable platform that deals with people’s money and data.
In this Starter Guide, we will look at how to create a donation form for your website, using a selection of form fields and conditional logic. Importantly, we begin by discussing the different payment processor options that Gravity Forms integrates with, and how to sync these with your form.
Let’s get started…
Payment Options
One of the key benefits of using Gravity Forms to create a donation form for your website is the wide assortment of payment processors that you can use. These include…
Choosing the right Payment Add-On for your donation form is a must – by ensuring the payment Add-On caters directly to the needs of your donors, you streamline the donation process, which will help to boost submissions. You also need a payment processor that can support the needs of your organization. Consider these key factors when making a decision…
- Payment Methods – Each payment processor offers a range of different payment methods that your customers can use to make a donation. As well as all major debit and credit card providers, other payment options to look out for include credit card types that are local to your area of business, as well as Google and Apple Pay (available with Stripe).
- Fees – All payment processors charge transaction fees, which vary greatly in price. Some payment processors offer discounted fees for nonprofits, but not all, so it is worth doing your research before signing up.
- Currencies – If you are based outside of the US then it is always worth checking that the payment processor deals with your local currency (as well as finding out the fees charged for that currency). For local European currencies, we recommend Mollie.
- Support – Reliable support is always a must when you are selling online. Again, do your research and find out which payment providers are known for their high-level support – 24/7 live chat or phone support within your region is always useful, as well as a user-friendly help center.
All Gravity Forms Payment Add-Ons can be installed from within your WordPress dashboard. Simply select Forms > Add-Ons and click Install when you find the appropriate add-on.
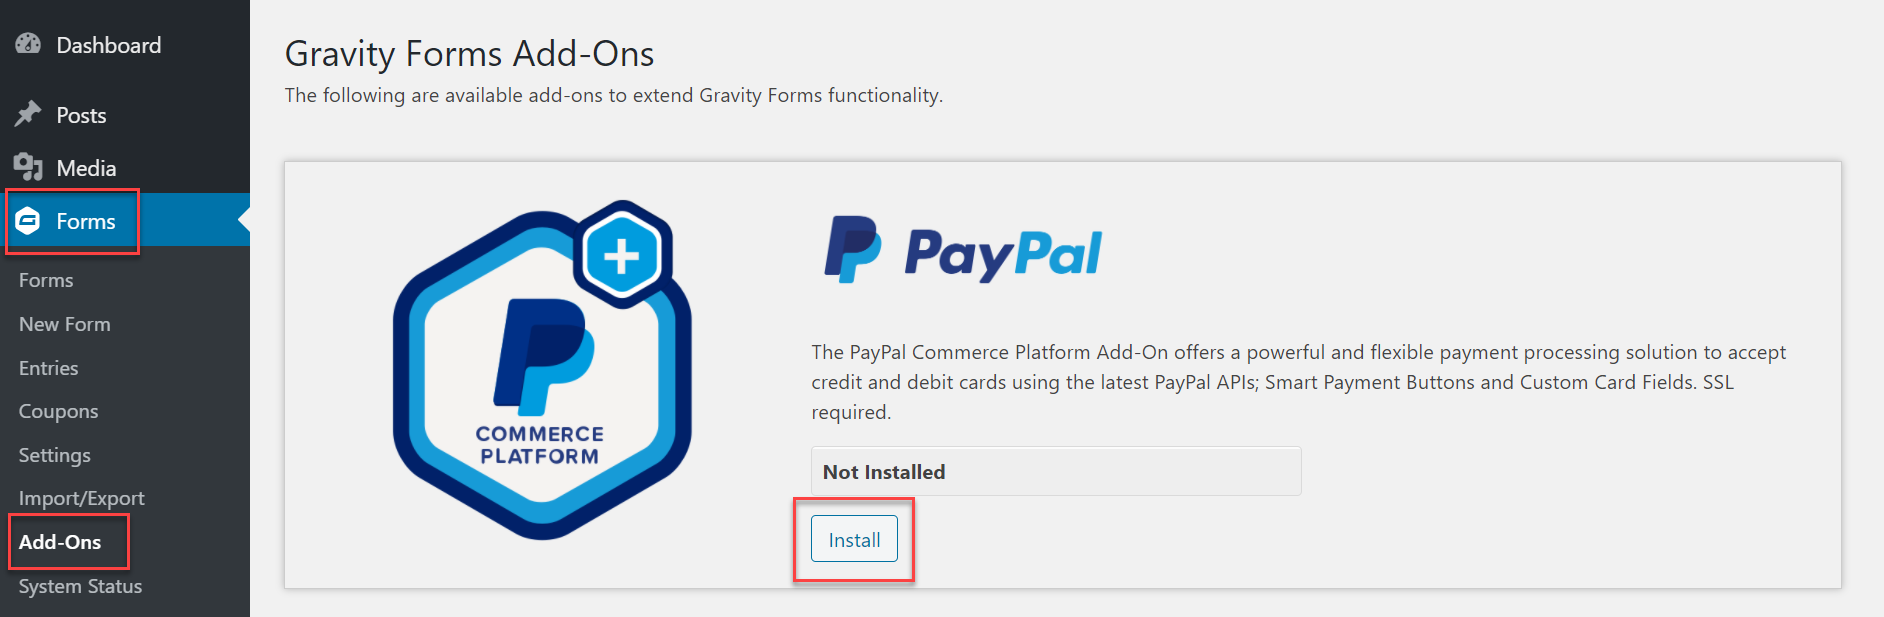
To integrate each specific payment Add-On after installation, check out our extensive Add-On documentation.
Once you have installed a payment processor Add-On, you are ready to create your donation form…
How to Create a Donation Form
The donation form you create will very much depend on the needs of your organization and the information you want to collect. However, the following instructions will walk you through how to put together a basic donation form and customize it to suit your needs.
Step 1: Create a New Form
Within your WordPress dashboard, select Forms > Add New, and give your form a name and description.
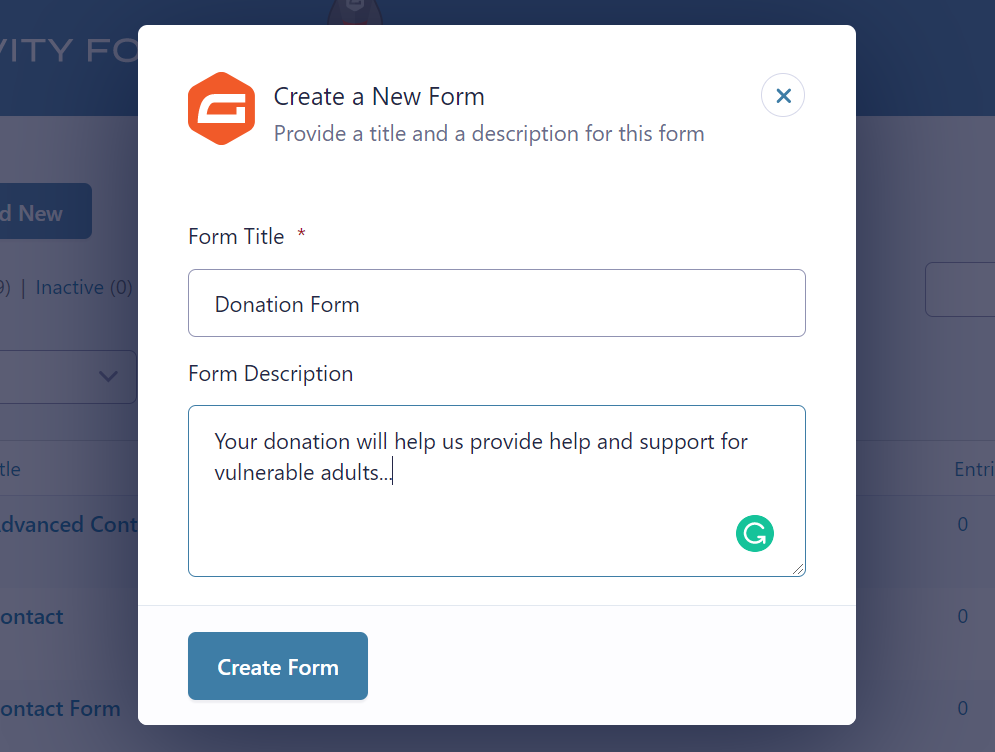
Consider your form description carefully, although it isn’t mandatory, a well-crafted description can speak directly to your audience, encouraging them to make a donation.
Step 2: Add Personal Information Form Fields
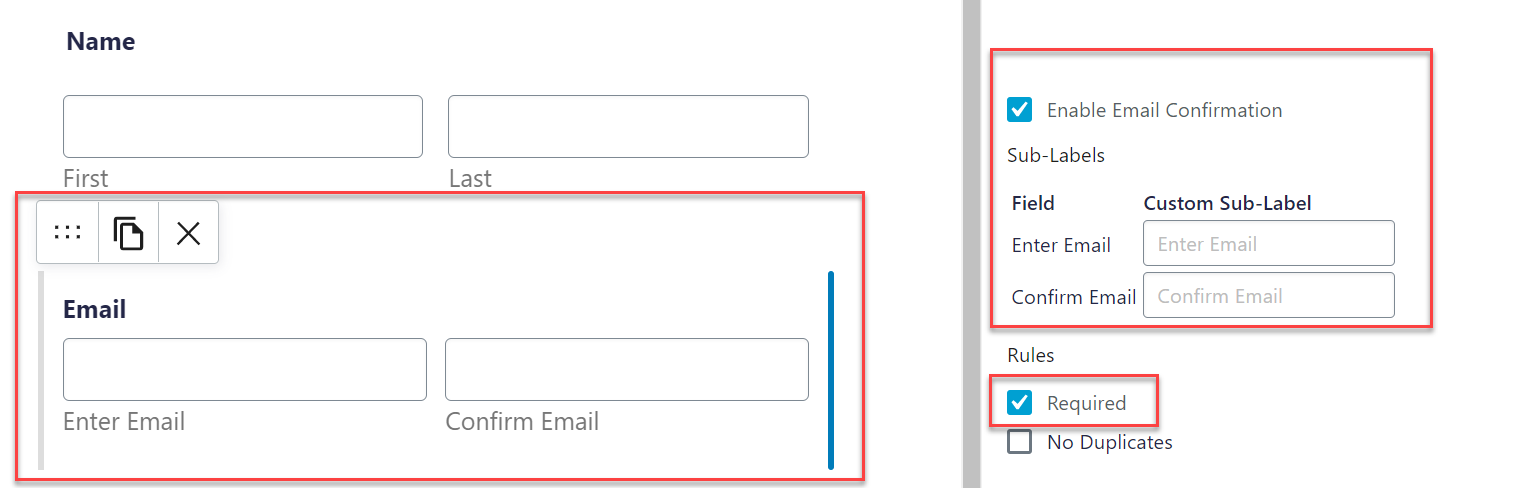
Start by adding the personal information fields that you want on your form. We recommend Name and Email, which can be found in the form editor under Advanced Fields.
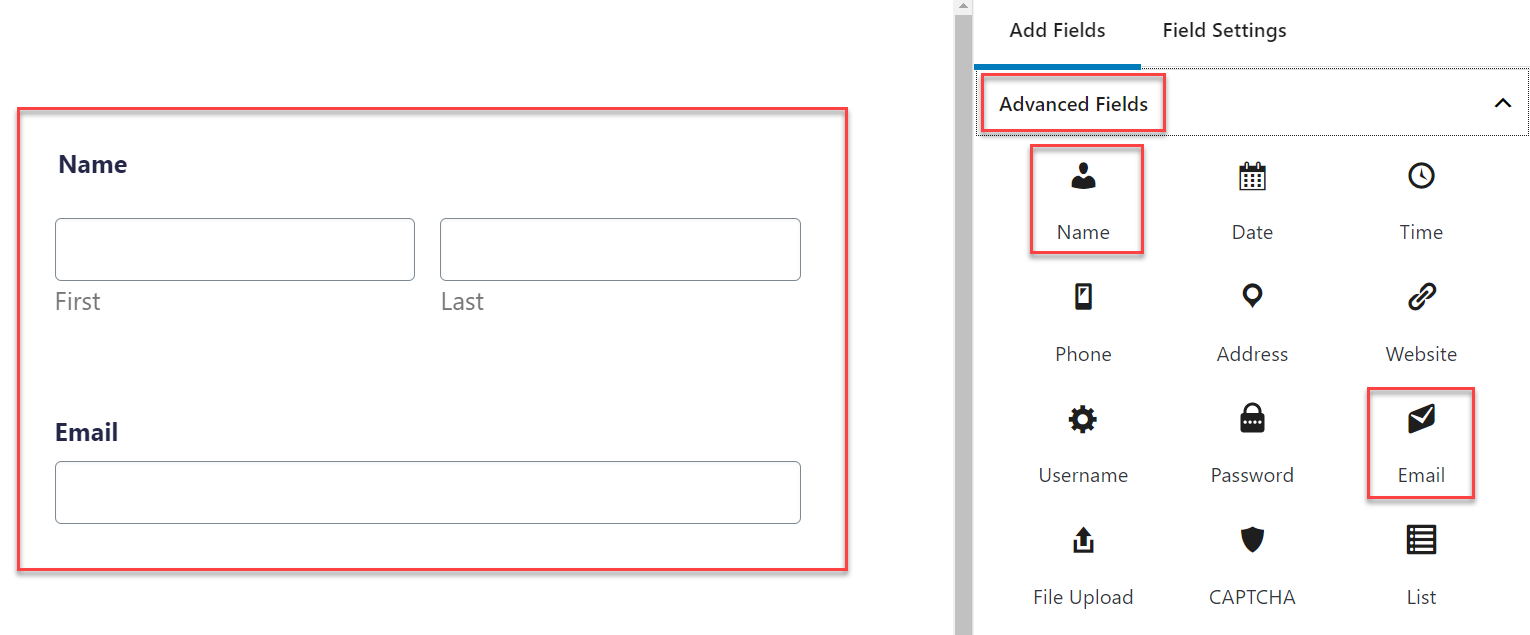
We also recommend enabling Email Confirmation and making both Name and Email fields Required. This ensures you collect people’s correct emails and that forms aren’t submitted without them.
You may also want to add further personal information fields including Phone Number and Address. However, try to make sure you only collect information that is essential – if the form becomes too long you risk missing out on donations.
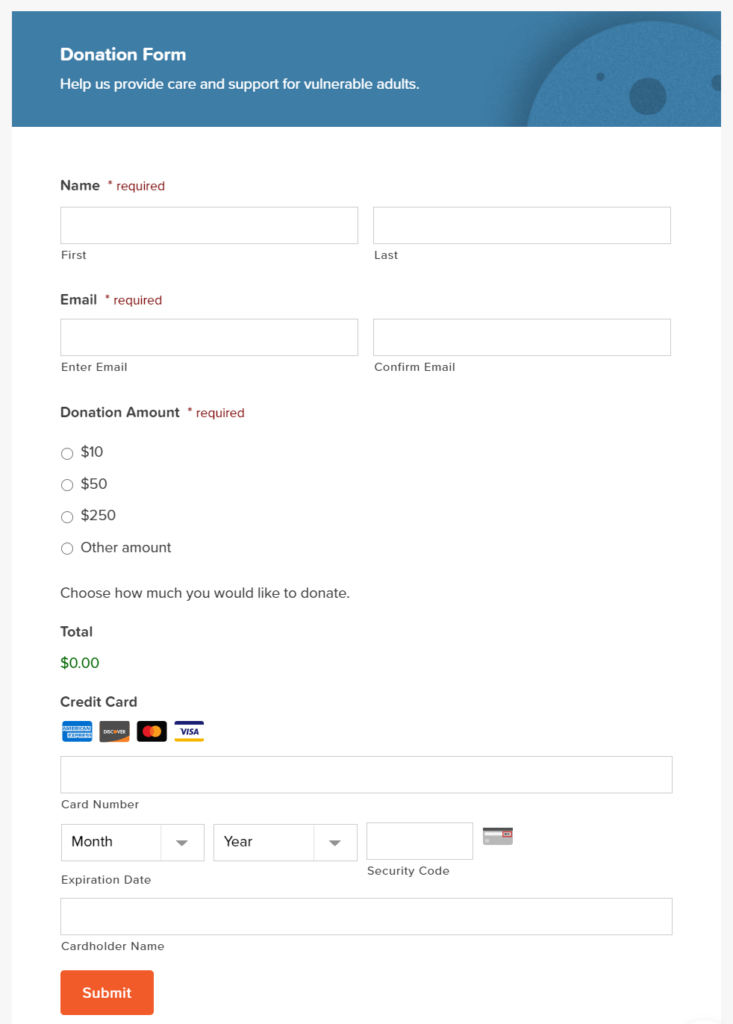
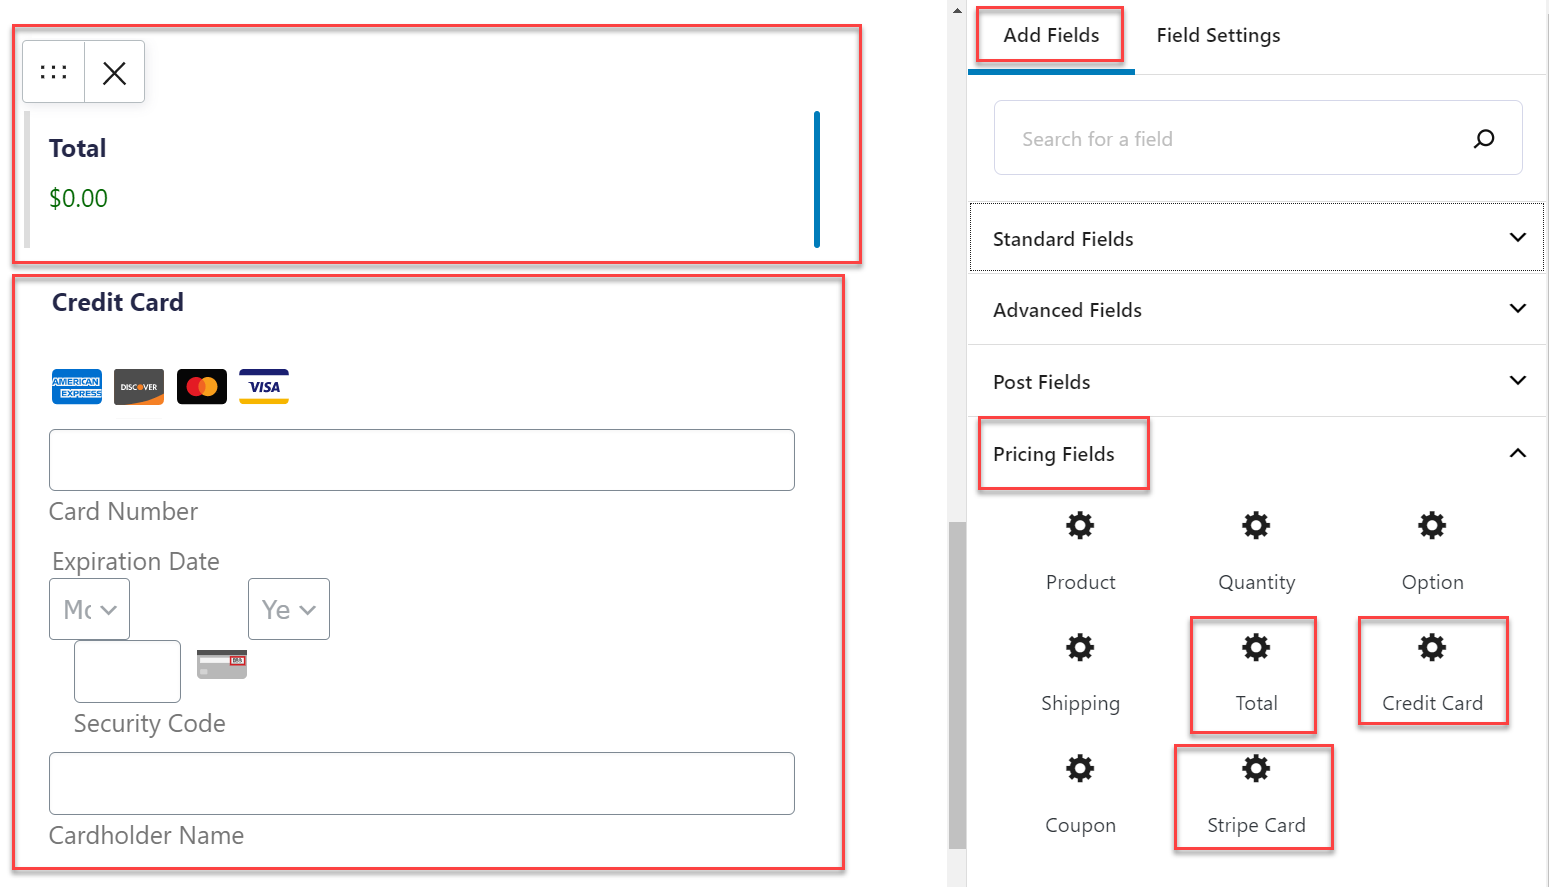
Step 3: Add Pricing Fields
To accept monetary donations on your website you will need to add Pricing fields to your form. You will probably want to give people the option of donating different amounts…
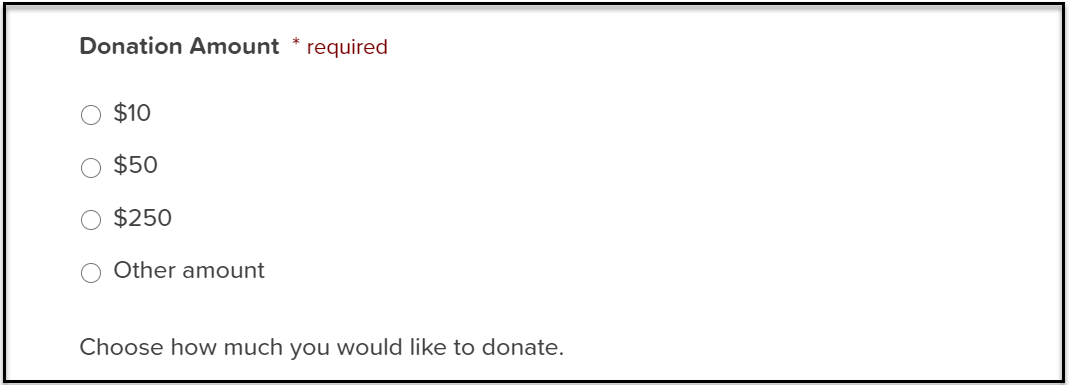
To set this up, select the Product field and within Field Settings choose Radio Buttons. Add in the donation amounts you would like users to choose from, and then add an extra option for ‘Other Amount’.
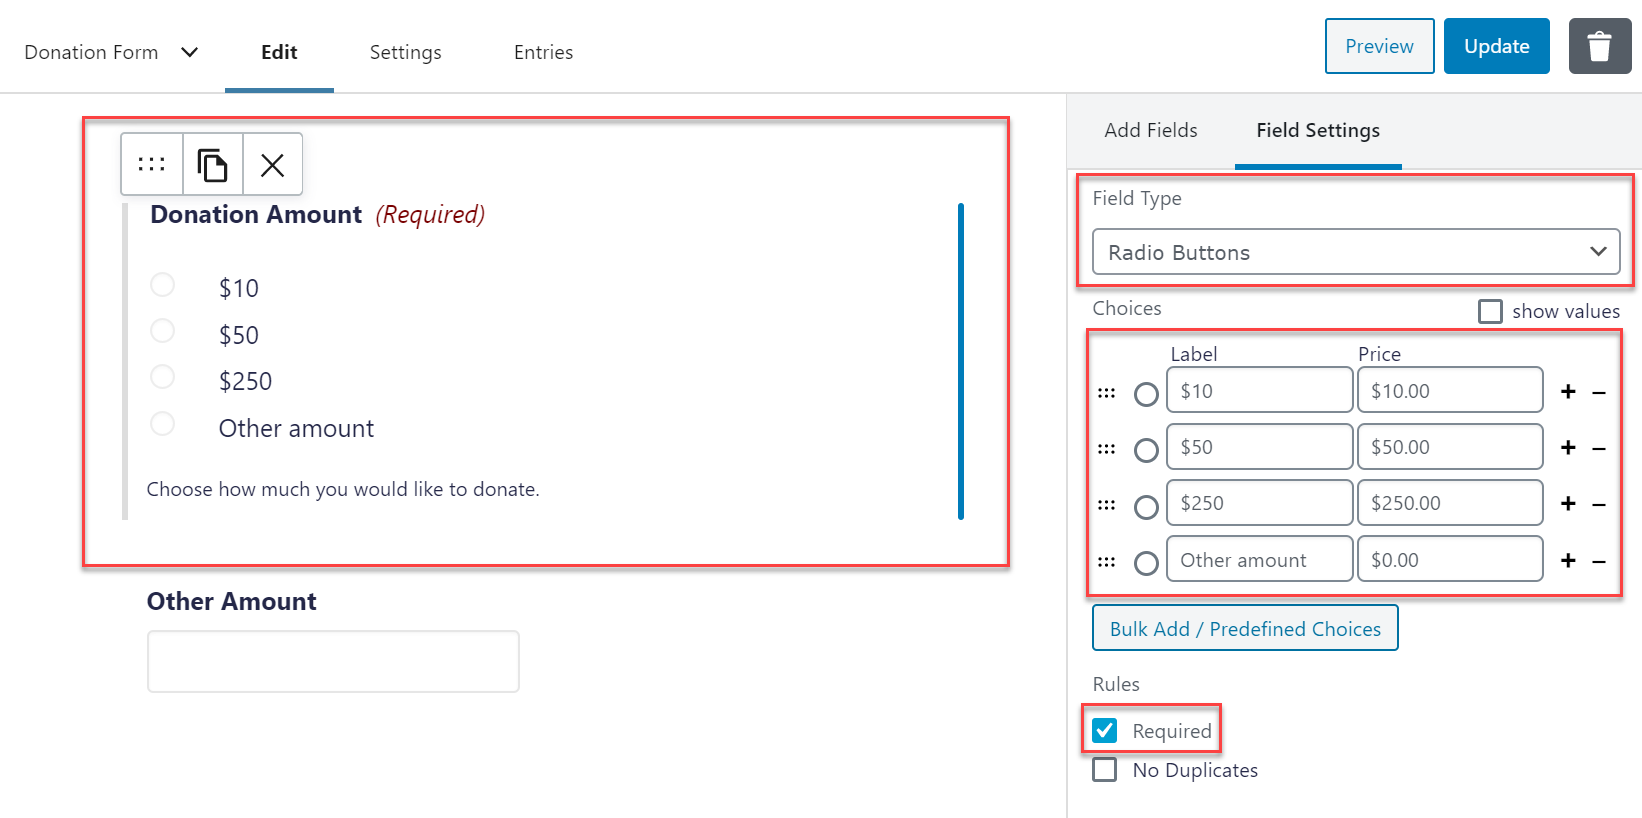
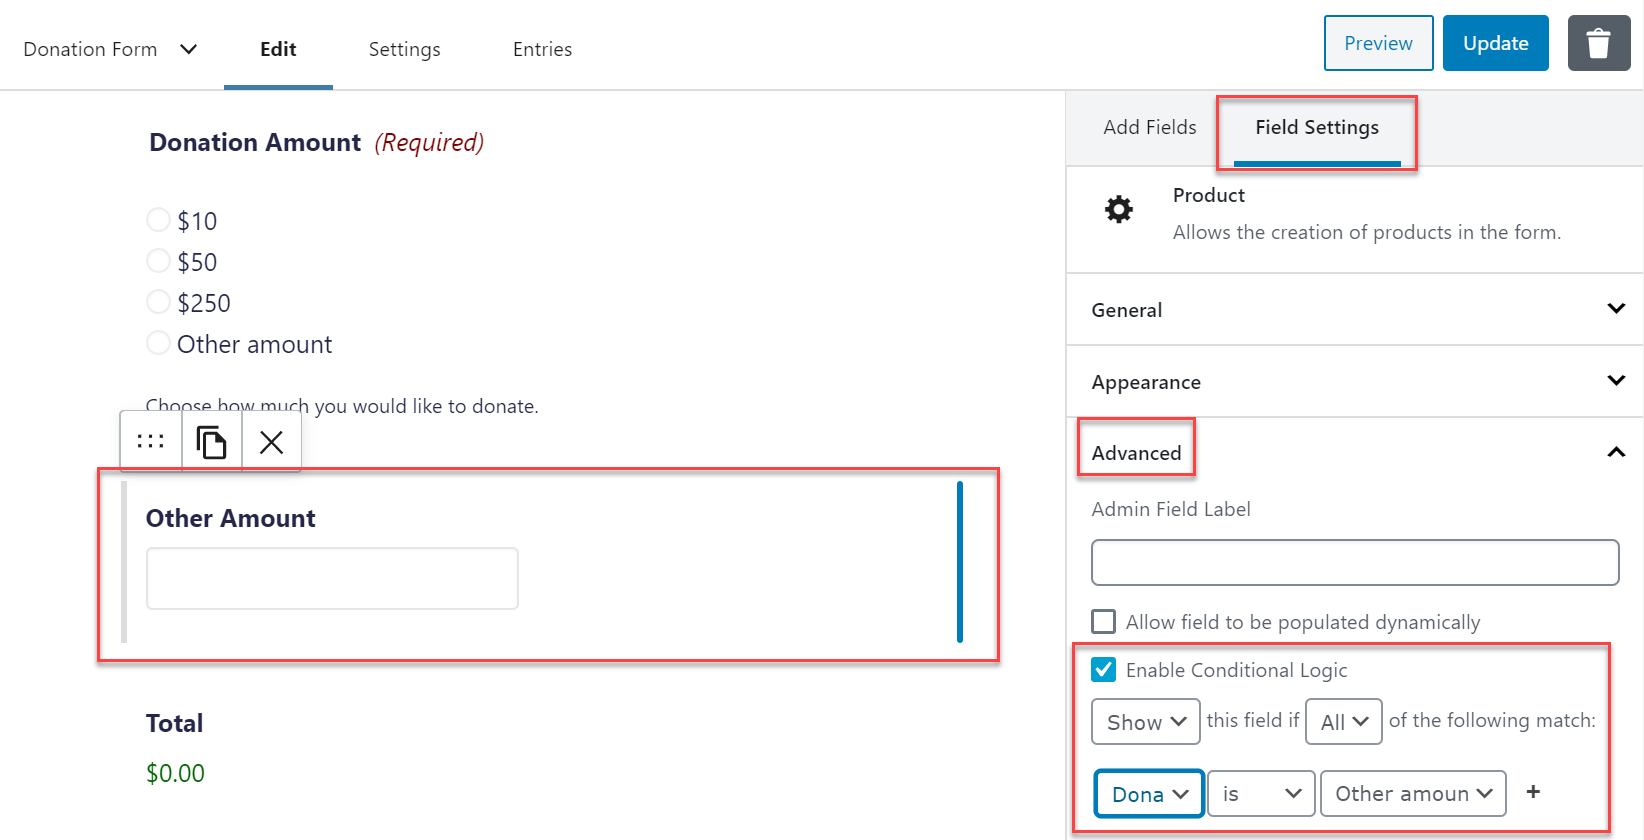
Next, select a second Product field underneath the existing field that you have just customized – also name this ‘Other Amount’. You will need to add conditional logic to this field, to allow people to enter their chosen donation amount if they select the radio button ‘other amount’.
To do so, within Field Settings > Advanced select Enable Conditional Logic. Then choose – Show this field if All of the following match: Donation Amount is Other Amount.
Lastly, you just need to add the Total field and the appropriate Card field (eg – Credit Card, Stripe Card, etc – this will depend on the payment processor you have chosen to use).
Now save your form and Preview it to check it is working.
Step 4: Add Any Extra Fields
You may want to add some extra fields to collect more info from your donors. Here are some examples…
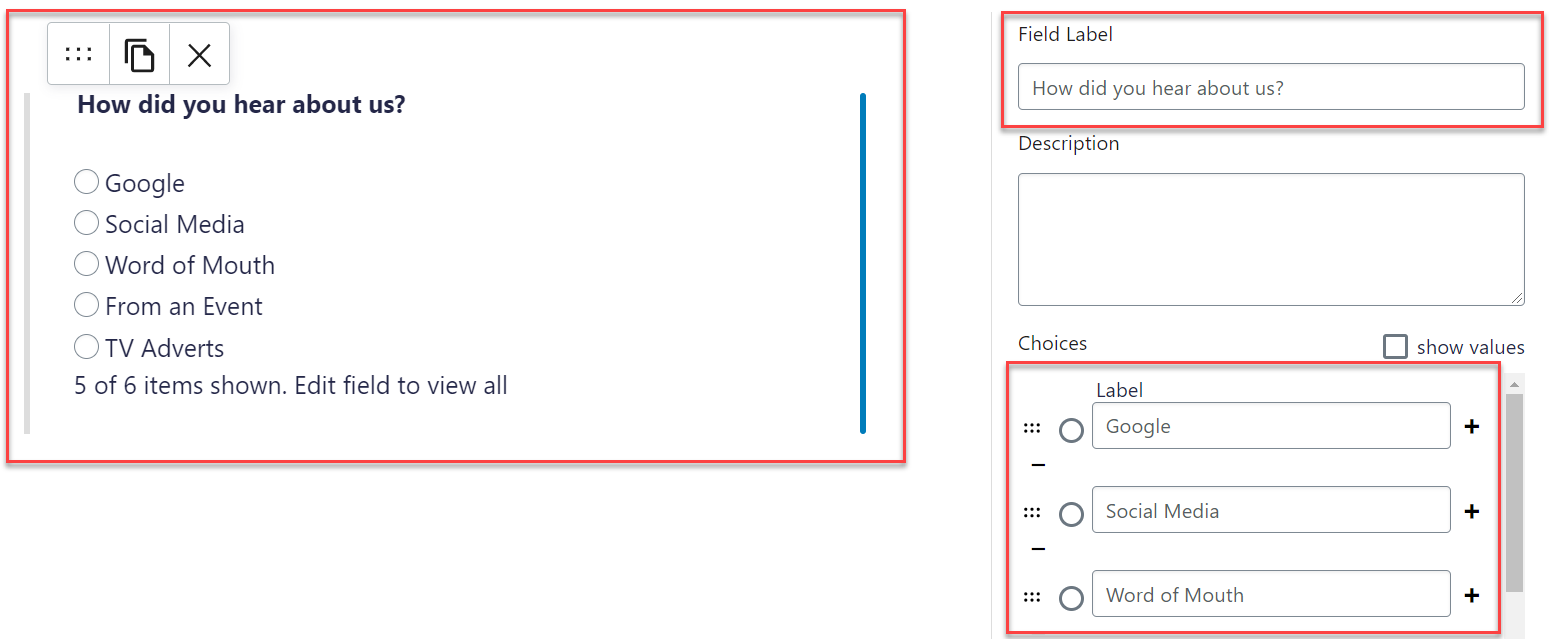
How did you hear about us?
For marketing purposes, you may want to track how your donors found out about you or why they decided to donate. This gives you a good idea of which campaigns are working and helps to inform future marketing planning.

To create this option select the Radio Buttons field, which you will find under Standard Fields. Radio Buttons can then be customized within the Field Settings.
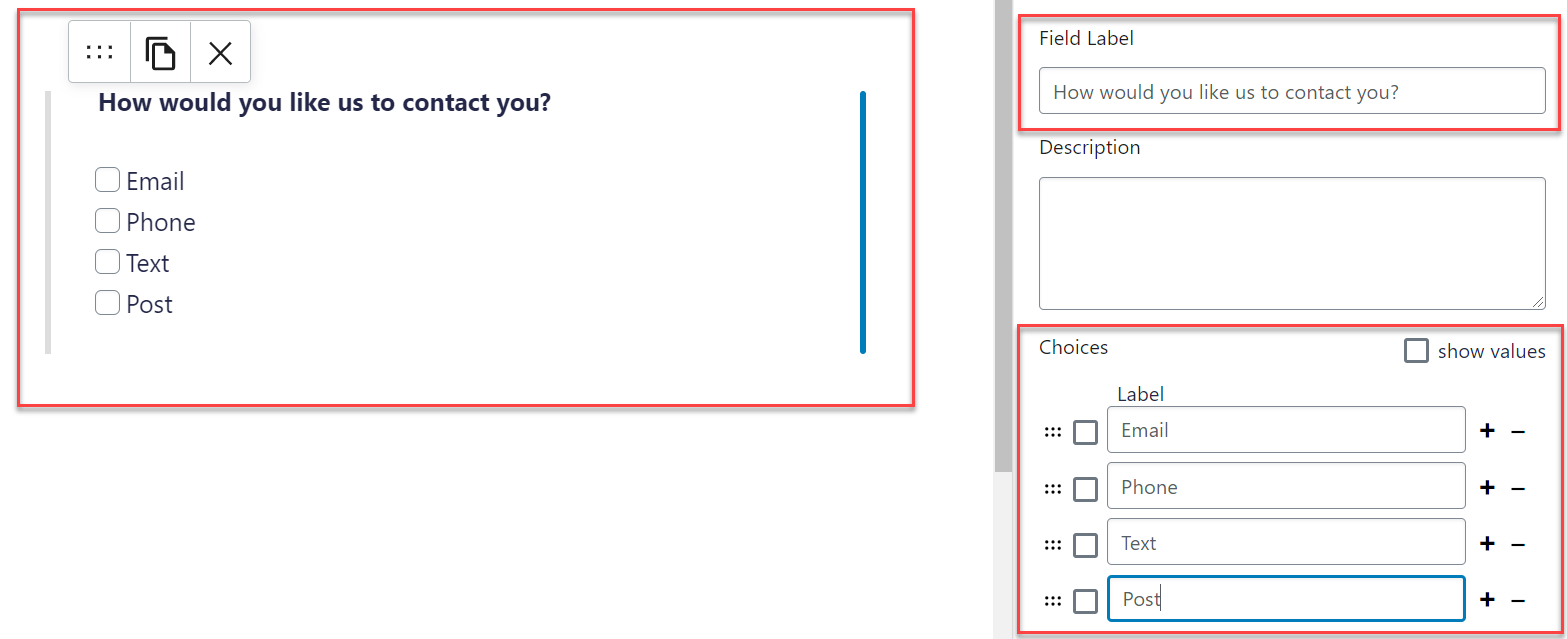
How would you like us to contact you?
Give donors some options for correspondence, letting them select the lines of future communication on their own terms.

If you want them to be able to select more than one option, select Standard Fields > Checkboxes and then customize within the Field Settings.
Managing contacts once they have opted into future correspondence is key to nurturing long-standing support and contributions. Consider integrating your form with an email marketing solution like Mailchimp or a CRM like Hubspot.
For more information on managing your contacts, have a read of this article The 8 Best Email Plugins for WordPress 2020.
Consent to our privacy policy
The rise of privacy protection laws over the last few years has necessitated that nonprofits add privacy policies to their websites.
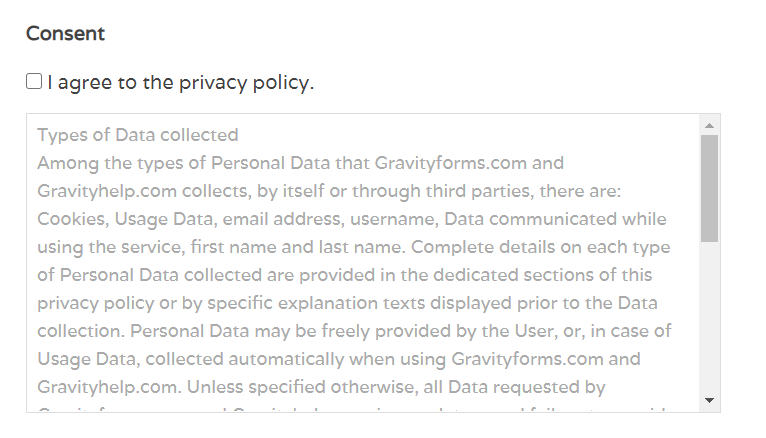
With Gravity Forms, you can display your privacy policy via the Consent field, found under Advanced Fields.
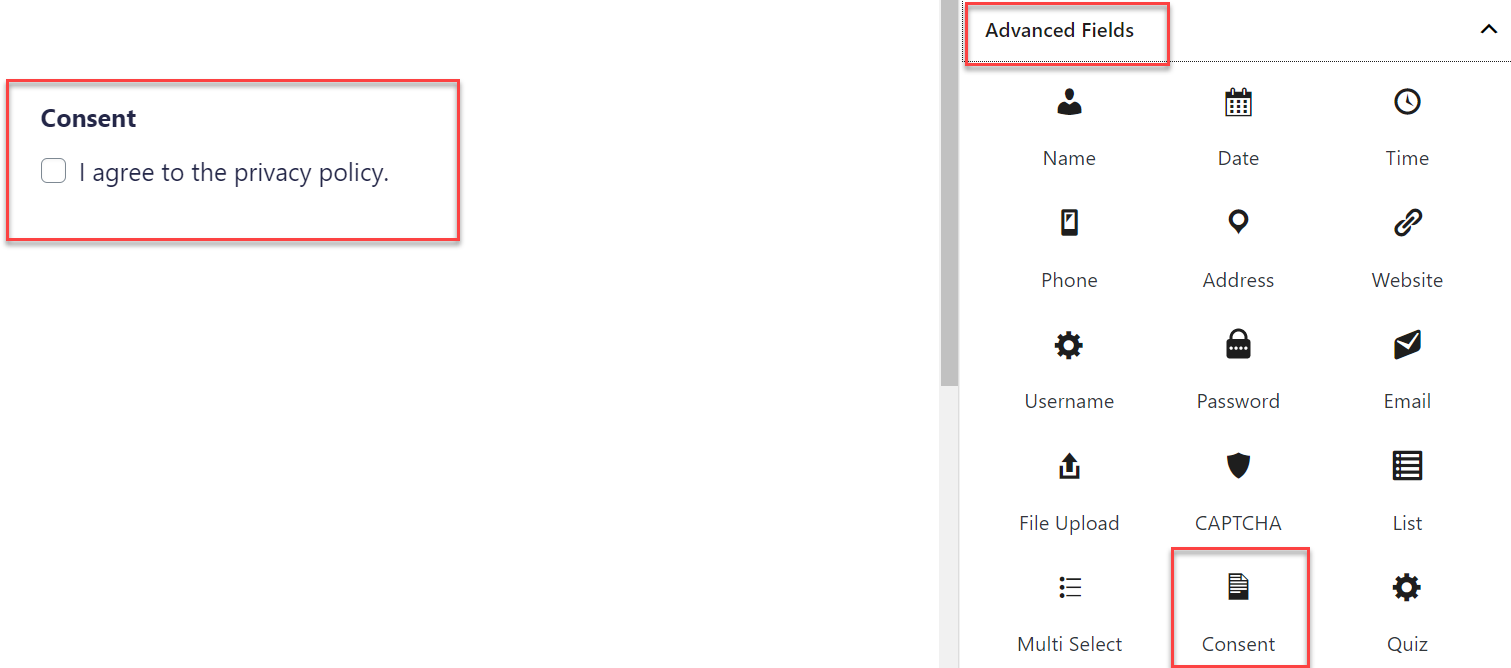
For more information on how to use this field, check out the article How to Collect and Store Consent with the Gravity Forms Consent Field.
Step 4: Create a Feed for Your Payment Form
Once you’ve created your form, you will need to connect it to your chosen payment processor. To do this you will need to create a Form Feed, which you can do within the Form Settings.
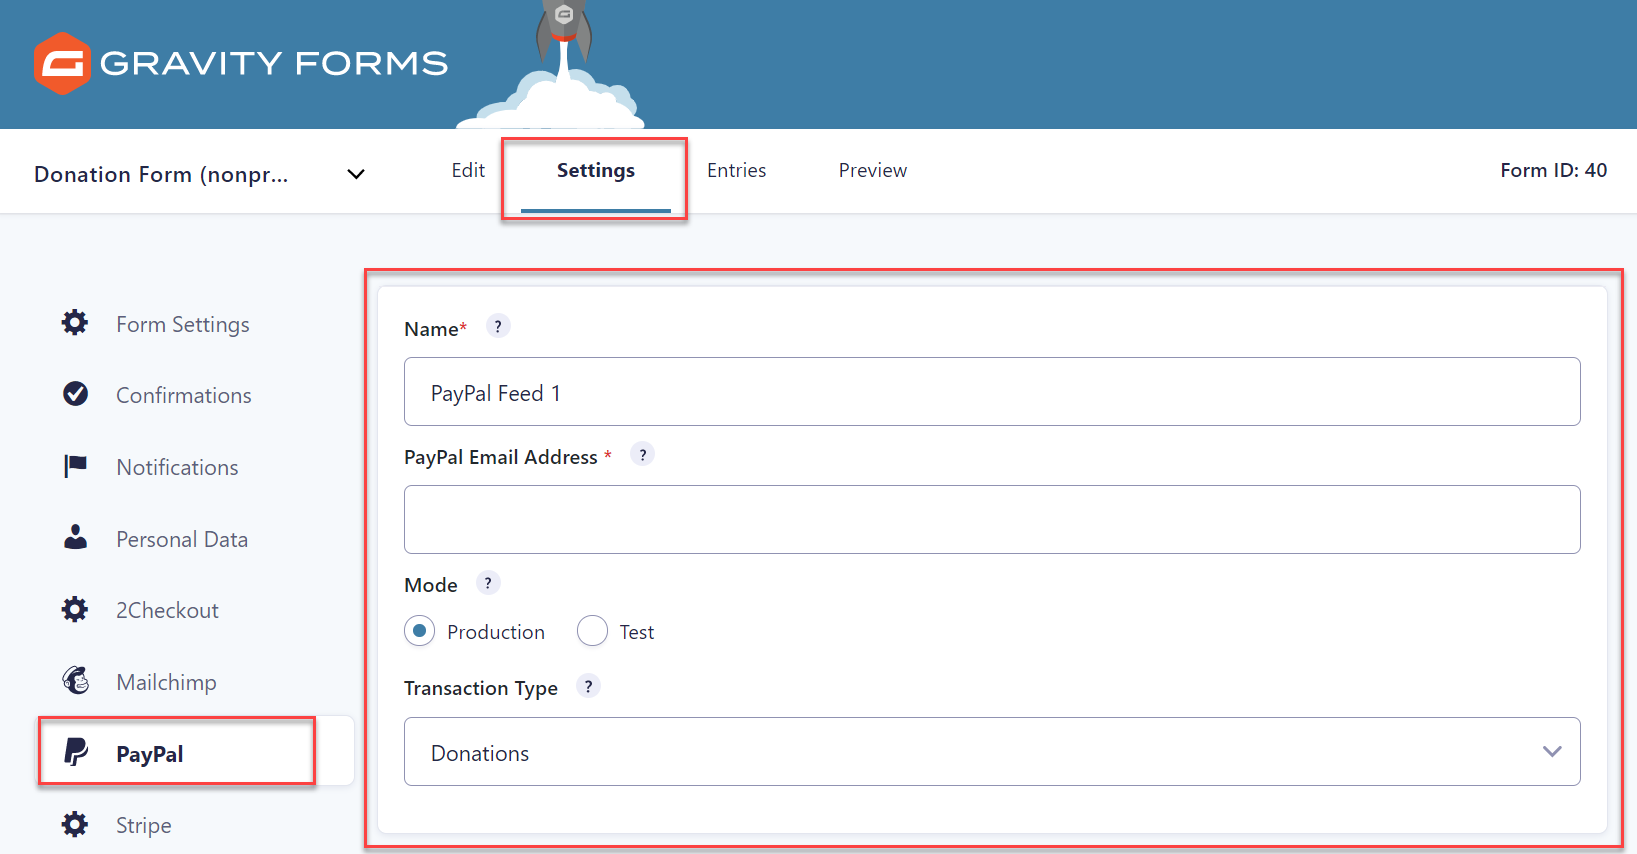
This is a quick and easy process that is written about extensively within the Gravity Forms documentation, with clear step-by-step instructions laid out for each payment Add-On.
Step 5: Edit the Confirmation Message
When a donor submits a form, a confirmation message will automatically be displayed directly on their screen. By default Gravity Forms displays the confirmation message ‘Thanks for contacting us! We will be in touch with you shortly.”
More appropriate for a donation form would be a message thanking the contributor for donating money to your cause. To alter this message, click on the Settings tab within the form editor and then select Confirmations.
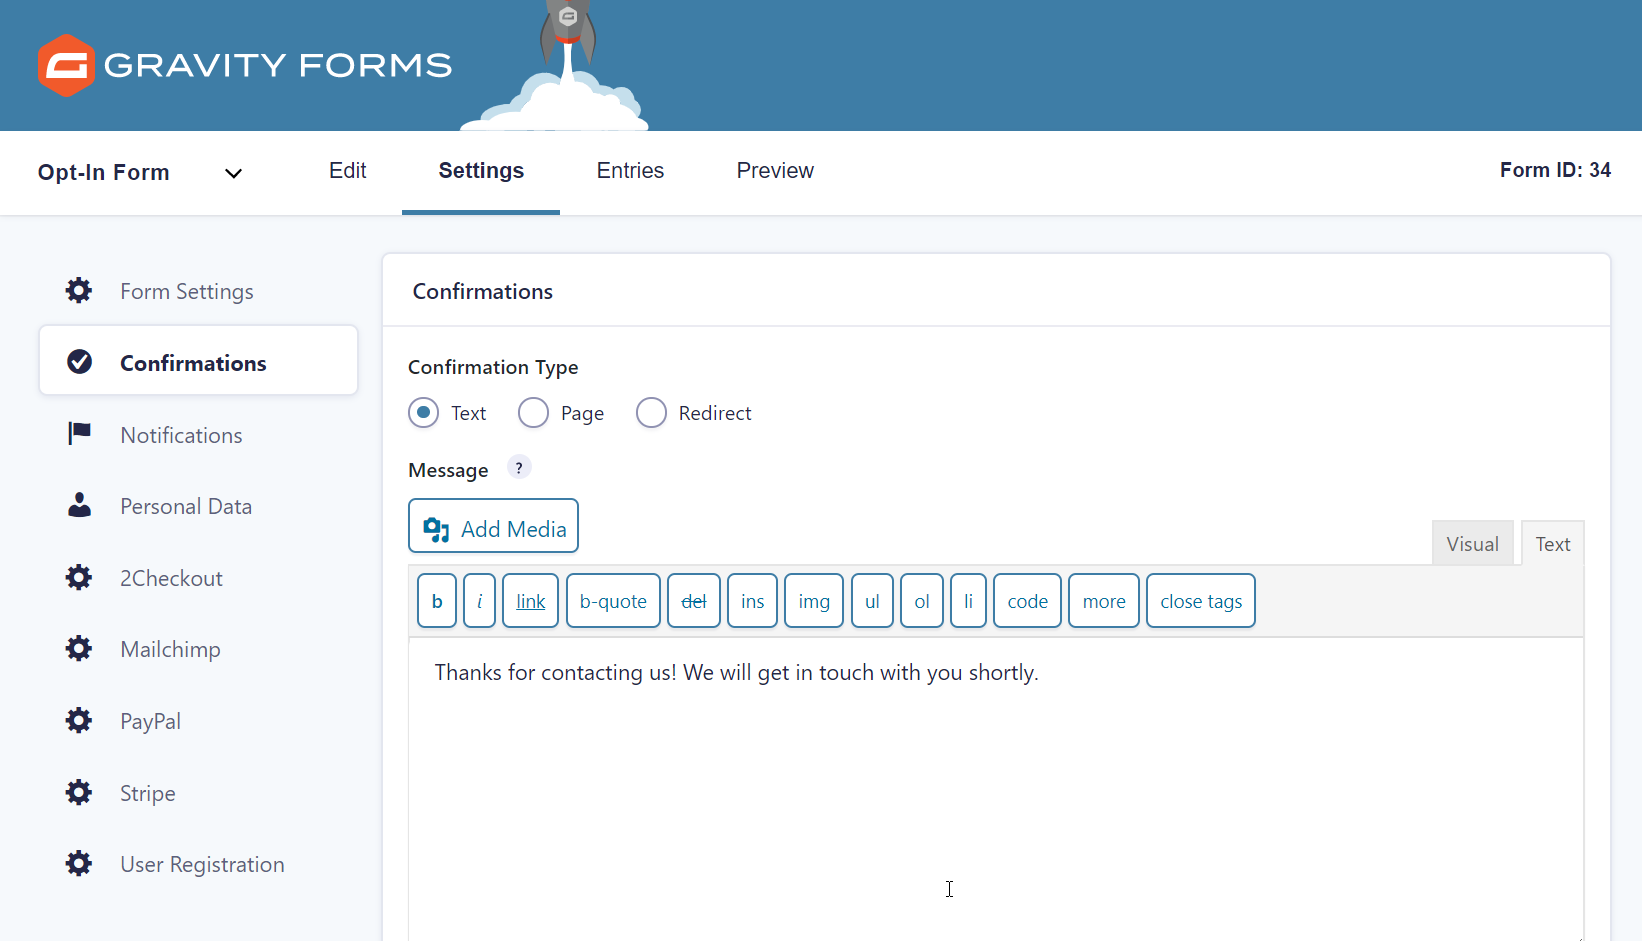
Once you have re-written the message, hit Save Confirmation at the bottom of the page.
If you have a large amount of information you want to share with your donors after form submission, you may want to redirect them to a new page. This could be a thank you page, provide links to social profiles and blog posts, or share further info on how to become involved with your organization.
Have a read of this article, How to… Redirect Users to a New Page or URL After Form Submission, to help you set up this function.
After you’ve configured your form’s settings, all that is left to do is to embed the form onto a post or page on your website. If you need help on how to do this, check out this guide on how to Add a Form to your Website.
Final Thoughts on How to Create a Donation Form
Think carefully about where you position the form on your website. An attractive and well thought out landing page, with well-crafted text and eye-catching images, will go a long way to encouraging visitors to donate.
And combined with a stylish and user-friendly donation form created with Gravity Forms, you should soon see donations significantly increase, helping to support your cause long-term.
Not a Gravity Forms customer yet? Sign up for our free demo to check out just how easy it is to create your own forms as well as customize our many form templates.

If you want to keep up-to-date with what’s happening on the blog sign up for the Gravity Forms newsletter!