How to Set Up a Giveaway with Gravity Forms

Giveaways are powerful ways to generate leads, grow your network, and gain exposure for your business. They also create fun and excitement among your community, which makes your followers think positively about your brand and appreciate your presence in their lives.
You may think you need a fancy giveaway app to run giveaways on your website, but that isn’t the case. You can set up a giveaway with your favorite lead generation tool – Gravity Forms! In this article, we’re going to explain how to create your own giveaway with Gravity Forms.
Step 1: Install Gravity Forms
Before you can make your giveaway, you’ll first need to install Gravity Forms. If you’ve never done that before, check out our Getting Started Guide.
Step 2: Install the Right Add-Ons
Since the purpose of your giveaway is to collect leads, you’ll want to move each entrant’s contact information into your email marketing tool. This will let you serve them nurturing email content over time. To do that, you’ll need to install the Gravity Forms Add-On that corresponds with your email marketing tool.
A Gravity Forms Basic License gives you access to the most popular email marketing tools, like Mailchimp, Constant Contact, AWeber, and others. If you prefer to load your new contacts into a CRM, grab the Pro License and install an add-on such as Agile, Capsule, or Zoho. Additionally, we also have a HubSpot Add-On and an Active Campaign Add-On available in our Gravity Forms Basic License. Their free CRM is one of the most popular services around.
Once you have the license, hover over Forms on the left side of your WordPress dashboard and click Add-Ons. Click Activate on any Add-On you want to install.
You can set up a giveaway with your favorite lead generation tool – Gravity Forms!
Step 3: Create Your Giveaway Form
A giveaway form isn’t much different than a standard lead capture form. The only pieces of information you need are the entrants’ names and email addresses.
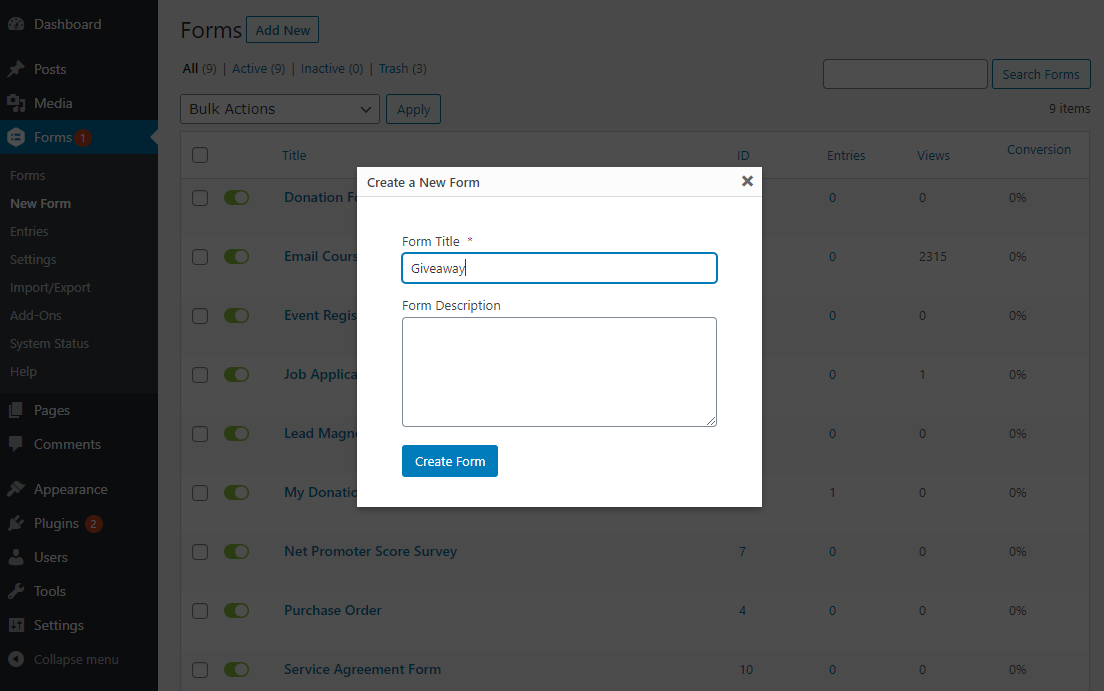
Creating a form in Gravity Forms is simple. Hover over Forms on the left side of your WordPress dashboard and click New Form. Give your form a name that distinguishes it from your other forms.
Once you create the form, you’ll be sent to the form builder. Here is where you add fields. Open the Advanced Fields drop down menu on the right side of the form builder to access the Name and Email fields. Click both to add them to your form.
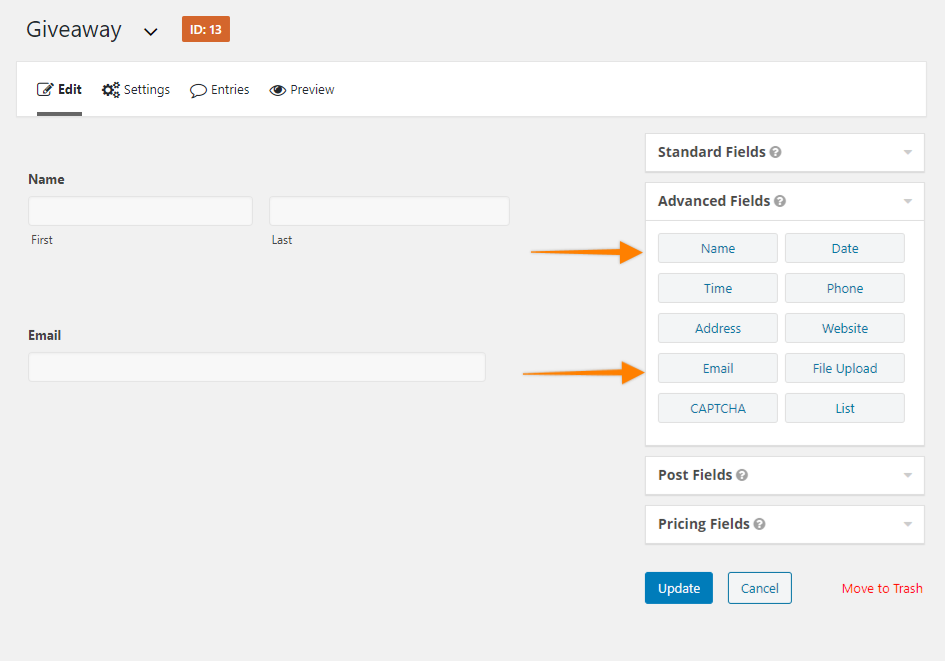
Once those two fields are on your form, open each and click the box next to Required so users are forced to input an answer before they can submit the form.
Next, add any other fields that are relevant to your giveaway. You might ask for other data points, depending on the specifics of your giveaway. For example, if the prize is a free T-shirt, you might ask your entrants to submit their T-shirt size. If the prize is only available to people of a certain age, you might ask for their birth date in order to disregard winners who didn’t bother to read the rules.
This is also a good place to qualify the leads you collect so you can take steps in the future to market to those people. For instance, let’s say your ideal customer is a company executive with the authority to purchase software tools. You could put a field on your giveaway form called “Title” or “Role” to identify these people. Later, your sales team can reach out directly to make a sale.
That said, it’s important to avoid asking for unnecessary information. Each extra field will reduce the number of people who complete the form.
Make sure to click Update when you’re finished.
Step 4: Create Your Giveaway Page
Now that your form is ready, you’ll need a place to put it. A giveaway page is the page where entrants will complete your form to be entered into the giveaway.
Other than your form, what goes on the giveaway page?
- A compelling title that explains what entrants can win.
- An image of the prize as well as any important details.
- Contest terms, rules, and eligibility.
- A deadline or timer that creates urgency.
That’s about it. You don’t need to overcomplicate a giveaway page. People won’t spend a lot of time on it. They just need to understand how to use it within the first few seconds.
Step 5: Set Up Your Notifications
A notification is an email your giveaway entrants receive when they submit your form. It’s important to send them an email so they have a record of their entry.
With other types of forms (like job application forms or event registration forms) it’s helpful to send the recipient a copy of their form responses. This gives them the opportunity to confirm their responses in case they submitted something inaccurately, or refer back to their responses in the future (e.g., they need to recall what they gave you for a salary expectation).
But giveaway forms are usually pretty simple. There’s no need to relay their name and email back to them.
So what goes in a giveaway confirmation email? First, start with a thank you. Then remind them of any relevant details, like when you’ll announce winners or how they can get more entries.
This JewelScent email is perfect. It’s short, simple, and effective.

Create a new notification for your giveaway form in Gravity Forms by clicking Settings at the top of the form builder, then Notifications in the left menu. Click Add New to make a new notification email.
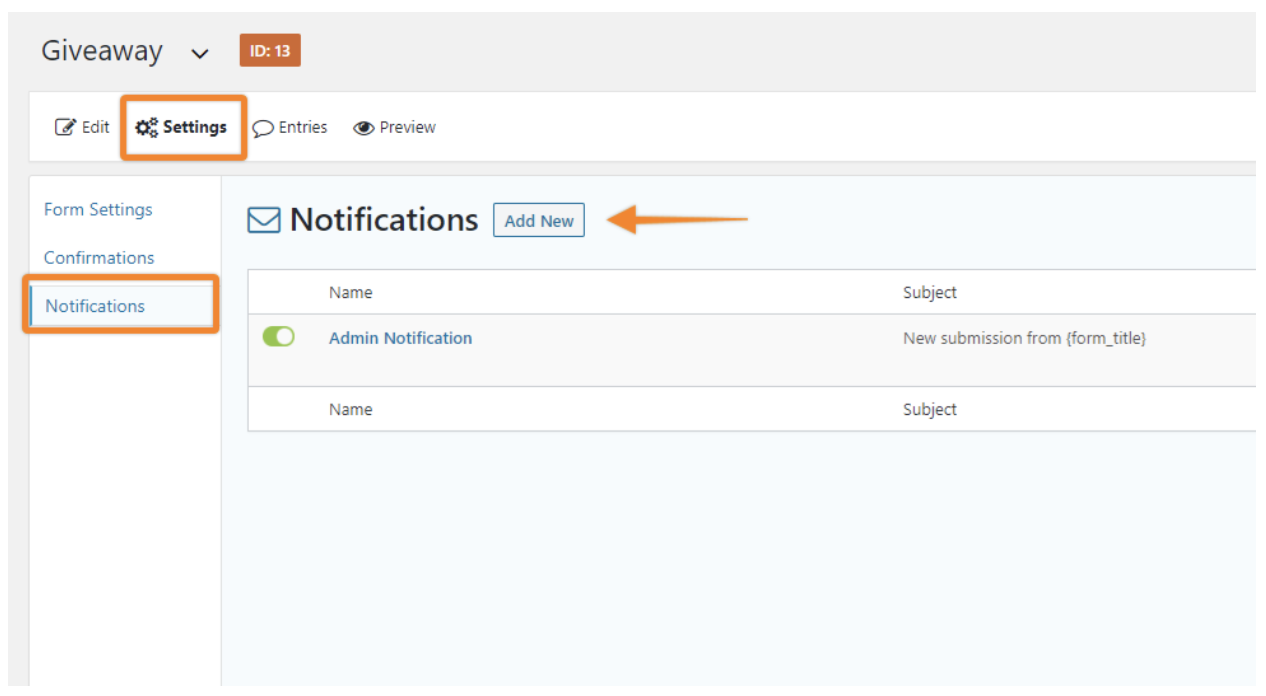
Once you’re in the notification editor, give your notification email a name. Next to Send To, check Select a Field and choose the email field on the form. This will send the email to the email address given by the entrant.
Customize your email in the following fields. Give it a From Name and From Email. Craft a simple Subject, such as “Thanks for entering our giveaway!” Then add your body copy to the Message box. Click Save Notification when you’re finished.
Step 6: Embed the Giveaway Form on the Page
Once your page is all set, it’s time to embed your giveaway form.
Open your giveaway page in your WordPress dashboard and find the spot where you’d like the form to appear. Use the Gravity Forms Gutenberg Block, WordPress’ default Shortcode Bloc, or paste the shortcode in manually. Check out our full documentation if you need help.
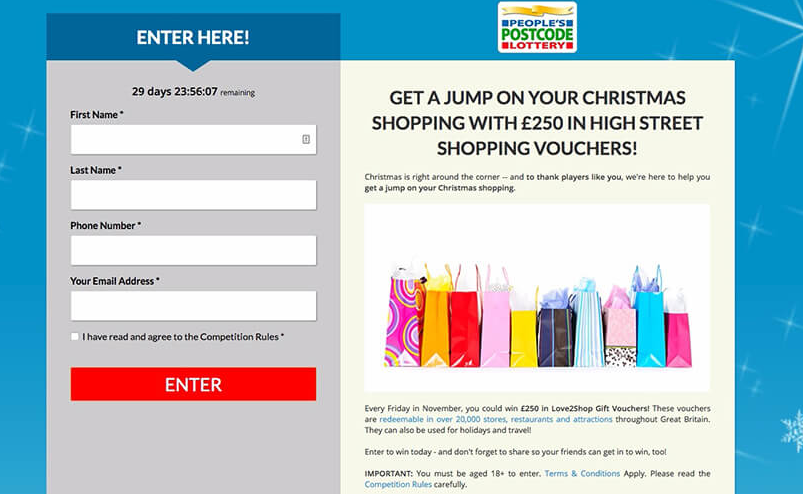
Where should you put the giveaway form on your page? Ideally, the form should be front-and-center so visitors can’t miss it. We recommend placing it above the fold (so the user doesn’t have to scroll to see it) and even with your giveaway title and details.
Notice how the form is impossible to miss on this giveaway page…

…and on this one.
Step 7: Test Your Giveaway
Once you are satisfied with your giveaway form, your notification email, and your giveaway page, your final step is to test the entire process to make sure it works for your website visitor.
Visit the page, fill out this form, and check to make sure you received a notification email. Finally, visit your email marketing software to make sure the email address you used was imported to the correct list.
Step 8: Drawing a Winner
When your giveaway closes, you’ll need to choose a winner. You don’t need a special giveaway app for this part. It’s easy to manage manually.
Google has a super convenient random number generator that lets you input a minimum and maximum value. Your minimum will always be one. Your maximum value will be the total number of giveaway entrants. Click Generate to find your winner.
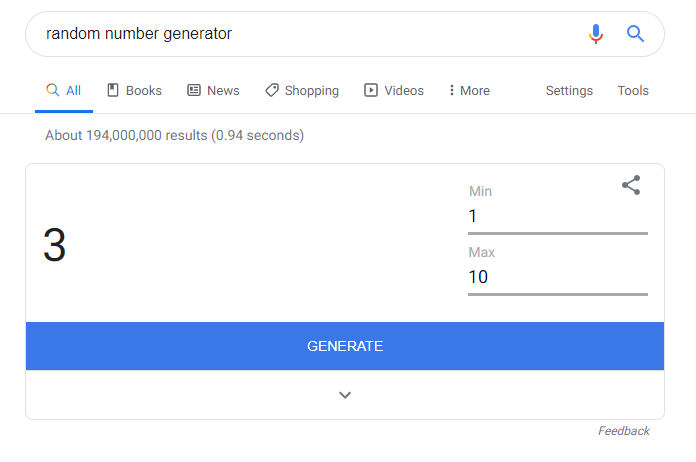
Once you have a random number, consult your list of giveaway entries. Find the person who corresponds with that number they let them know they won.
Of course, this assumes your prize is granted randomly. If you have other criteria (like “the best logo design” or “the cutest puppy,” for instance), make sure to follow your own rules so you aren’t accused of dishonesty.
Capture Endless Leads
Now you know how to set up a giveaway with Gravity Forms. Since your license lets you create unlimited forms, feel free to host as many giveaways as you like. You could give something away every week if you really wanted to delight and engage your fans. Over time, you’ll collect countless leads, some of which will turn into real sales.

If you want to keep up-to-date with what’s happening on the blog sign up for the Gravity Forms newsletter!
