3 Strategies to Promote your Business’s Services Online (and secure future work)

During these difficult times, many people are looking to take their business online. There have been lots of articles written helping people to move business processes online and instructing readers on how to start selling products and services through their websites. But, what do you do if you run a strictly offline, in-person business?
In-person businesses cover a wide assortment of industries, including hairdressing, gardening, and construction work (plumbers, electricians, etc), to name a few. These are businesses where you need to be physically present to manually complete a job – not something you can offer online.
However, although you can’t take your services online, you can still use this time wisely, taking advantage of online tools to generate future work. In this article we run through three strategies to engage with your customers and ensure that you have work to return to when lockdown restrictions are eased. These include:
- Adding a Request a Quote Form to Your Website
- Accepting a Deposit to Secure a Future Appointment or Service
- Offering a Discount on Purchases
All of these strategies use Gravity Forms and are quick and easy to implement – and importantly they will help support your business through this difficult period of uncertainty…
Request a Quote
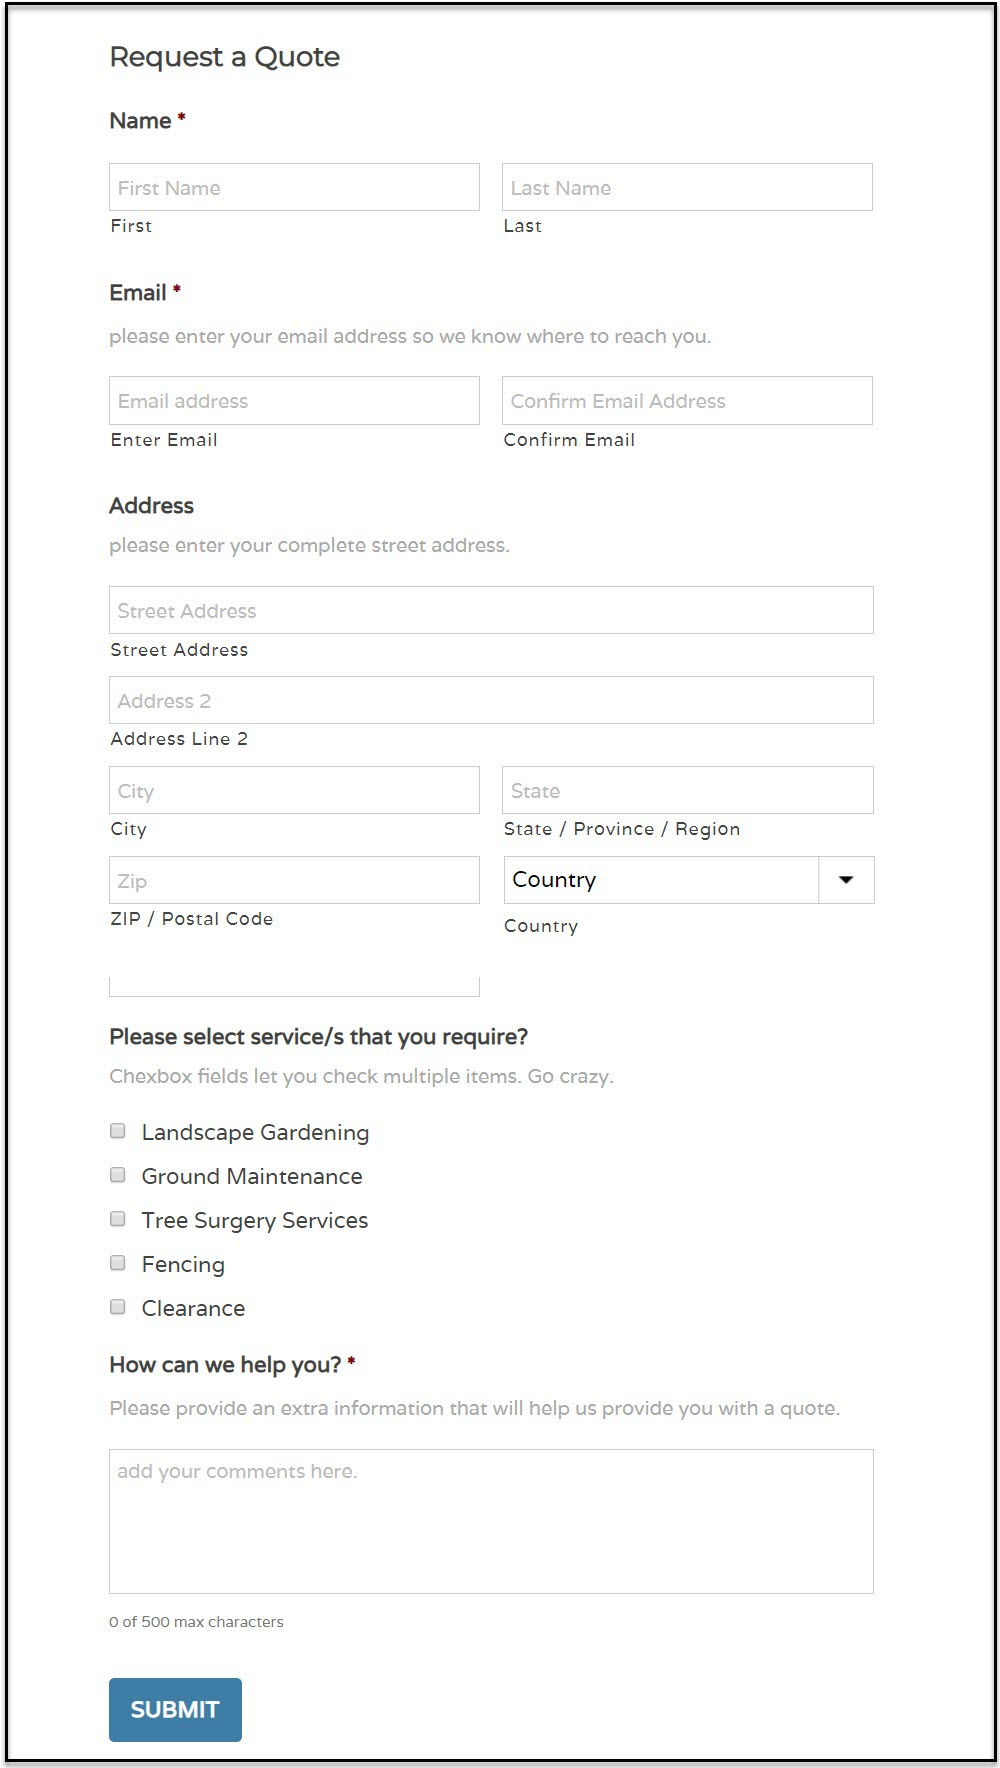
Although people are in lockdown, they are still keen to plan for the future. For example, if someone wants their garden re-landscaped, then they may use this time to find a company that can do the work in the future, as well as get a quote on what the project will cost.
With Gravity Forms you can add a ‘Request a Quote’ form to your website, where your potential customers can submit their information and either select the services they are interested in, or provide details of the service they would like.
Once they have submitted the form, you can then contact them directly, either via email or phone, starting a discourse and providing a personal quote. By engaging with potential customers now, you begin to build relationships, which will help lead to work in the future.
Building a Request a Quote Form
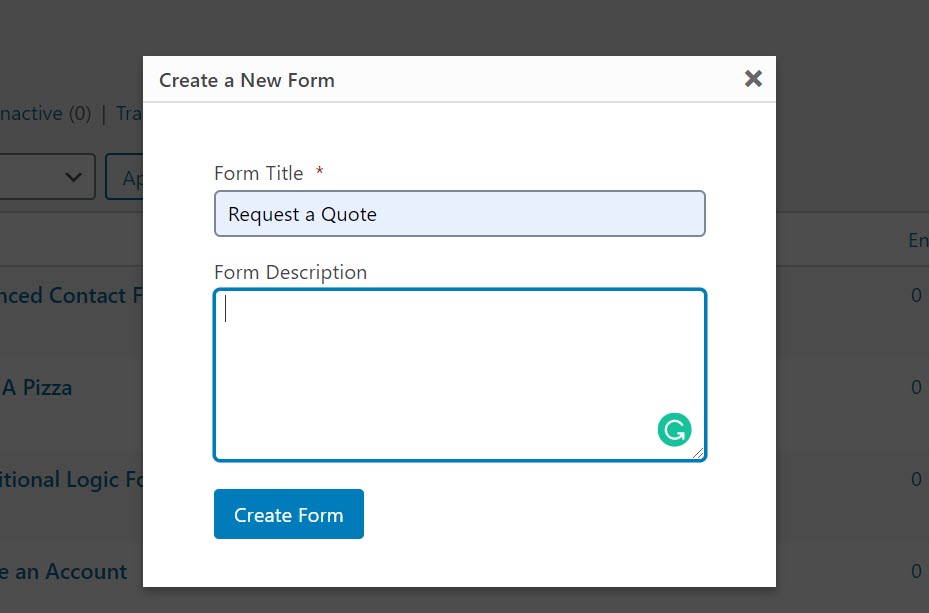
Building a ‘Request a Quote’ form is very straightforward with Gravity Forms. Within your WordPress dashboard, select Forms > Add New and give the new form a name.
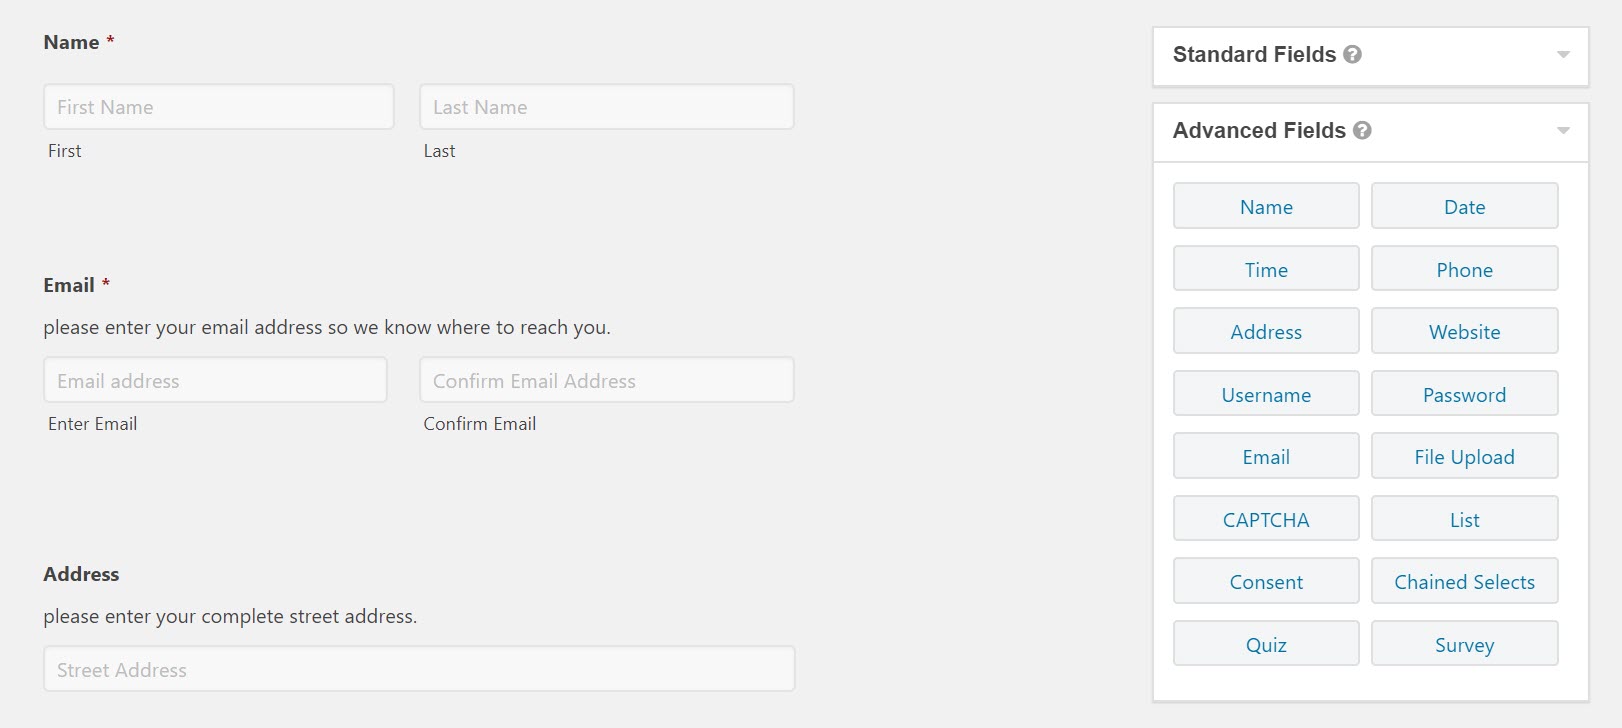
Then, within the Form Editor, click on Advanced Fields and add the contact fields you would like your customers to complete. We recommend…
- Name
- Phone
- Address
This gives you enough information to know who your potential new customer is, where the job will take place, and how to contact them.
If you want to give your customers a list of services to choose from, next select the Checkboxes field, found in the Standard Fields box. Then edit the options to reflect the services you offer.
You may also want to give customers the option of adding any extra information. To do so, select the Paragraph Text field, also found under Standard Fields. Again, edit the text of this field to make it relevant to your customers and business.

Now Update the form and Preview it to check you are happy with your form.
Next open the page where you want to display your form. Within the Block Editor type in Embeds > Gravity Forms and then select the form you just created.
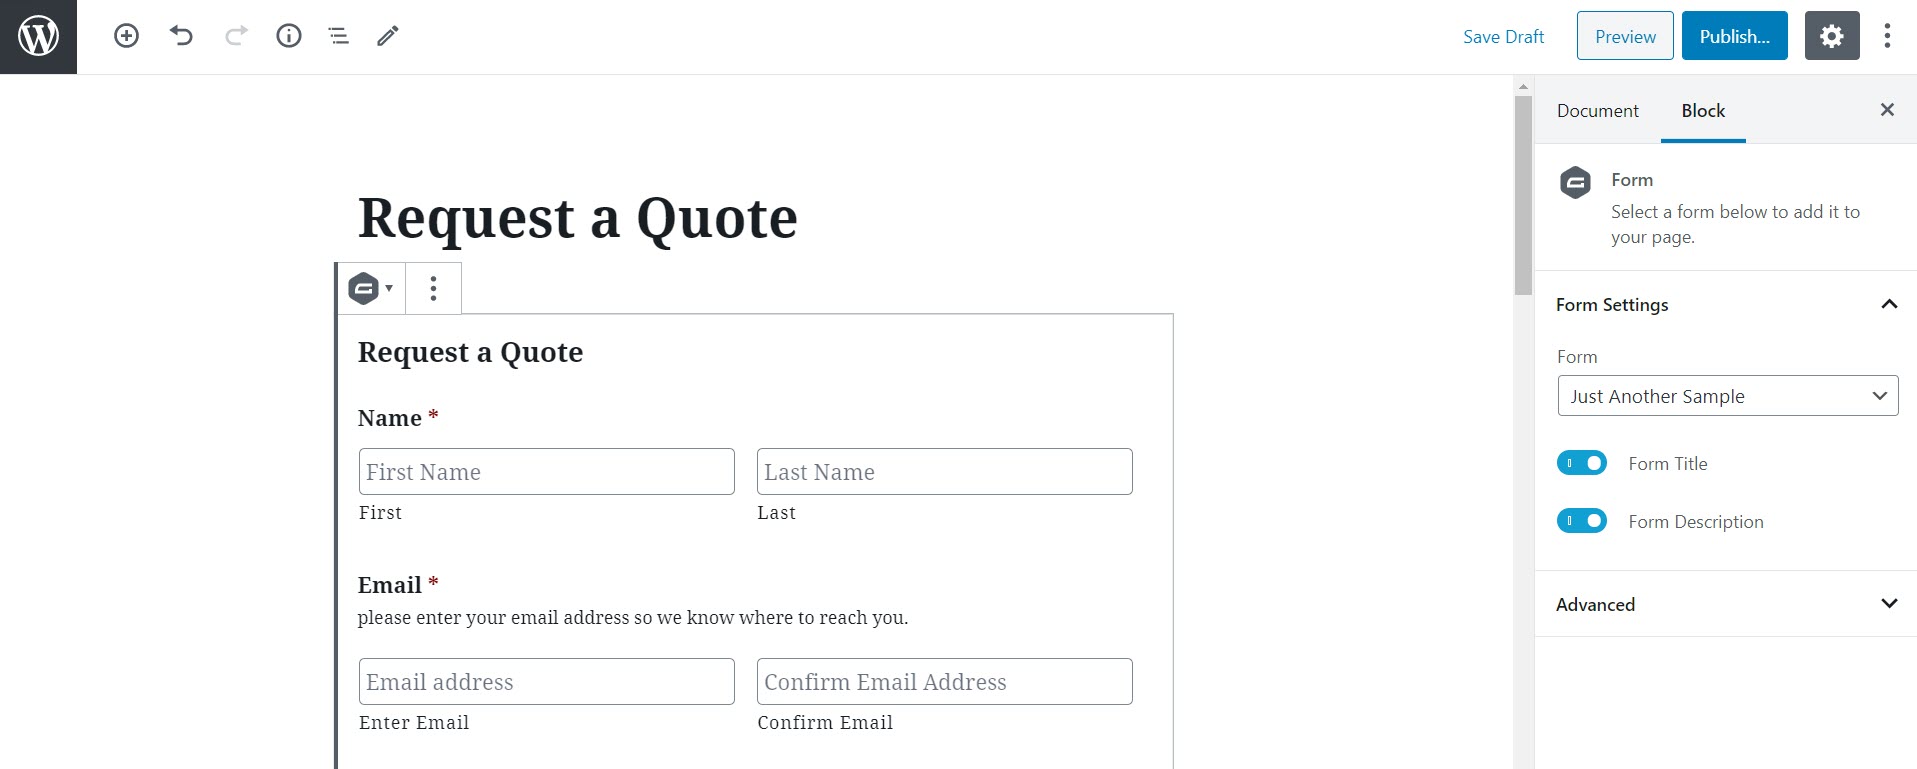
Preview and Publish the page – the form is now live and ready for submissions.
For more information on how to create a form, including form settings and add-ons, check out this article How to Create a Form in WordPress.
Take a Deposit
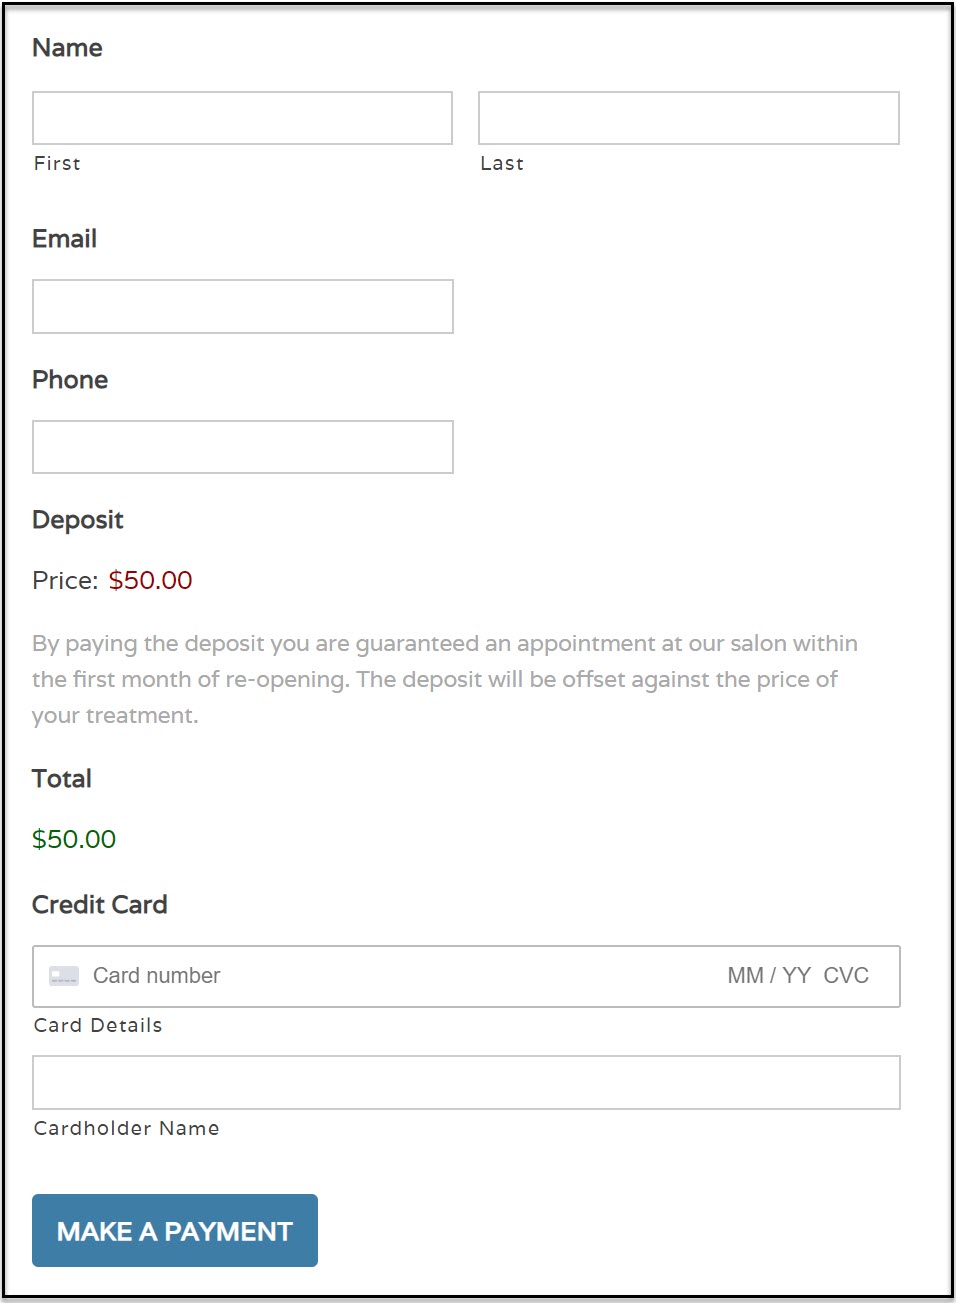
Another option for offline businesses is to take a deposit online for a future appointment or service.
For example, when hairdressers reopen, they will be in high demand, and getting an appointment in a high-end salon may take months. Therefore, if you are a hairdresser with a large client base, you should consider charging clients a deposit to secure a future booking.
Although you will not be able to give your clients a date for their appointment, in return for the deposit you should guarantee a spot on your first-come-first-served waiting list.
This is a win-win for both you and your customers…
- Customers – By paying a deposit, your clients will be reassured that they will be able to visit your salon within a certain time frame of your re-opening.
- You – Benefit from an income stream even though you aren’t open, while ensuring you stay connected with your customers and have a full schedule when you do re-open.
This strategy is a good option for any business that has a large customer base and will be in high demand once they re-open. However, make sure you don’t over book – if you are promising your customers that you will serve them within the first month of opening, don’t take two months’ worth of deposits!
So let’s find out how to use Gravity Forms to take an online deposit…
Create a Form to Accept Deposits
Building a form, where you can take a deposit for a service, follows a similar process to the ‘request a form’ set up.
Click on Forms > New Form, and then within the Form Editor, add the basic contact fields.
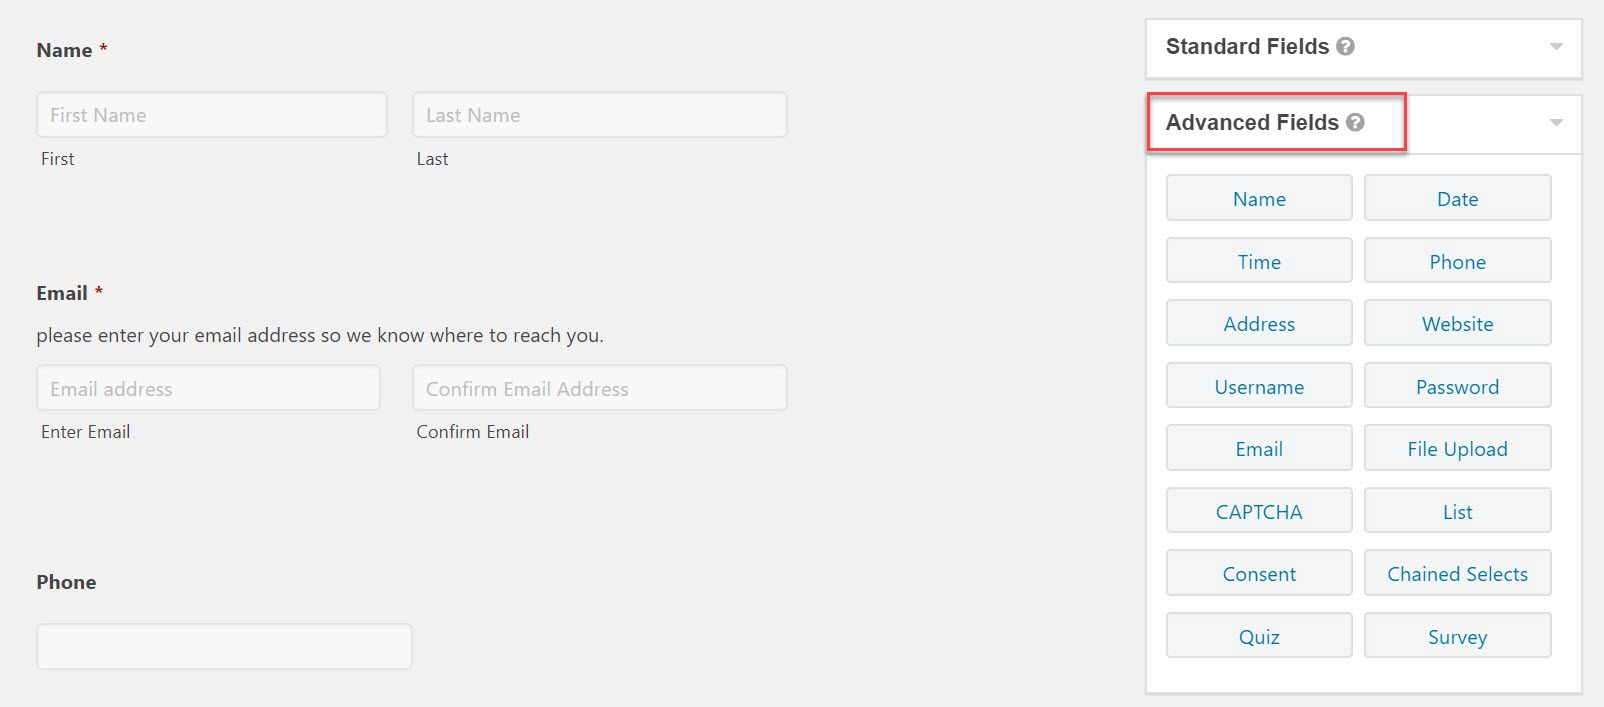
Next you need to set up your form to accept payments. Gravity Forms integrates with numerous payment providers including:
- Stripe
- PayPal
- Authorize.net
- Mollie
- Square
- 2Checkout
Choose the payment processor that best fits the needs of your business and audience – to check out the different integrations and their features, view our Add-Ons page.
Once you have made a decision on your payment provider, from inside your WordPress dashboard select Forms > Add Ons > Install.
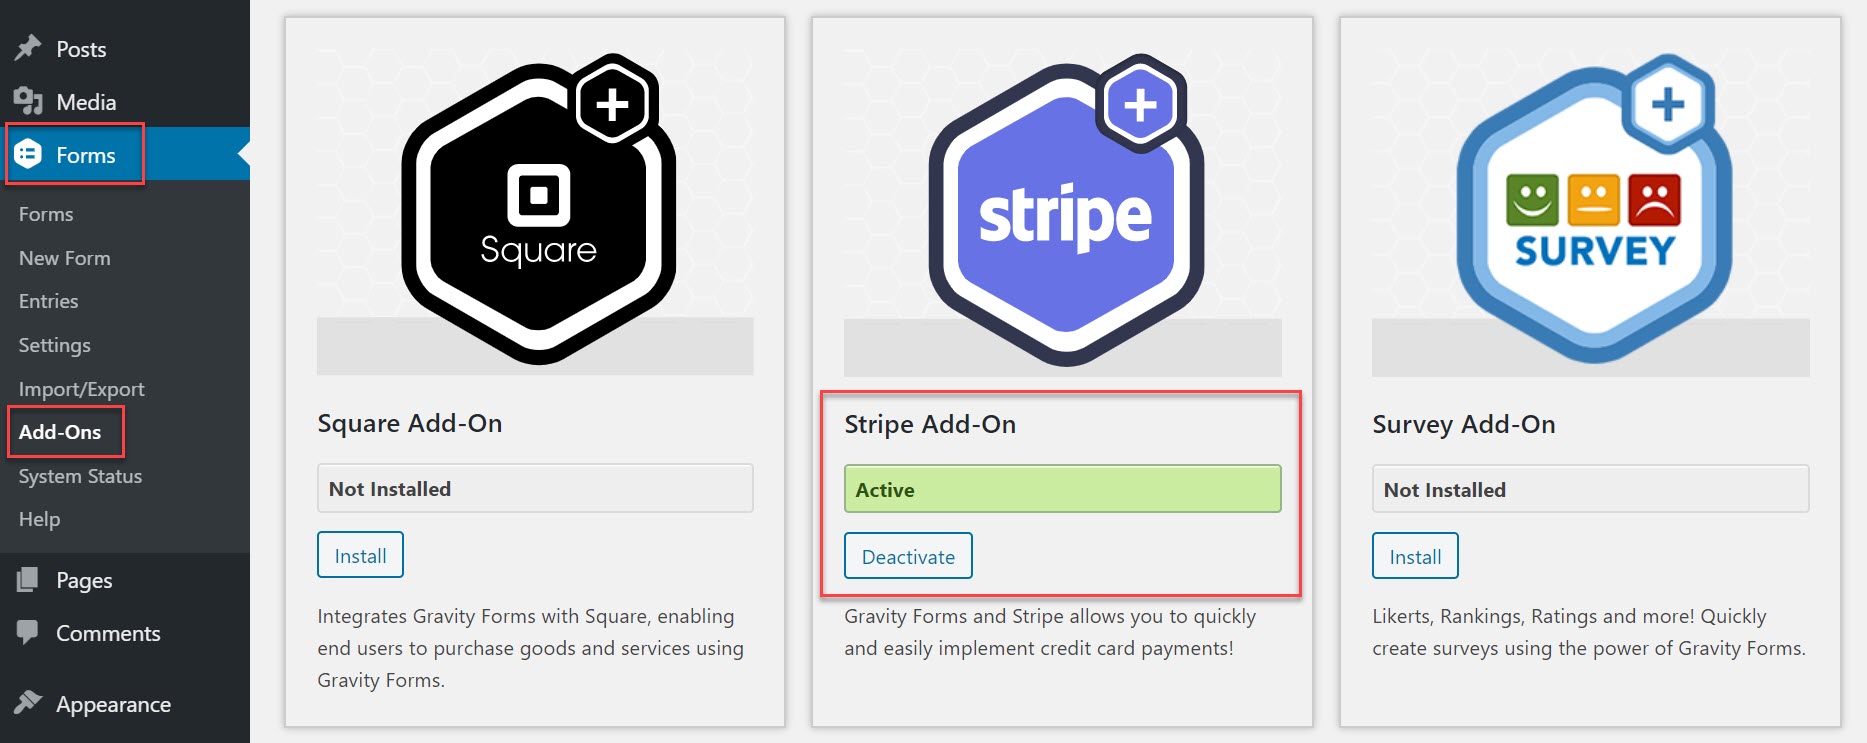
As you can see, here we have opted to use Stripe. Once installed, follow the instructions (found in the Gravity Forms Documentation) to connect your Stripe account and WordPress website.
Now switch back to your form and under Pricing Fields you need to select:
- Product
- Total
- Stripe Card
Best practice for taking a deposit online in this situation is to charge a set fee. Your customers may not want to make a decision right now on what type of hair cut or treatment they want, considering the appointment could be months away. Instead, charging a flat fee for making a booking will satisfy your customers that they are on the waiting list for an appointment, but will also give them the flexibility of choosing which treatment they would like nearer the time.
Edit the fields to make the form relevant, as we have done below…
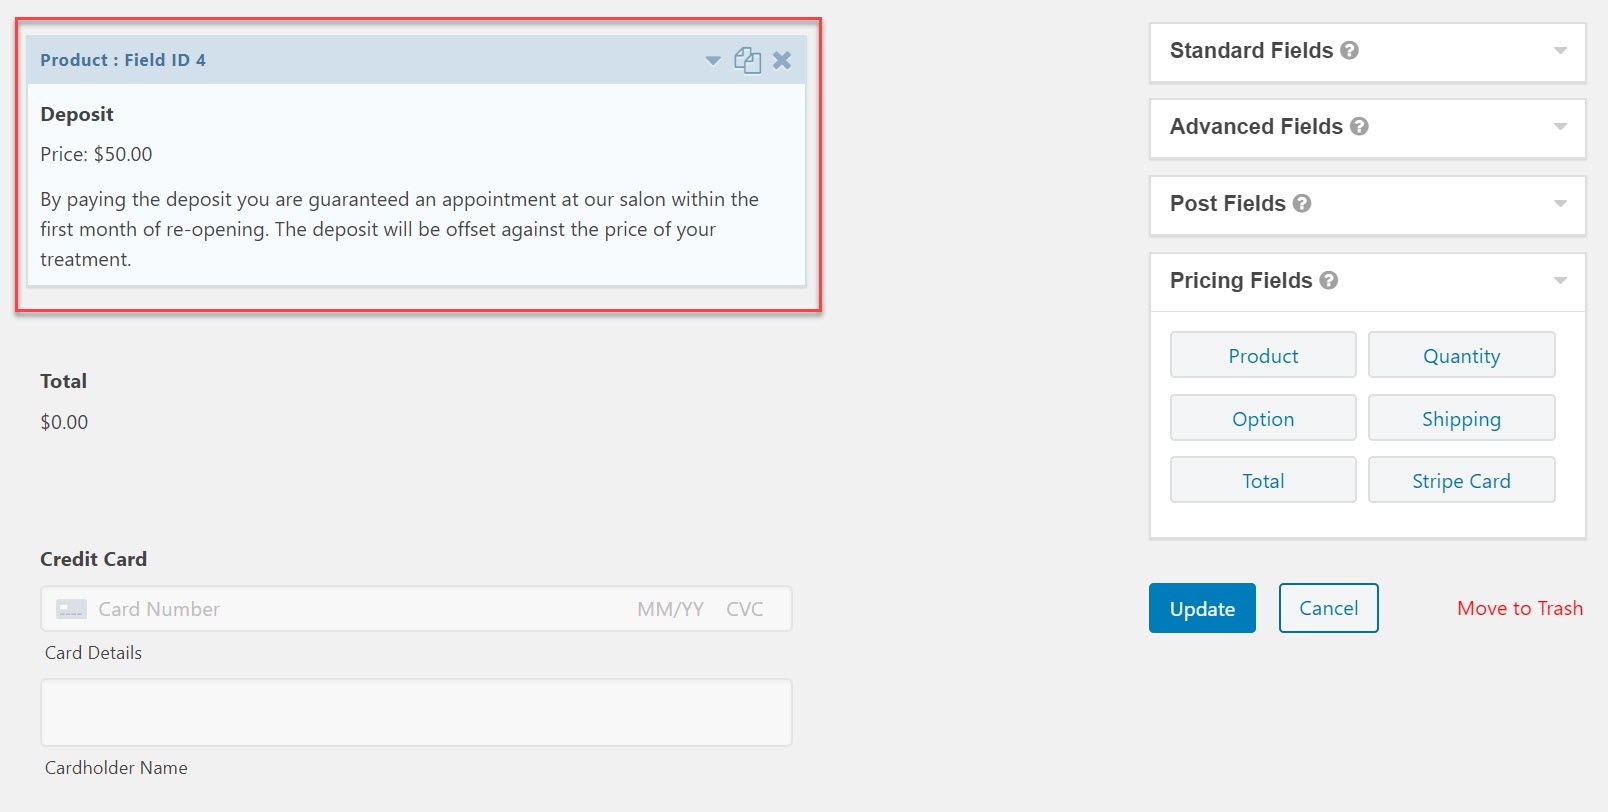
Once you are happy with your form, select Update and Preview.
The last step of the process is to integrate your form with Stripe. To do this, click on the Settings tab at the top of the page and then select Stripe > Stripe Feeds > Add New.
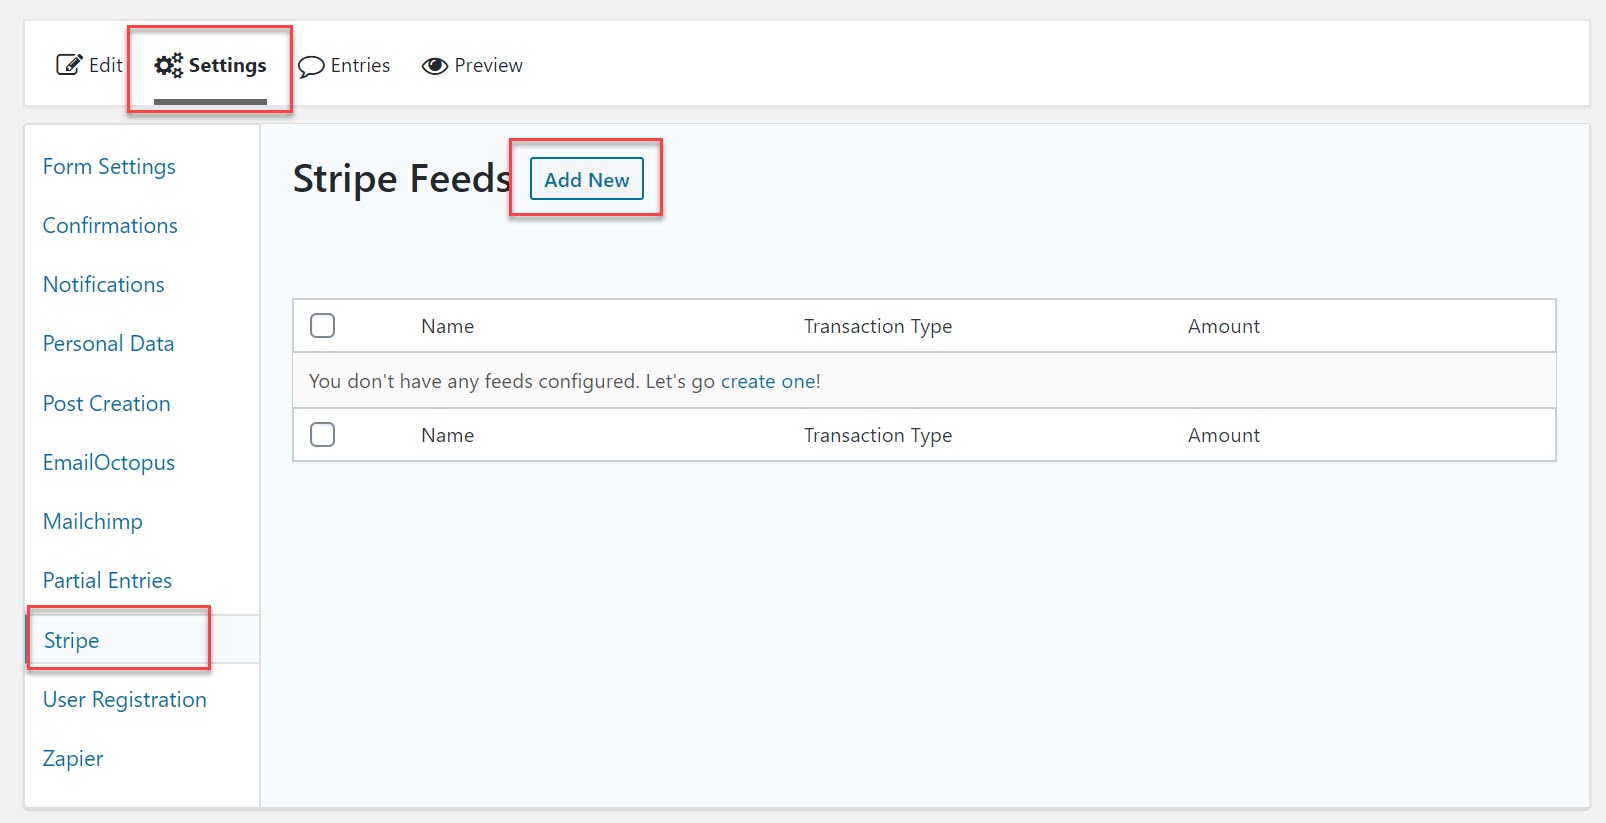
Then scroll down the page and complete the necessary information. For more help on how to do this, check out the Gravity Forms Documentation.
Your form is now finished and can be embedded into a post or page on your website, or a stand-alone landing page.
Offering a Discount on Services
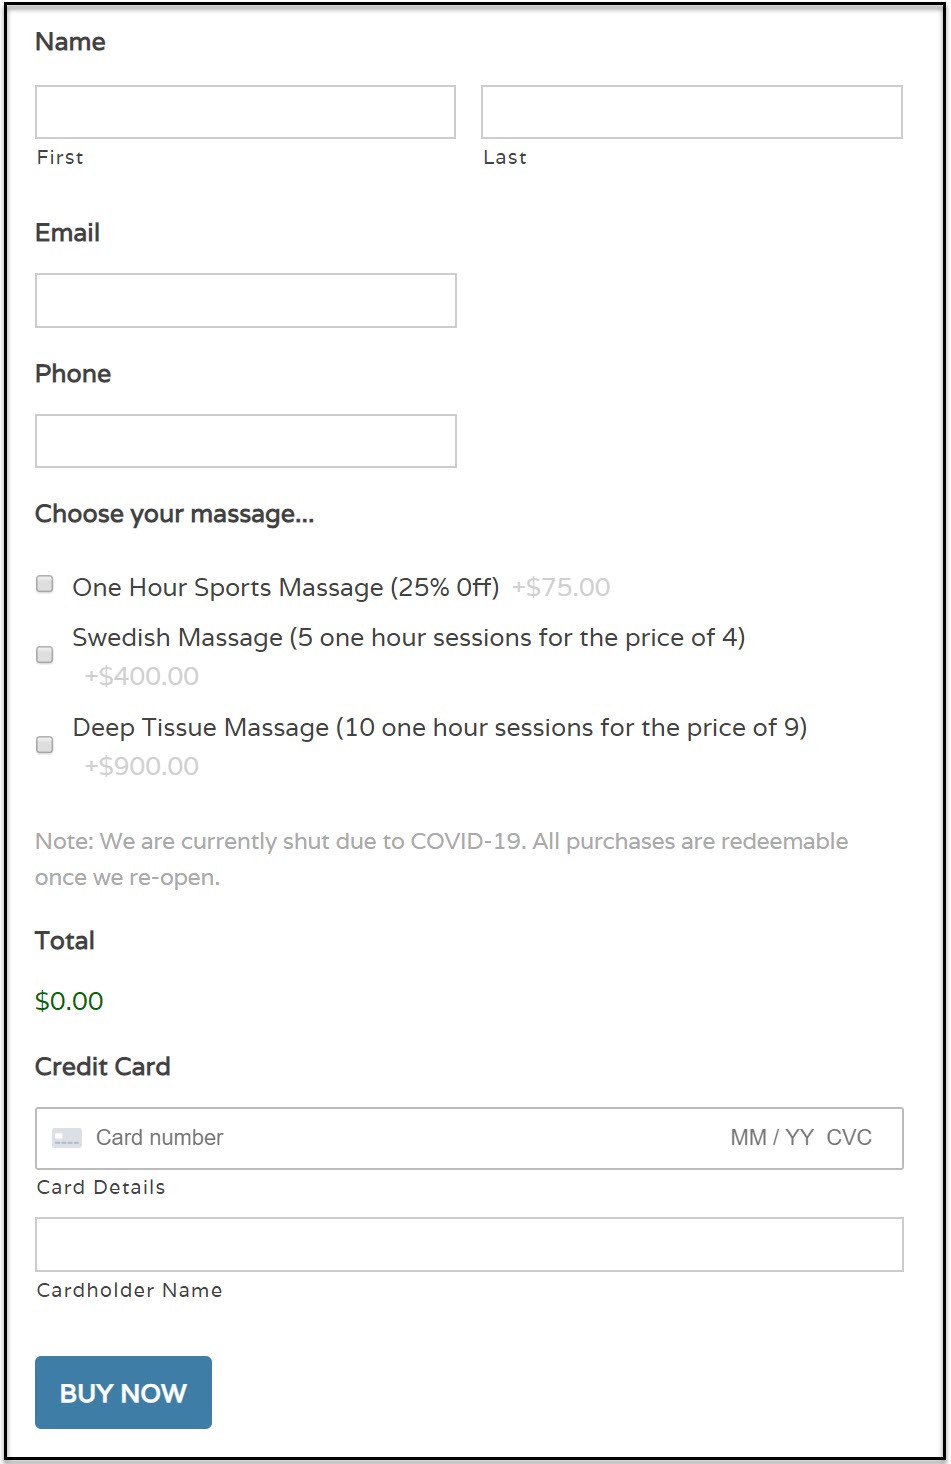
The third strategy to support offline businesses during the next few months is to sell services or appointments at a discount. These discounted services would be available to purchase now, and redeemable once your business has re-opened. Offering a discount provides an incentive for customers to make a purchase, even though they can’t access your service right away.
For example, if you are an osteopath or a sports therapist, you could sell vouchers for a one hour consultation or massage, offering a 25% discount. Or equally, you could sell a block of 10 sessions for the price of 9. Work out a discount that you could afford, and that would also encourage your clients to make a purchase.
Setting up a form to take payments on your website follows the same process as building a deposit form. However, you may want to offer numerous discount options (like in the form above).
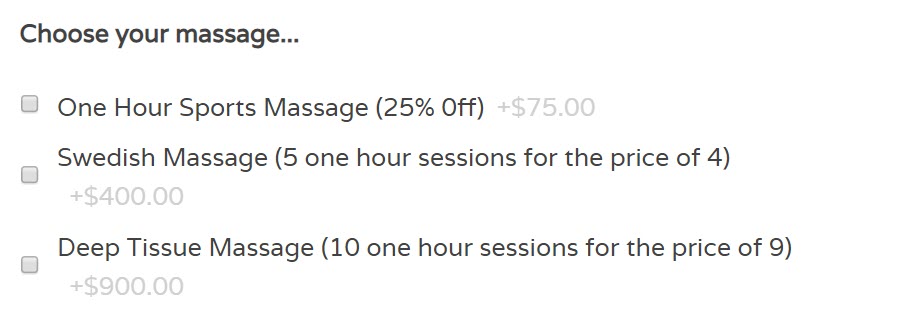 To do this, from the Payment Fields select:
- Product
- Options
- Total
- Stripe Card
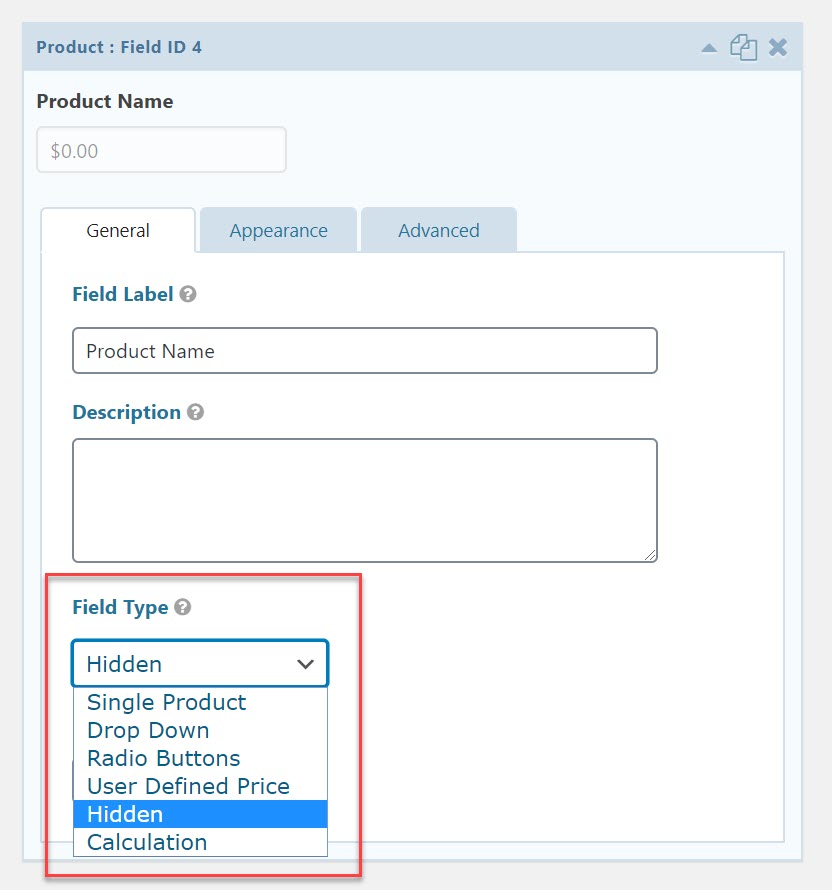
Firstly, within the Product field, under Field Type, select Hidden.
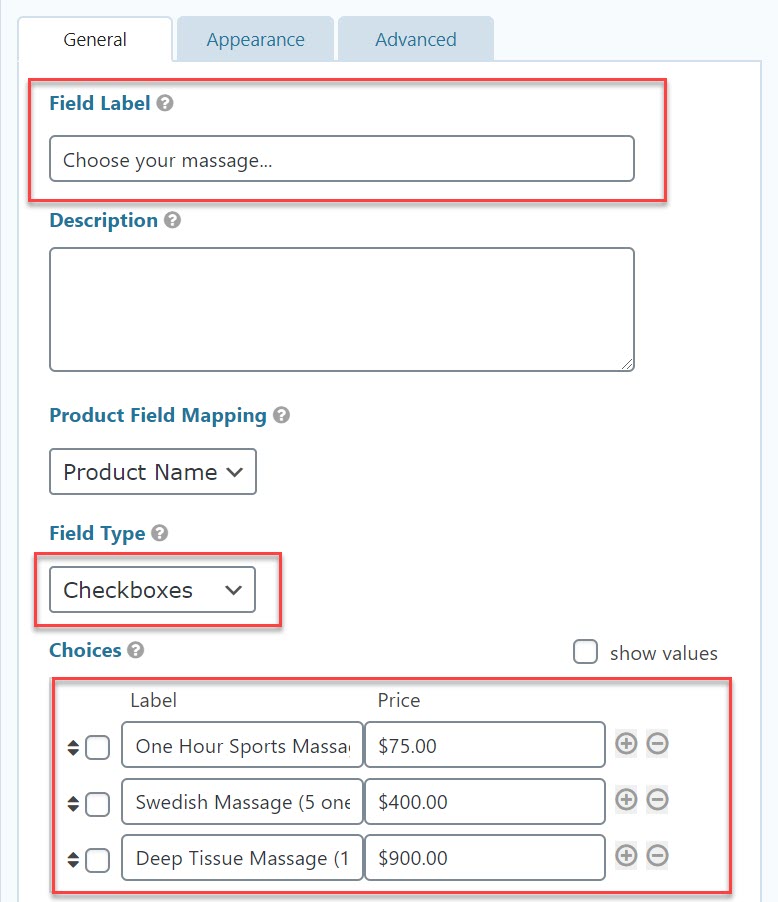
Next, open the Options Field. Edit the text under Field Label to make this field relevant to your customers. Then, to give your customers the ability to make more than one purchase, under Field Type select Checkboxes. Then under Choices, add all the purchase options you want to offer your customers.
Update and Preview your form. Create a feed for Stripe (or your chosen payment processor) and then go ahead and embed your form into a post or page within your WordPress website.
Once your form is live and customers are making purchases, it is important to have the right follow-up procedure in place, acknowledging their purchase and sending a receipt. Check out this article After Submit: What Happens After the Form? for more information on your options.
Final Thoughts On How to Secure Future Work
Gravity Forms is extremely user-friendly, and building any of the forms mentioned in this article is a quick and easy process. So if you have an offline business that is struggling during this pandemic, then consider implementing one of the above strategies to help you stay connected with your customers and guarantee work for the future.
Still not sure if Gravity Forms is for you? Then check out our free demo (no credit card required) to see what you think.

If you want to keep up-to-date with what’s happening on the blog sign up for the Gravity Forms newsletter!
