Tracking Form Submissions with Google Analytics
Tracking form submissions with Google Analytics is now possible with the new Gravity Forms Google Analytics Add-On. Once set up, you will be able to monitor form analytics, tracking submissions and pagination events, and giving you clear insight into the performance of all forms across your website.
In this article, we look at the features of the Gravity Forms Google Analytics Add-On and discuss how tracking form submissions can help you understand and improve the success of your business. We will then run through how to get started with the Google Analytics Add-On, from installation and activation, to goal setting for form submissions and pagination tracking.
Let’s jump in…
Tracking Form Submissions with Google Analytics
Tracking how your WordPress website is performing, understanding who your web visitors are, and most importantly, how they are behaving on your website, is key to running a successful business. In-depth analytics, providing clear insight into engagement and performance allows you to make informed decisions and improvements, driving revenue and growth over time.
Forms are no exception, and as an essential component of any website, it is imperative that form analytics are tracked. Your business may currently use Gravity Forms for marketing and lead generation, taking payments or donations, or one of the many other numerous use cases that our form builder is used for – the data captured through these forms is all vital to the growth of your business.
Understanding how forms on your site are performing and where there may be issues with form abandonment will enable you to implement improvements, ensuring your forms are optimized for conversions. This will ultimately result in capturing more leads and growing your email list faster, increasing payments taken through order and subscription forms, and much more!
Gravity Forms Google Analytics Add-On: An Intro
Tracking form submissions with Google Analytics couldn’t be easier with the new Gravity Forms Google Analytics Add-On. You can now seamlessly send form submission and form pagination related events to your Google Analytics service, allowing you to better understand the effectiveness of your forms and how your audience interacts with them.
With the Google Analytics Add-On you can…
- Track Form Submissions – Easily track newsletter signup form conversions, payment form completions, new subscriptions, survey submissions, and much much more – all via your Google Analytics account. Monitor form conversions over time, get a clear understanding of your highest converting forms, or dig down to analyze specific goals relevant to your forms and business.
- Analyze Pagination Events – Track multi-page form metrics across your site, giving you insight into form abandonment. Identify the barriers to form conversion, then tailor form length and content to help create a more user-friendly form experience for website visitors.
The add-on also provides support for both Universal Analytics and Google Analytics 4 (via Google Tag Manager). For in-depth information on the Google Analytics Add-On, please check out the Gravity Forms documentation.
Get Started with the Google Analytics Add-On
We’ll now run through how to set up and get started with the Google Analytics Add-On. This tutorial presumes that you already have Gravity Forms installed, and existing active forms running on your WordPress website.
1. Install the Google Analytics Add-On
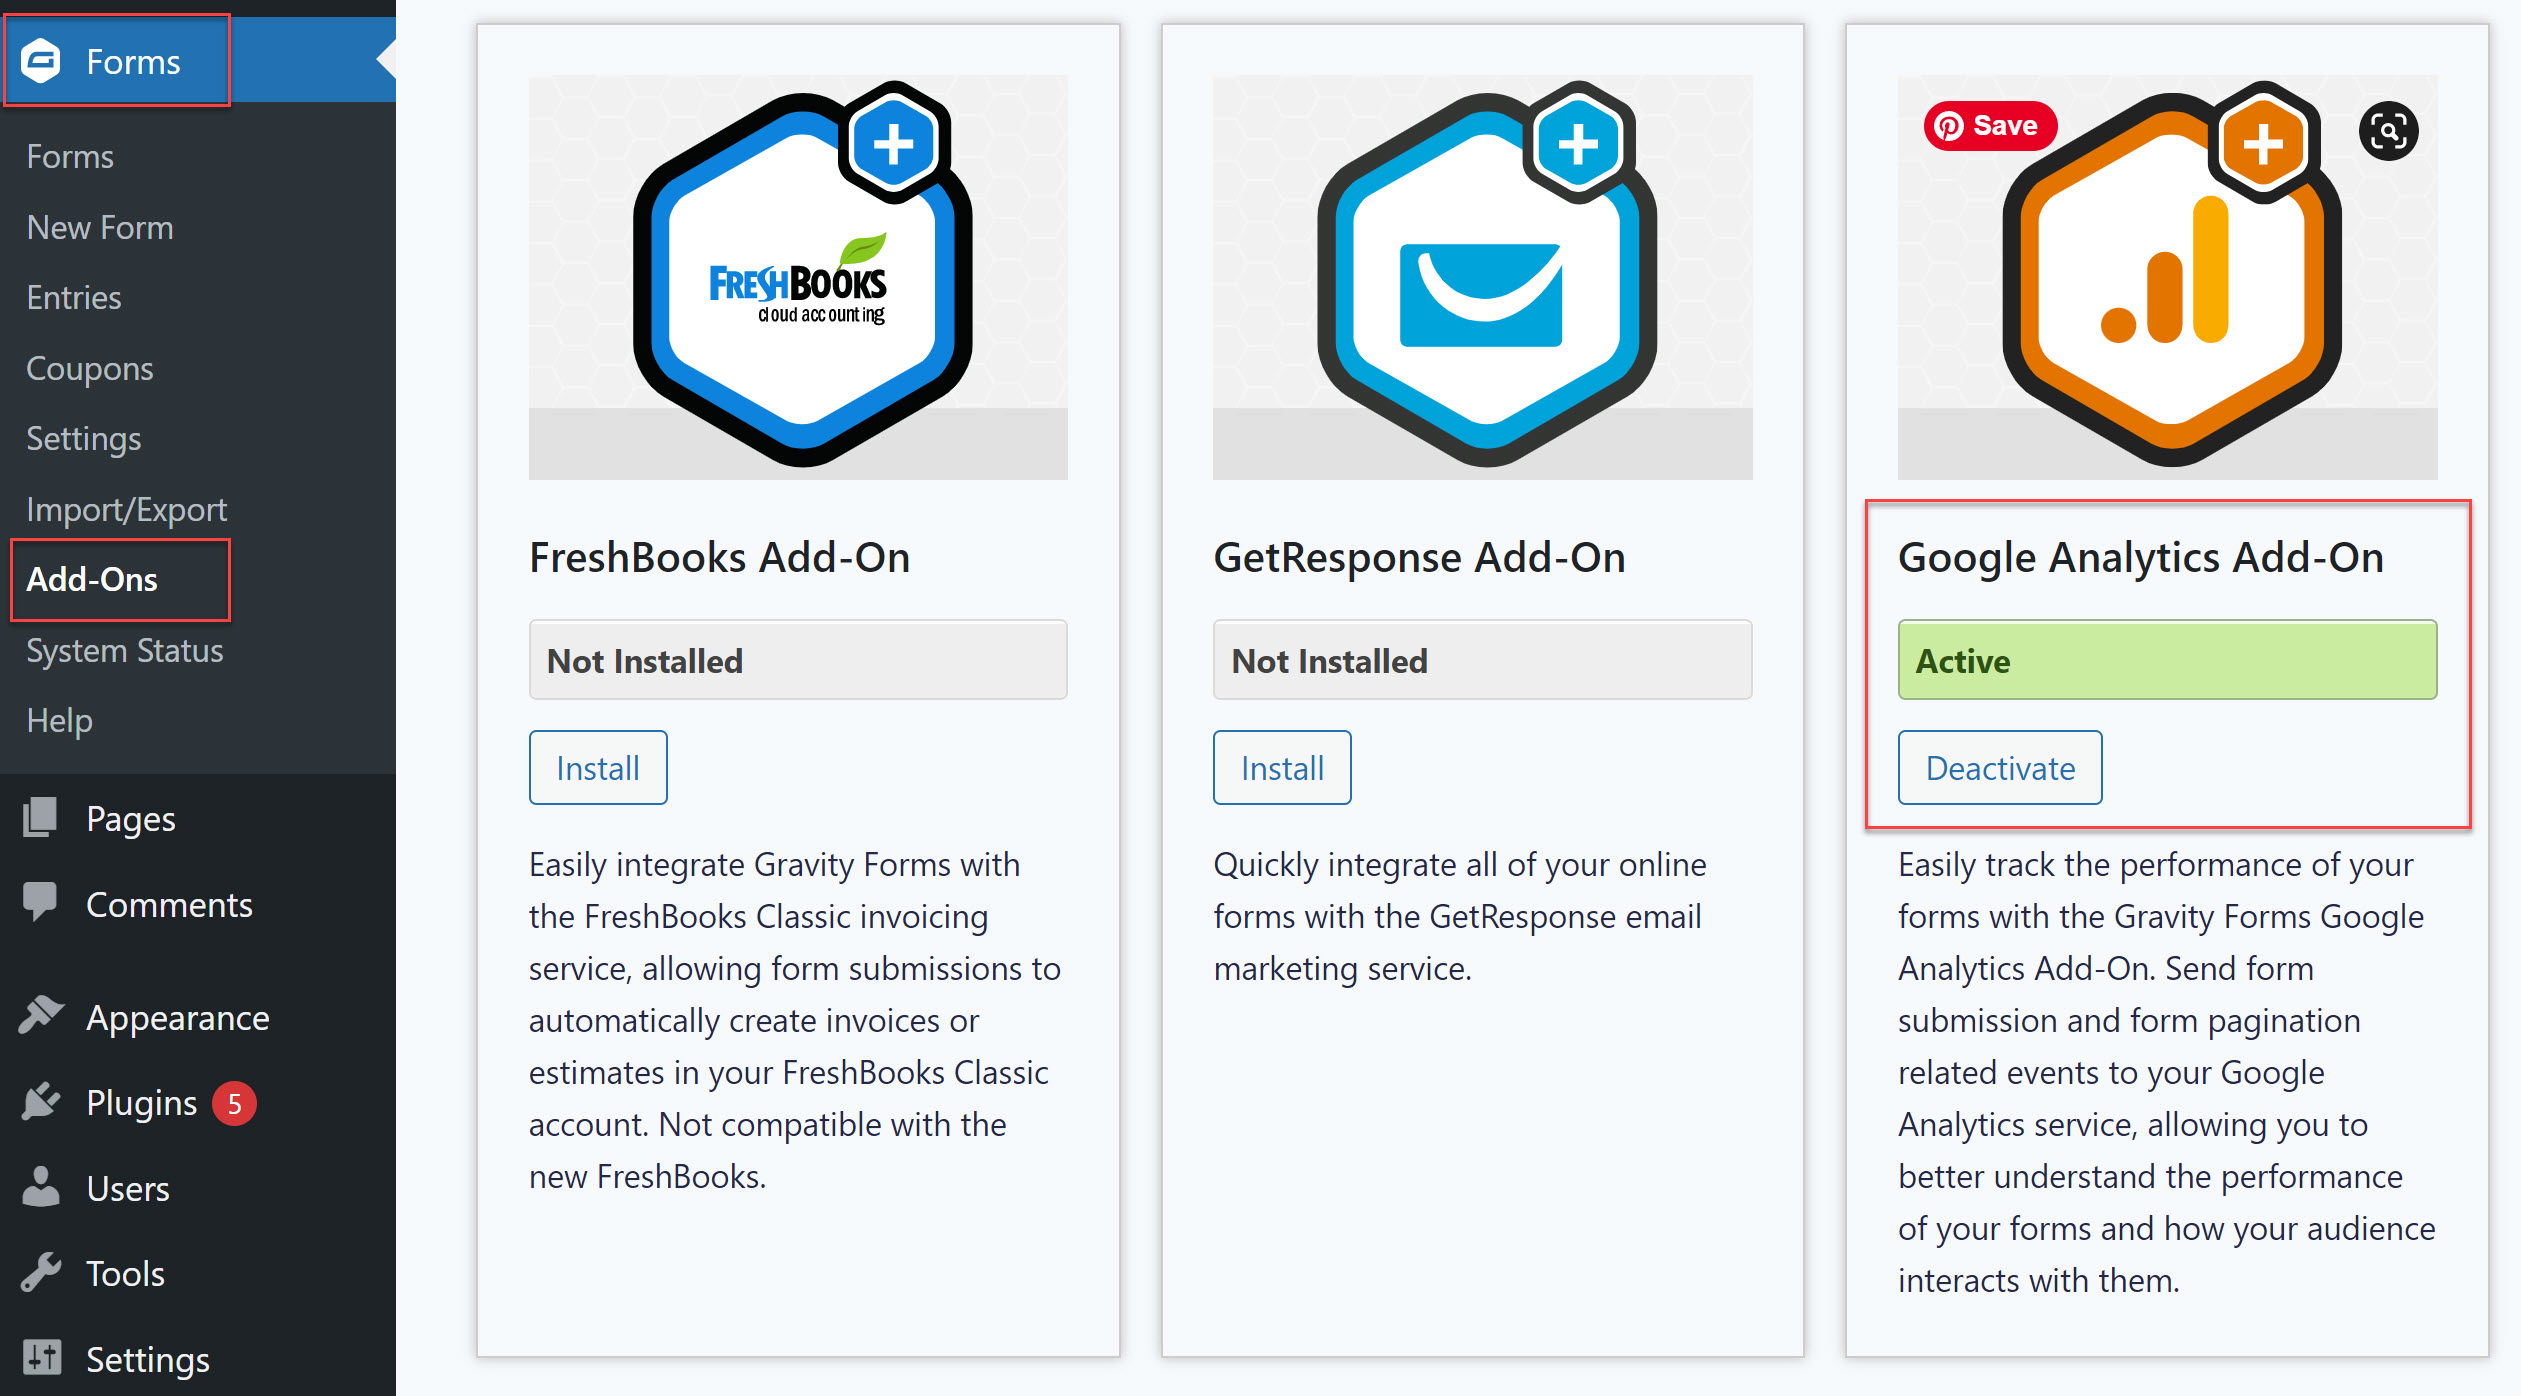
The first step is to install the Google Analytics Add-On on your WordPress website. To do so, open your WordPress dashboard and navigate to the Add-On Browser by selecting Forms > Add-Ons.
Then scroll down to the Google Analytics Add-On and click Install > Activate.
2. Connect Gravity Forms and Google Analytics
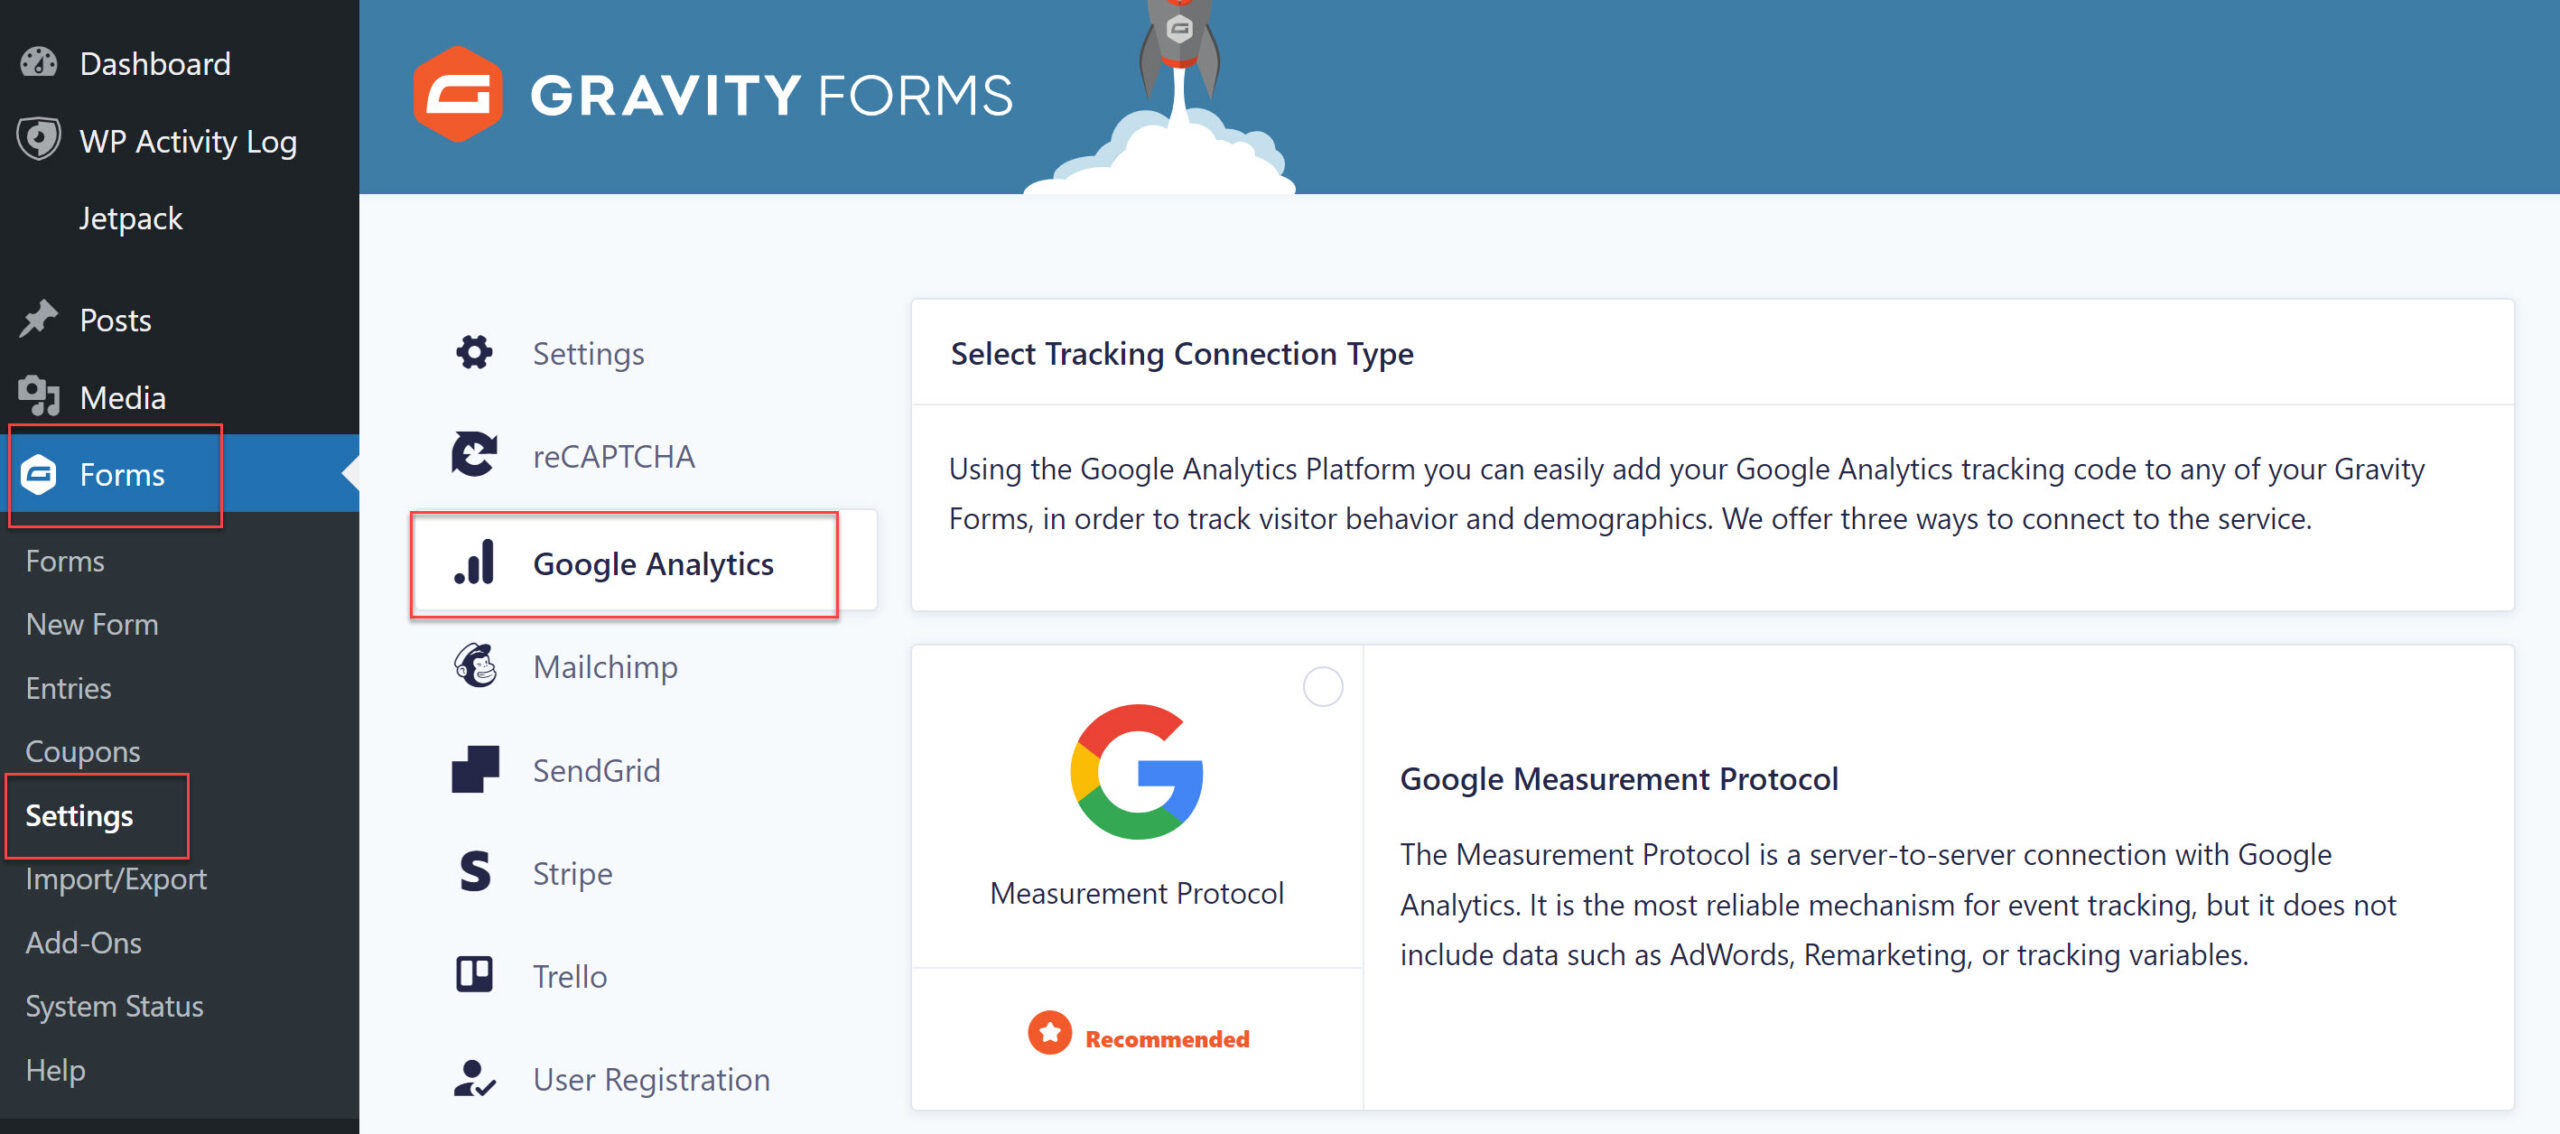
You now need to connect Gravity Forms with your Google Analytics account. To do so, select Gravity Forms > Settings > Google Analytics.
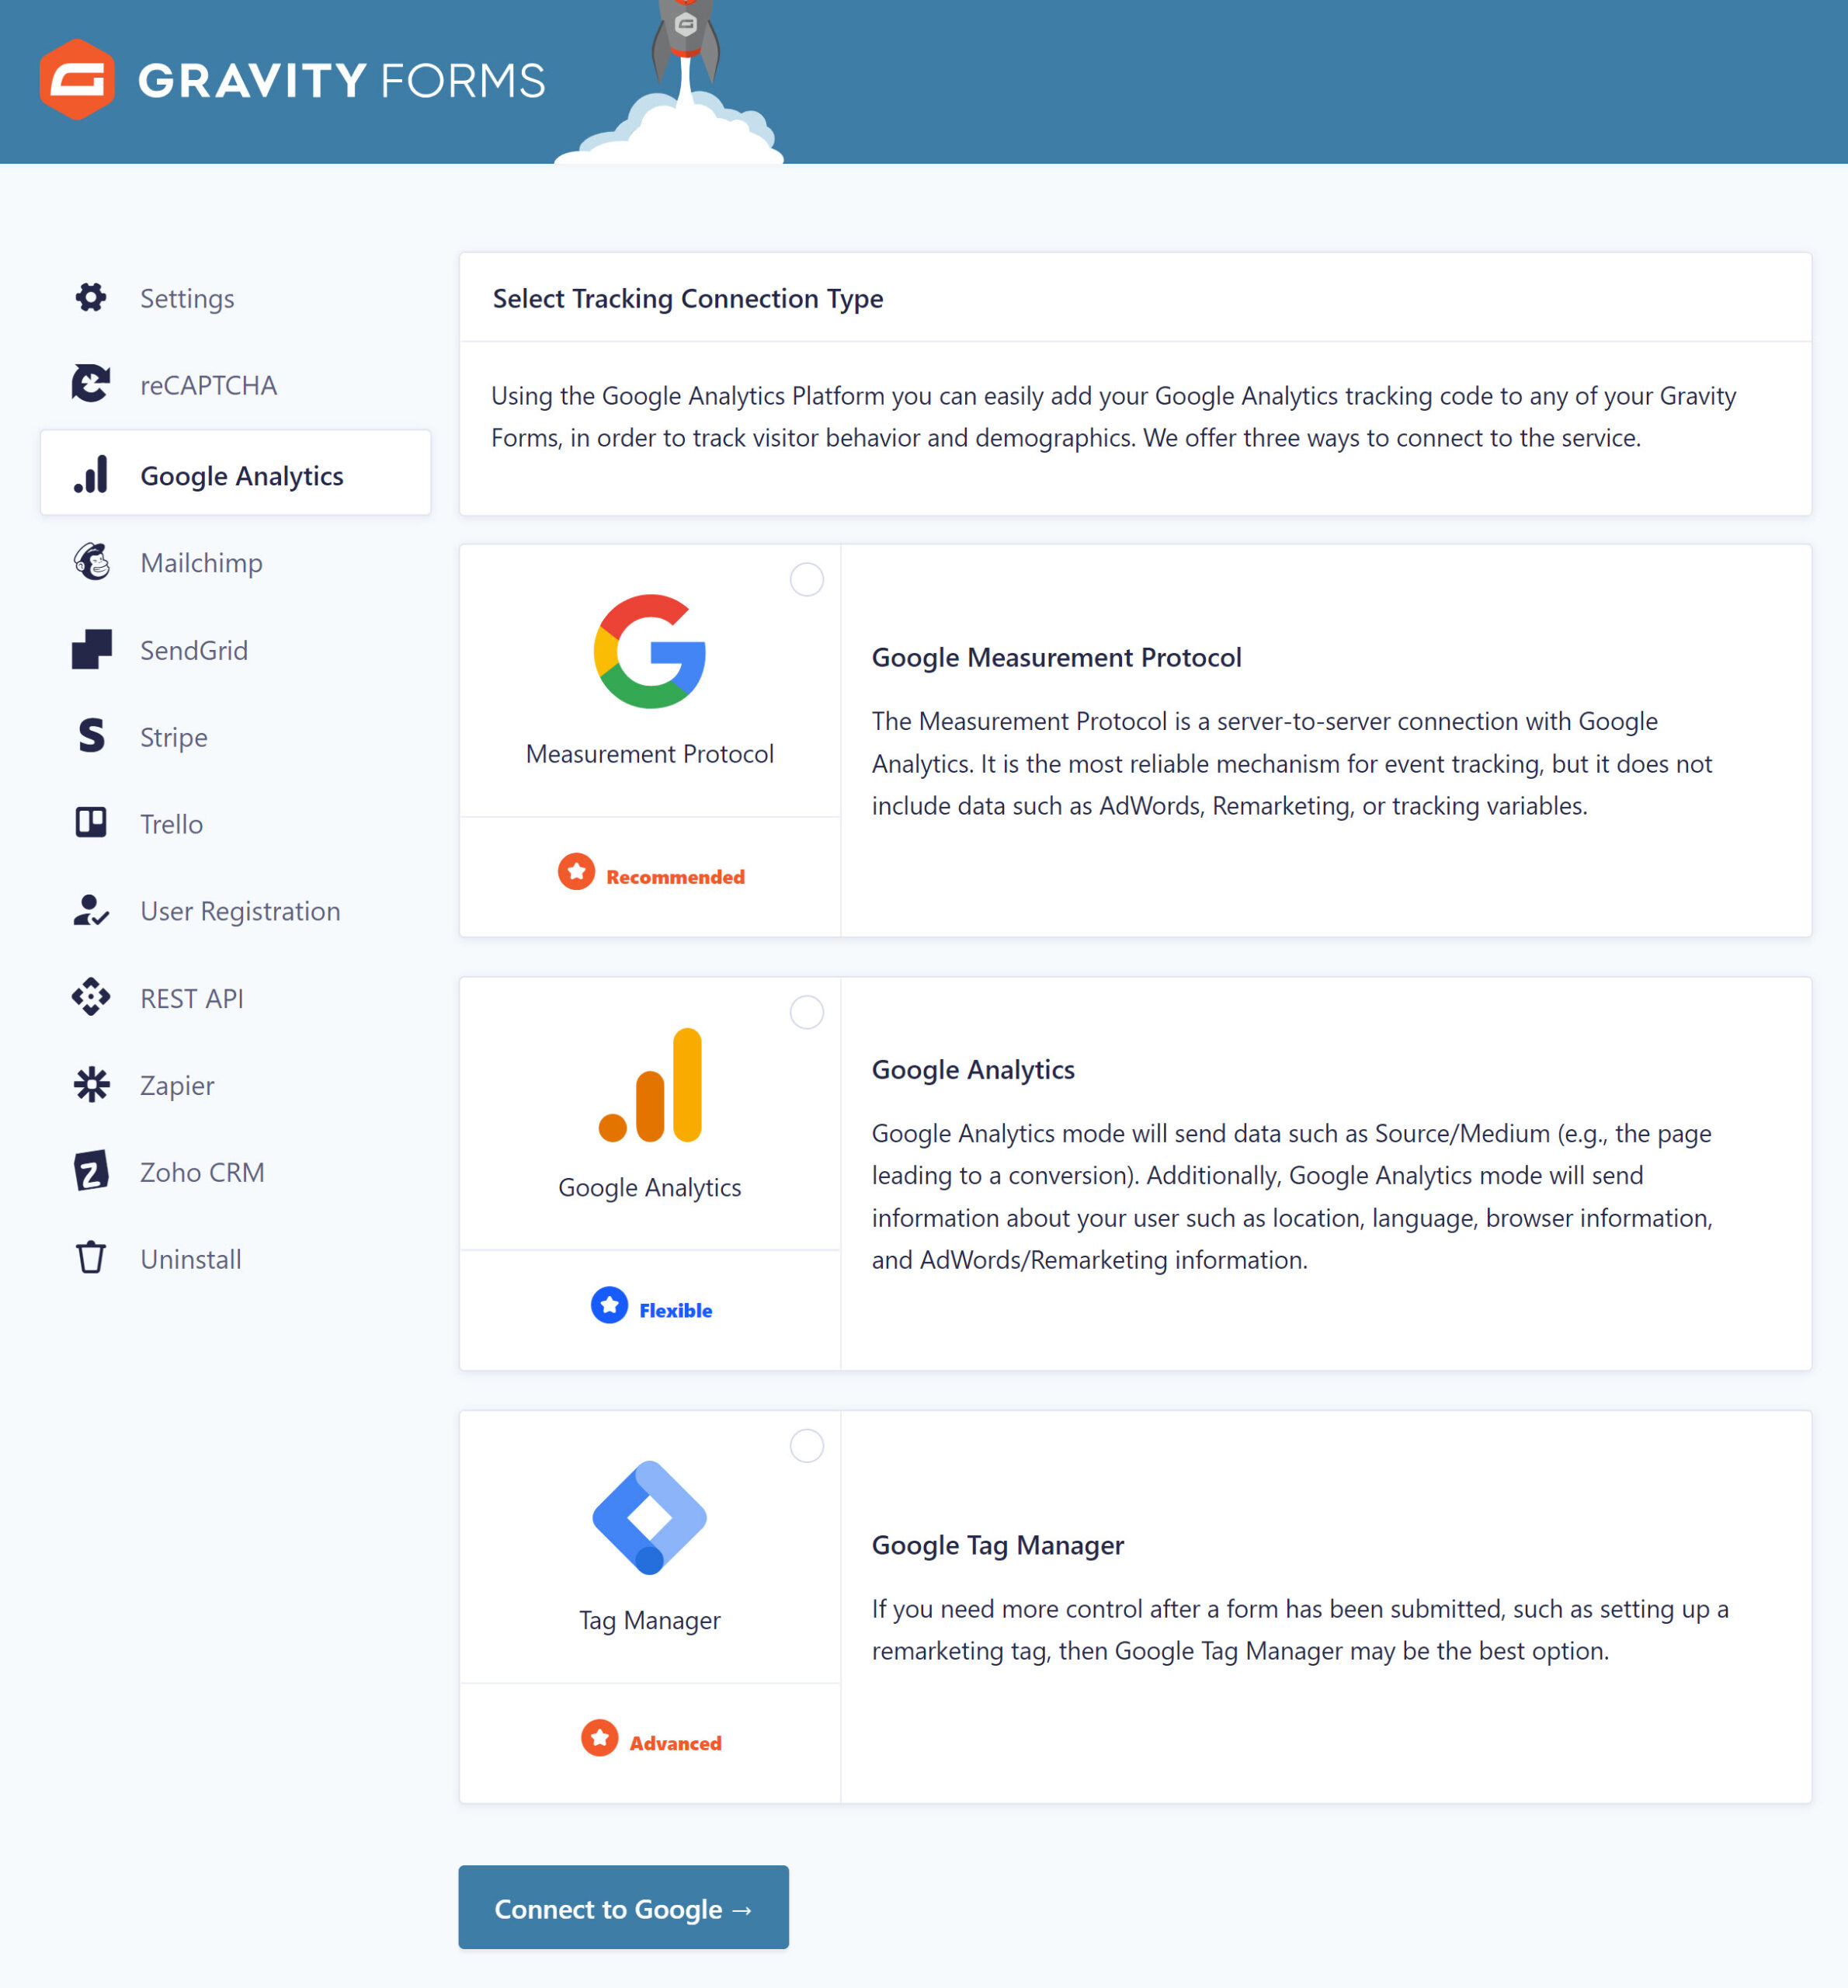
Here you will find three connection options:
- Google Measurement Protocol (Recommended)
- Google Analytics
- Google Tag Manager
The connection you type you choose will affect the capabilities and recording of the events you track. It is also important to note that support for Google Analytics 4 is only provided via Google Tag Manager.
Gravity Forms recommends that you connect via Google Measurement Protocol, as it is the easiest and one of the most secure connection types. However, it does have its limitations – notably no integration with AdWords and Remarketing (instead connect with either Google Analytics or Google Tag Manager).
For information on each of the connection options, and to help you choose the right option for your website, check out this article in the Gravity Forms Docs – Google Analytics Connection Types.
Once you’ve selected the right connection type for your forms, select Connect to Google and follow the instructions to connect to your appropriate Google account.
For more information on how to install and connect the Google Analytics Add-On, have a read of this documentation – Setting Up the Google Analytics Add-On.
3. Configuring Feed Settings
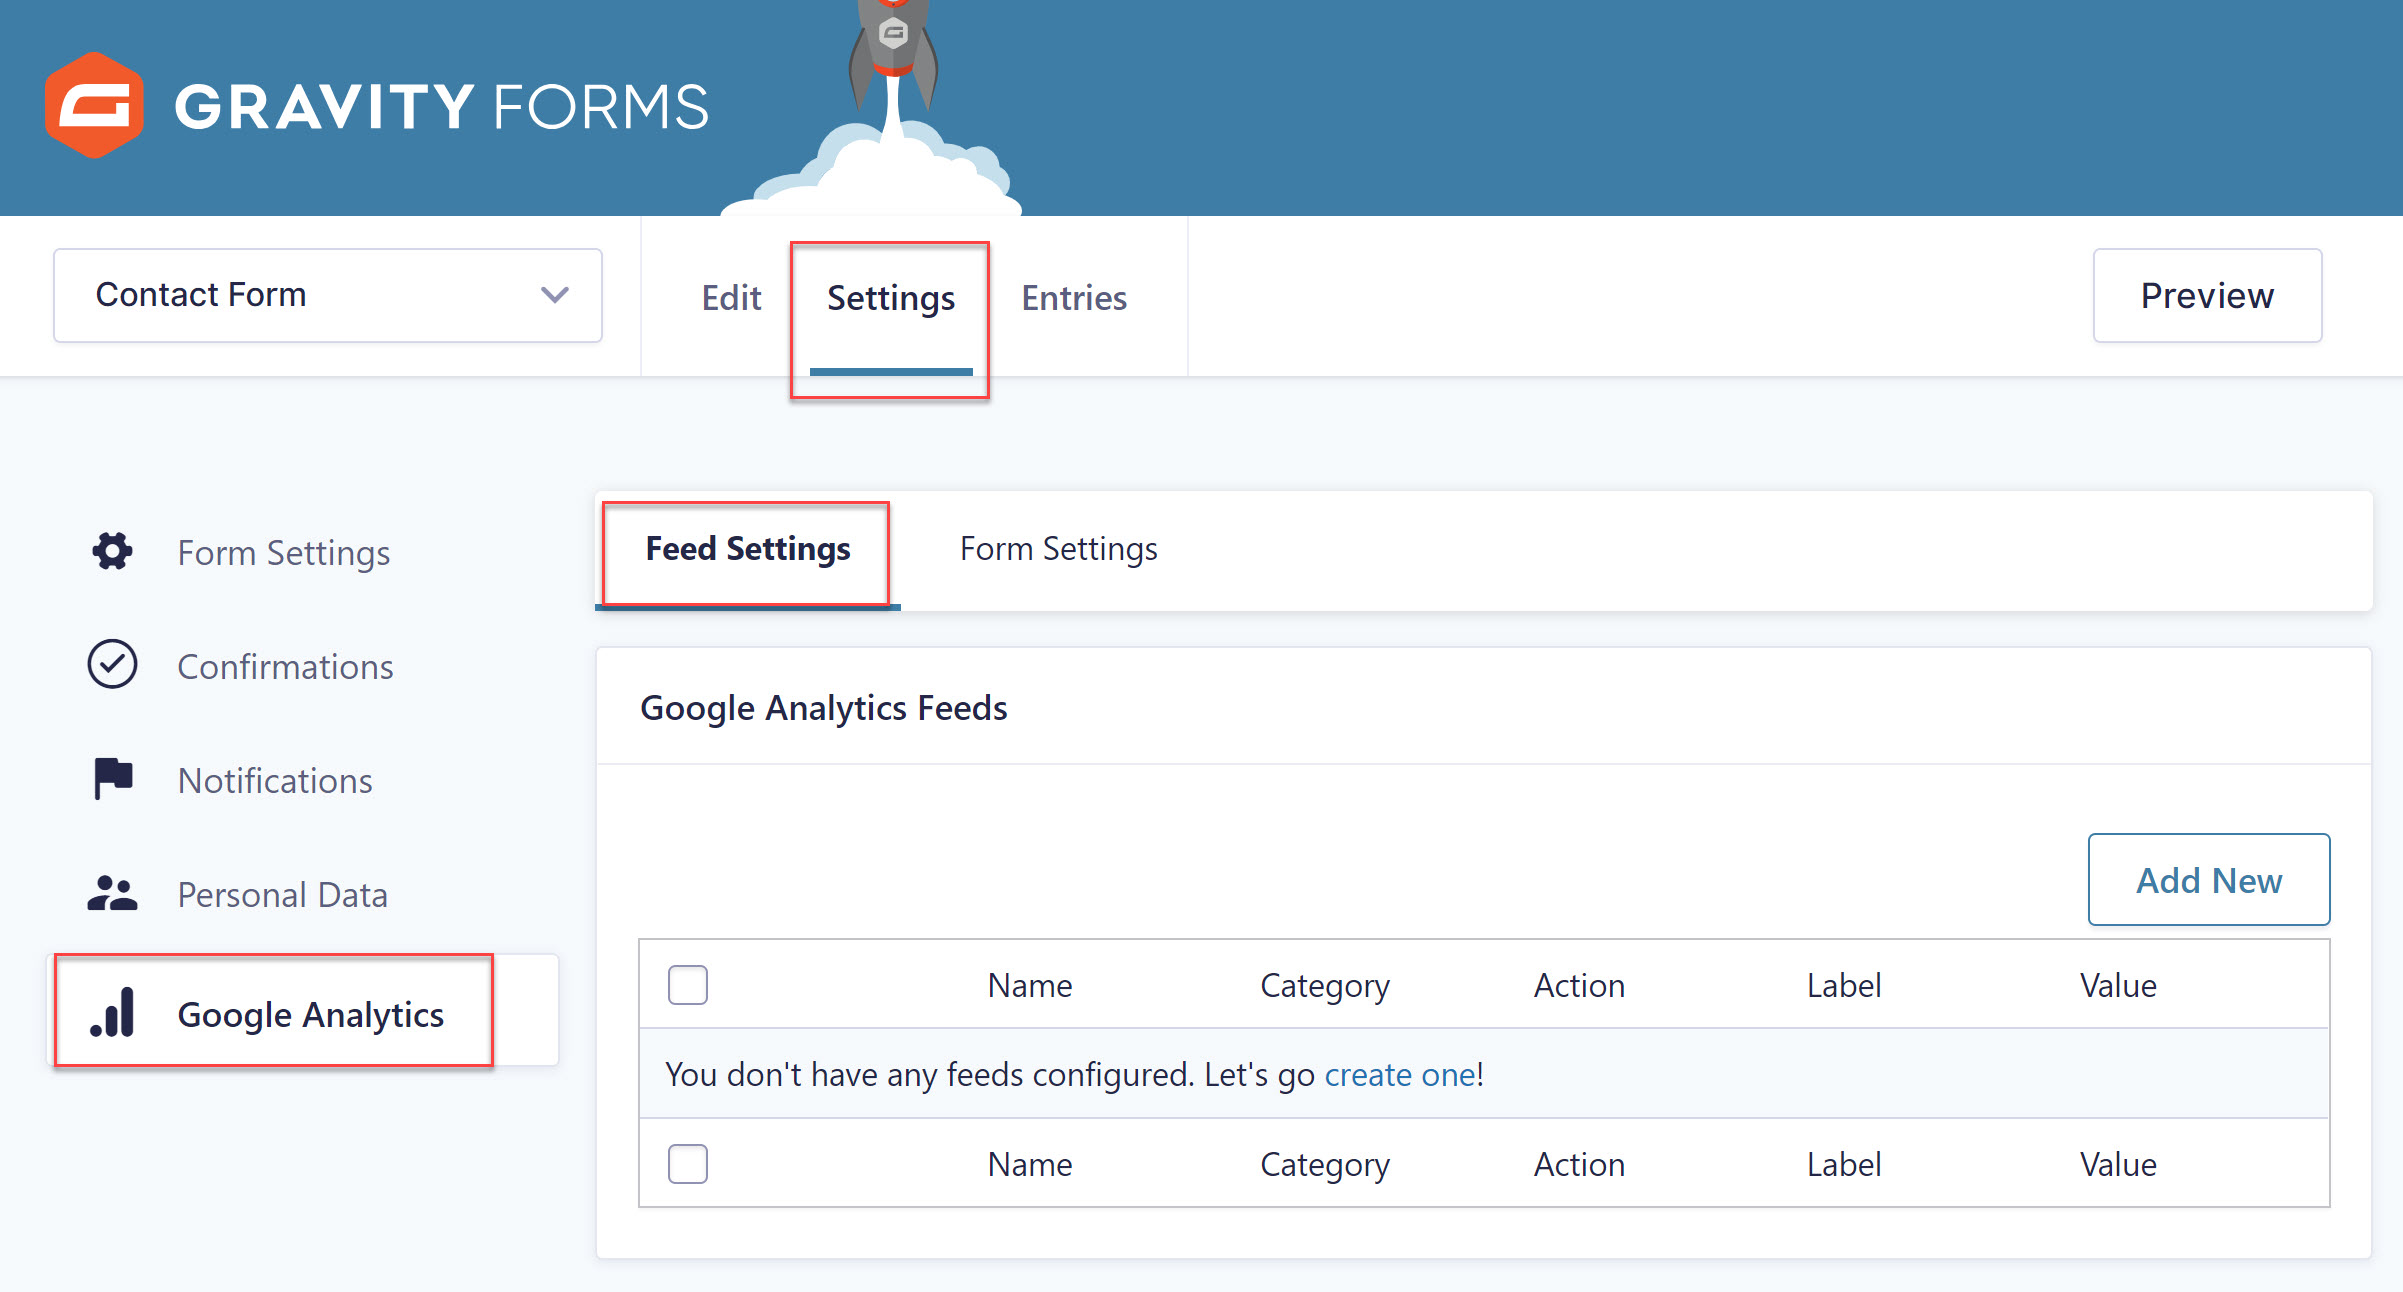
The next step is to configure the settings for each individual form that you would like to track. Navigate to an appropriate form and then select Settings > Google Analytics.
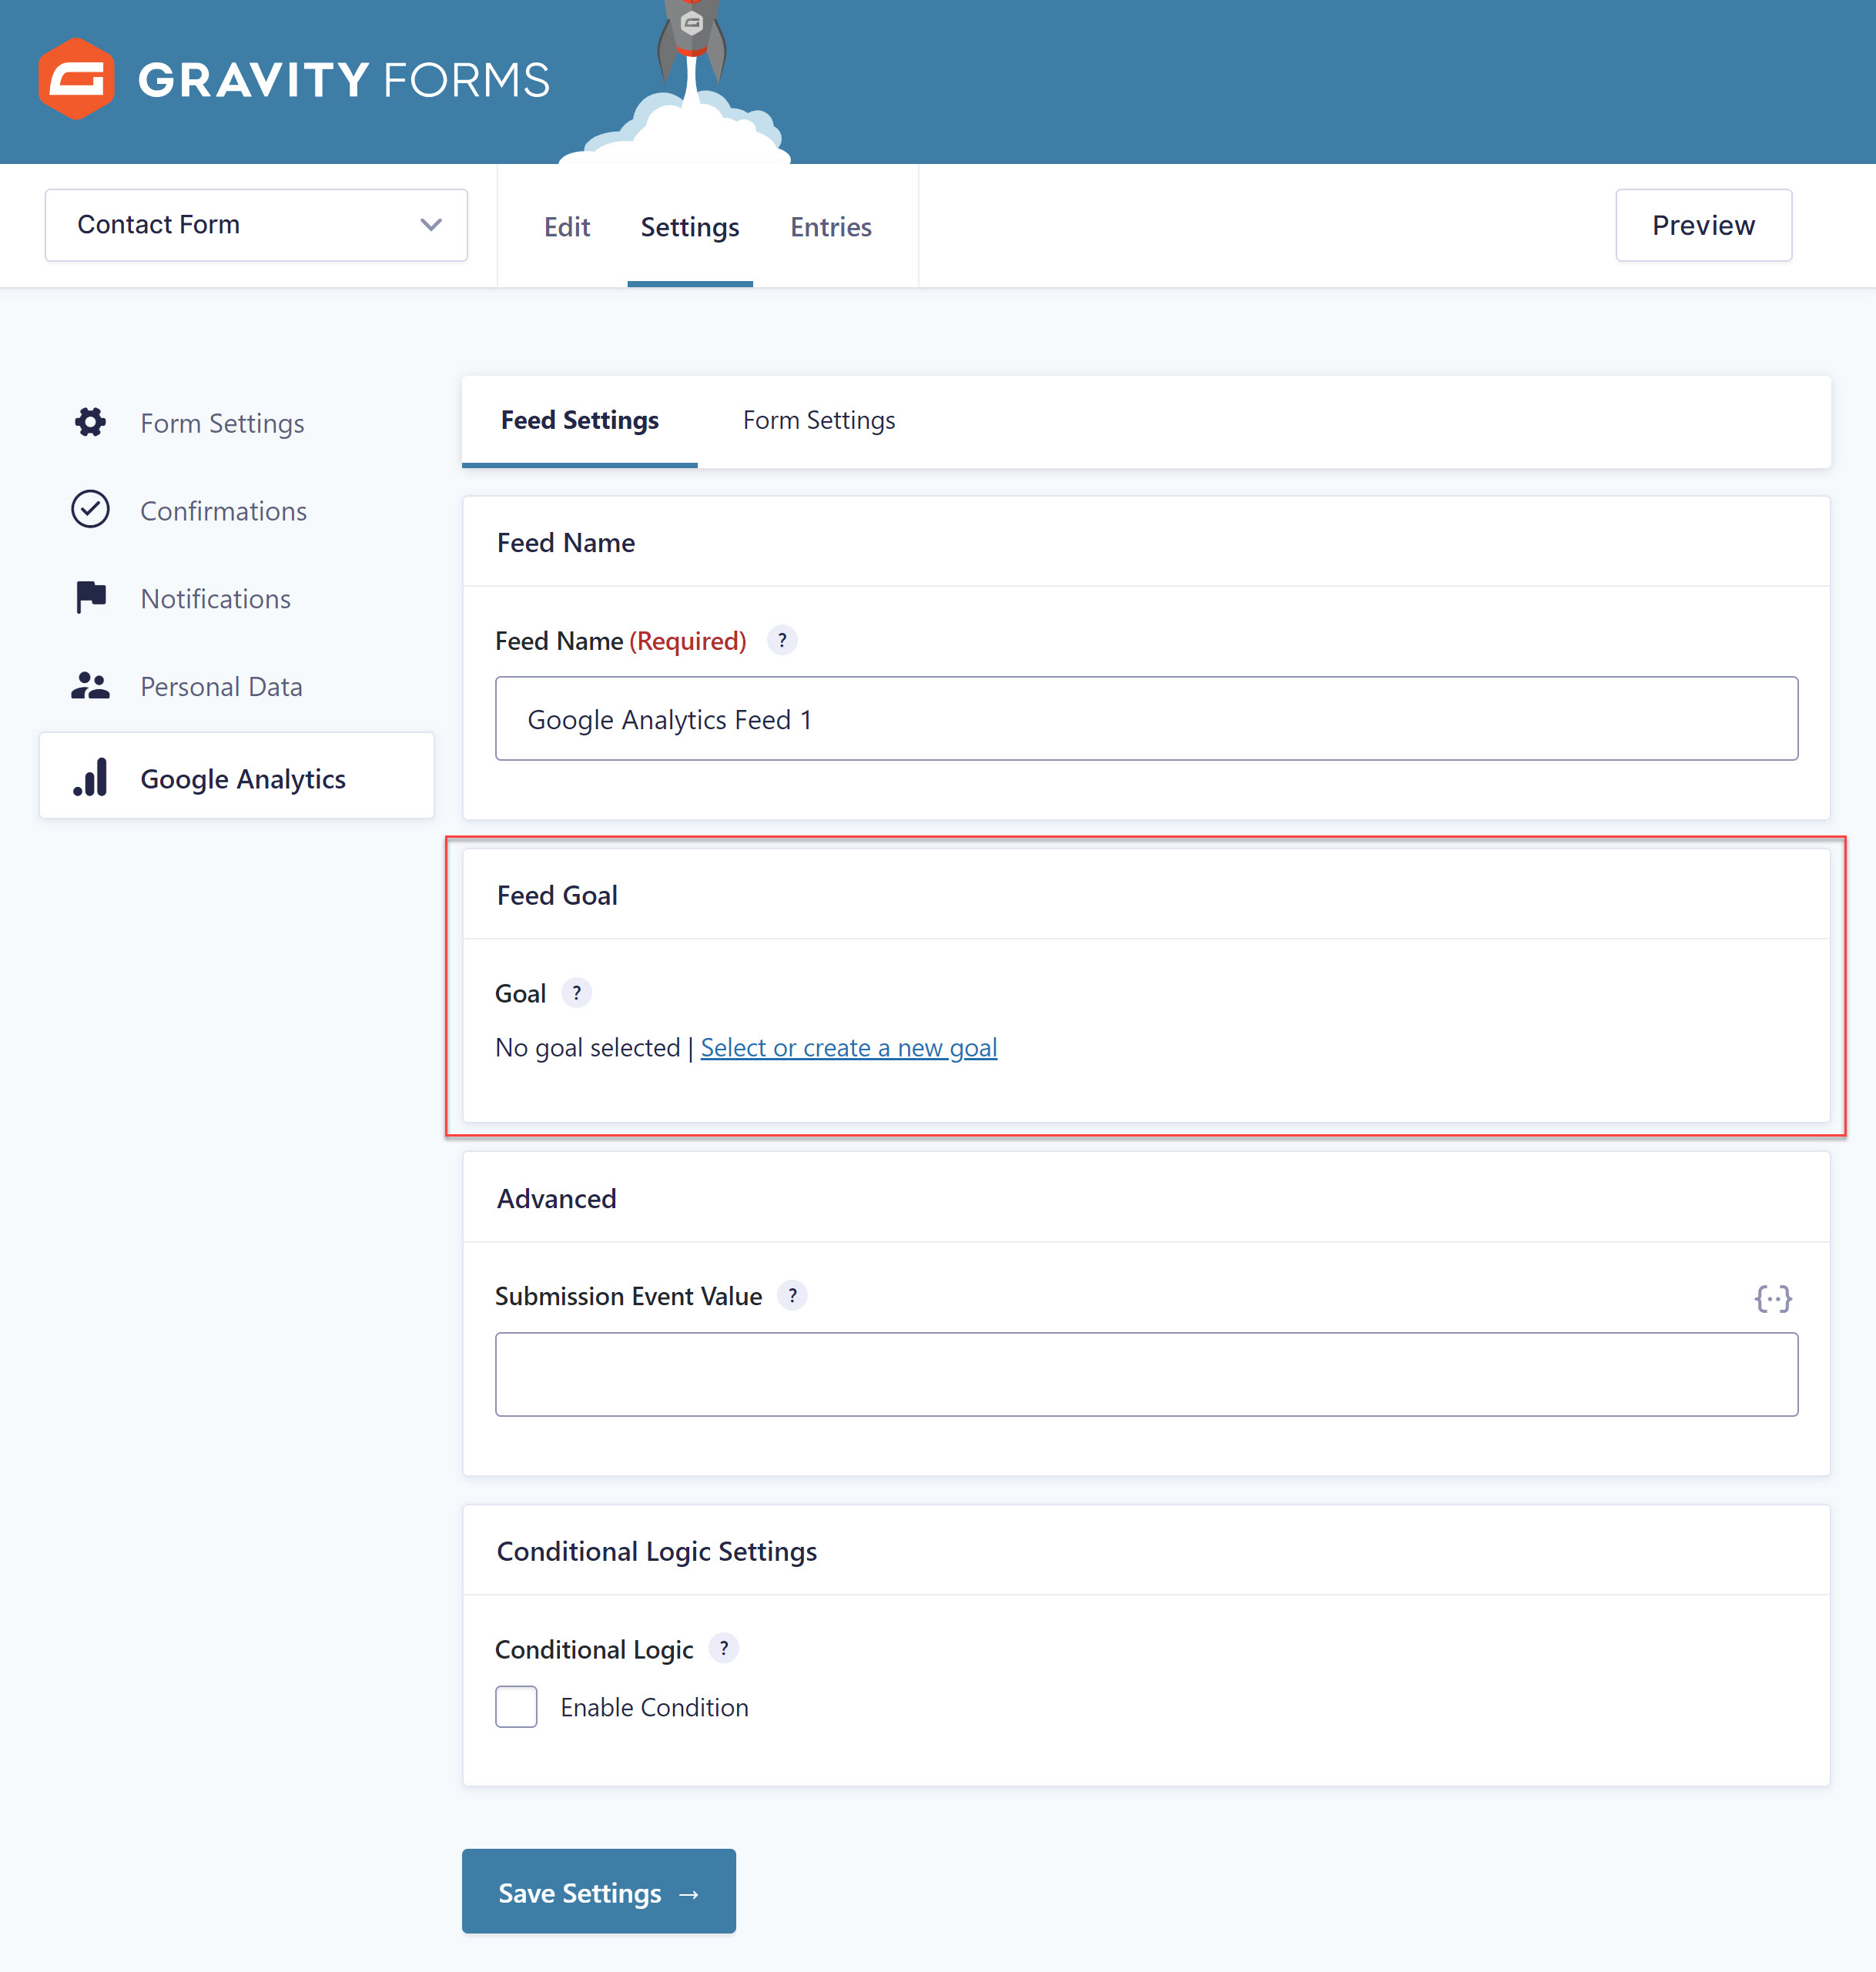
Here you will see you have the option of selecting both Google Analytics Feed Settings and Form Settings. We’ll start with Feed Settings where we will create a goal, allowing us to track successful form submissions.
Select to Create a new feed and give the feed a name. You will then need to configure the feed goal. To do so, click on Select or Create a New Goal.
In Google Analytics, goals are intended to measure how well your site or app fulfills a target objective, based on an event. In short, a goal represents a completed activity that contributes to the success of your business.
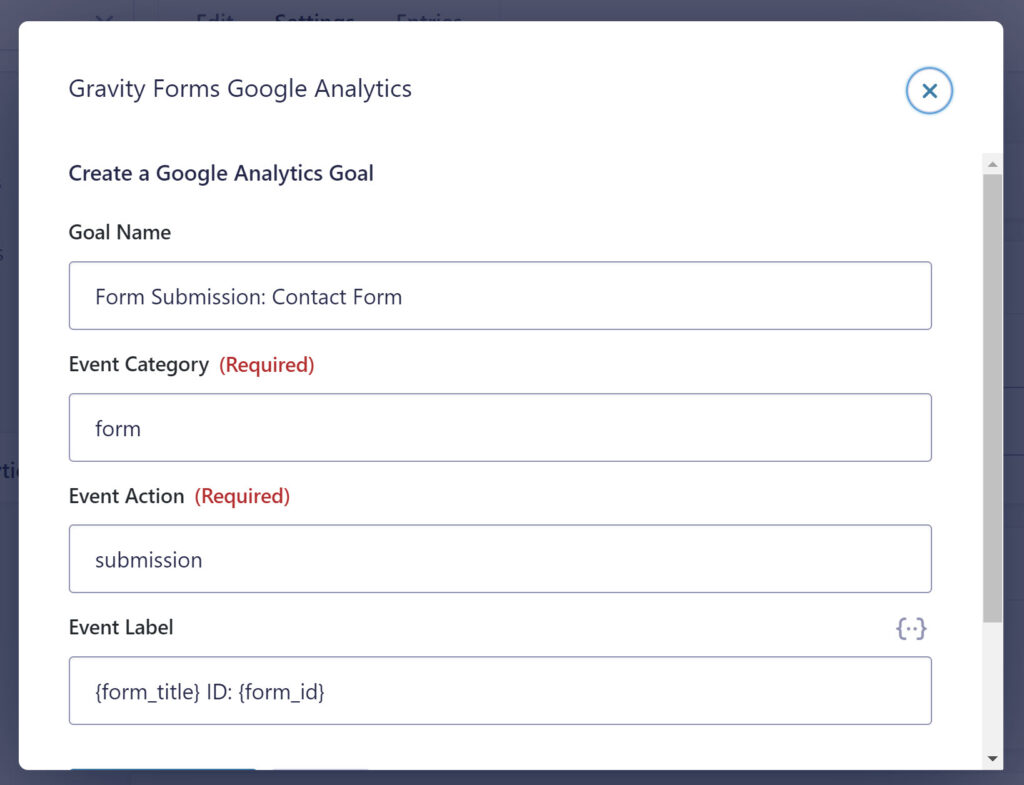
Within the Select/Create popup interface, you can create a new goal:
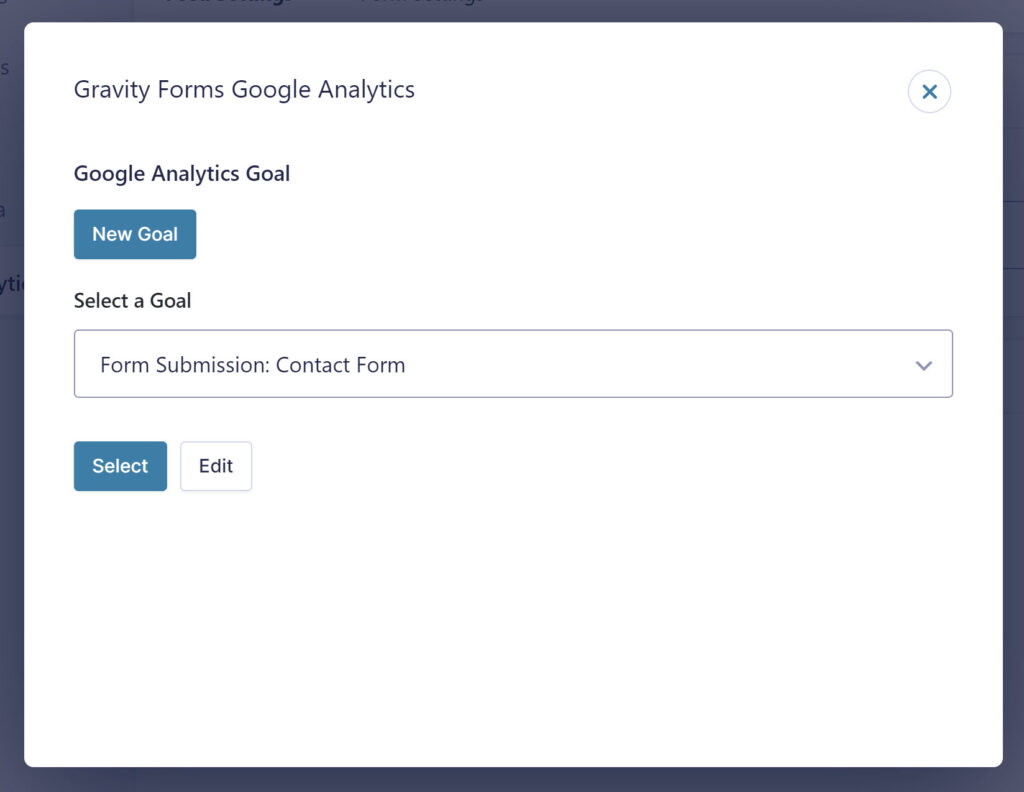
Or you can select or edit an existing goal (all available goals from your connected Google Analytics account will be displayed):
For more in-depth information on Google Analytics goals and how to create them, check out this article from the docs – Setting Up a Form and Feed for the Google Analytics Add-On.
Once you’ve completed setting up the feed, and added conditional logic if required, click Save Settings.
4. Configure the Google Analytics Form Settings
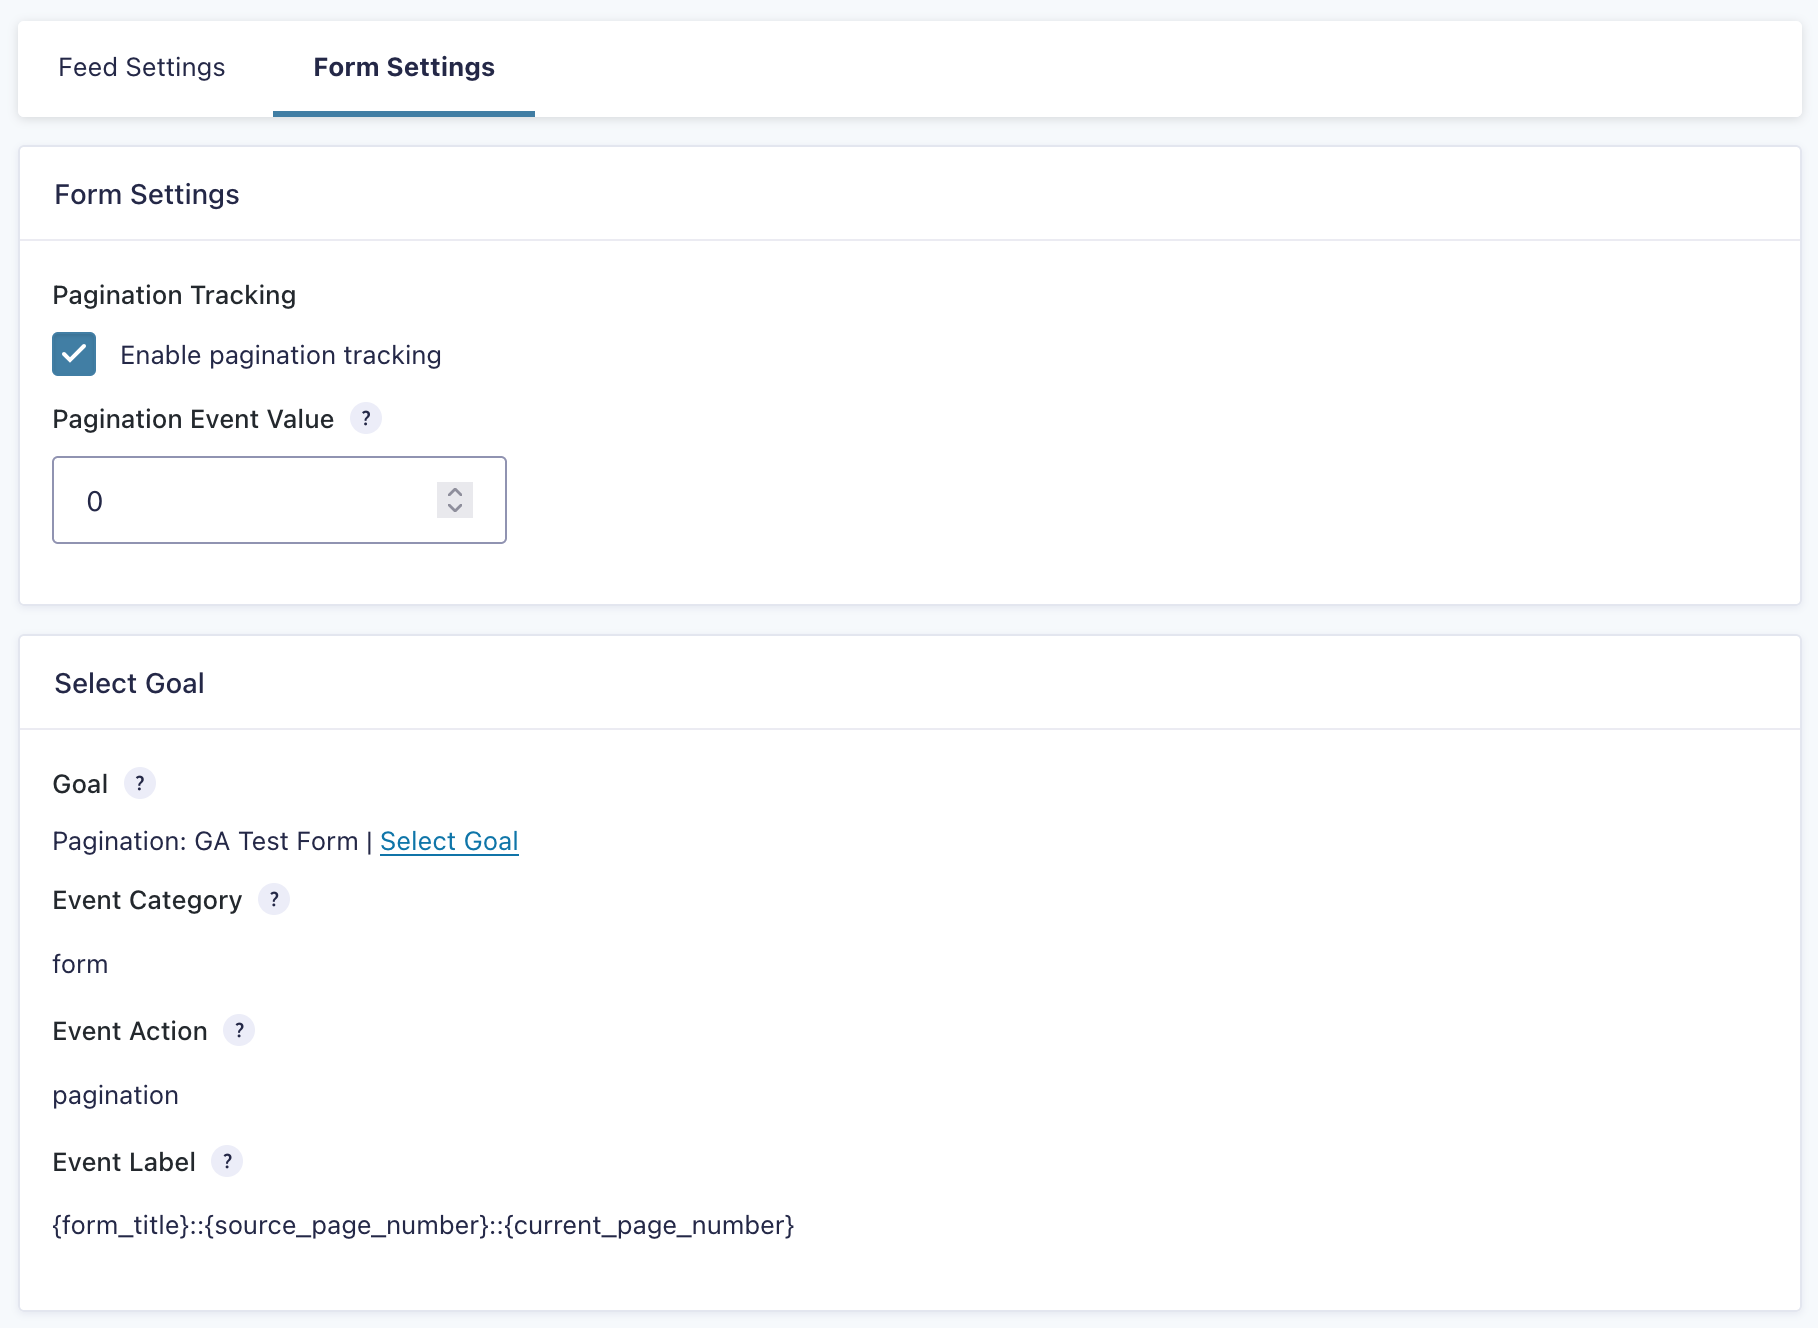
Next you can configure the Google Analytics Form Settings, where pagination events are handled. Toggle over to Feed Settings and select Enable Pagination Tracking.
Pagination events will be generated as a user navigates between pages of a multi-page form. You will need to create a new goal for pagination, which follows the same sequence as creating a goal for a form submission.
Once set up, click Save Settings. Your form is now synced with Google Analytics and data will be sent to your Google Analytics dashboard.
Make sure you test your forms to ensure you have set up the add-on successfully. However, it is important to note that form submission and pagination events may not show up in real-time in your Google Analytics dashboard!
Tracking Form Submission with Google Analytics: Ready to Get Started?
Performance is everything, and if you want forms that convert, then you need to know what is working and what isn’t. With the Google Analytics Add-On, you can track all forms on your website and get a reliable overview of submissions and form abandonment. With this data, you can evaluate form performance and make informed changes and improvements to ensure optimal conversions.
Are you ready to get started with the Gravity Forms Google Analytics Add-On? Install it Today!

If you want to keep up-to-date with what’s happening on the blog sign up for the Gravity Forms newsletter!

