Create Online Payment Forms with the Conversational Forms Add-On
Are your online payment forms lengthy, not converting well, or seem at odds with your brand’s personable tone of voice? Then you should consider upgrading those forms to conversational payment forms.
In this tutorial, we discuss how to create online payment forms with WordPress form plugin Gravity Forms, and its Conversational Forms Add-On. Using the Conversational Forms Add-On, you can create easy-to-use, distraction-free payment forms that use a conversational tone, making them more engaging and pleasant for your customers than the classical payment form. Plus, as you will see below, it is very easy to set up.
If you want to try out conversational online payment forms for your website, simply follow this step-by-step guide. If you don’t have Gravity Forms, sign up for the free demo so you can follow along with the tutorial. You can also view a selection of conversational forms, including an event registration payment form, over at the conversational forms gallery.
Below, we’ll go over the types of payment forms you can create, what conversational forms are and why they’re a good idea, and how you can combine the two on your WordPress site.
Let’s jump in…
Why Use Gravity Forms for Online Payments?
Gravity Forms makes creating online payment forms easy. Its beginner-friendly drag-and-drop editor works seamlessly in the WordPress dashboard and the plugin is super flexible and customizable, supporting many payment providers and other integrations. Plus, it comes with extremely comprehensive support and documentation.
You can create payment forms for various types of purposes, including:
- Selling products and services – Easily sell physical and digital products as well as services. Whether your business is in-person, online, or a combination of both, with Gravity Forms you can easily accept one-time or recurring payments via your WordPress website.
- Event registrations – Have an upcoming event you want to sell tickets for? Gravity Forms can easily accommodate.
- Memberships and subscriptions – Set up recurring payments for products, services, access to membership areas, and more.
- Donation forms – Create a donation form to accept one-time and/or recurring donations, ideal for nonprofits.
For more information about Gravity Forms payment options, check out this Ultimate Guide to Taking Payments on Your WordPress Website with Gravity Forms.
What Are Conversational Forms?
Now, your next question might be, “What exactly are conversational forms?” In short, they are forms that request information in a step-by-step manner. Instead of seeing all the form fields at once, users click through questions one at a time.
For example, conversational forms might first ask you for your name, then billing address, shipping information, and finally payment information. It’s more like a back-and-forth conversation, hence the name.
This approach offers several benefits:
- Less overwhelm because users only have to focus on one piece of information at a time.
- More engaging due to increased interactivity; users have to actively take part in the process.
- Mobile-friendly since there is less information on the screen, making it easier to use with touch.
- Improved branding because there are more design elements to customize.
Conversational forms are especially suited for providing a more personal experience to clients and customers. Businesses offering exclusive experiences and high-quality products can particulary benefit from using them. These forms are also suitable if you want your sales process to tell more of a story.
The Gravity Forms Conversational Forms Add-On
In order to use this type of web form in Gravity Forms, you need the Conversational Forms Add-On. It’s important to note that this add-on comes with the Gravity Forms Elite license.

Once installed, the add-on allows you to easily turn your normal web forms into conversational forms. All you have to do is toggle it on; no coding is necessary, and there’s no need to learn a new interface. You can also still use your forms as traditional web forms with a shortcode or block; the conversational form only lives at a specified URL. But more on set up in a minute!
Most importantly, the add-on gives you many ways to customize your conversational forms to make them fit the rest of your branding. We will also cover this in detail below. You can also still use almost all Gravity Forms features and add-ons with it, save for a few incompatibilities.
How to Create Conversational Online Payment Forms in Gravity Forms
Now that you have a good overview of what’s needed to set up conversational online payment forms, let’s look at how to put it all together.
For the following tutorial, we’ll assume that you have a working WordPress site and the Gravity Forms installed. We’ll be using Stripe as our payment provider via the Gravity Forms Stripe Add-On.
Stripe is one of the most popular online payment systems out there and offers lots of features, can accept both one-time and recurring payments, and provides great security and PCI compliance. For more information on Stripe and its many features, check out this Stripe and Gravity Forms Ultimate Guide.
1. Install the Stripe and Conversational Forms Add-Ons
To get started, we want to install both the Stripe and Conversational Forms Add-Ons. Again, you’ll need the Gravity Forms Elite license for this.
Navigate to Forms → Add-Ons in the WordPress dashboard. Here, just look for the Stripe Add-On and Conversational Forms Add-On by name.
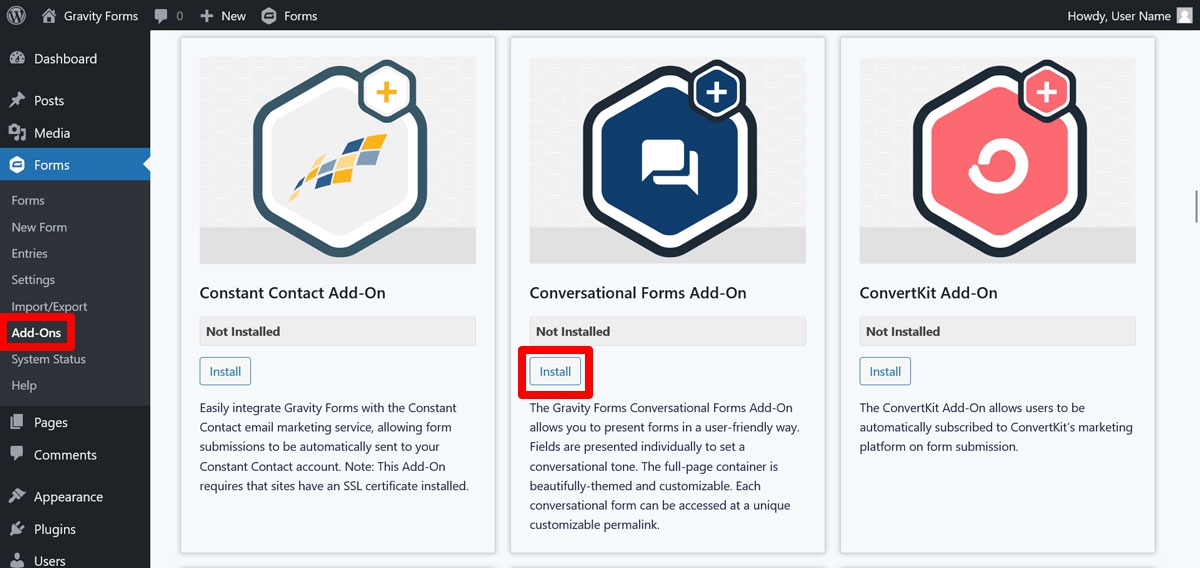
When you have located them, click on Install, then activate each afterwards. Alternatively, you can download them from your Gravity Forms dashboard and upload them to your site.
2. Connect to Stripe
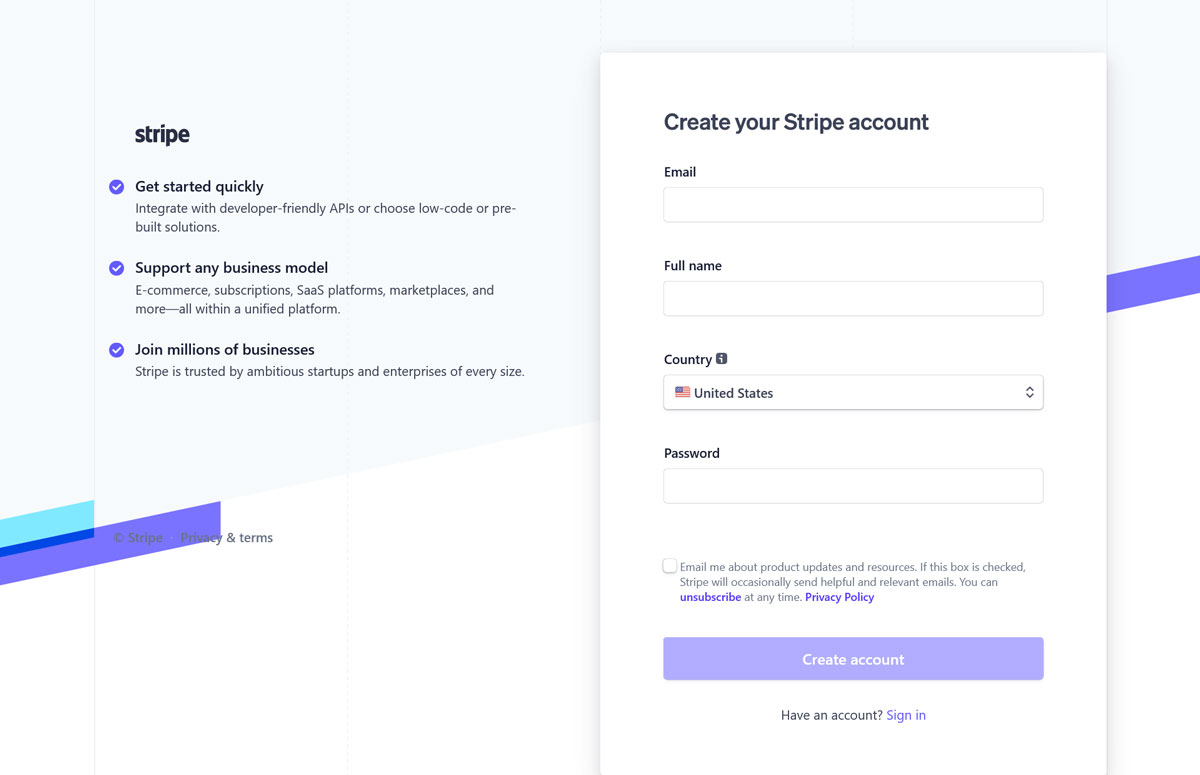
The next step is to connect your site to the payment provider. You’ll need a Stripe account for that. If you don’t have one yet, you can register for it here.
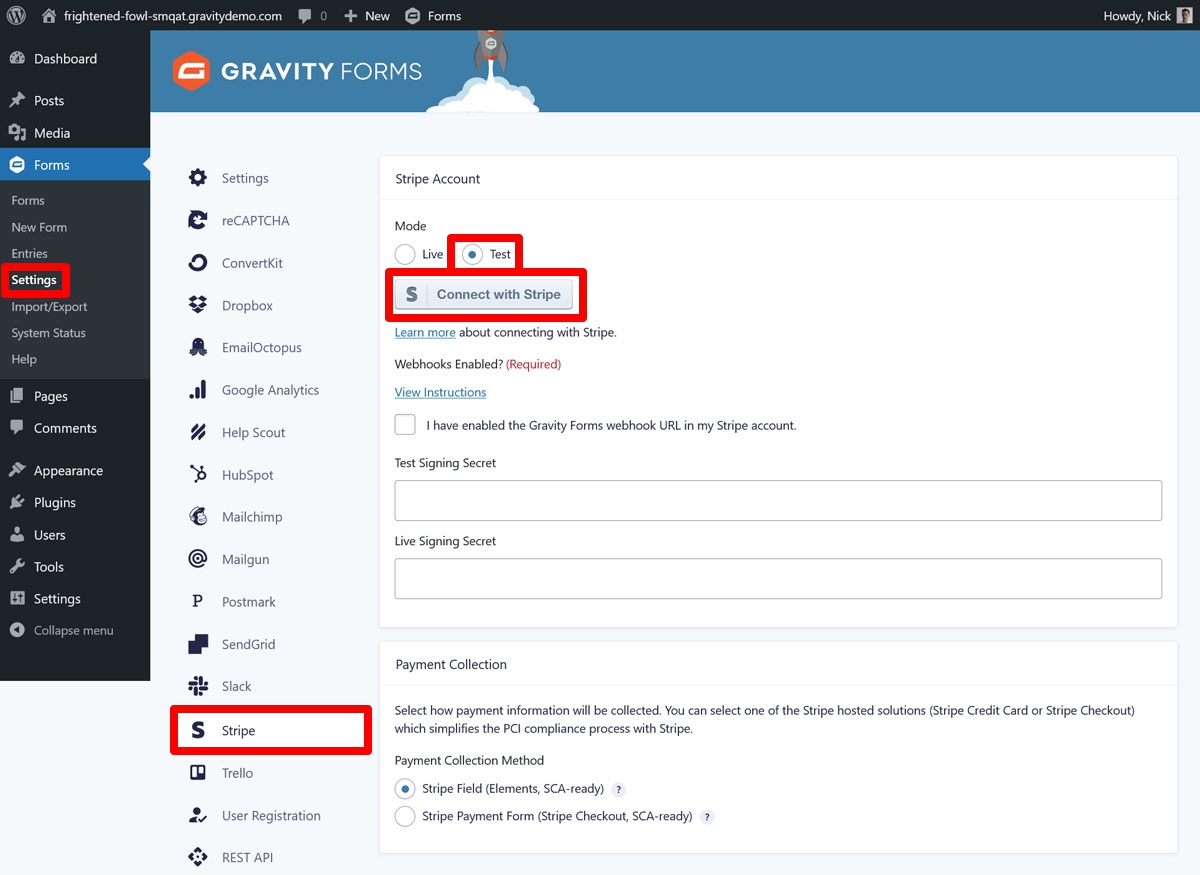
Once done, go to Forms → Settings → Stripe in your WordPress dashboard. Here, under Mode, choose Test. This will allow you to build and test your online payment forms with dummy payments. Afterwards, click on Connect with Stripe.
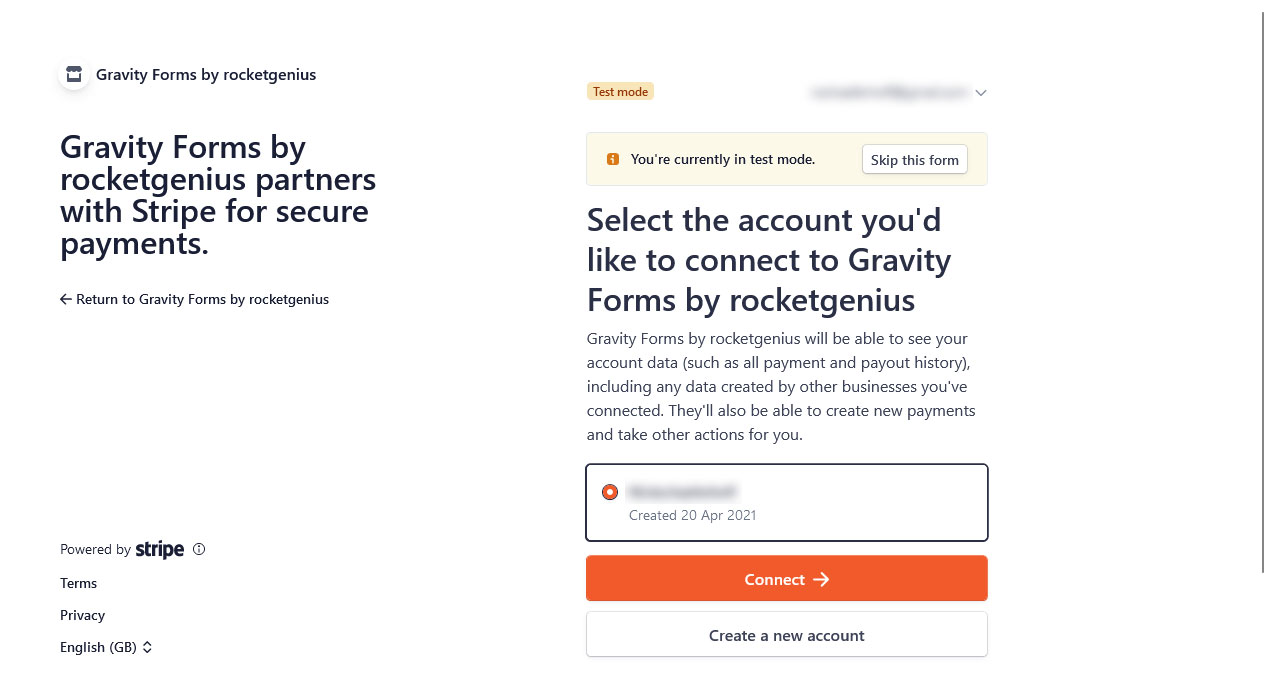
This will redirect you to the Stripe website, where you need to select your account and click on Connect.
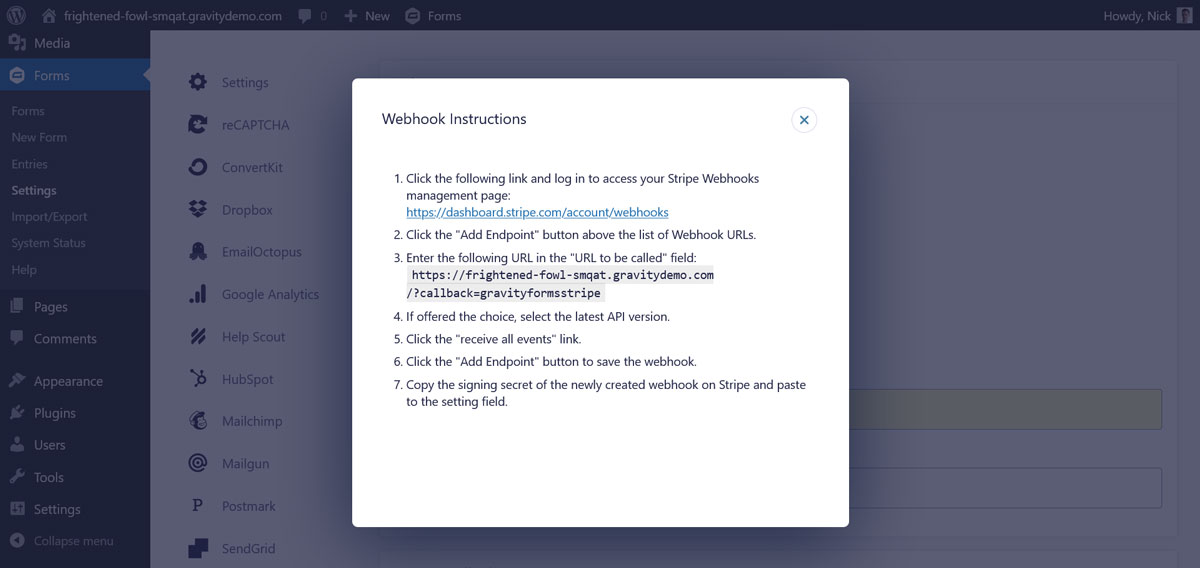
After that, you land back on the WordPress dashboard, where the next step is to add a Gravity Forms webhook to your Stripe account. You find instructions for that under Webhooks enabled? when you click on View Instructions.
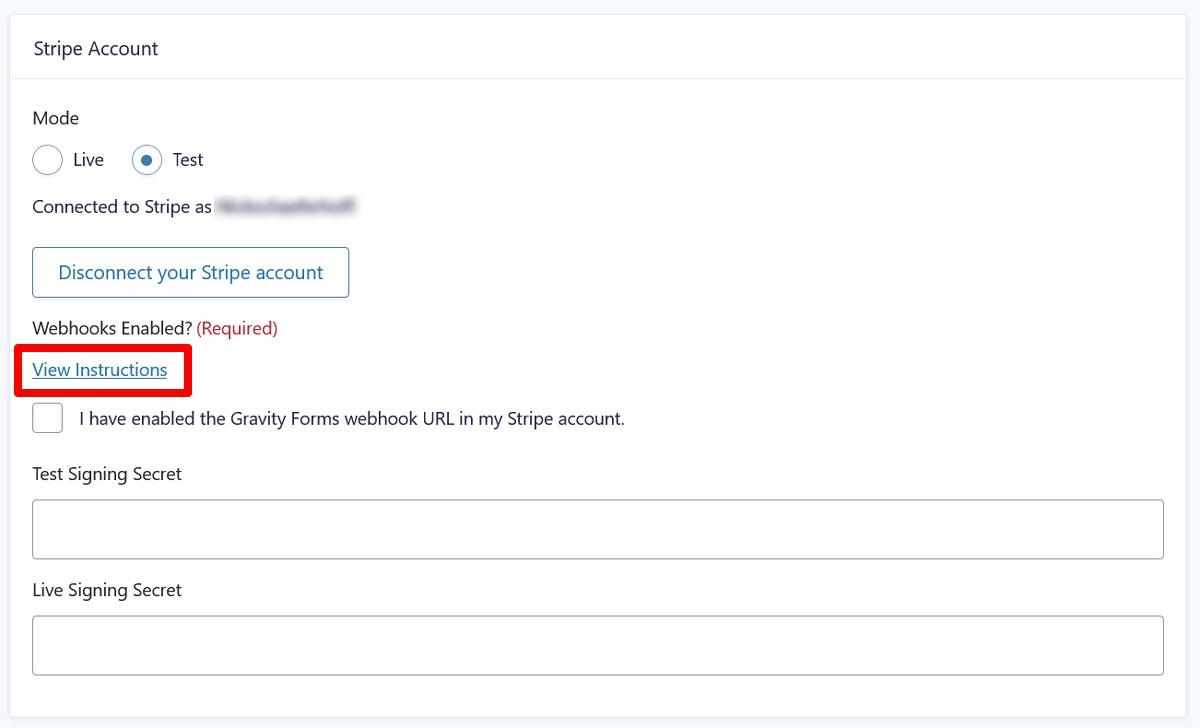
Simply follow the steps laid out here.
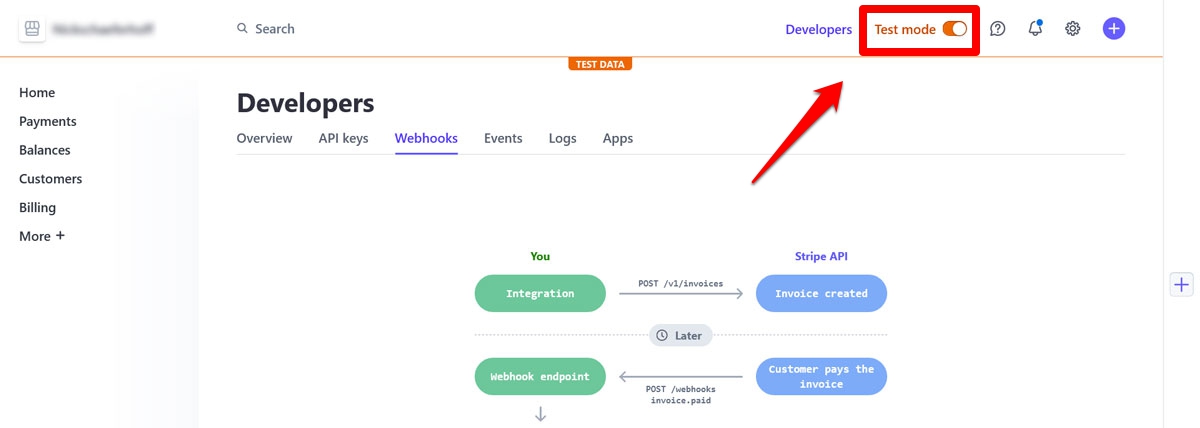
In addition, be sure to enable test mode in the Stripe dashboard as well.
For a more advanced tutorial, check our Gravity Forms and Stripe guide.
3. Set Up a Payment Form
Next up, naturally, we need to create a payment form. You can do that in the usual way: go to Forms → New Form and either set up one from scratch, use an existing one, or go with one of the available templates. For example, for this particular use case, we have selected the Event Registration template.
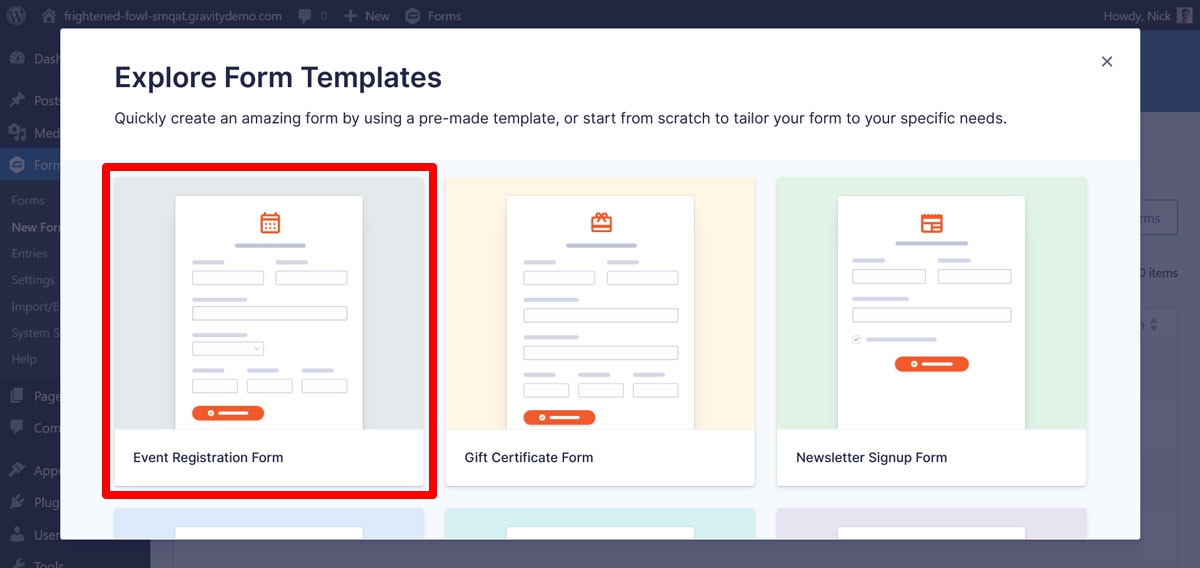
It already has many of the fields we are going to need.
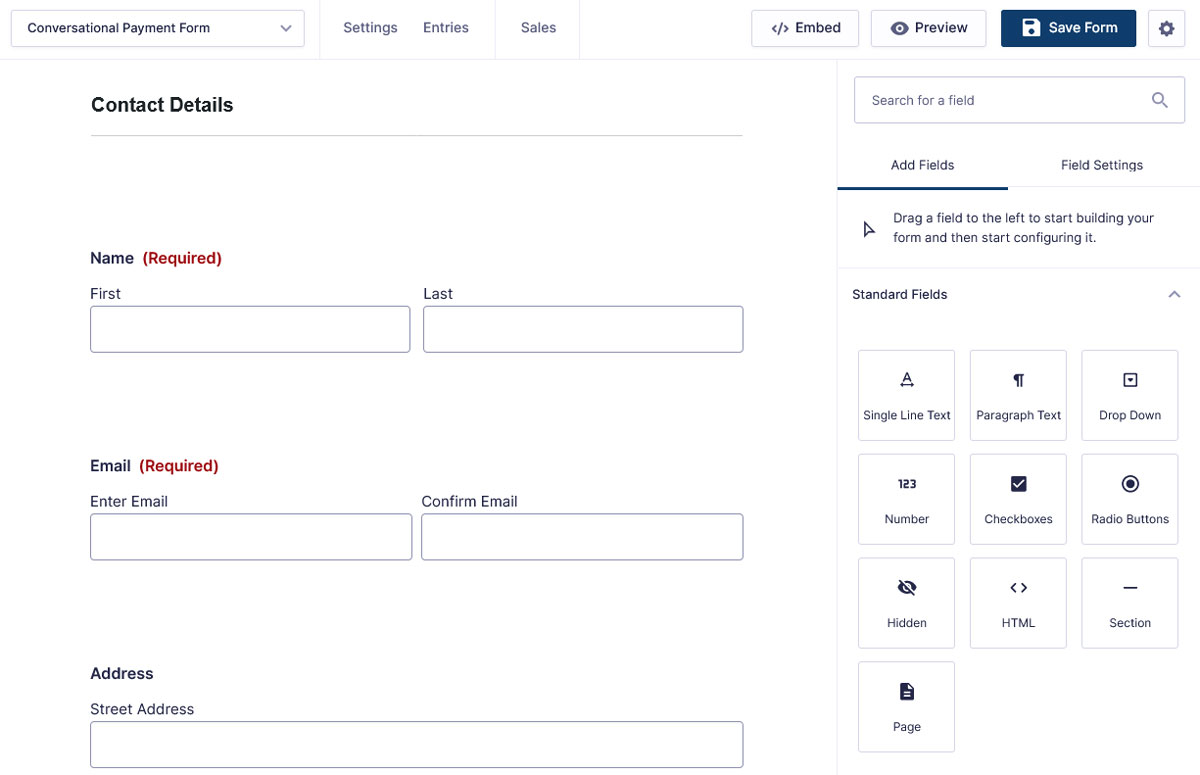
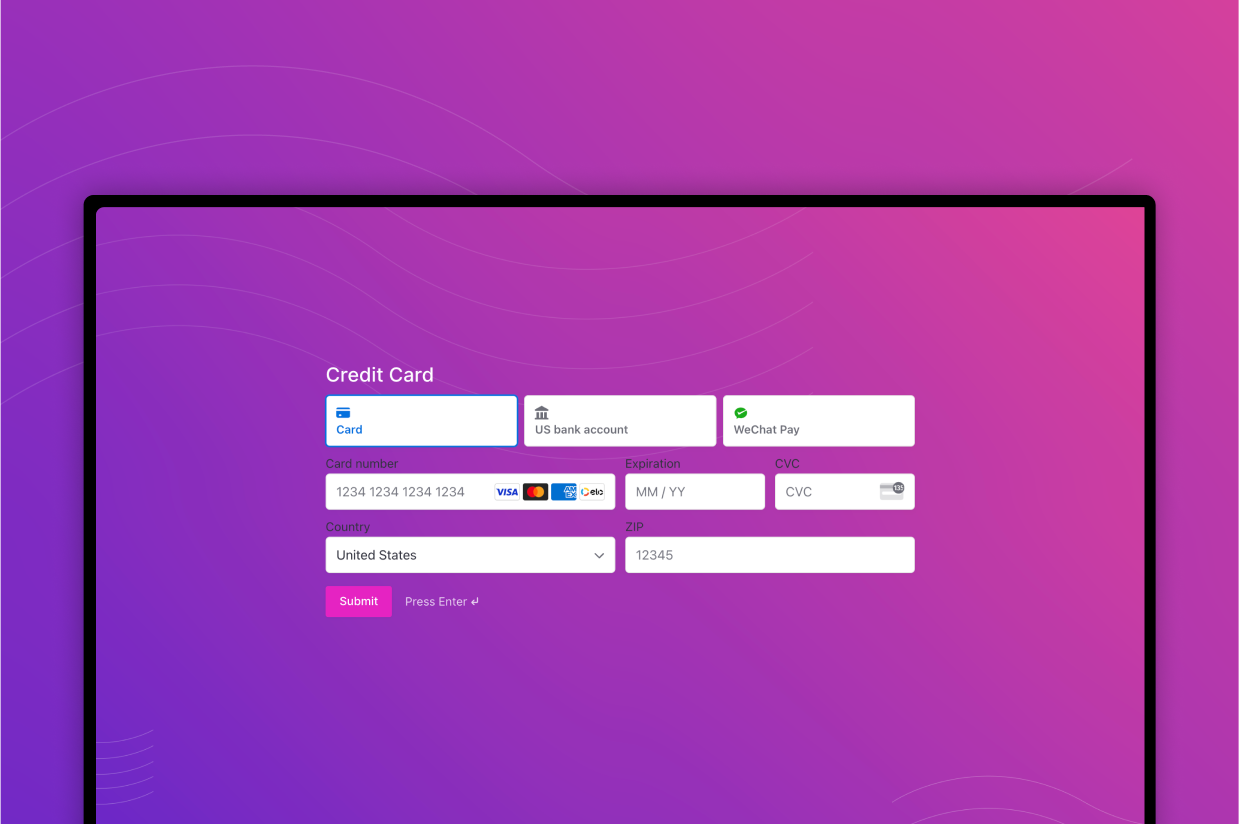
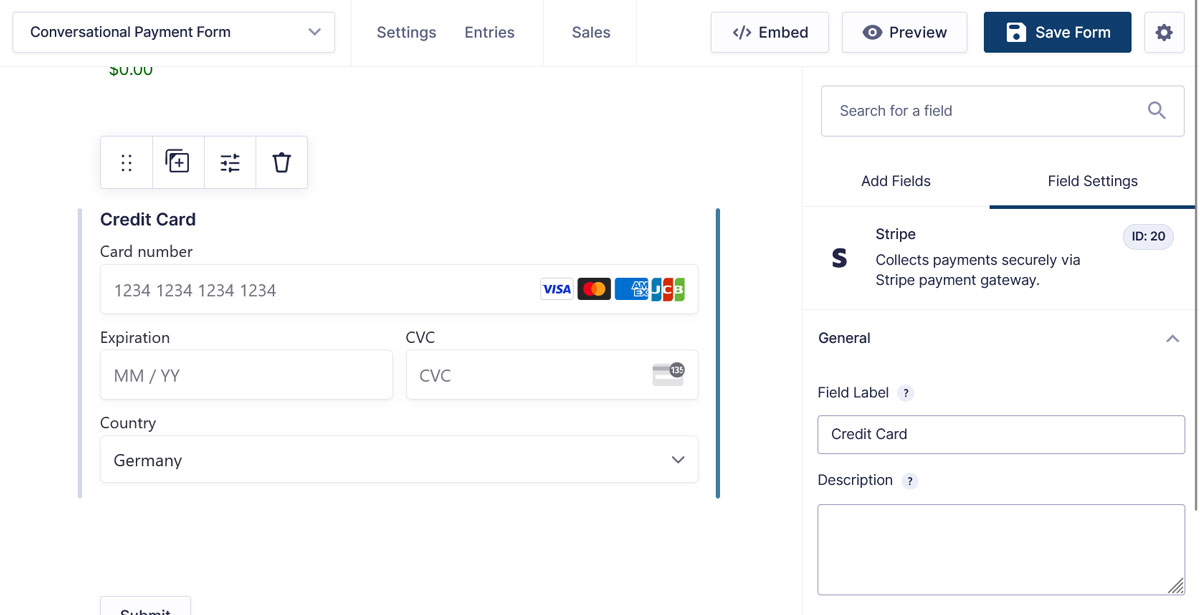
We are just removing the phone number, gender, and age fields, adding a Radio Buttons field to ask for t-shirt sizes, and switching the Credit Card field for the Stripe field. The latter has several configuration options, most importantly the ability to add additional payment methods.
Be aware that, for conversational forms, the order matters. Fields appear one at a time, and Gravity Forms will use the order that you arrange the form in, from top to bottom. If you have more than one field in a single row, the left field will display before the right. Just something to be aware of for user experience.
4. Create a Stripe Feed
In Gravity forms, a feed controls what happens after someone submits your form. In the case of Stripe, that means how to process the form information on the side of the payment provider, such as whether to collect a one-time or recurring payment.
The first step in creating a feed is to go to Settings → Stripe in the form editor and clicking Add New.
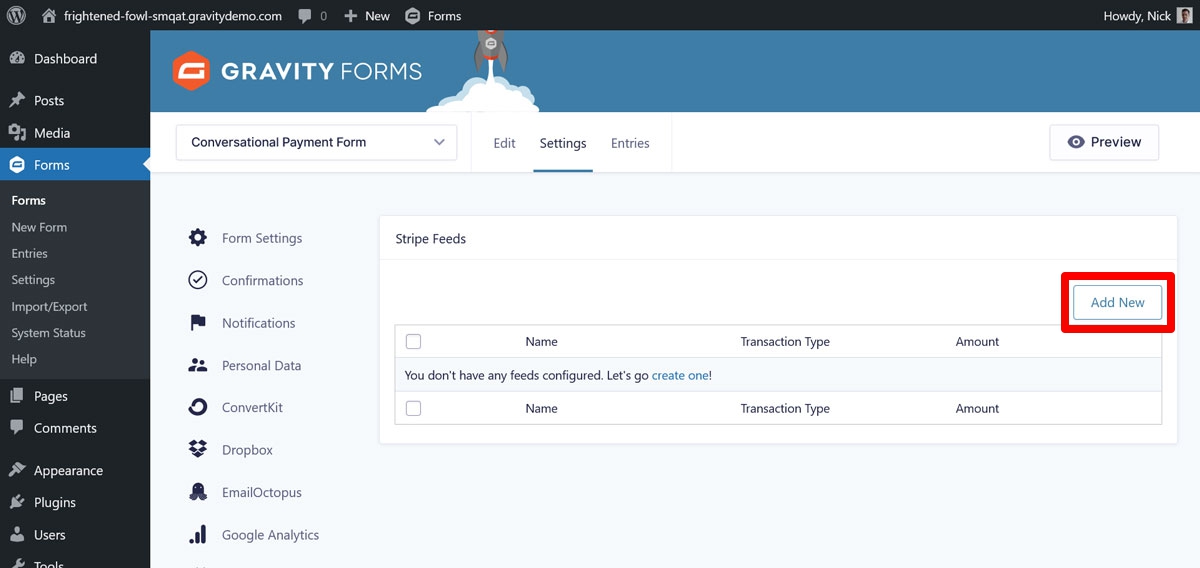
Provide a name for the feed and, under Transaction Type, choose Products and Services or Subscription.
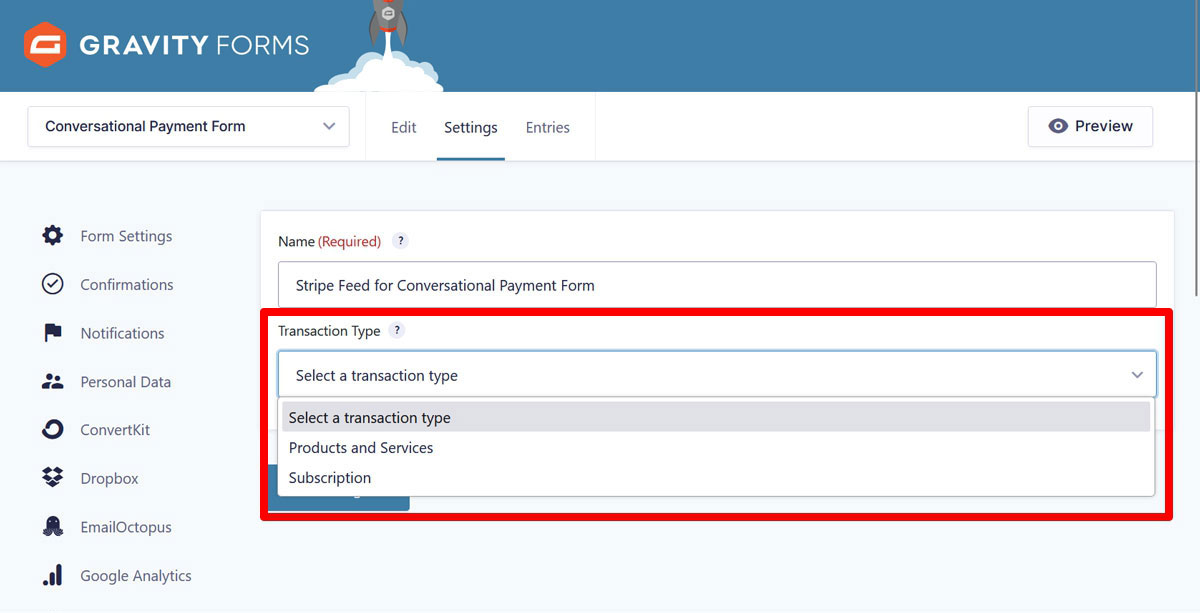
The first option is for one-time payments, the second for recurring billing. We are going for a one-time payment in this case.
After that, in the sections that appear below, you need to map the billing information form fields to the respective data in Stripe.
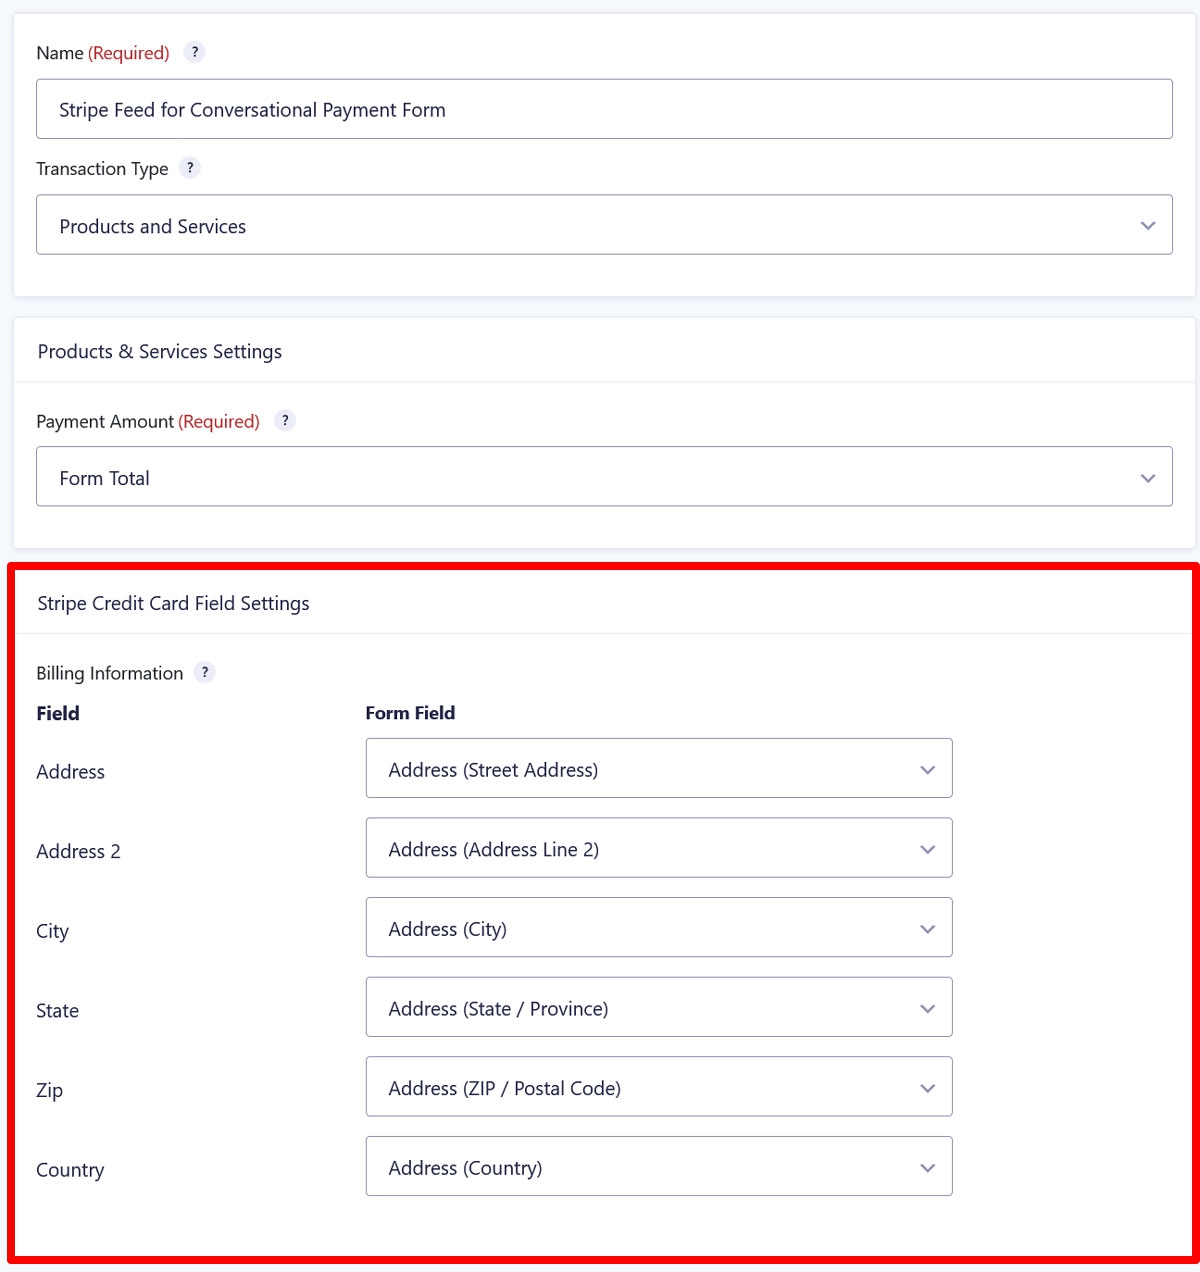
There is also a section for additional information, such as product descriptions or coupons, if you want to implement those. Don’t forget to save your changes!
5. Switch On the Conversational Form Page
When you have your basic online payment form done, it’s time to turn it into a conversational form.
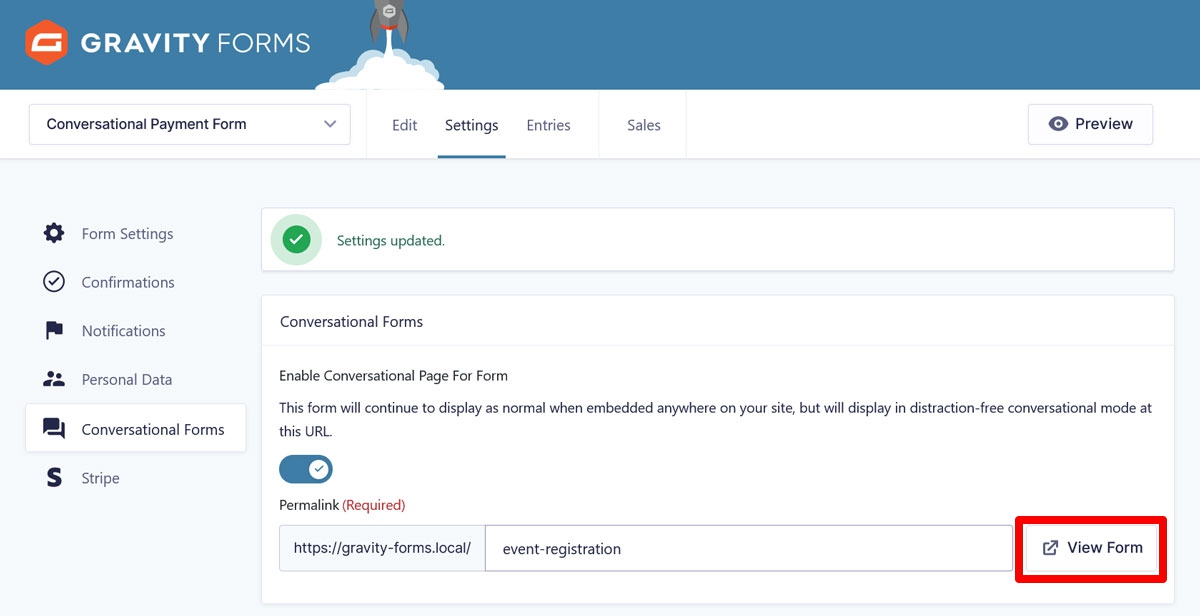
In the form editor, simply head on over to Settings → Conversational Forms. Here, flip the switch to enable the conversational form page for this form and then input the URL where you want it to be available.
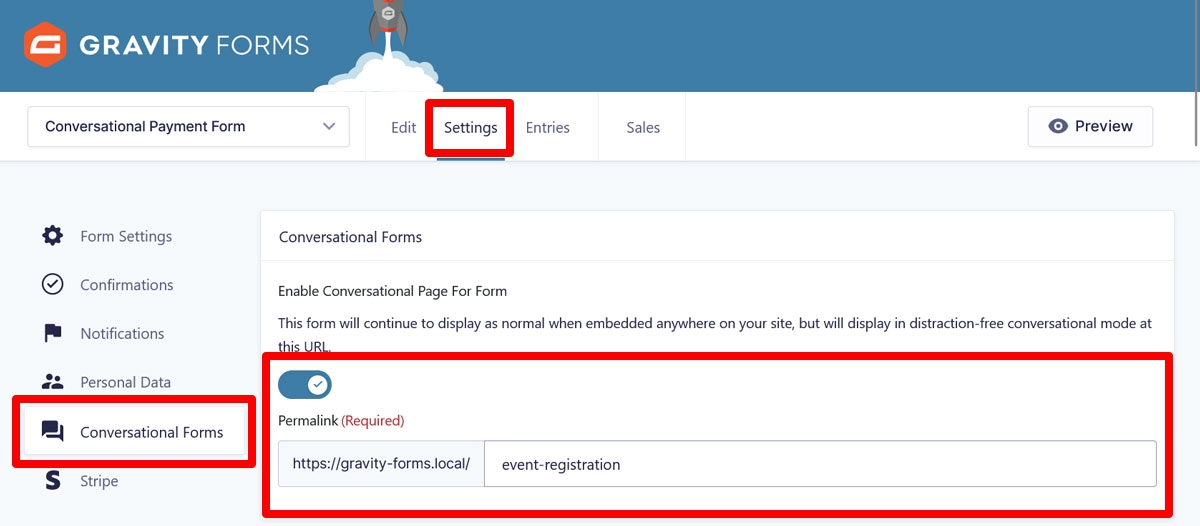
Make sure the URL is unique on your site, although Gravity Forms will also warn you if you try to use one that already exists.
Again, it is important to note that the conversational form will only be available under that URL. If you embed your payment form using a block or shortcode anywhere else, it will display as a regular web form.
Use the View Form button to preview your form.
6. Configure Form Design Options
You have multiple ways to customize the way your conversational payment form looks. You’ll find the options in the Form Design section.
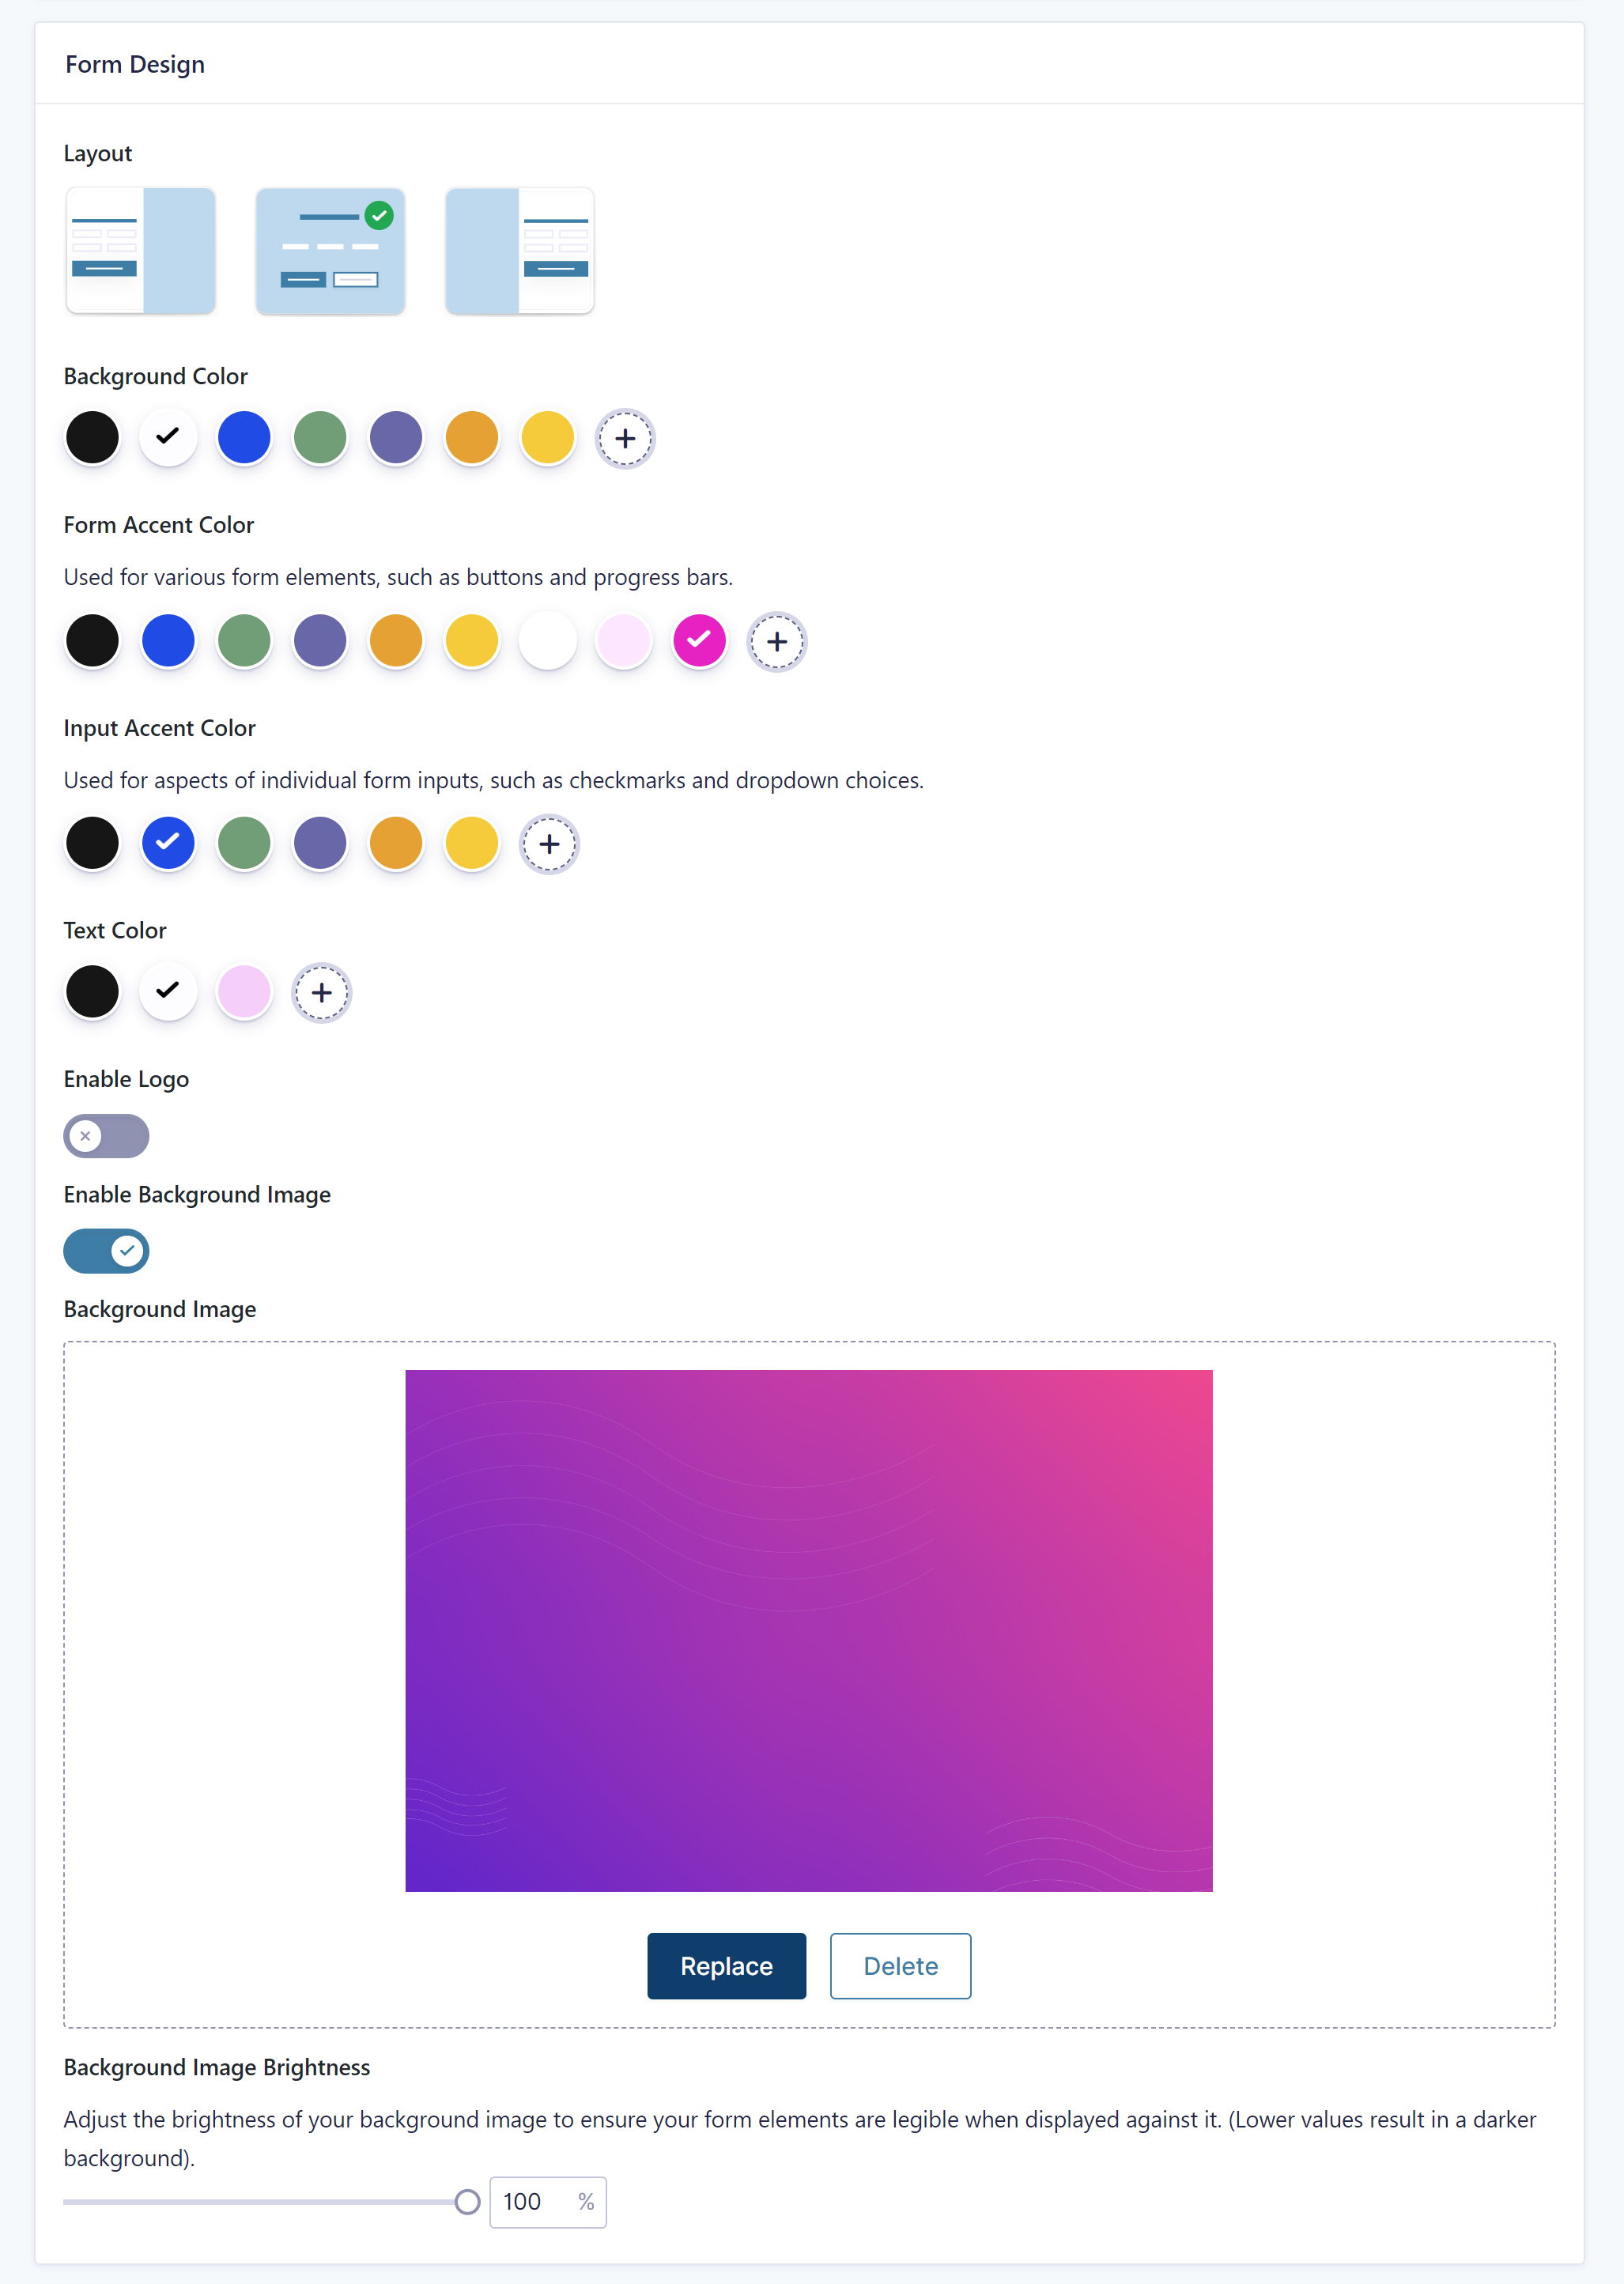
Pick a layout to display the form center stage or on the left or right side. Select a background color as well as accent colors for the form, its input elements (button, checkmarks, etc.), and text. Upload a logo and decide where it should link to. You can also add a background image and control its brightness.
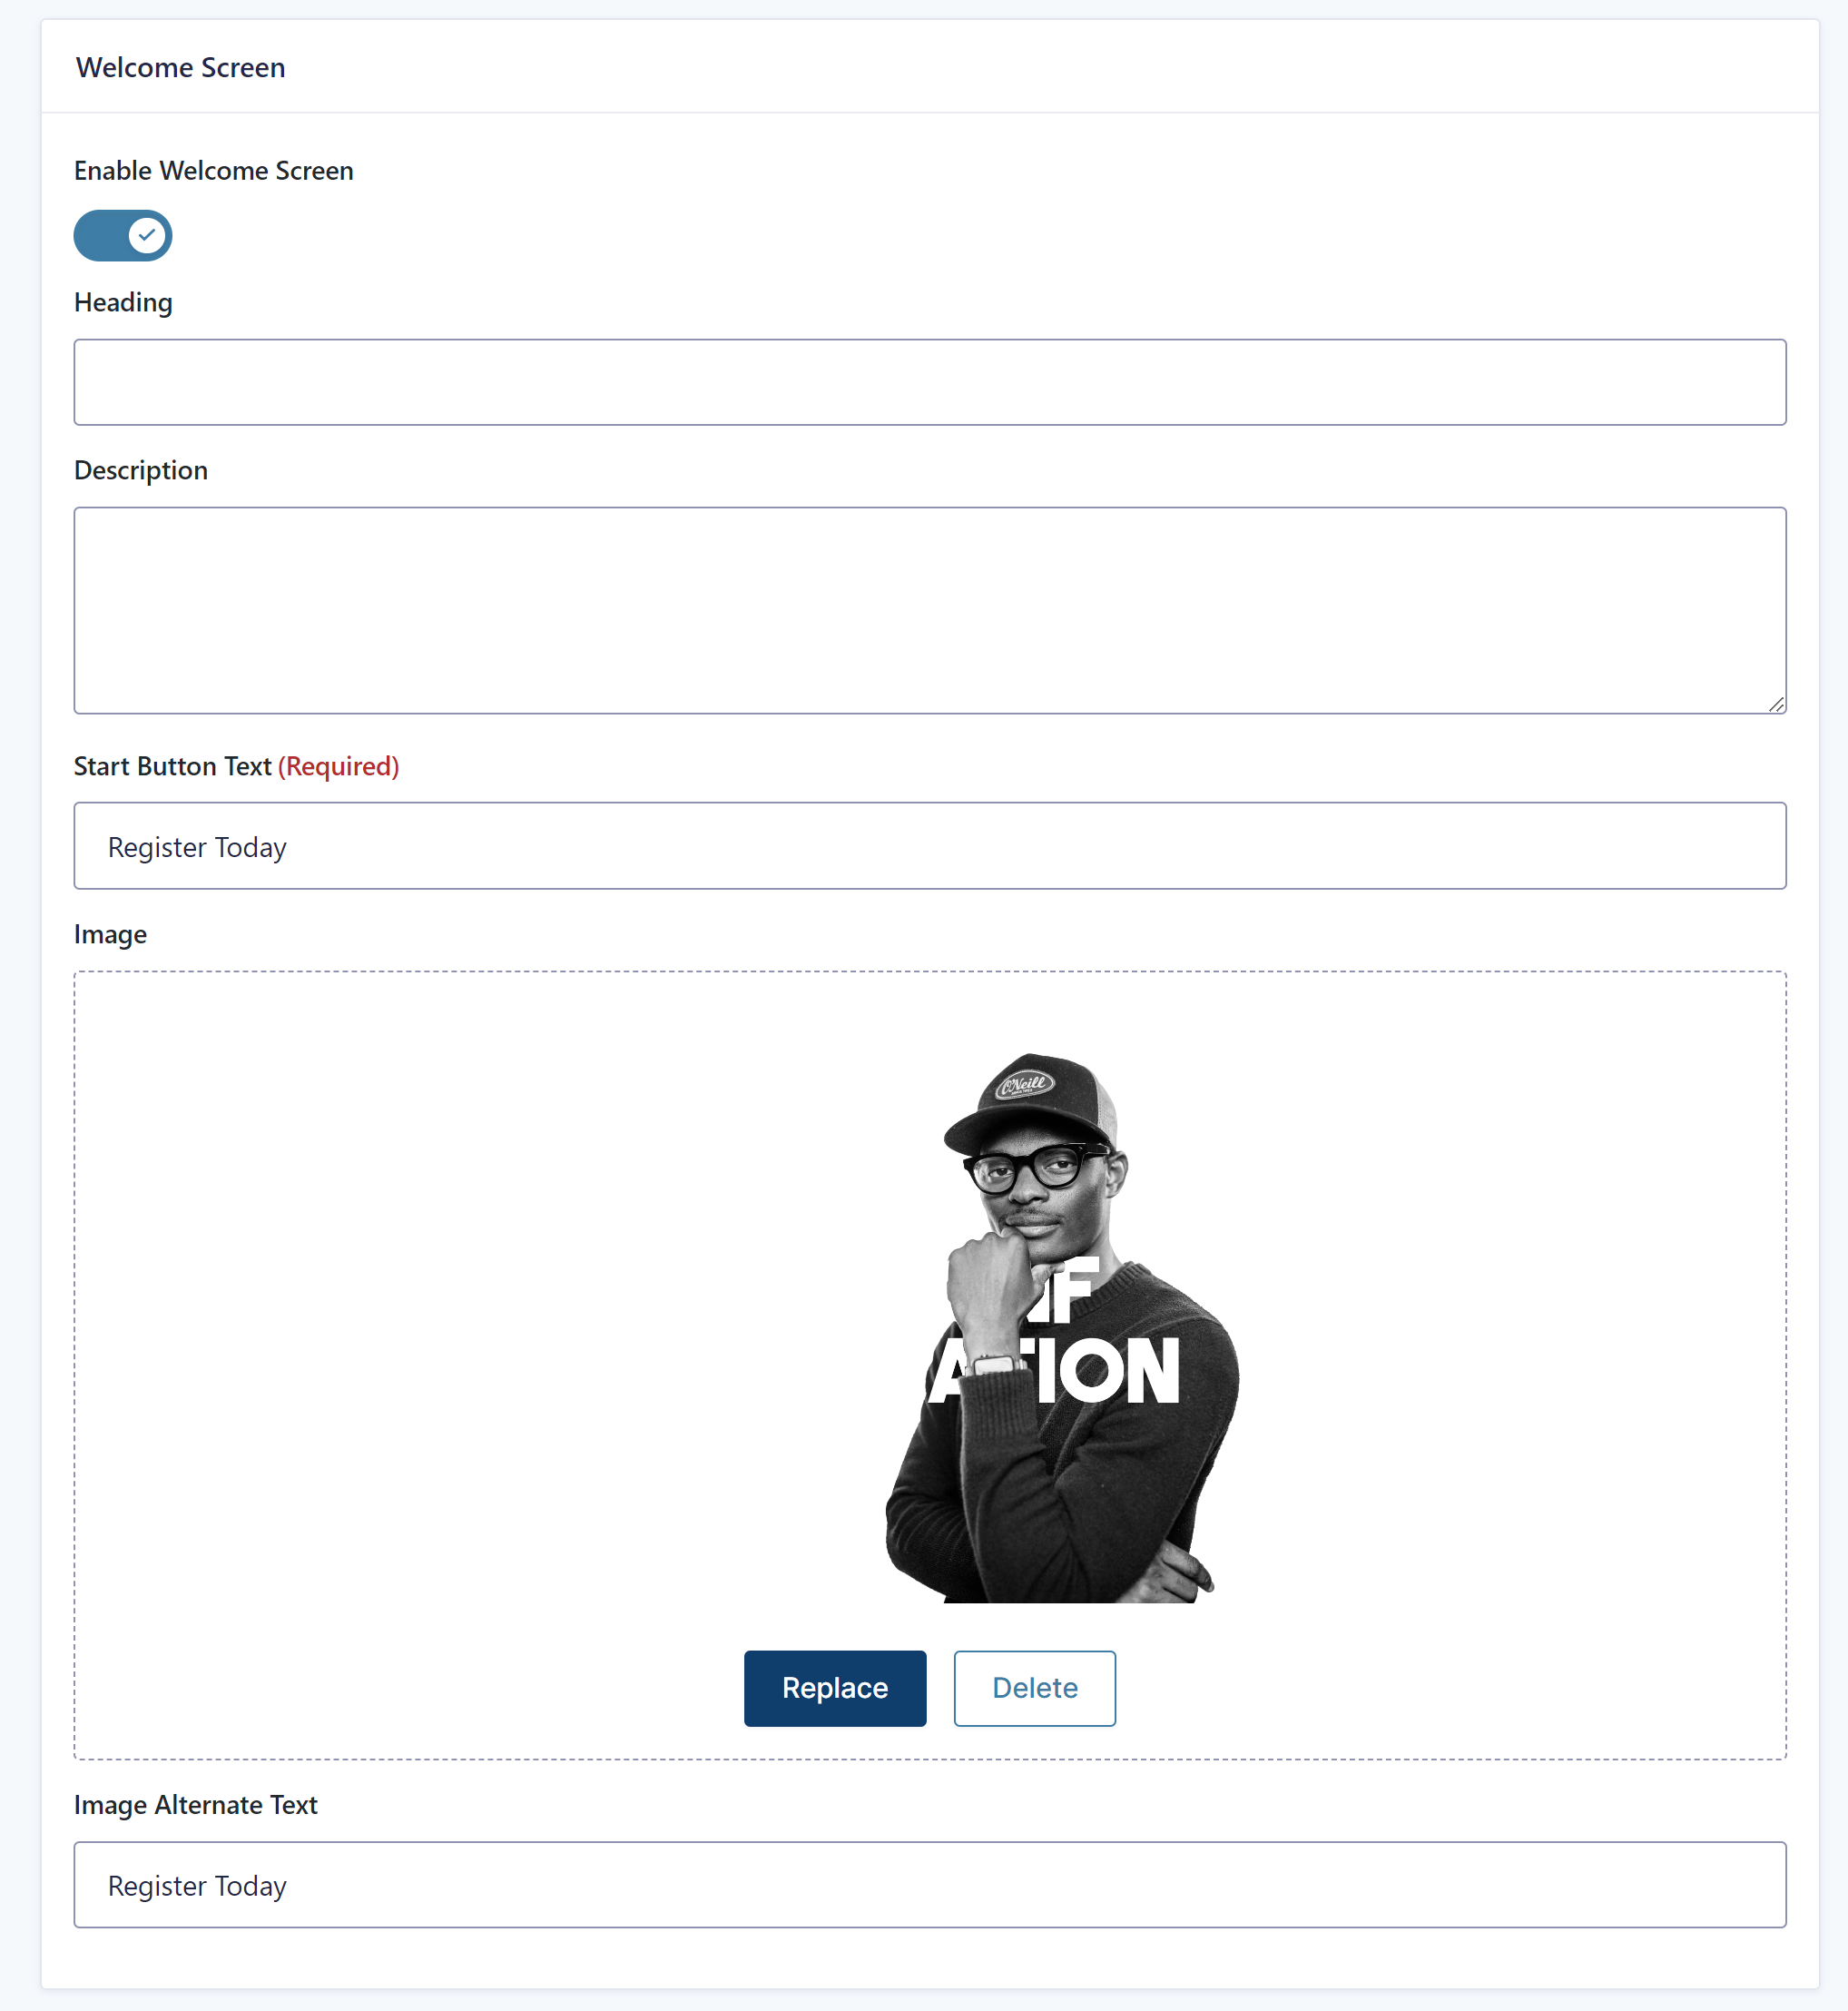
In addition, there is an option to add a welcome screen in the Welcome Screen section. You can use it to greet users and give them any important information they might need.
Once enabled, you can add the following information:
- Heading
- Description
- Start Button Text (users click this to start the form experience)
- Image
- Image alternate text
There are also two customization options available for form Buttons and the form Footer.
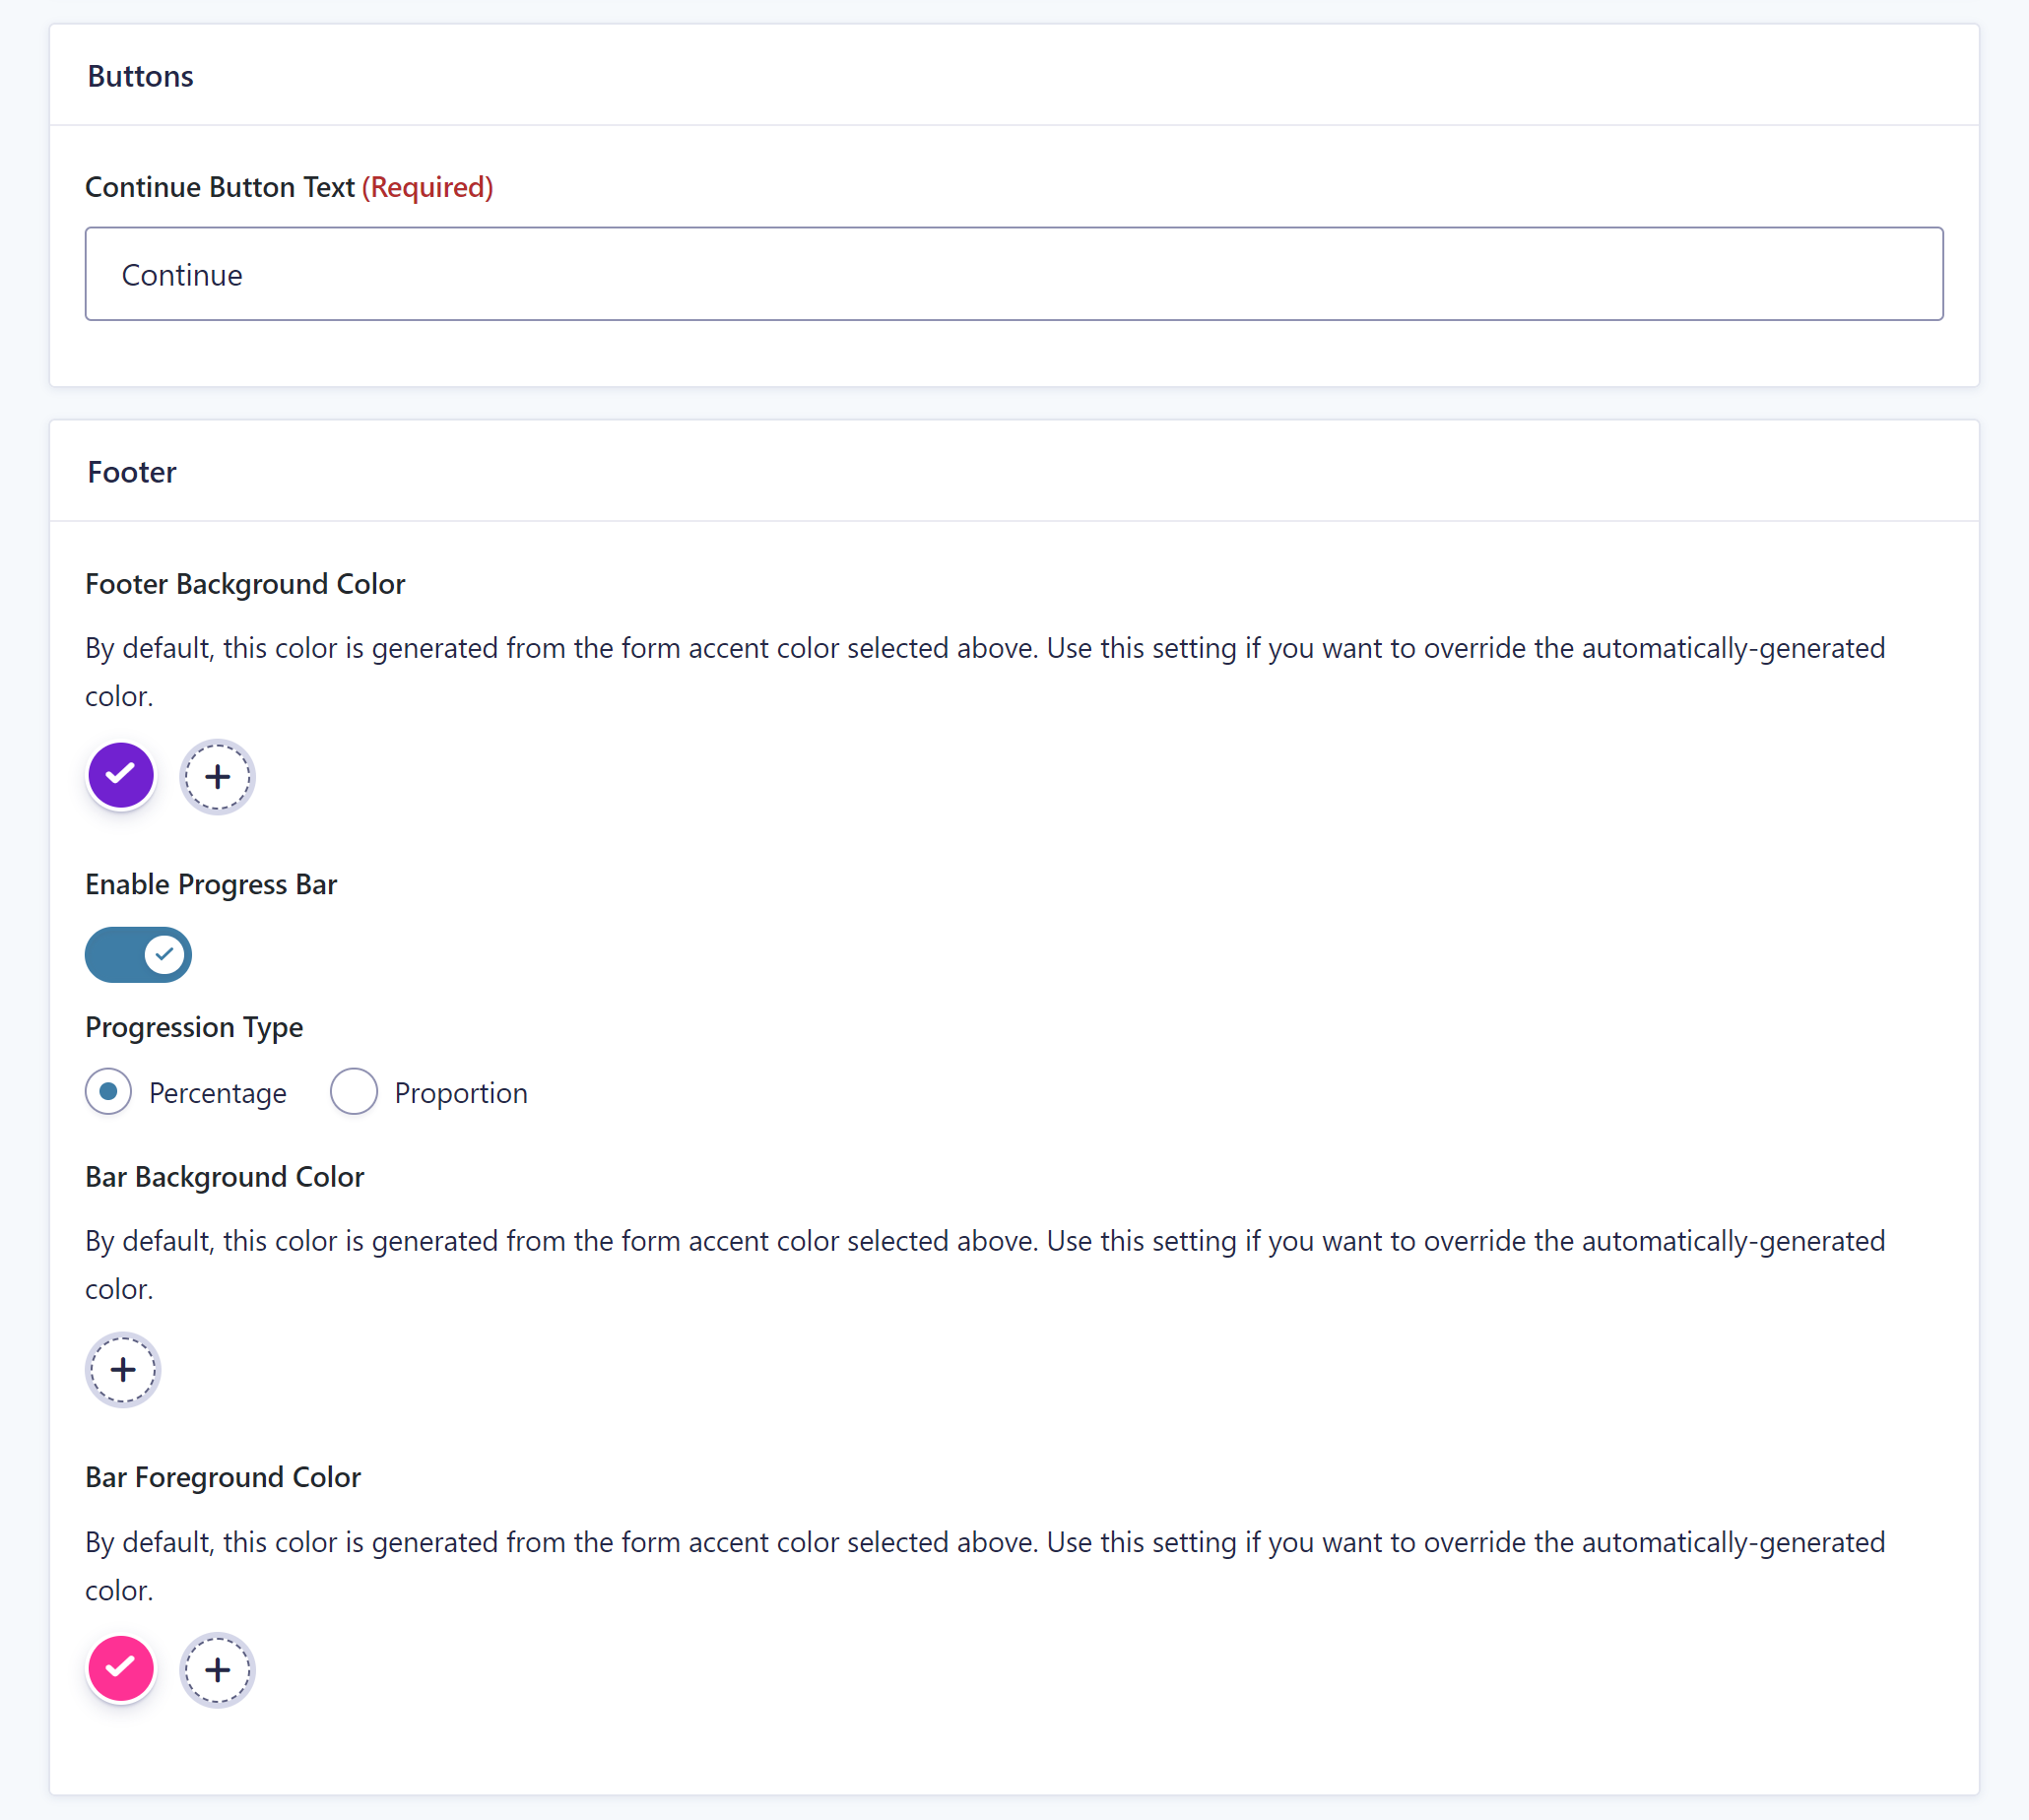
In the first box, you are able to modify the text of the button users click to get to the next step of the form.
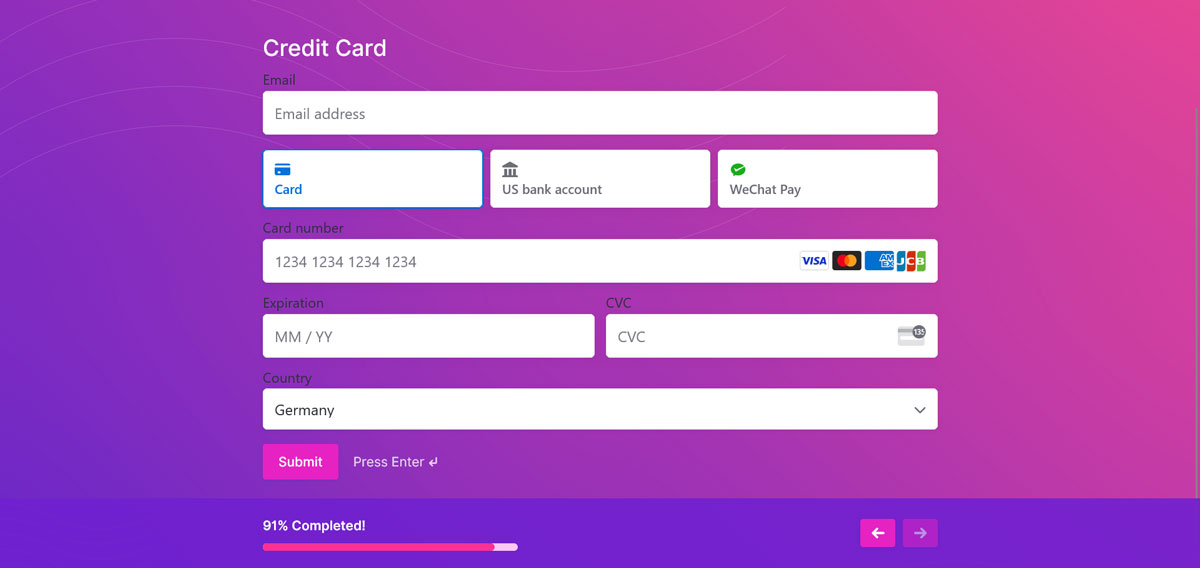
Under Footer, you can customize the footer background color (only if needed – Gravity Forms automatically generates one based on your accent color choices) and switch on a progress bar to show visitors where they are in the form completion process. It can either show a percentage or the number of steps. You can also override its automatically generated colors.
If you want to see the entire thing in action, check this example.
In case you’re having trouble designing your own form, head on over to the conversational forms gallery for some inspiration.
7. Test Your Form
The last step is to test your form. Access it through the URL you specified earlier. Click on View Form in the conversational forms menu to open it in a new browser tab.
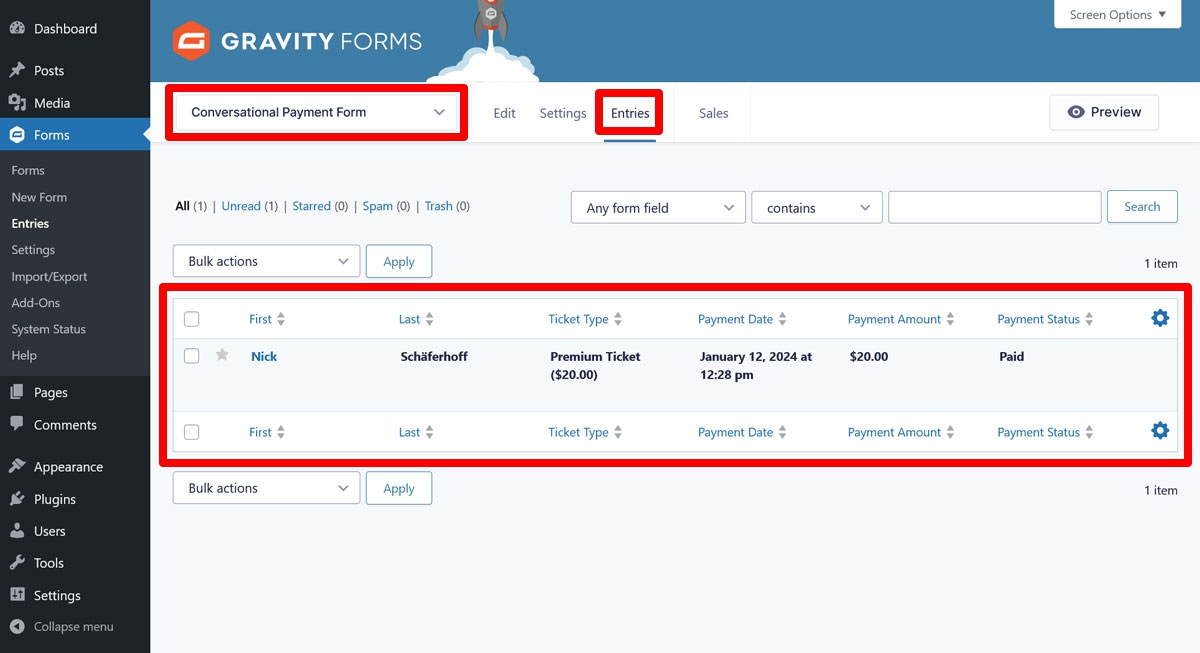
Give it a test run to make sure everything works and you receive all the relevant notifications. With Stripe in test mode, you can also make dummy payments to see if they show up in your WordPress dashboard under Entries.
Once satisfied, don’t forget to switch your form to live mode to be able to start accepting real payments. In the same place as before, switch Mode from Test to Live, then connect to Stripe again but be sure to disable test mode and use the live signing secret this time.

Save when you are done.
Final Thoughts: Conversational Online Payment Forms
The Gravity Forms Conversational Forms Add-On is here to make online payment forms more interactive and engaging. It lets you take paying clients on a journey, providing an exciting user experience with a more human touch.
As you have seen above, conversational online payment forms are super easy to implement and customize. If you want to take advantage of them, the Conversational Forms Add-On is available for holders of the Gravity Forms Elite license or Nonprofit license (if your organization is a registered nonprofit) and you can install it and get started right away.
Should you not have a license yet, purchase it now or if you’re a customer, head on over to your Gravity Forms account dashboard to upgrade your existing license. And as mentioned, if you want to test Gravity Forms before buying, feel free to create a free Gravity Forms demo site.

If you want to keep up-to-date with what’s happening on the blog sign up for the Gravity Forms newsletter!