How to Send Gravity Forms Entries to Podio Using Zapier

Wouldn’t it be great if you could directly integrate the forms on your website with your project management tool? You know, capture form submissions so that they automatically become part of your management workflows? Luckily, that exact scenario is possible with Gravity Forms and our Zapier integration with Podio.
Podio is an excellent tool for wrangling your projects into shape and collaborating among your team members. It has all the necessary features to keep track of who is doing what and ushering your undertakings to a successful end. And being able to feed incoming messages and information from your website into this process is a must. Thanks to the Gravity Forms Zapier Add-On, you can do so with just a few clicks.
Sounds too good to be true? We’d be happy to demonstrate.
In the upcoming article, you can learn more about what Podio can do for you, why it makes a great pairing with Gravity Forms, and step-by-step instructions for how to establish a connection between the two.
Let’s Start With the Obvious: What is Podio?
Podio isn’t necessarily a household name. Undeservedly so, seeing as it boasts more than 500,000 customers. Yet, while it might not have the renown of the Asanas of the world (which, by the way, can also integrate with Gravity Forms), its feature list is no less impressive.
So, what does Podio have to offer?
As mentioned in the beginning, it is basically a project management and collaboration tool. As such, Podio gives you everything you need to formulate, execute, and track projects, including:
- File and information sharing — Keep all team members on the same page and equipped with everything they need to do their job.
- Organizational tools — Task management, time tracking, and any other help you need to keep things running smoothly.
- Automation — Set up if-this-then-that workflows that automatically spring into action when certain events occur.
- Reports — Stay on top of every part of your project with detailed reporting.
- Integrations — Podio integrates with many other services besides Gravity Forms, including Google Drive, Dropbox, Freshbooks, and more.
In addition to the above, Podio offers a free plan for up to five employees. Plus, their paid plans are fair, too, starting at $11.20/month when billed annually.
Why Use It With Gravity Forms?
That leaves the question, what makes this project management solution a great companion to Gravity Forms?
Well, first of all, you can take advantage of Gravity Forms’ awesome form-building abilities and features:
- Drag-and-drop form builder — Create and customize a wide range of complex web forms for every business need without any technical knowledge.
- Wide extendability — Besides Podio, Gravity Forms comes with many other extensions. They allow you to connect your forms with most popular software solutions and add a variety of functionality to them.
For the integration with Podio, Gravity Forms comes with powerful conditional logic that allows you to filter requests at the source. That way, only those form submissions that are crucial for your workflow really go through to to your project management interface.
What’s more, with the help of custom fields, you can collect almost any custom data your business needs and pass it on to Podio. Make your forms fit your requirements, not the other way around.
Finally, the Zapier Add-On makes it really easy to set up the entire thing. Which brings us to the next point.
Gravity Forms and Zapier

If Zapier doesn’t ring a bell for you, it’s a service that allows you to connect many different online apps and services to each other. In fact, it supports almost 7,500 of them with many ways to exchange data between them. For example, you can:
- Display your form data in Google Sheets
- Add Zoom webinar registrants to your CRM software
- Send PayPal customers to MailChimp
Because of it’s endless possibilities, we have created the Gravity Forms Zapier Add-On. It has quickly become one of our most popular extensions and lets you connect your web forms to services like Pipedrive, Brevo, Zendesk, Excel, and now Podio.
If you want to make use of the Zapier Add-On, it is available with Gravity Forms Pro and Elite licenses. Holders of other licenses can also upgrade them and only pay the pro-rated price.
Connecting Your WordPress Forms to Podio Using Zapier: Step-by-Step Instructions
Alright, let’s get to the meat and potatoes of this tutorial and talk about how to set up your Gravity Forms to Podio integration.
In this example, we’ll show you how you can use Gravity Forms and Podio to improve your hiring process by capturing and sending data from job seekers applying through your website.
For the following instructions, we will boldly assume you already have a WordPress website with the Gravity Forms main plugin installed on it. If you don’t, no need to despair, you can also follow along with a free demo site. It comes with all the necessary add-ons and functionality and allows you to get your feet wet risk-free.
1. Sign Up to Podio
The first piece of the puzzle we’ll need to make this work is a Podio account. Let’s get to that first then, shall we?
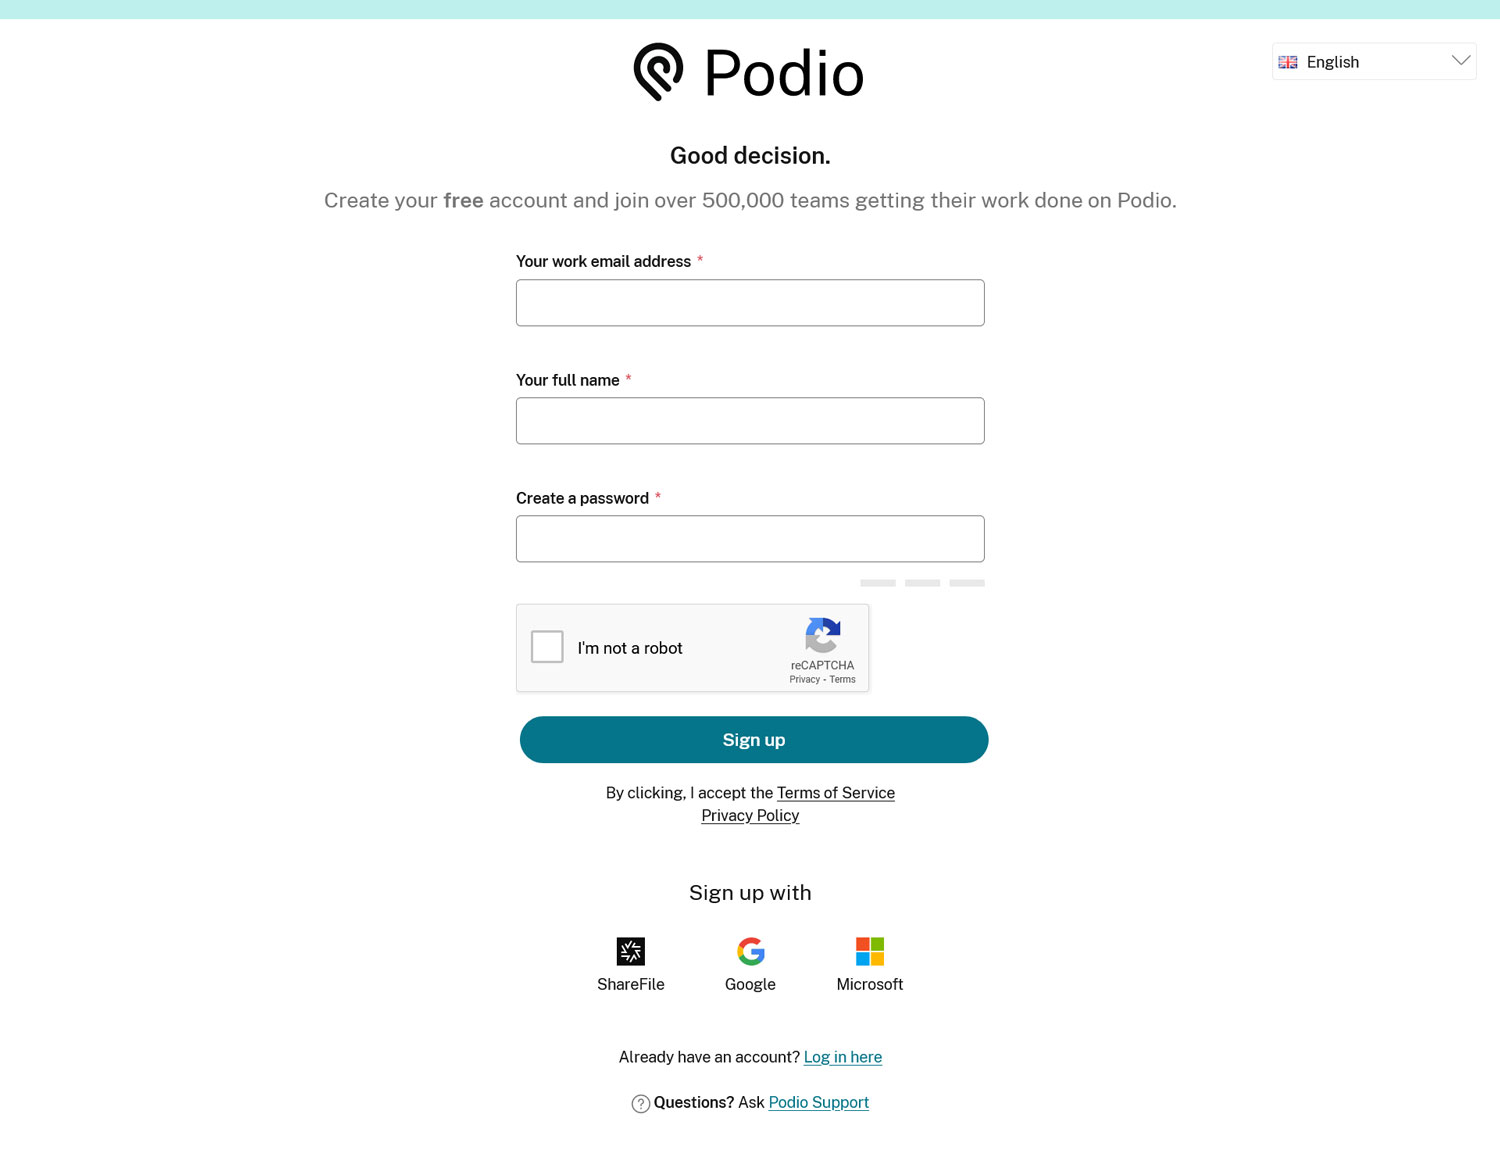
As a first step, head on over to the Podio website and click on Sign Up in the upper right corner.
Podio will ask you for a work email address, name, and password.
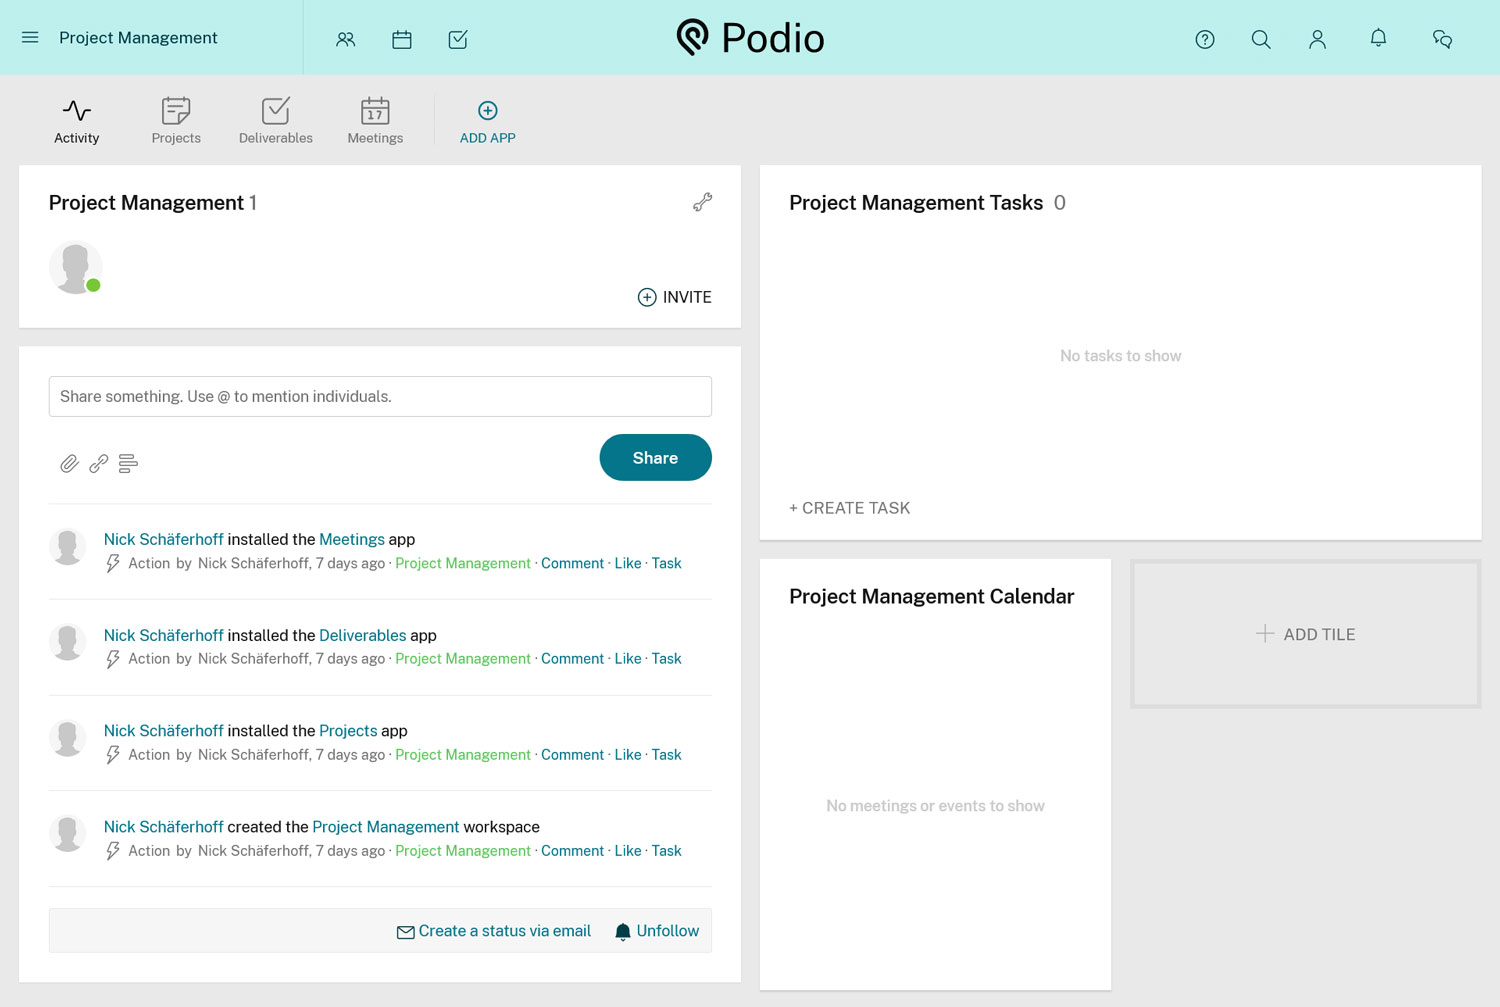
Provide those, submit, and verify your email address. Then, set up your profile with information about yourself and your company. After that, you land straight on the main Podio dashboard.
2. Set Up Your Information Architecture
When you sign up to Podio, it automatically sets up some sample data so you have a better idea what to do with it. To understand what’s going on, you need to know the different information levels Podio uses. They will also become important down the line.
- Organization — You automatically created this during the sign-up process. This is your company. You can be part of several organizations with one Podio account.
- Workspace — These are different parts of your business that bring certain people and teams together. For example, you would create separate workspace for distinct projects so that everyone belonging to them can stay up to date.
- Application — Applications reside inside workspaces and you can use them to create and manage items (see below). The type of application you create determines what items you can set up. For example, the Meetings app is used to create meeting items, while a Projects application allows you to create items for project management.
- Item — The smallest parts of your Podio account are the aforementioned items. These are actionable elements, like to-dos, individual meetings, leads to follow, or whatever else you create.
Knowing this matters so you can set up your Podio account in a way that allows you to capture the right information from your forms later.
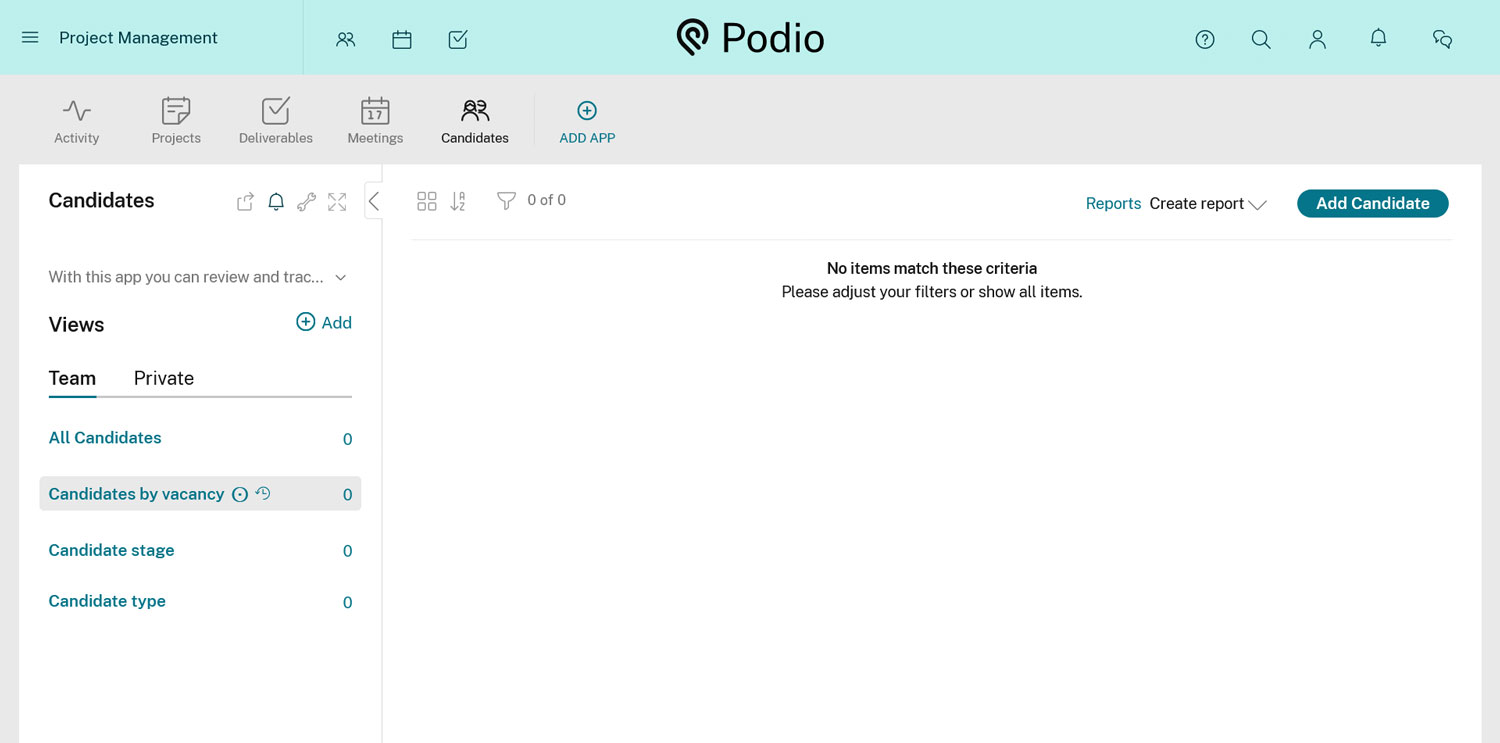
As mentinoed, in this example, we want to use Podio for improving our hiring process and capture data from job seekers applying through our website. In order to do so, we installed the Candidates app in the existing workspace, which is exactly for that purpose.
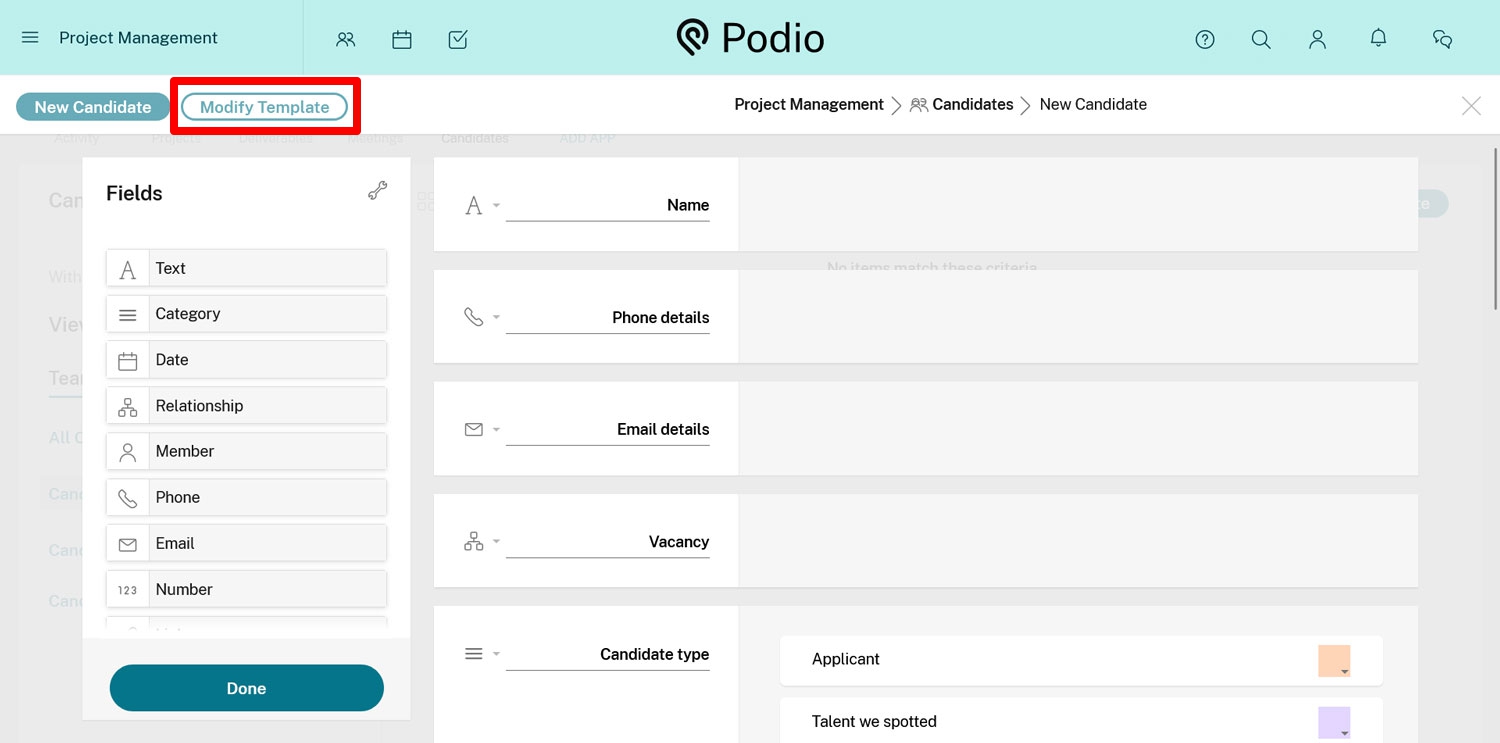
You can modify the template for candidate items via Add Candidate → Modify Template to include whatever information you want to collect.
Once done, that’s all the preparation needed inside Podio and we can move on.
3. Sign Up to Zapier
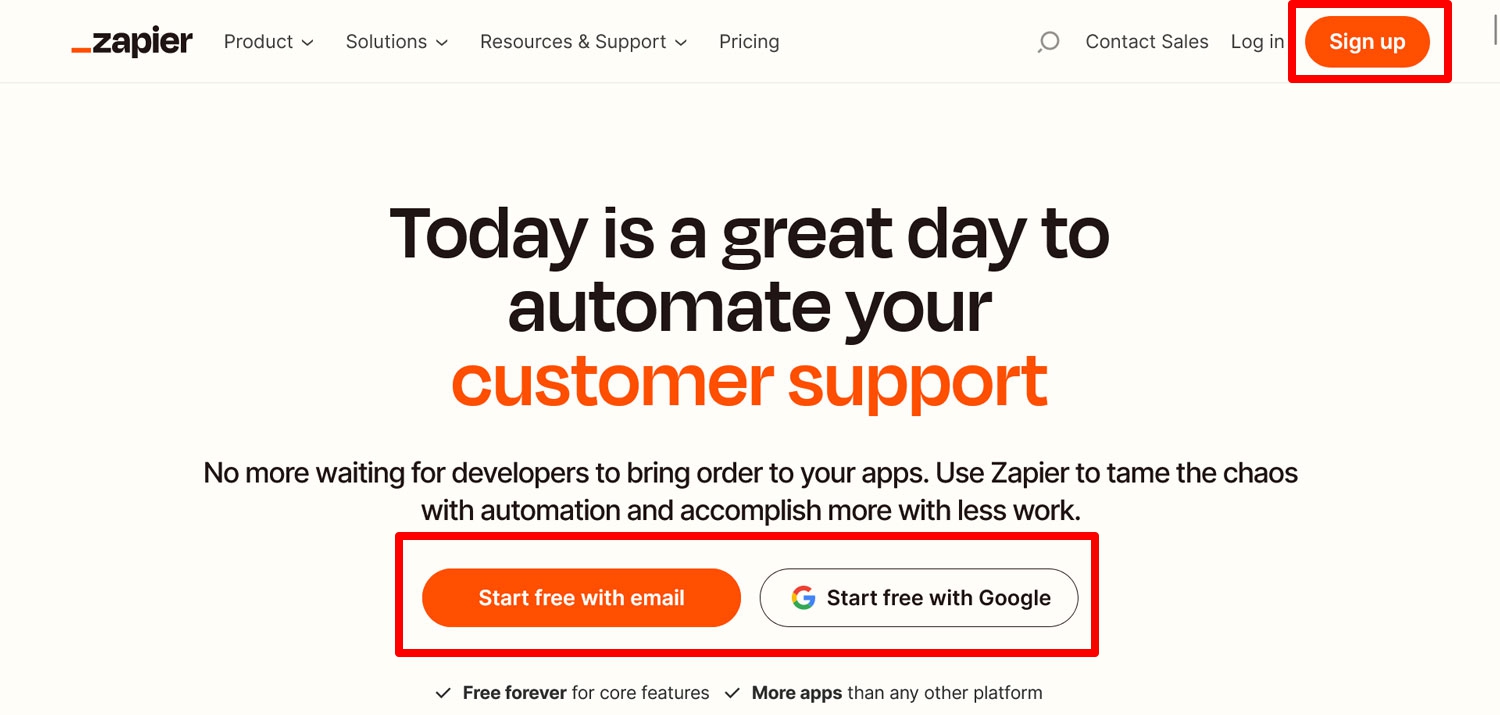
The next required item on our list is a Zapier account. Naturally, you can get that on the Zapier homepage. Just click one of the many calls to action. You can sign up with your email address or your Facebook, Google, or Microsoft account.
Zapier offers a free account, which is enough for the purposes of this tutorial. With that in hand, head on over to your WordPress website.
4. Install and Configure the Gravity Forms Zapier Add-On
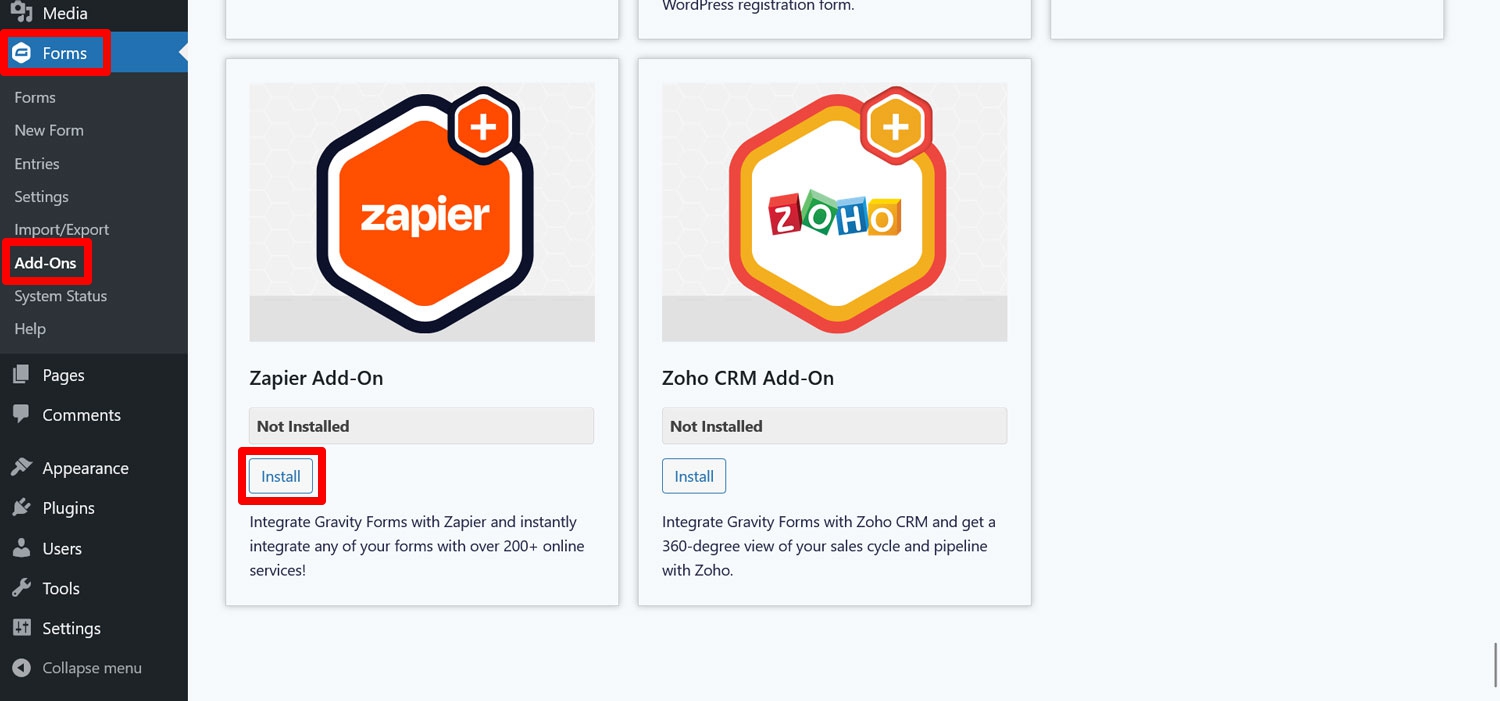
On your site, you now need the Gravity Forms Zapier Add-On. You can add it to your website under Forms → Add-Ons. Look for the extension by name click Install once you have found it.
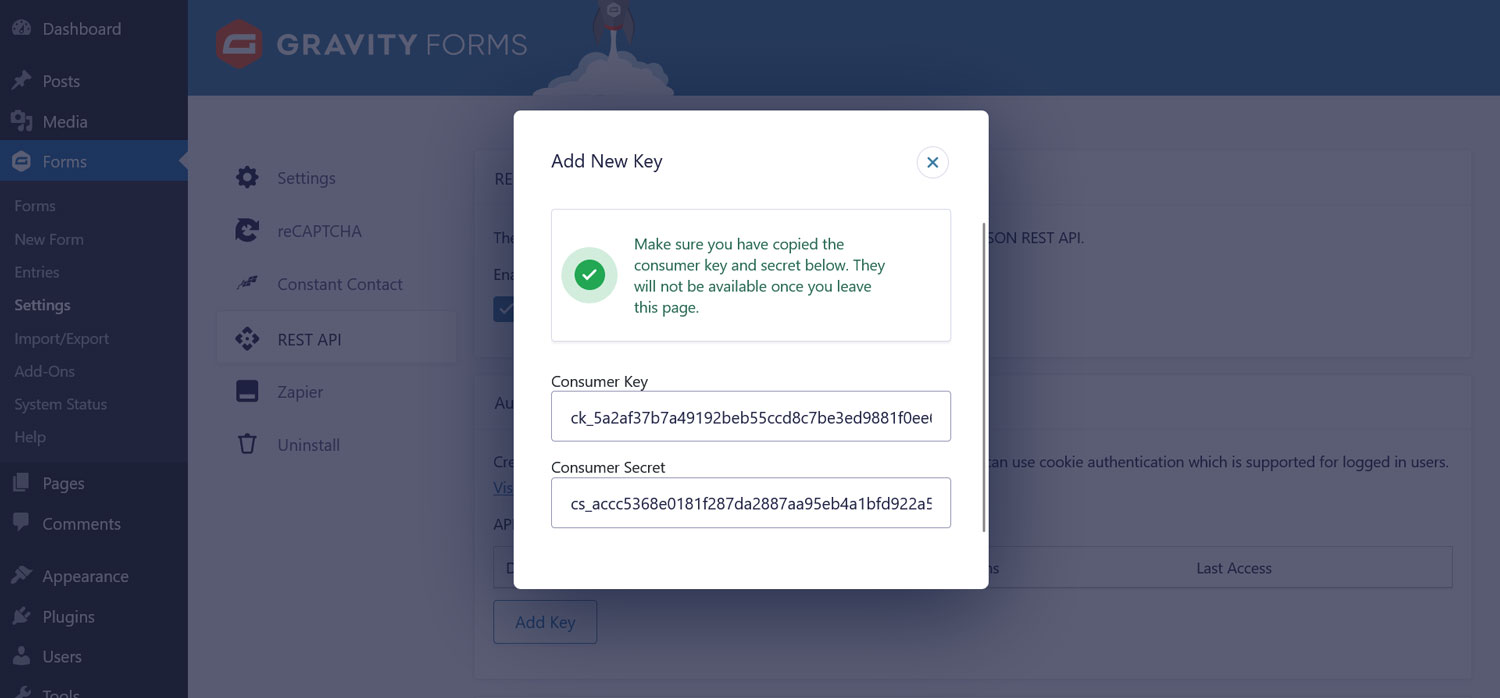
Once the installation finishes, activate the add-on as well. Then, it’s time to create an API key for the Gravity Forms REST API. We’ll need this to connect your site to Zapier down the line.
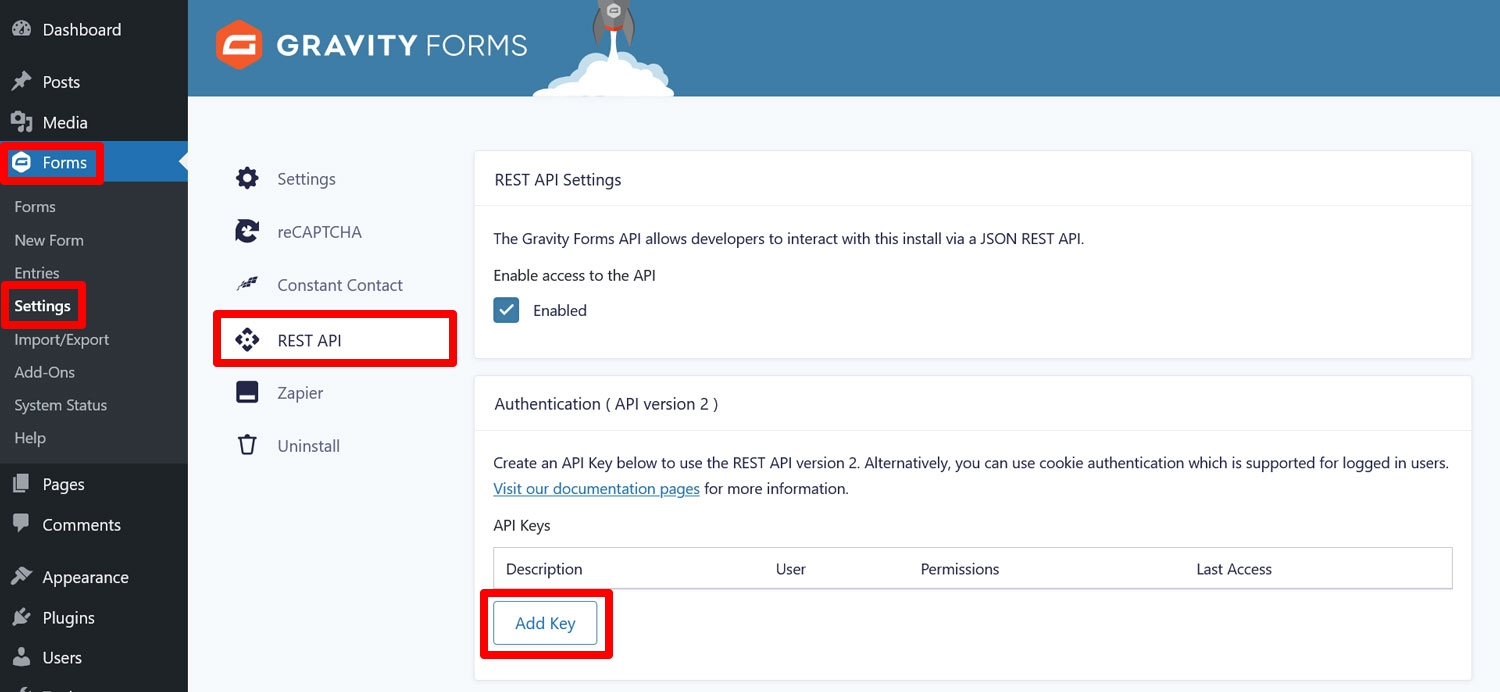
For that, go to Forms → Settings → REST API and check the box to enable the API. After that, click on Add Key under Authentication (API version 2). Pay attention to the version number!
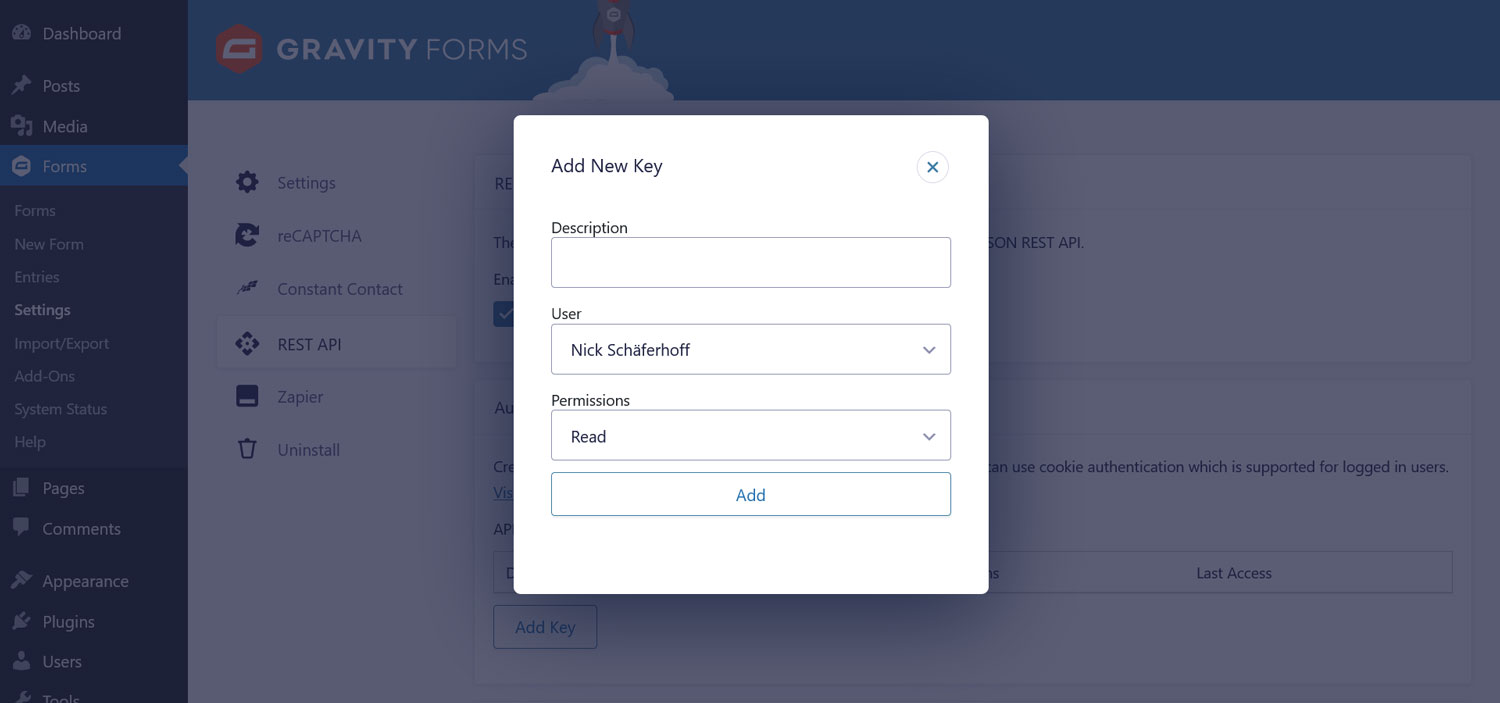
In the panel that appears, provide the following information:
- A Description to distinguish between different API keys
- Select a User with the permission level to view and edit entries
- Pick Read/Write Permissions from the drop-down menu
Then, click the Add button to see your consumer key and consumer secret.
Copy those and store them somewhere safe. It’s the only time you will see them during this process. Finally, don’t forget to save the settings by clicking Update at the bottom of the page.
5. Create and Configure Your Form
As mentioned, in this example we want to use Podio for our hiring process. For that purpose, we want to automatically load incoming applicant data into it. In order to do so, we first a need form on our website to capture said information.
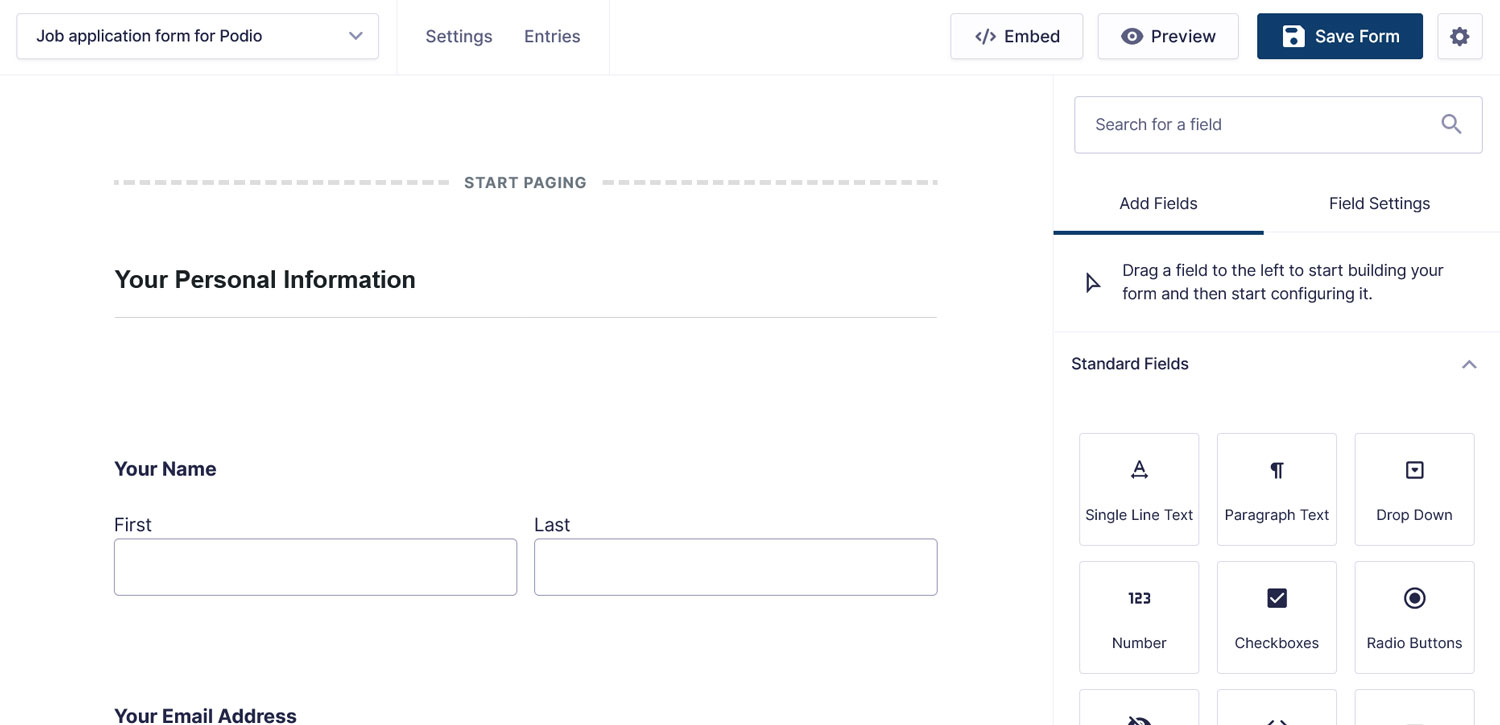
Thankfully, Gravity Forms has an Employment Application Form template in the template library. It already comes with many of the necessary form fields.
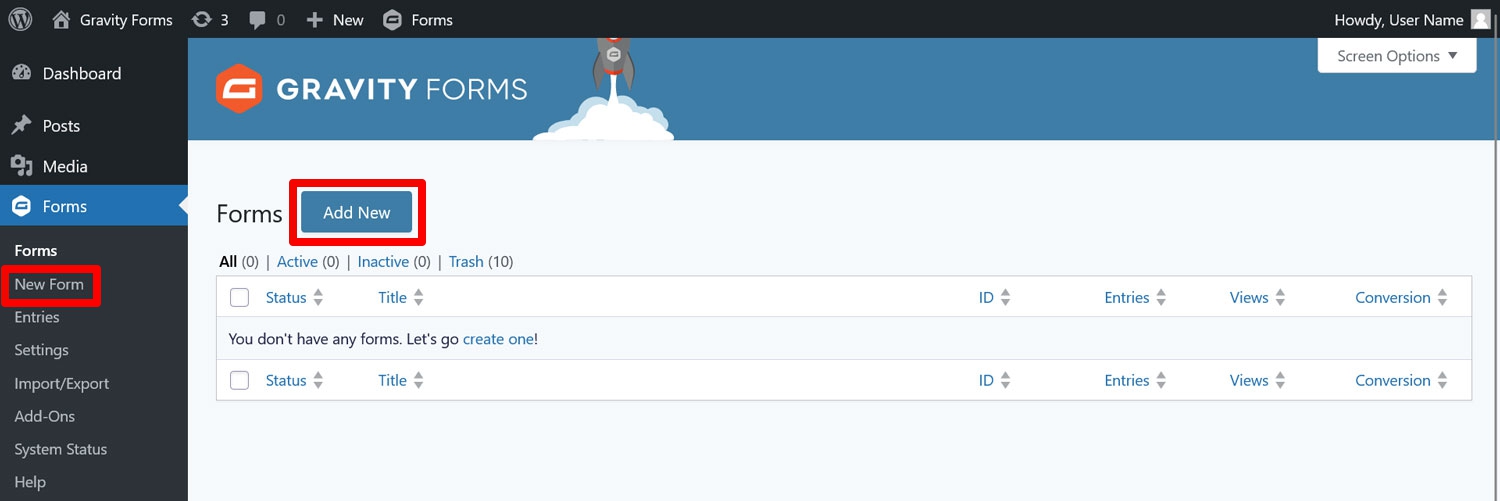
To create it, in your website’s administration interface go to Forms → New Form.
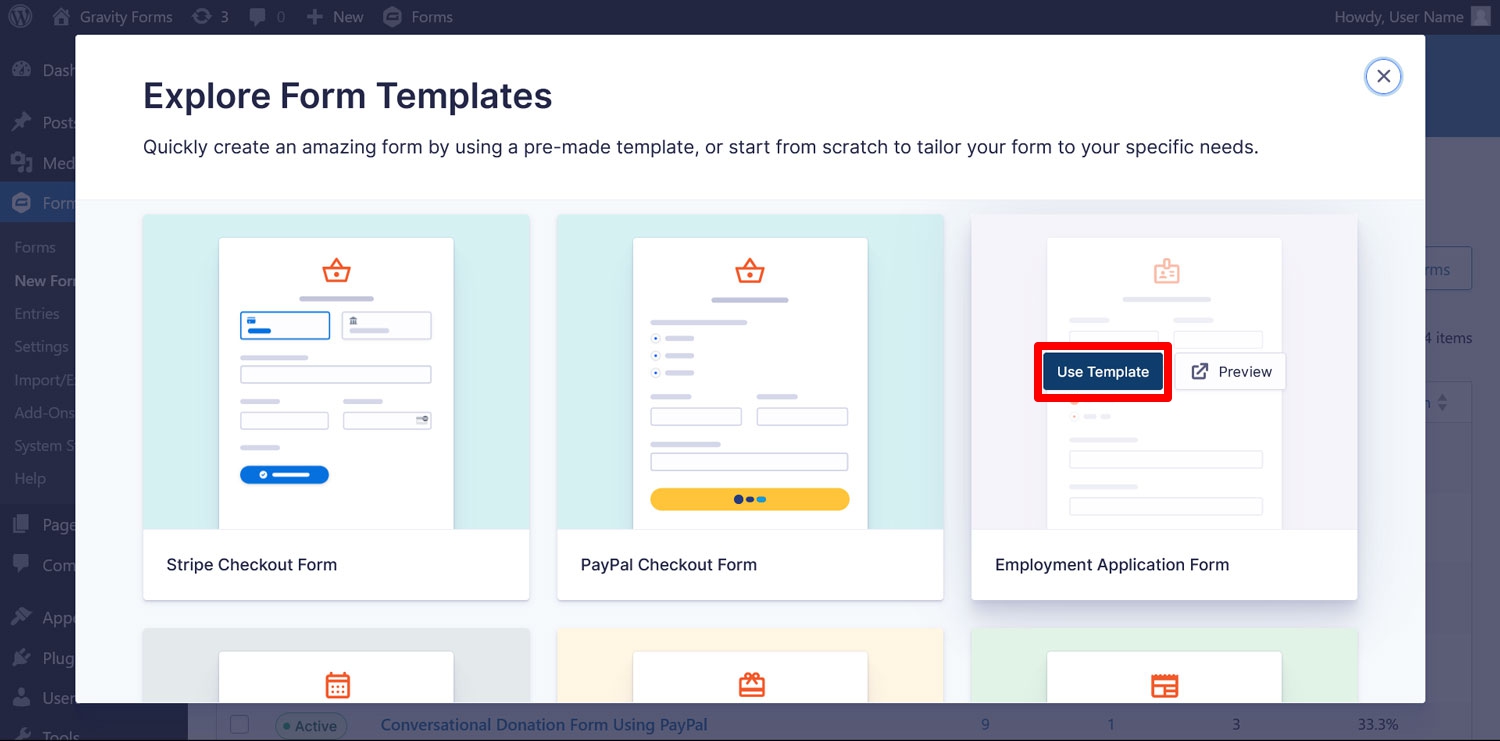
When you do, it a pop-up with all available templates opens. Find the Employment Application Form in the list and hover over it, then click Use Template.
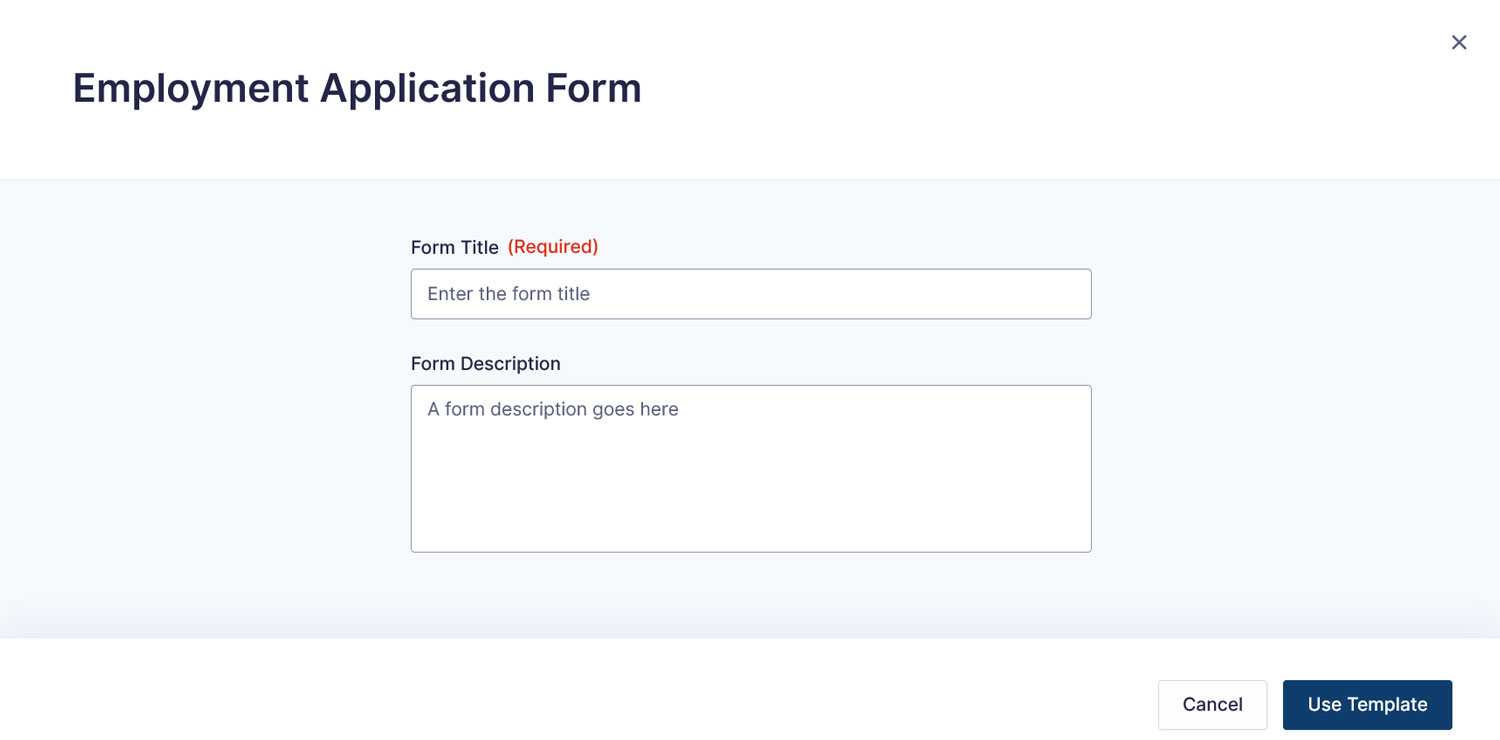
In the next step, name your form then continue.
You will land in the Gravity Forms drag-and-drop form editor.
The template already has form fields for:
- Personal information (name, email, address, phone number, best time to call back)
- The desired position (job options, availability, previous employment record)
- Additional information (space for a cover letter, the ability to upload a resume)
- A consent form for the terms and conditions
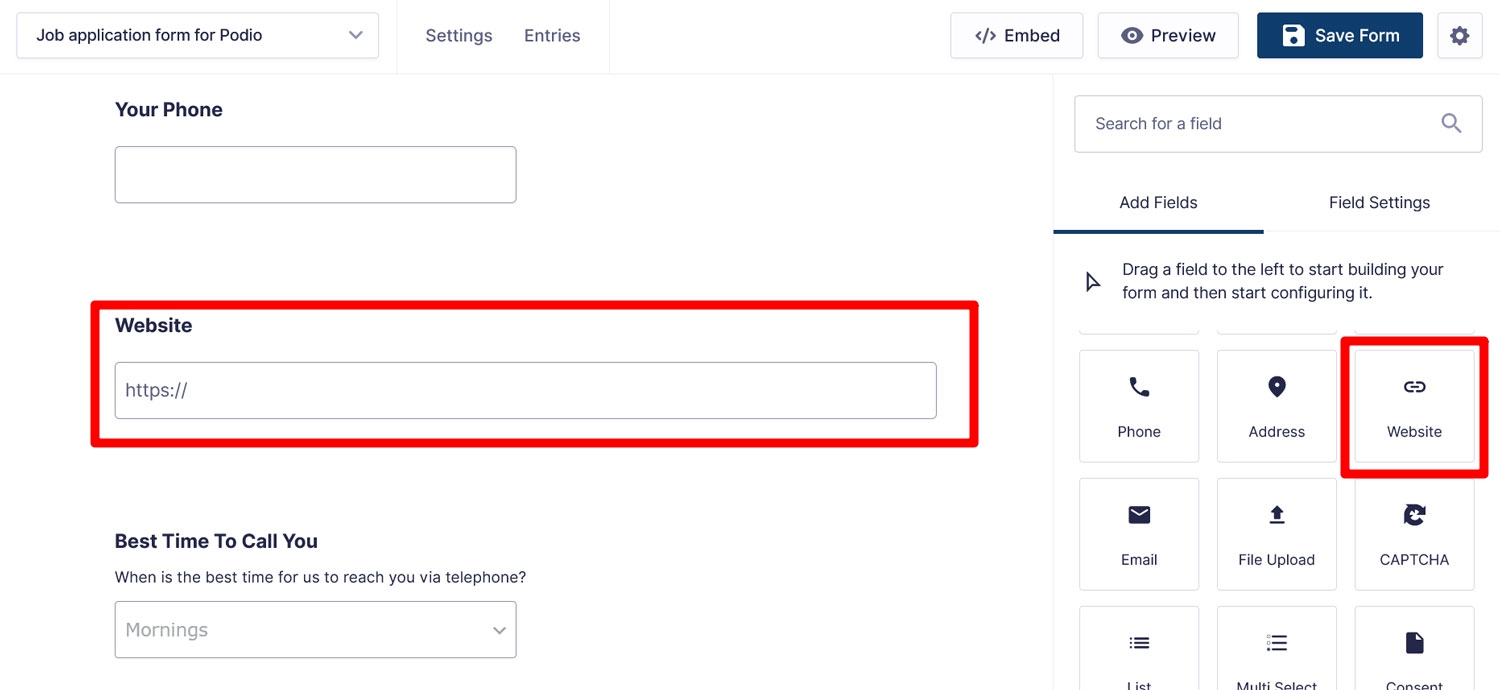
If you want to customize it for your purposes, you can do so in two ways. For one, you are able to drag and drop additional form fields from the right sidebar to where you want them to appear in your form.
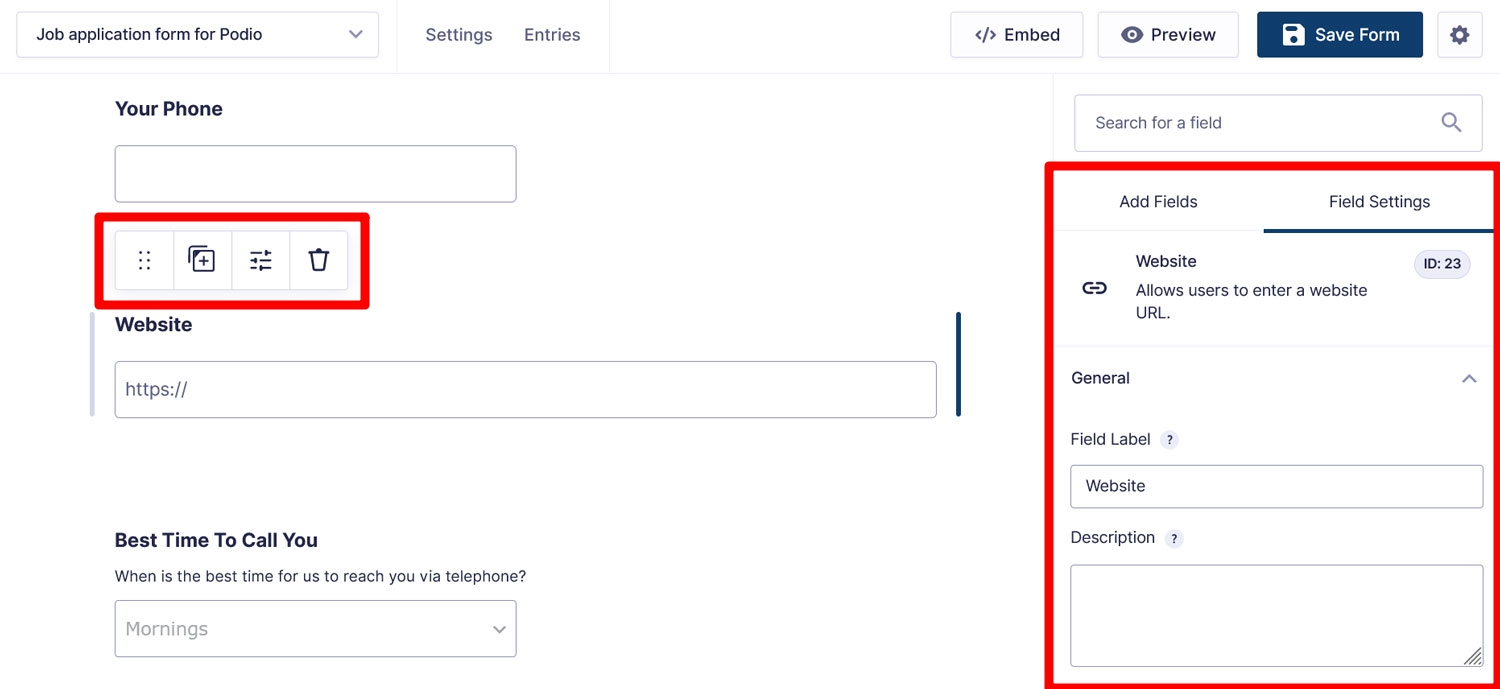
Additionally, you can click on any existing form fields to move, duplicate, and delete them (via the upper toolbar) or completely adjust them in the field settings on the right.
Once satisfied, save the form.
6. Create Your Zap and Connect Your Site
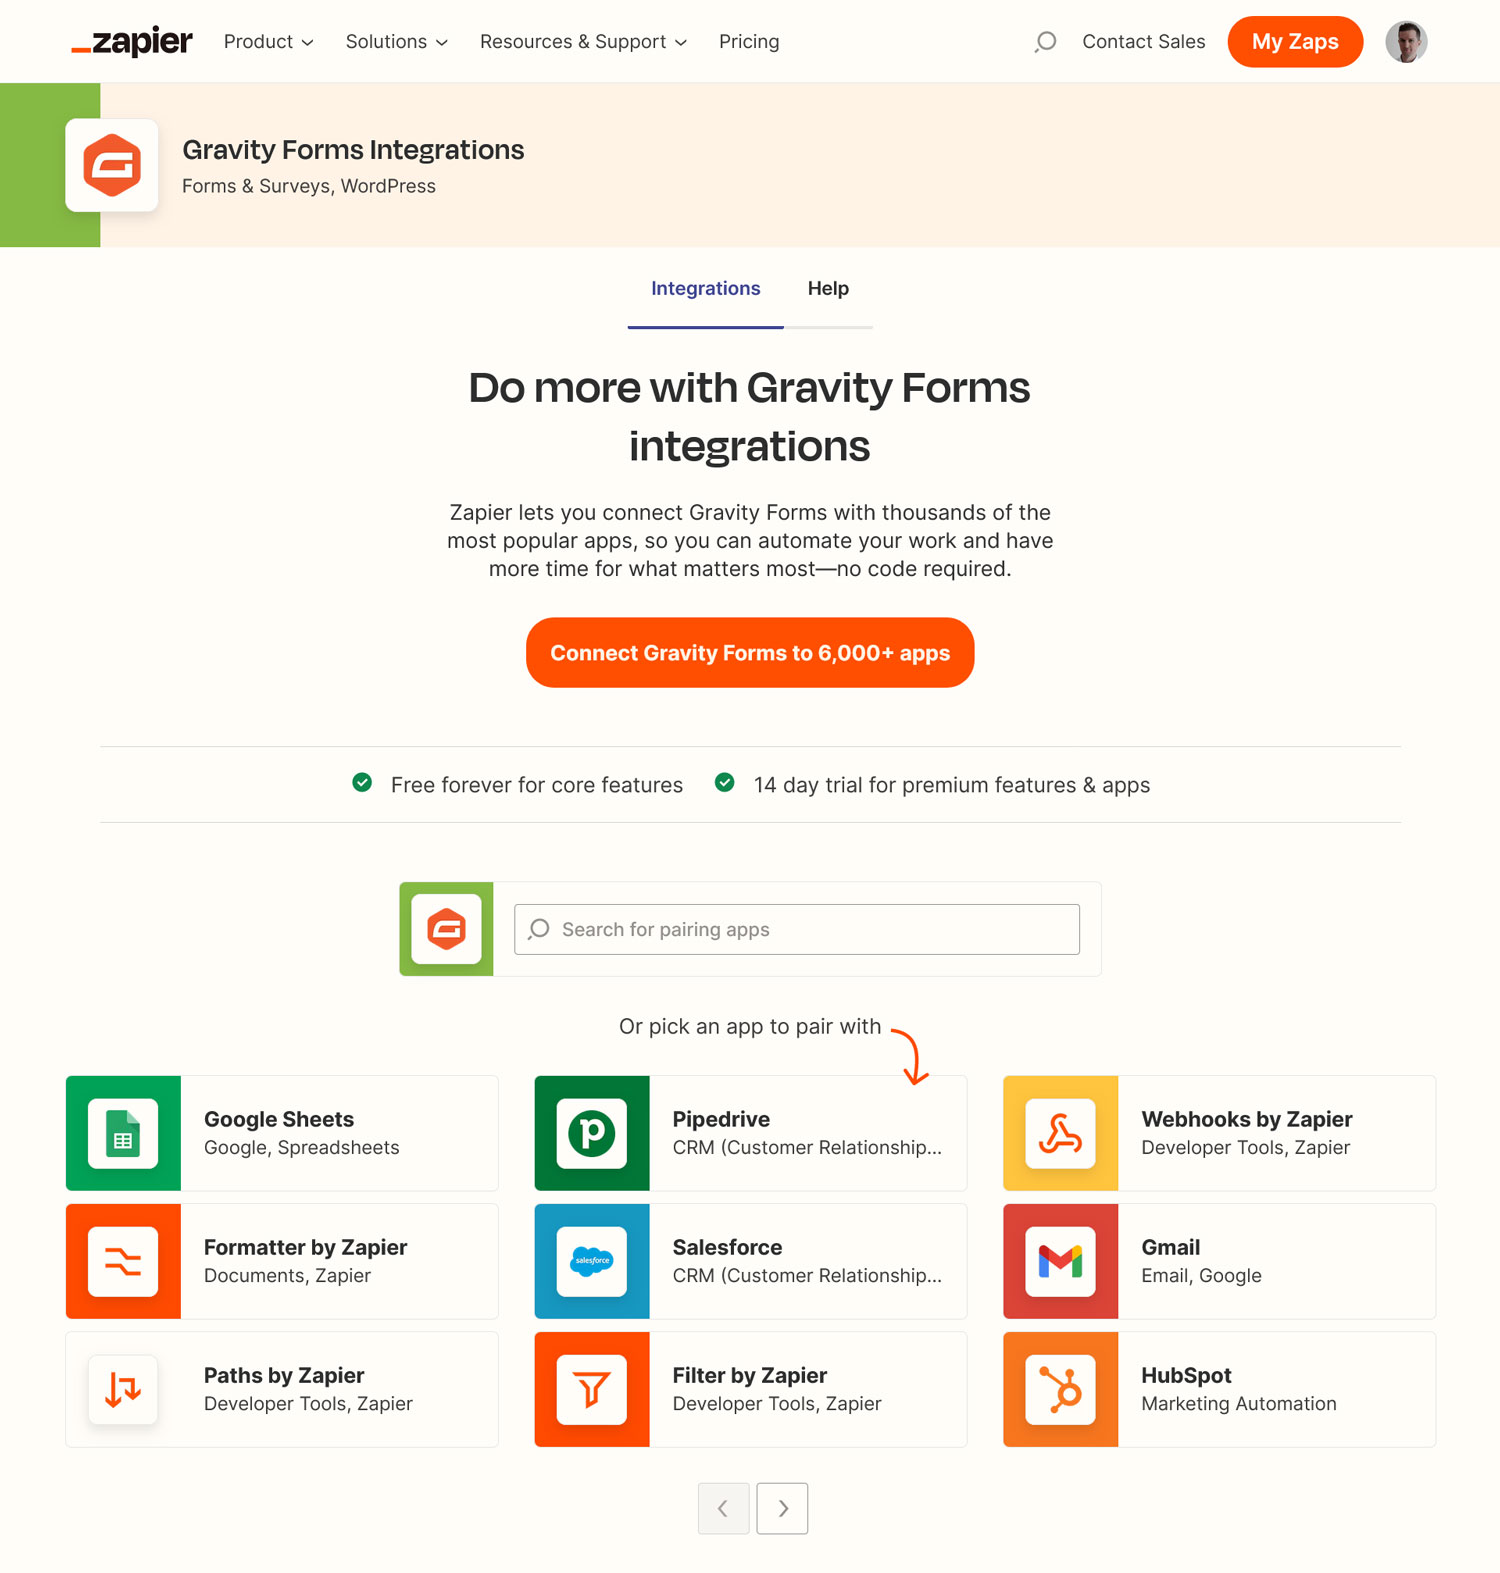
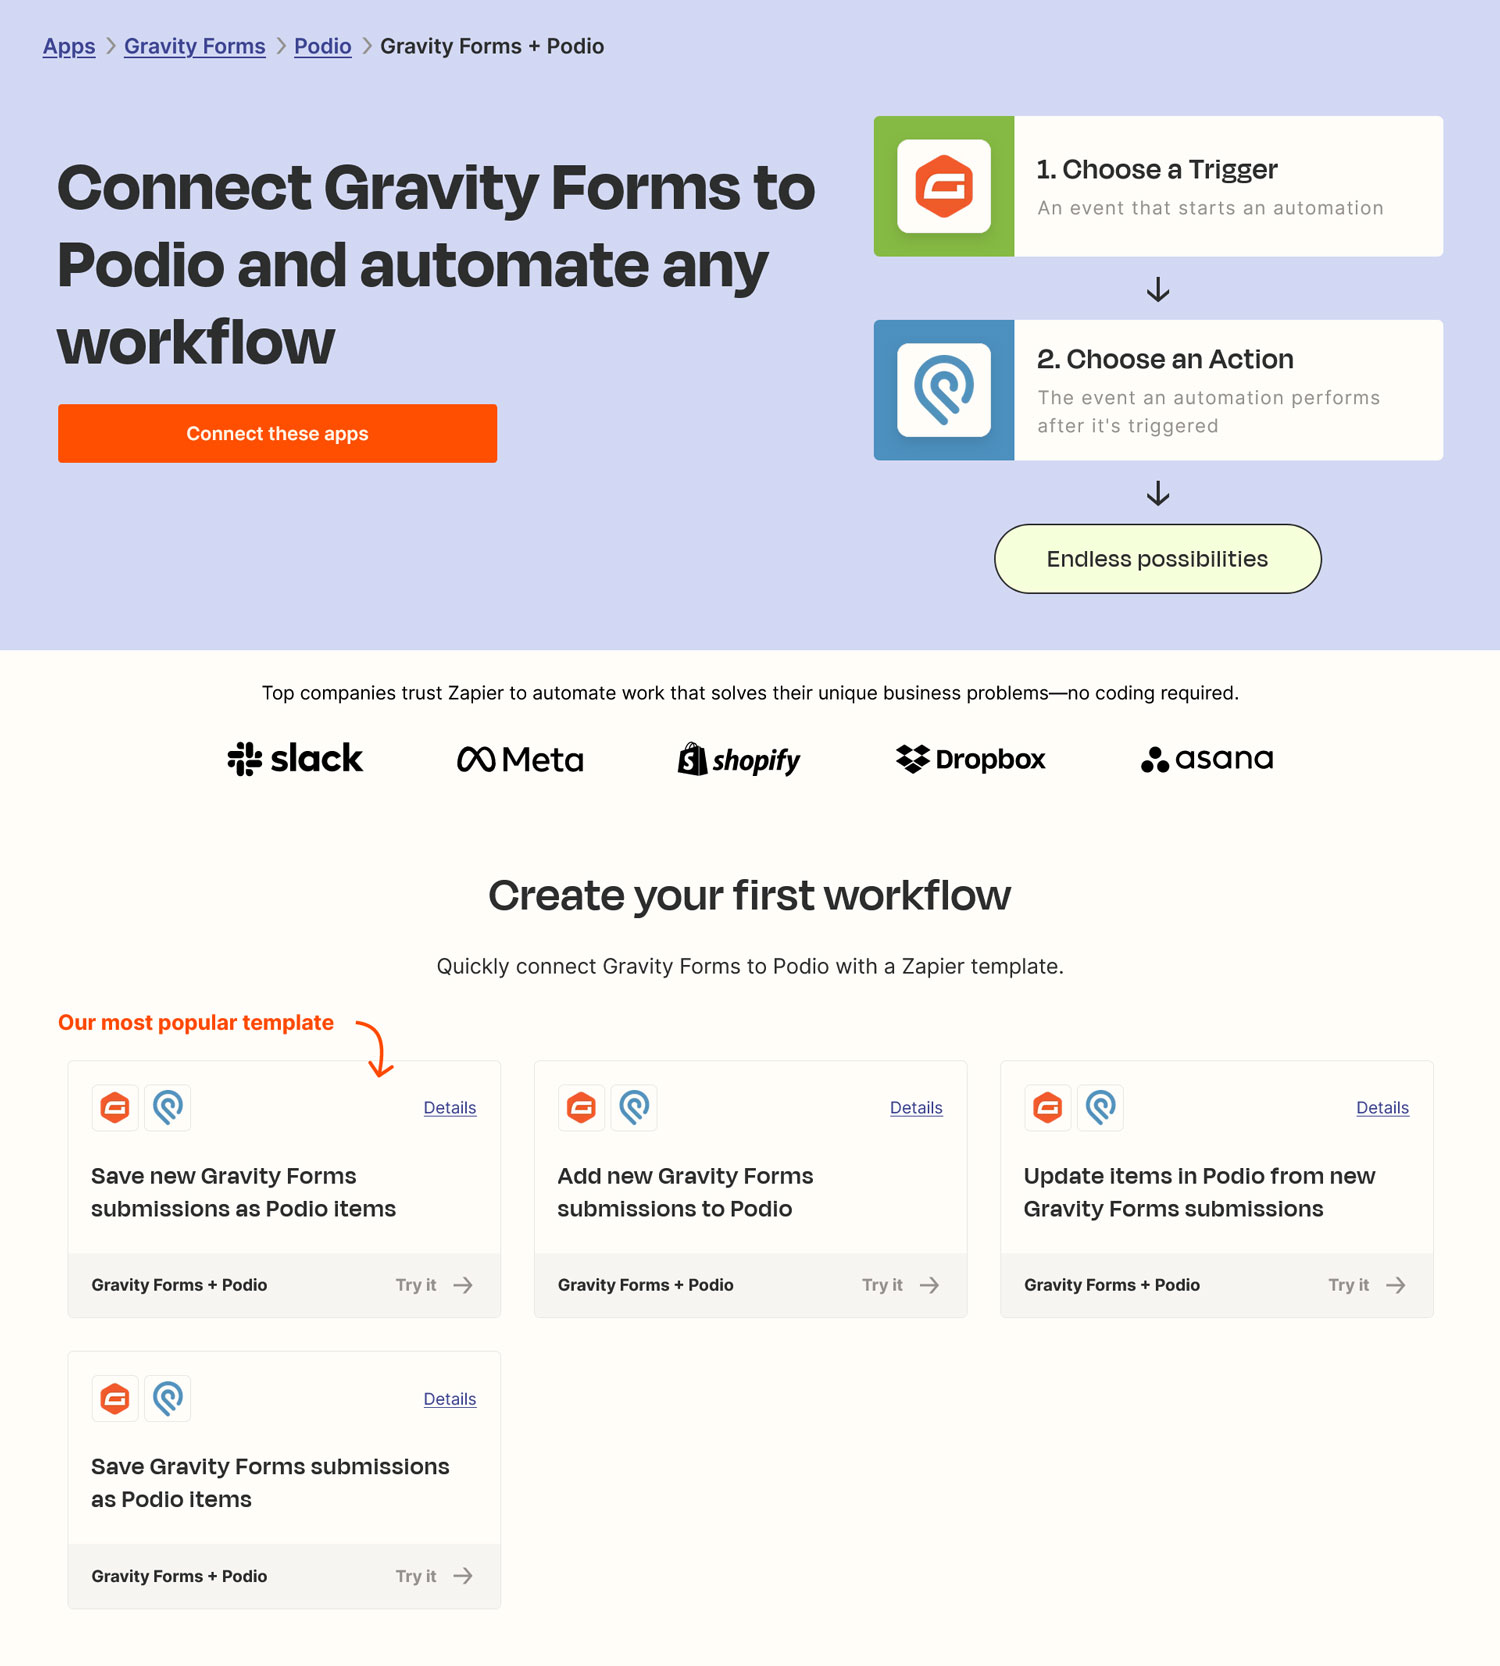
Now it’s time to set up your automation or “Zap” in Zapier. You can build Zaps from scratch or use existing templates. The Integrations page contains all available options for Gravity Forms.
Use the search function to limit your choices to Podio. The following page shows all available triggers and actions that involve both apps. In our case, we want the trigger to be a form submission, and create a Podio item as the action. This is also the most popular option for these two applications. Click Try it start configuring your Zap.
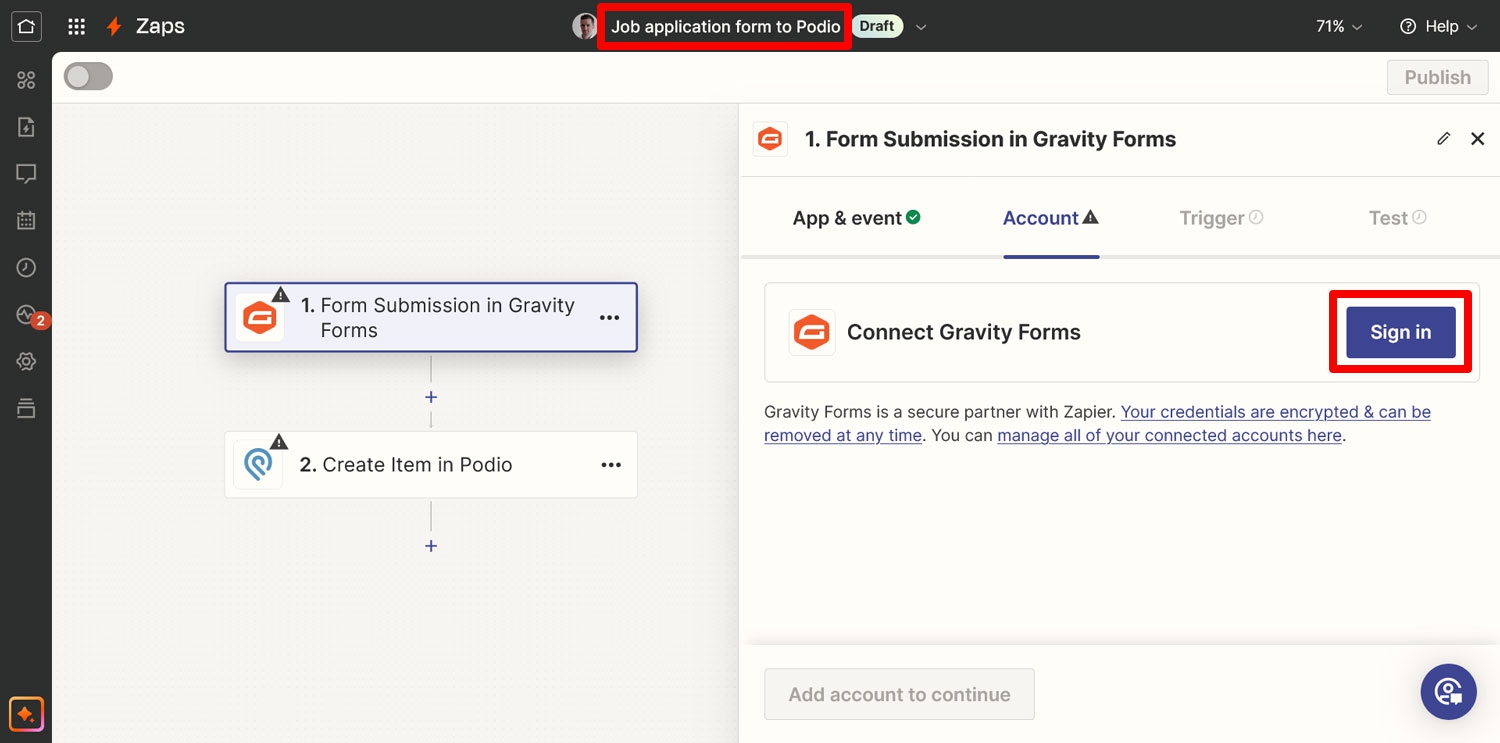
On the following screen, first name your automation at the top of the screen. Then you’ll need log in to both apps, starting with Gravity Forms. Click Sign in to get started.
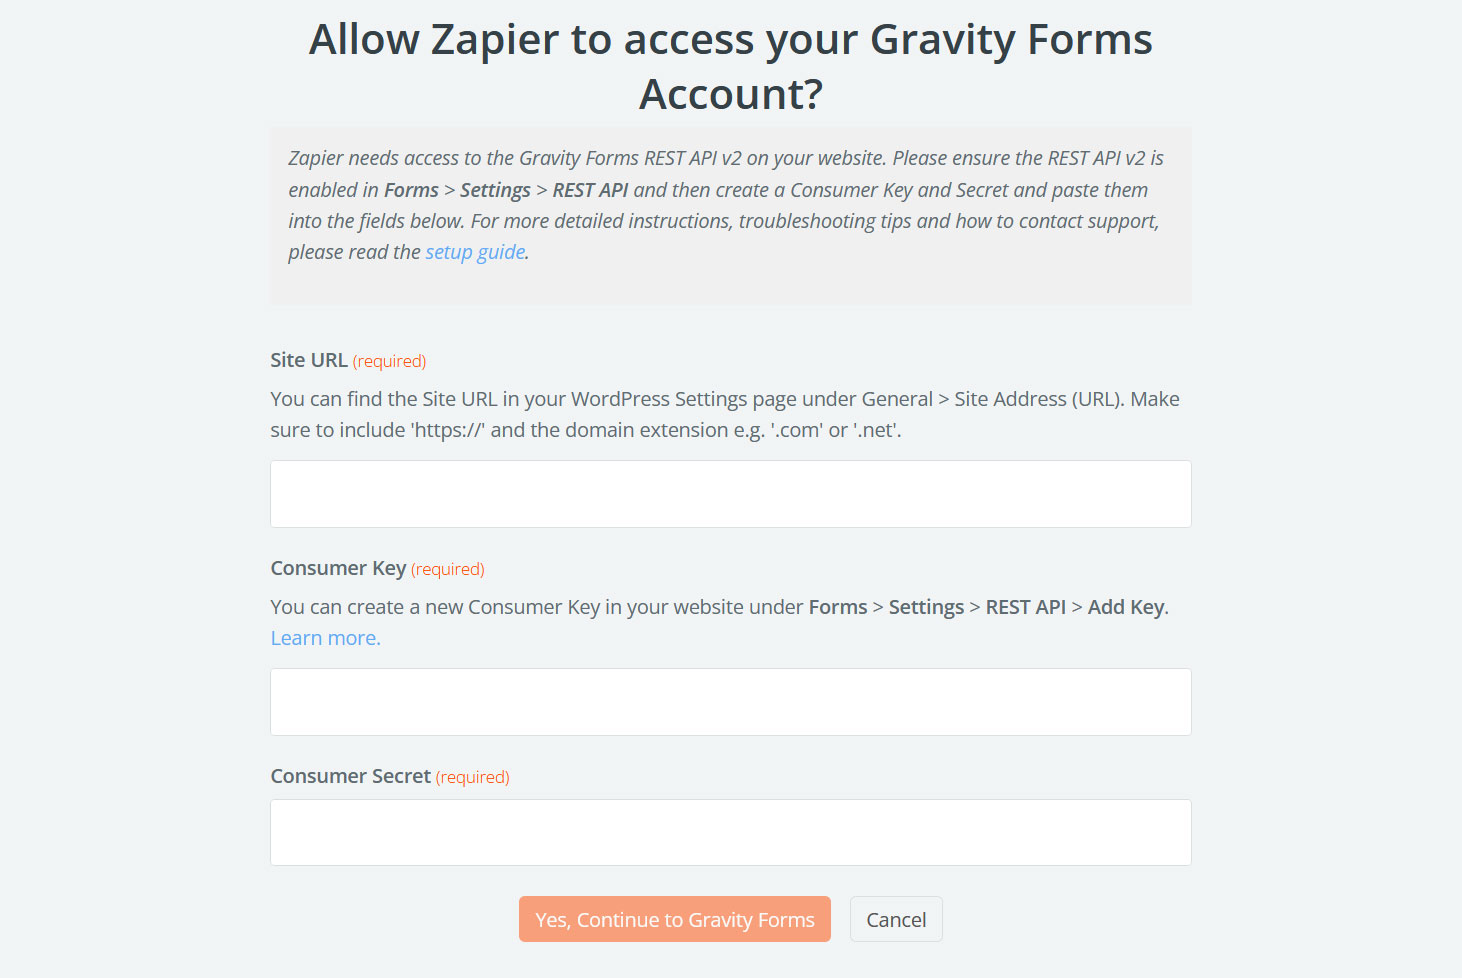
A form will open in a new window. Here, you need to enter your website’s URL and the Consumer Key and Consumer Secret you created earlier.
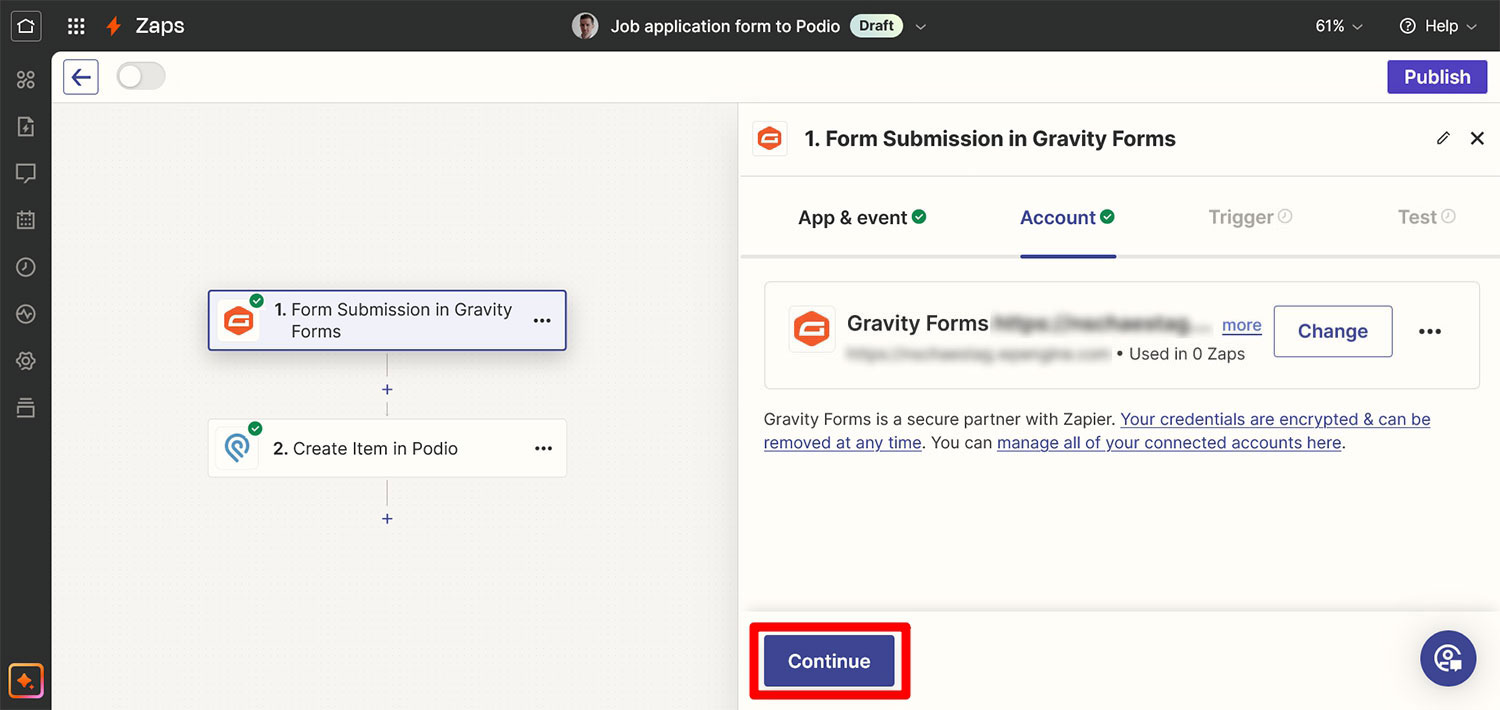
Do so and click Yes, Continue to Gravity Forms. This should close the window and show the connection as established in the sidebar. Click Continue to move on.
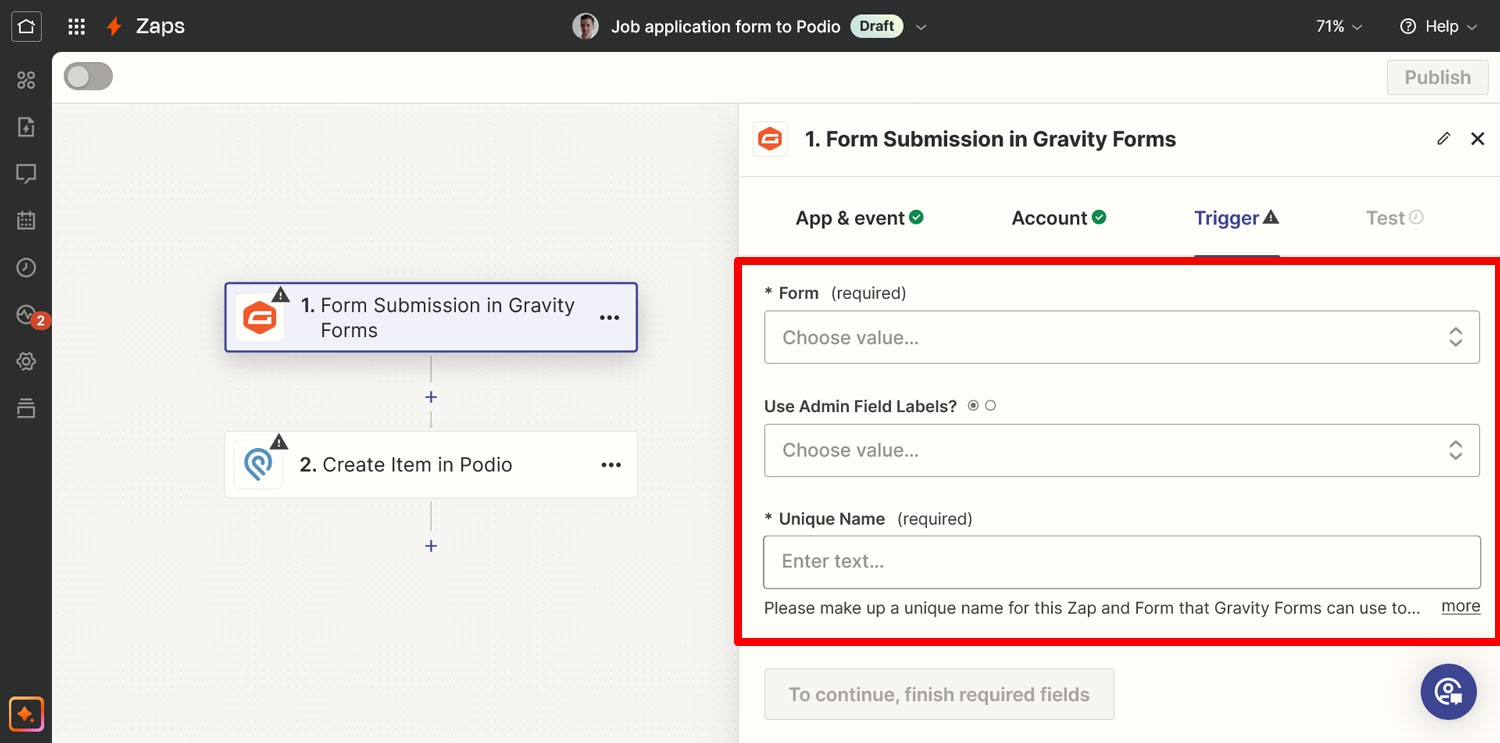
In the next step, you will see three drop-down menus to configure your trigger.
In the first one, choose the form you want to use, most likely the one you just created.
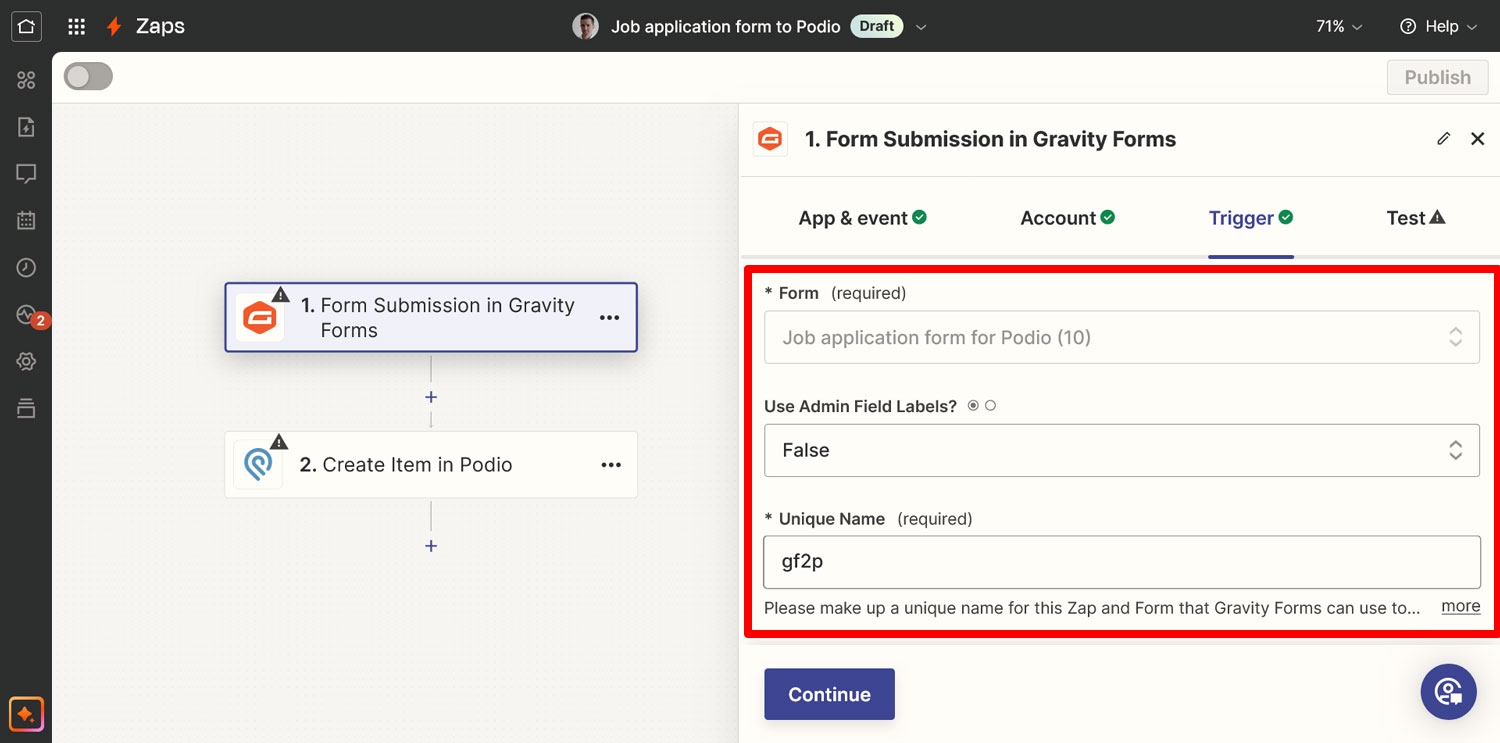
The Use Admin Field Labels? section is only important if you added Admin Labels earlier. In most cases, setting it to False is the appropriate choice.
Under Unique Name Zapier asks you to provide a descriptor for this Zap and form. Gravity Forms uses this to process the data and it needs to be one of a kind for that reason. Check our setup below if you are not sure how to fill everything in.
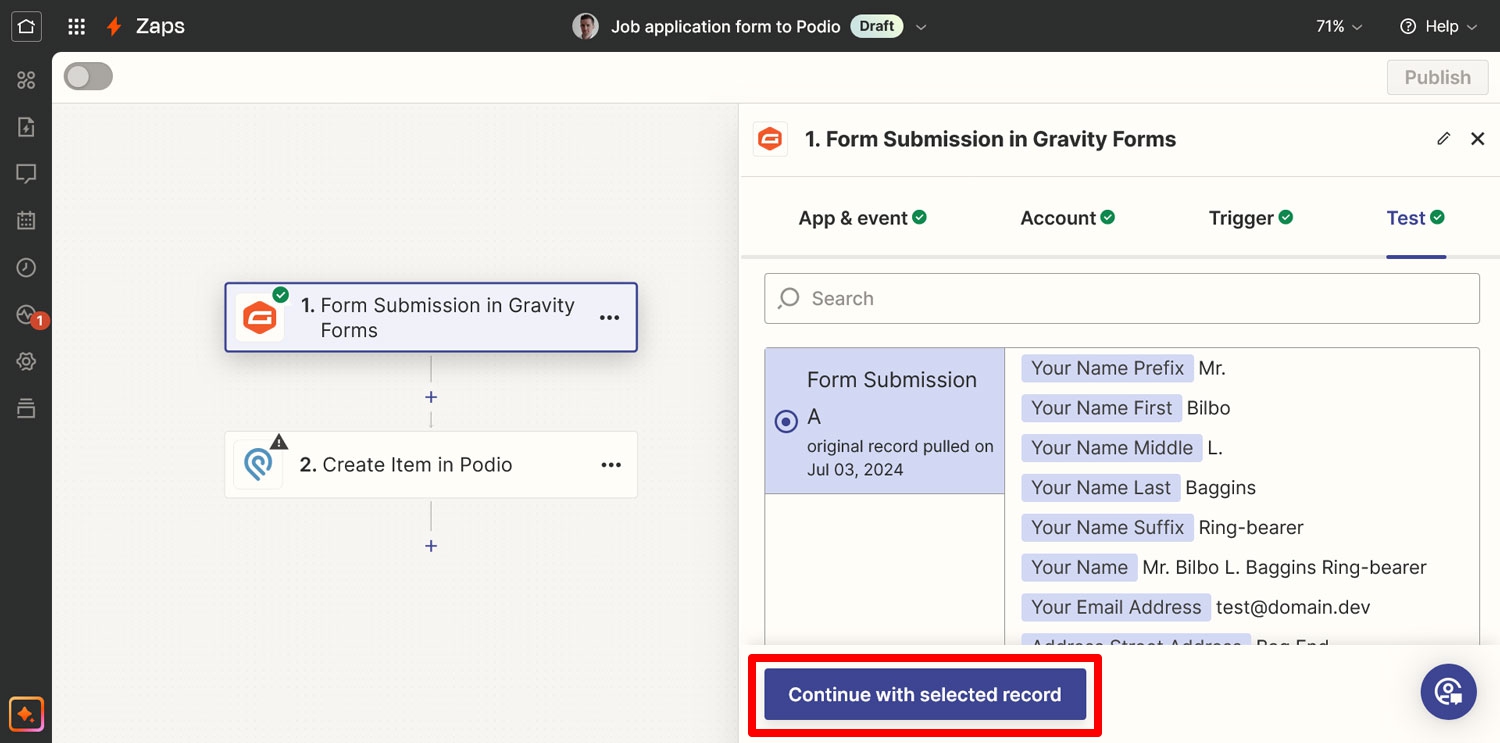
Once finished, click Continue again, then Test Trigger in the next screen to have Zapier attempt to load example data from Gravity Forms.
If that works without a problem, the connection is established and you can click Continue with selected record.
7. Link Zapier and Podio
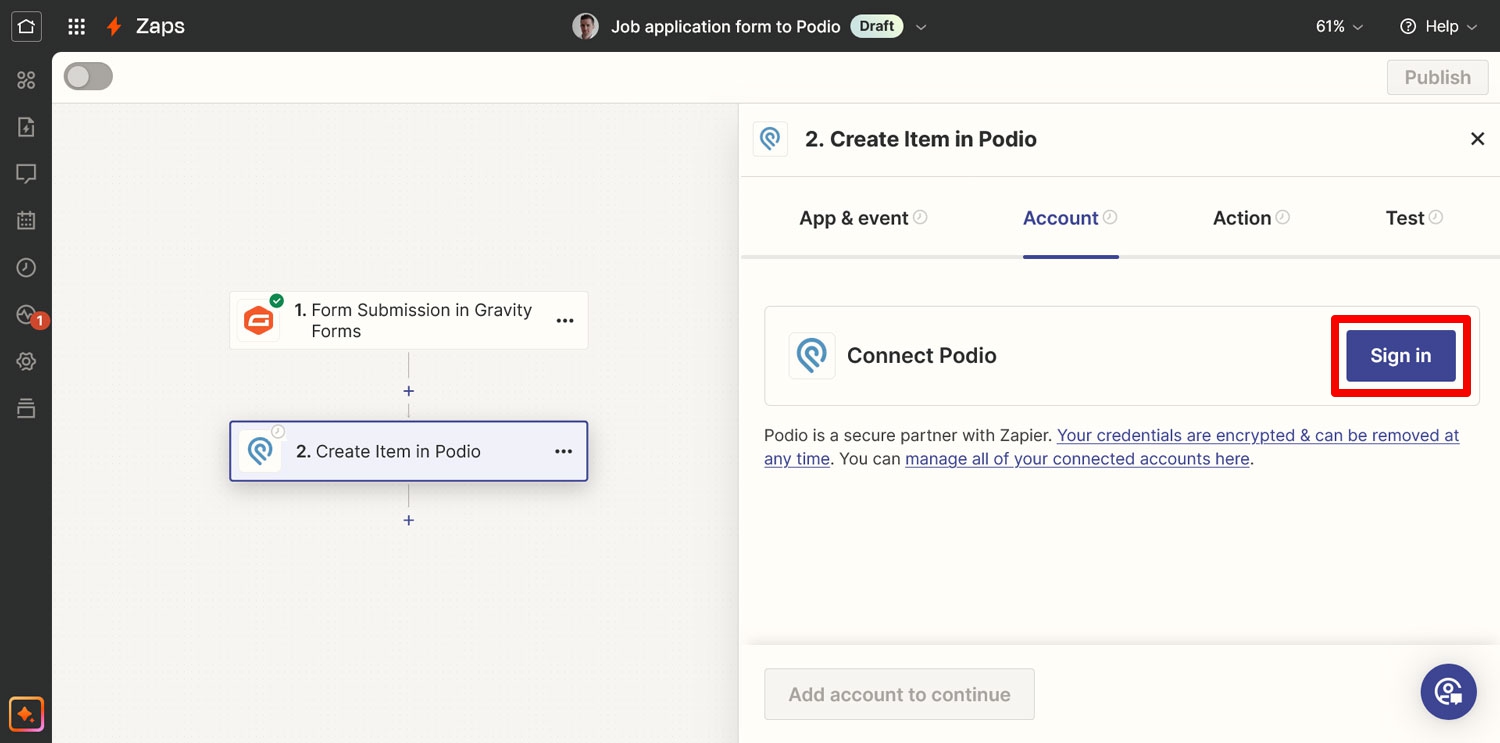
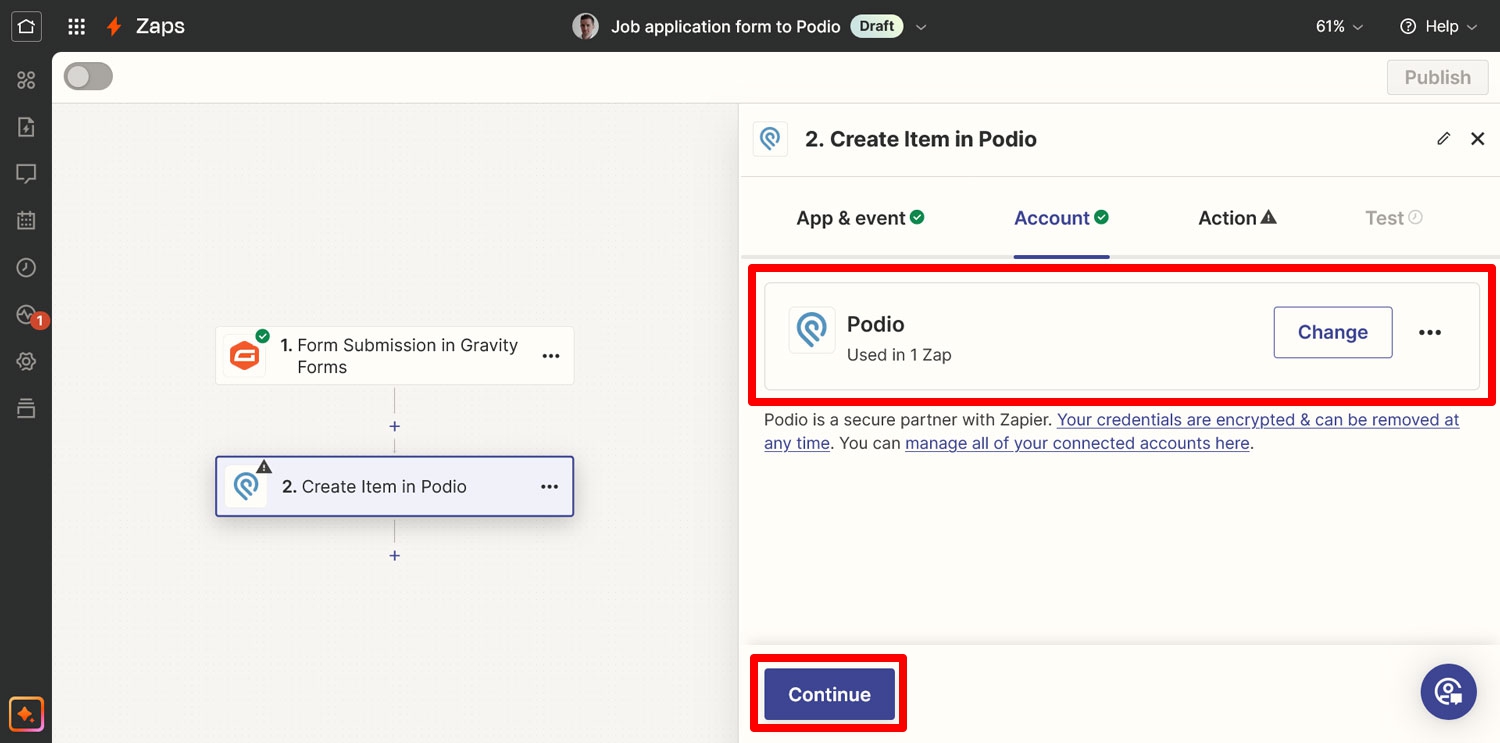
You still need to connect to Podio. It’s quite easy. Simply click on Sign In again in the screen that shows up.
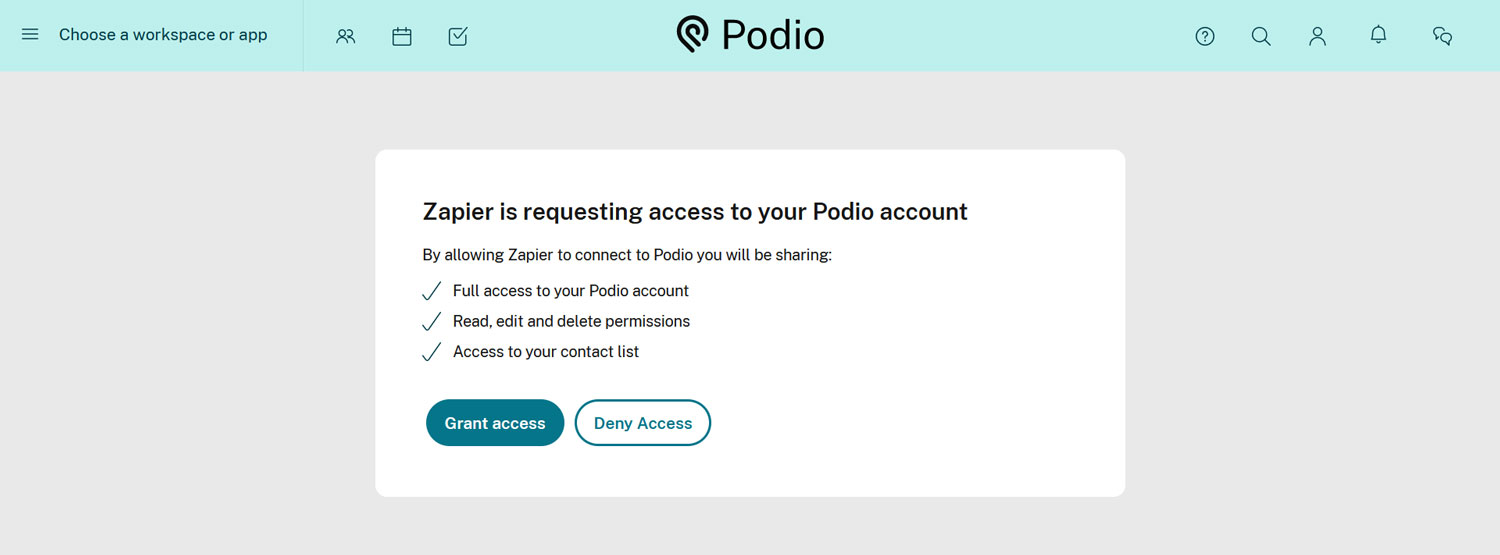
Doing so opens a pop-up where, if you are logged in to Podio, you simply need to grant Zapier the access.
That should do the trick. Continue by clicking the respective button.
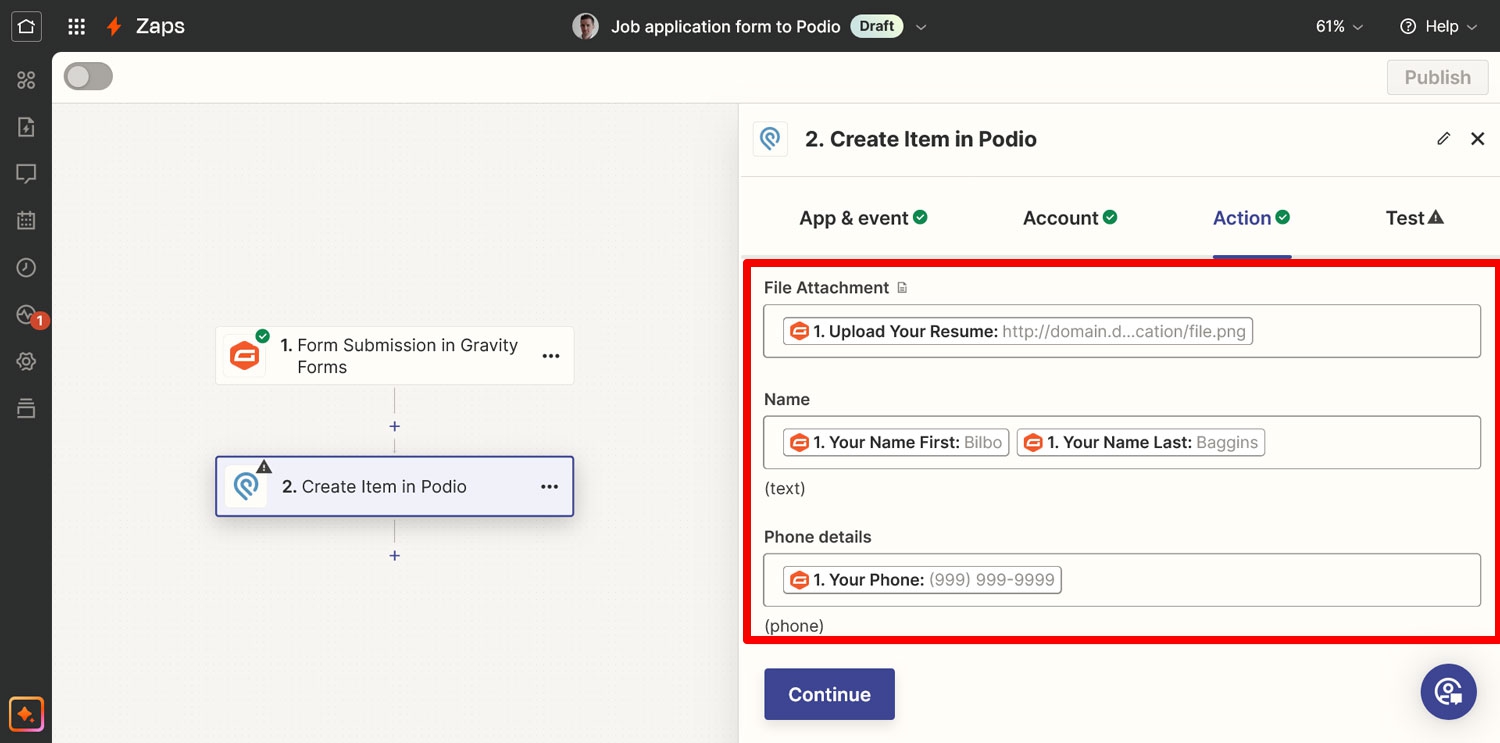
After that, it’s time to configure what information Gravity Forms should send to Podio and where it should land.
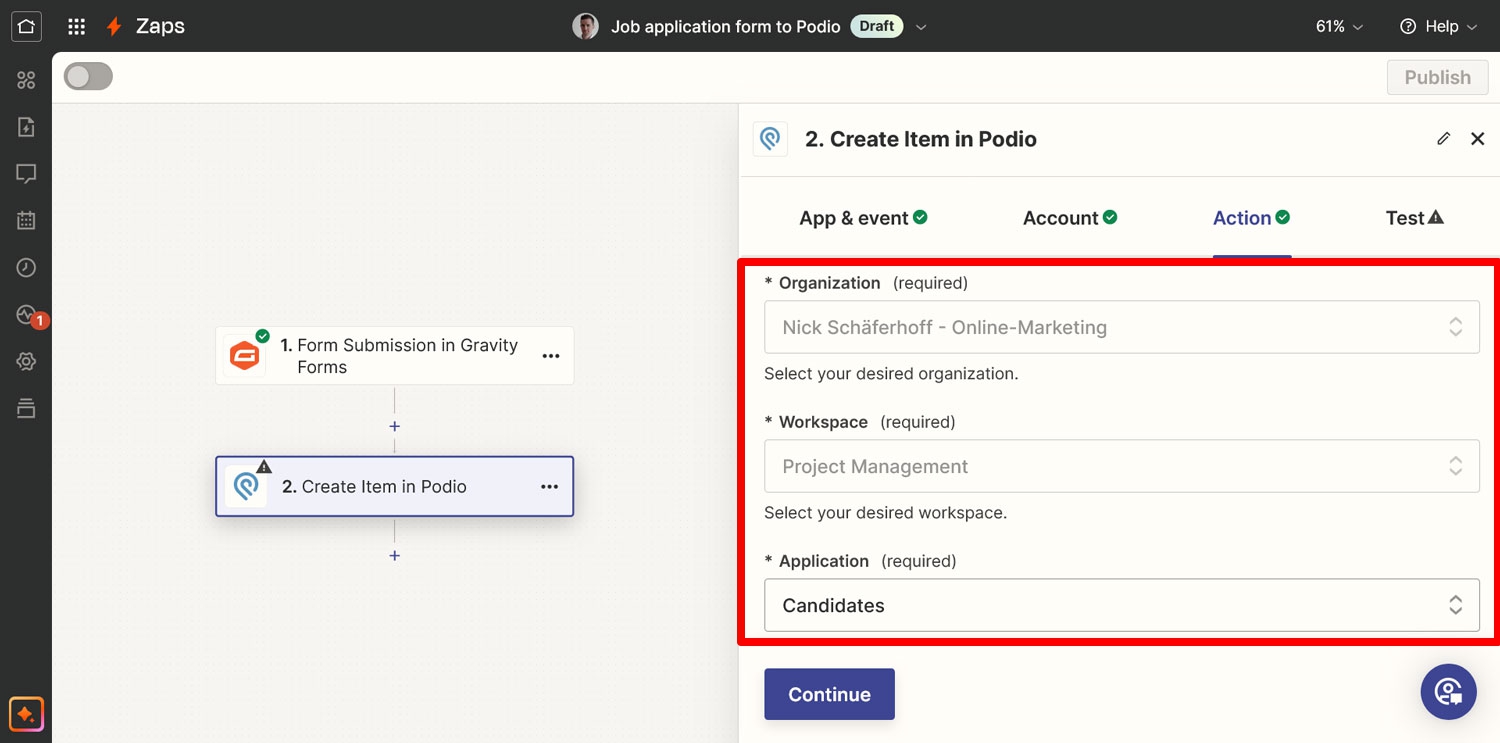
For that, first pick the organization, workspace, and application that you want to target via the drop-down menus at the top.
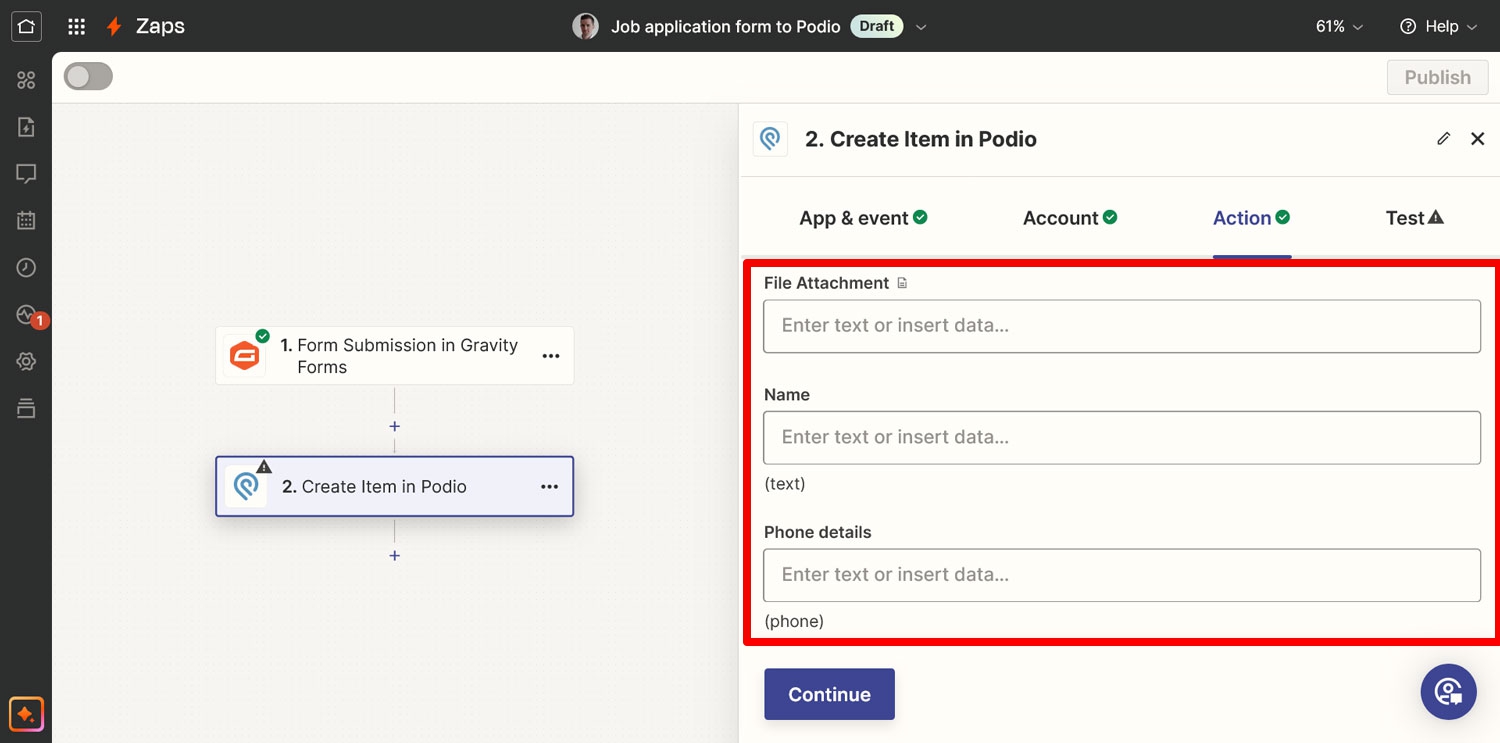
In this example, we make sure it is the Candidates application. Once you make your pick, Zapier shows you the information you can send to your choice.
You will notice that it corresponds to what we set up in Podio earlier. You now need to click into each option you want to use, then choose the respective sample data Zapier loaded from Gravity Forms.
It’s also possible to use more than one per field, e.g. you can put the first and last name in the same location. Just be sure to place a space between.
Note that you don’t have to fill everything in. In fact, some stuff is specifically there to be added in Podio later.
Once you have configured everything here, click Continue again.
8. Make Sure the Connection Works and Publish Your Zap
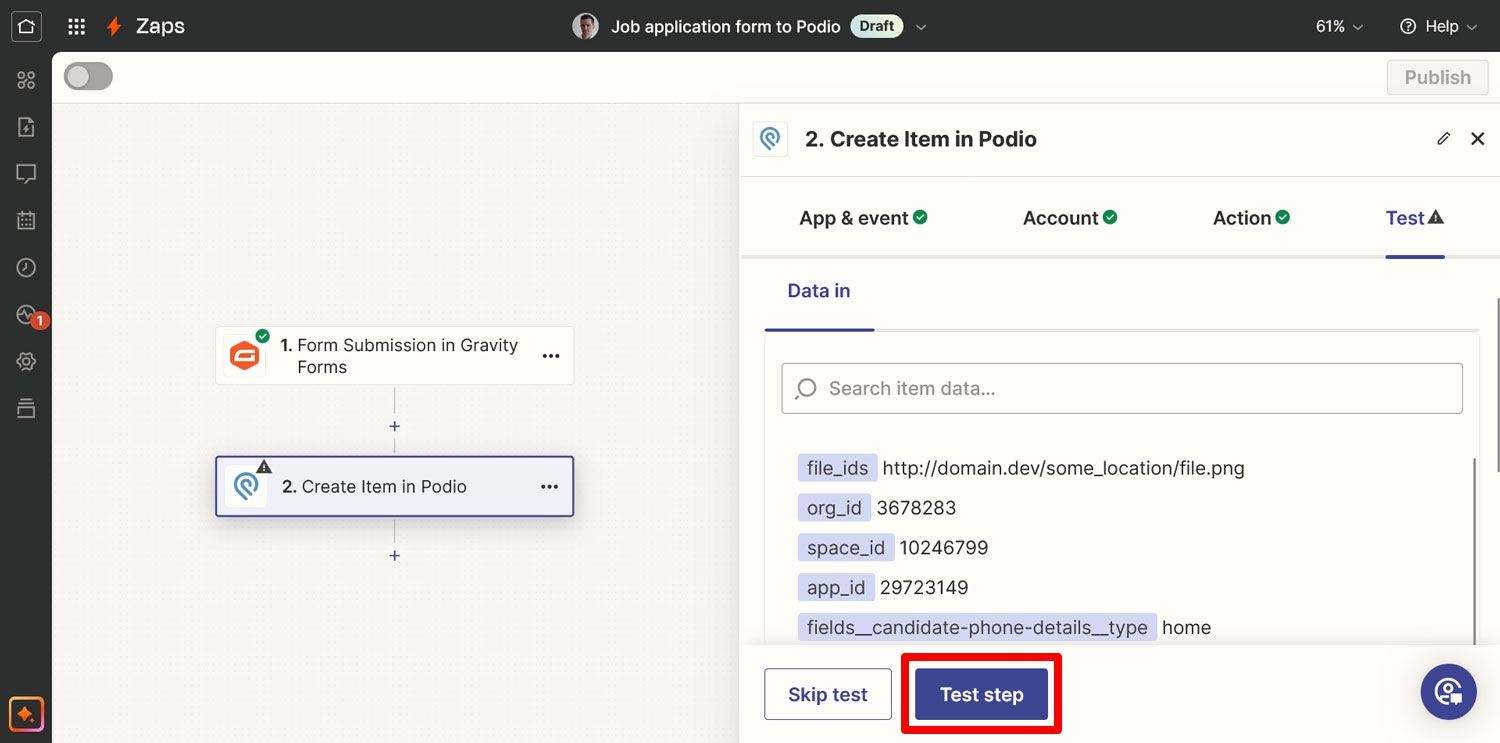
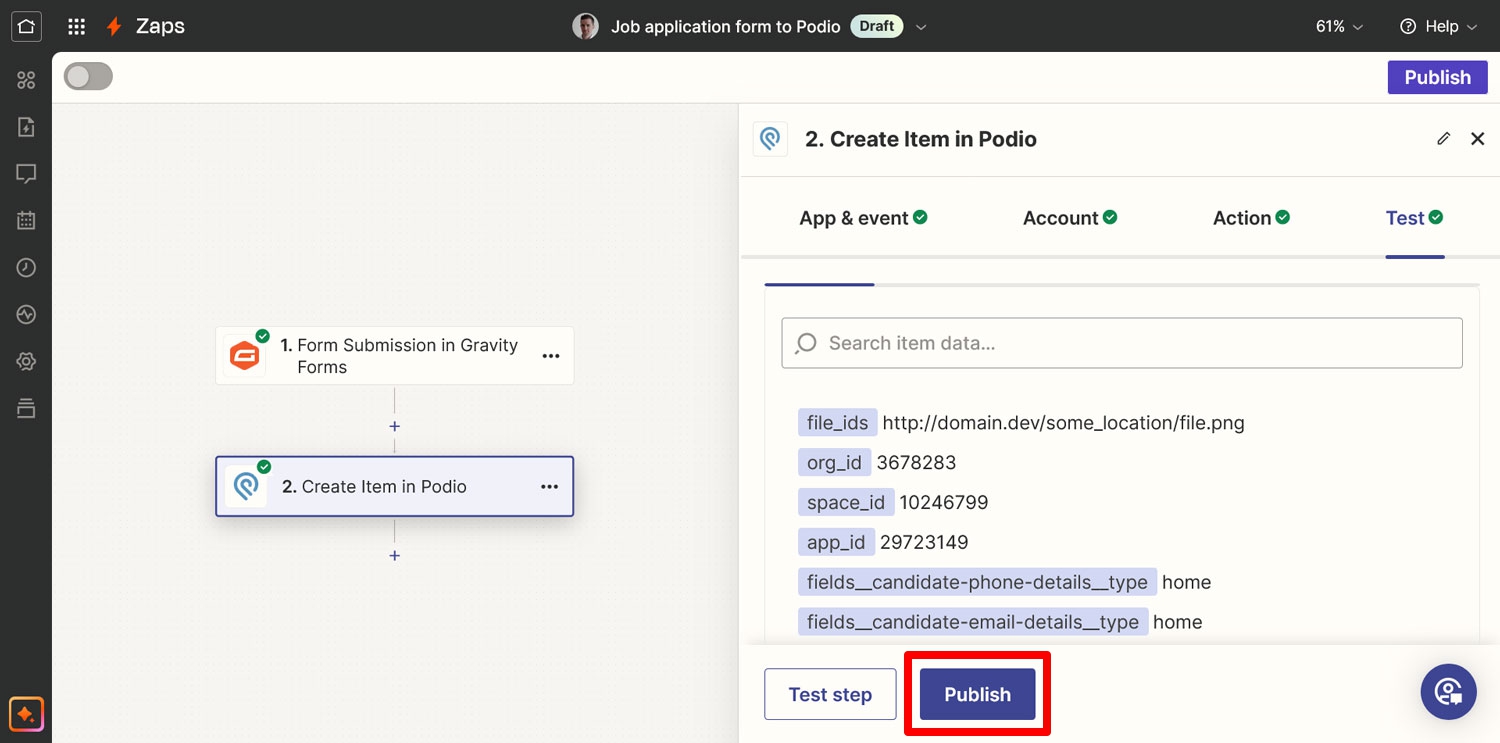
The last step happening in Zapier is testing the connection and making your Zap active. For the first part, you should see a button that says Test step in the interface.
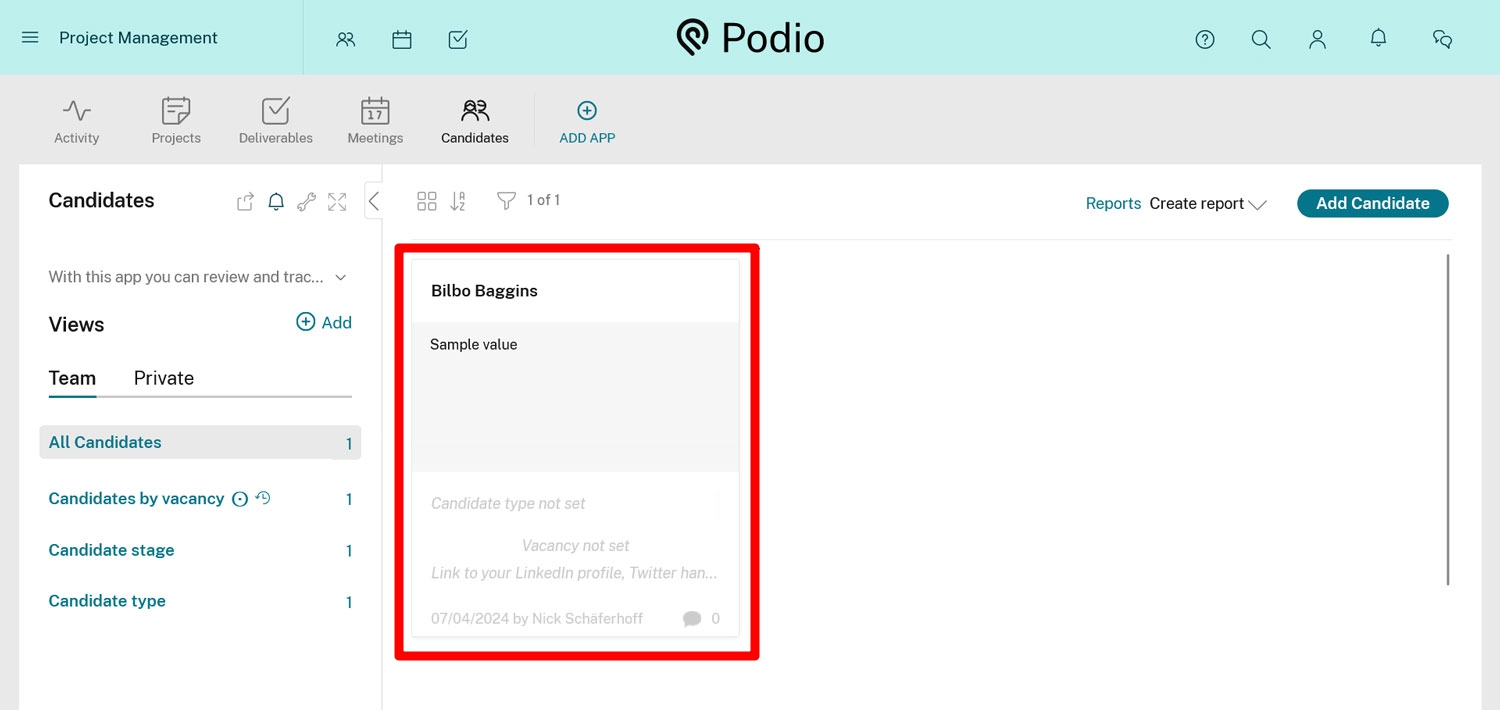
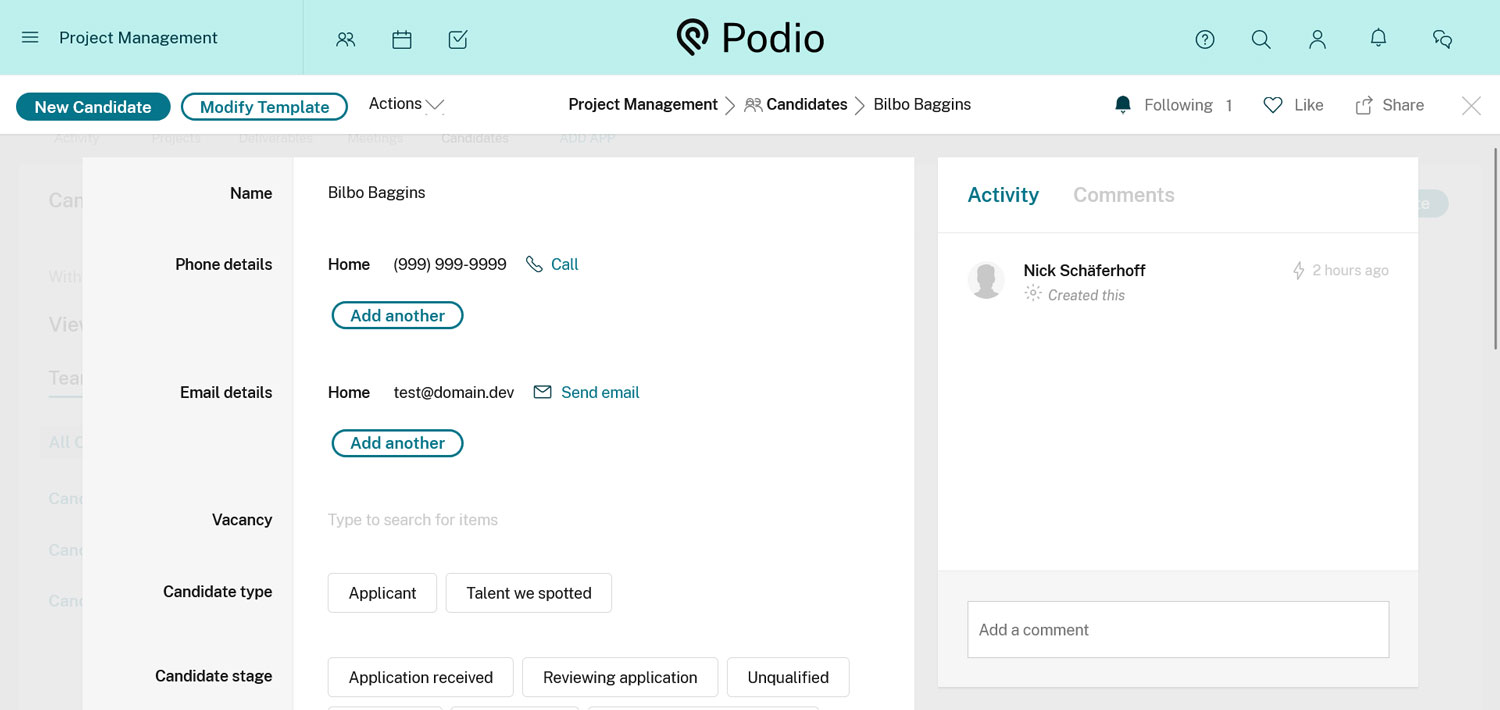
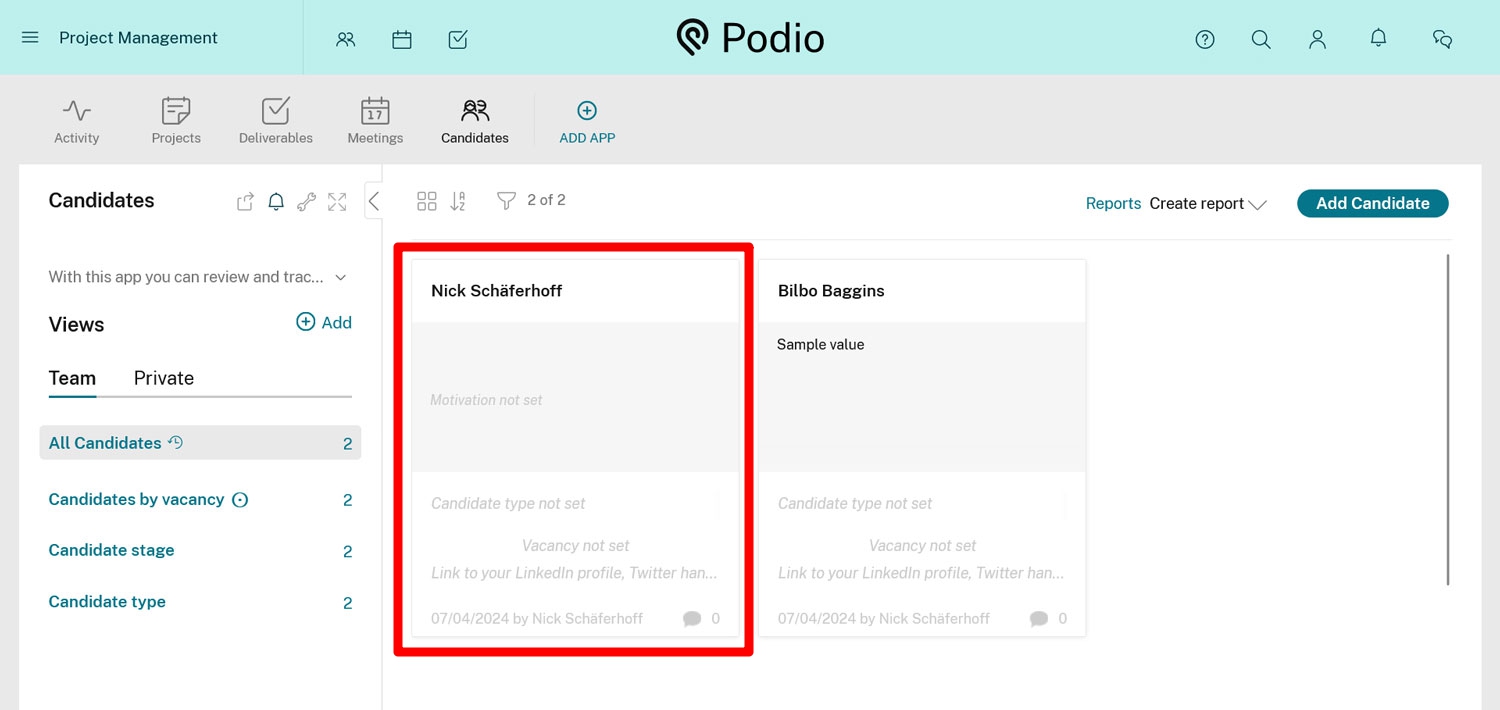
Click it to have Zapier send the Gravity Forms test data to Podio. Then, go to your Podio dashboard and the Candidates app in your workspace. The test user should appear as an applicant there.
Click it to see if all the details are correctly filled in as well.
If that’s the case, the last step is to click on Publish in Zapier to make the Zap active.
9. Configure Confirmations and Notifications
Before making your job application form live, there are still things you can and should customize about it.
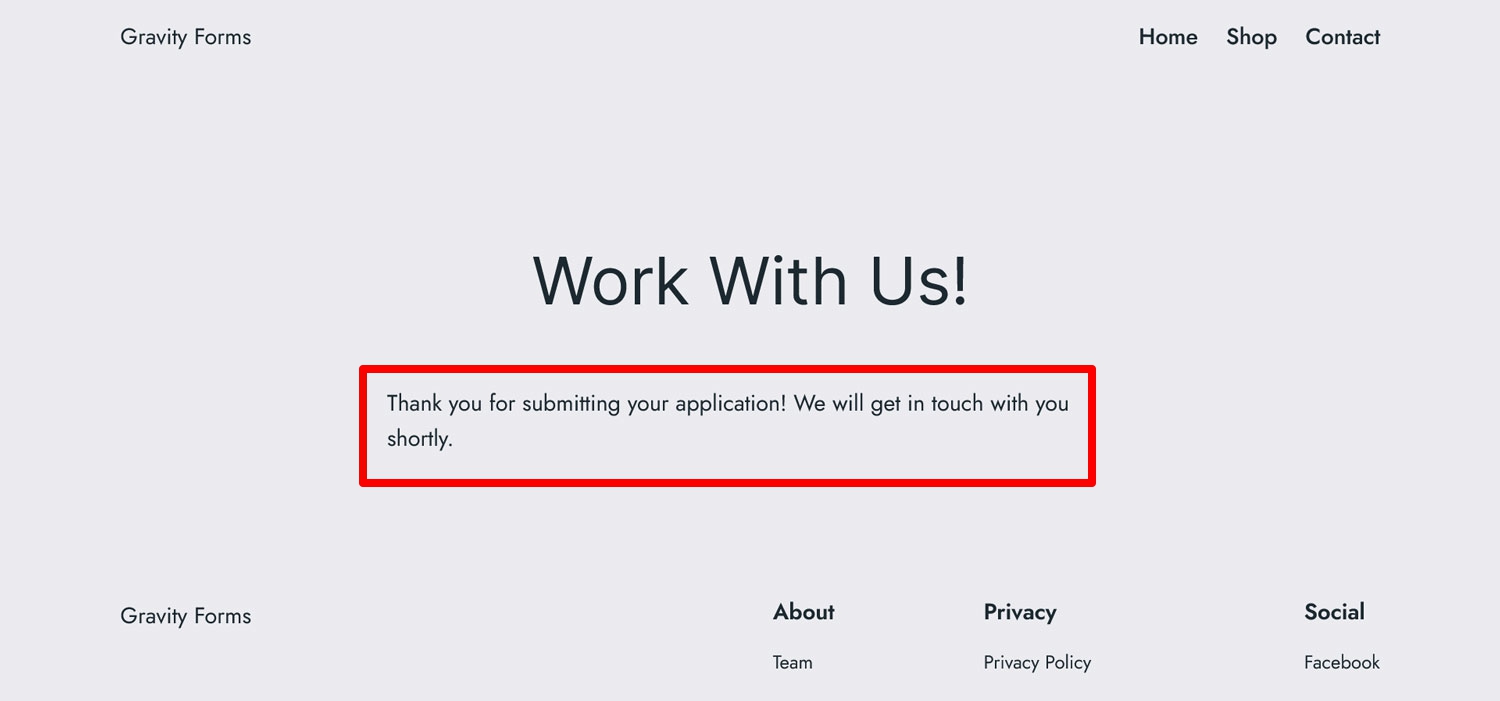
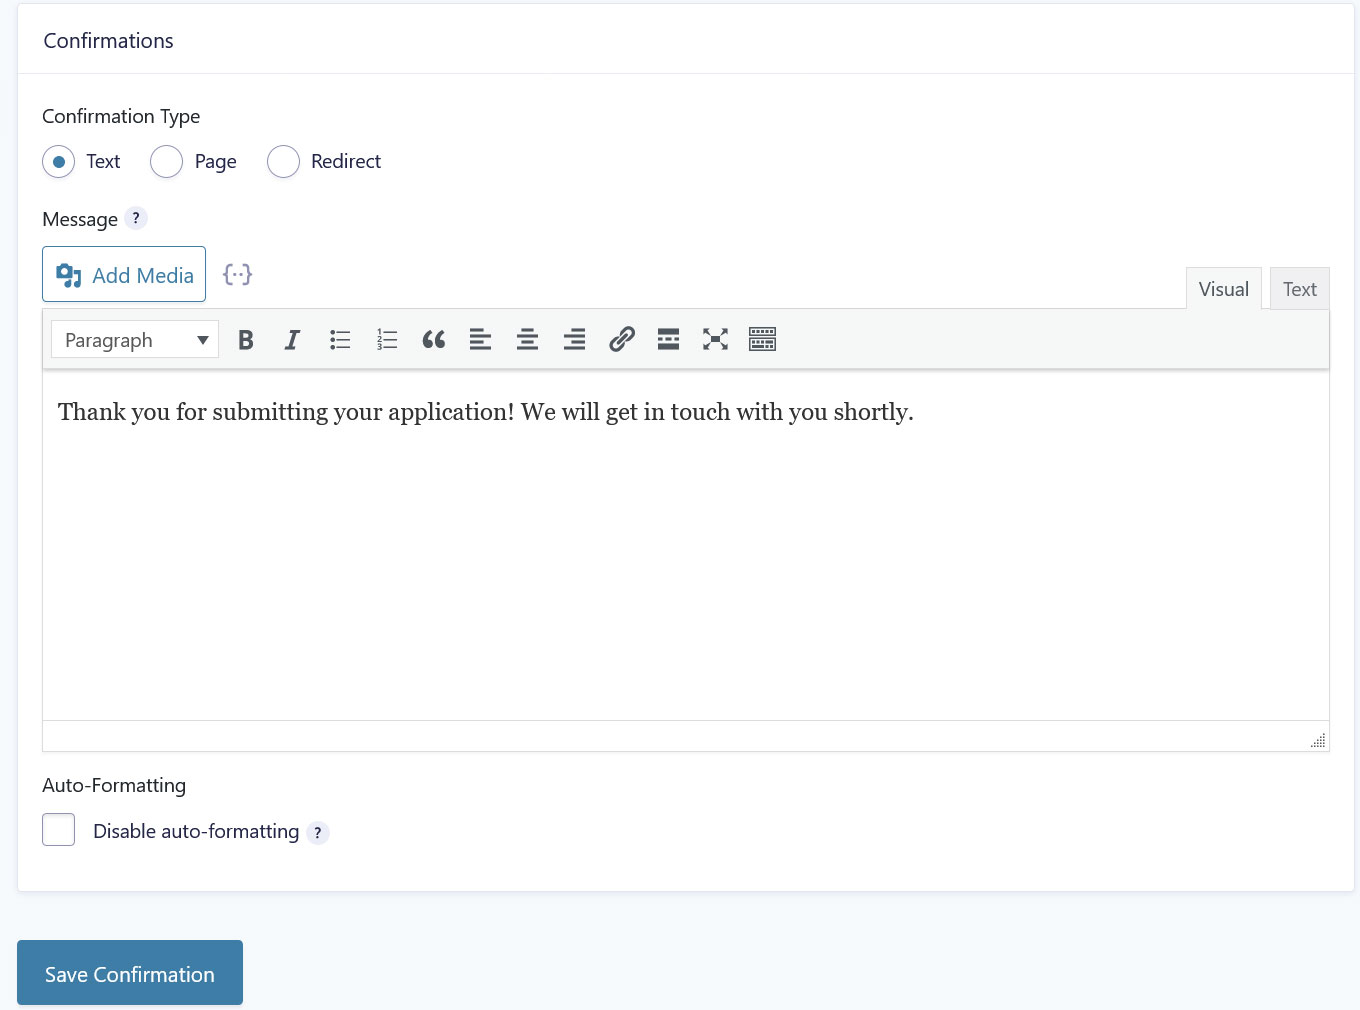
For one, there are Confirmations. That’s the message that appears on your web page when someone submits your form.
It lets users know their submission was successful and can also use deliver extra information.
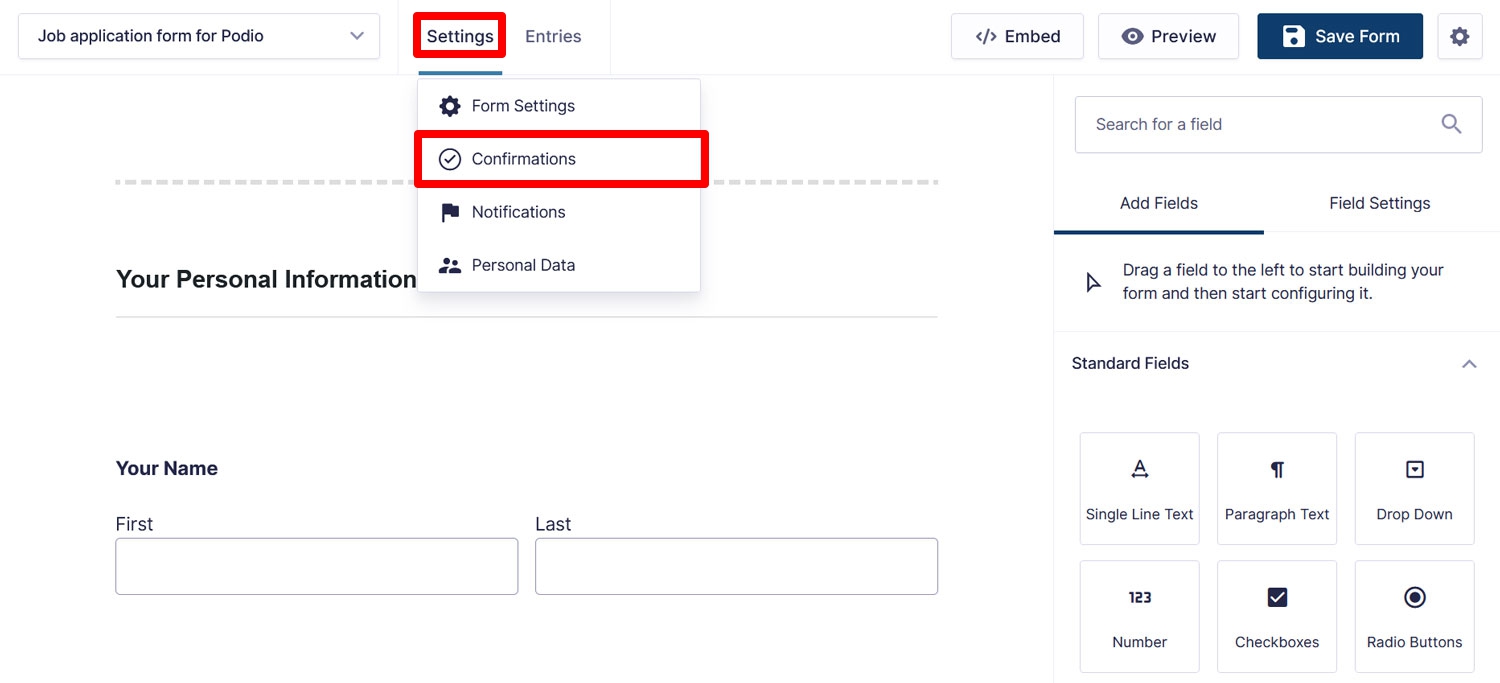
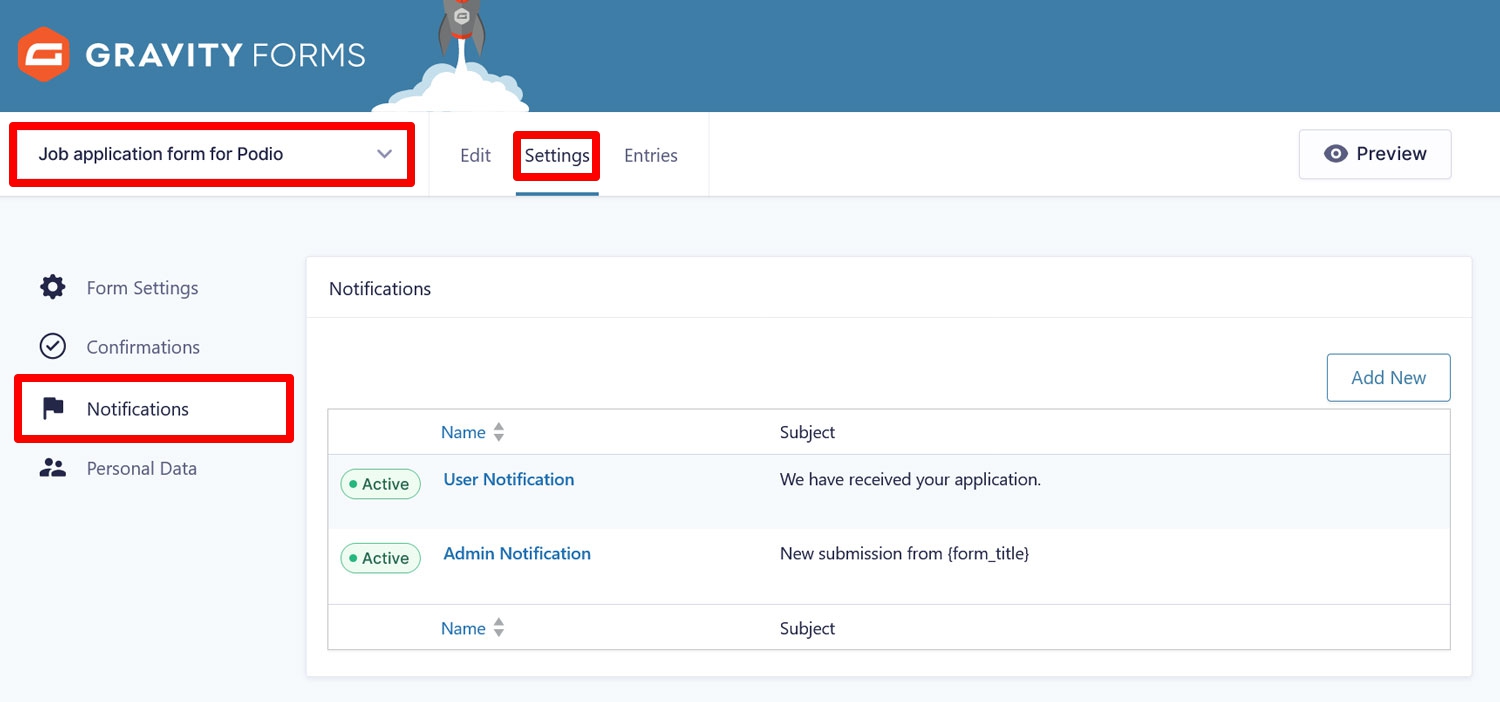
You find options to configure your confirmation in the form settings. Access them by hovering over Settings in the form editor and choosing Confirmations.
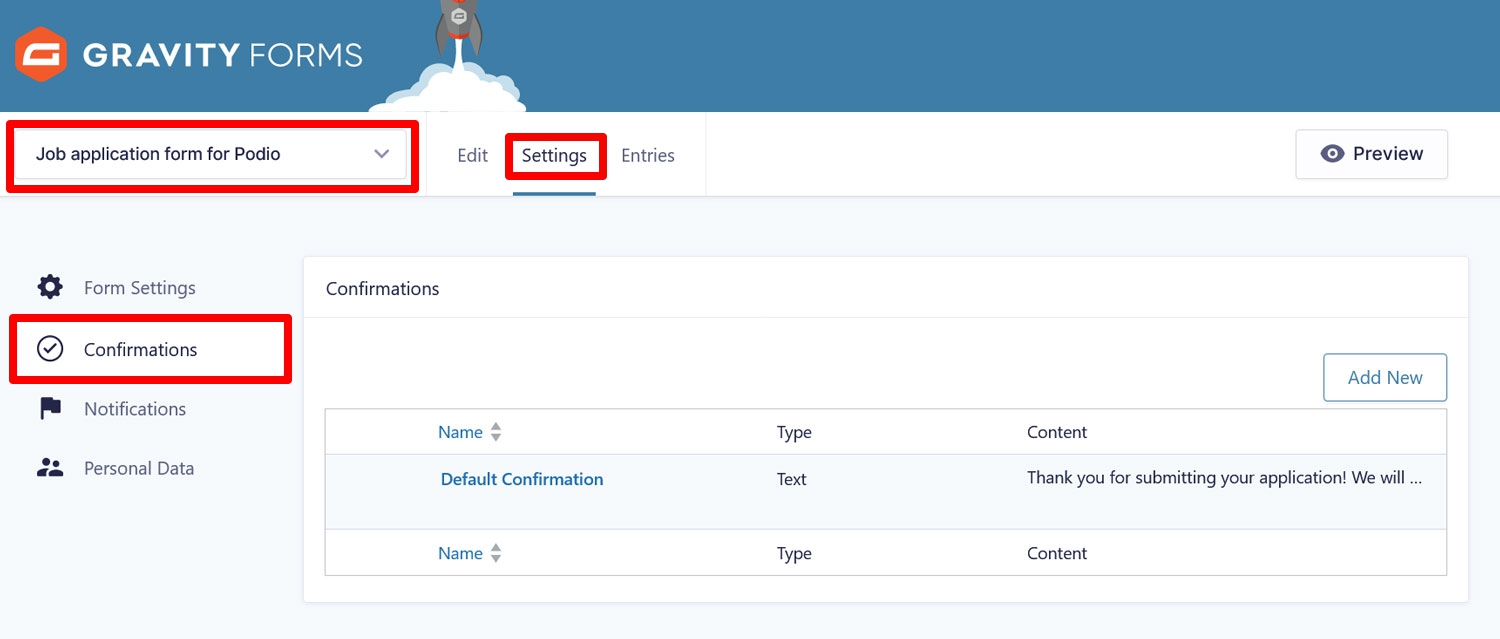
Alternatively, go to the Forms menu, move your cursor over the form in the list, then click on Settings → Confirmations. Either way gets you to the screen below.
You can edit the default confirmation or create a new one. Gravity Forms gives you plenty of options to customize it, including the option to redirect users to a separate confirmation page.
For more information, read up on this topic.
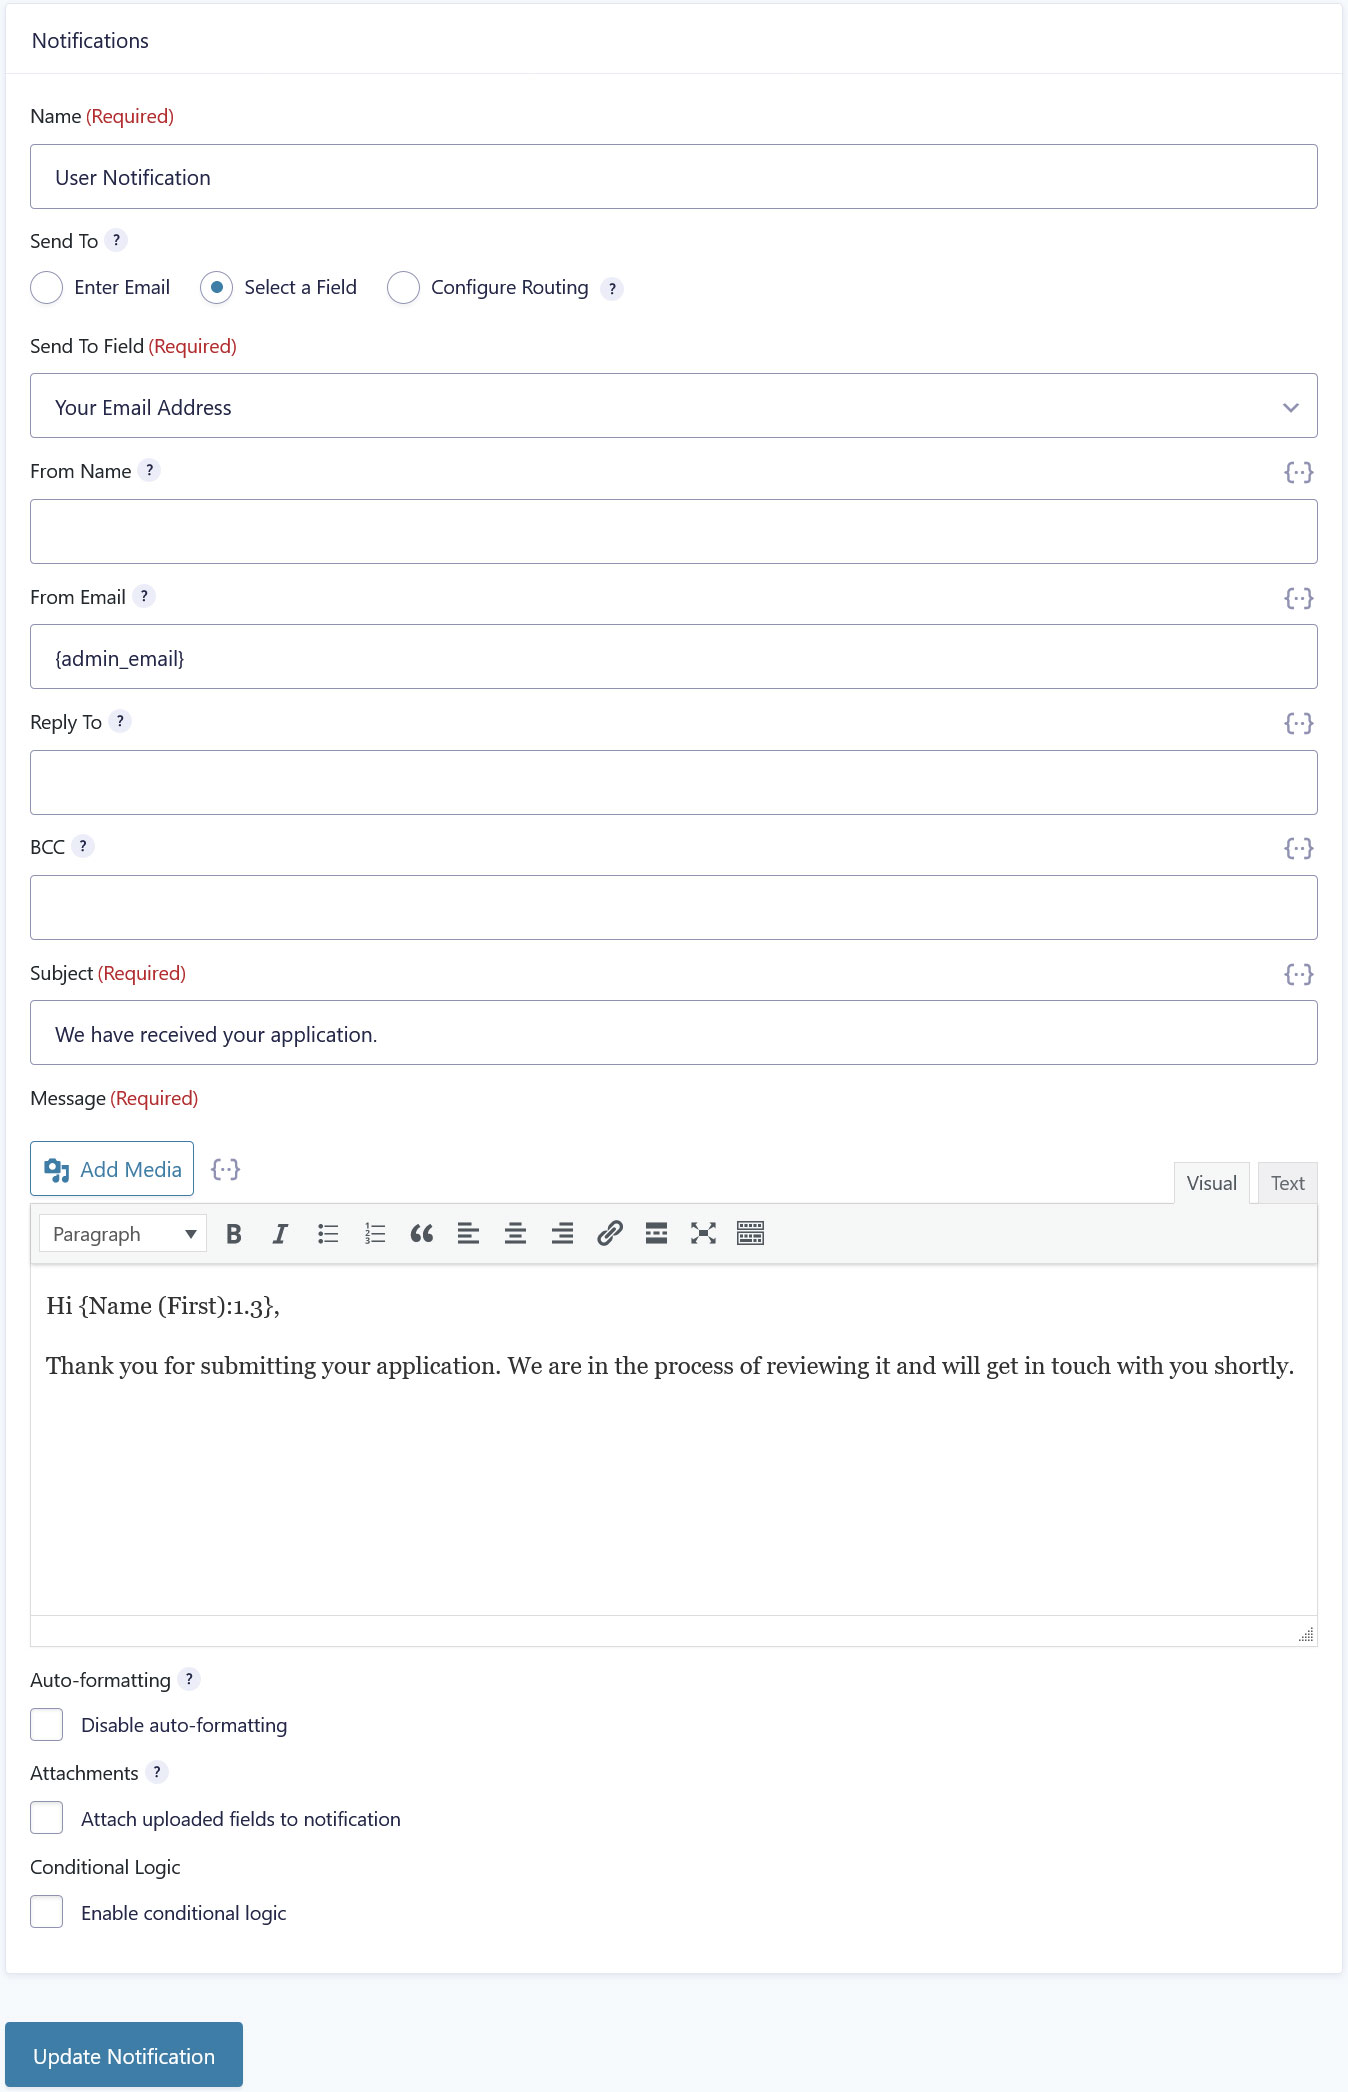
Notifications, on the other hand, are email messages sent to you and the people who submit your form. These are especially crucial for something like a job application to confirm that your company has received it and also send more information, such as next steps or how long it will take you to get back to applicants.
You find options to edit existing notifications and create additional ones in your form settings as well under Notifications.
Here, too, you have plenty of customization options, which you can learn more about in the documentation.
10. (Optionally) Use Conditional Logic
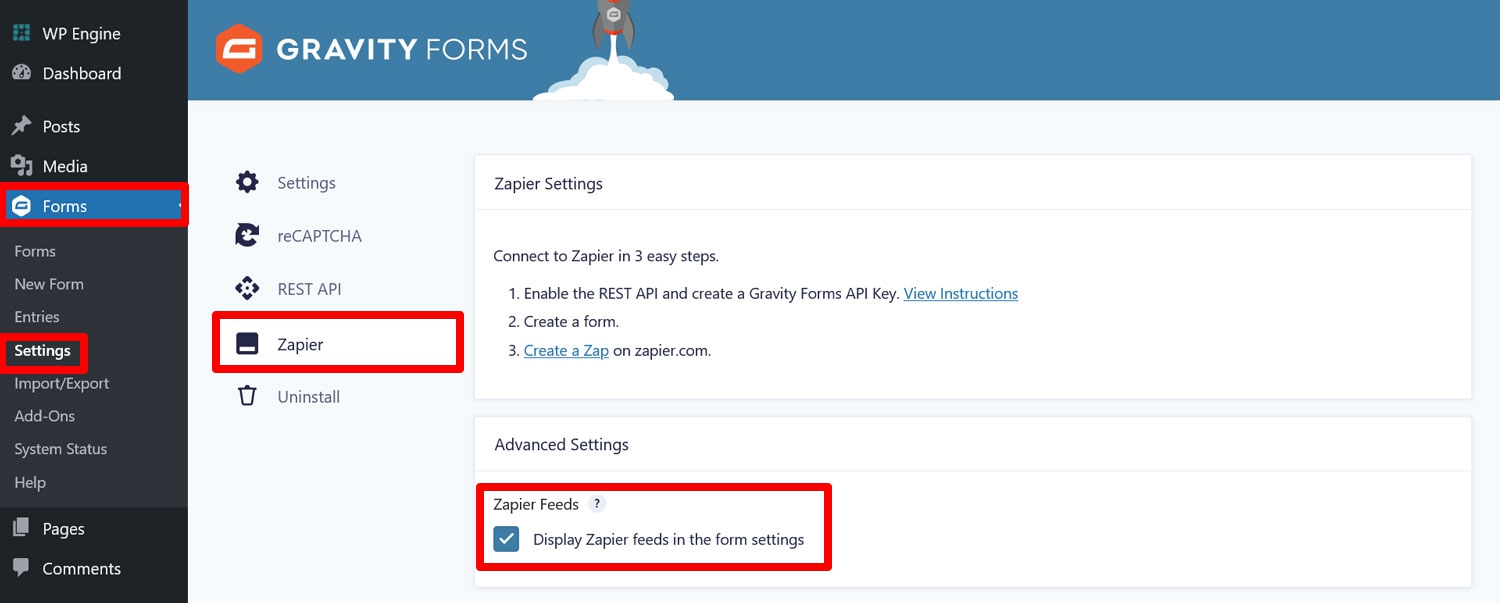
The final option to consider is Conditional Logic. As mentioned, it allows you to filter which job applications go through to Podio and which don’t.
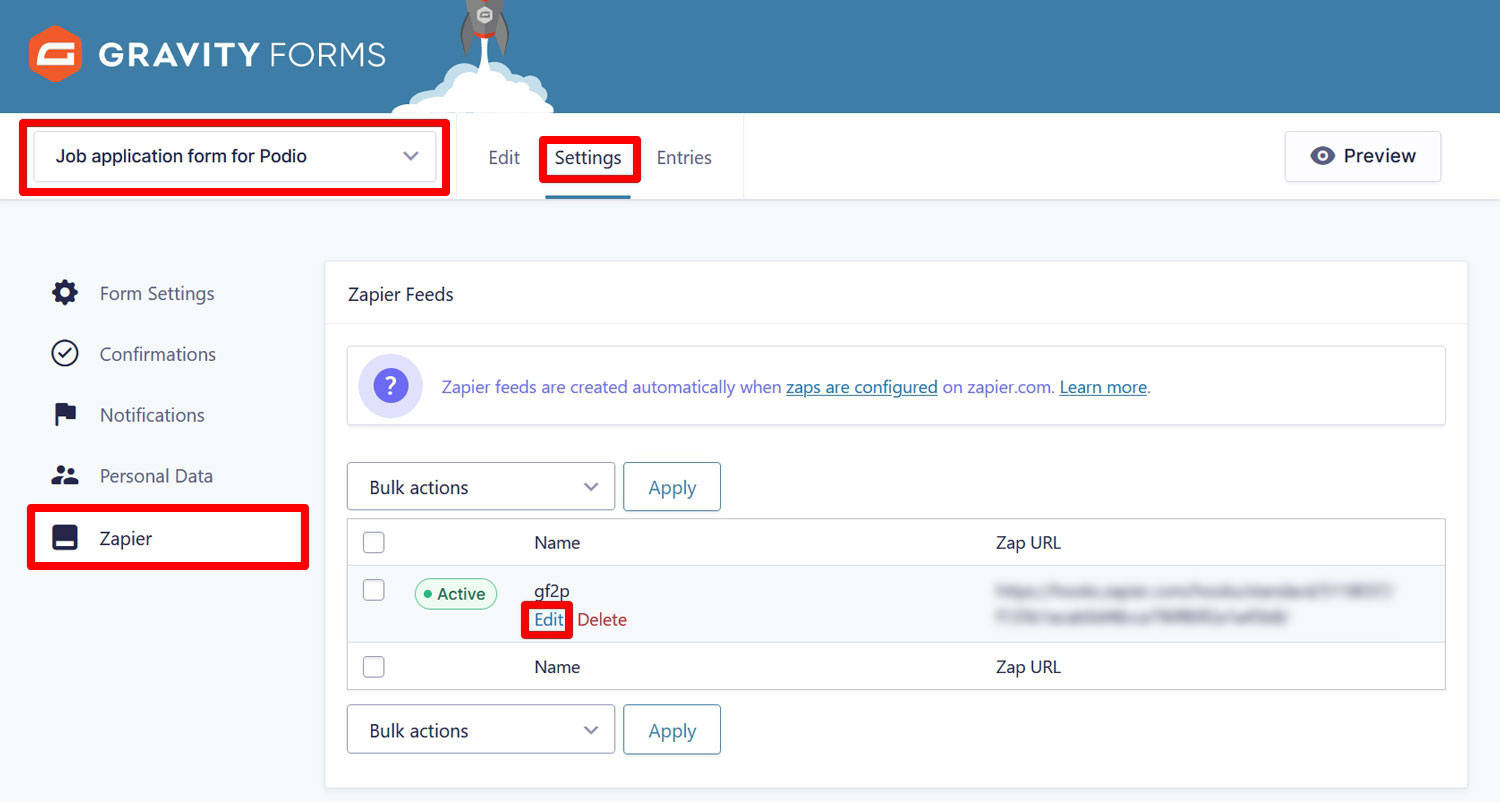
To enable it, you first have to go to Forms → Settings → Zapier and check the box where it says Display Zapier feeds in the form settings.
After that, a new Zapier menu appears in the form settings, where you can configure the feed, which is the part that controls what happens to your form data after submission. You should already have one here. Hover over it and click Edit.
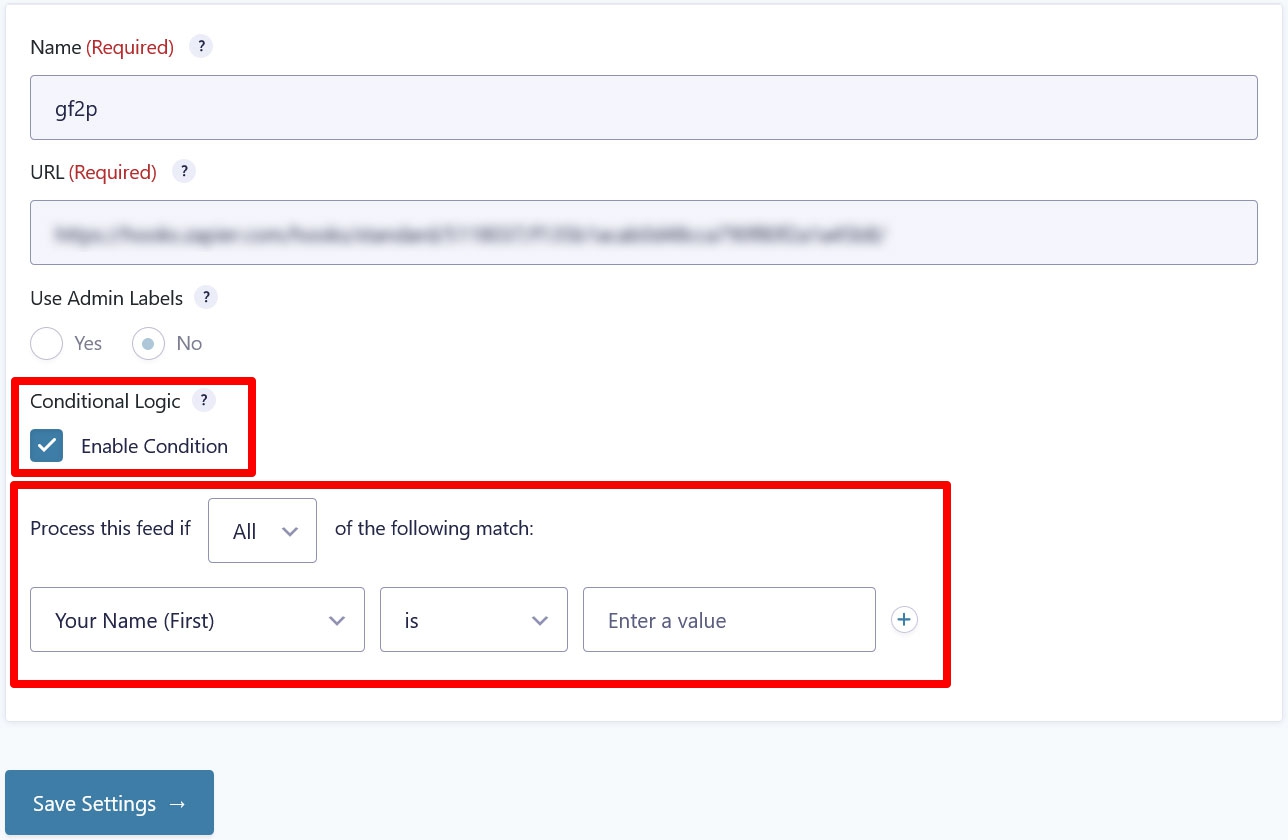
In the following menu, simply check the box next to Enable Condition, then set up your conditions with the drop-down menus as needed.
Here, too, we have a more information for you to check out.
11. Embed Your Form and Test That It Works
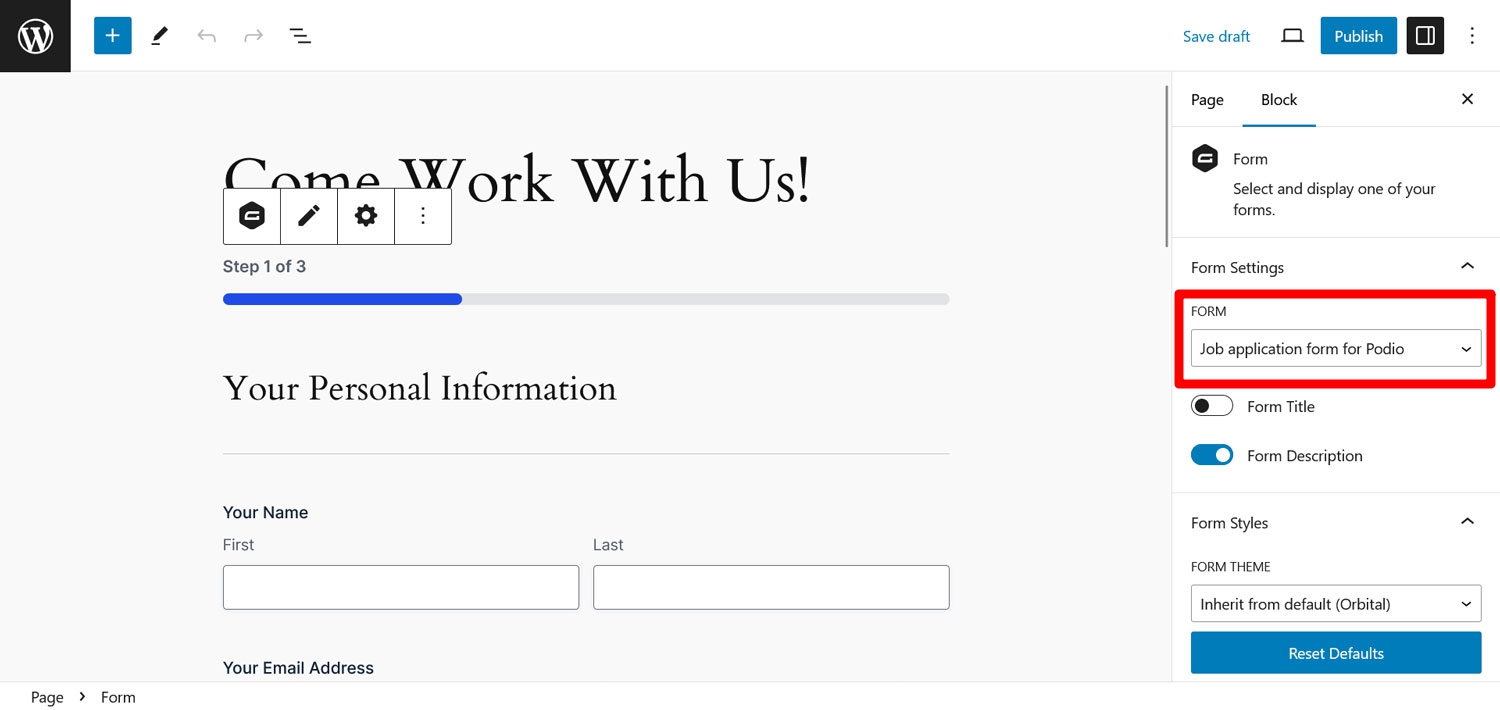
Once finished with all of the above, all that’s left is to embed your form and test it. Embedding happens in the WordPress editor using either the Gravity Forms block or shortcode.
Using either preview mode or the published page, input some sample data into your form and submit it.
Make sure you get the right confirmation and notifications and, most importantly, see that your information arrives in Podio.
If that is the case, your form is ready to go live on your site.
Gravity Forms and Podio Integration Done Right
Podio is an excellent organizational tool for companies. It allows you to collect, manage, and track all important information for your projects and make it available for the right people.
That includes data coming in through the web forms on your WordPress site. Using the Gravity Forms Zapier Add-On, you can easily create Podio items out of form submissions so they automatically become part of your workflows. There is absolutely no need to manually input that data.
In addition, you can set the whole thing up without coding knowledge or dealing with APIs. Everything happens in user-friendly visual interfaces. If that isn’t the dream, I don’t know what is!
Just a reminder, to use the Gravity Forms Zapier Add-On, you need a Pro or Elite license. It’s also possible to upgrade your existence license or test drive Gravity Forms on a free demo site.

If you want to keep up-to-date with what’s happening on the blog sign up for the Gravity Forms newsletter!
