How to Enable Anti-Spam Honeypot for WordPress Forms
If you’ve ever used a contact form on your website, you’ve probably encountered spam submissions. You know the ones – the canned, fake responses that look like they were written by a robot and often contain links that you probably shouldn’t click.
So, how do you prevent those annoying spam bots from taking over your form submissions, without sacrificing the experience of your real, human audience?
One effective option is to enable the anti-spam honeypot setting on your forms – a Gravity Forms built-in feature that is available for free with all license types.
Read on to find out more about honeypot, and how it’ll help you in your fight against spam form entries!
What is Honeypot?
Honeypot is an effective option when it comes to preventing spam form entries, and is just one of the many ways Gravity Forms can help you fight spam.
It’s a simple form field that is hidden on the front end, so your legitimate human visitors won’t see it or interact with it. But it works behind the scenes to catch and either block bot entries, or send them straight to spam for you to review later.
With Gravity Forms, you can decide how spam entries should be handled once honeypot is enabled on your forms – more on that later!
Why Enable Honeypot to Prevent Spam
Spam is not only frustrating, constantly having to sort through so many fake form submissions can be time consuming, expensive, and even risky in multiple ways:
- Wastes valuable time that could be better spent on more productive tasks.
- Overwhelms databases and email inboxes, which could cause performance issues or missed important messages.
- Distorts analytics and reporting, making it difficult to accurately assess audience engagement.
- Increases security risks, as spam often contains malicious links and phishing attempts.
Overall, form submission spam is a headache, a massive drain on resources, and can negatively impact site management and performance.
Enter Gravity Forms honeypot.
Enabling the Gravity Forms Honeypot
The good news is, the honeypot setting is a built-in feature of Gravity Forms, so enabling it is quick and painless. Let’s look at how to do that next…
How to Enable Honeypot
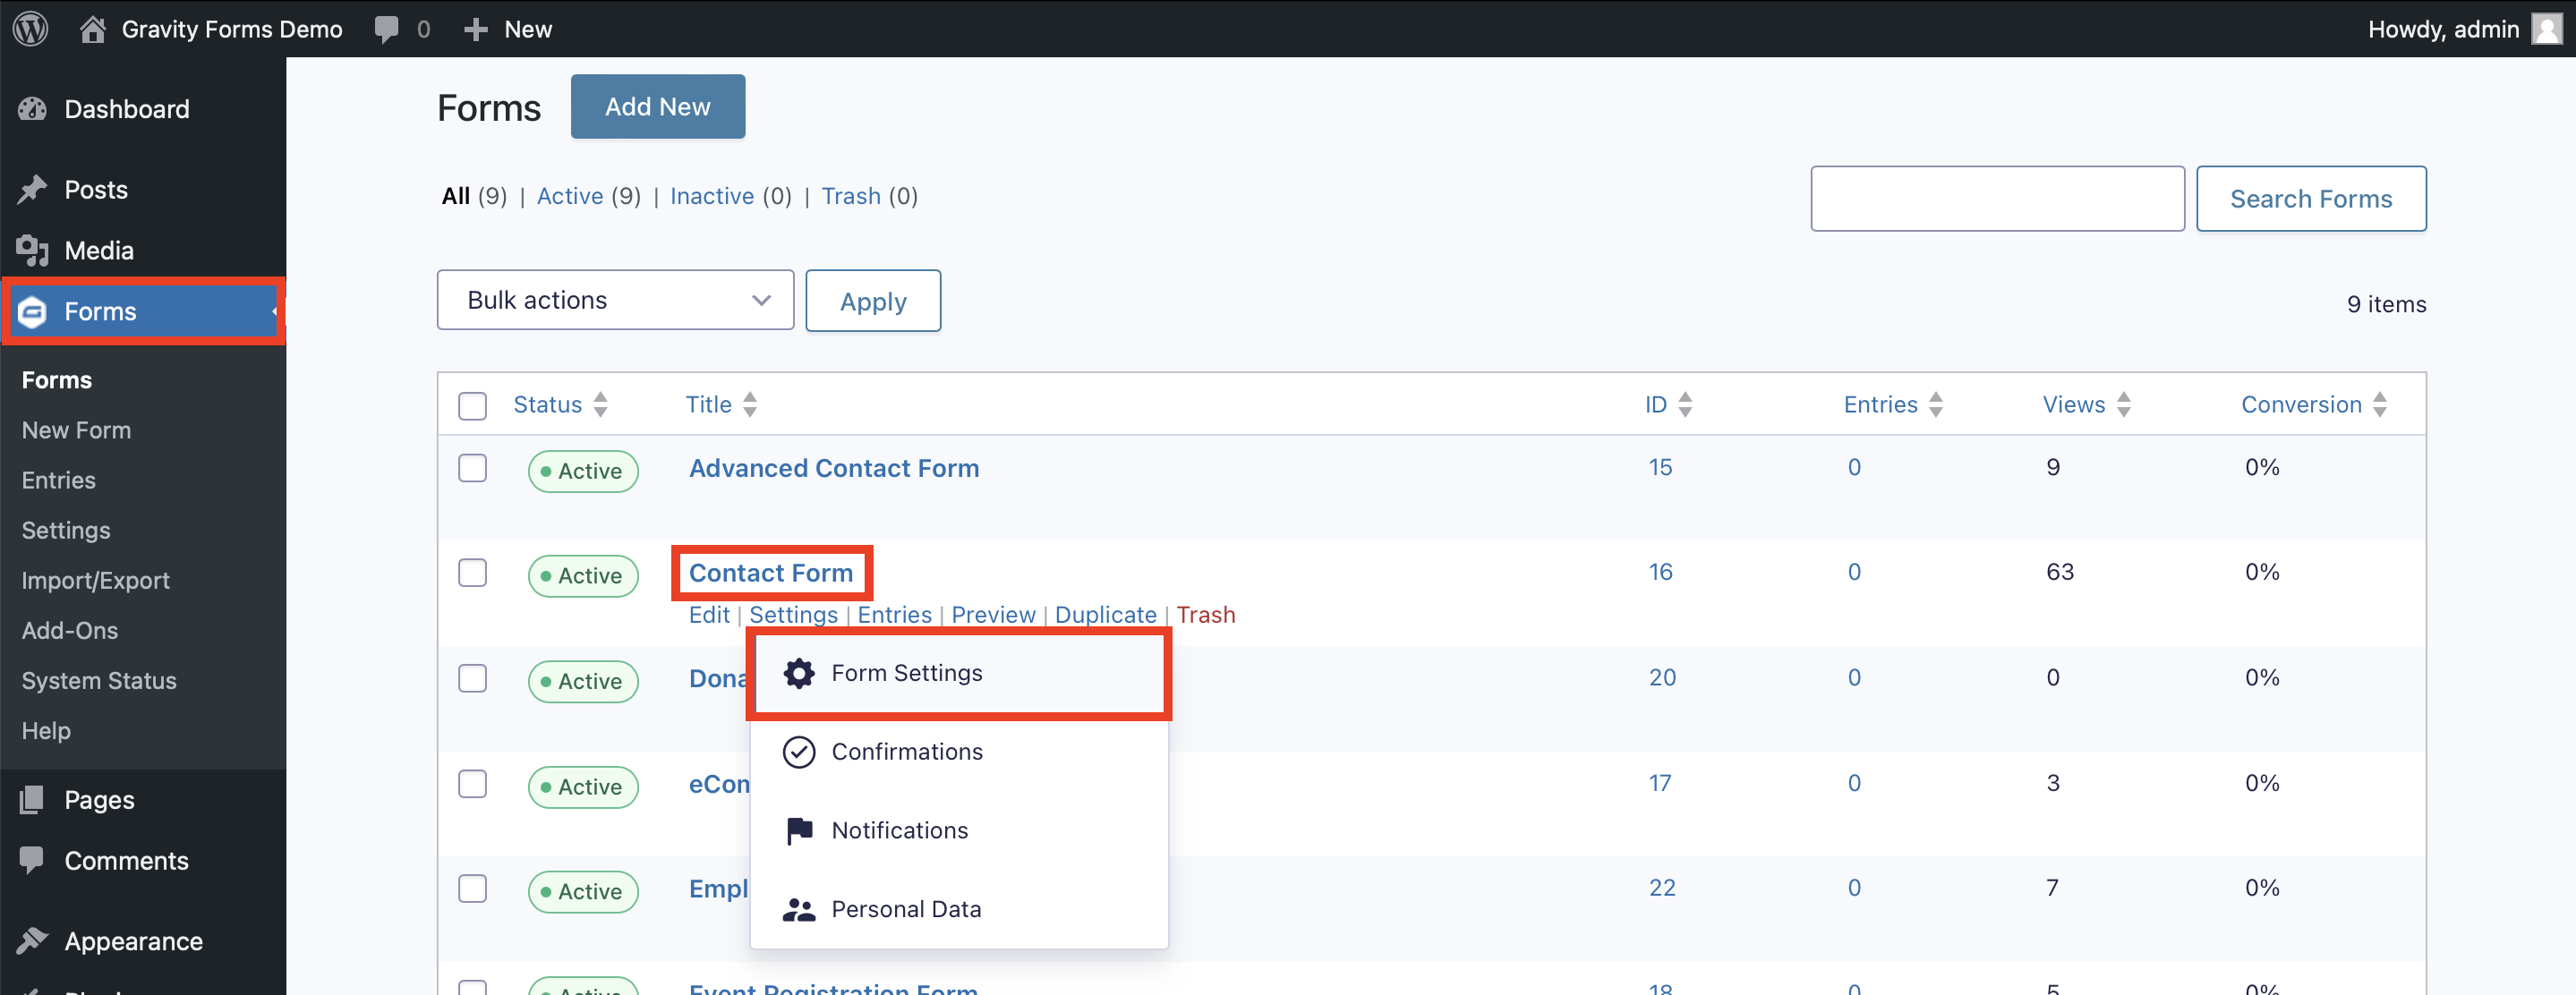
Start by navigating to your list of forms.
1. Hover over the form name, then under Settings, click Form Settings.
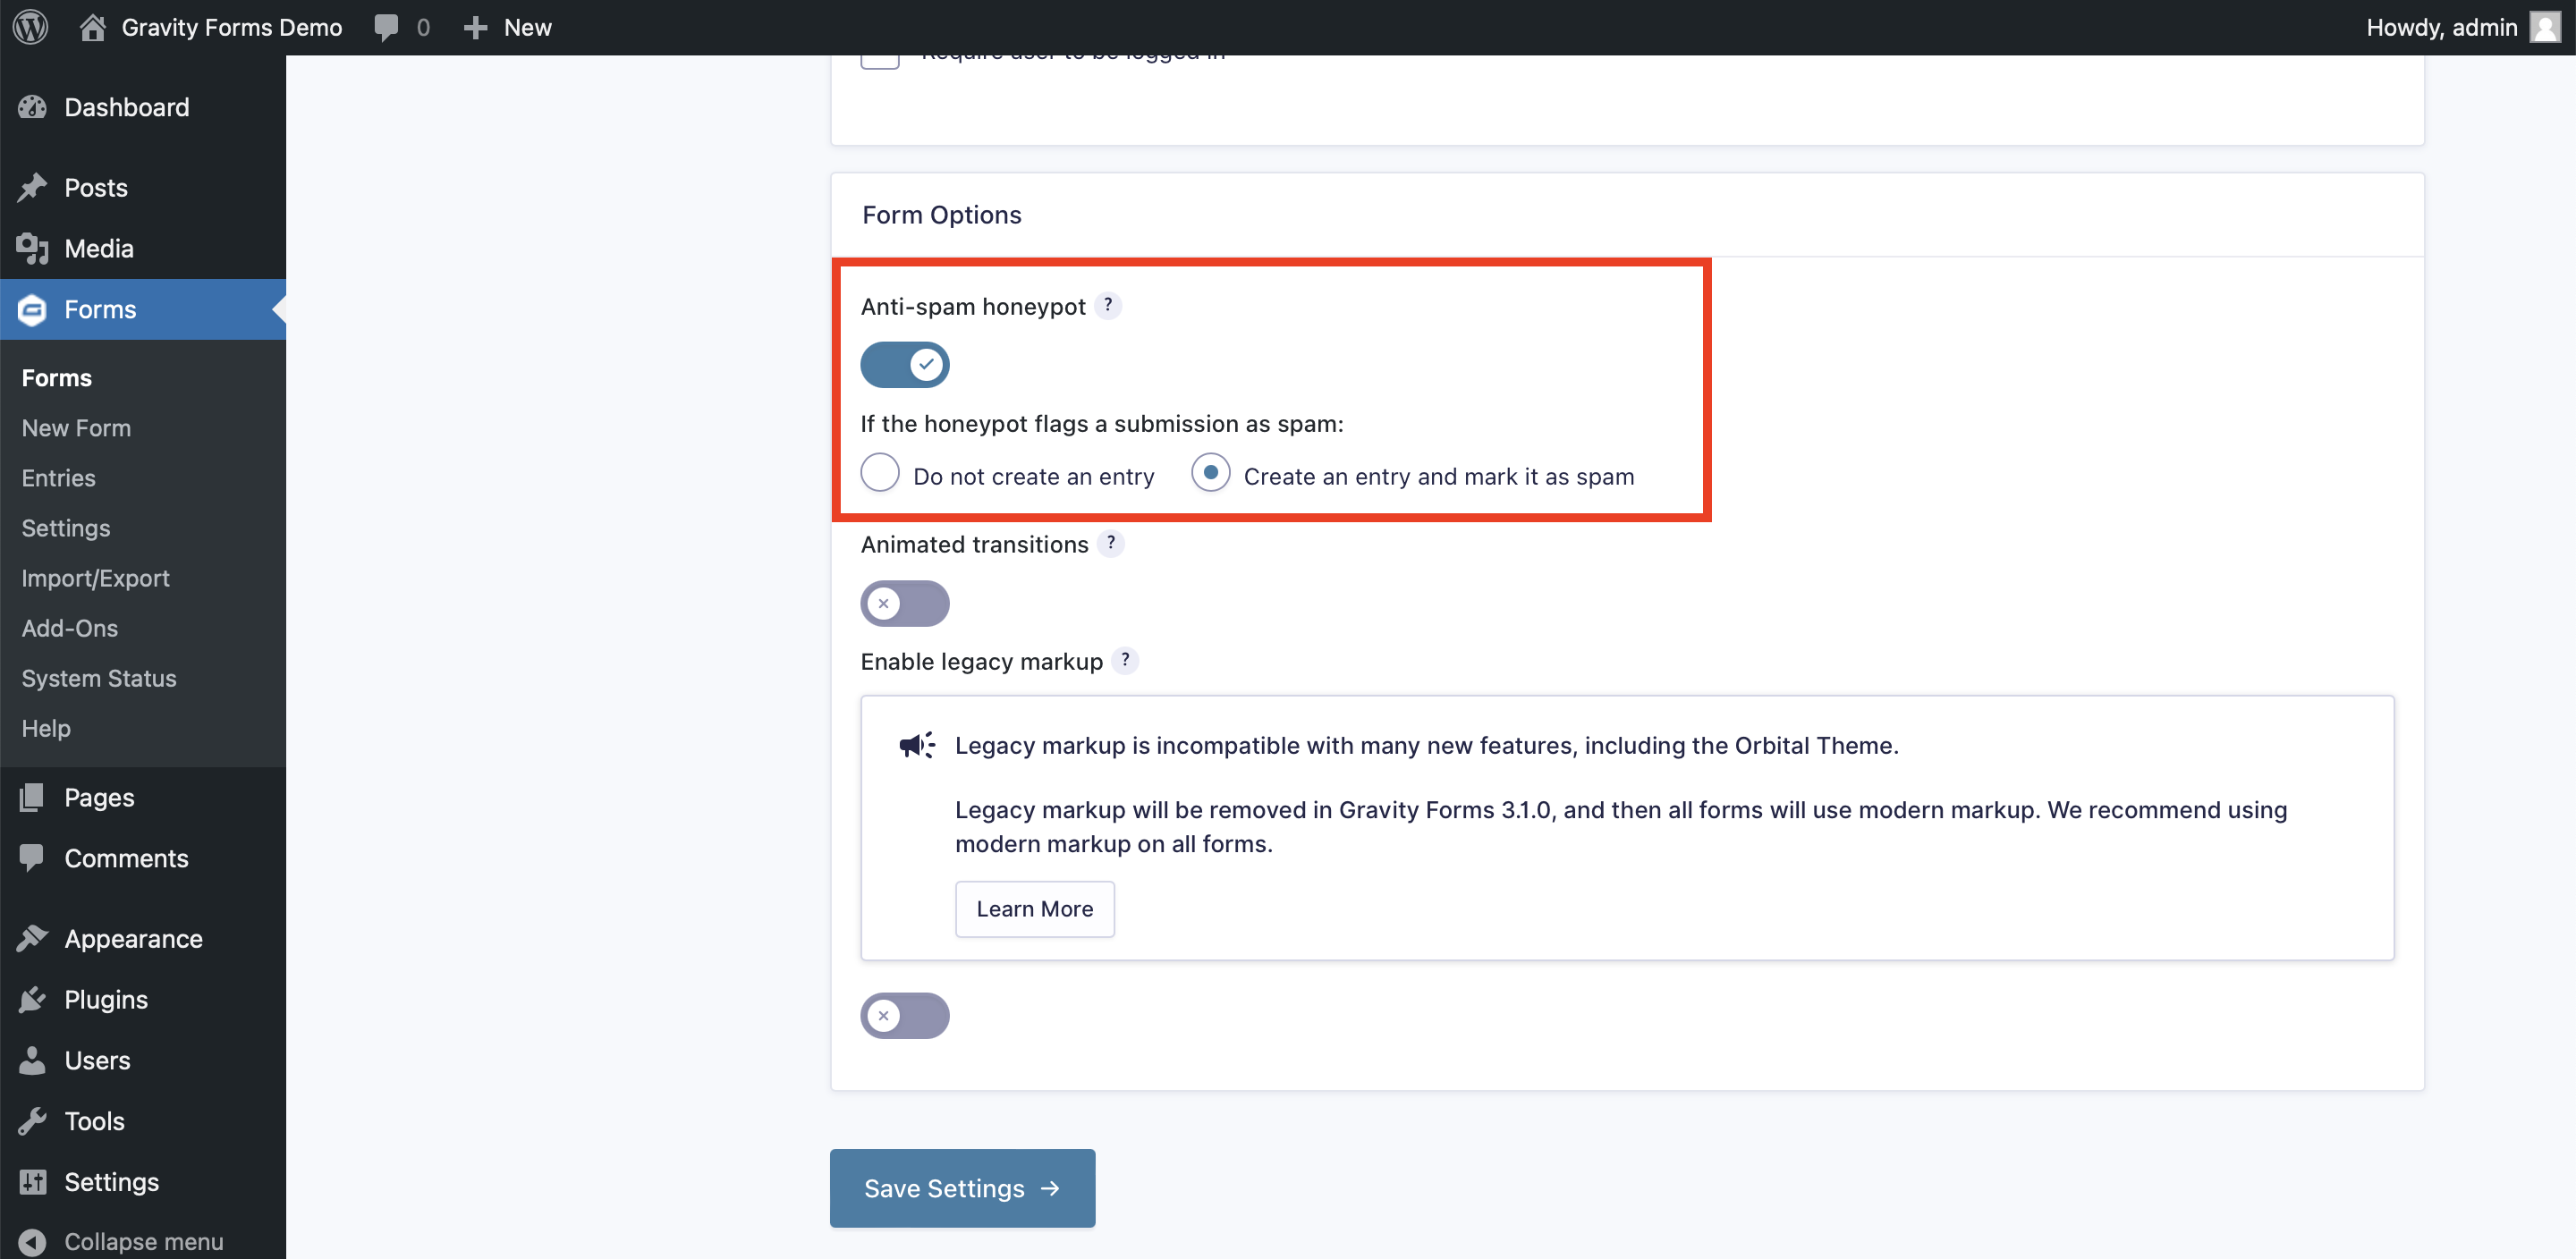
2. Scroll down to the Form Options section.
3. Toggle on the Anti-spam honeypot field.
4. Choose what should happen when the honeypot flags a submission as spam.
- Choosing Do not create an entry will block a form submission from being created altogether.
- Choosing Create an entry and mark it as spam will allow the form submission to be created, but will send it to your spam folder (more on that below).
5. Click Save Settings.
View Spam Form Entries
When you set up honeypot, choosing Do not create an entry means if a bot encounters and tries to submit your form, it will not reach your inbox. This can be a great catch-all solution and an easy way to avoid clutter.
If you’re worried about a legitimate response being flagged as spam, especially on your most important forms, we recommend you choose to Create an entry and mark it as spam.
With this option, new form entries that get caught by honeypot will still be created, but they’ll be set aside so you’ll still be able to view them later.
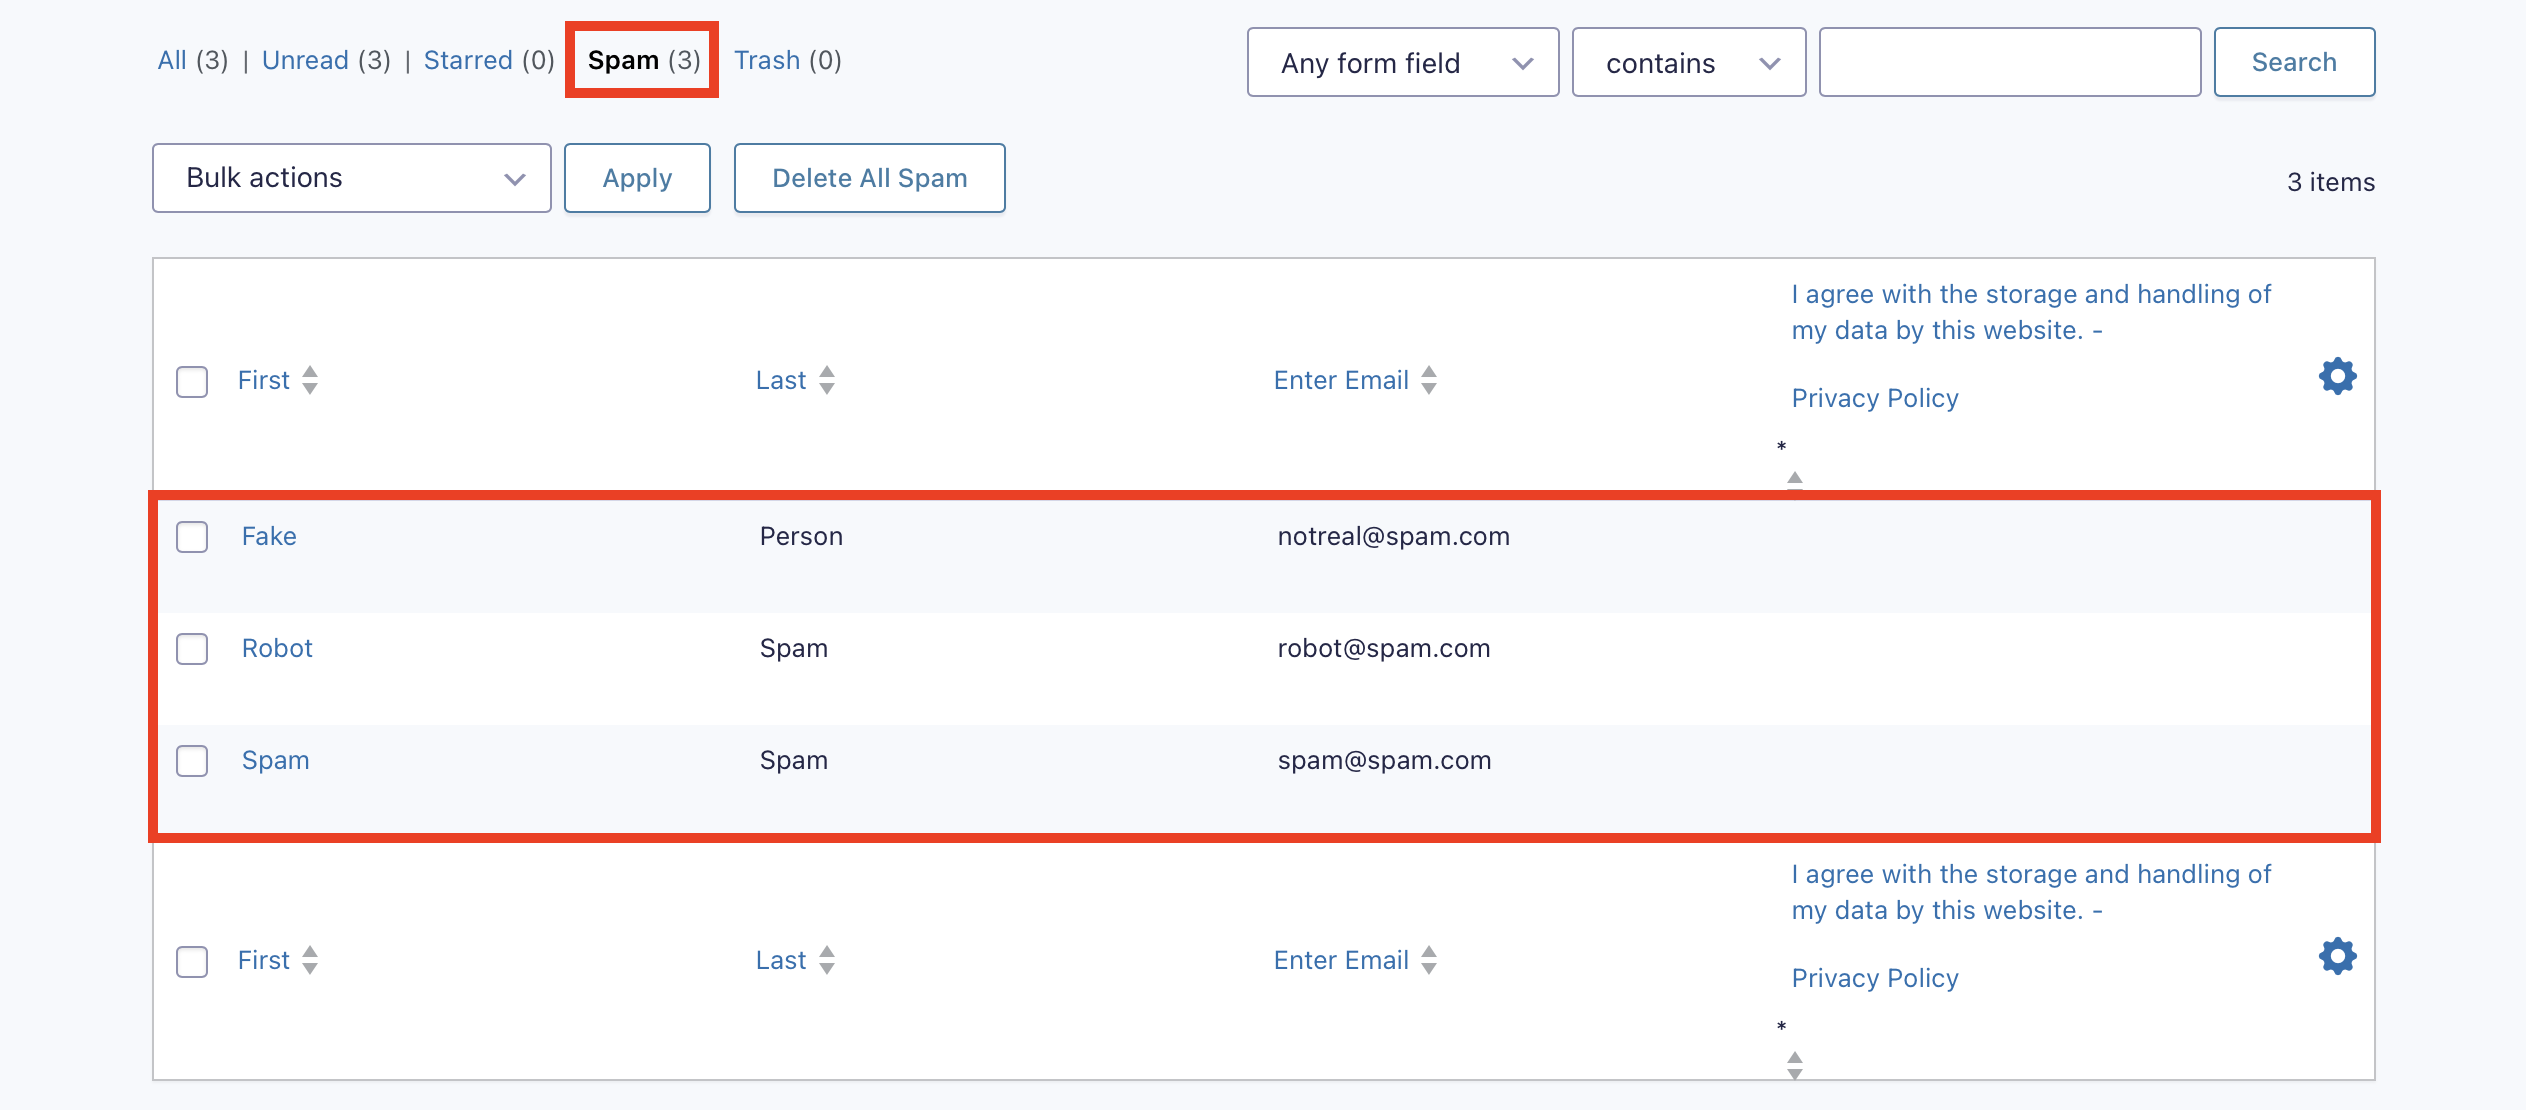
To view form responses that have been marked as spam, navigate to your form list and hover over the form title.
1. Click Entries.
2. Click Spam.
From here, you can review spam entries and take further action, like View the message, mark as Not Spam, or Delete Permanently.
More Ways to Stop Spam
Using honeypot is a quick and effective option when it comes to fighting spam form submissions, but it’s not the only method available.
If you’re really struggling with spam, consider putting multiple layers of protection in place. We put together the ultimate guide to anti-spam protection, where you’ll find even more tools and tactics to help you put an end to spam once and for all.
Any Gravity Forms license gets you access to all the anti-spam tools mentioned in our ultimate guide, including:
- Google reCAPTCHA – Gravity Forms offers integration with both Google reCAPTCHA v2 and v3, giving you options when it comes to preventing spam form entries.
- Akismet – The Gravity Forms Akismet Add-On integrates with one of the most trusted anti-spam solutions for WordPress and WooCommerce.
- Cloudflare Turnstile – The Gravity Forms Cloudflare Turnstile Add-On offers a privacy focused, frustration-free alternative to Google reCAPTCHA.
For more anti-spam measures, check out these add-ons by our certified developers. While they weren’t developed by Gravity Forms directly, they have received our stamp of approval:
- Zero Spam by GravityKit – This add-on works automatically to protect against spam, with no user input or settings configuration required.
- Limit Submissions by Gravity Wiz – Easily limit the number of entries that can be submitted by a variety of conditions including IP address, user, email, and so on.
For more information on the Gravity Forms anti-spam toolkit of built-in features and add-ons, check out the documentation.
Ready to Stop Spam?
If you’re already using Gravity Forms, you can enable the built-in honeypot setting on any of your forms right now.
If you’re yet to get started with Gravity Forms, we’ll give you your very own free, personalized demo site so you can check it out for yourself.
And when you’re ready to make a purchase, check out our pricing page to decide which license is right for you!

If you want to keep up-to-date with what’s happening on the blog sign up for the Gravity Forms newsletter!


