How to Accept Venmo Payments on WordPress
Accepting Venmo payments on your WordPress website is a smart decision. With its widespread popularity, particularly among key demographics, Venmo offers a seamless and convenient way for users to make mobile payments. Adding it as a payment option on your WordPress site can enhance the shopping experience and potentially increase sales.
With the Gravity Forms plugin and the PayPal Checkout Add-On, you can very easily add Venmo to your website and benefit from all the added form-building features the plugin offers.
If you want to learn more about the benefits of equipping your WordPress site with Venmo payments and how exactly to do it, this article is for you.
Benefits of Accepting Venmo Payments on Your WordPress Website
Venmo is an app that makes it easy to transfer money between people. You can use it to pay online, in apps, stores, and more. It has more than 78 million users, many of whom are in a younger demographic.
81% of Venmo users are under the age of 45, and more than half are 34 and younger. There are even options for teenagers. Consequently, if your site’s target group fits those demographics, accepting their preferred payment option makes it more likely they will purchase from you.
Venmo is a trusted brand among its users, to the point that the app’s name has become a verb. Just like we google things, people now often ask others to “Venmo” them money.
The reason for that is that it makes paying frictionless. You can simply transfer money using your mobile phone. Plus, Venmo offers buyer protection and the social component of displaying your purchases online.
It is important to note that Venmo is only available in the US.
Why Use Gravity Forms and the PayPal Checkout Add-On?
Since Venmo is owned by PayPal, you can easily integrate it into your WordPress site using Gravity Forms and its PayPal Checkout Add-On. Going the Gravity Forms route has many benefits:
- Easy setup and integration – Gravity Forms makes adding Venmo as a payment option to your site as easy as ticking a box – literally!
- Drag-and-drop form builder – You can create your payment forms in a beginner-friendly interface that works seamlessly in the WordPress dashboard. No coding required.
- Quick-start payment templates – You can either start with a blank form or use one of the many templates from the template library to speed up the process significantly.
- Fully customizable forms – Collect as much or as little information from your customers as you need.
- Lots of integrations and extensions – Gravity Forms lets you add many more features to your payment forms to make them more valuable and user-friendly.
- Well-supported and secure – Our plugin complies with the highest safety standards. We also offer comprehensive support and detailed documentation for any problems.
- Not just for ecommerce – You can use Gravity Forms for much more than payment forms. Build anything from donation forms to newsletter sign-up forms to restaurant order forms and beyond.
How to Add Venmo Payments to WordPress
To offer Venmo payments on your WordPress site and to follow along with this tutorial, you’ll need:
- An active Gravity Forms Pro, Elite, or Nonprofit license, and the main Gravity Forms plugin installed on your WordPress website. If you are not a Gravity Forms customer yet and want to try the plugin out before committing, you can always sign up for a free Gravity Forms demo. It comes with all the functionality you’ll need to follow along with this tutorial.
- A PayPal business account. Plus, to use the sandbox testing environment, you’ll want to sign up for a developer account as well.
- Your business needs to be located in the United States, since that’s currently the only place where Venmo is available.
- Your website must have an SSL certificate in order to process sensitive payment information. If you don’t have one yet, talk to your hosting provider.
1. Install the PayPal Checkout Add-On
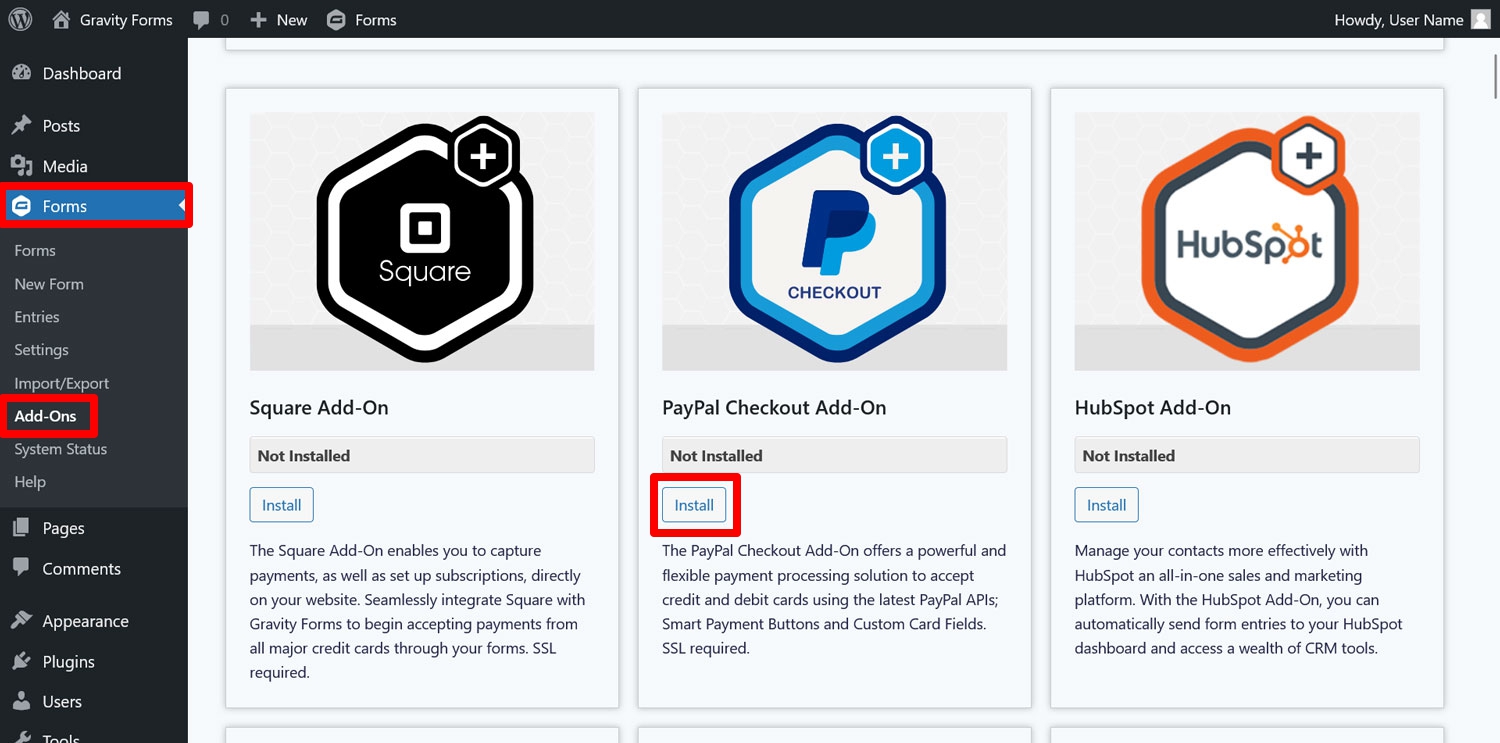
First, log in to your WordPress website, go to Forms → Add-Ons. Look for the PayPal Checkout Add-On by name and click Install.
Once installed, be sure to click Activate.
2. Connect Your Site to PayPal
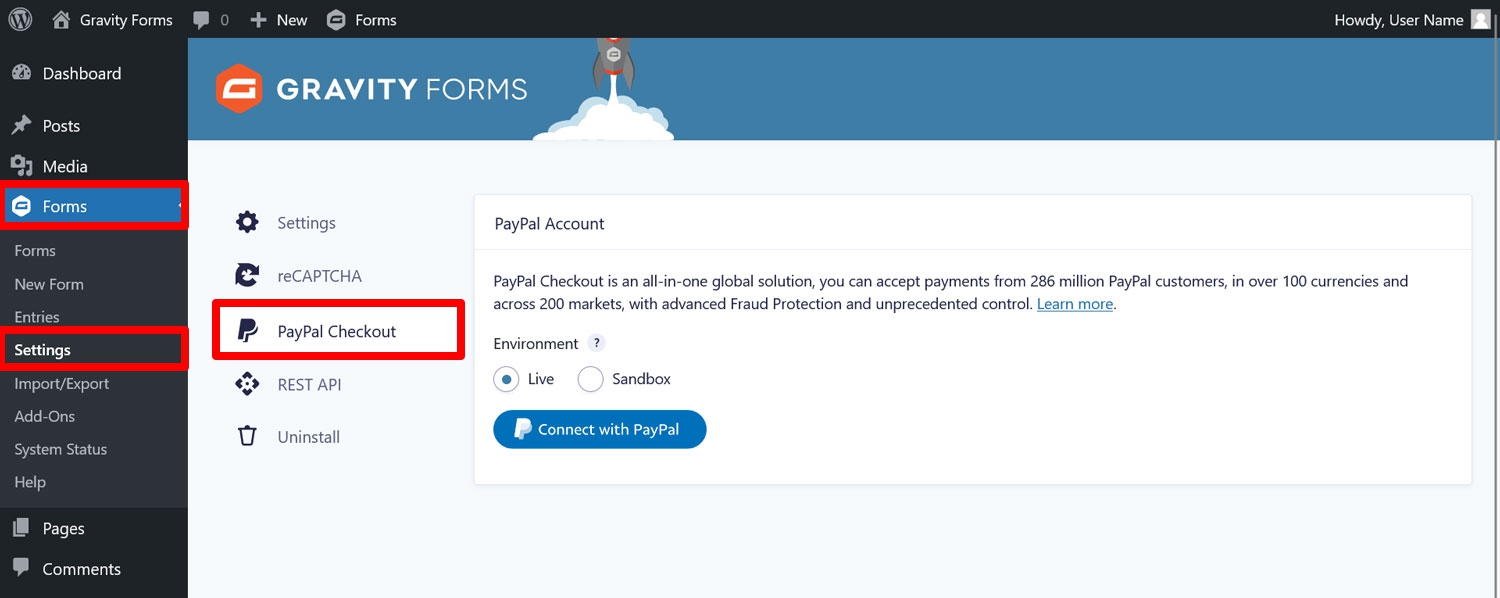
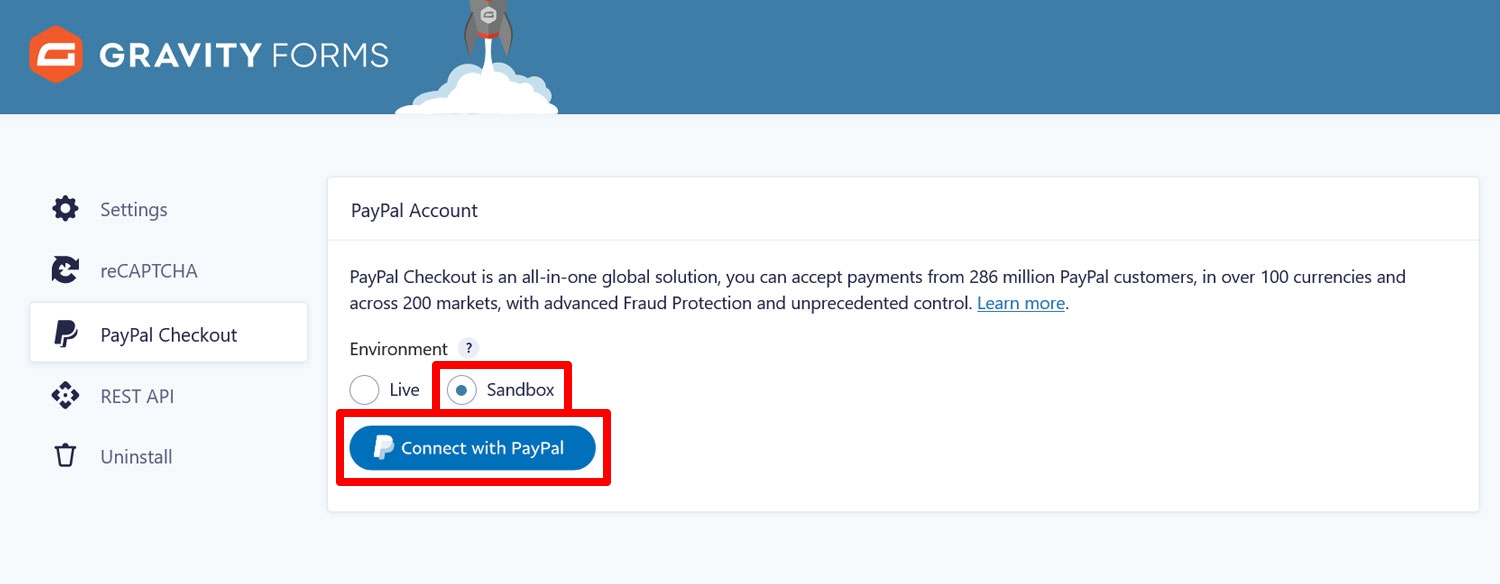
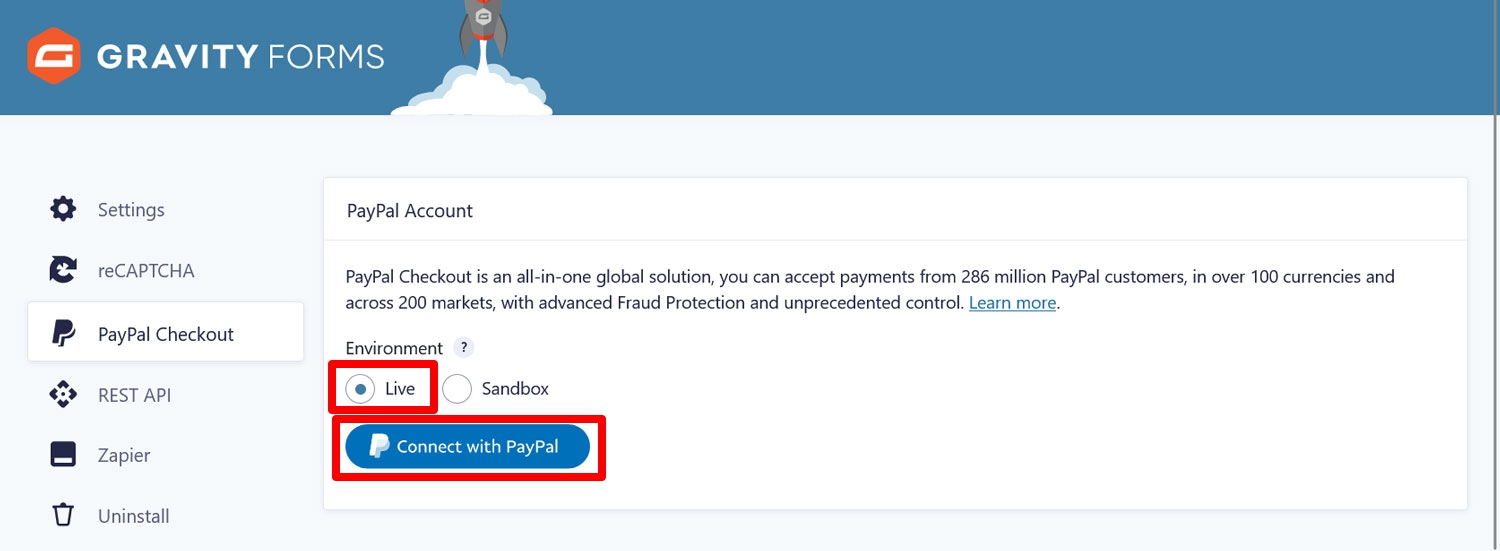
In order to use Venmo in WordPress, your site needs to be connected to PayPal (there is no need for a separate link to Venmo). To establish the connection, go to Forms → Settings → PayPal Checkout.
Here, make sure to choose Sandbox mode. This allows you to test your setup first without real money being exchanged.
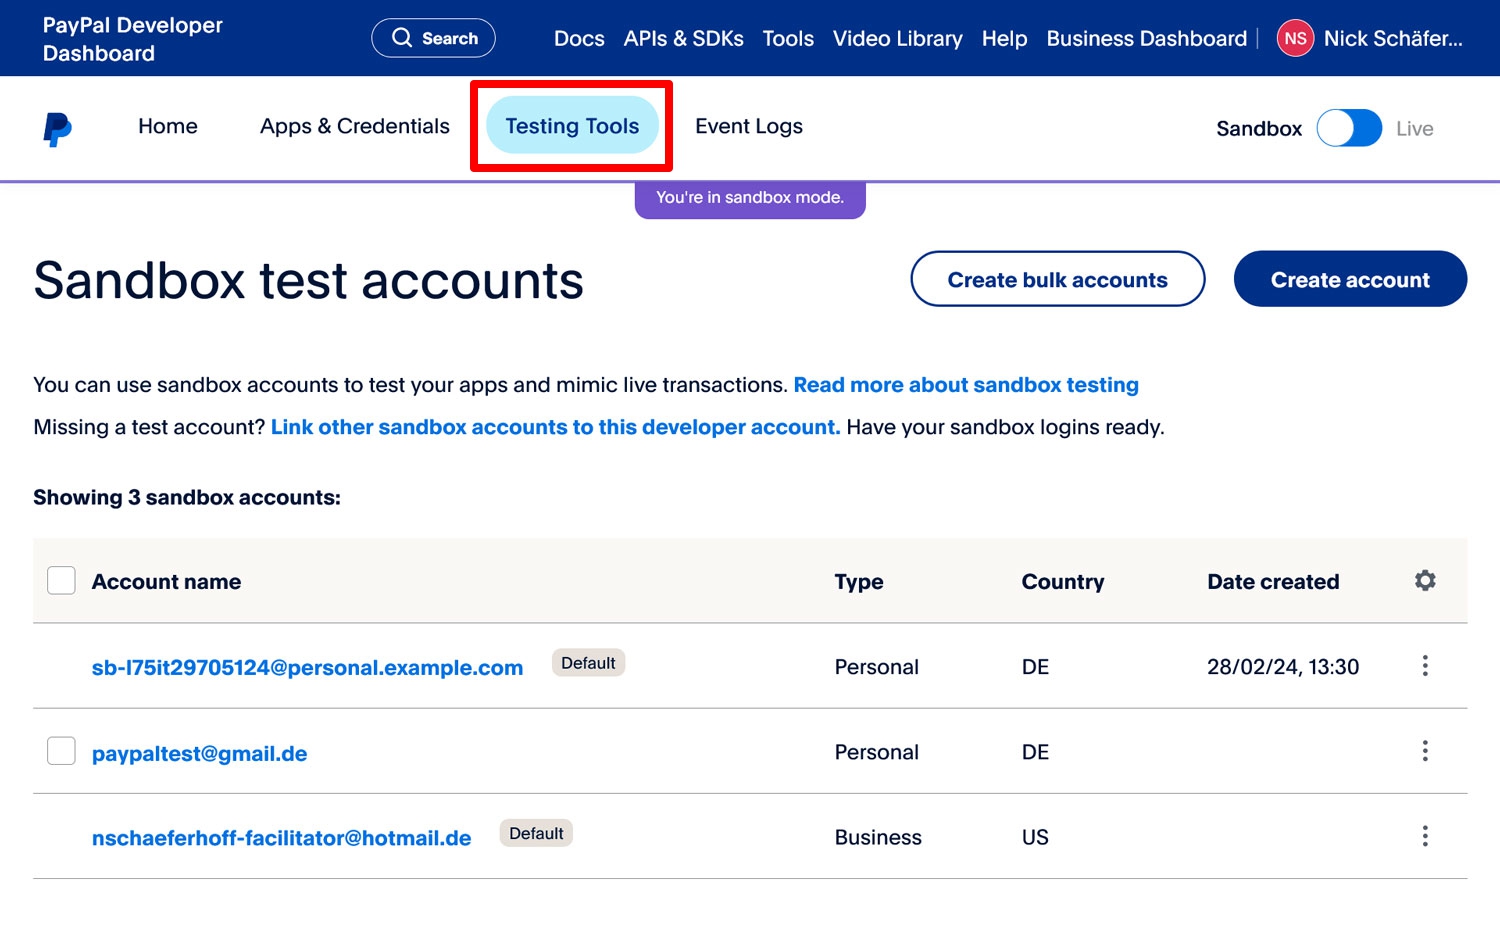
To use the PayPal sandbox, you need special credentials. You can find those in your developer account under Testing Tools → Sandbox Accounts.
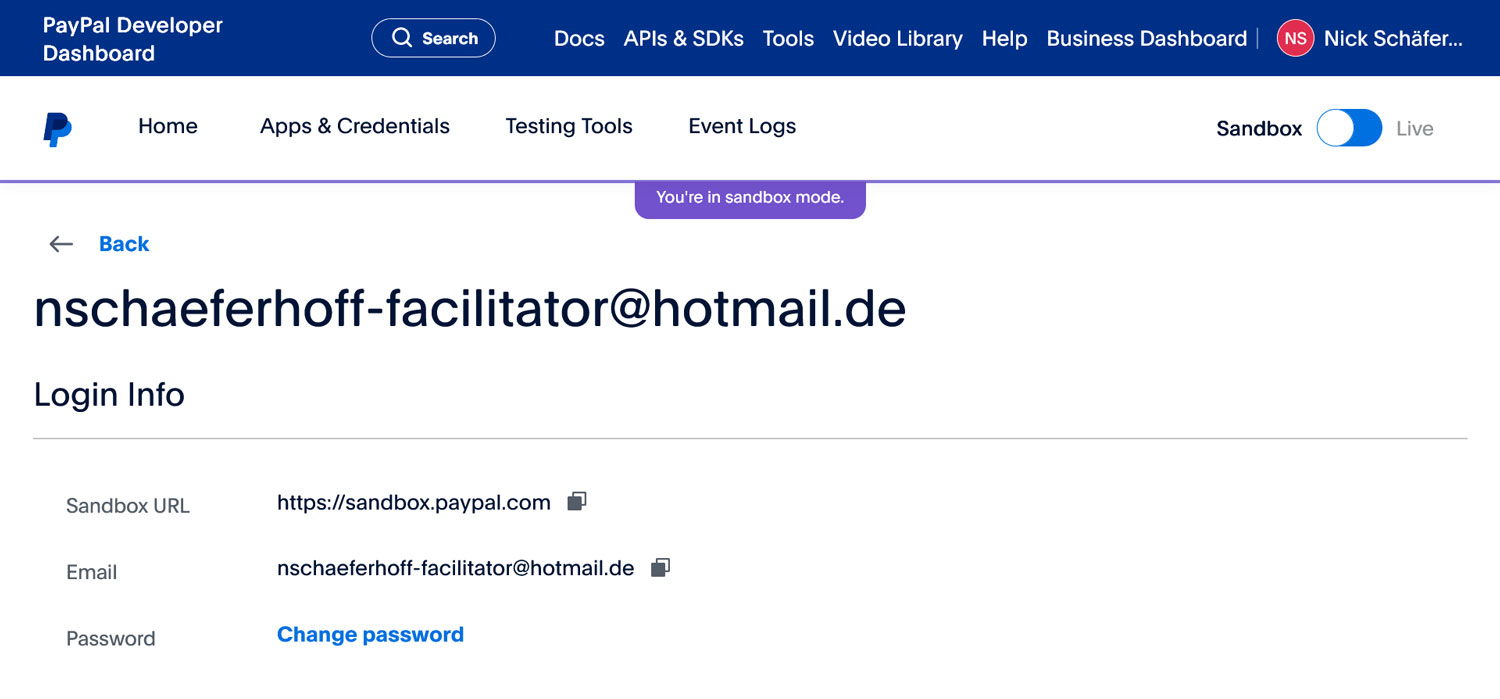
You can either use an existing account or create a fresh one. The important thing is that you end up with an email address and password.
When you have those, go back to your WordPress site and click Connect with PayPal.
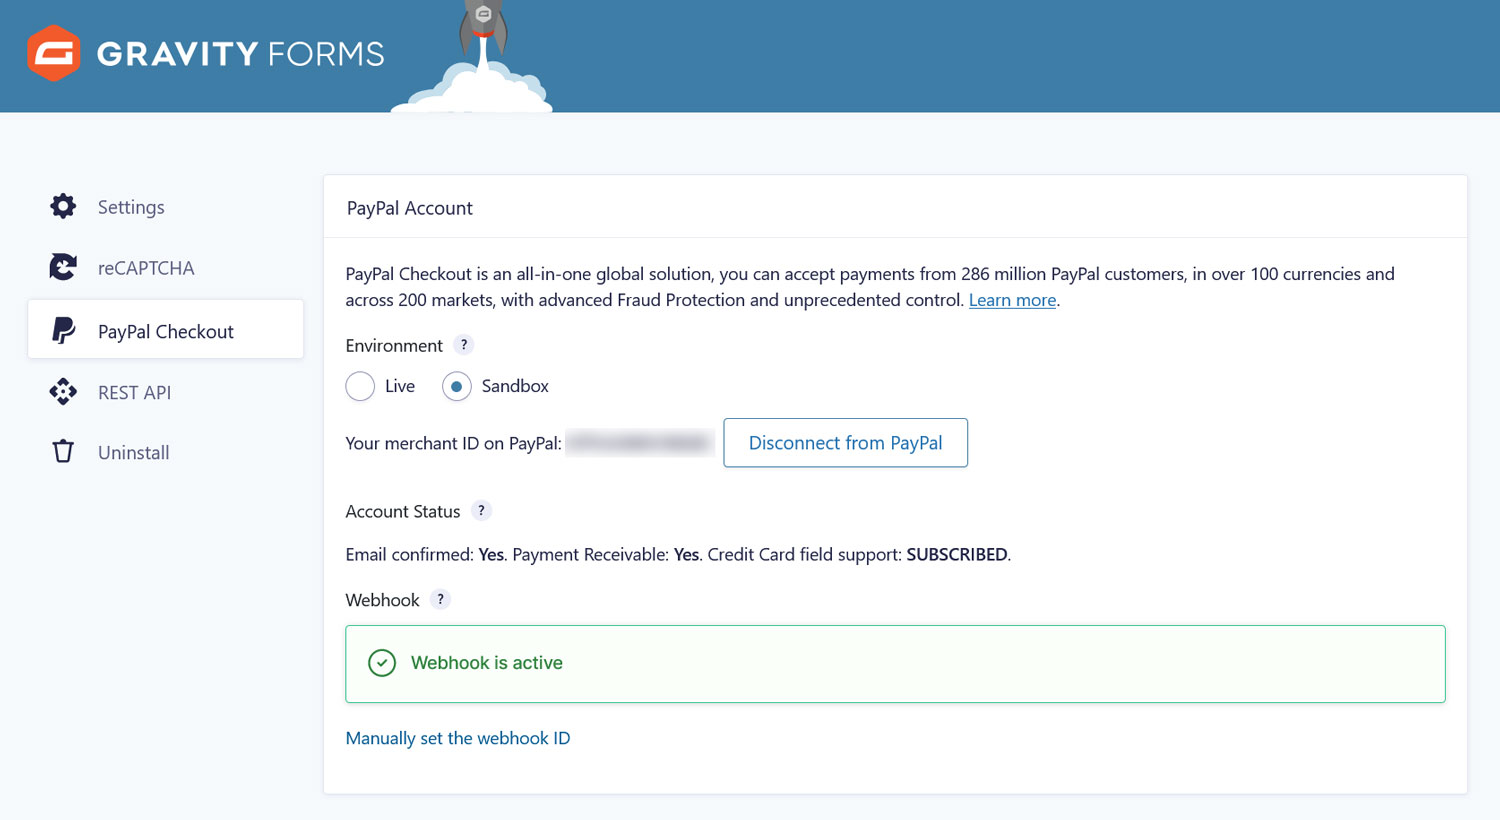
You will be asked to sign in to PayPal. Here is where you’ll enter the sandbox credentials from the previous step. You should automatically return to the WordPress dashboard afterward and see that the connection has been established.
3. Create Your Payment Form
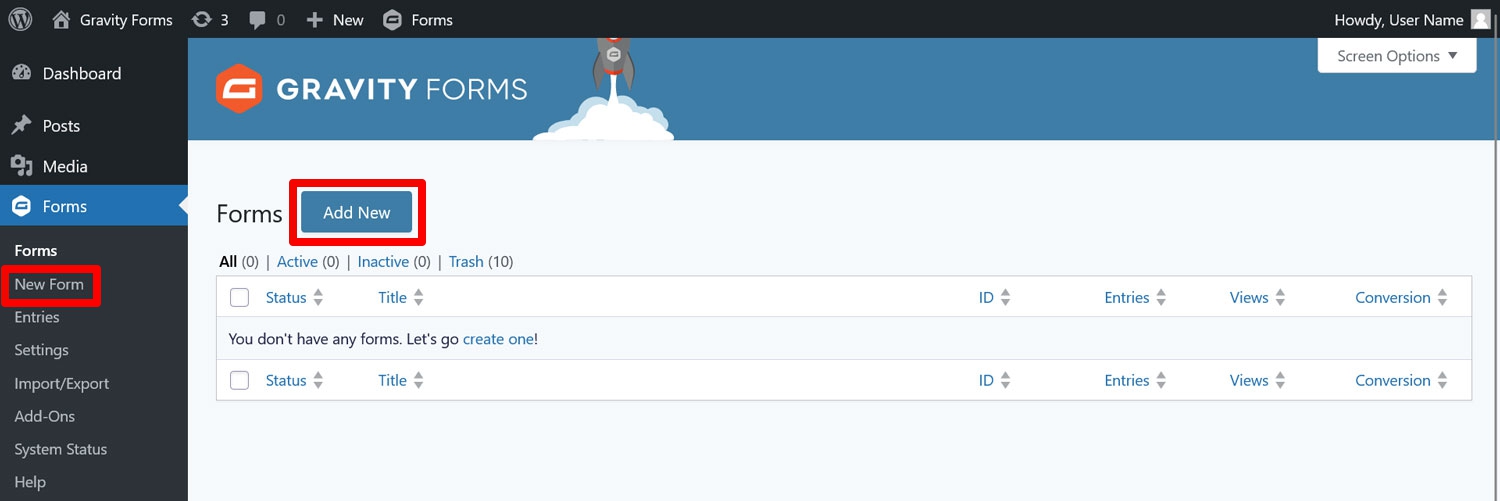
Next, create a form to process Venmo payments. From your WordPress dashboard, navigate to Forms → New Form/Add New.
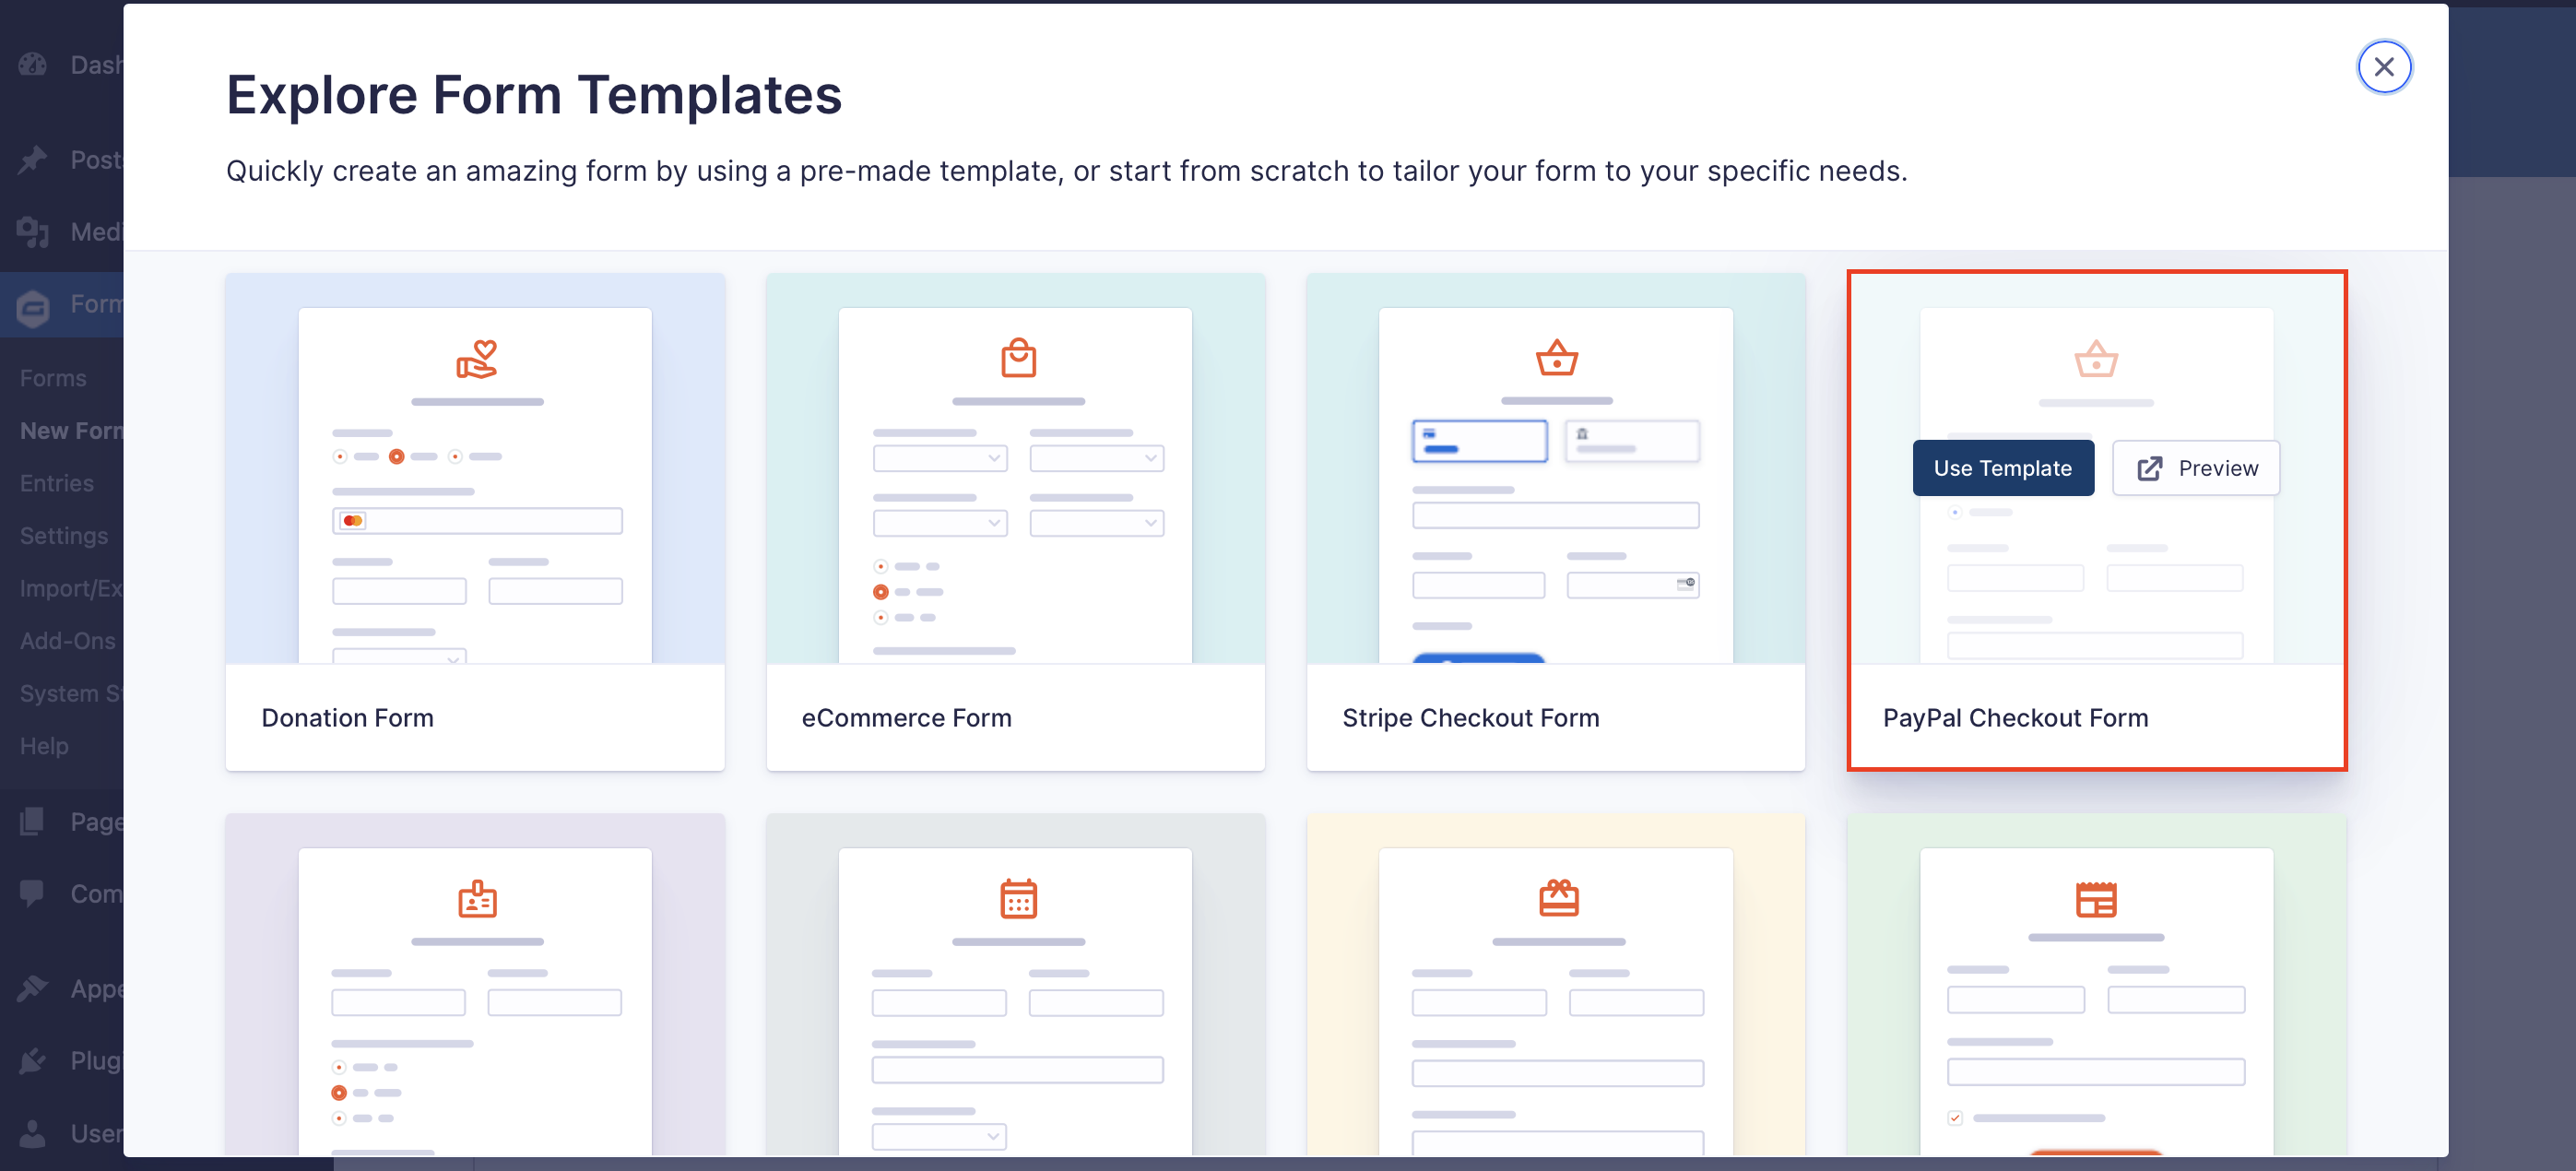
Next, you can choose to start with a Blank Form or use one of the aforementioned templates.
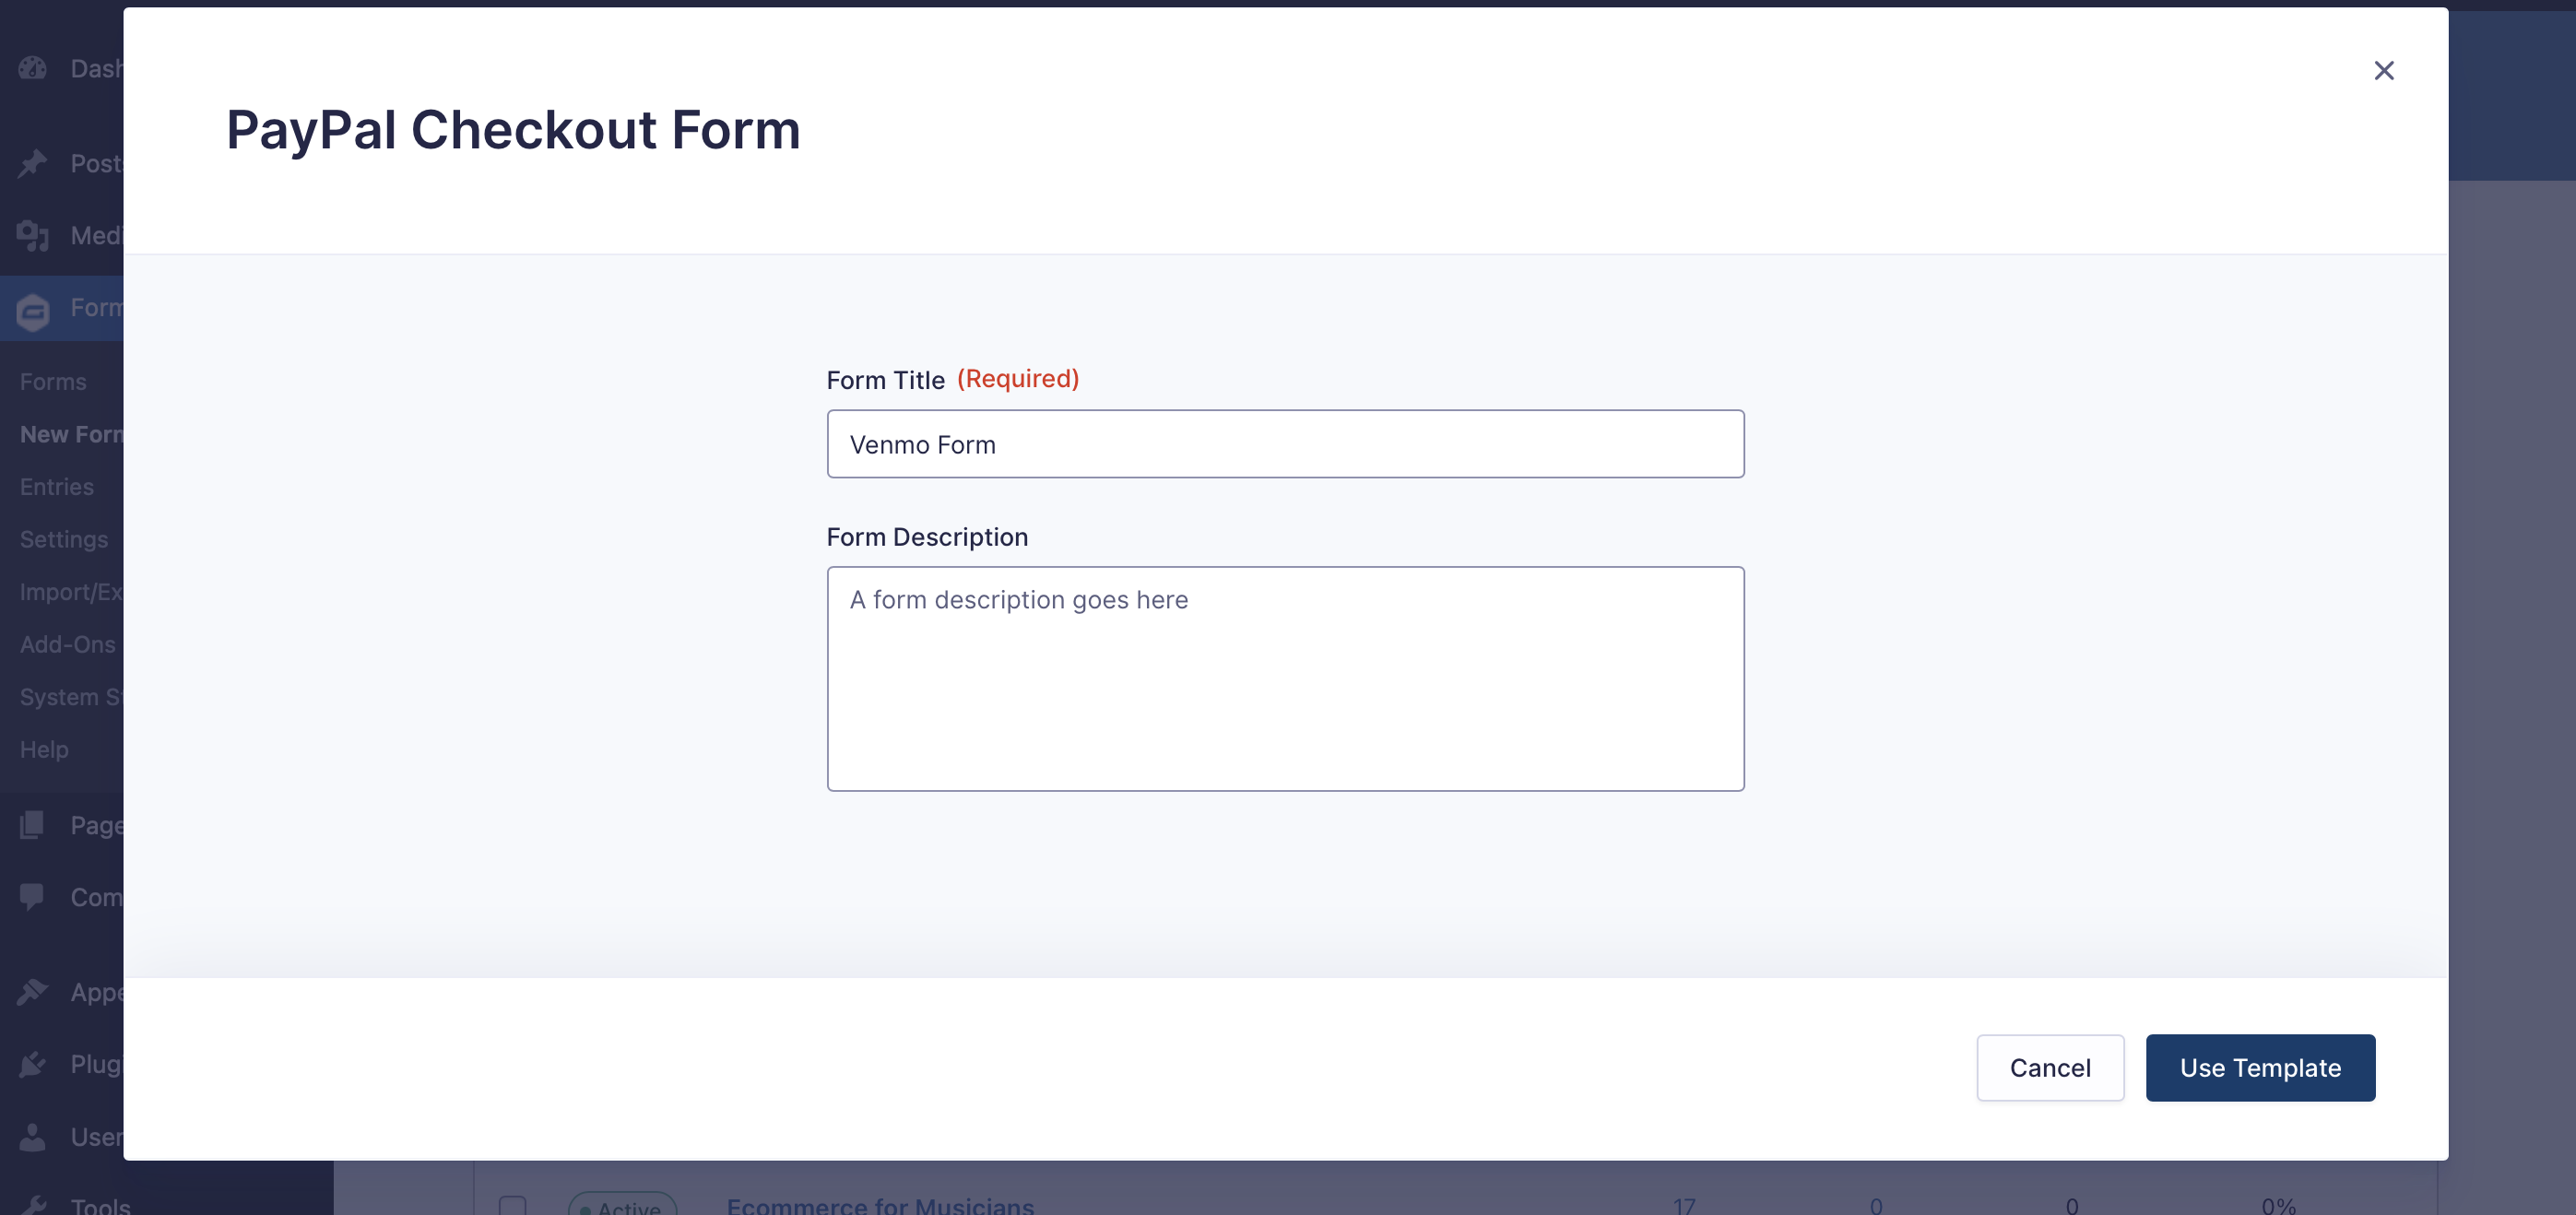
The PayPal Checkout Form template is a great starting point. Simply scroll to find it in the list of templates, and then click Use Template.
On the next screen, name the form and, optionally, provide a description. Once done, click Use Template again.
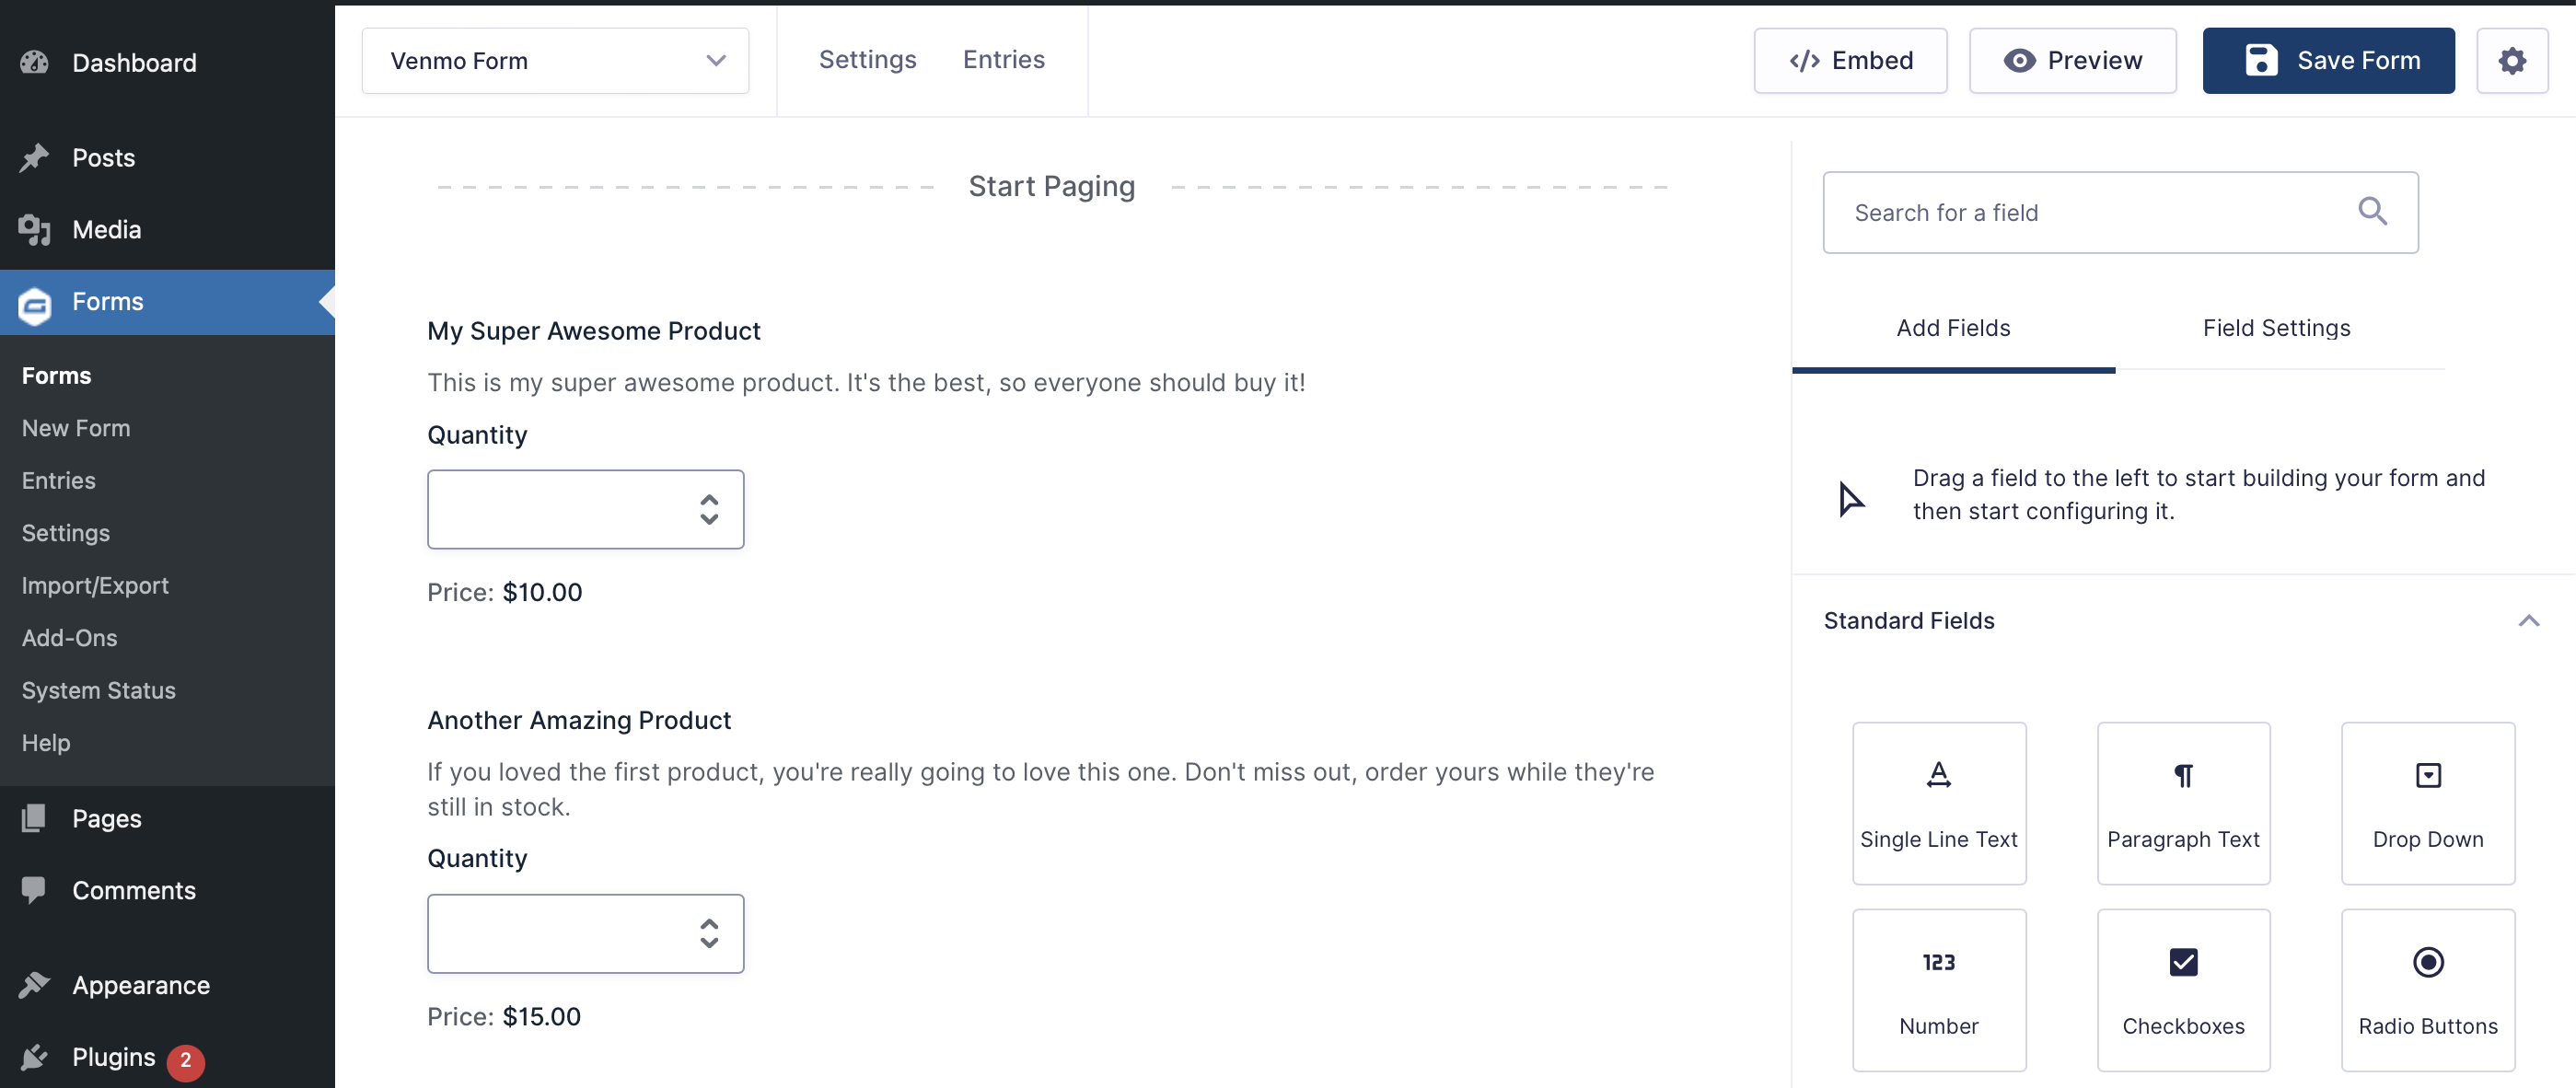
When you do, you’ll land in the Gravity Forms drag-and-drop form editor.
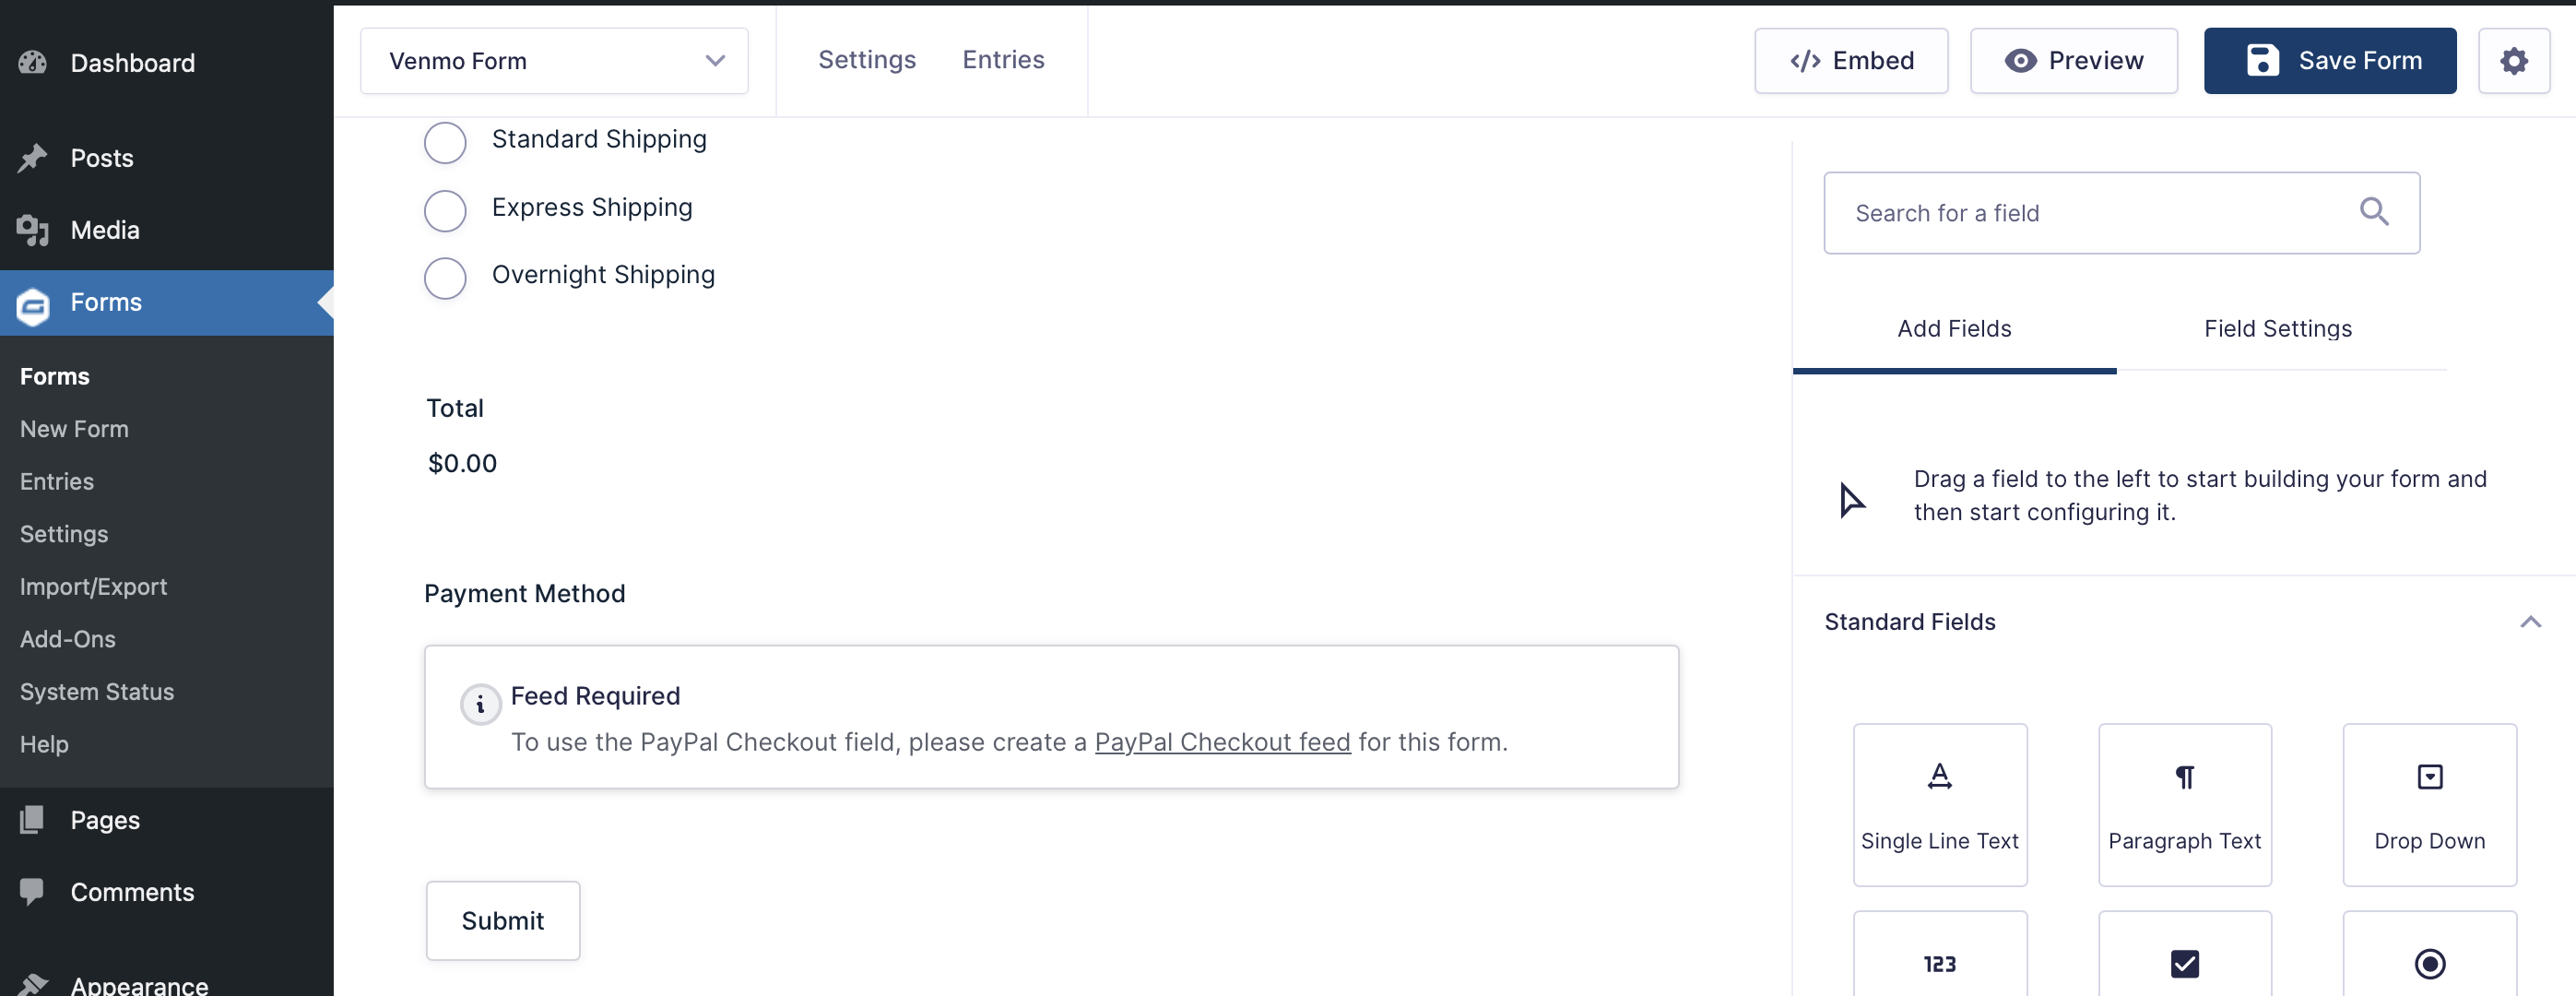
You will notice that it already contains a few form fields:
- Two Product fields and a Subtotal field that adds them together.
- Name, Email, and Address fields for the billing and shipping addresses.
- A Shipping field to choose shipping options.
- A Total field that calculates the overall price.
- A Payment Method field that prompts you to create a feed. More on this later.
Visit the Gravity Forms Documentation to learn more about the form fields you can use.
4. Customize the Form to Your Needs
Gravity Forms makes it easy to customize your forms to fit your needs.
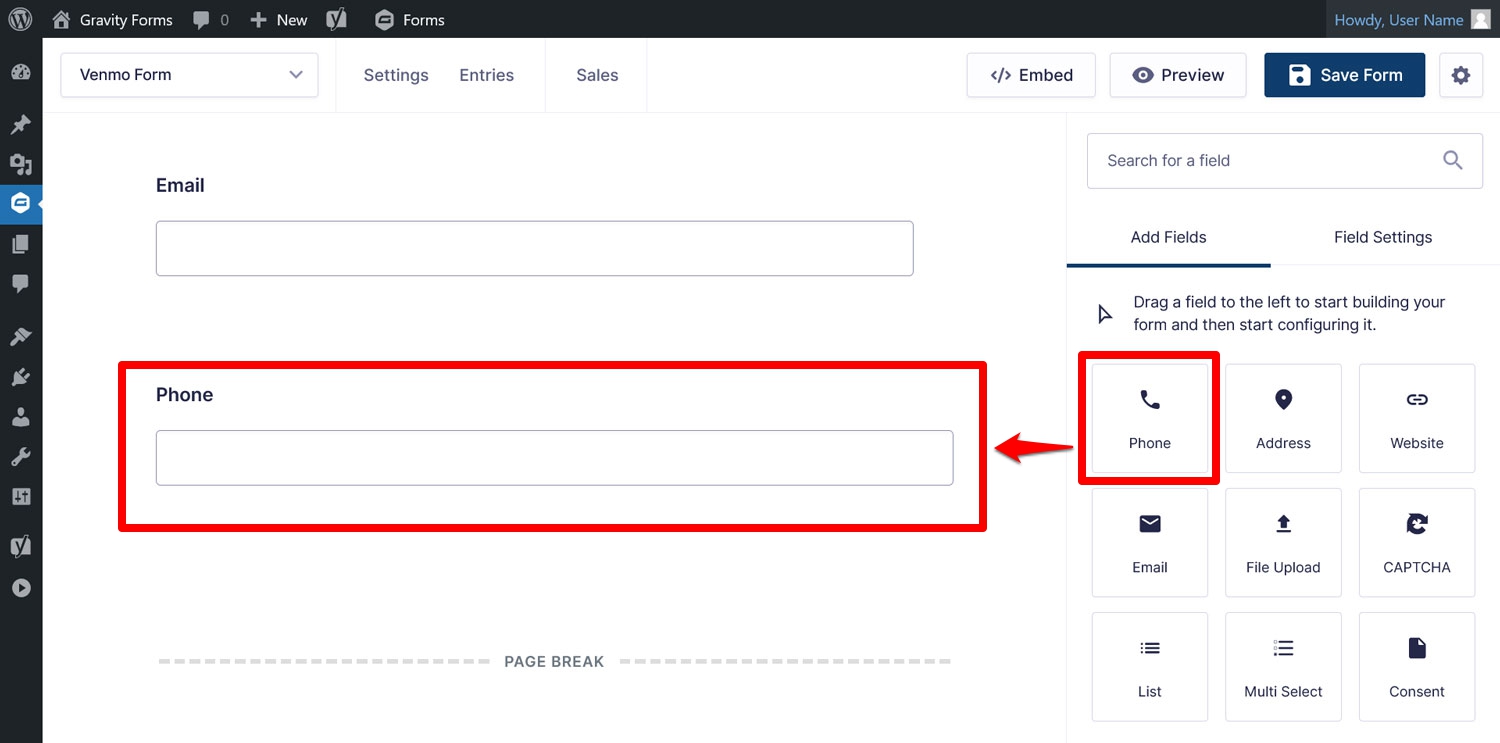
Double-click or drag and drop to add fields from the right sidebar, to add more functionality and collect additional information.
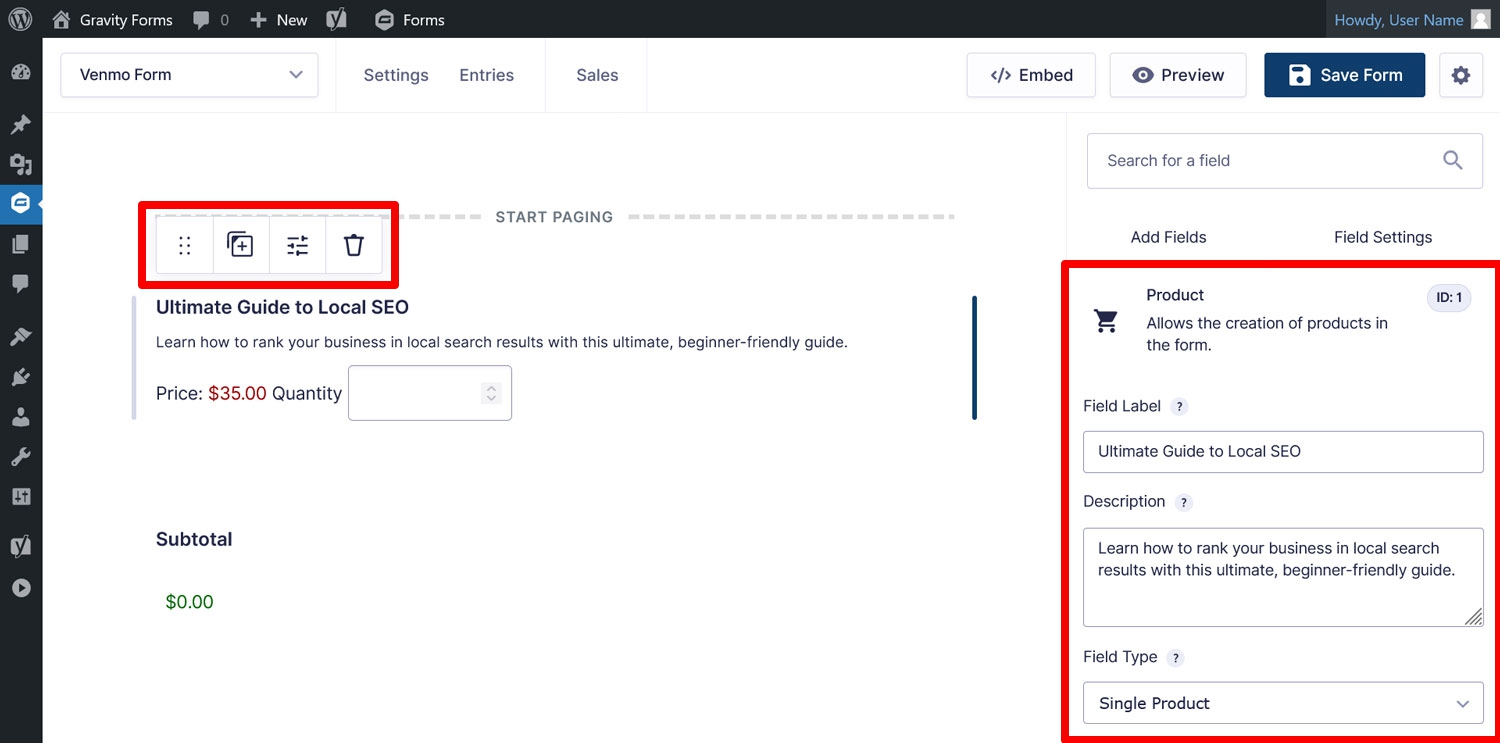
Additionally, when you click on a field in the form, a top bar will appear, allowing you to move, duplicate, or delete it.
On the right-hand side, the field settings will be displayed, where you can make more detailed adjustments, such as editing field labels, configuring content, and more. For example, you can edit the generic Product fields to fit your business.
If you are selling a physical product, you’ll also want to consider adding the Shipping field. If you are selling digital products, this field will likely not be needed.
5. Create a PayPal Checkout Feed
The next step is to create a PayPal feed.
Feeds specify how your form data is processed after it has been submitted. In this case, the feed makes sure your customers’ payment data is processed by PayPal.
To create a feed, simply scroll down on the form to find the Payment Method field and click to create a PayPal Checkout feed.
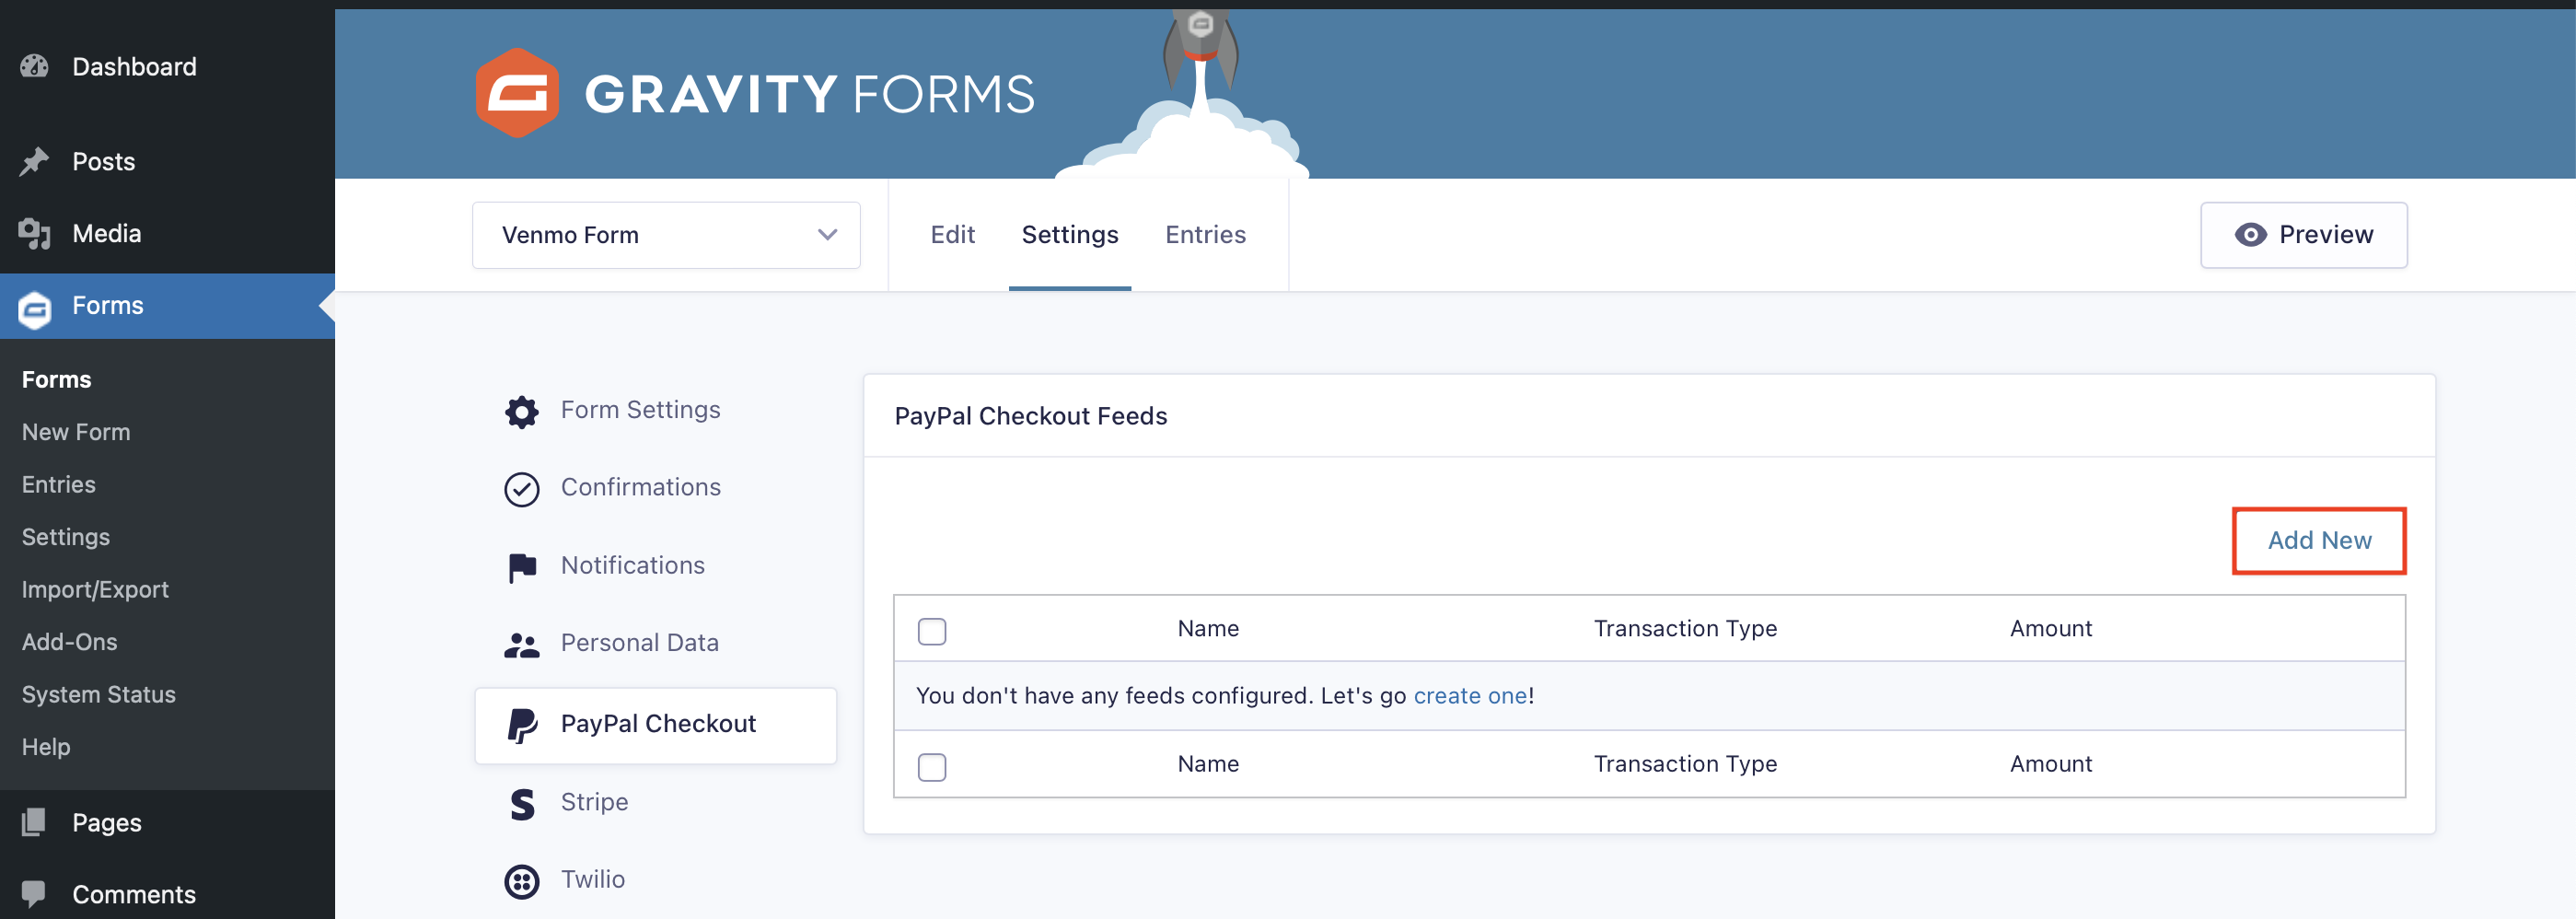
On the following screen click Add New to create a new feed.
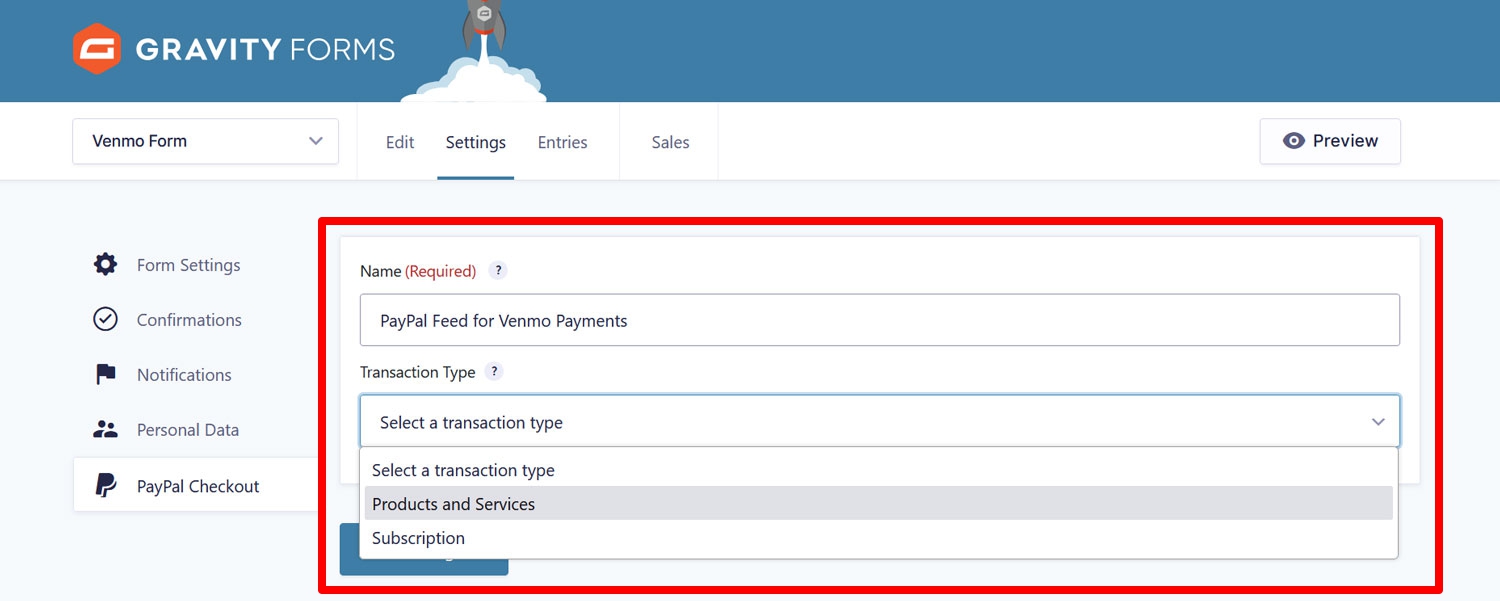
First, set Transaction Type to Products and Services for one-time payments.
(Alternatively, learn how to use PayPal for subscriptions here.)
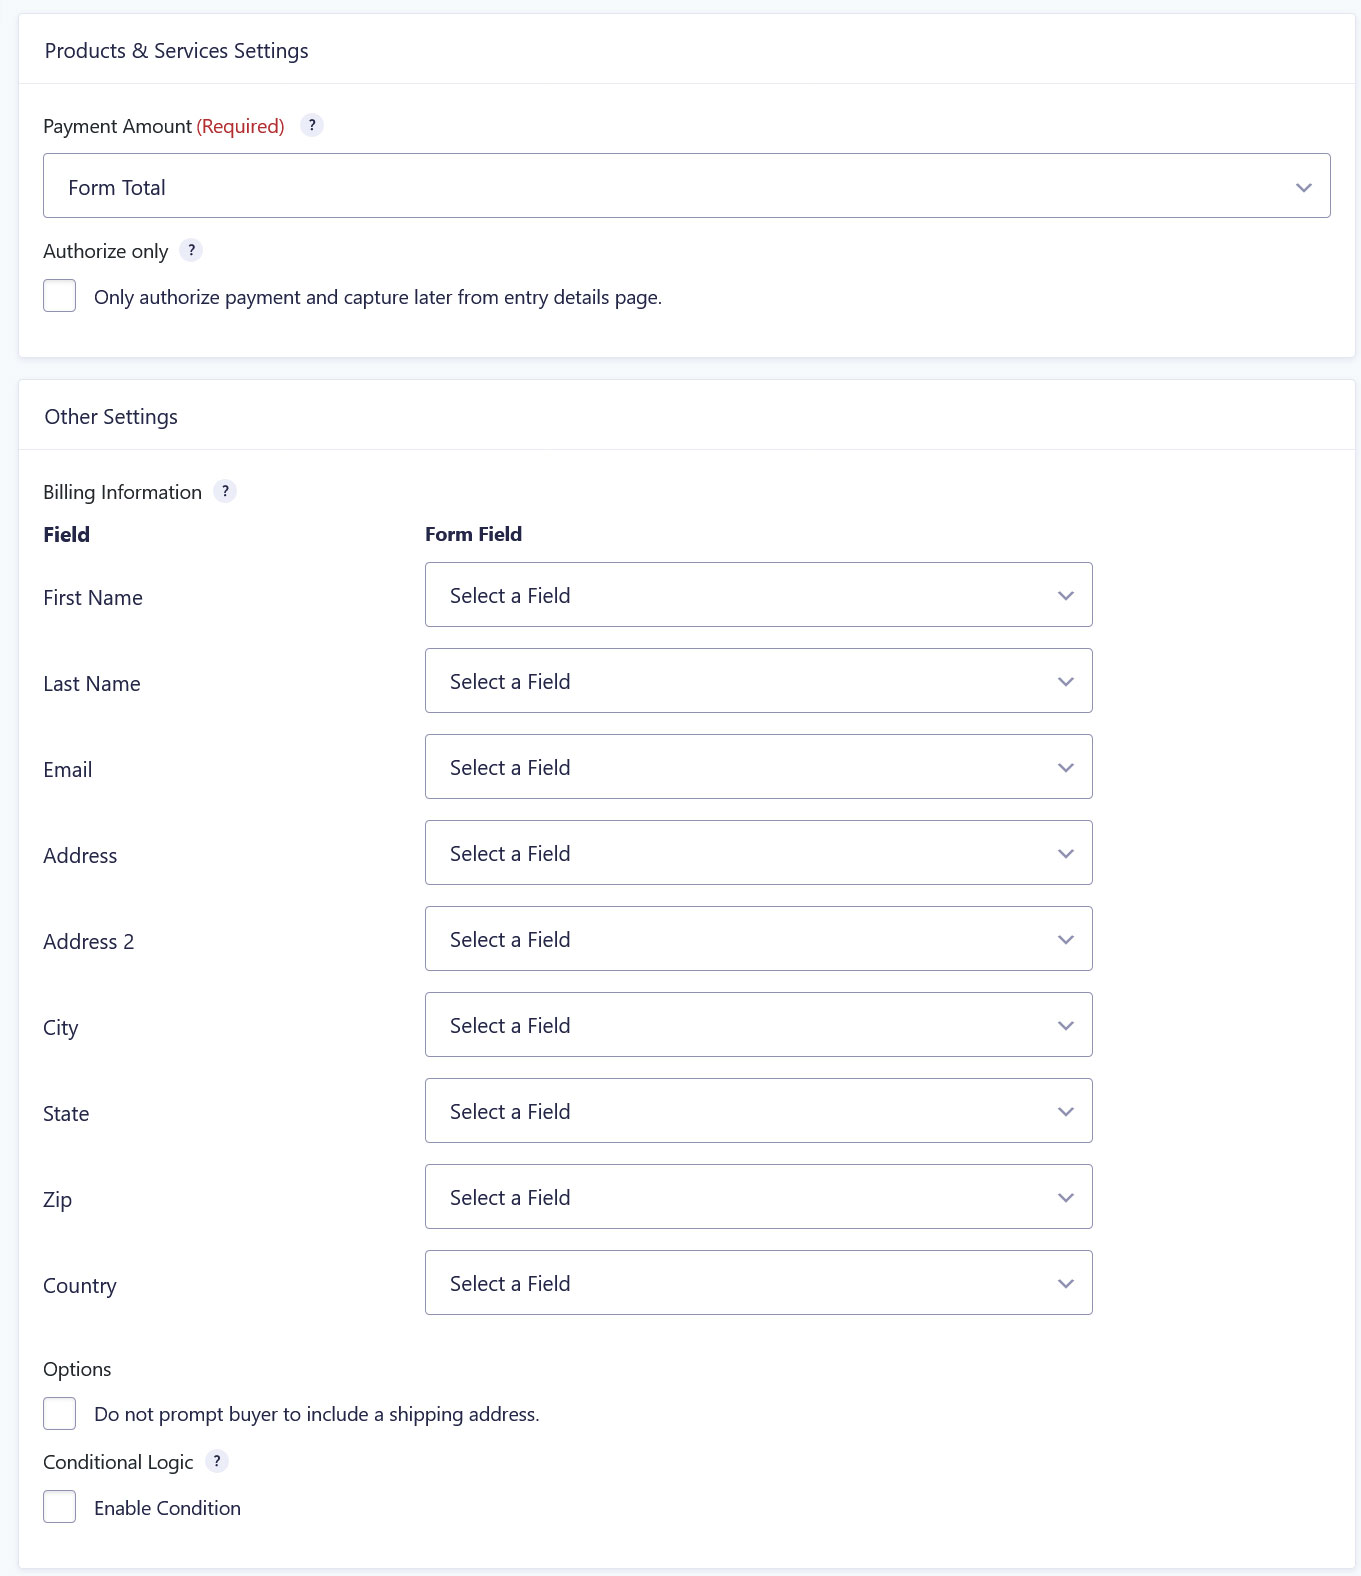
Next under Payment Amount, select Form Total.
The Billing Information section allows you to map your form fields to the billing address information in PayPal. Simply choose the appropriate form fields via the drop-down menus on the right.
If you are selling a digital product, check the Do not prompt buyer to include a shipping address box.
Lastly, you can enable conditional logic for this feed if you only want to process this feed under certain conditions. Learn more about conditional logic here.
Save the feed when you are done.
6. Edit the PayPal Field
Now, when you revisit the form editor, your Payment Method field will look a little different.
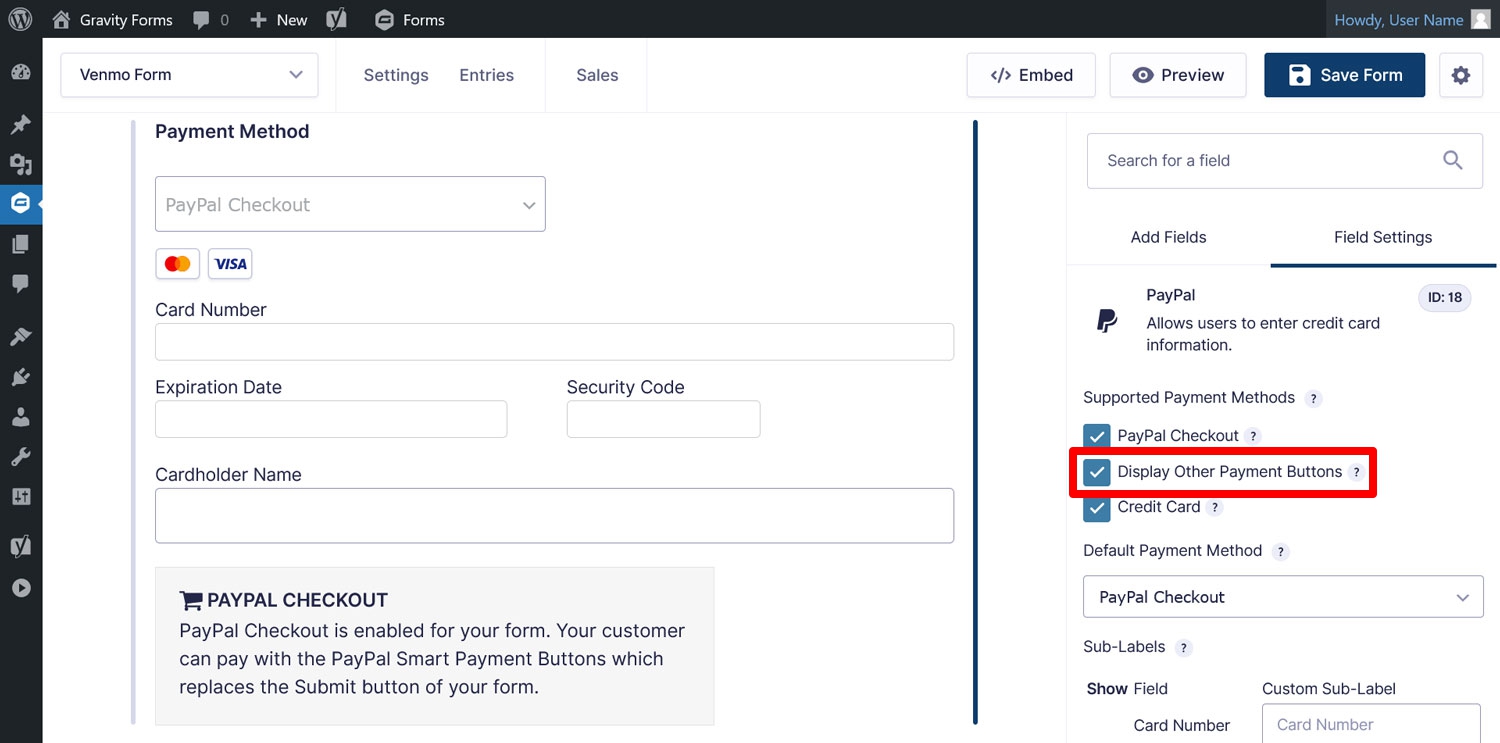
The PayPal field replaces the standard Submit button on the form and allows you to configure the available payment methods.
To add Venmo, enable Display Other Payment Buttons under Supported Payment Methods in the settings. Be sure to also enable the PayPal Checkout option, as that is mandatory.
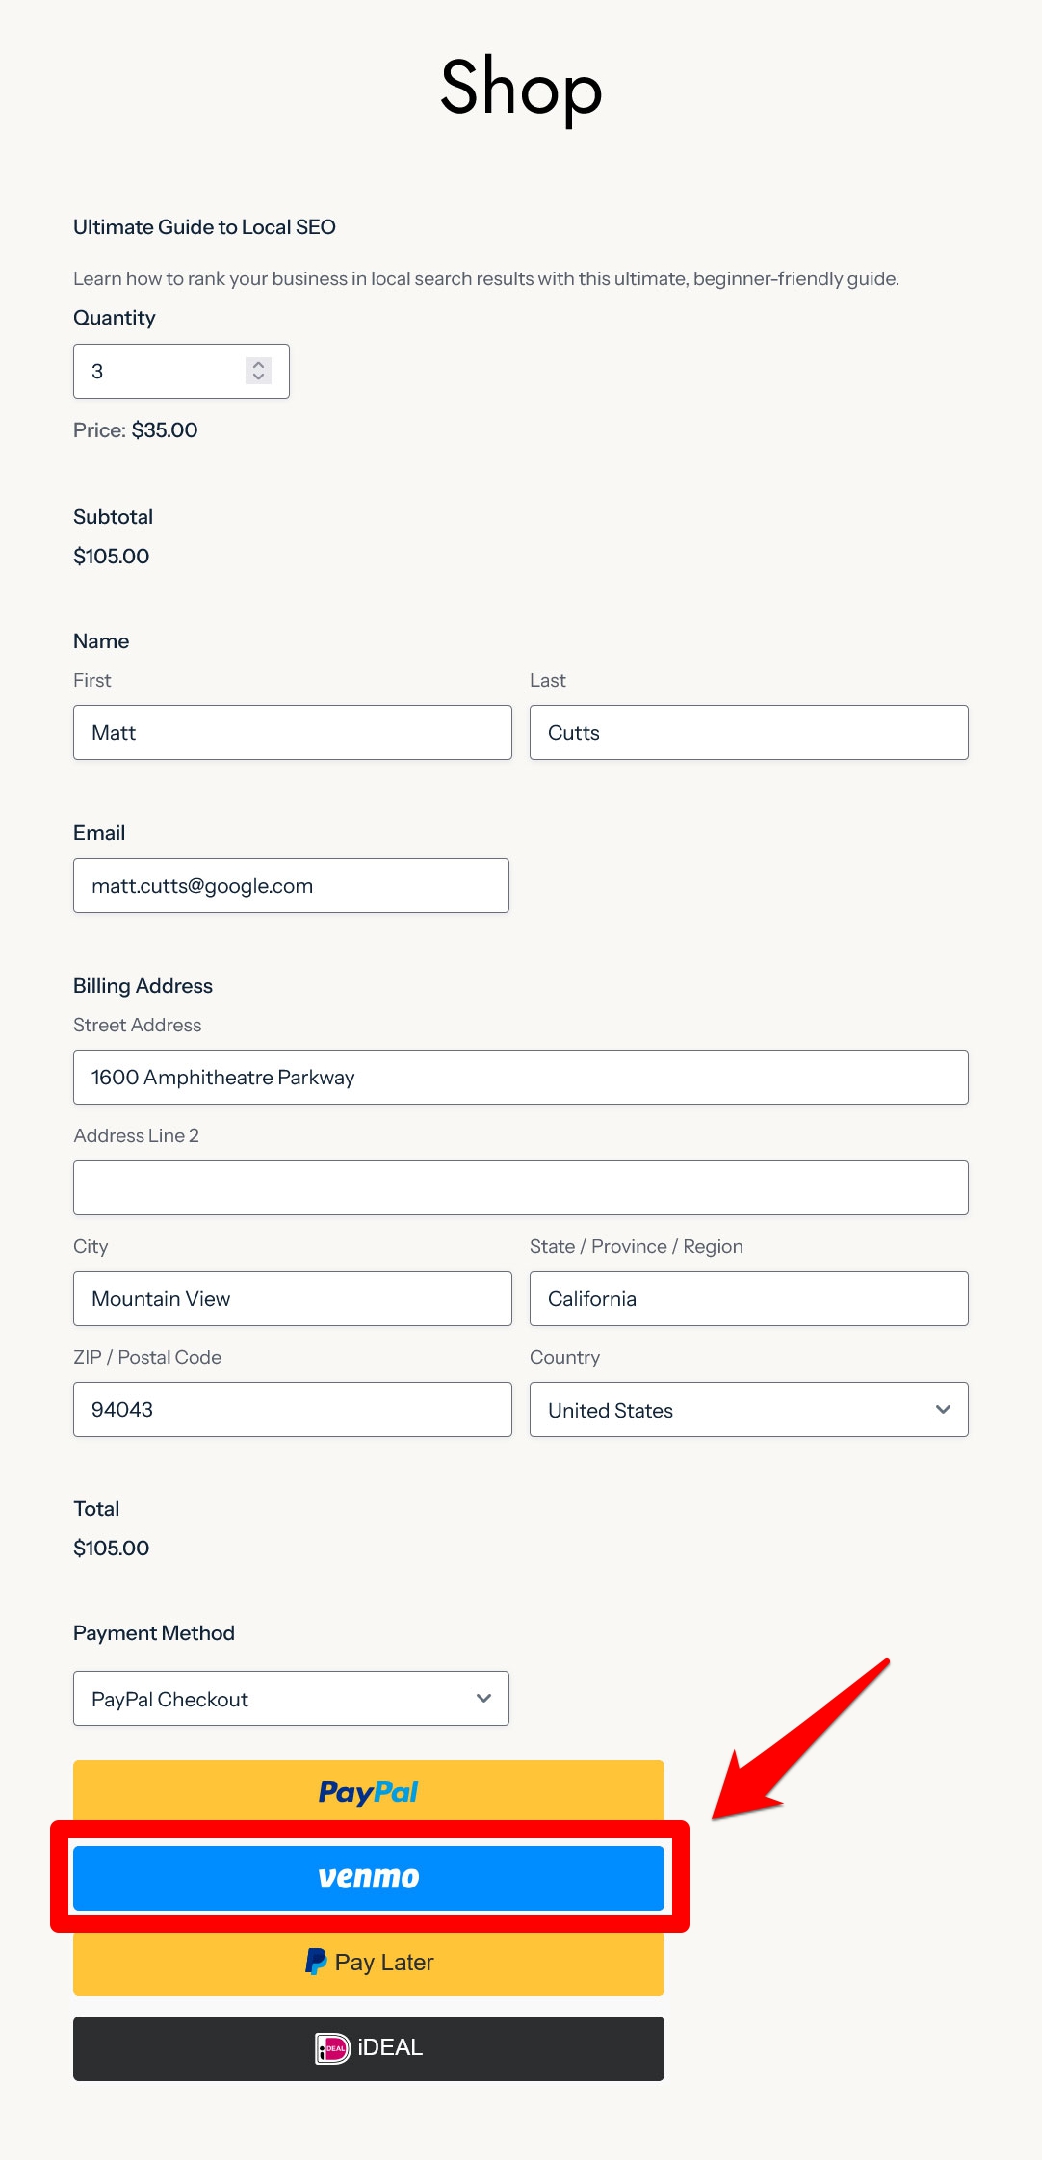
Note that you will not see the Venmo option in the form editor, but it will appear automatically on the front end of your site. More on that later.
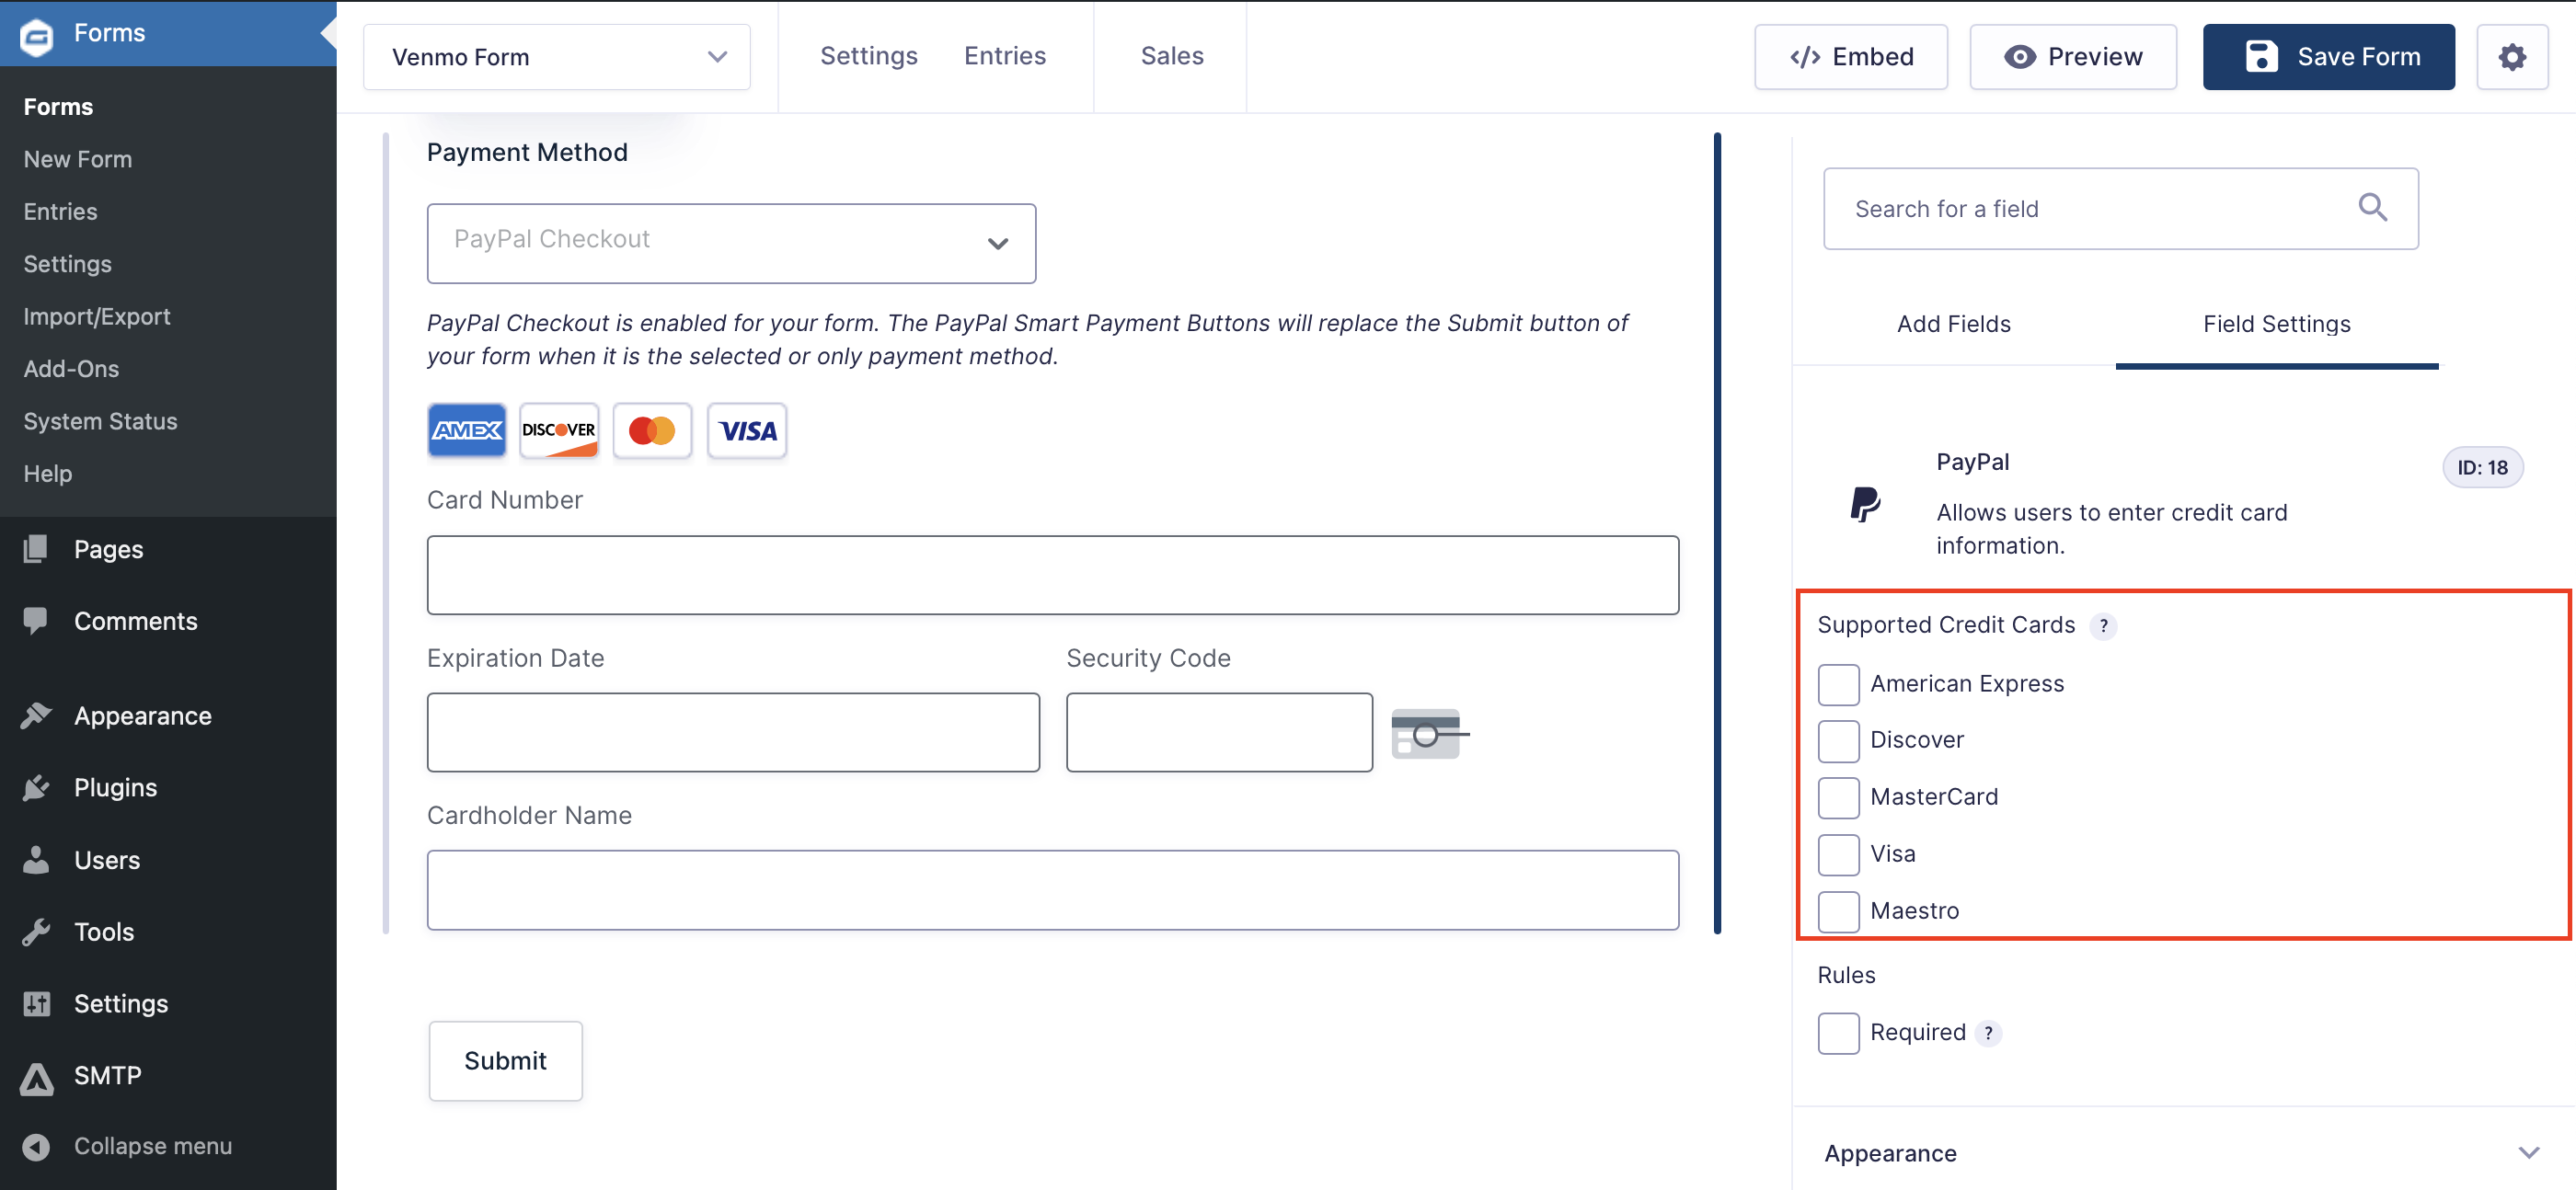
Further down in the settings, you can also select the credit cards you’ll accept support and then adjust the appearance of your buttons.
When everything is ready, click Save Form.
7. Configure Confirmations and Notifications
If you want to make your forms even more user-friendly, consider setting up notifications and confirmation messages:
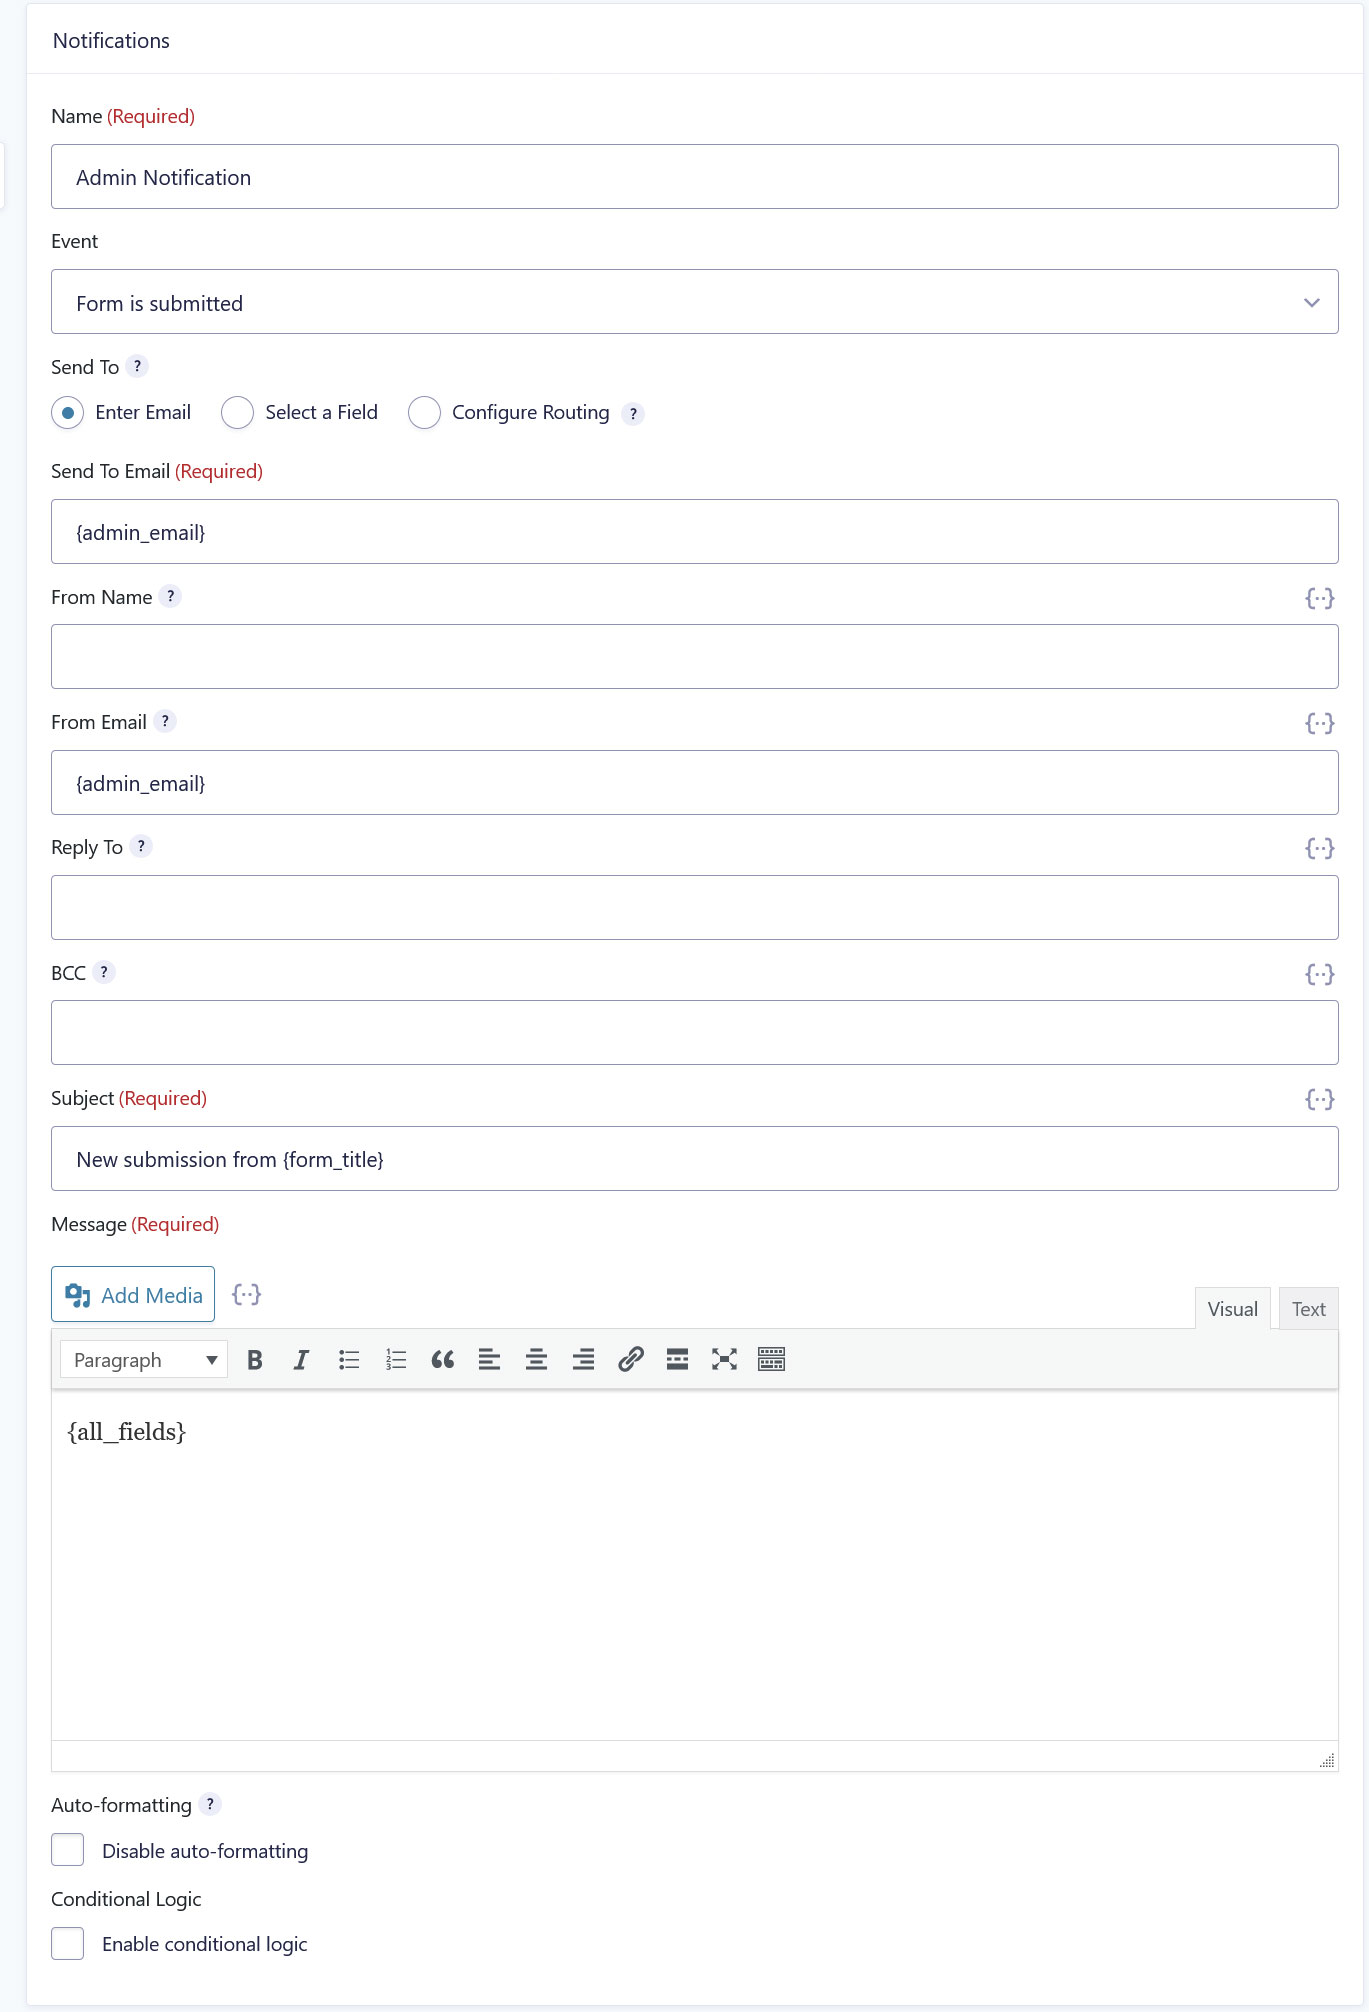
- Notifications – These are emails that can be sent to your customer, yourself, or anyone else after a form is submitted.
- Confirmations – This is the message that displays after someone submits your form.
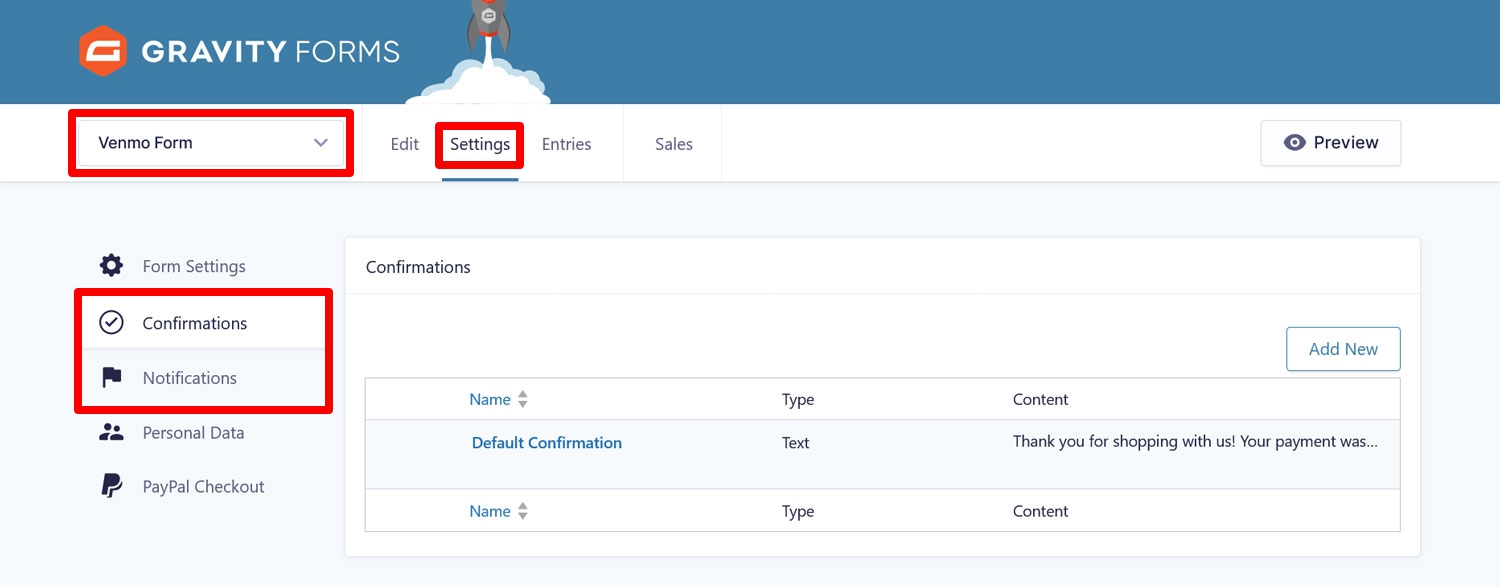
You can configure these at any time through the form settings.
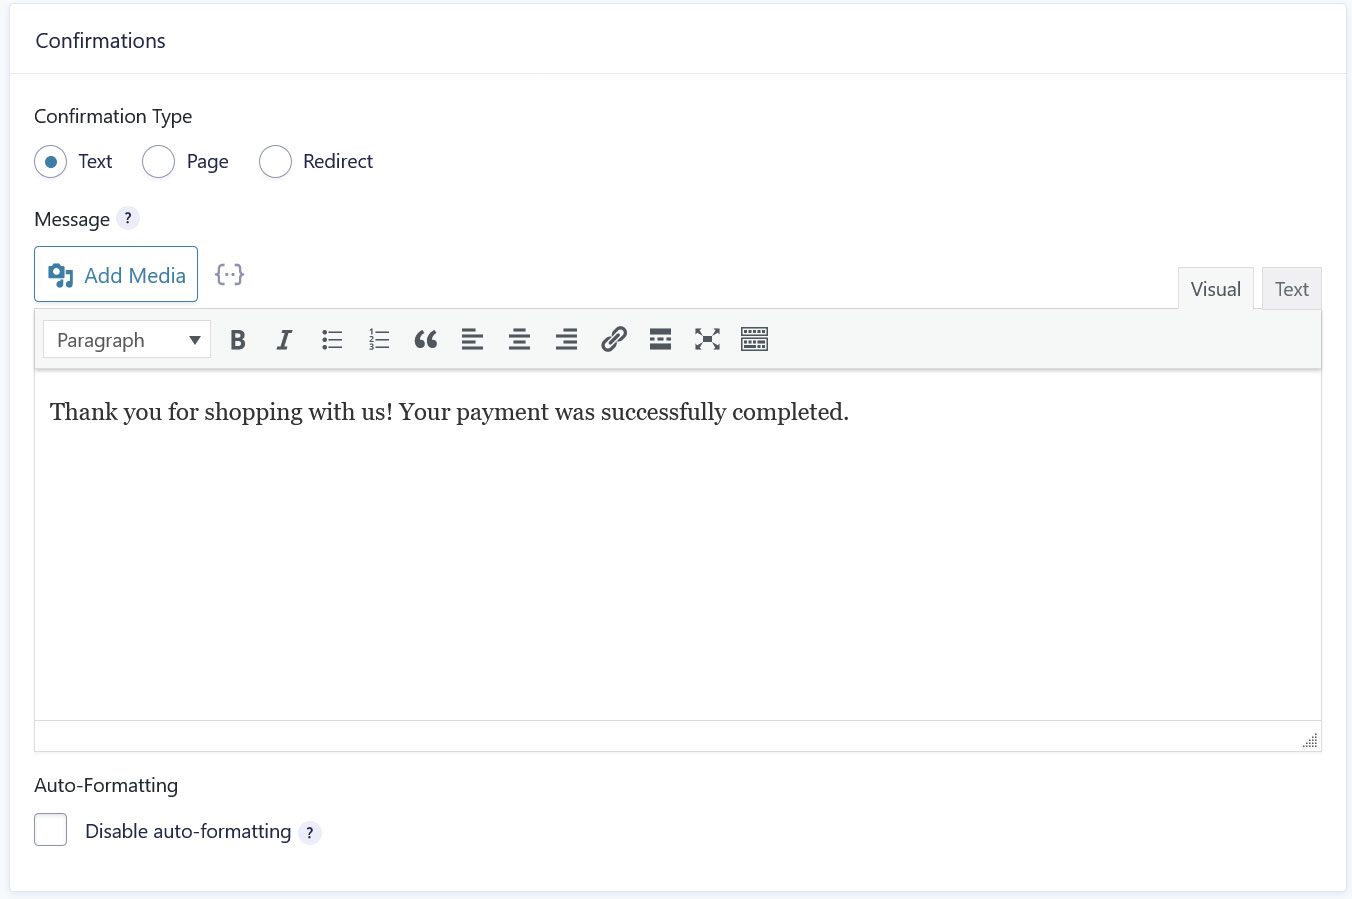
Forms will have a confirmation message set up by default, which you can click to edit. To create a new one, click Add New. Here, you can customize the message and change the confirmation type to send your users to another page or redirect.
Notifications are similar in that you can click to either edit the default message or create your own using the email editor.
You can learn more about confirmations and notifications in the Gravity Forms documentation.
8. Embed and Test Your Form
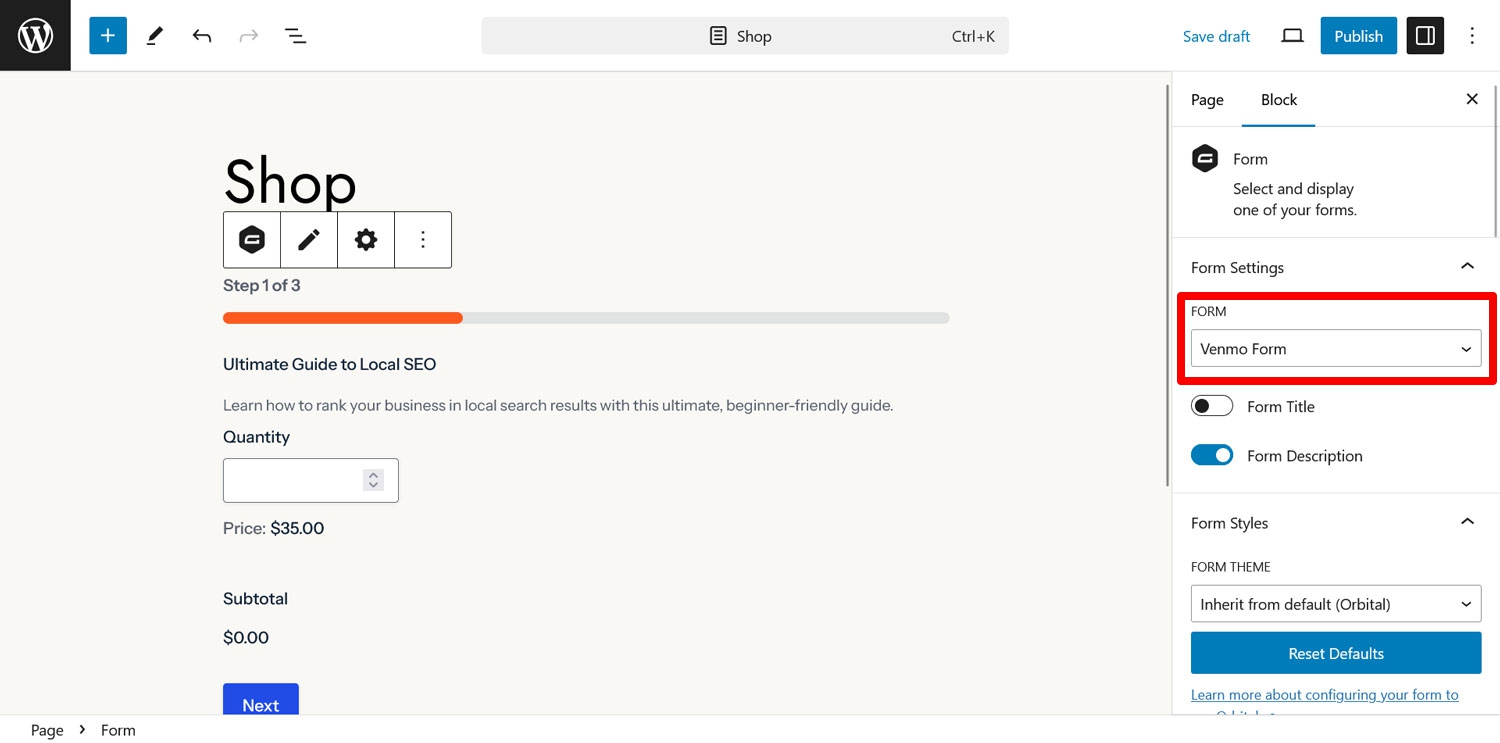
At this point, the only thing that’s left is to test your form. To do this, embed it in a page using the Gravity Forms block or shortcode.
Publish or preview the form. Then complete the fields like a customer would and submit it. As long as your form is in sandbox mode, it will not capture real payments.
When you get to the payment method section, you should see the regular PayPal Checkout button and a separate button for Venmo.
If your physical location is outside of the United States, the Venmo button will not be visible, but you can still test the functionality. Simply use a VPN to simulate browsing from that location.
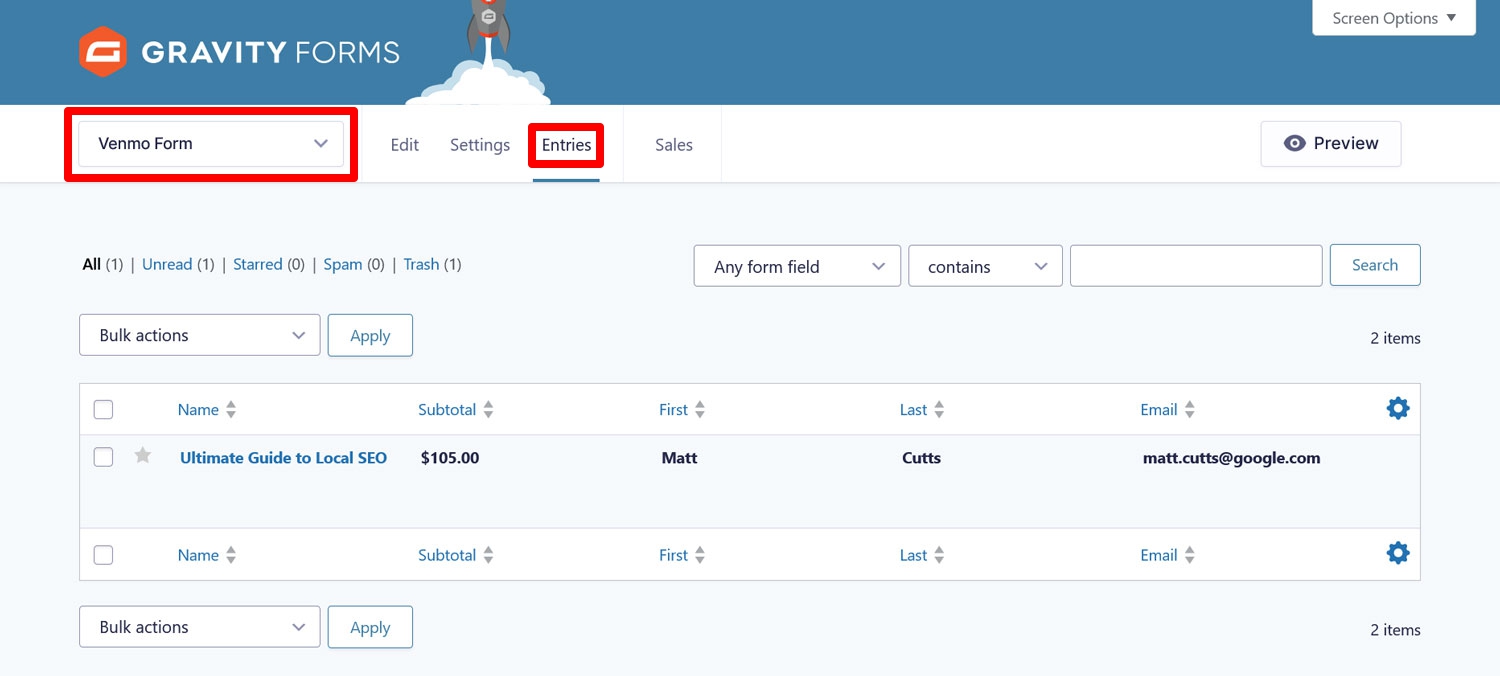
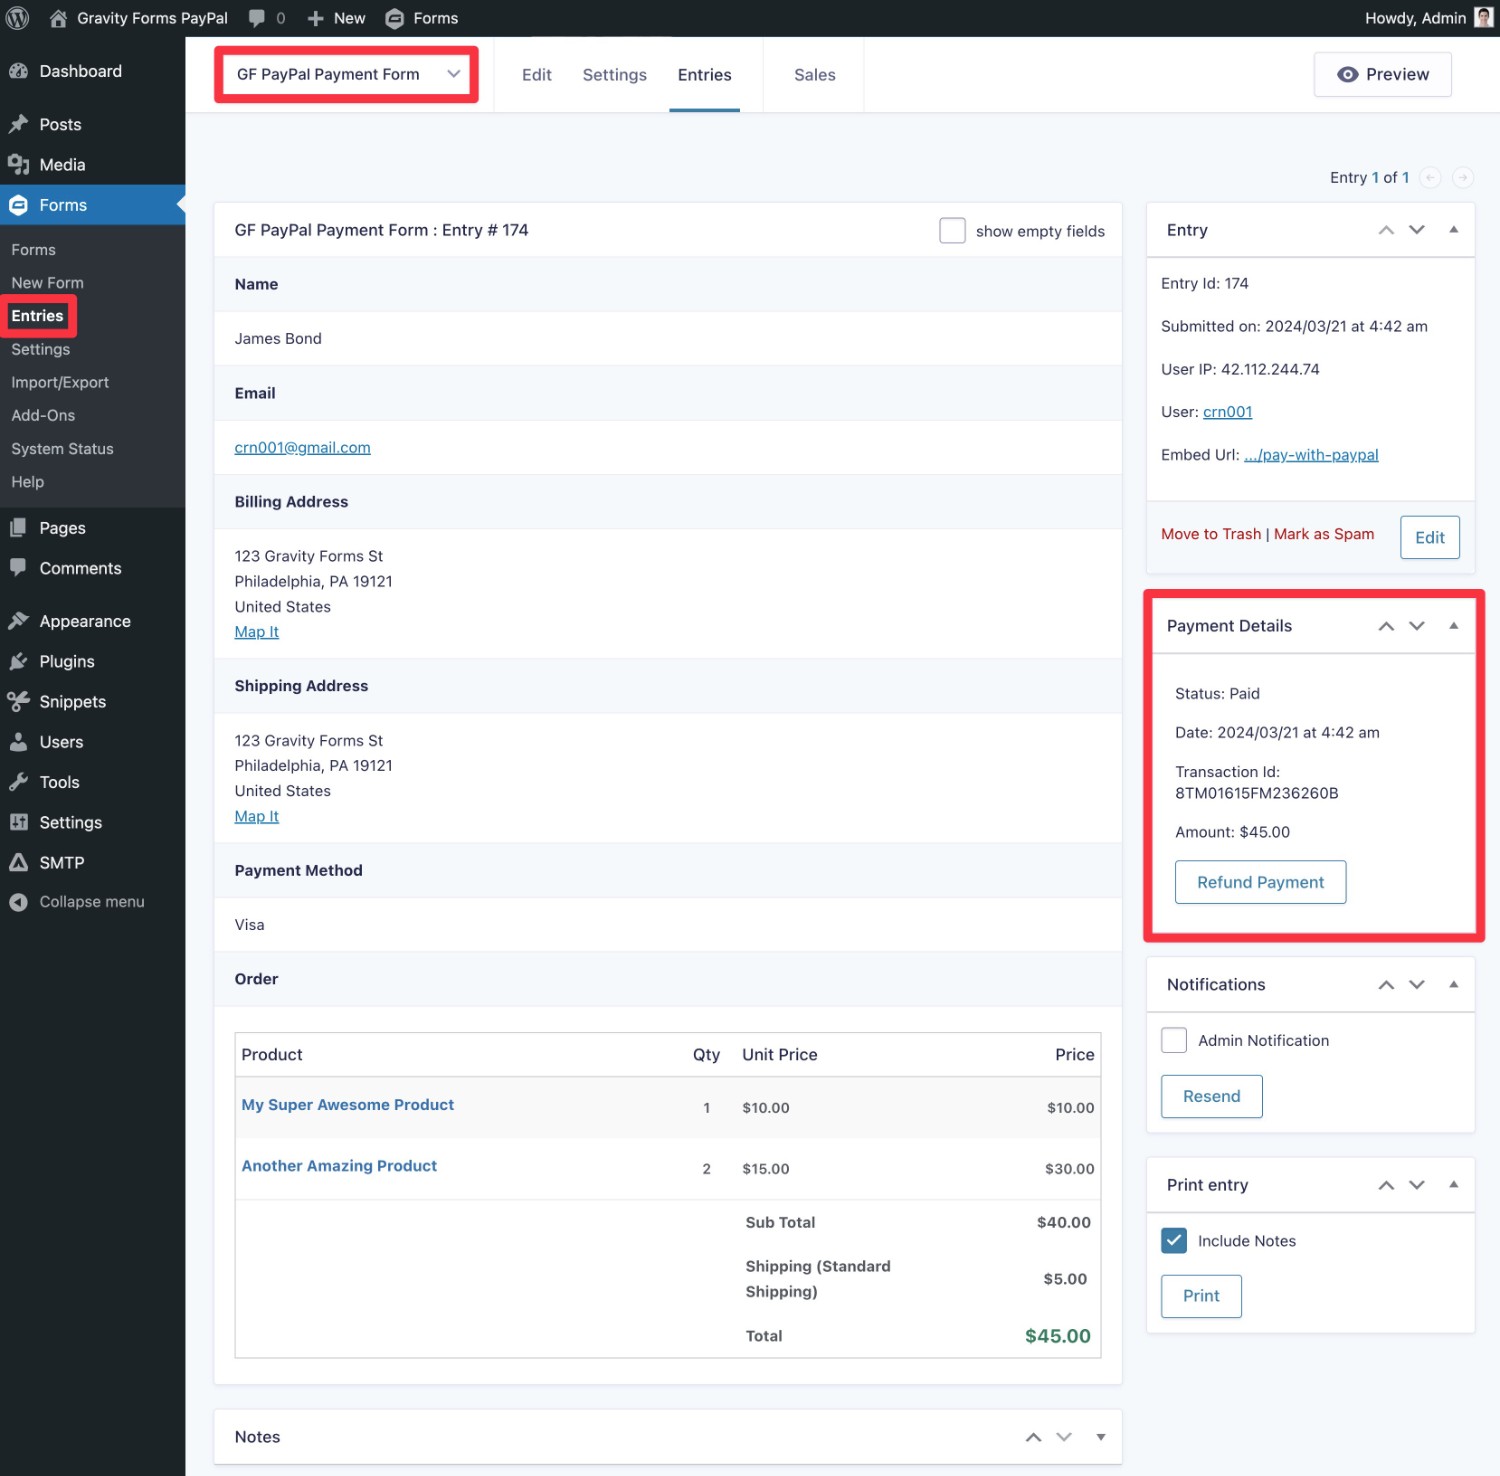
Any payments you complete should show up in the Entries menu of your form.
9. Make PayPal Live
When your testing is successful, remember to switch your PayPal account to Live mode when you are ready to start accepting real payments. To do this, go back to the settings (Forms → Settings → PayPal Checkout) and switch the radio button from Sandbox to Live.
Finally, click Connect with PayPal again. Re-authorize your account, this time with your real PayPal credentials.
Your form should now be all ready to accept payments.
10. View and Manage Payments in WordPress
In addition to seeing payments in your form entries as mentioned above, you can also view and manage payments in more detail from within your WordPress dashboard.
Clicking a payment entry will display the details of the payment. You can even issue a Refund Payment from here.
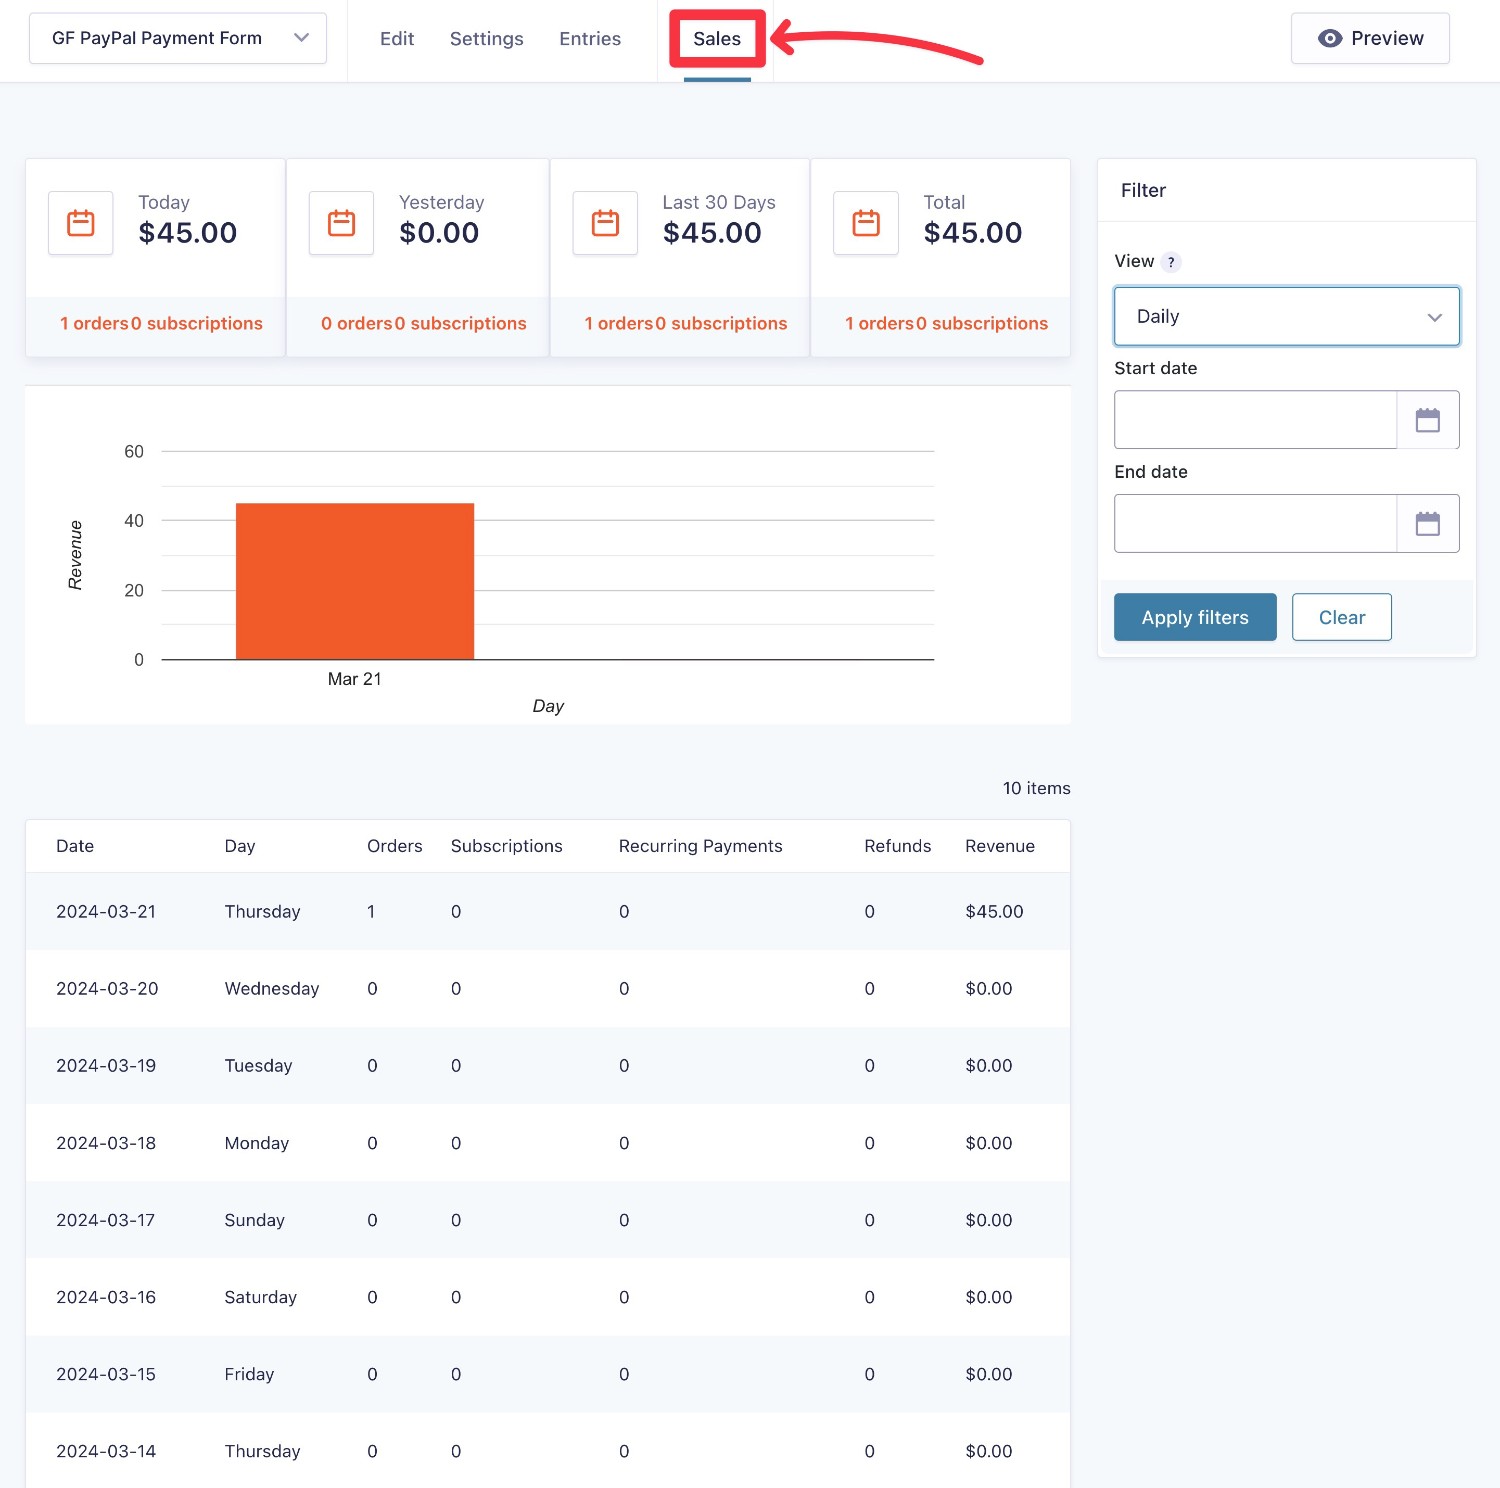
You also get a dedicated Sales area, where you can view and analyze your PayPal sales. You can filter by specific date ranges and also view numbers for specific days, weeks, or months.
Alternatively, you can still manage everything through the PayPal interface.
For detailed instructions on how this works, refer to PayPal’s help documentation, which covers managing transactions, including processing refunds and handling subscriptions.
Start Accepting Venmo Payments on Your WordPress Site Today!
Adding Venmo as a payment option on your WordPress website is an awesome way to streamline the payment experience for your US-based customers, especially those in younger demographics.
As you have seen, with the Gravity Forms PayPal Checkout Add-On, you only need to check a box to offer it on your site.
To start using Venmo on your WordPress site and take advantage of all the extra benefits Gravity Forms has to offer, sign up for your Pro, Elite, or Nonprofit license today!

If you want to keep up-to-date with what’s happening on the blog sign up for the Gravity Forms newsletter!


