The Ultimate Guide to Gravity Forms for Musician Websites

As a musician, your time is precious. Whether you’re booking gigs or lessons, or managing the band, paperwork and band website headaches shouldn’t eat into your creative time. That’s where WordPress and Gravity Forms come in – they’re the dynamic duo that can transform how you handle the business side of music.
Let’s face it – managing a music career or business involves a lot of forms. You might be juggling student registrations, venue bookings, equipment rentals, and more. If you’re still using paper forms or juggling multiple digital tools, you’re probably experiencing these common headaches:
- Spam entries on your band’s contact form.
- Lost emails with important booking details.
- Missing client and student contact information.
- Scattered payment records.
- Endless back-and-forth messages about gig requirements.
Sound familiar? In this guide, we’ll walk you through why WordPress and Gravity Forms are a winning combination that can help you grow your audience. We’ll explain the basics and show you how to get started with Gravity Forms, even if you’re brand new to WordPress.
By the end of this post, you’ll understand how these tools can solve your biggest problems and help you focus on what really matters: creating amazing music and connecting with your community.
Why WordPress and Gravity Forms Are Perfect for a Musician Website
WordPress is like your band’s reliable roadie – it handles the heavy lifting of your website without complaining. It’s also free. When you add Gravity Forms to WordPress, you get a powerful form builder that’s as versatile as a multi-effects pedal. Together, they create a professional, automated system that works while you sleep.
Think of Gravity Forms as your personal assistant who never forgets to collect important information, automatically sends notification emails, keeps all your form submissions organized, handles payments professionally and more.
Before we dive deeper into Gravity Forms, let’s take a moment to highlight why WordPress is the best platform for hosting and managing your music website:
- Full Control Over Your Content – With WordPress, you own your website, so you get the freedom to share your content on your terms (unlike social media platforms where you’re at the mercy of changing algorithms).
- Themes With Built-In Audio Players – There are many free and paid WordPress themes out there that are geared toward musicians and bands. Some themes even include built-in audio players, so you can host your entire E.P.K. (electronic press kit) and showcase your work in one accessible place.
- Customization at Your Fingertips – WordPress is known for its flexibility and vast array of themes and plugins. You can customize the look and functionality of your site with just a few clicks, ensuring it reflects your unique style.
- SEO & Growth Potential – With its built-in SEO features and powerful plugins like Yoast SEO, WordPress gives you the tools to help you get discovered by new listeners and buyers. This helps you to optimize your content and attract organic traffic to your website.
In short, WordPress is an all-in-one platform that can help you grow and expand your audience and fanbase, and manage your content with ease.
But to take things a step further, you’ll need a tool that can help you build custom forms for engagement and to better manage your business. That’s where Gravity Forms comes in.
What is Gravity Forms and How Can it Help Musicians?
Gravity Forms is a WordPress form plugin that allows you to create custom forms for your website. You can put these forms to work for you in many ways, and there is even a template library to help get you started.
Whether you ultimately decide to use the templates or start from scratch, you can add as many forms to your site as you want and customize each one to fit your needs.
Common Questions
Q: Do I need coding skills to use Gravity Forms? No! The drag-and-drop builder makes form creation easy for everyone.
Q: Can I accept different payment types? Yes, Gravity Forms integrates with multiple payment processors.
Q: Can I use the same form for different types of gigs? Absolutely! Conditional logic lets one form adapt to different situations.
The sky is the limit when it comes to form building. Before we start the tutorial, let’s look at a few of the many things you can do with Gravity Forms as a musician on WordPress:
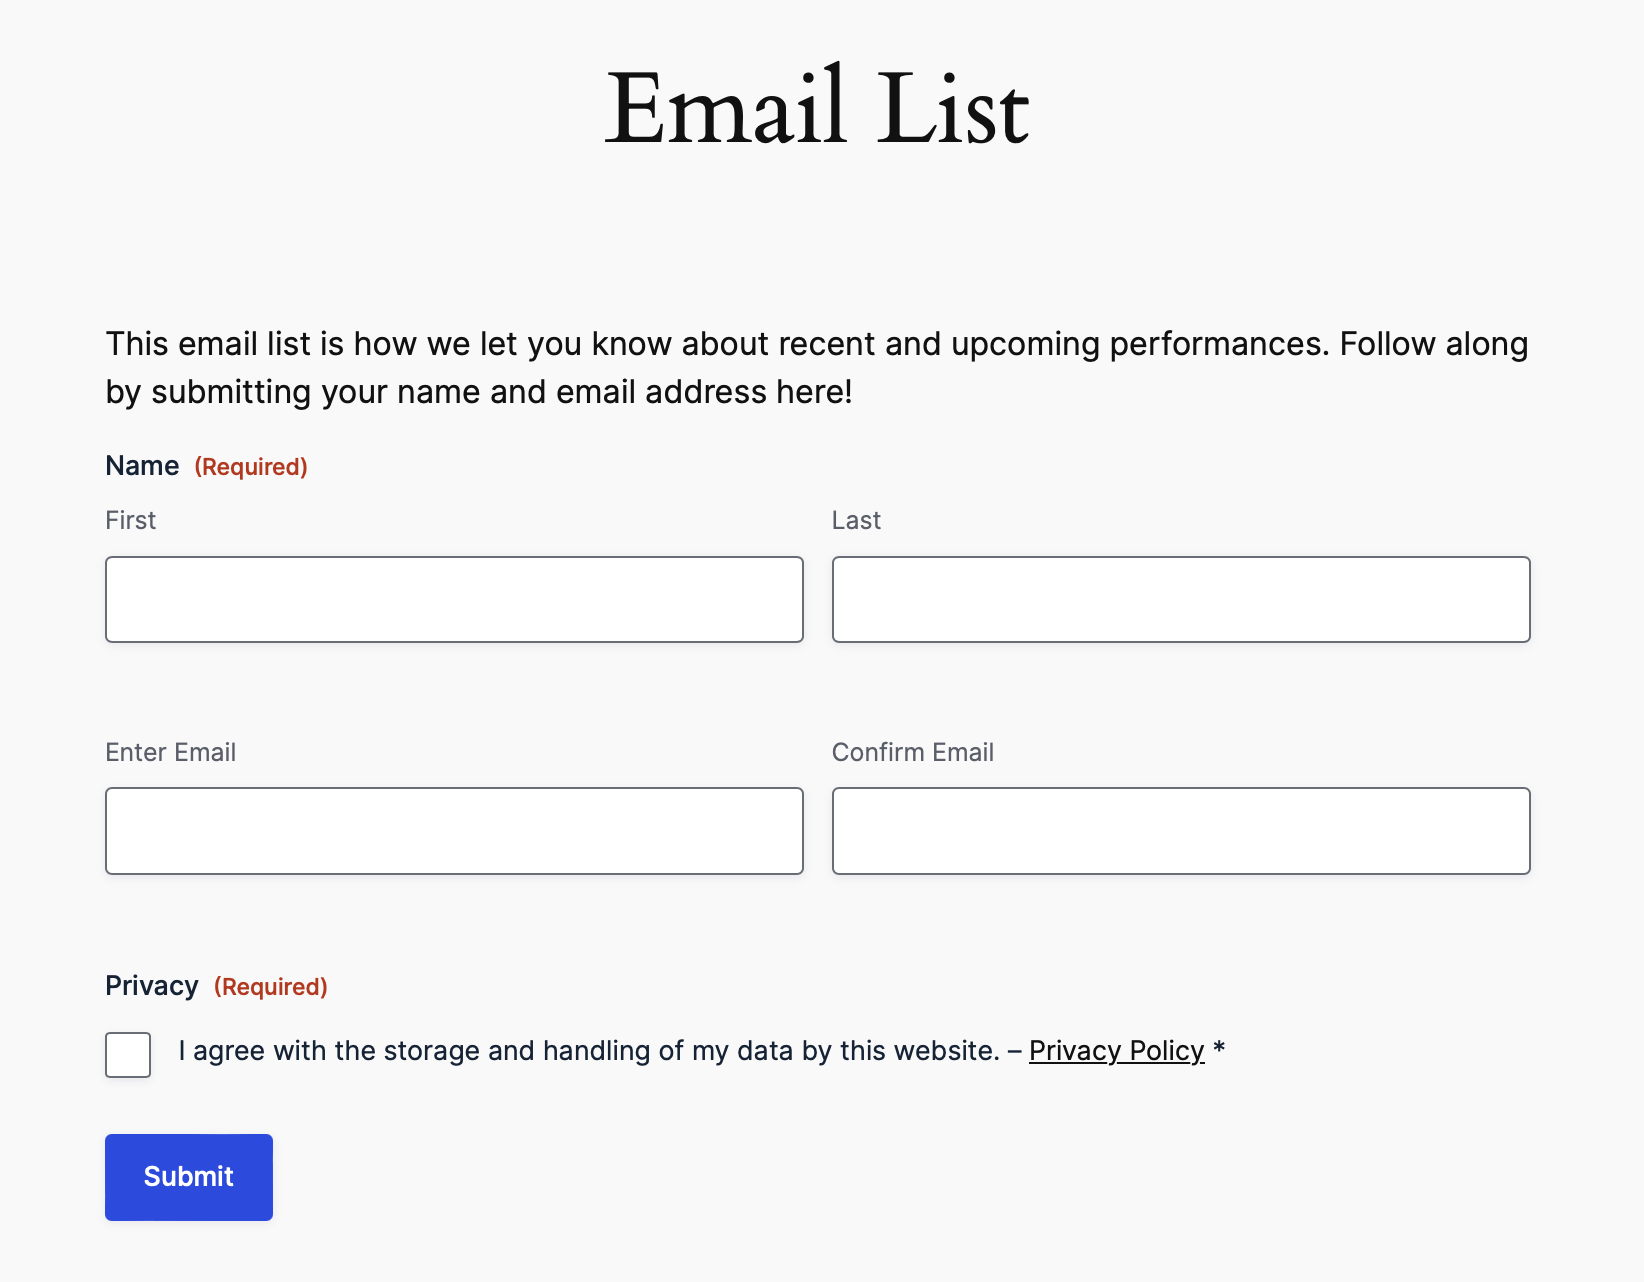
Grow and Manage Your Email List
How many times do you get asked, “Where/when are you performing next?” And how often, after you perform next, do you realize that you’ve forgotten to let everyone know you were performing?
Use the newsletter signup form to sign your friends, family, and audience up to your email list, and then let them know about your upcoming performances.
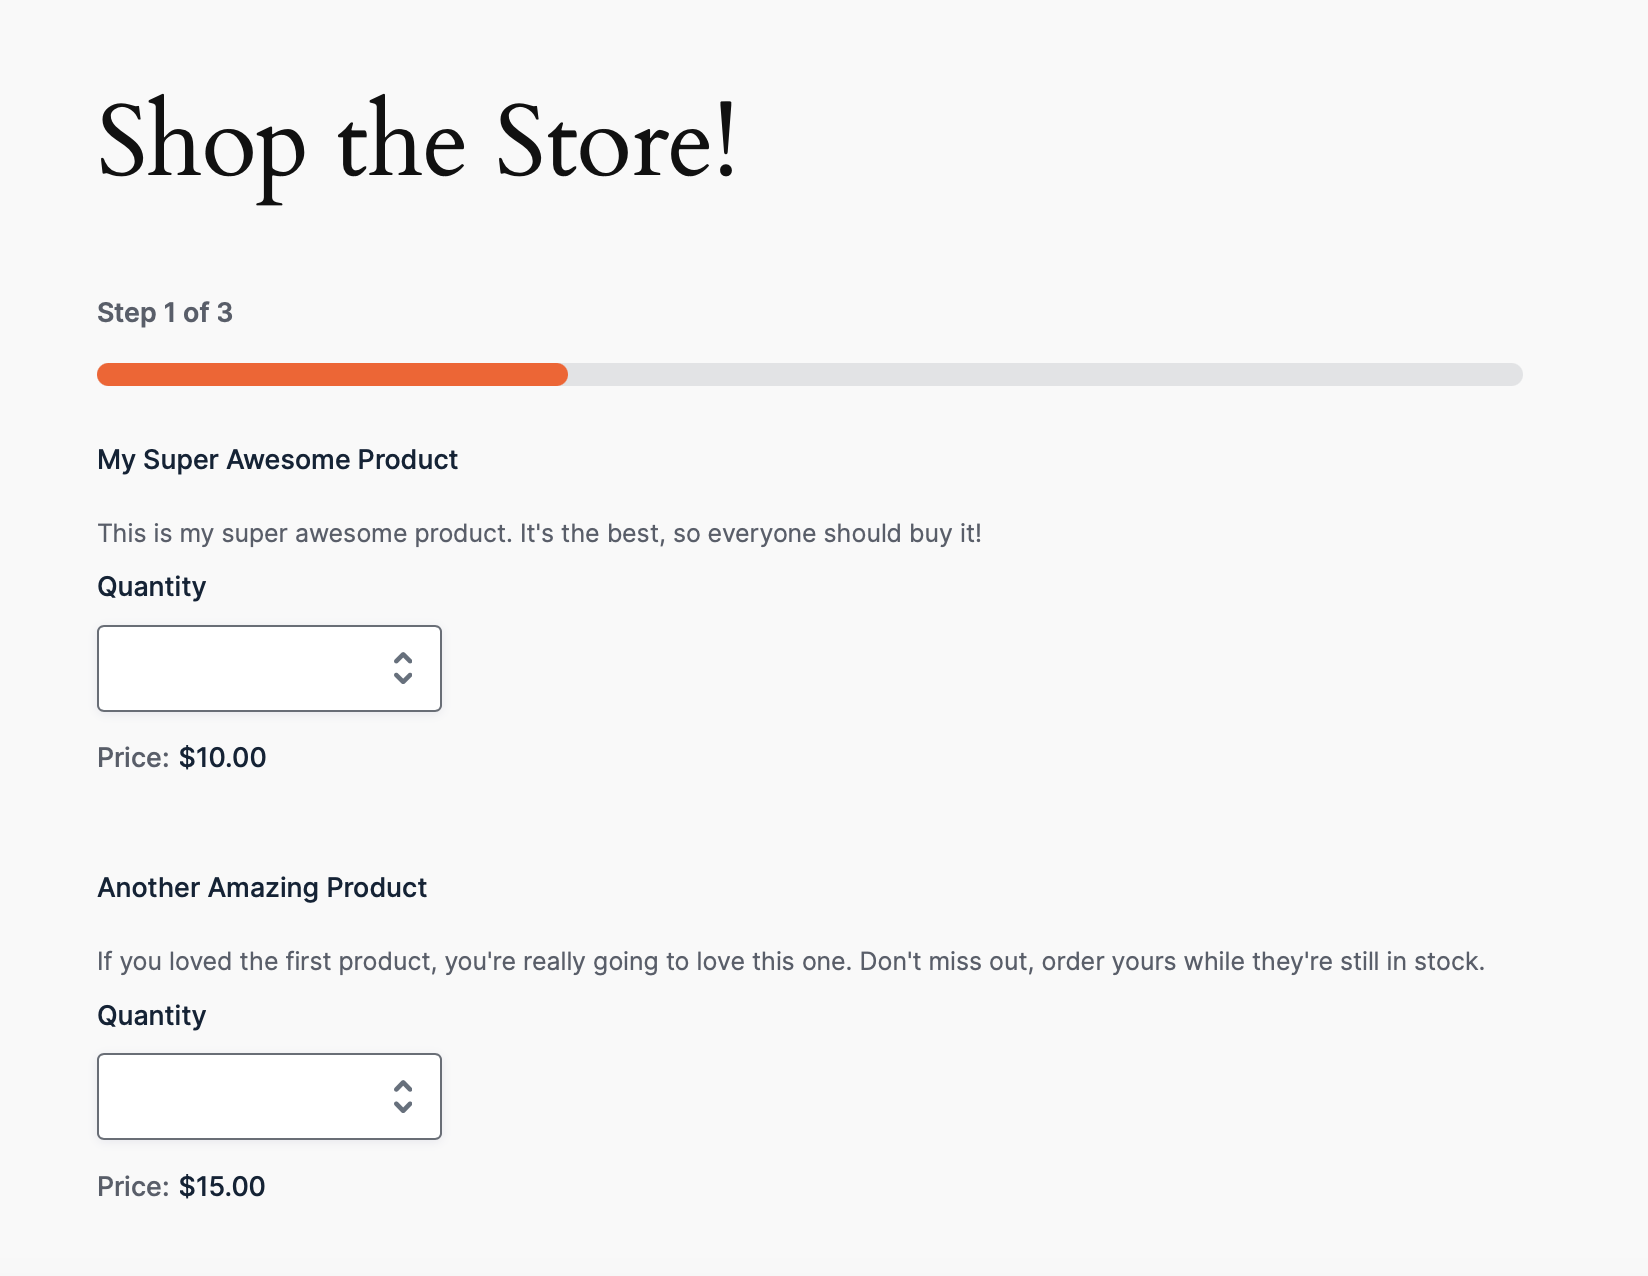
Sell Your Merch
Slinging shirts at your shows is not only a great way to get your name out there, it can account for serious portions of your revenue. Giving your fans a way to buy your merch online, directly from you, removes the limitation of location and keeps more of the profits in your pocket.
Create an ecommerce form to sell your merch and collect payments directly on your WordPress site. With Gravity Forms you can connect your forms to popular payment processors like Stripe, Square, and PayPal.
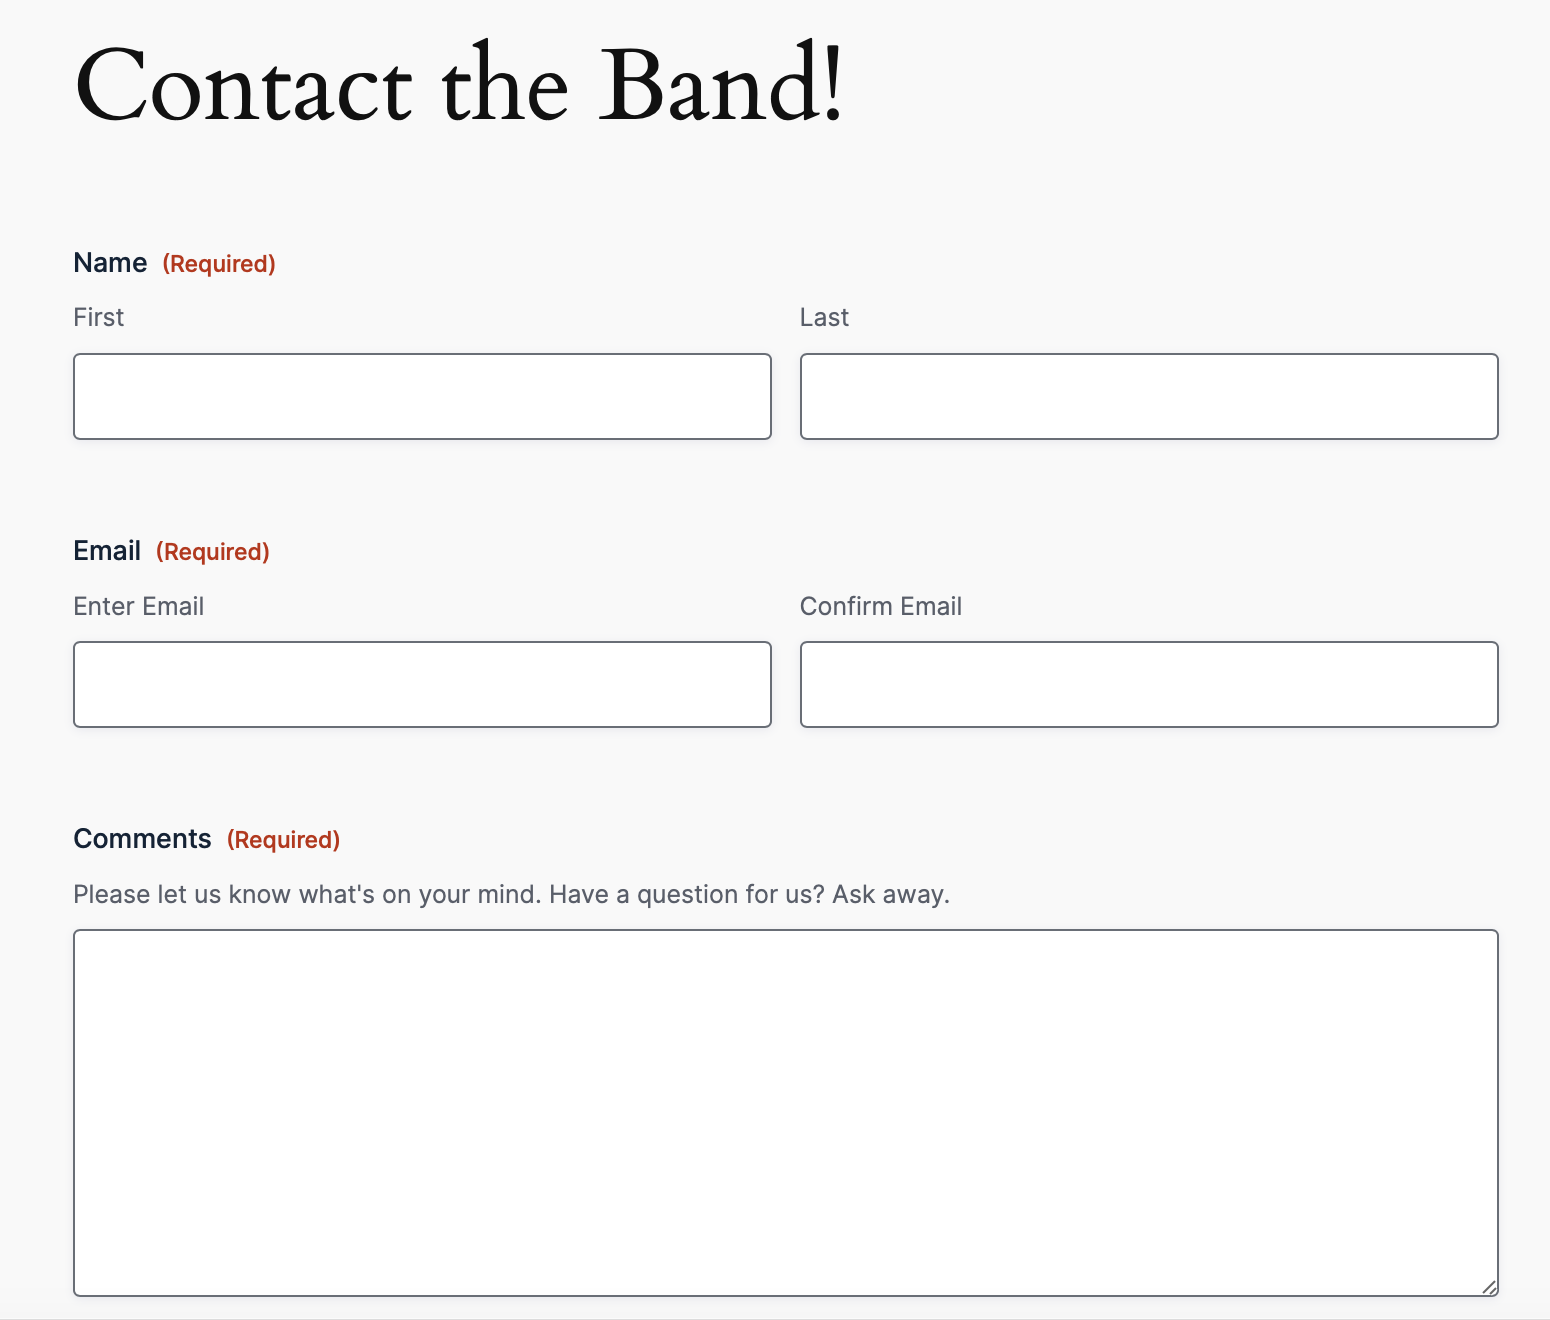
Receive Contact Requests
Gravity Forms actually has both a simple and advanced version of the contact form template, making it easy to collect as much contact information as you need from booking agents, talent buyers, potential students, or anyone inquiring about your services. The best part is that you can also enable spam protection, so your inbox won’t be flooded with bots and fake gig requests.
Take Song Requests
Do you play covers? All you need to do is create a simple form with just one or two fields, and then invite your audience to request their favorite song or artist. Then, route the entries to a preferred email address and receive the requests in real time.
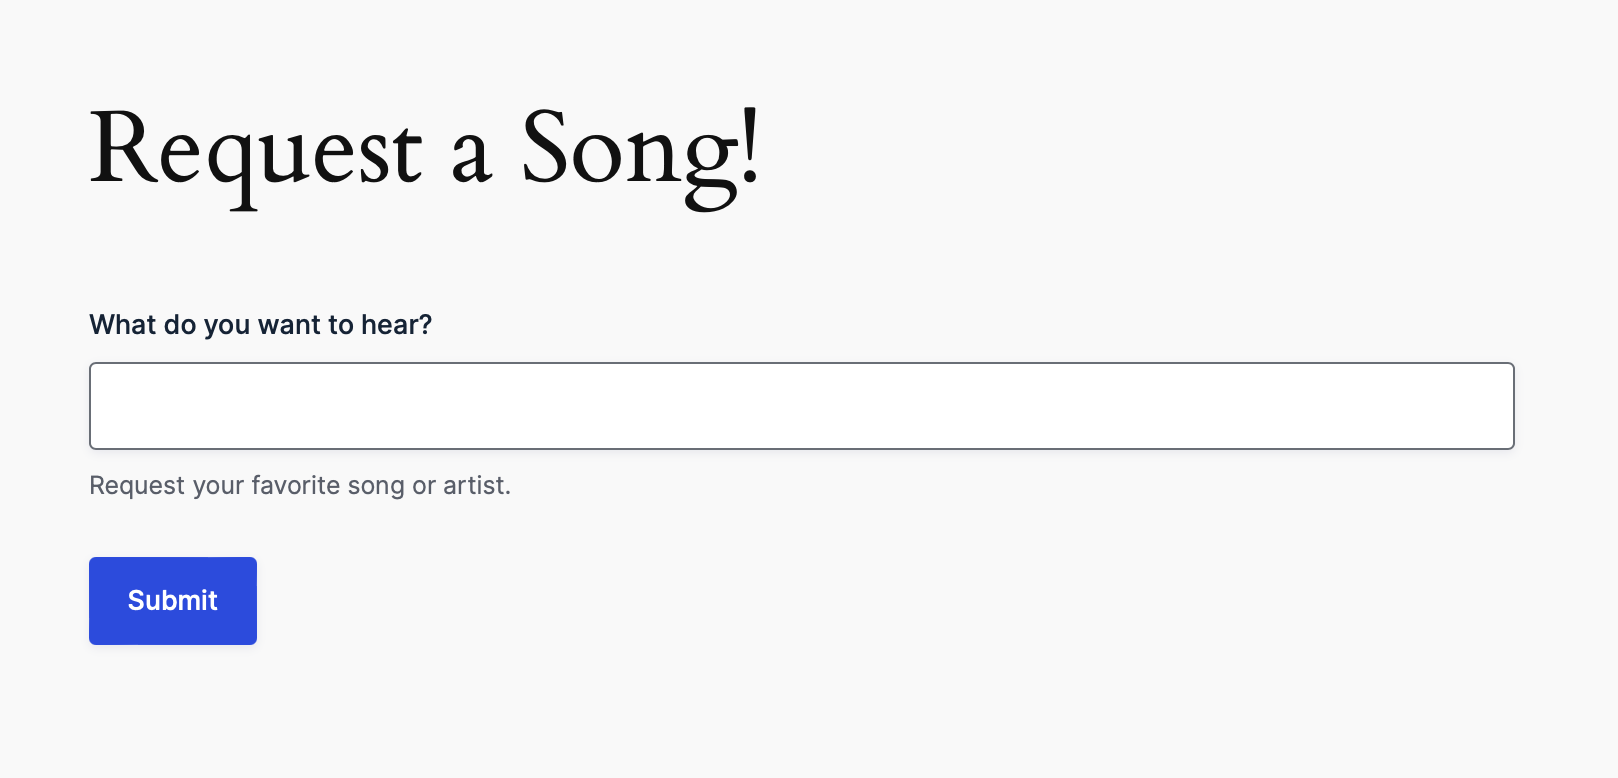
As a bonus, after your fans submit their request you can route them to your newsletter signup form and invite them to join your email list.
Manage Event Registration
Will you ever be hosting auditions or another type of meetup? What about a ticketed event? Register your attendees for free and paid events, and even collect payments all with the convenient Event Registration Form template.
There are many more form templates to choose from in the template library, and the number of ways to use them is nearly endless. Whether you decide to use a template or start from scratch, Gravity Forms makes it easy for you to customize your forms to fit your needs.
Now, onto the tutorial…
How to Get Started with Gravity Forms on WordPress
Now that you know how Gravity Forms can help you, let’s look at how you can get started using it on your WordPress site.
Purchase a Gravity Forms License
Gravity Forms offers a few types of licenses, all of which include access to our knowledgeable and friendly support team. You can compare license types here, and pick the one that will suit your needs. It’s worth noting that if you want to accept payments, you’ll need to purchase a Pro or Elite license.
If you’d like to try before you buy, you can create a free demo site – it has all the functionality you’ll need to follow along with this tutorial.
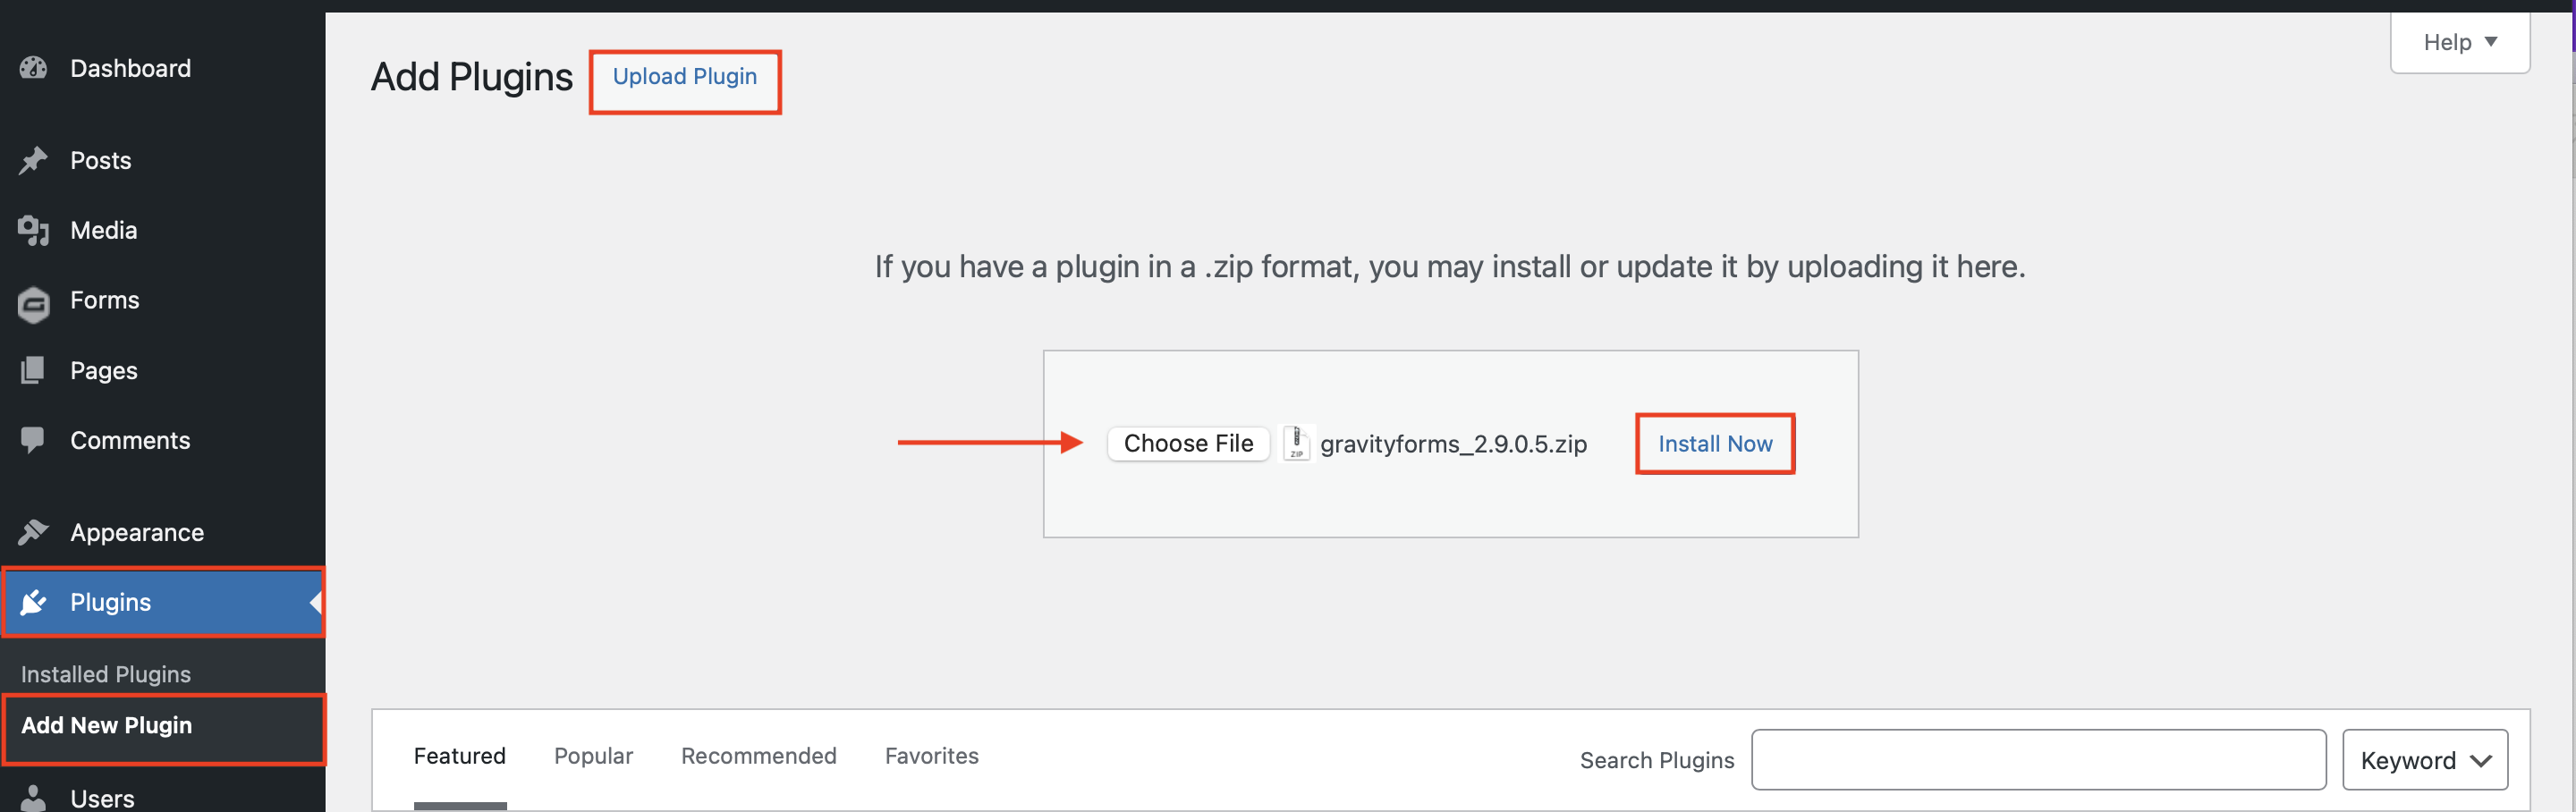
After you’ve made your purchase, you can log in and download Gravity Forms directly from your My Account section. This download should remain a ZIP file, as this is the format in which you’ll upload it to your WordPress site.
Next, install the Gravity Forms plugin on your WordPress site. Here’s how:
- Go to your WordPress dashboard and navigate to Plugins → Add New Plugin.
- Click Upload Plugin.
- Choose the ZIP file you just downloaded, then click Install Now.
- After the plugin is installed, click Activate.
Now, follow the instructions in the Setup Wizard. You’ll be asked to enter your Gravity Forms license key and answer a few questions to help you get started. You can find your license key by logging in to Gravity Forms and clicking My Account.
Create Your First Form
Once Gravity Forms is installed (or if you’re using our demo), creating a form is simple. Here’s how:
- From your WordPress dashboard, go to Forms → New Form.
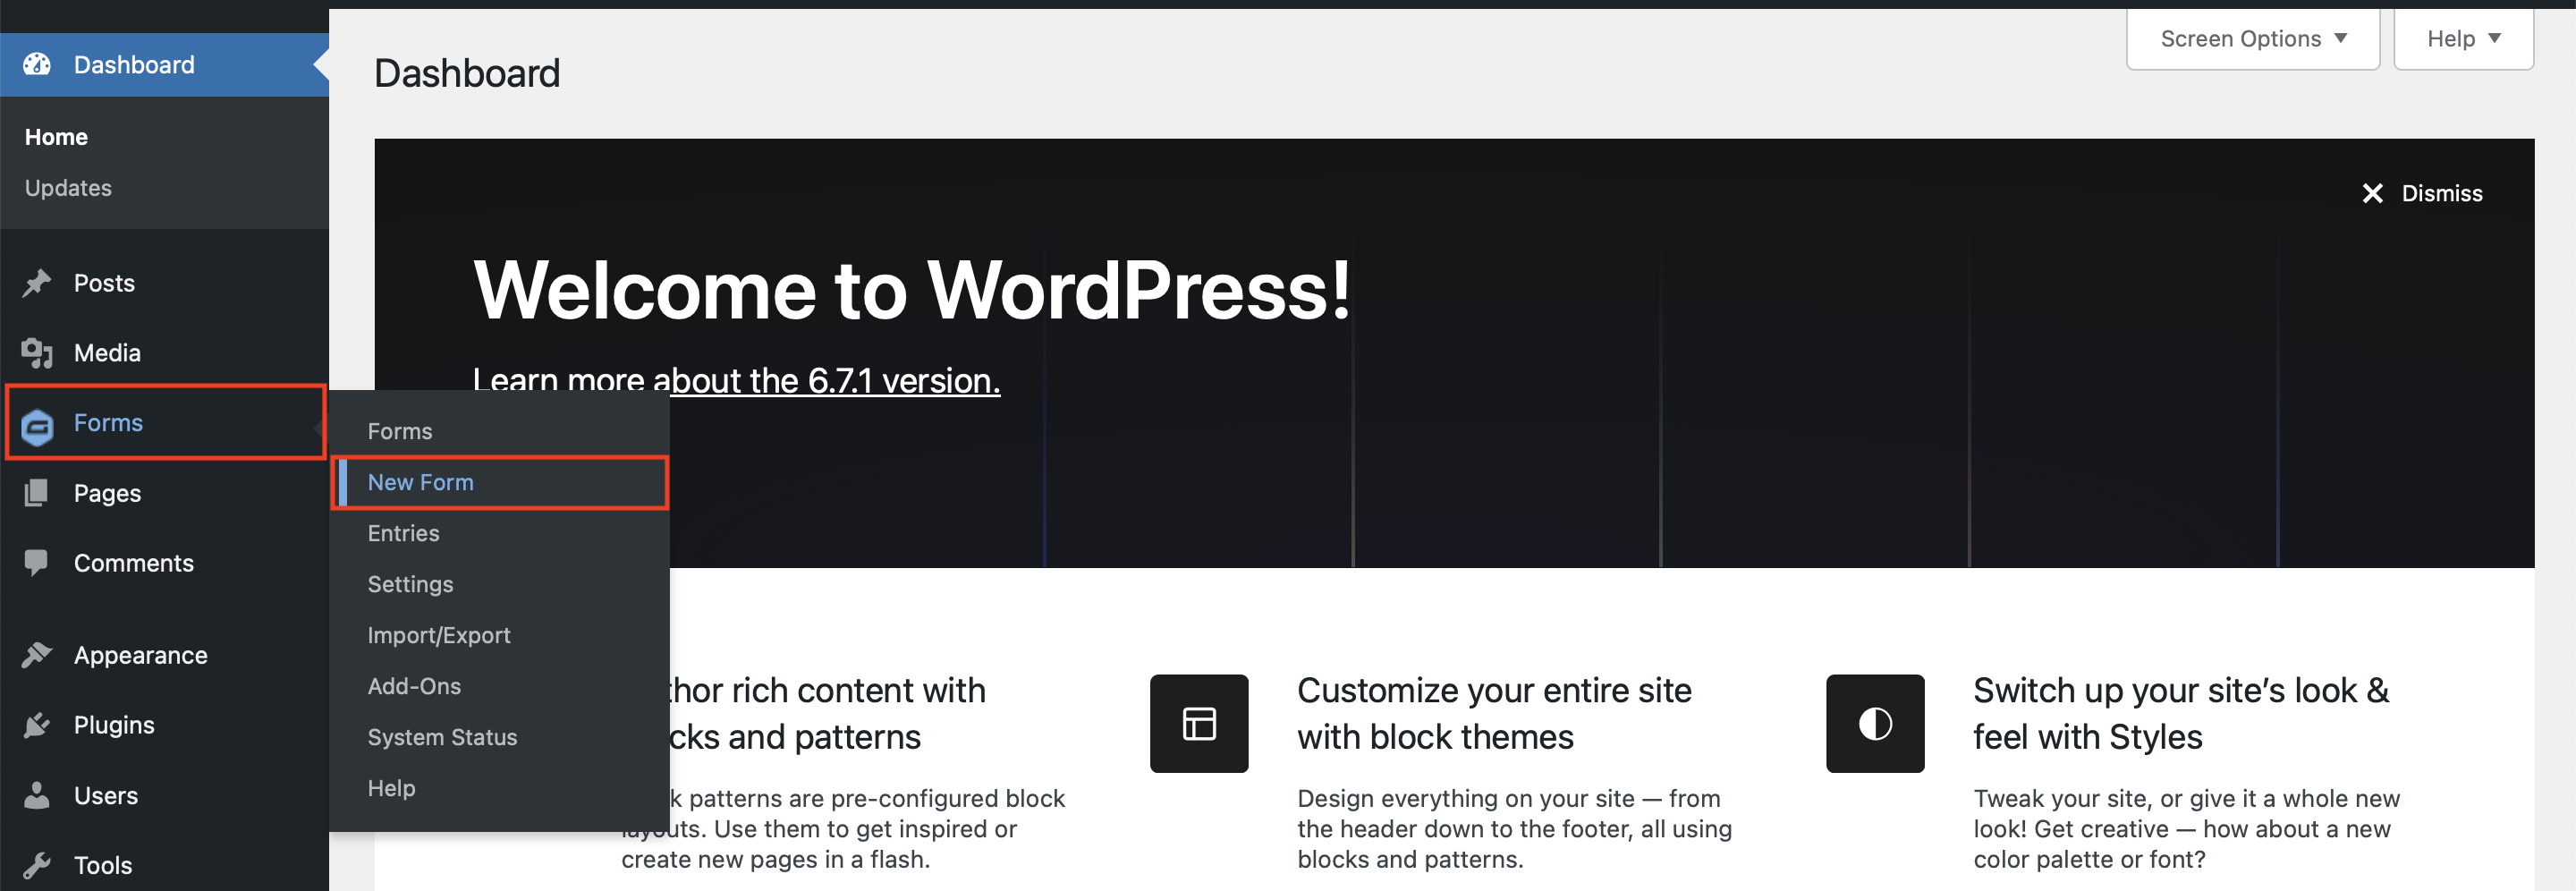
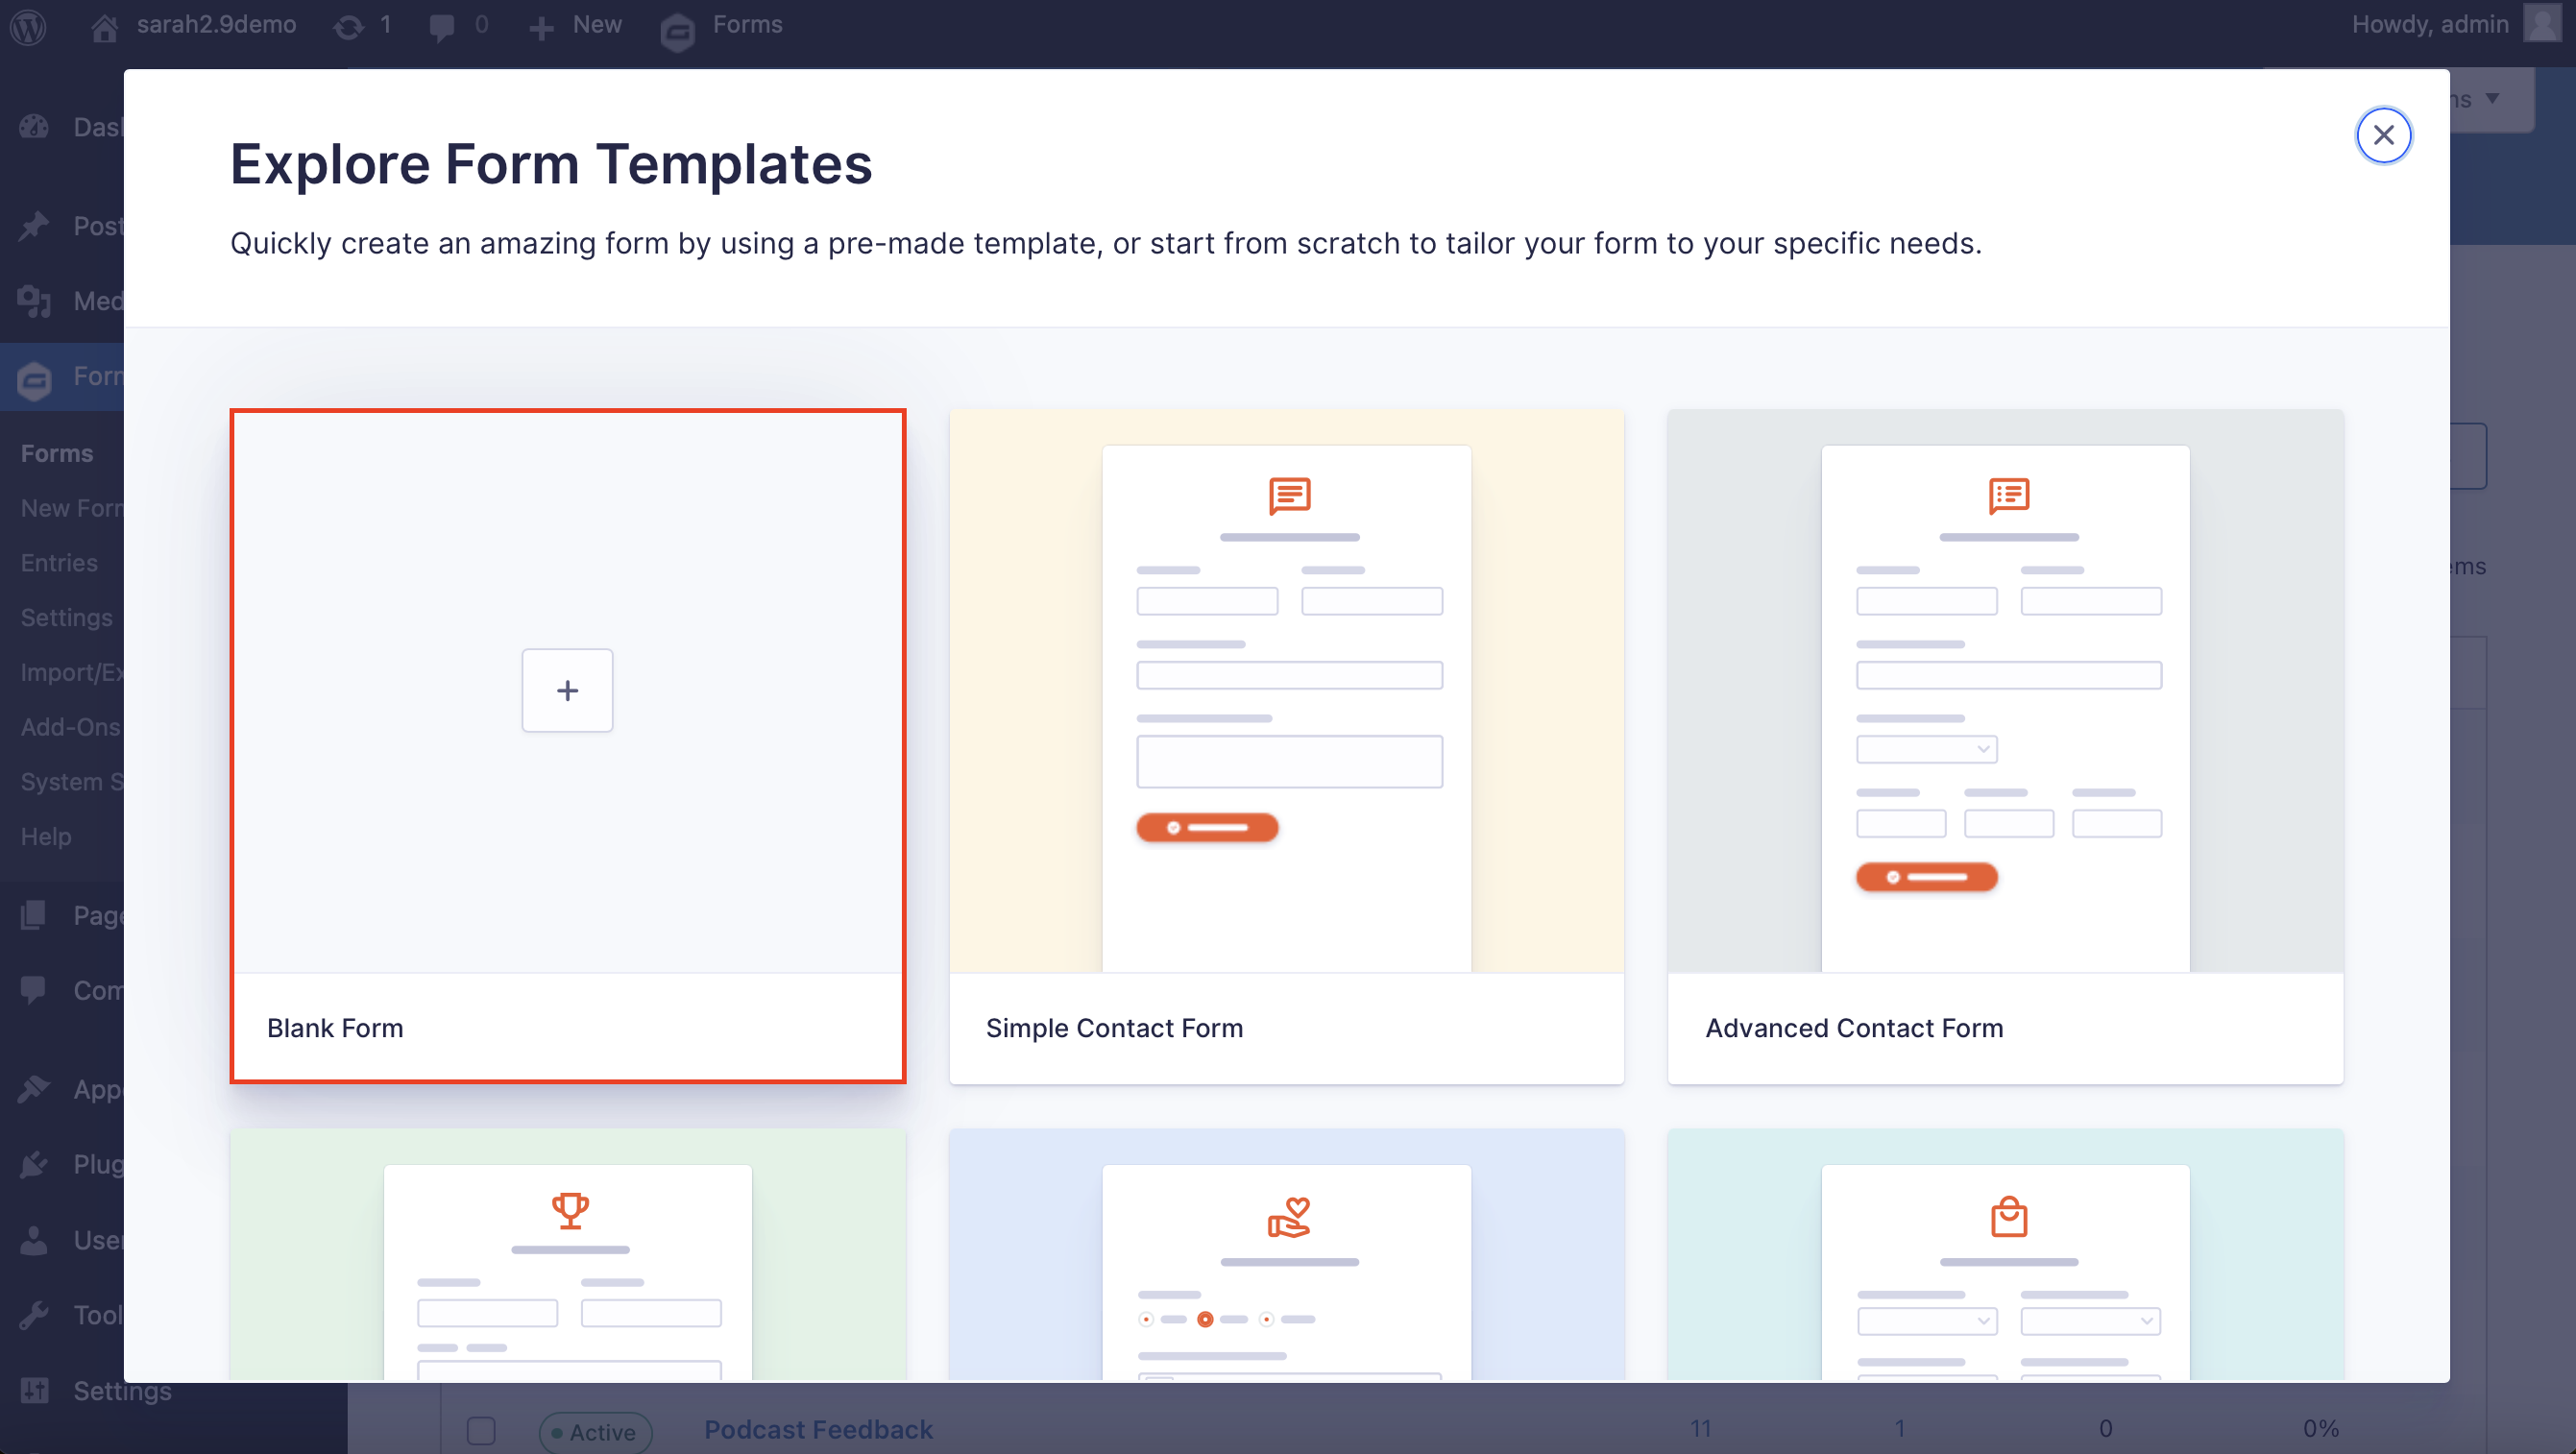
- Choose a form template from the Gravity Forms template library, or start from scratch by choosing the Blank Form.
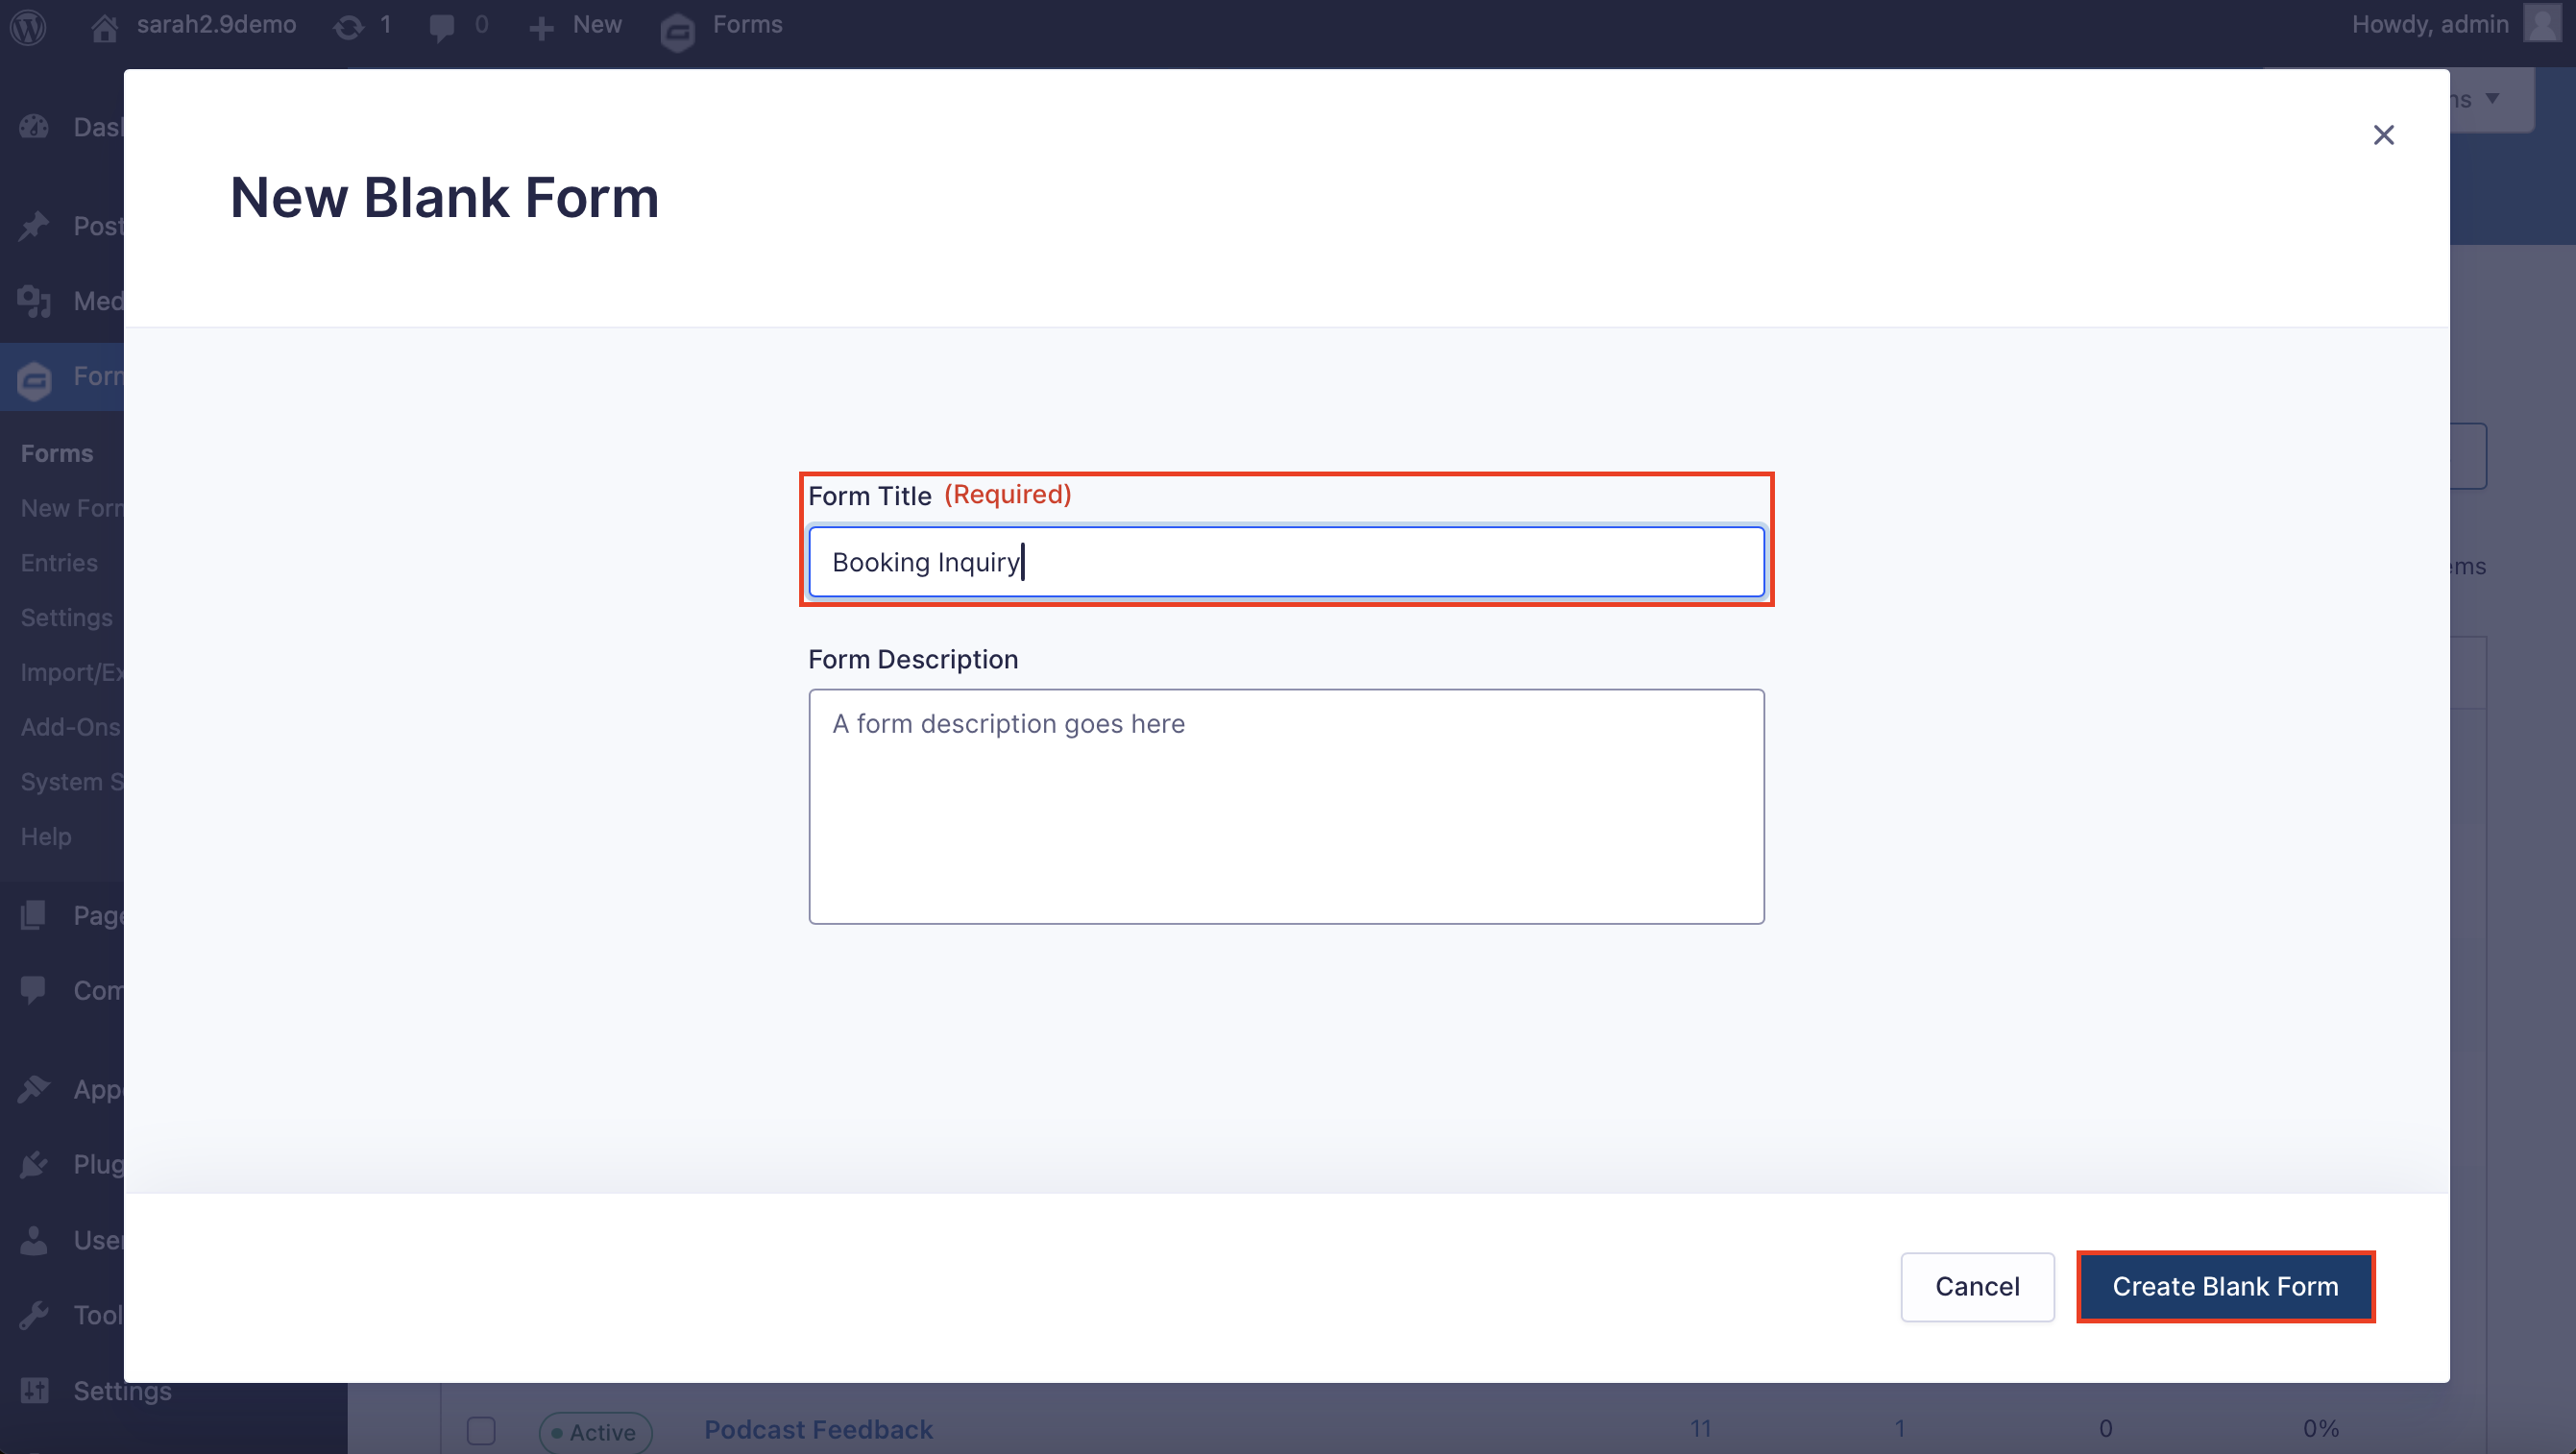
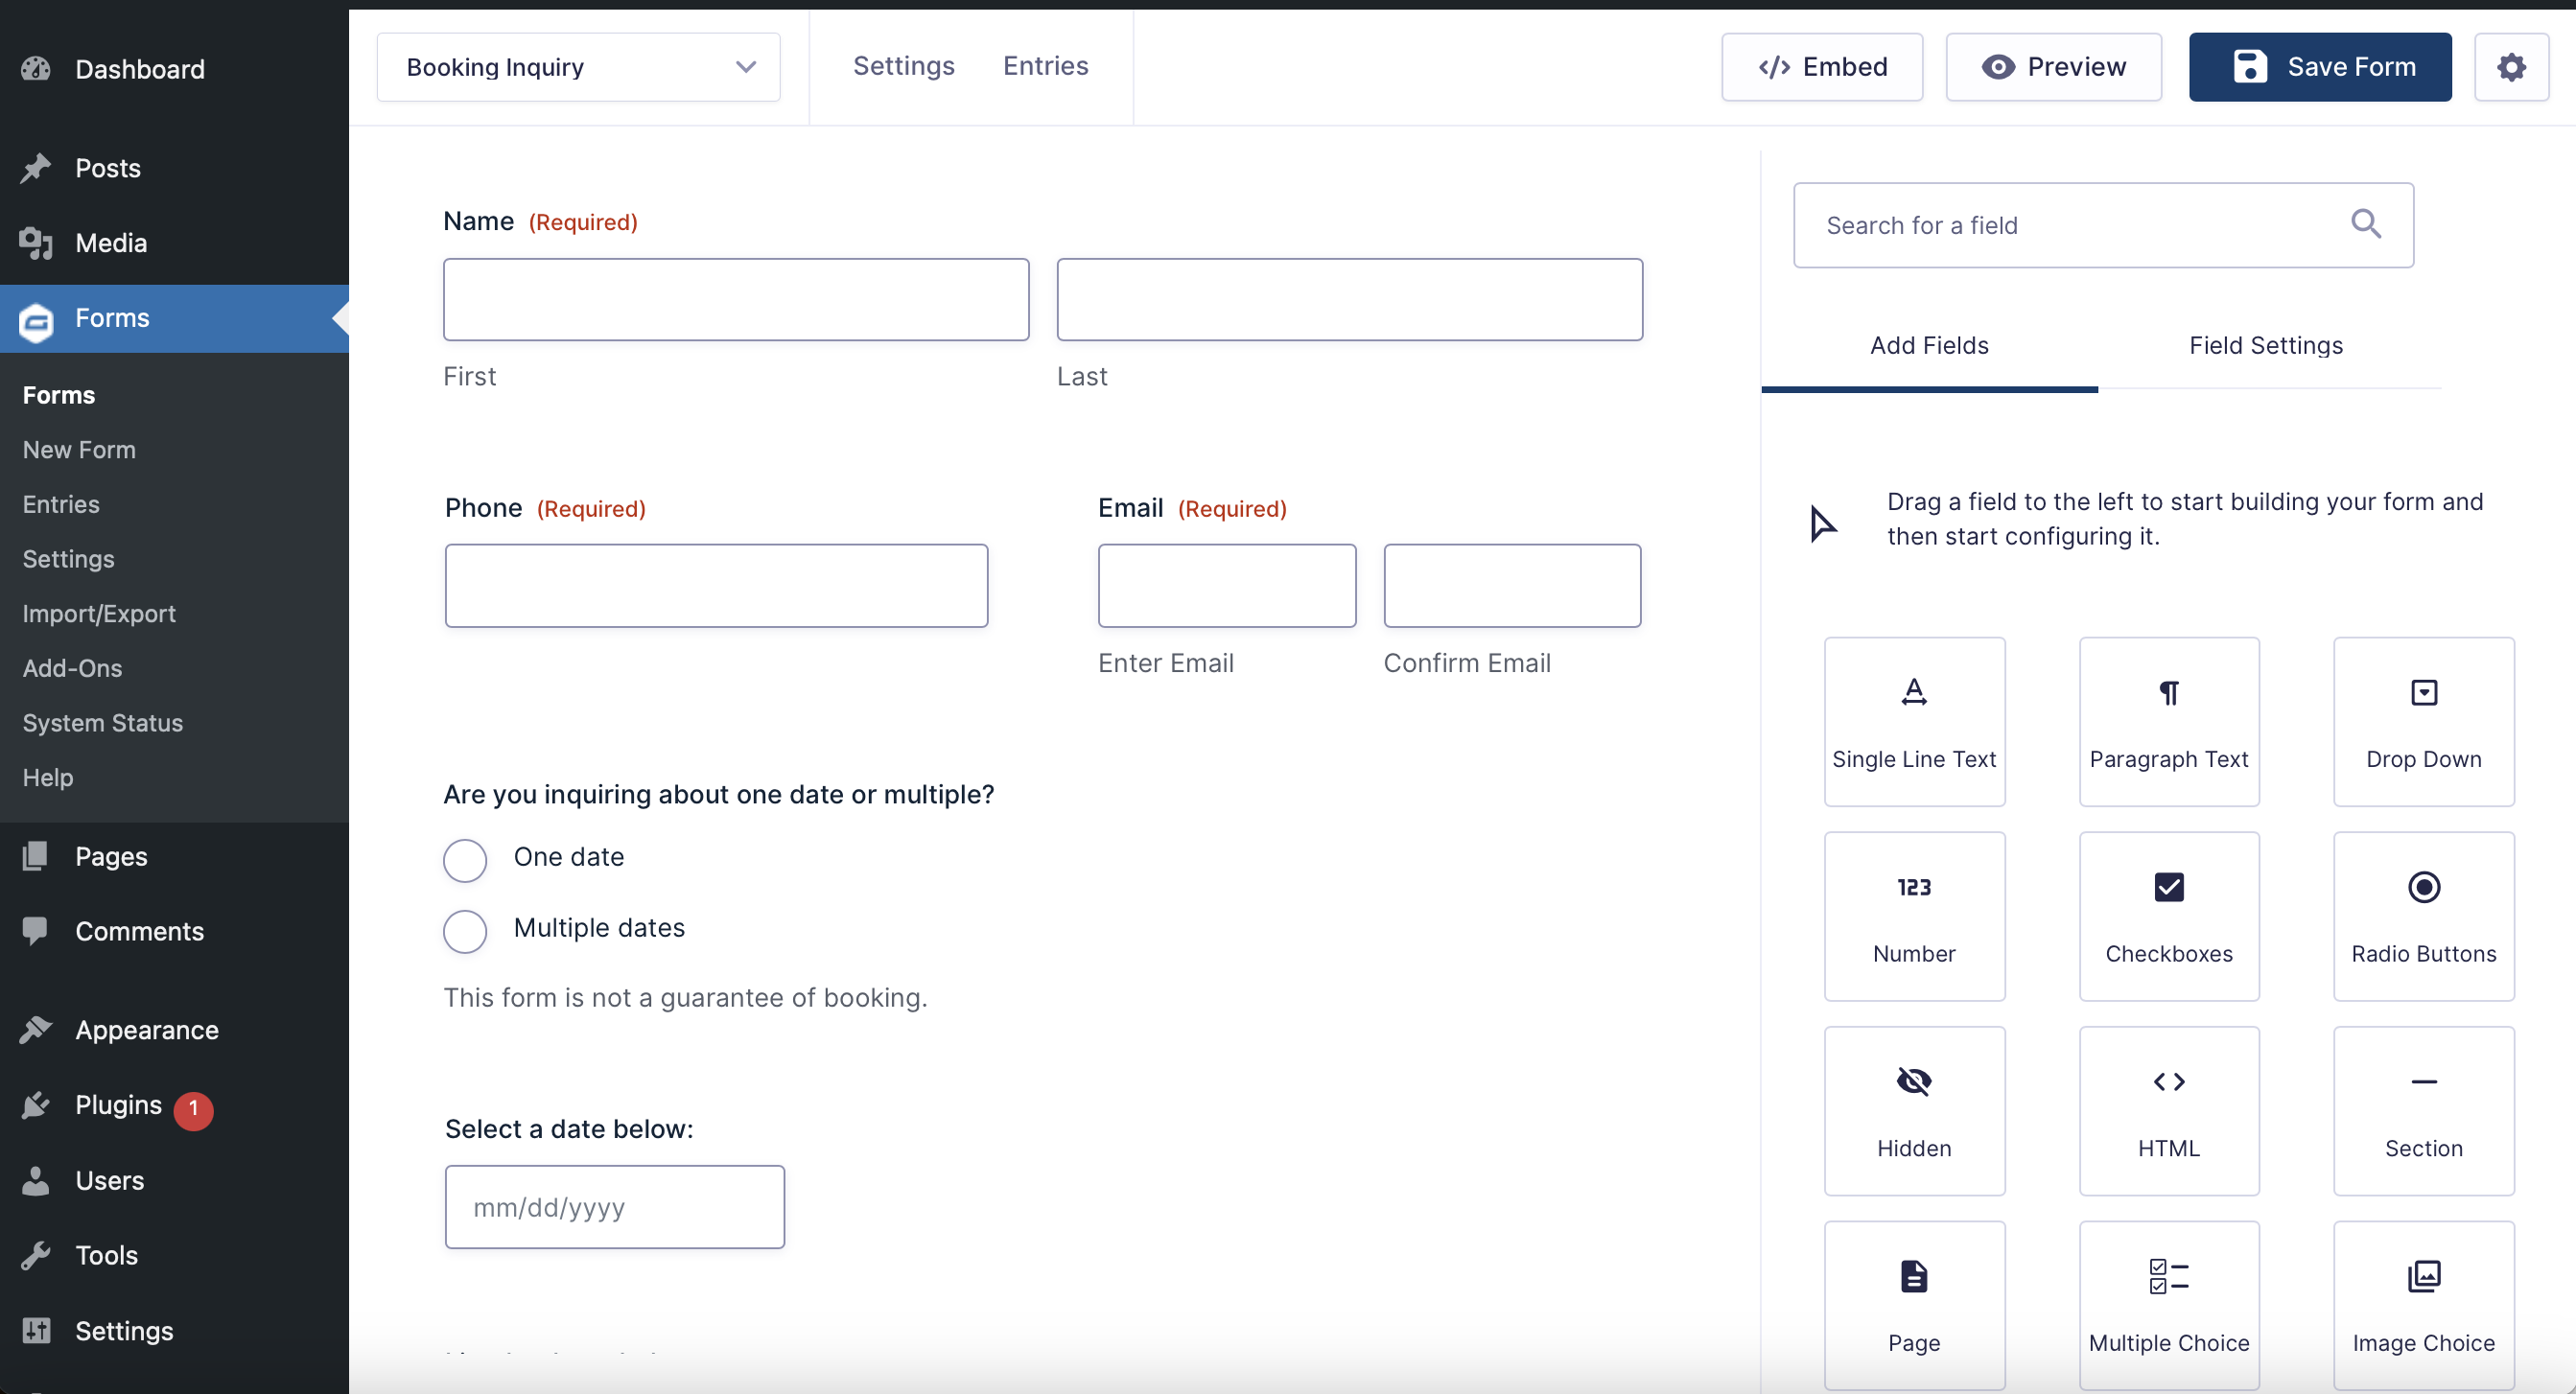
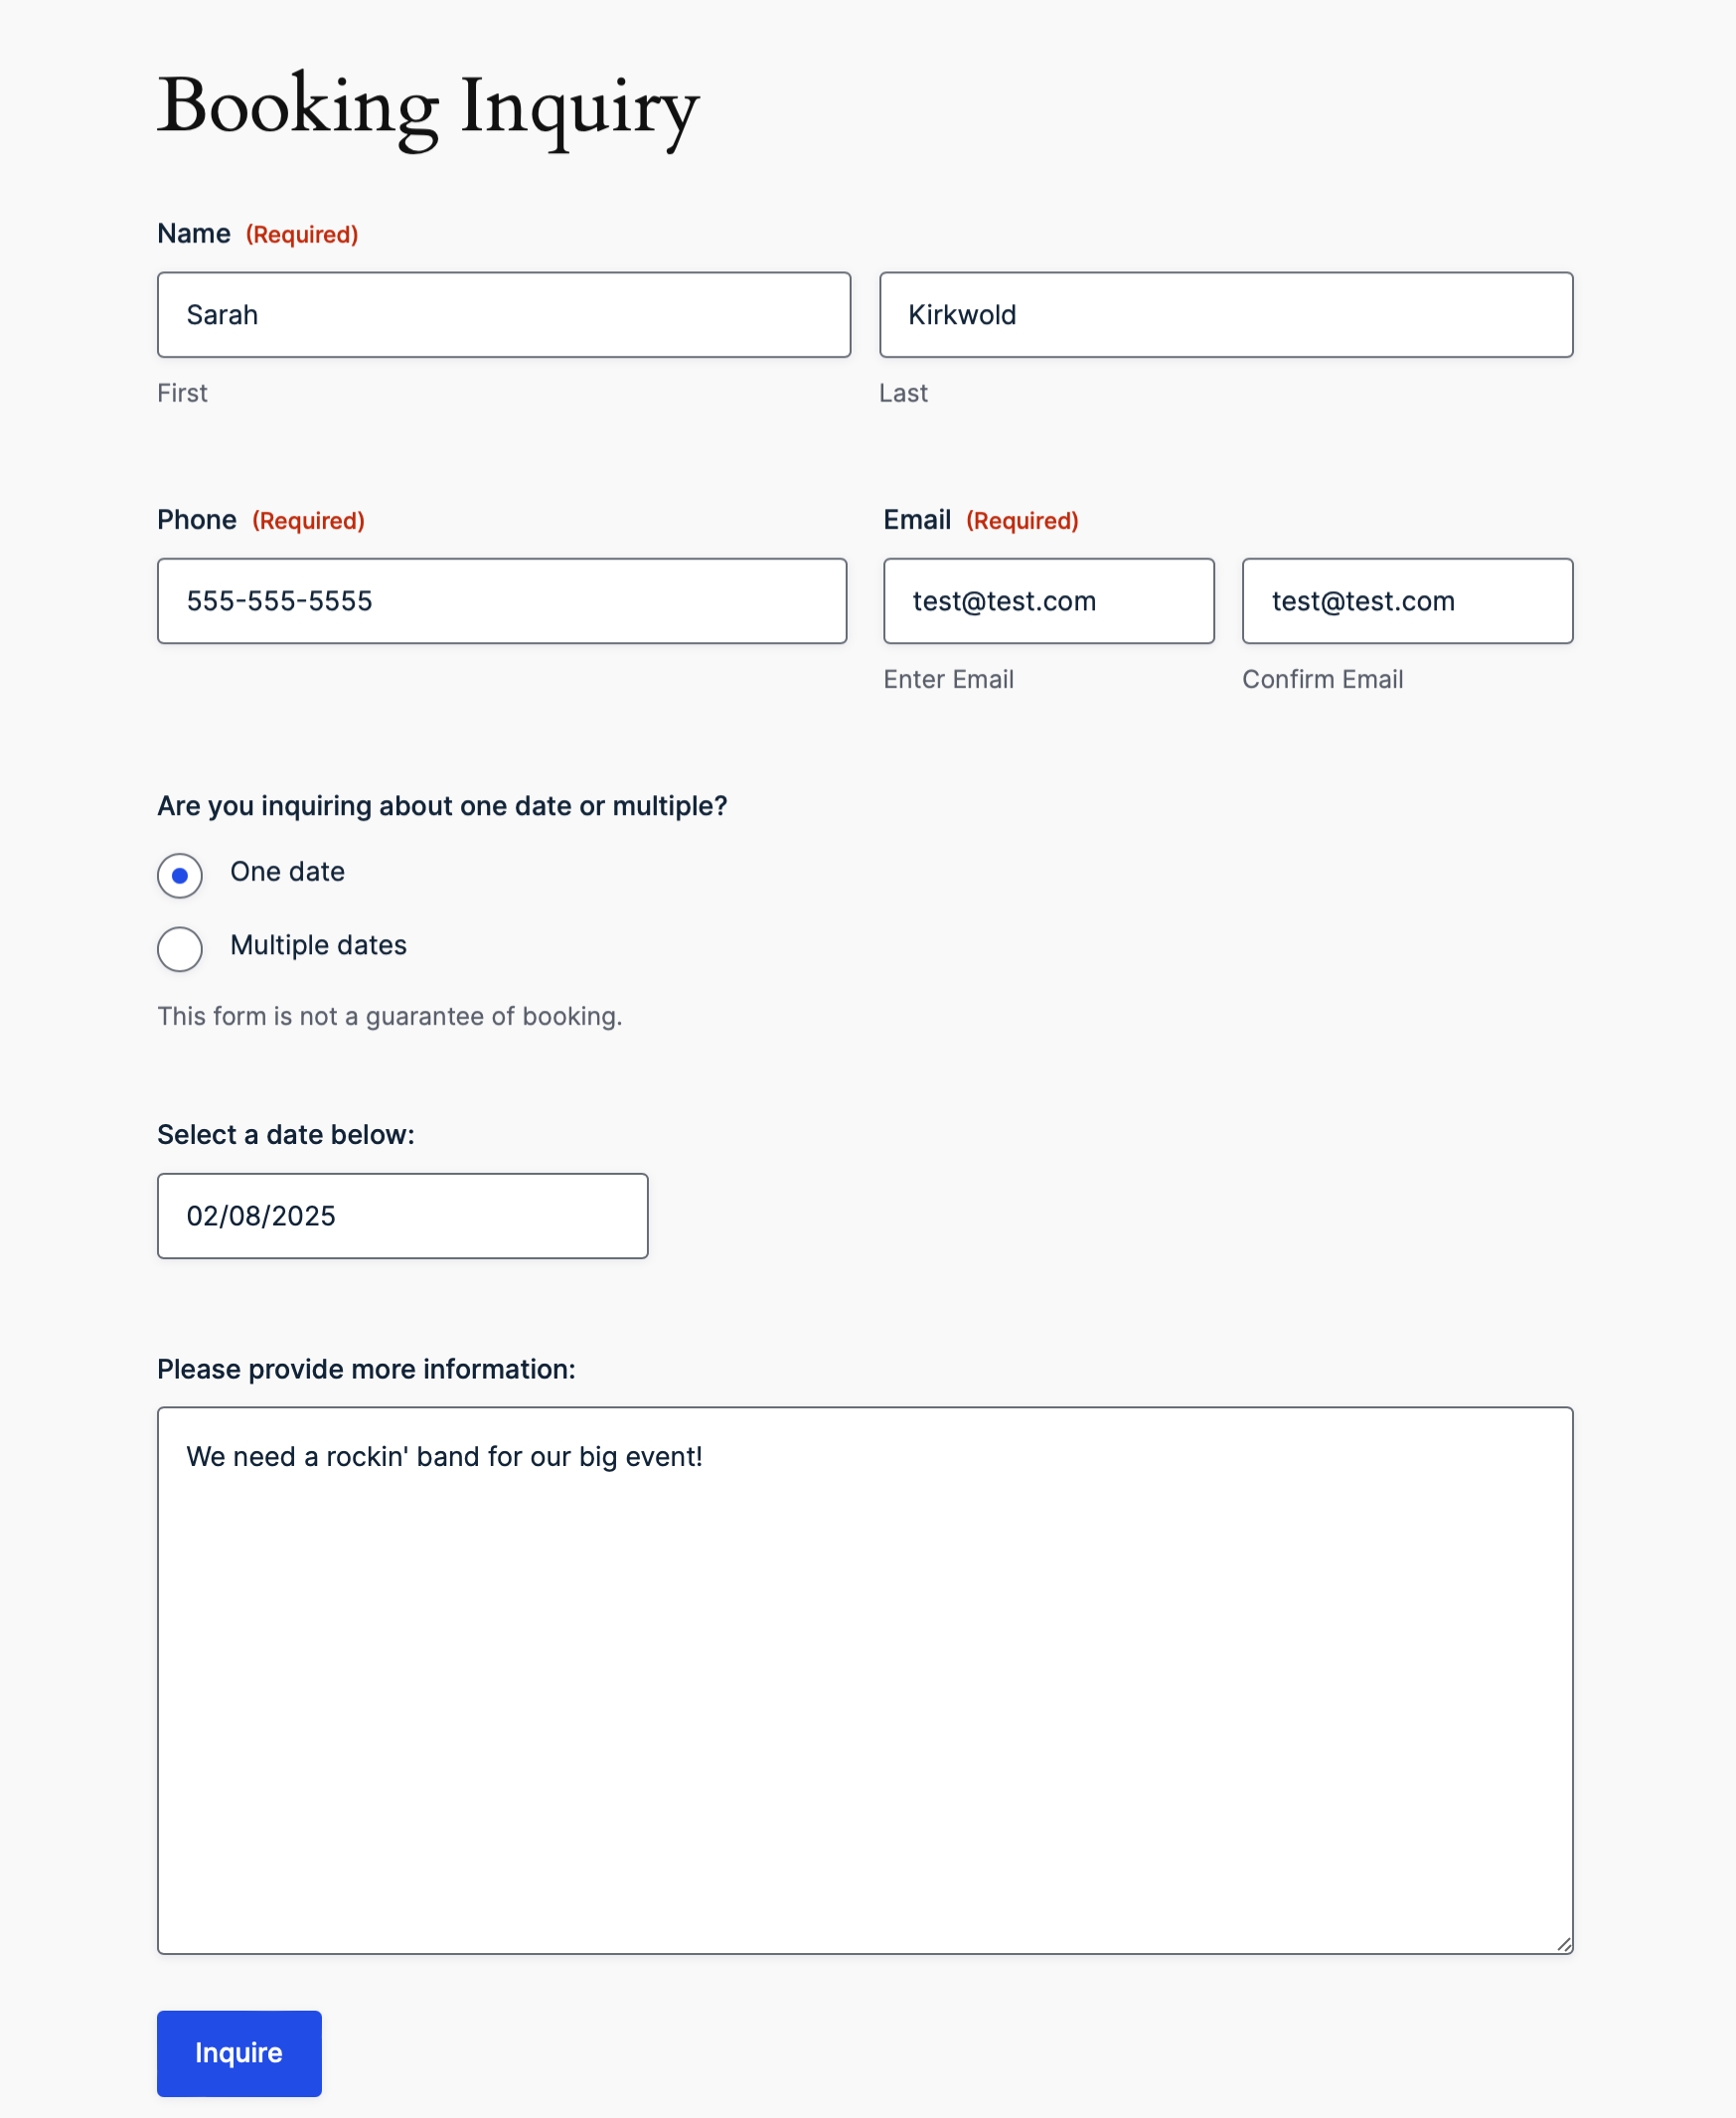
In this tutorial, let’s create a booking inquiry form. Give your form a title and optionally a description, and then click Create Blank Form.
- This is the fun part. Drag and drop fields onto your form and arrange them as needed. Edit the field settings to make fields required, modify the appearance, add conditional logic and so on. With Gravity Forms, you have an enormous amount of flexibility when it comes to customization. When you are satisfied, click Save Form.
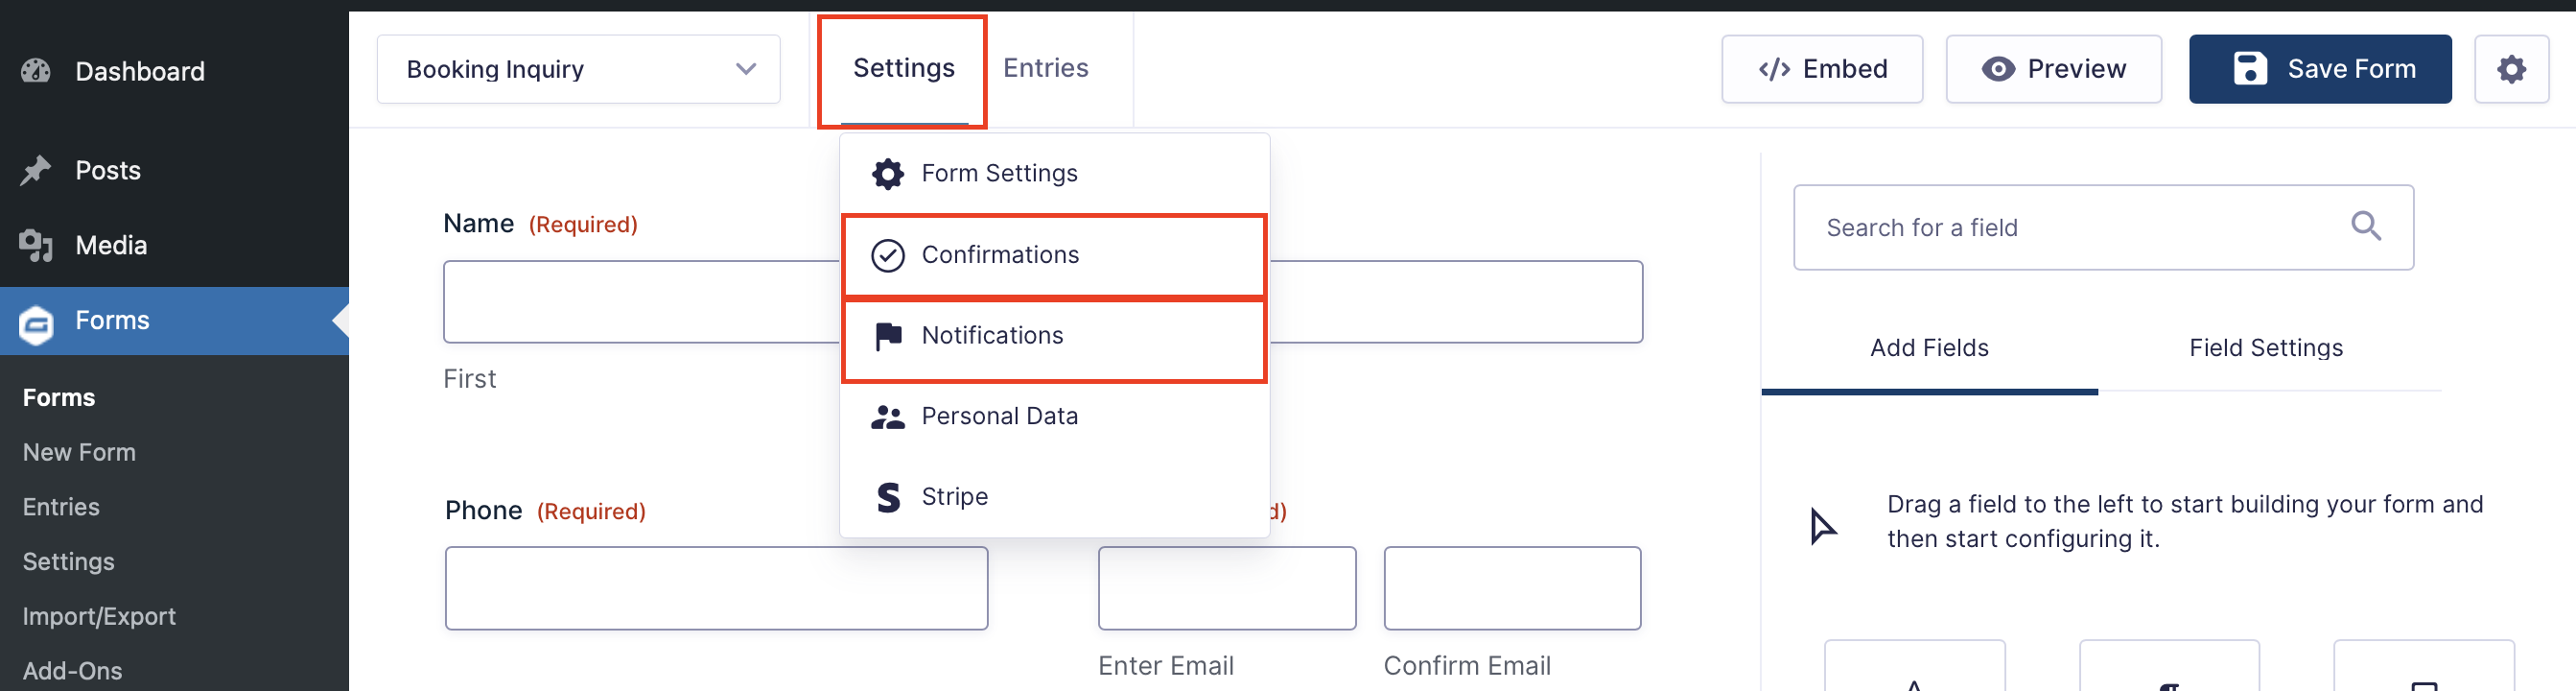
- Under Settings, you can further enhance your form by customizing the notifications and confirmations to let your users know their form has been submitted successfully. Our documentation will help you get started with notifications and confirmations.
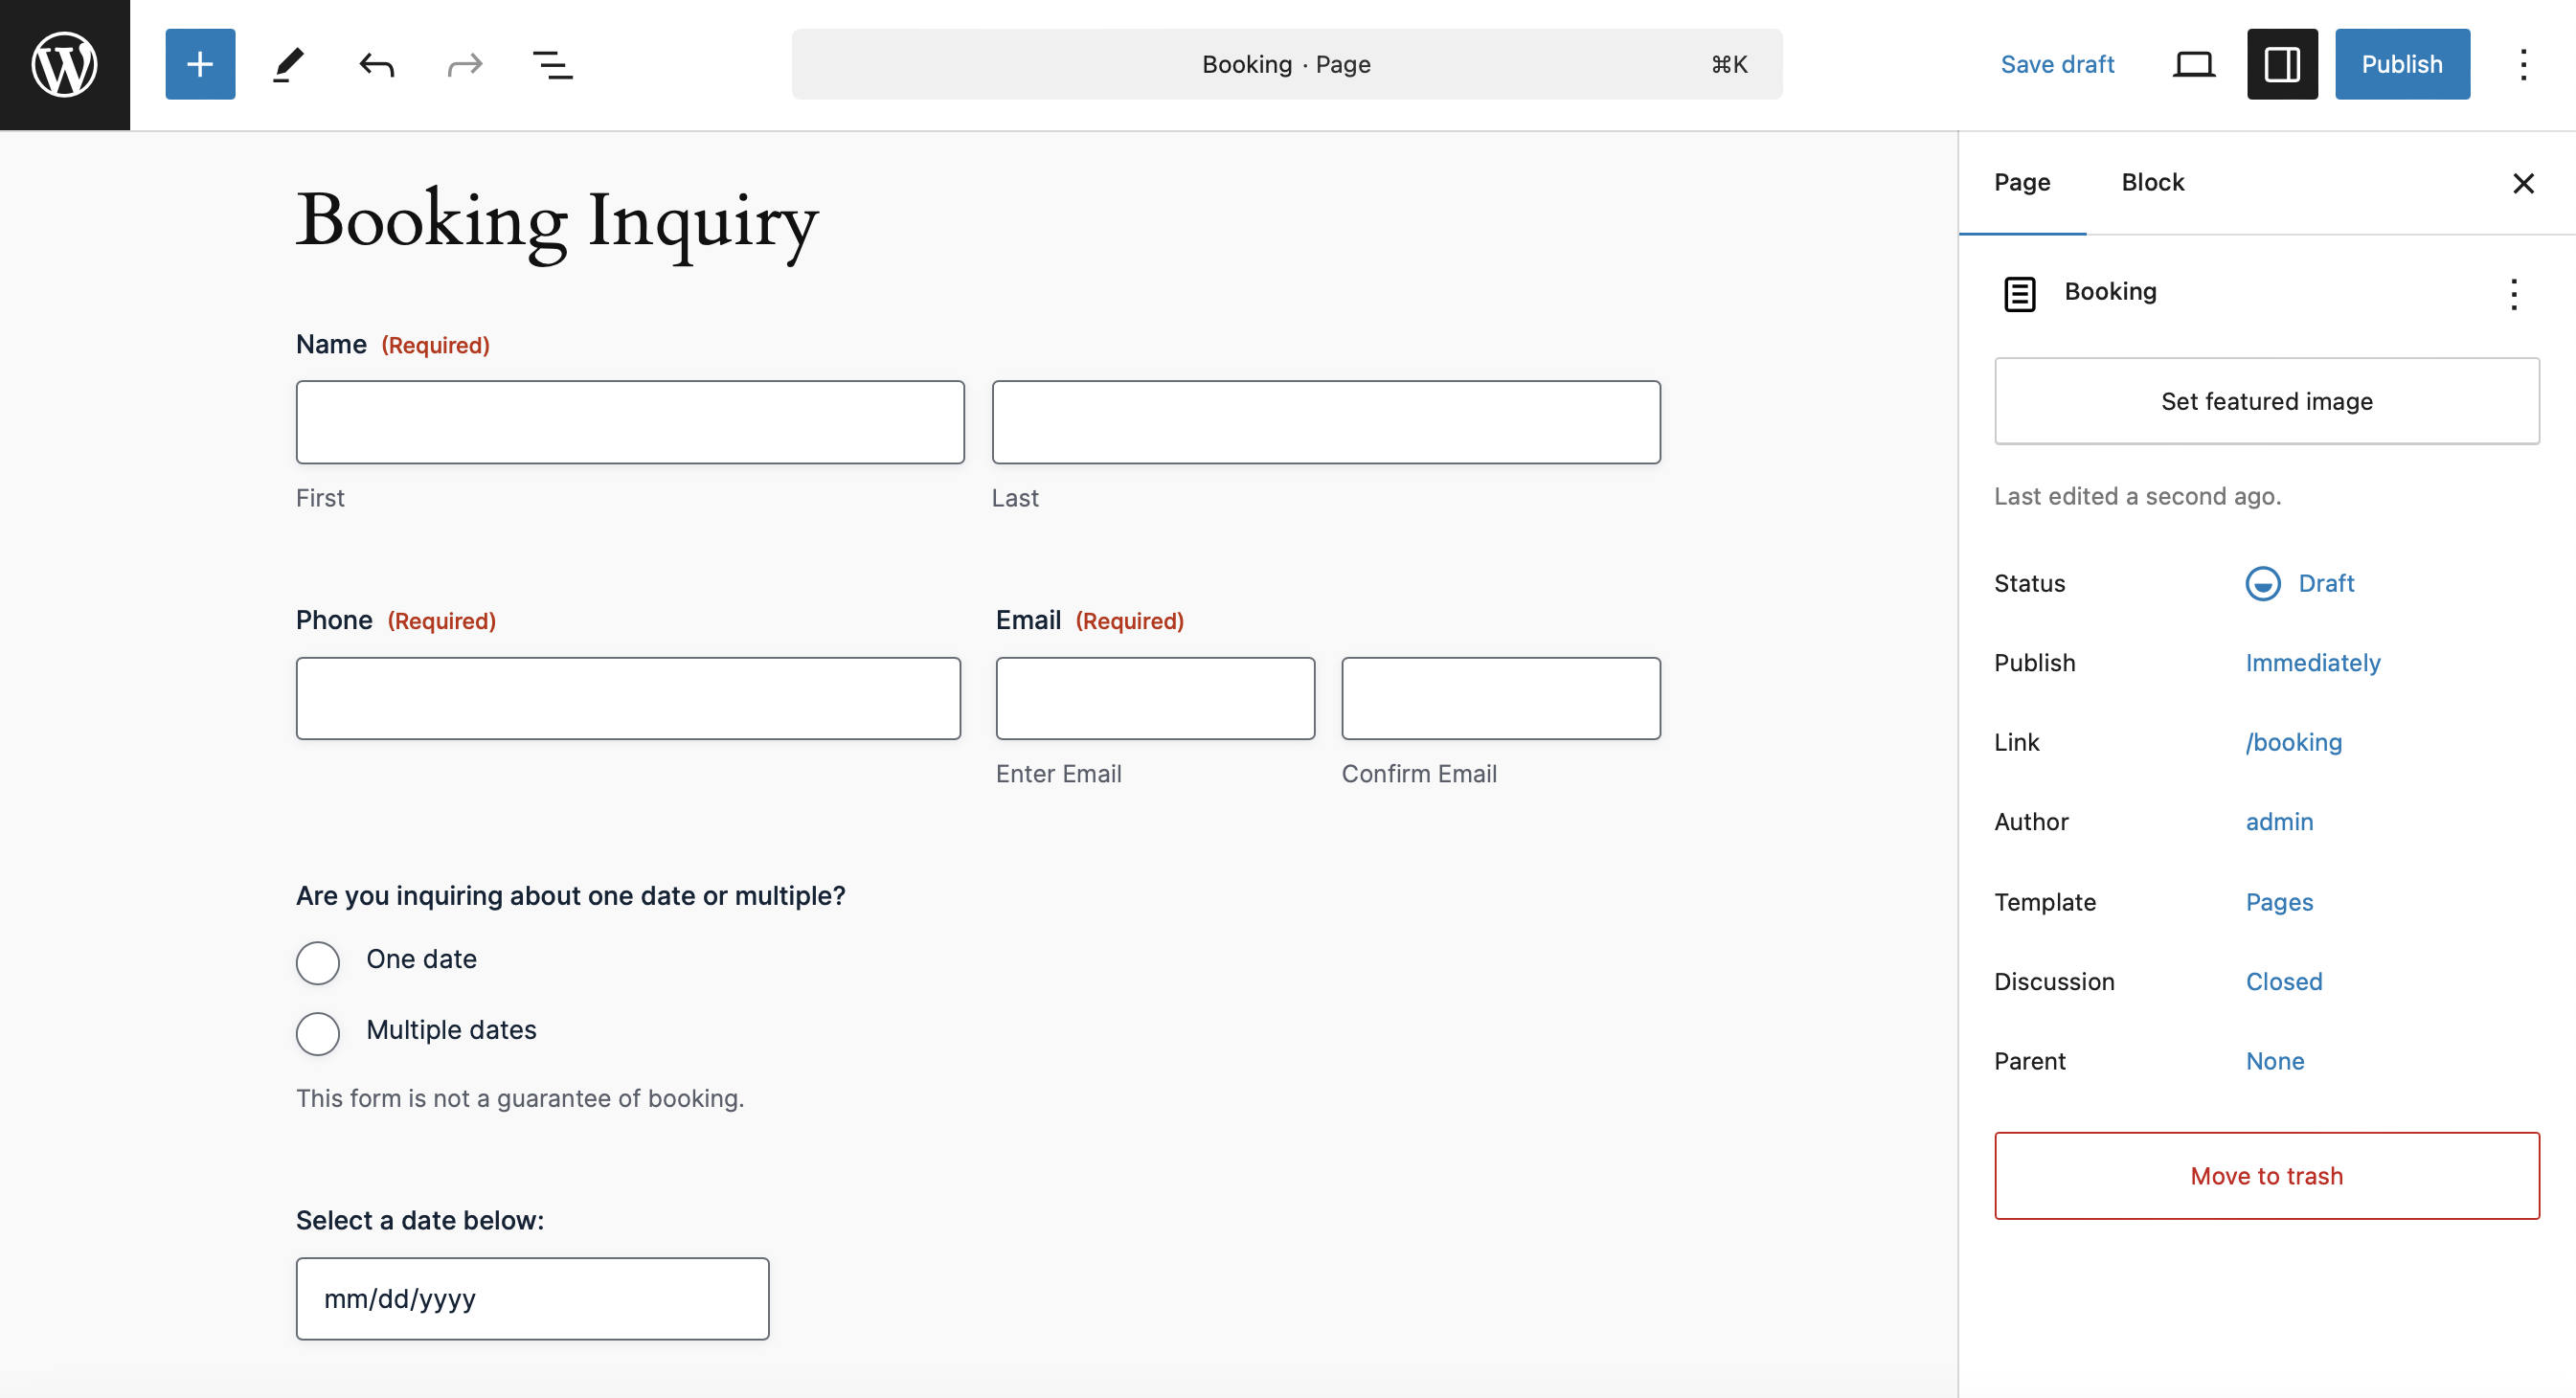
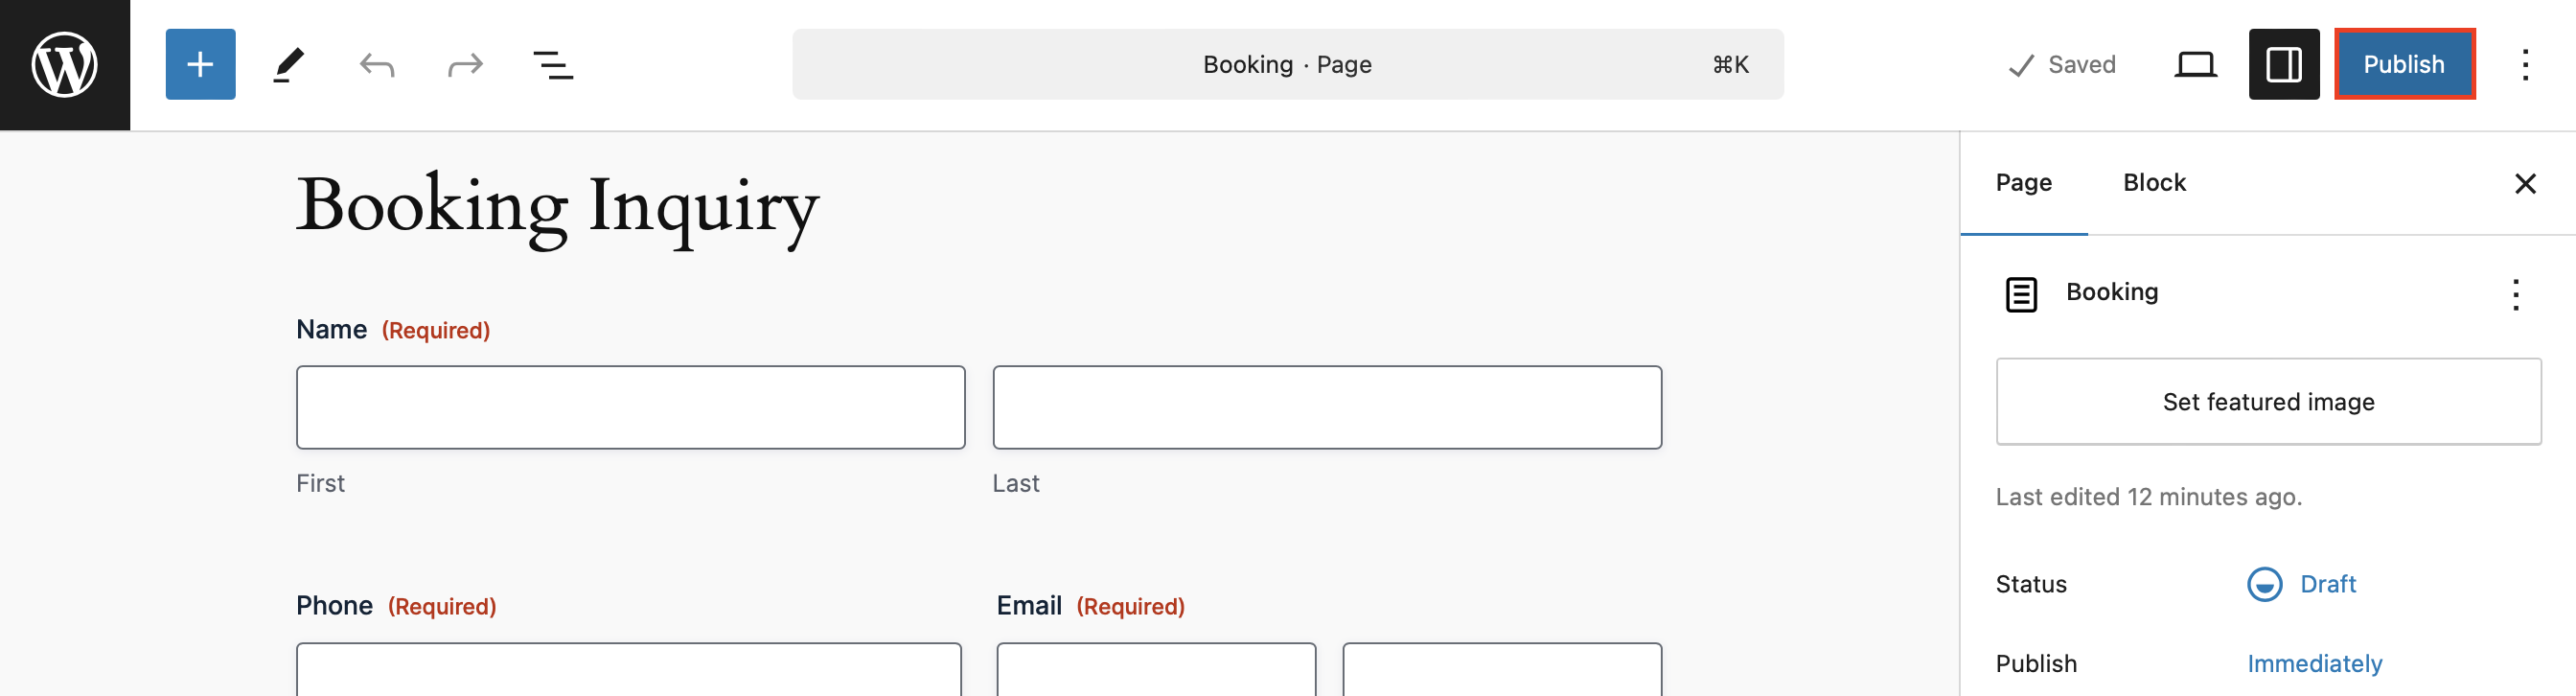
- To view the finished product, embed the form on any page or post. In this case, we’ll embed the form on a new page:

From here, you’ll be able to view your form and make further changes to style your form via the block editor as needed. Don’t worry, this page starts out in Draft status, so you can still make as many changes as you need to before publishing for the world to see.
Test Your Form
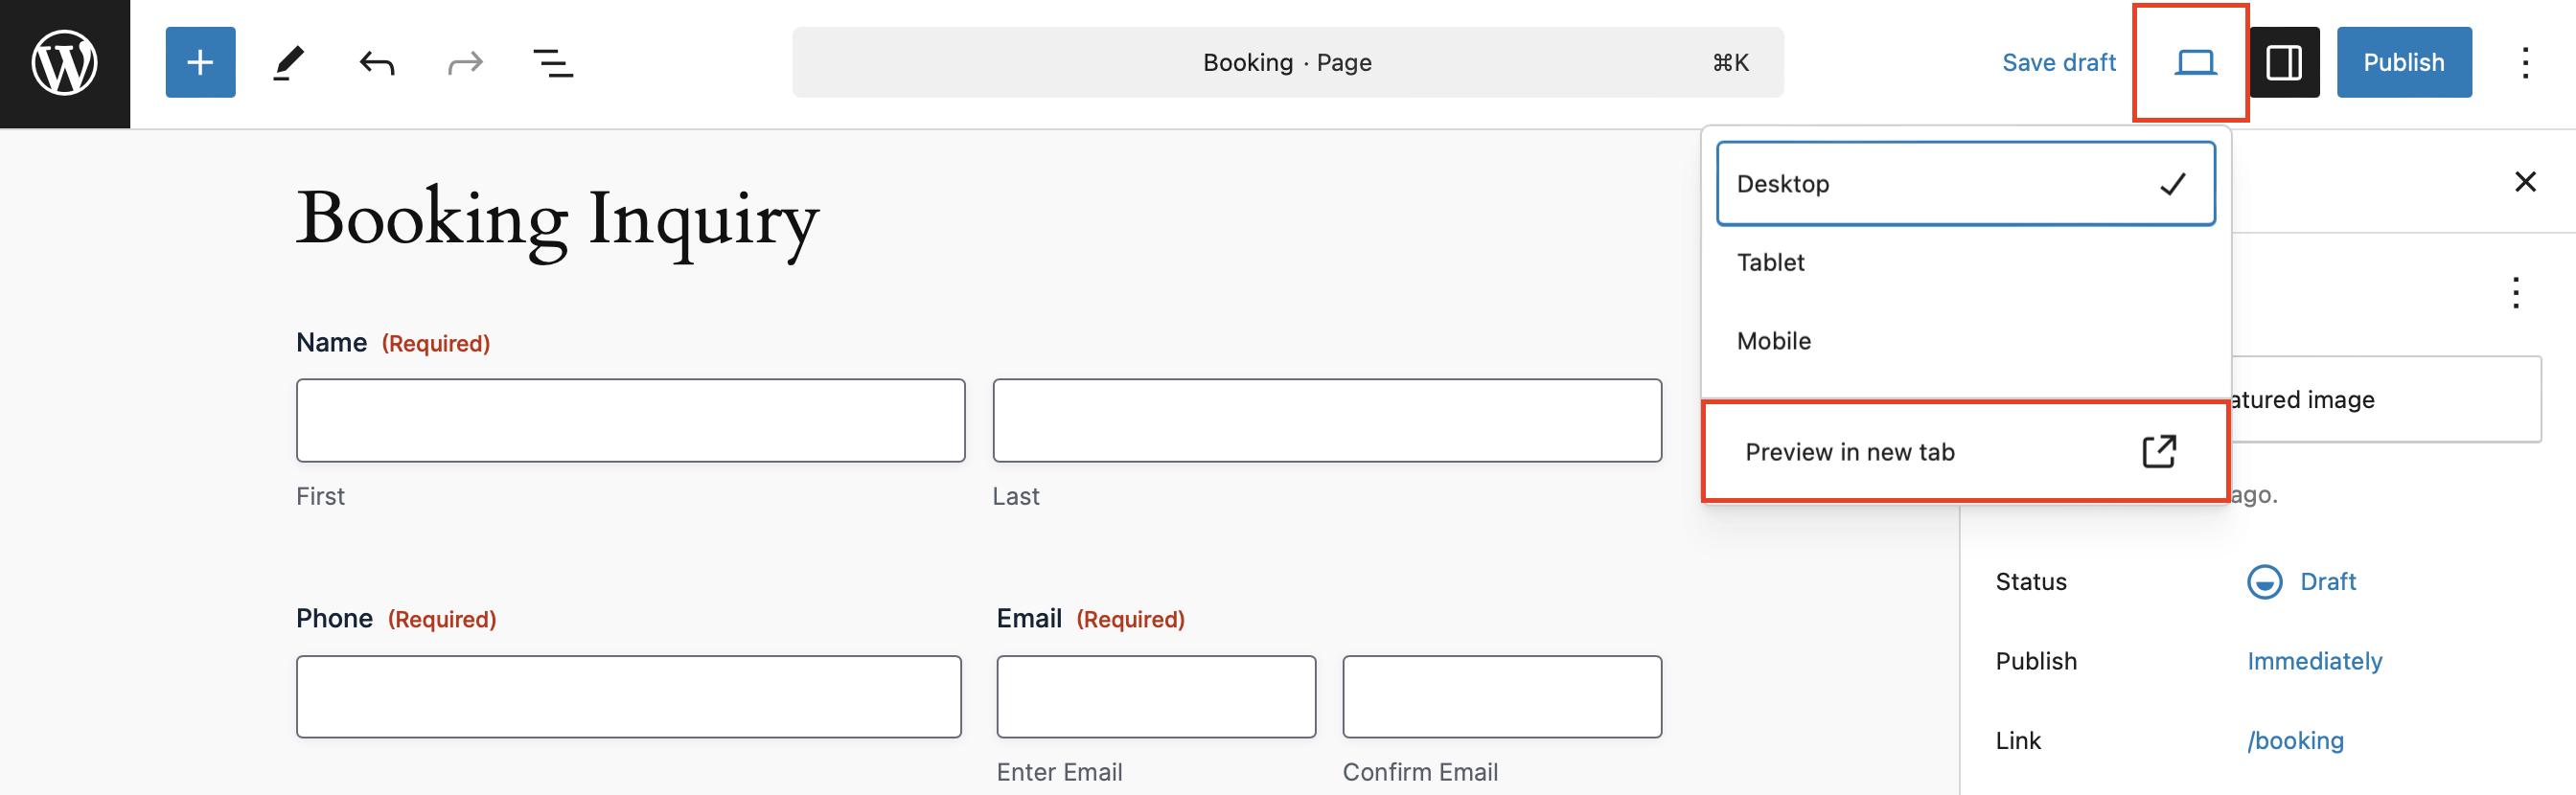
Make sure to test your form by submitting a few test entries. The easiest way to do this is from the page editor, by clicking Preview in new tab.
Fill out the form and click to submit.
This way, you can ensure everything is working as expected and that all submissions are being routed correctly. This is also how you’ll be able to validate your confirmation messages and notifications, if you’ve added any.
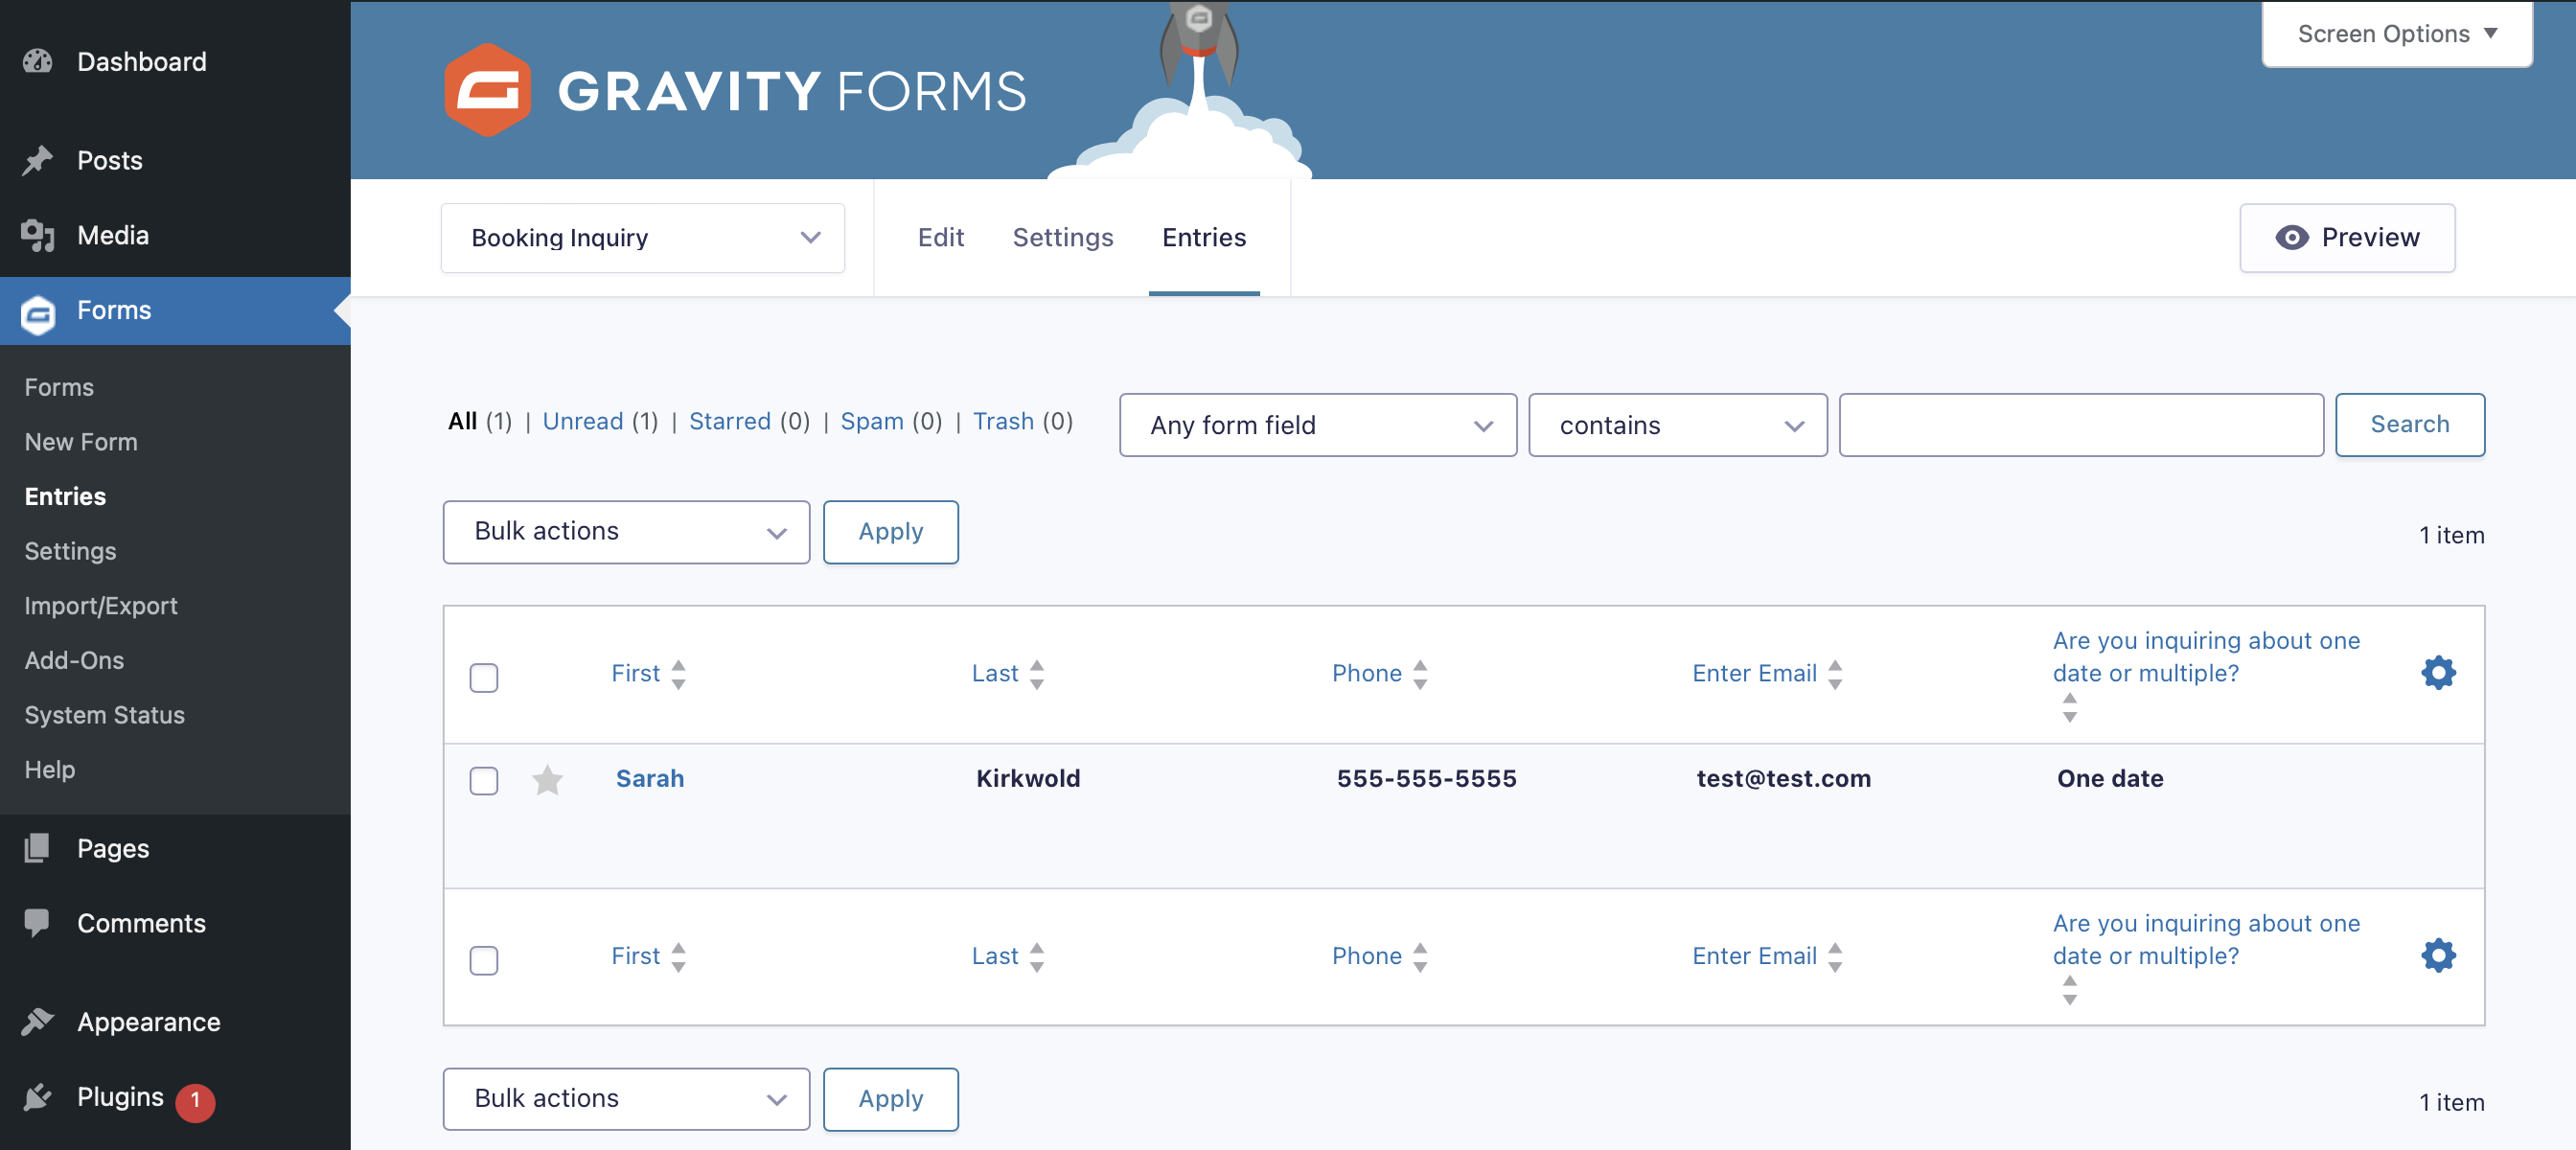
To check that your form submission has been received, head to your Forms list and click Entries.
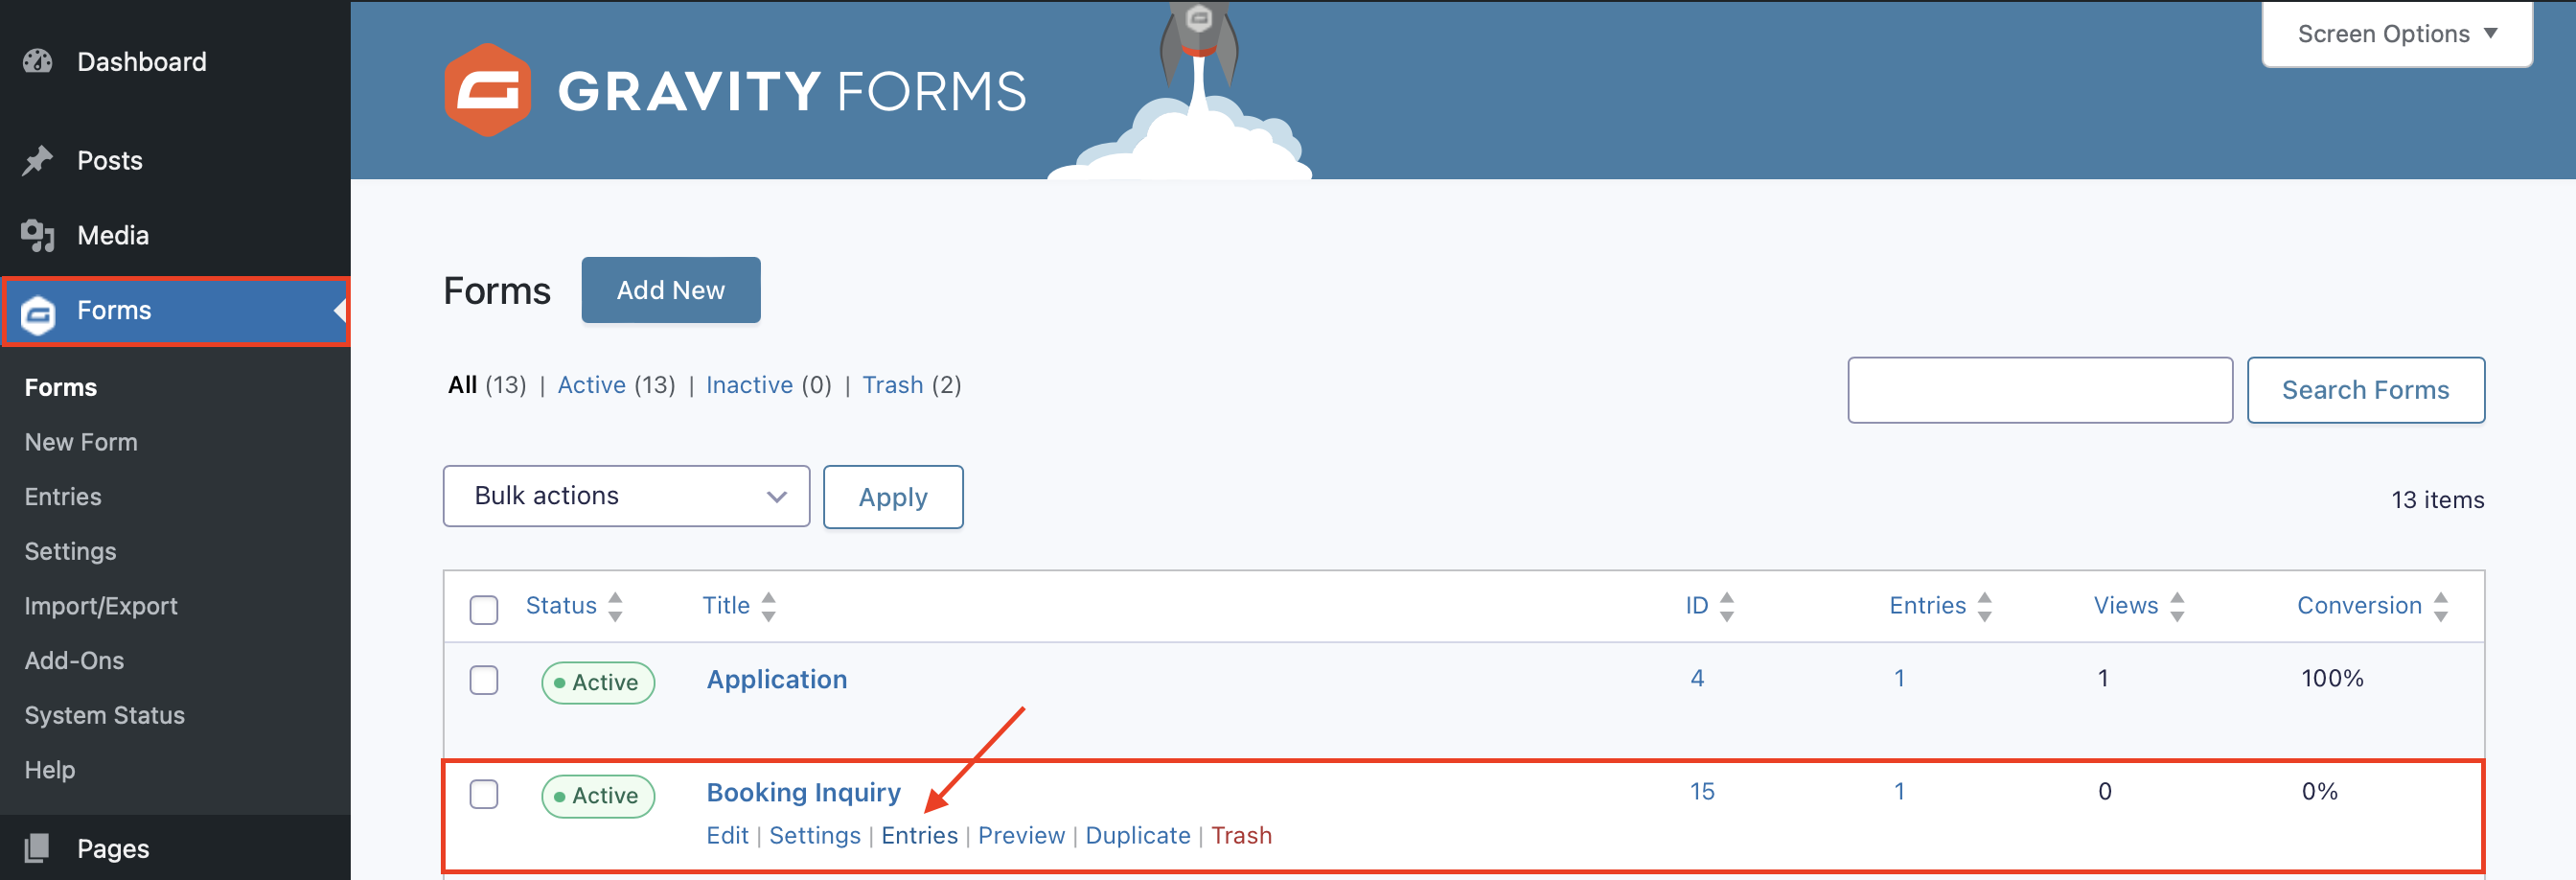
Here you should see the test entry you just submitted, and can confirm everything is working properly.
Publish Your Form
When you are ready to publish your page, simply navigate back to the page you created and click Publish. That’s it!
Enhance Your Form
If you really want to take your forms to the next level, you can extend the functionality of your WordPress site by taking advantage of the many features and add-ons available with your Gravity Forms license.
Accept Tips or Payments
Whether you’re accepting tips or selling access to exclusive content (like unreleased songs, behind-the-scenes footage of the band on the road, or music lessons, etc.), Gravity Forms provides easy-to-use payment integrations.
You can accept one-time or recurring payments with platforms like PayPal, Stripe, Apple Pay and Google Pay, and this streamlined process helps you focus on making great music, rather than dealing with payment logistics.
Enable Conditional Logic
Think of conditional logic as an “if-this-then-that” system. For example, if someone inquires about booking you for a wedding gig, then show additional questions about ceremony music.
Check out our documentation to learn more about conditional logic.
Set Up Confirmations and Notifications
Confirmations appear after someone submits your form. You can show a simple “Thank you” message, or direct them to take further action like signing up to your email list, or following you on social media.
Notifications are the emails that get sent from your WordPress website. Send payment receipts, booking confirmations and more – automatically.
Accept File Uploads
Add the File Upload field to accept things like signed contracts, song lists, sheet music and more.
Learn more about the many other fields you can use in the Gravity Forms documentation.
Reduce Manual Work
One of the biggest advantages of using Gravity Forms is the ability to automate many of the repetitive tasks involved in managing your business. By setting up conditional logic, confirmation messages, notifications, and integrations with other platforms, you can automate things like:
- Sending unique confirmation emails when someone submits a gig request.
- Adding friends, family, and fans to your email marketing list.
- Notifying you whenever a song request is submitted.
- Generating an invoice or receipt for gigs or payments.
This automation saves you time and ensures your processes run smoothly without manual intervention.
Additionally, if you hold a Pro, Elite, Nonprofit, or Developer (legacy) license, you can take advantage of the powerful Gravity Forms Zapier Add-On, and connect your forms to thousands of other web services.
Control What Happens After the Form Submission
If you want to make your life even easier, you can use a dedicated automation tool like Gravity Flow. Gravity Flow helps musicians focus more on their craft while automating the behind-the-scenes work by streamlining tasks including:
- Booking requests – Automatically route booking requests to the right team member and notify them without manual intervention.
- Testimonials – Set up automated approval workflows to instantly review and manage testimonials from your clients and fans.
- Collaboration requests – Automatically assign collaboration inquiries to the appropriate musician or manager for faster responses and better organization.
For more information on Gravity Flow and to see examples of automation in action, check out the video tutorials in our documentation or try out a free demo!
Easily Integrate with Other Tools
Gravity Forms integrates seamlessly with a wide range of third-party tools. Whether you’re integrating your calendar, automating social media posts, or generating contracts, Gravity Forms allows for a smooth workflow.
Check out our expansive list of add-ons and explore the possibilities.
Get Started with WordPress and Gravity Forms Today
On a top-notch musician website, WordPress and Gravity Forms aren’t just tools; they’re the ticket to a more organized, professional, and efficient music business. They handle the administrative heavy lifting so you can focus on your art and your audience.
Remember, every minute spent setting up these forms saves hours of administrative work later. That means more time for what really matters – making music.
Your future self will thank you for making the switch to automated, professional form management. After all, shouldn’t your business run as smoothly as your best performance?
Purchase your Gravity Forms license today to get started!