How to Take Payments with Apple Pay and Google Pay in WordPress

Offering a range of payment methods on your website is one of the best ways to improve your customers’ experience online, and boost sales and revenue. Apple Pay and Google Pay are popular payment methods that give customers an alternative to credit and debit cards, and can be easily accepted on your website using Stripe and Gravity Forms.
Credit and debit cards are one of the most widely accepted forms of online payment. However, they also come with their own set of challenges. For starters, not all of your customers will want to enter their credit card information online. Secondly, most of us don’t have our credit or debit card with us at all times.
In today’s article, we’ll take a look at the benefits of offering Apple Pay and Google Pay to your customers, what you can do with Apple Pay, Google Pay, and Gravity Forms, and how to set up these payment methods with WordPress and Gravity Forms.
Benefits of Offering Apple Pay and Google Pay
Apple Pay was launched in 2014 and since then, it has steadily gained popularity with millions of users. It’s available on all Apple devices, including the Apple Watch and it makes it easy and convenient to submit a payment – you can use Apple Pay for both online and in-person payments without entering your credit card details.

Google Pay is another popular digital wallet platform and online payment system that allows users to pay online, in apps, in shops, and more, using desktops, Android phones, tablets, and watches.
 Here are the top benefits of offering Apple Pay and Google Pay to your customers.
- Security — With high-level security in place, users feel confident paying with Apple Pay and Google Pay, contributing to higher conversions for your business. Apple Pay was designed with privacy and security in mind, with users payment details stored on their devices that have security features built-in. This includes the use of biometrics as well as the fact that credit card information is never actually transmitted or shared with the merchant. Google Pay also uses advanced security measures that will keep users card details encrypted and secure and their accounts safe.
- One-click payments — Once users store card information in the Apple Pay or Google Pay systems, payments are then executed with a single click, providing your customers with a better user experience.
- Caters to mobile users — Mobile payments are growing in popularity. By offering Apple Pay and Google Pay, you’ll make it easy for mobile users to submit payment on your website.
- Attract new customers — According to statistics, iPhone users that activated Apple Pay worldwide grew by more than 65 million people in 2020. By offering Apple Pay and Google Pay, you’ll attract new customers who are looking for a convenient way to pay with a payment method that’s readily available on a device they already use to communicate, work, play, and shop.
Stripe Features And Benefits
As mentioned earlier, Apple Pay and Google Pay are available as a payment method through our Stripe Add-On. Stripe is one of the most popular payment processors out there. It allows you to accept credit card payments on your website and it’s used by millions of businesses worldwide.
 Stripe has several benefits:
- Fast setup. If you already have a Stripe account, all you have to do is connect your account with Gravity Forms. If not, opening up a Stripe account is fast and easy.
- Stripe supports all major credit and debit cards as well as Apple Pay and Google Pay.
- Stripe is available in more than 35 countries and supports 135+ currencies so you can easily start accepting payments from international customers.
- Accept one-time and recurring payments.
- Low credit card processing fees and no signup or monthly fees to process your payments.
- Stripe Radar helps prevent fraud through machine learning that monitors transactions across the Stripe network.
- Stripe is certified as a PCI Service Provider Level 1 which means your customer’s sensitive financial information is never stored on your servers which reduces your risk and costs.
What Can You Do With Gravity Forms, Stripe, Apple Pay, and Google Pay?
Now that we’ve covered the benefits of Apple Pay, Google Pay, and Stripe, let’s talk about what you can do when you add Gravity Forms in to the mix. Here are a few practical use cases to consider:
- Sell digital and physical products and accept one-time payments — with this integration, you can sell both physical and digital products and let your customers pay with Apple Pay or Google Pay.
- Sell memberships or retainer services — with both Apple and Google Pay, you can set up recurring billing for a membership program or retainer services.
- Set up a weekly or monthly product orders — allow customers to restock on items in your shop without having to come back and place another order. Recurring payments can be set up for a fixed amount or a variable amount.
- Accept donations online — if you’re a non-profit, you can use Apple Pay and Google Pay to allow your website visitors to submit donations. You can even set up pre-determined donation amounts to further streamline the donation process.
How to Set Up Apple Pay and Google Pay With WordPress and Gravity Forms
In order to offer Apple Pay and Goole Pay on your website, you’ll need the Gravity Forms plugin and the Stripe Add-On enabled on your website. Let’s go through the steps below.
1. Install Gravity Forms
The first thing you need to do is install Gravity Forms plugin on your website. You’ll need to purchase an Elite or Pro license and then download the plugin.
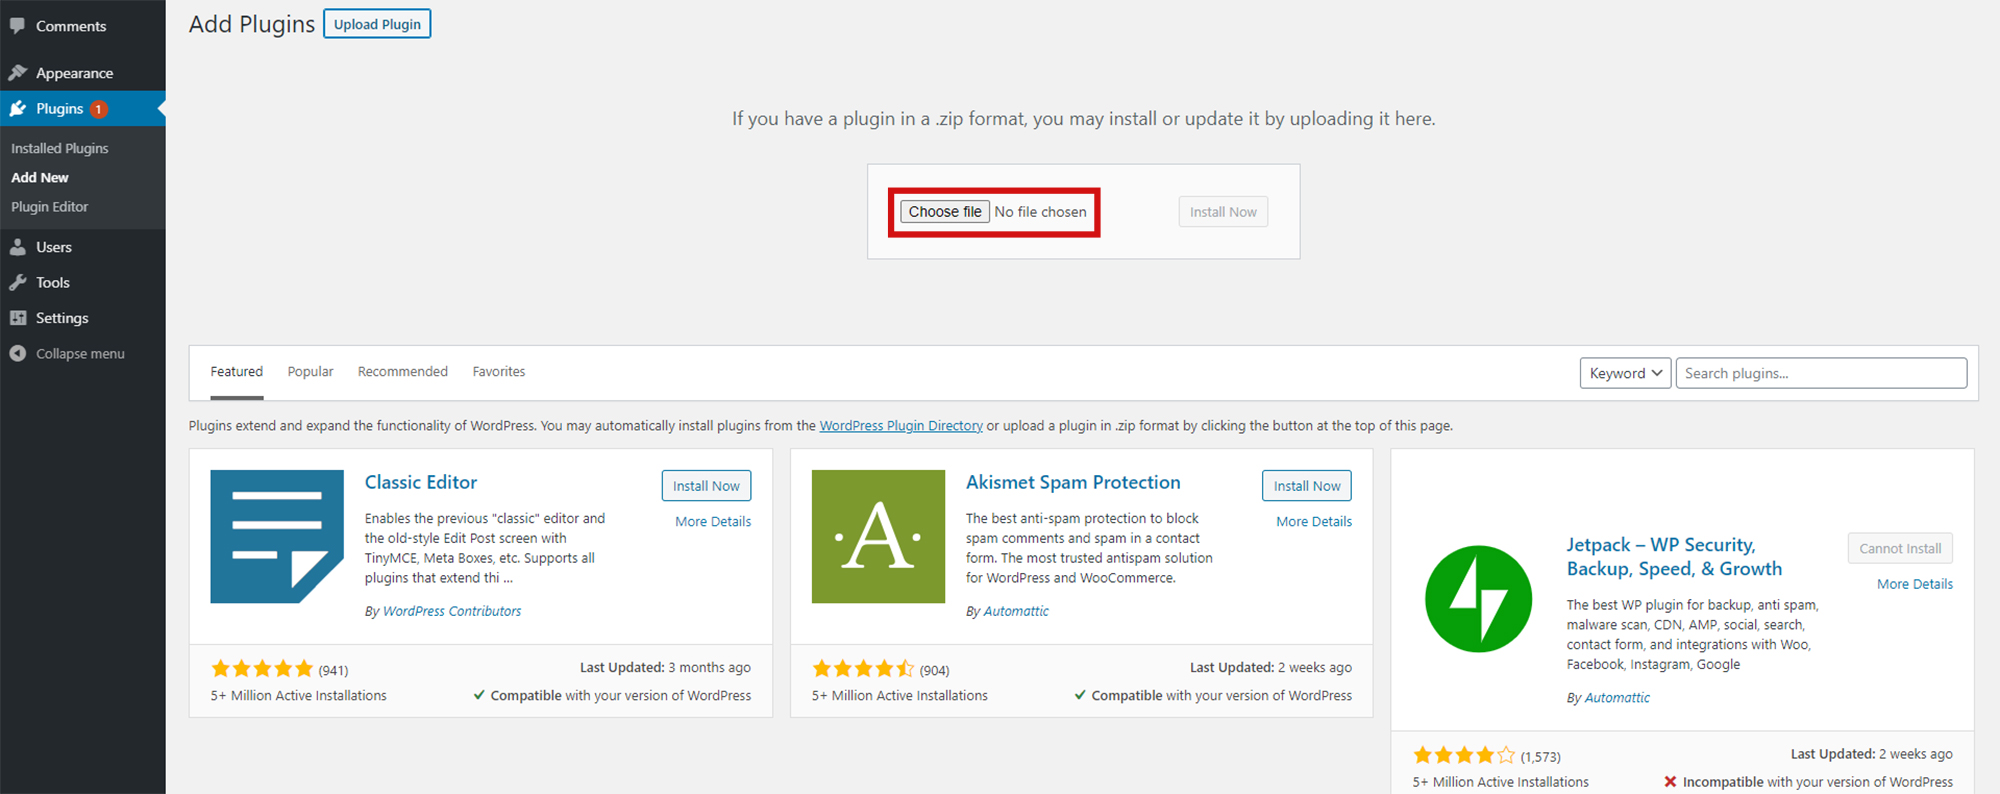 Next, go to your WordPress dashboard and navigate to Plugins > Add New > Upload. Select the Gravity Forms zip file and press Install > Activate.
Once the plugin has been installed and activated, follow the instructions to register the plugin with Gravity Forms.
For more information on how to get started with our plugin, check out this video tutorial – How to Install Gravity Forms on Your WordPress Website.
2. Install and Configure the Stripe Add-On
Once you’ve activated the plugin, you’ll need the Stripe Add-On. To activate it, Go to Forms > Add-Ons and click Activate under the Stripe Add-On.
 Next you’ll need to connect the Stripe Add-On with your Stripe account.
In your WordPress dashboard, go to Forms > Settings > Stripe. Press the Connect with Stripe button and follow the instructions. On the next page, you’ll be asked to sign into your Stripe account (or create one if you need to).
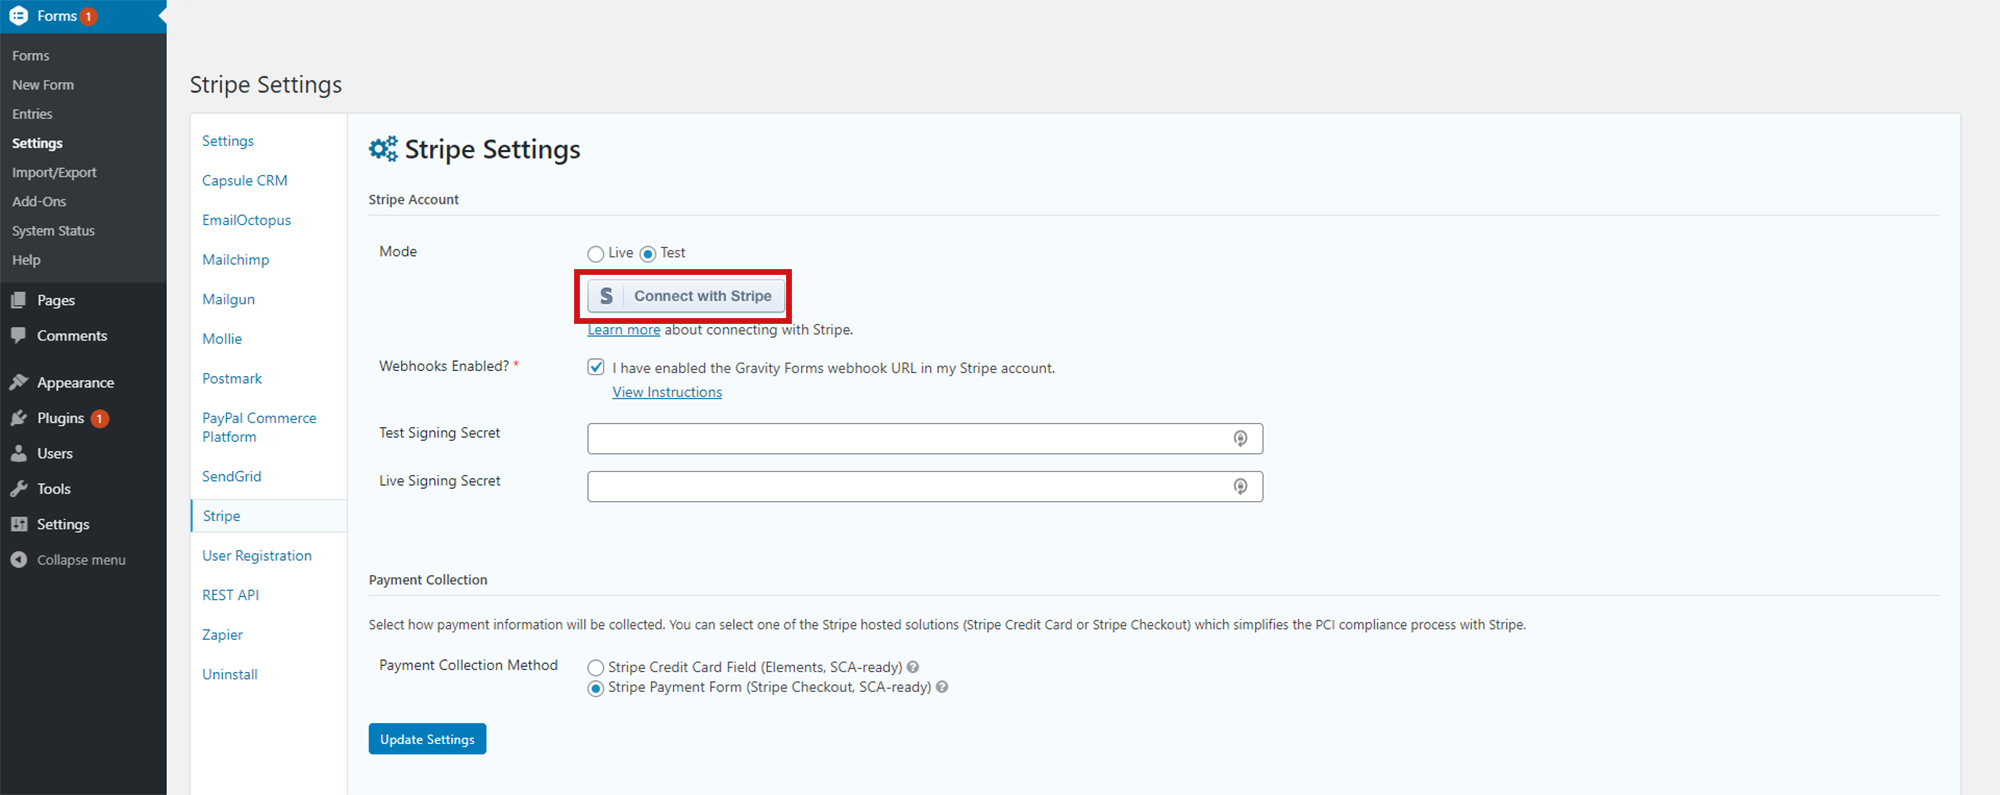 The Stripe Add-On provides a number of payment collection methods. To accept payments with Apple Pay and Google Pay you will need to use Stripe Checkout. This option uses a Stripe hosted form to collect all payments details directly within Stripe’s domain.
The benefits of using Stripe Checkout, aside from being able to take payments with Apple and Google Pay, is that it is SCA ready and it reduces your responsibility for handling and securing sensitive payment and customer information, as none of the form collected data is stored by your WordPress database.
To enable Stripe Checkout, under Payment Collection, select Stripe Payment Form (Stripe Checkout, SCA-ready).
For more information on Stripe Checkout, and the other Stripe payment collection methods, check out this article from the docs – Overview of Stripe Payment Collection Methods.
3. Import A Payment Form Template
The next step in the process is to create a payment form. However, you don’t have to start from scratch. We have a full library of form templates that you can browse through, download, and import into your WordPress website and Gravity Forms.
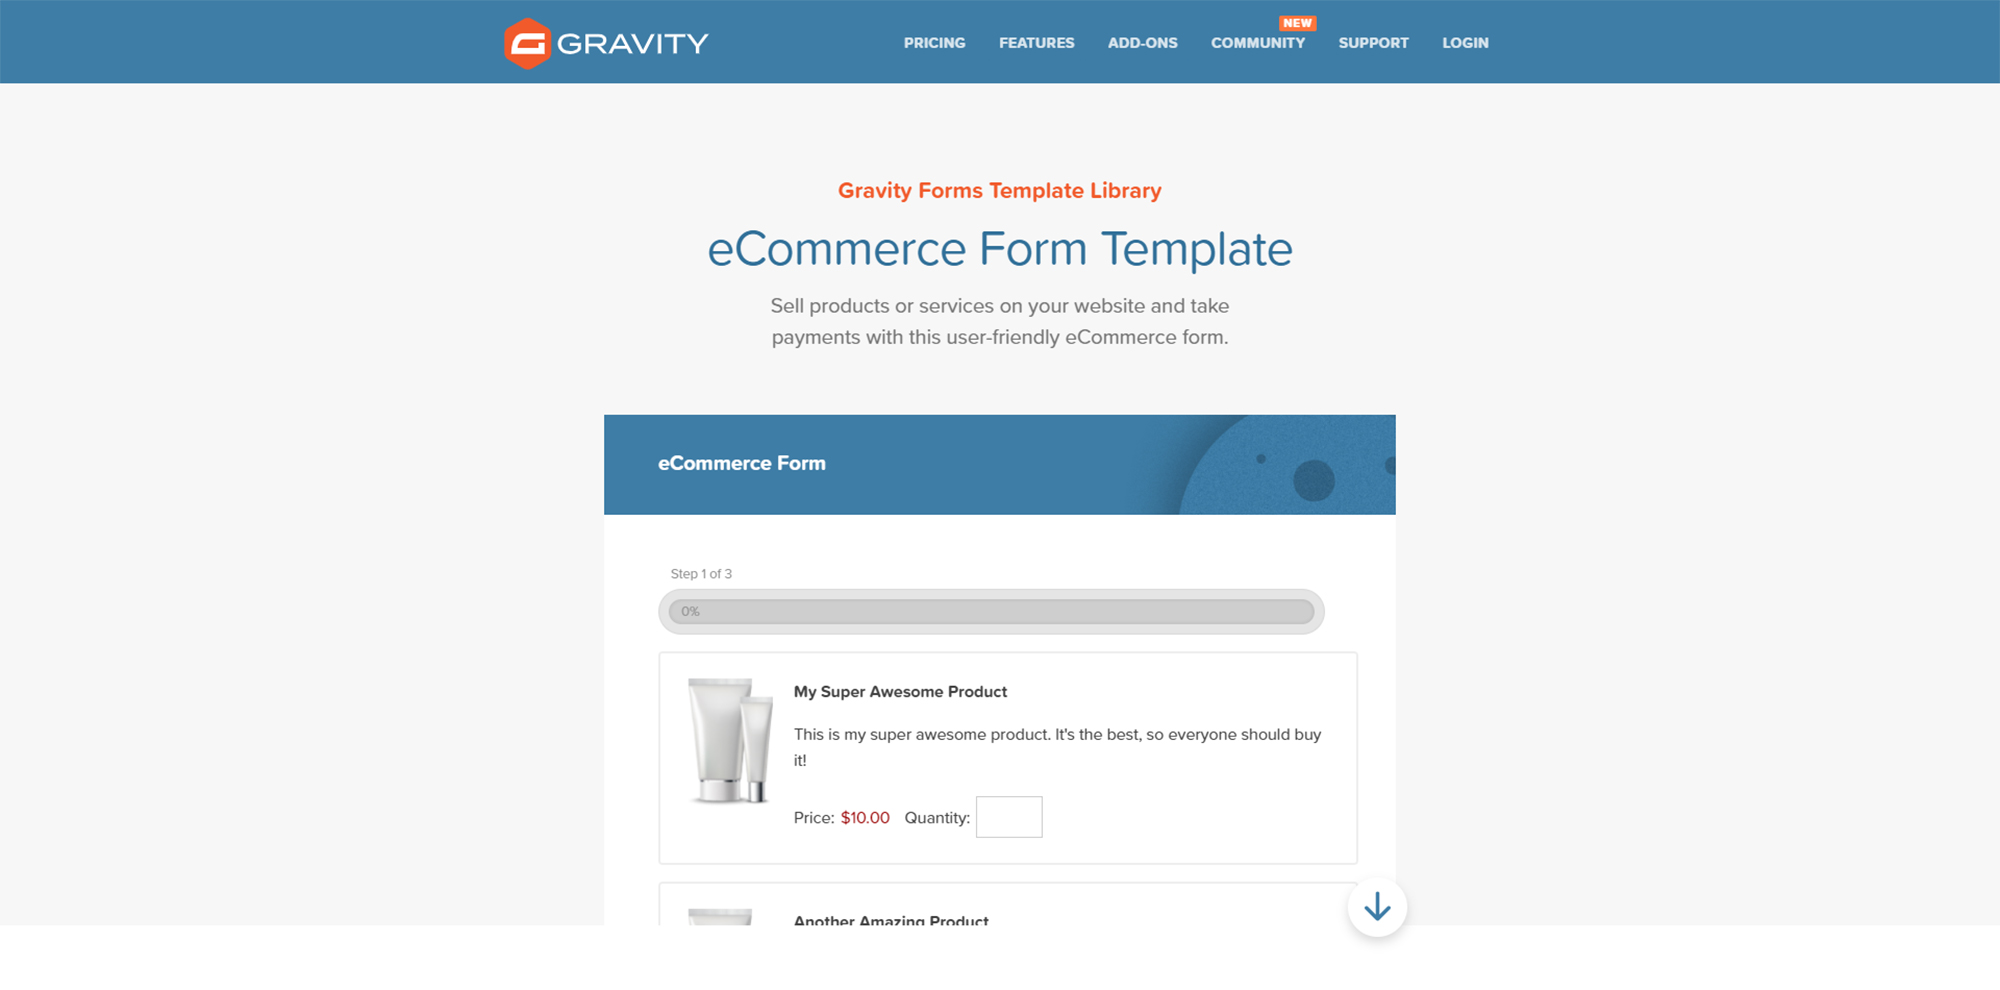 All you have to do is select the payment form template that suits your needs and download it to your computer. Then, go back to your dashboard and navigate to Forms > Import/Export.
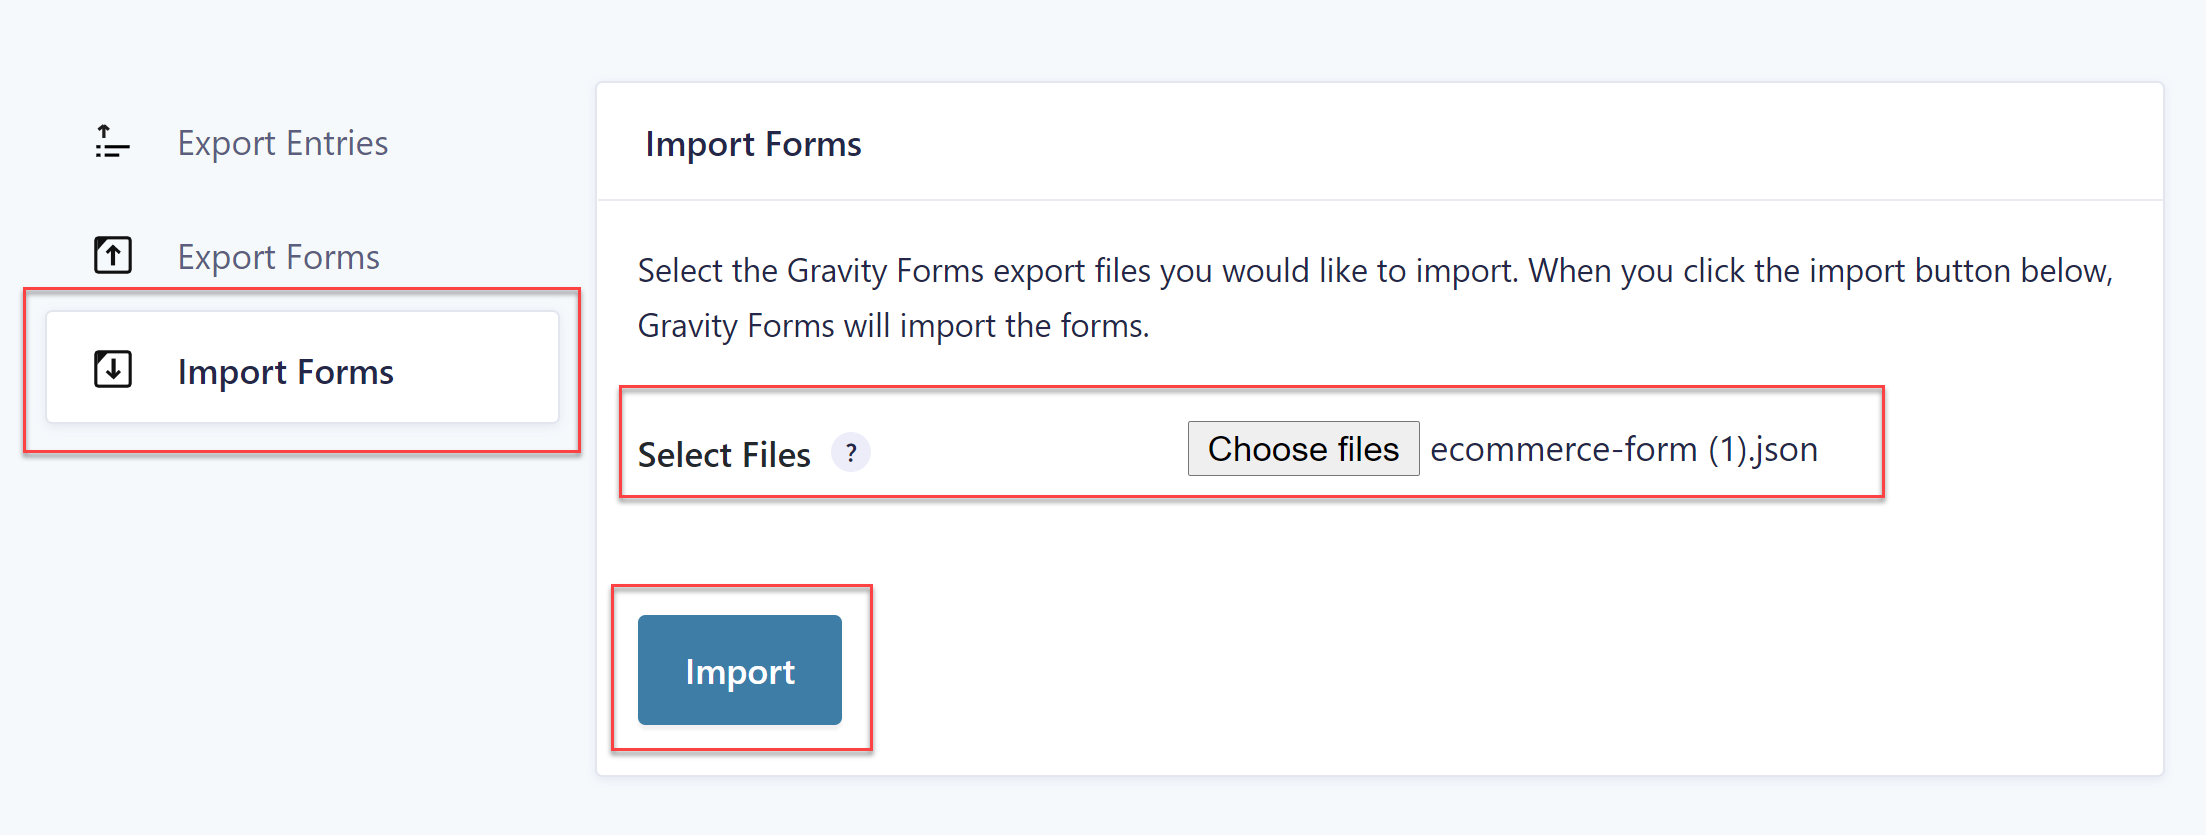 Select the Import Forms tab and locate the downloaded form template in the .json format. Click the Import button.
4. Add Stripe Feed To Your Form
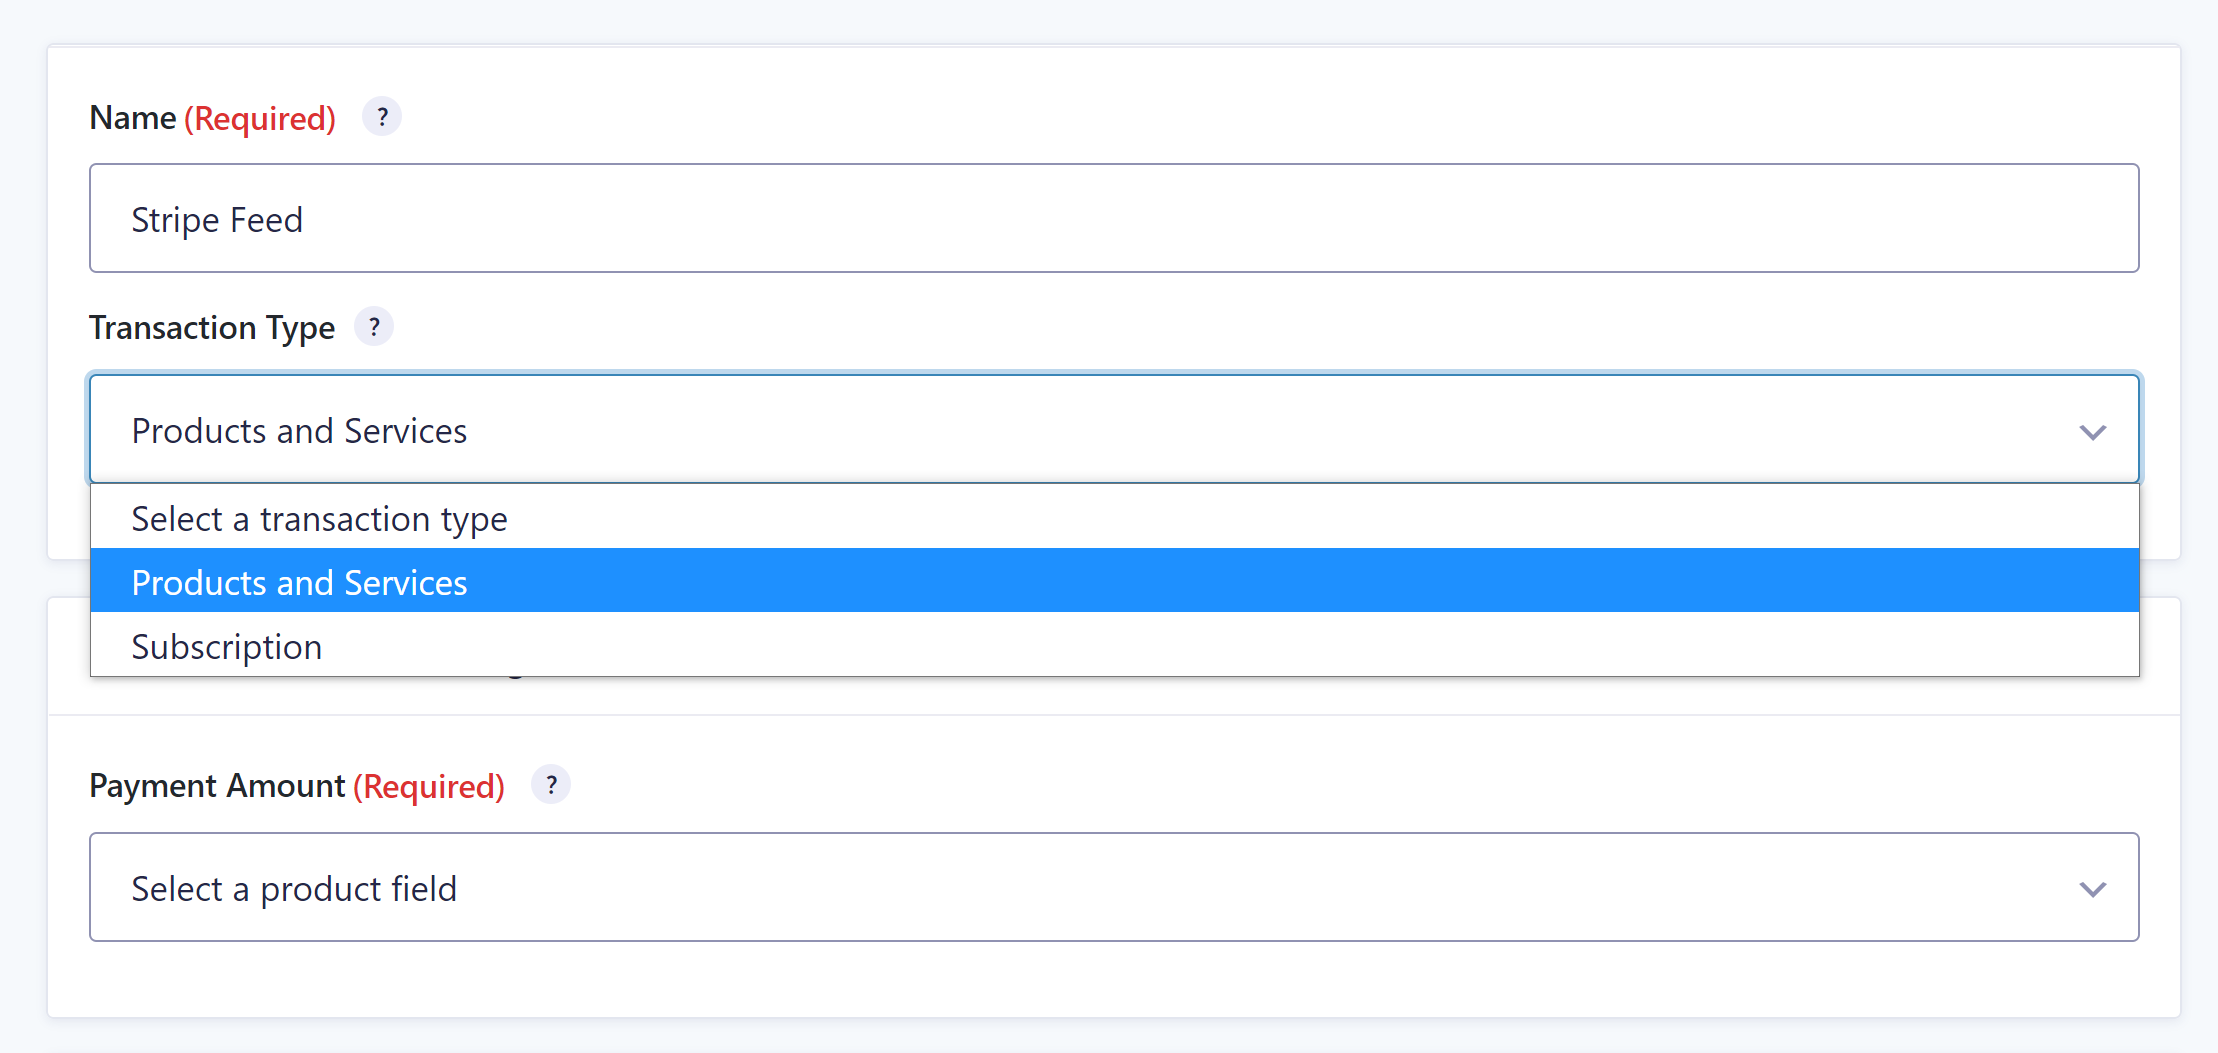
When using Stripe Checkout, you do not need to add a Stripe Field to your form, as customer payments will be taken via a Stripe hosted form. However, you will still need to create a Stripe Feed to sync your payment form with Stripe.
To do so, select Form Settings > Stripe and create a new feed. Here you can select whether you want your form to take a one-off payment for a product or service, or set up a subscription.
 For more information about configuring the Stripe Add-On offering Apple Pay and Google Pay as payment collection methods, read our documentation.
Ready to Get Started With Stripe, Apple Pay and Google Pay?
As you can see, offering Apple Pay and Google Pay as payment methods on your WordPress website is a quick and easy process through our Stripe Add-On. If you’re looking for more information about integrating Apple Pay and Google Pay with your WordPress website, these resources will be helpful:
- This Month’s Featured Add-On… Stripe — This article highlights all the benefits of the Stripe Add-On and shows you how to set up a payment form that integrates with Stripe from scratch.
- How to… Take Subscriptions on Your WordPress Website with Gravity Forms and Stripe — If you sell subscriptions or want to allow your customers to stock up on certain products, this tutorial will show you how to set up recurring payments.
- Stripe Add-On — Take a look at our documentation to find out what’s possible with the Stripe Add-On and how to set it up properly on your website.
Don’t Have Gravity Forms Yet?
If you don’t have Gravity Forms or the Stripe Add-On yet, don’t worry. Visit our pricing page and take a look at the Gravity Forms licenses. Keep in mind that Stripe is available with our Pro and Elite plans so you’ll need to choose one of those plans to take advantage of the Apple and Google Pay integrations.
You can also take our forms for a test drive with your own personalized Gravity Forms demo. Sign up for a free demo and see how you can easily customize different form templates and offer different payment options to your clients and customers.
Any questions on taking payments with Apple Pay and Google Pay? Please ask away in the comments below…

If you want to keep up-to-date with what’s happening on the blog sign up for the Gravity Forms newsletter!
