Boost Your Email Marketing With Omnisend

Are you looking to improve marketing efforts for your ecommerce website?
There are numerous tools that exist to make this possible. In this article we are going to focus on two of the best: Omnisend and Gravity Forms.
Omnisend is an ecommerce-centric marketing platform that makes it easy to create email and SMS marketing campaigns, organize subscriber information for advanced personalization, and automate a variety of email and SMS marketing processes.
But how do you get your subscriber information to Omnisend in the first place?
That’s where Gravity Forms comes in. Gravity Forms is a powerful WordPress forms plugin that makes it easy to send information from your site to various marketing tools, including Omnisend.
This article will show you:
- How Omnisend can improve your marketing
- How Gravity Forms can improve your lead generation
- How you can connect Omnisend to Gravity Forms using Zapier
Let’s dive in!
Improve Ecommerce Marketing with Omnisend
Omnisend is an ecommerce email marketing platform with many excellent features. Some of the most notable are:
- Drag-and-drop email builder that makes it easy to create email campaigns in minutes. You can then save your campaigns as templates so you can create a consistent, branded experience across campaigns.
- Pre-built ecommerce workflows so you can automate sales, including abandoned cart emails, emails based on previous purchases, and more.
- Automation builder for creating unique automation workflows.
- Advanced data collection and segmentation based on things like previous on-site behavior, engagement with past marketing campaigns, and more.
- Analytics to help you better understand your sales and the success of individual email campaigns and automations.
- Omnichannel marketing through SMS, web push notifications, Facebook retargeting sync, and Google retargeting sync, allowing you to share new products and other promotions with your customers in a variety of spaces.
Best of all, you can get started with Omnisend in just a few minutes.
We’ll talk about how to connect Omnisend to Gravity Forms through Zapier in a bit, but first, let’s take a closer look at the Gravity Forms plugin itself.
Improve Lead Generation with Gravity Forms
Gravity Forms makes it easy to:
- Create forms with its drag-and-drop builder, including signup forms, contact forms, payment and donation forms, and many other essential form types.
- Build quizzes and polls to better understand your customers, making segmentation and other personalization tactics easier.
- Receive payments, including both one-time payments and recurring payments. Payments can be processed through Stripe, PayPal, Square, Mollie, and more.
- Protect yourself and your audience. Gravity Forms is renown for its focus on security and reliability. And with a plethora of anti-spam tools, there’s much you can do to keep those pesky bots at bay.
You can also use Gravity Forms to automatically send any information you collect to tools you’re already using through a variety of add-ons. For example, you can easily send lead and customer data to Omnisend using Zapier.
How to Connect Omnisend to Gravity Forms using Zapier
The Gravity Forms Zapier Add-On makes it possible to connect Gravity Forms with over 5,000 apps to automate numerous areas of your business, from marketing to data and tax management. The time-saving possibilities are endless.
I’m going to walk you through how to connect the Gravity Forms plugin to Omnisend using Zapier – creating a Zap that will add a new subscriber to your Omnisend email list each time a form is submitted.
But before we get started, make sure you’ve bought and installed Gravity Forms. You’ll need to purchase either a Pro or Elite license to access the Zapier Add-On. You can read our documentation on installing Gravity Forms if you need help.
Once you’ve got Gravity Forms set up on your WordPress site you can connect it to Zapier in just a few steps:
1. Install the Gravity Forms Zapier Add-On
Head to Forms > Add-Ons in your WordPress dashboard and scroll down until you see the Gravity Forms Zapier Add-On, then click the Install button.
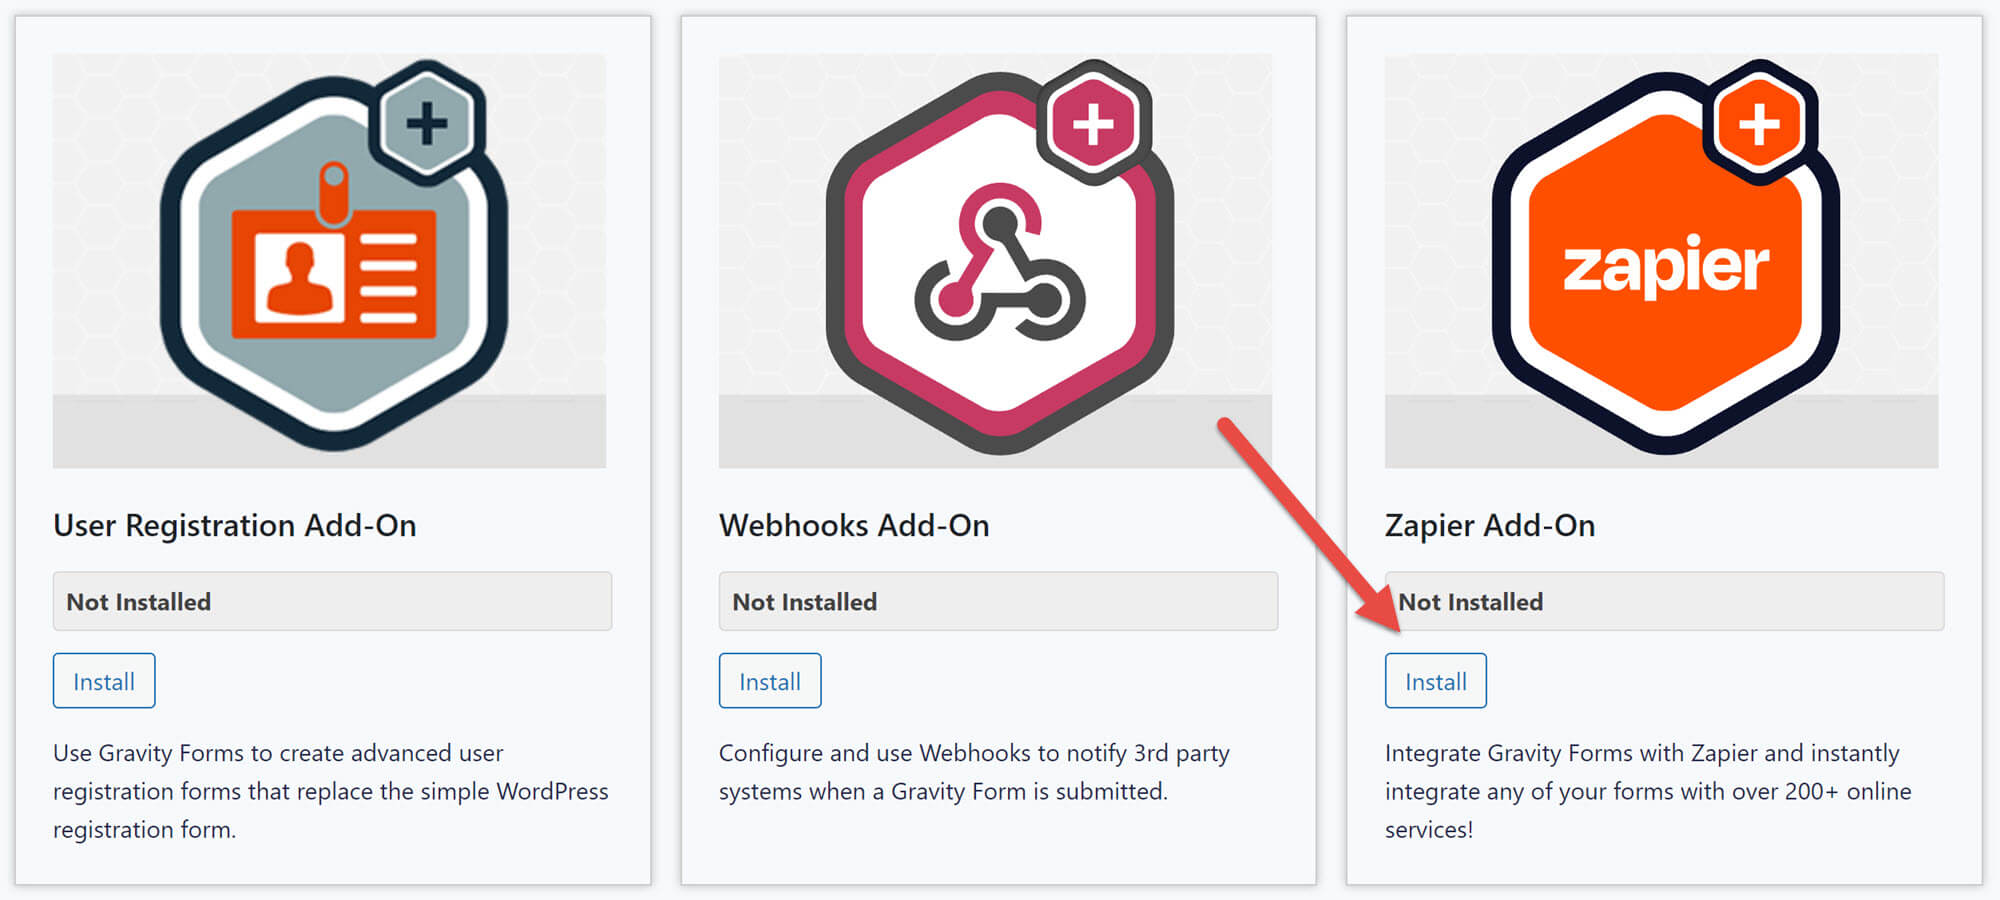
This will automatically unpack the add-on. Click Activate to enable it.
2. Enable the REST API
Next, head to the Settings area of Gravity Forms and choose REST API. Here, check the Enable access to the API box.
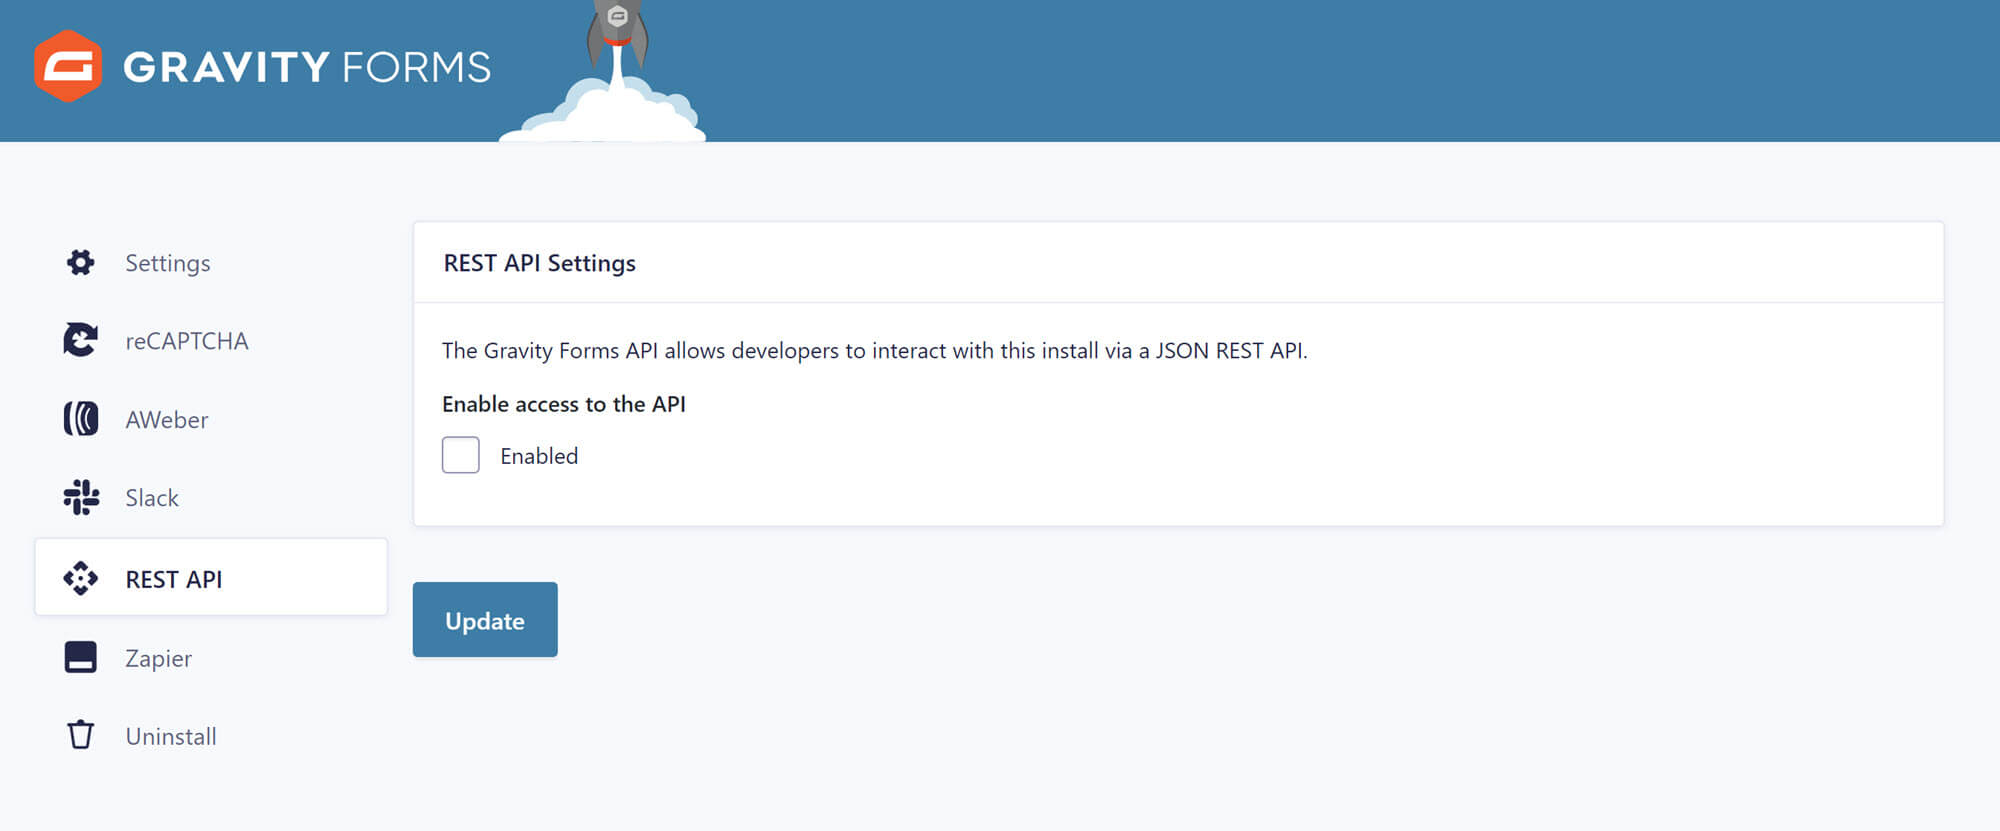
This will reveal a couple of different API areas. Click on the Add Key button in the now-visible Authentication (API 2) area.
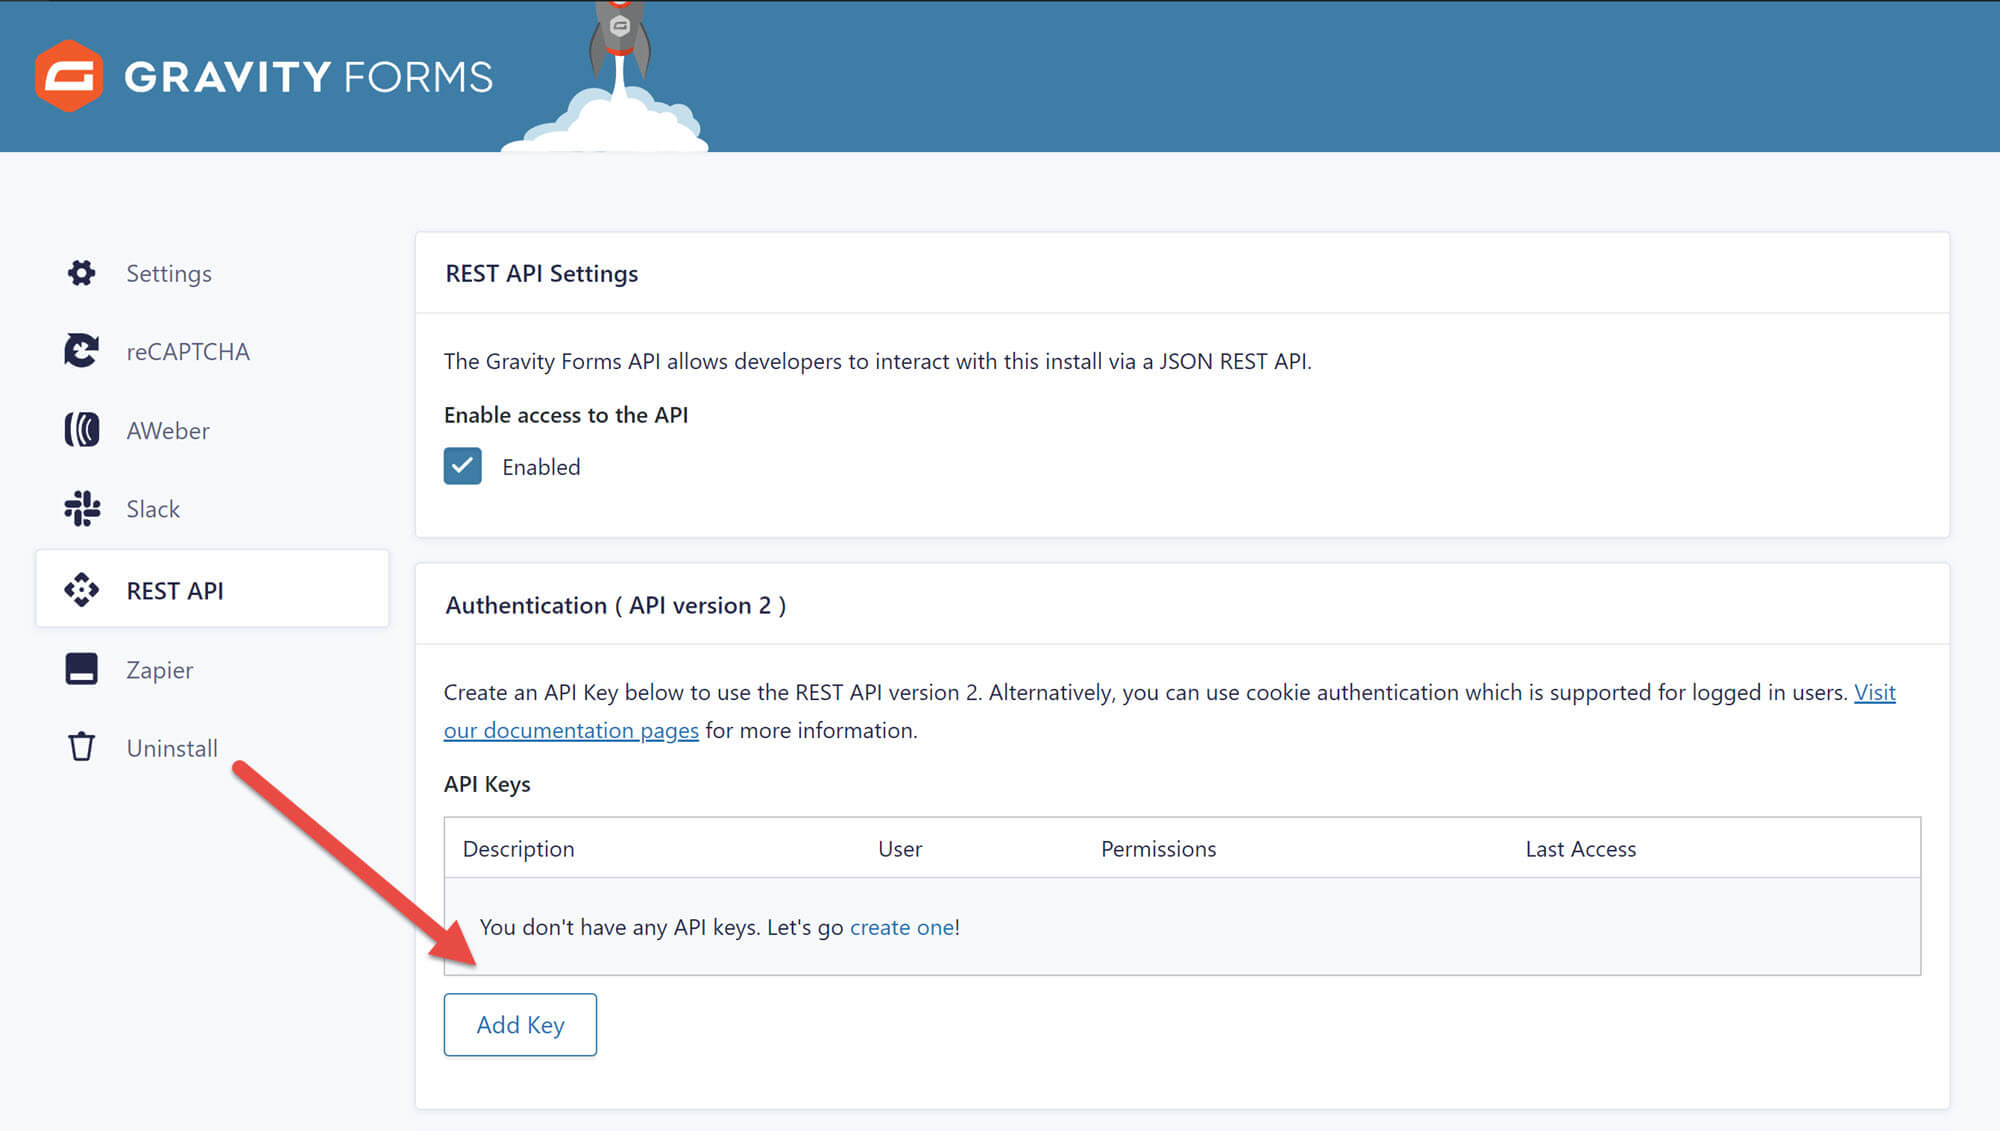
Now you’ll need to enter some basic information about the API you’re trying to create. Start by filling out the Description area with an identifier like “Zapier API key”. You’ll also need to select a User to have editing permissions over the API. Finally, you’ll need to select Permissions from the dropdown menu. In this case, you’ll want to choose Read/Write.
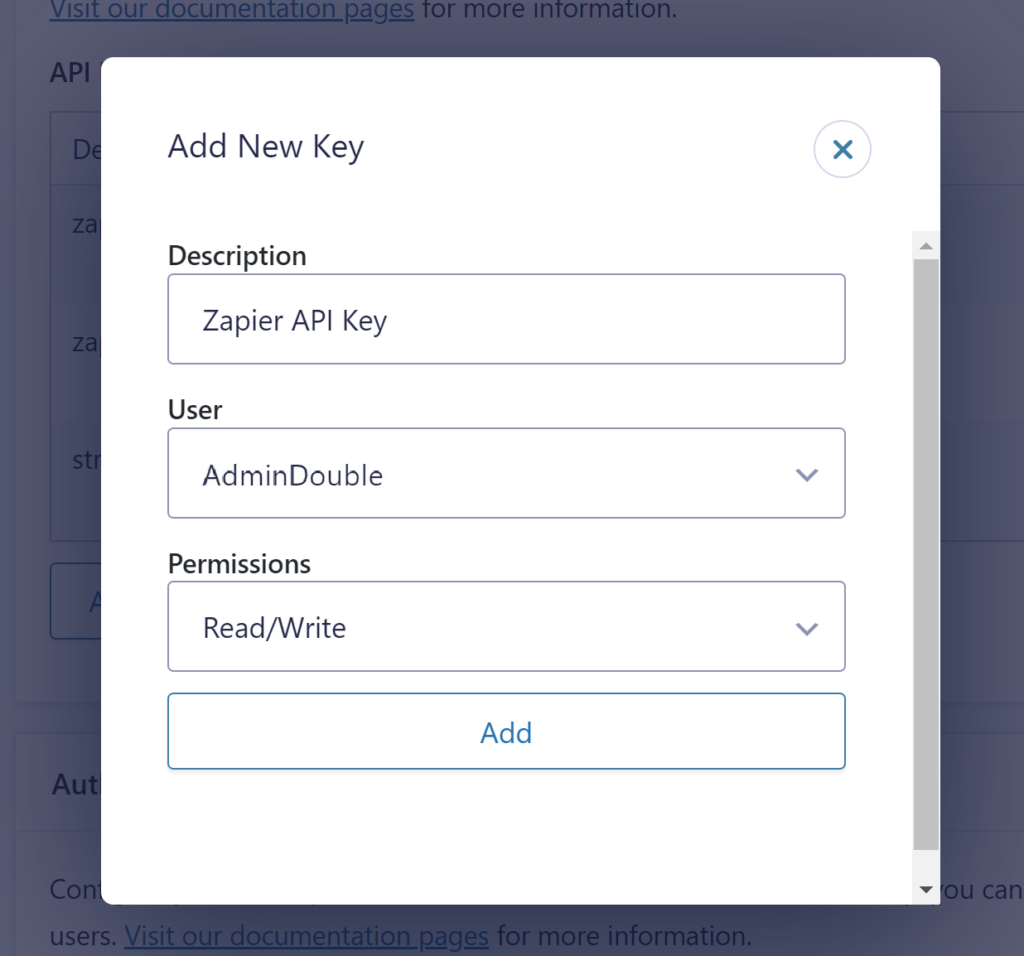
Once you’ve entered the correct details, click Add. This will generate a Consumer Key and a Consumer Secret. Copy + paste these into a secure document right away. You won’t be able to access them again.
Finally, scroll to the bottom of the REST API page and click Update to make sure the new API is enabled.
3. Create a Form
Next, head to Forms > New Form. This takes you to a page where you can type in a name and description for your form.
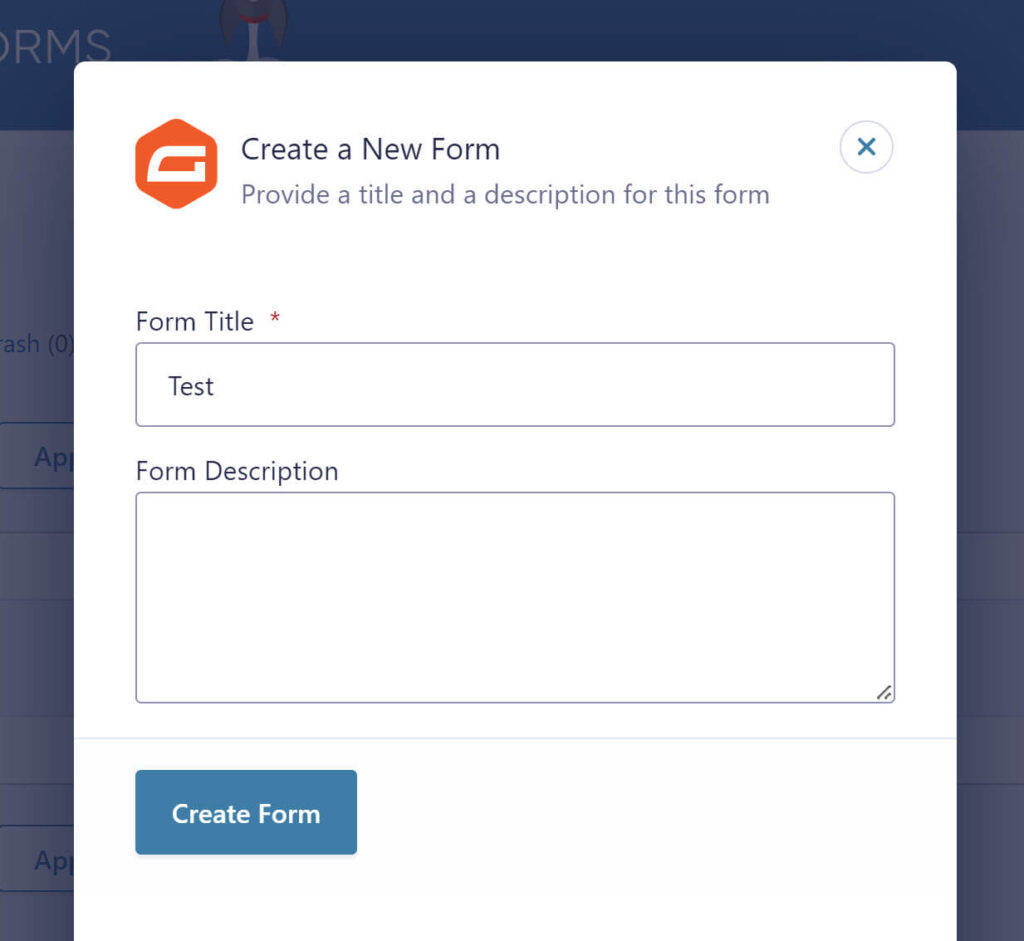
When you’re happy with your details, click Create Form. This will take you to the form editor, where you can…
4. Build your Form
The Gravity Forms drag-and-drop editor has everything you need to build all kinds of forms. Below you can see we’ve drag-and-dropped the fields Name and Email. You can find both of these options in the Advanced Fields area of the sidebar.
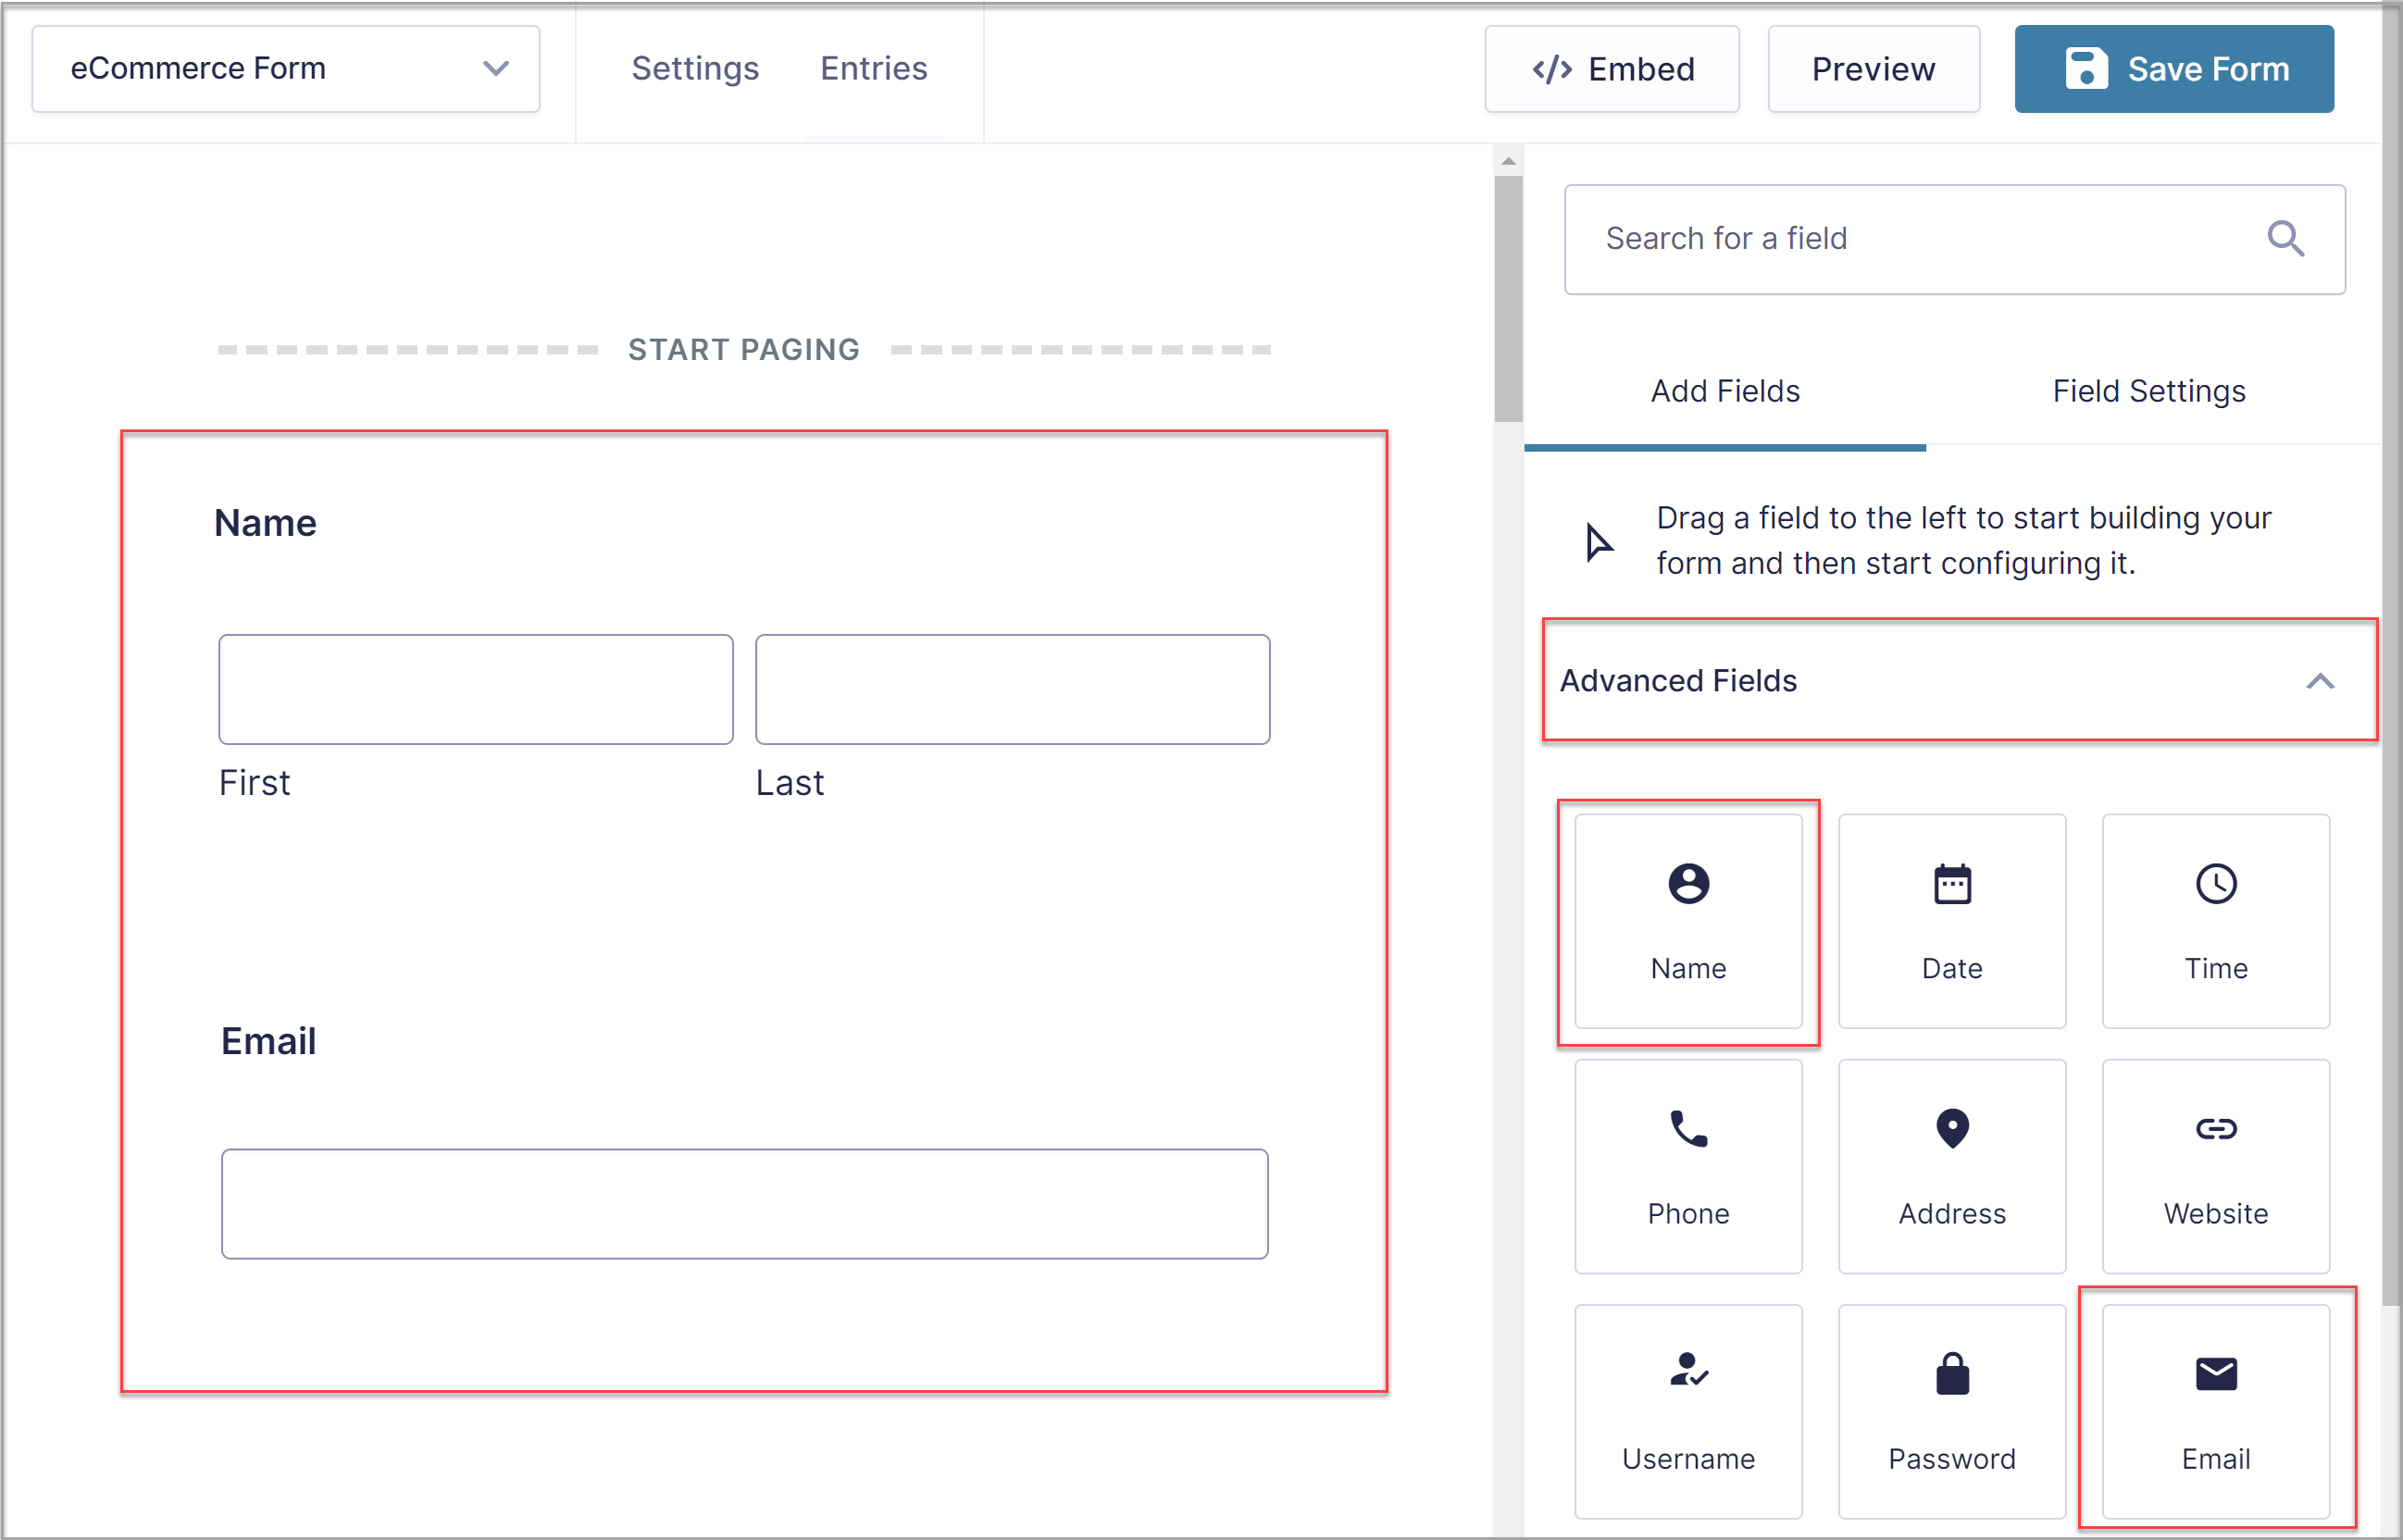
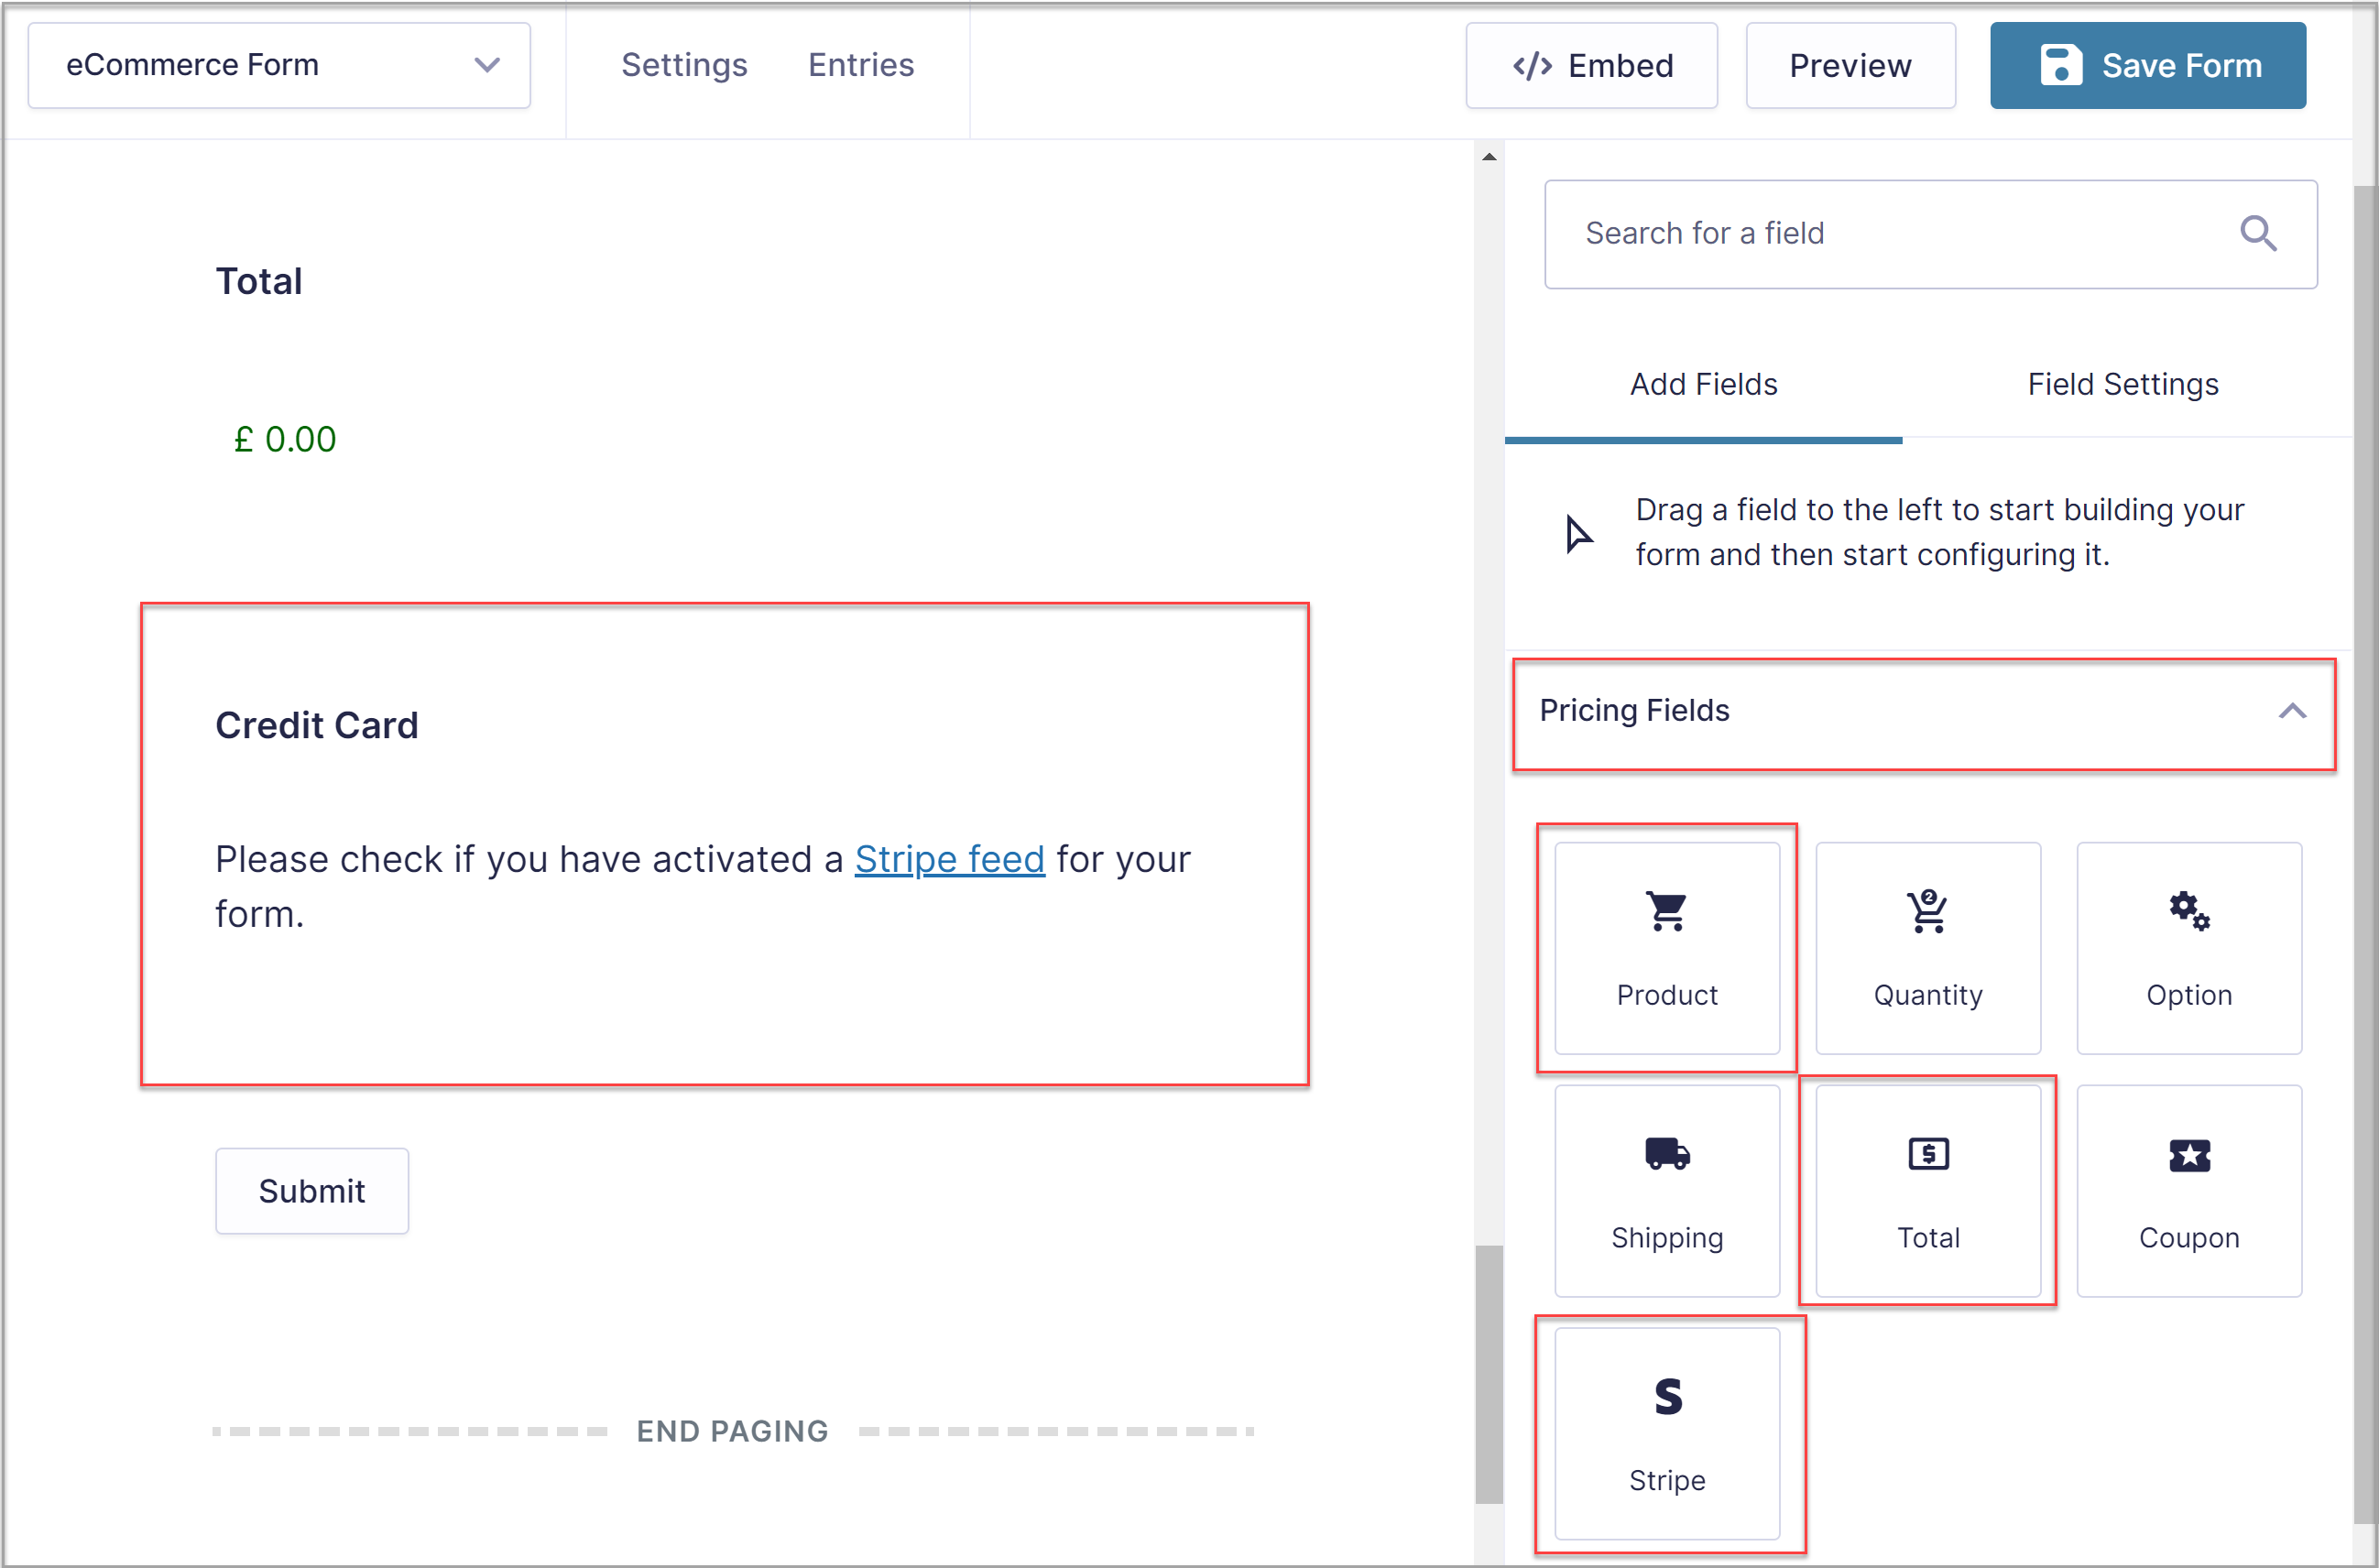
To create a payment form you will need to add some Pricing Fields, including Product and Total. You will also need to install and connect with the payment processor of your choice.
You will see below we have installed the Stripe Add-On and added the Stripe Field to the form. Then simply create a Stripe feed for the form so your payments will be processed.
Once you’ve created your form, simply embed it on a page of your website and publish!
For more information on how to create a payment form, check out this article – The Ultimate Guide to Taking Payments with Gravity Forms.
5. Create a Zap
Next, you’ll need to create a Zap. To do this, head to Zapier, and log in or create a new account. Then click the orange + sign in the sidebar to create a Zap. Remember, we are going to create a Zap that will add a new subscriber to your Omnisend email list each time a form is submitted.
This opens the Zapier editor where you can create your Zap. To get started, type in Gravity Forms into the search bar and select the listing when it appears.
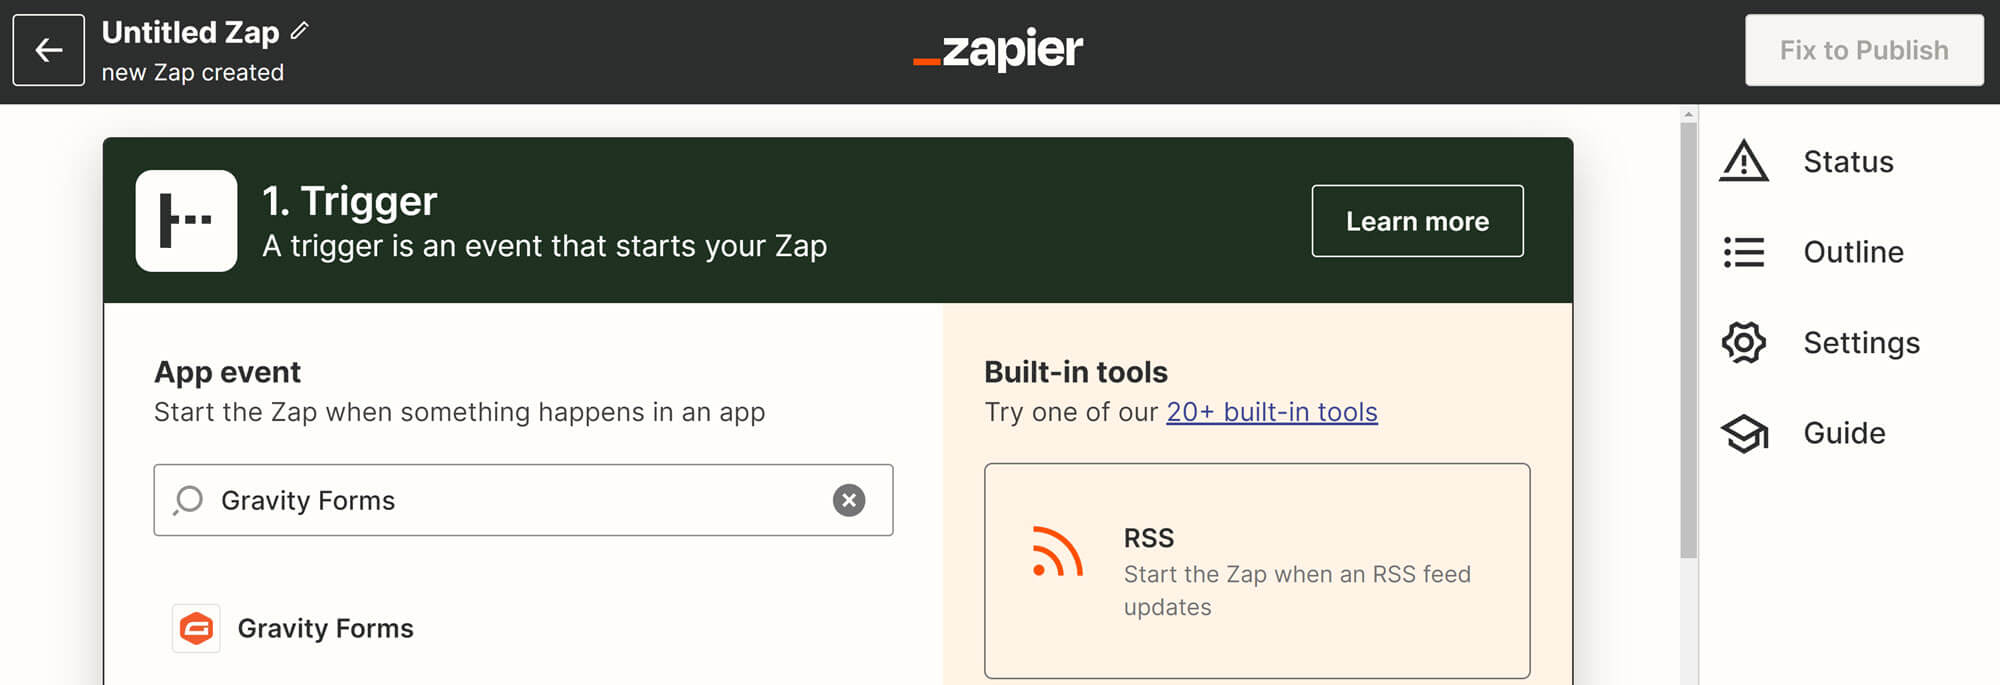
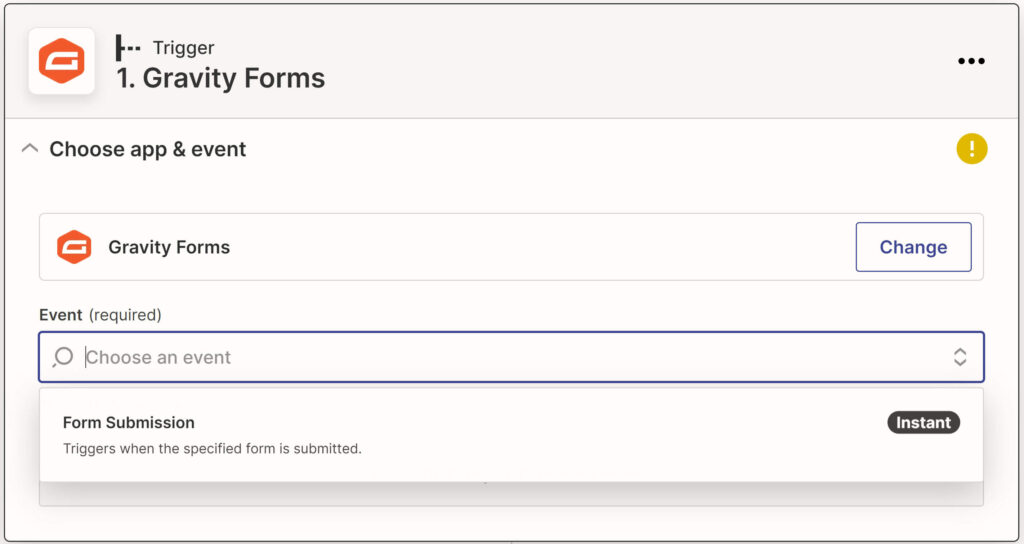
You will now be asked to enter some basic information for your Zap. First, you need to select an event to trigger the Zap. To do so, click on the Event area and choose Form Submission. Click Continue when you’re done.
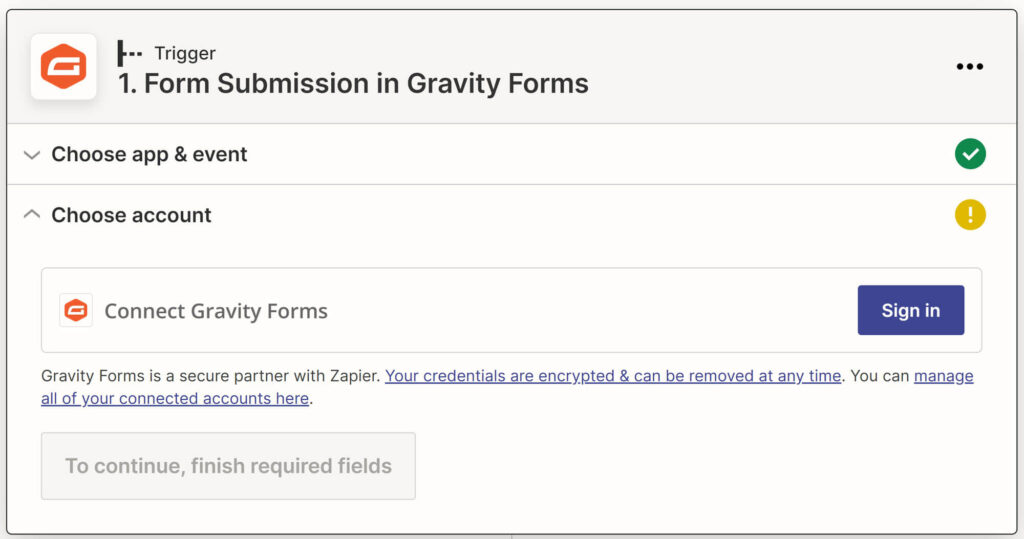
Once you’ve chosen an event, you’ll be prompted to connect Zapier to your Gravity Forms account. You can do this by clicking Sign In in the Connect Account area.
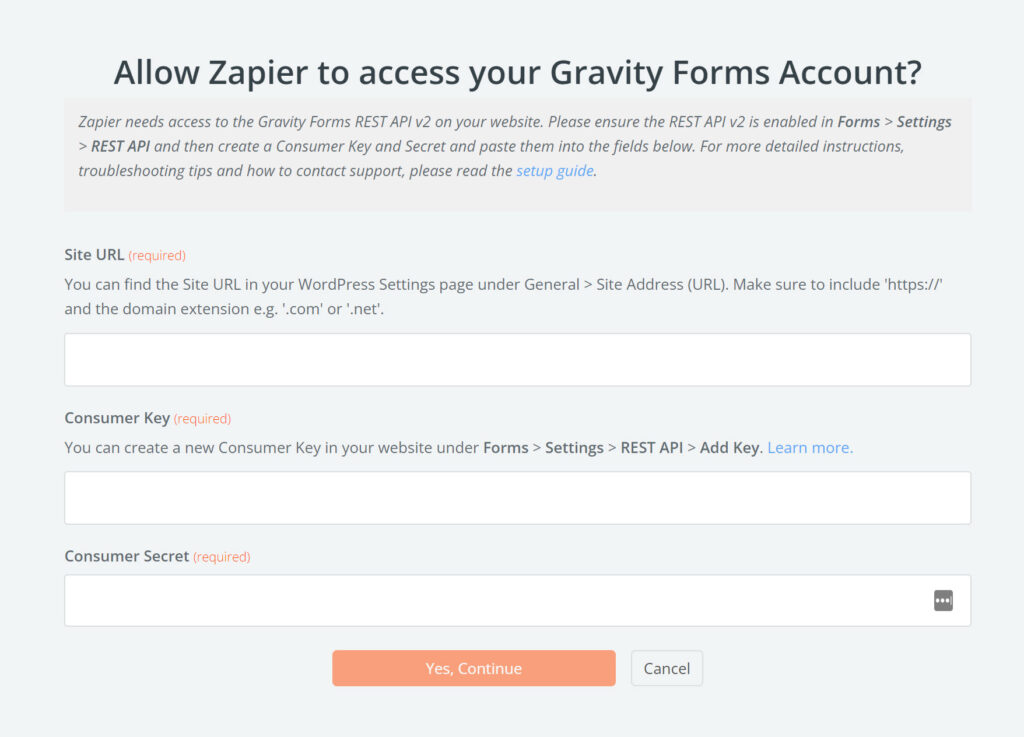
This will open a popup where you can enter your website URL and the Consumer Key and the Consumer Secret you created earlier. Click Yes, Continue when you’re done.
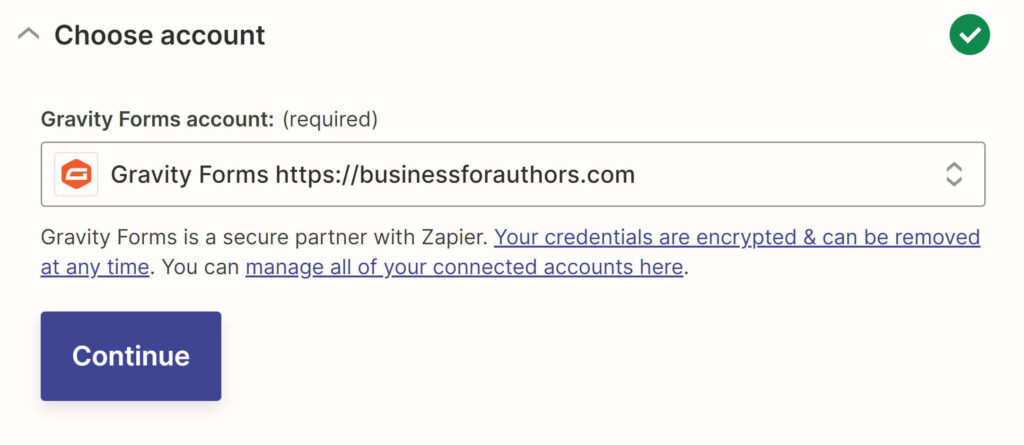
The window will automatically close, redirecting you to your Zap, where you can click Continue to move on to the next step.
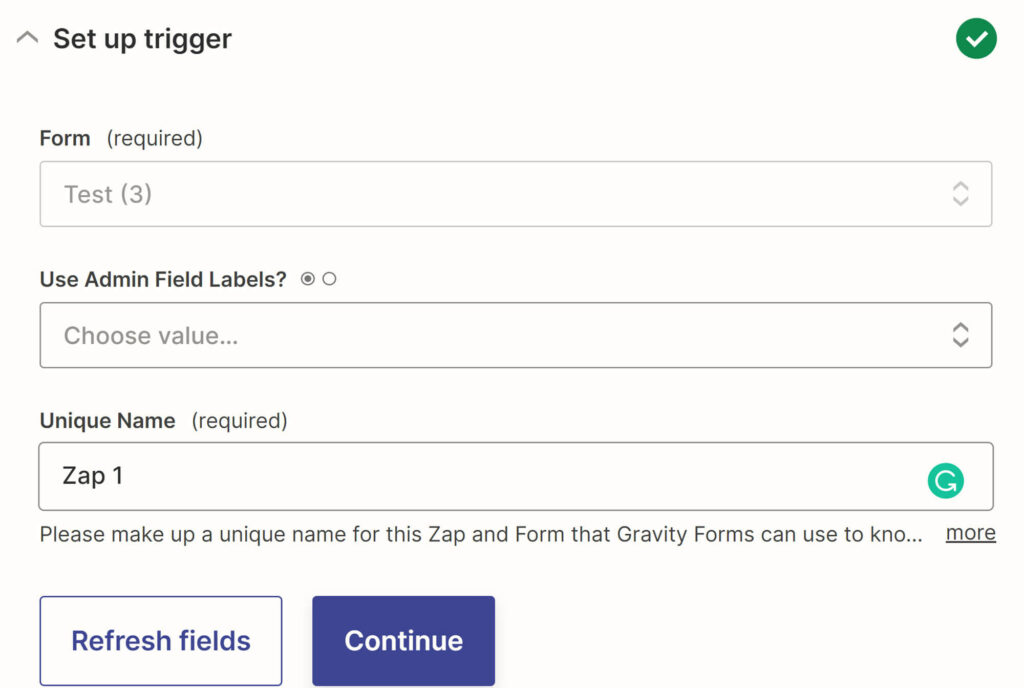
This brings you to the Set Up Trigger area. Select the form you want to connect to Zapier from the dropdown menu then simply work through the other fields and click Continue.
After this, you’ll be asked to test your form. You can do this with a couple of clicks, then move on to the next step in creating your Zap.
6. Connect your Zap to Omnisend
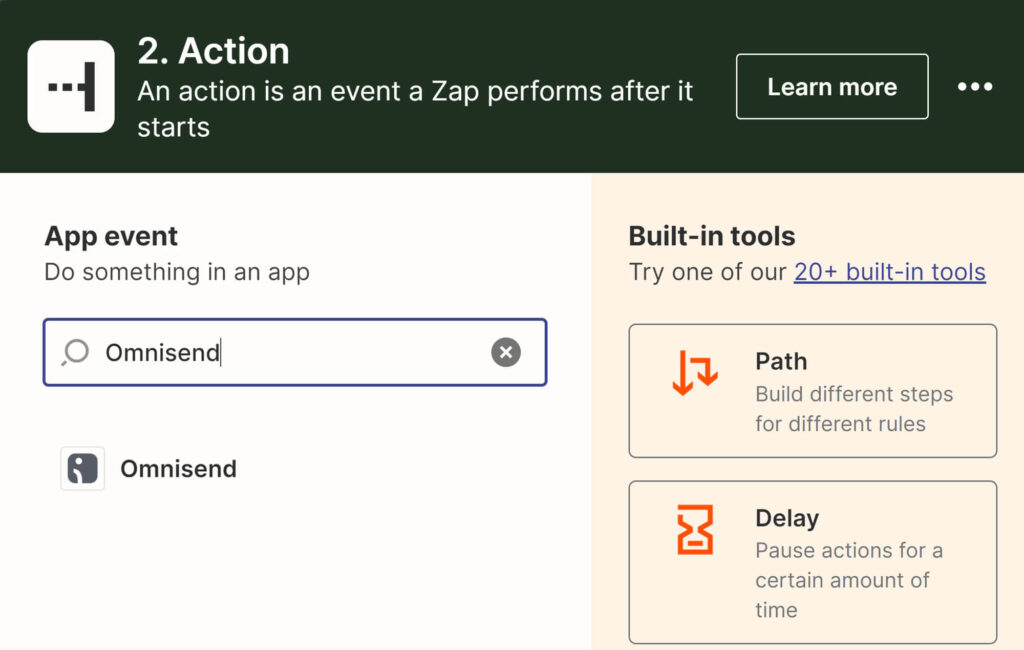
You’ll now be prompted to set up the Action. This is where you tell Zapier what it should do with the information submitted through your forms. Type Omnisend into the search bar provided and click on it when it shows up.
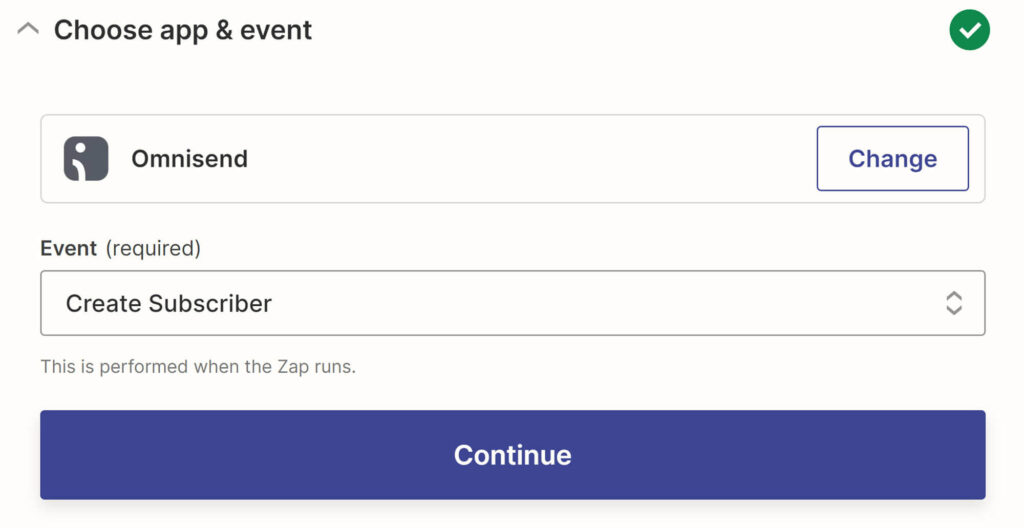
Next, select an event from the dropdown menu. The only option available by default is Create Subscriber although Zapier does give you the option of creating custom actions. Click Continue when you’re done.
This opens a pop-up where you’re required to enter your Omnisend API Key. If you don’t have one set up already you can create it by logging into your Omnisend account, and selecting Store Settings from the profile settings dropdown menu (accessed by clicking your profile picture in the top right corner).
From there, scroll down and click on API Keys in the sidebar. This will bring you to a page where you can create and manage API Keys:

Click Create API Key and, on the next page, fill out the permissions as you see fit. Click Save when you’re done.
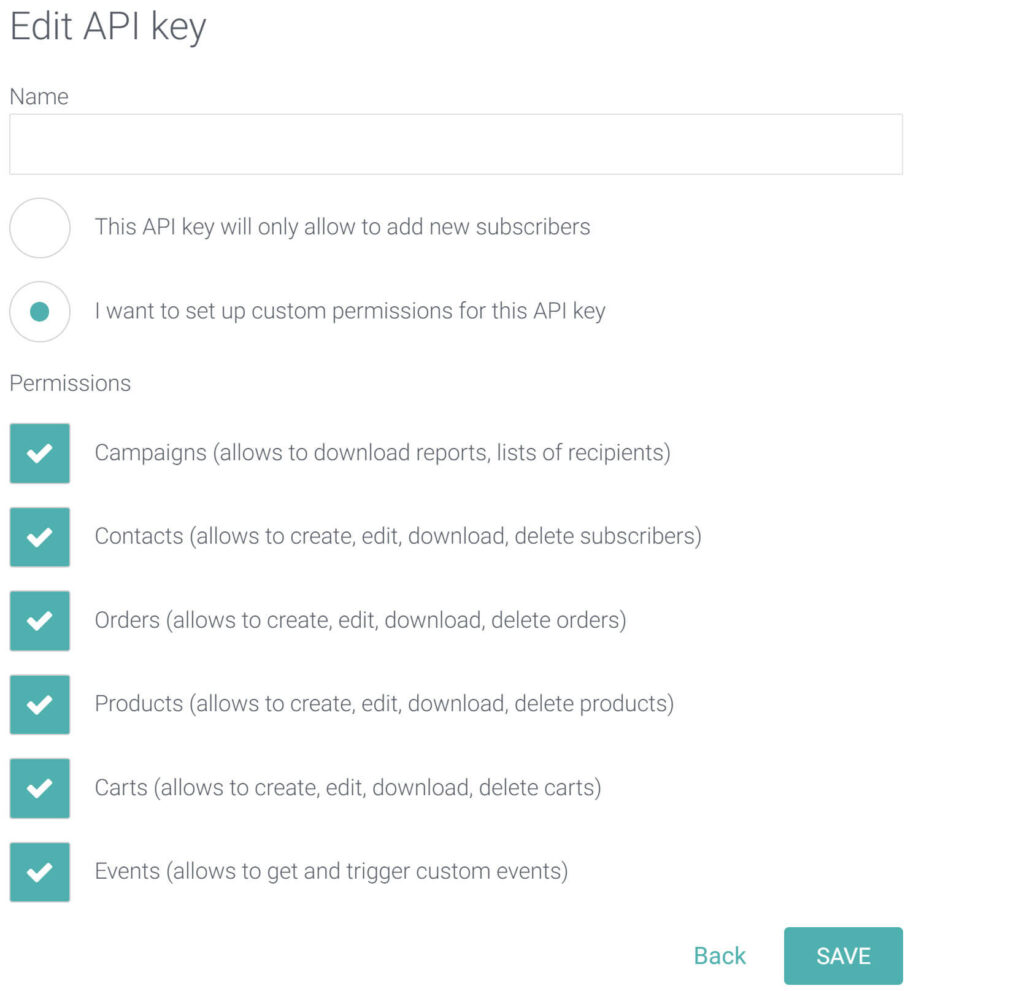
Finally, copy + paste your newly generated API Key into the popup asking you to connect Zapier to Omnisend and click Yes, Continue. This will redirect you to the Zap, where you can click Continue and move on to the semi-final step of creating a Zap.
7. Set Up your Action
Now you need to select what information Zapier will send to Omnisend. Simply map the fields to determine where to put the values from your form.
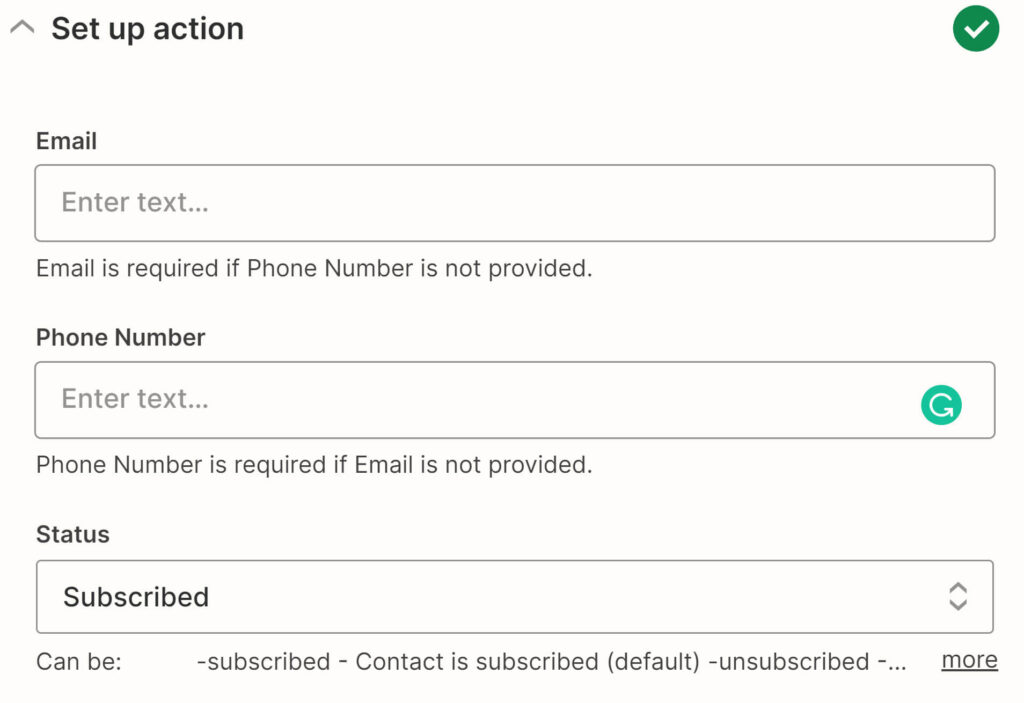
When you’re finished, scroll down and click Continue. This will bring you to the actual final step: testing your connection. Zapier will automatically create all of the information you need to run a test, so all you need to do is click Test & Continue.
If the test works, congratulations! You’ve created a Zap to connect Omnisend to Gravity Forms.
Find Out More About Zapier
In this article, we’ve only scratched the surface of what you can do with Zapier. Check out these resources to help you do more with Gravity Forms and Zapier…
- This Month’s Featured Add-On… Zapier
- Gravity Forms Zapier Integrations
- 10 Ways to Supercharge Your Forms with Zapier
- Gravity Forms Zapier Add-On Documentation
Don’t Have Gravity Forms Yet?
If you don’t have Gravity Forms or the Zapier Add-On, don’t worry. You can still test out everything in this article for free inside your own personalized Gravity Forms demo and see why Gravity Forms is the top choice for WordPress sites worldwide.
Already in love? Purchase our premium WordPress form plugin today!

If you want to keep up-to-date with what’s happening on the blog sign up for the Gravity Forms newsletter!
