Starter Guide: How to Create a Church Donation Form
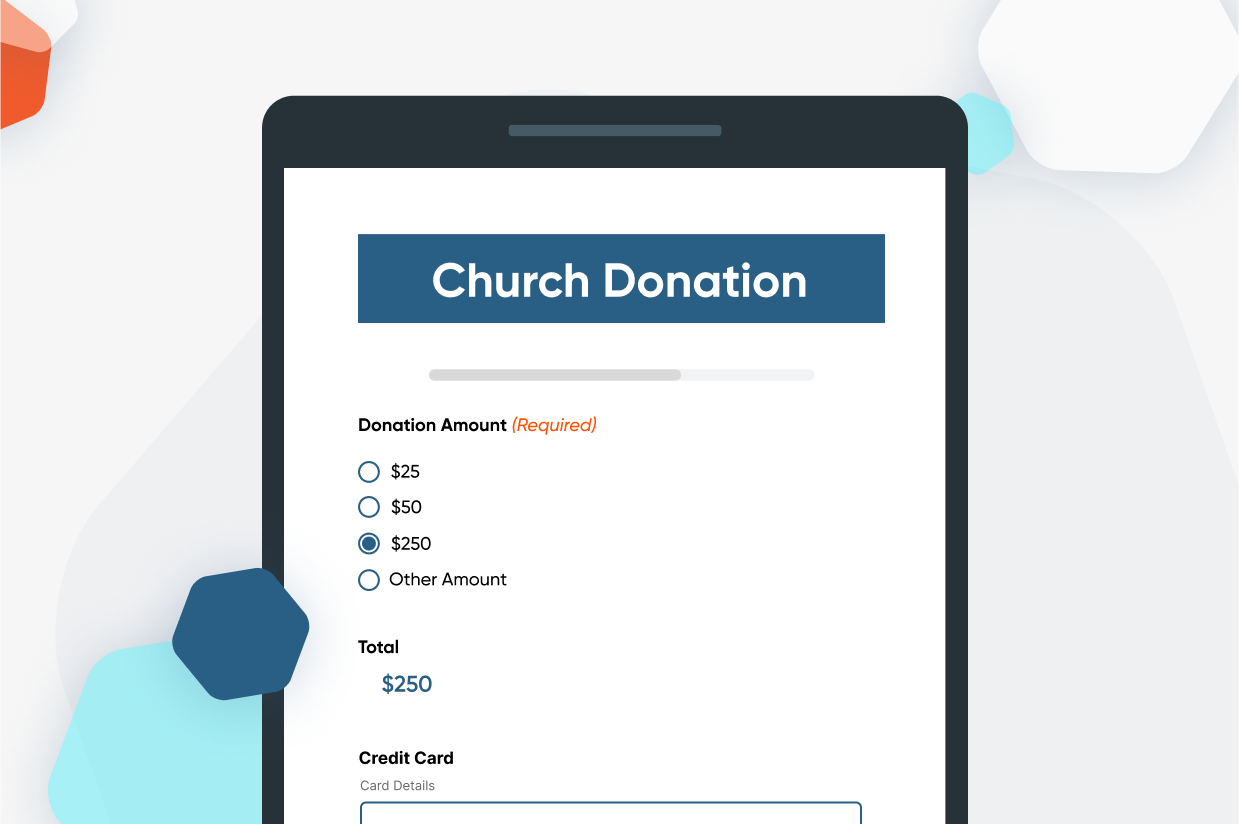
Adding a donation form to your church website is like creating a digital collection plate. It gives members of your community a convenient and secure way to support your mission regardless of whether they attend services in person, and allows you to accept recurring donations automatically.
Giving your community members an easy and flexible way to contribute to your church through a donation form not only helps fund your ministries, community projects, and other church activities, it also reinforces the values of generosity and stewardship.
With Gravity Forms, you can add a donation form to your church website without a web developer or knowing how to code. We’ll show you how to set up a fully working donation form on your church site using mostly just your mouse. You’ll learn how to create the form, connect it to a payment provider, set up one-time and recurring donations, and embed it on your website, all in a matter of minutes.
Does that sound good? Then let’s dive right in.
Why Use WordPress and Gravity Forms for Your Church Donation Form?
Below, we’ll create the donation form using WordPress and our Gravity Forms plugin. Doing so offers several benefits.
Firstly, WordPress itself is an excellent solution to run your church website. It’s free, flexible, and very beginner friendly — pretty much all you could want out of a website solution.
But WordPress itself doesn’t come with the functionality to create donation forms. That’s where Gravity Forms comes in. You can use it to set up almost any kind of form, from contact and event registration forms, to payment and donation forms.
Besides that, Gravity Forms has many other useful features.
Benefits of Using Gravity Forms for Your Church Website
Creating web forms with Gravity Forms is convenient in several ways:
- Ease of use – As mentioned, building forms requires neither technical nor coding knowledge. It all happens in a beginner-friendly drag-and-drop editor, where you can create even complex forms quickly and easily.
- Flexibility – You have full control over the layout and content of your forms and can collect as much or as little information as you need. Gravity Forms includes more than 40 different form fields for this purpose.
- Quick-start templates – While you can start from a blank slate, blueprints such as the donation form template are designed to give you a head start.
- Many payment processing options – The plugin lets you accept online payments using many payment processors like Stripe, PayPal, and more. These, too, are very easy to configure and use in your forms. Importantly, they also let you accept both one-time and recurring donations.
- Further extensibility – Your forms can integrate with many other tools, some of which you might already be using, like an email marketing provider. The Gravity Forms universe includes a plethora of add-ons for many purposes. You’ll find concrete examples below.
- No limits – Any Gravity Forms license allows you to create as many forms as you want and accept unlimited form submissions at no extra cost. Use it to create forms for recruiting, lead generation, volunteer applications, and more.
- Well-supported and secure – We adhere to the highest security standards and offer extensive support and documentation.
Take Advantage of the Nonprofit License
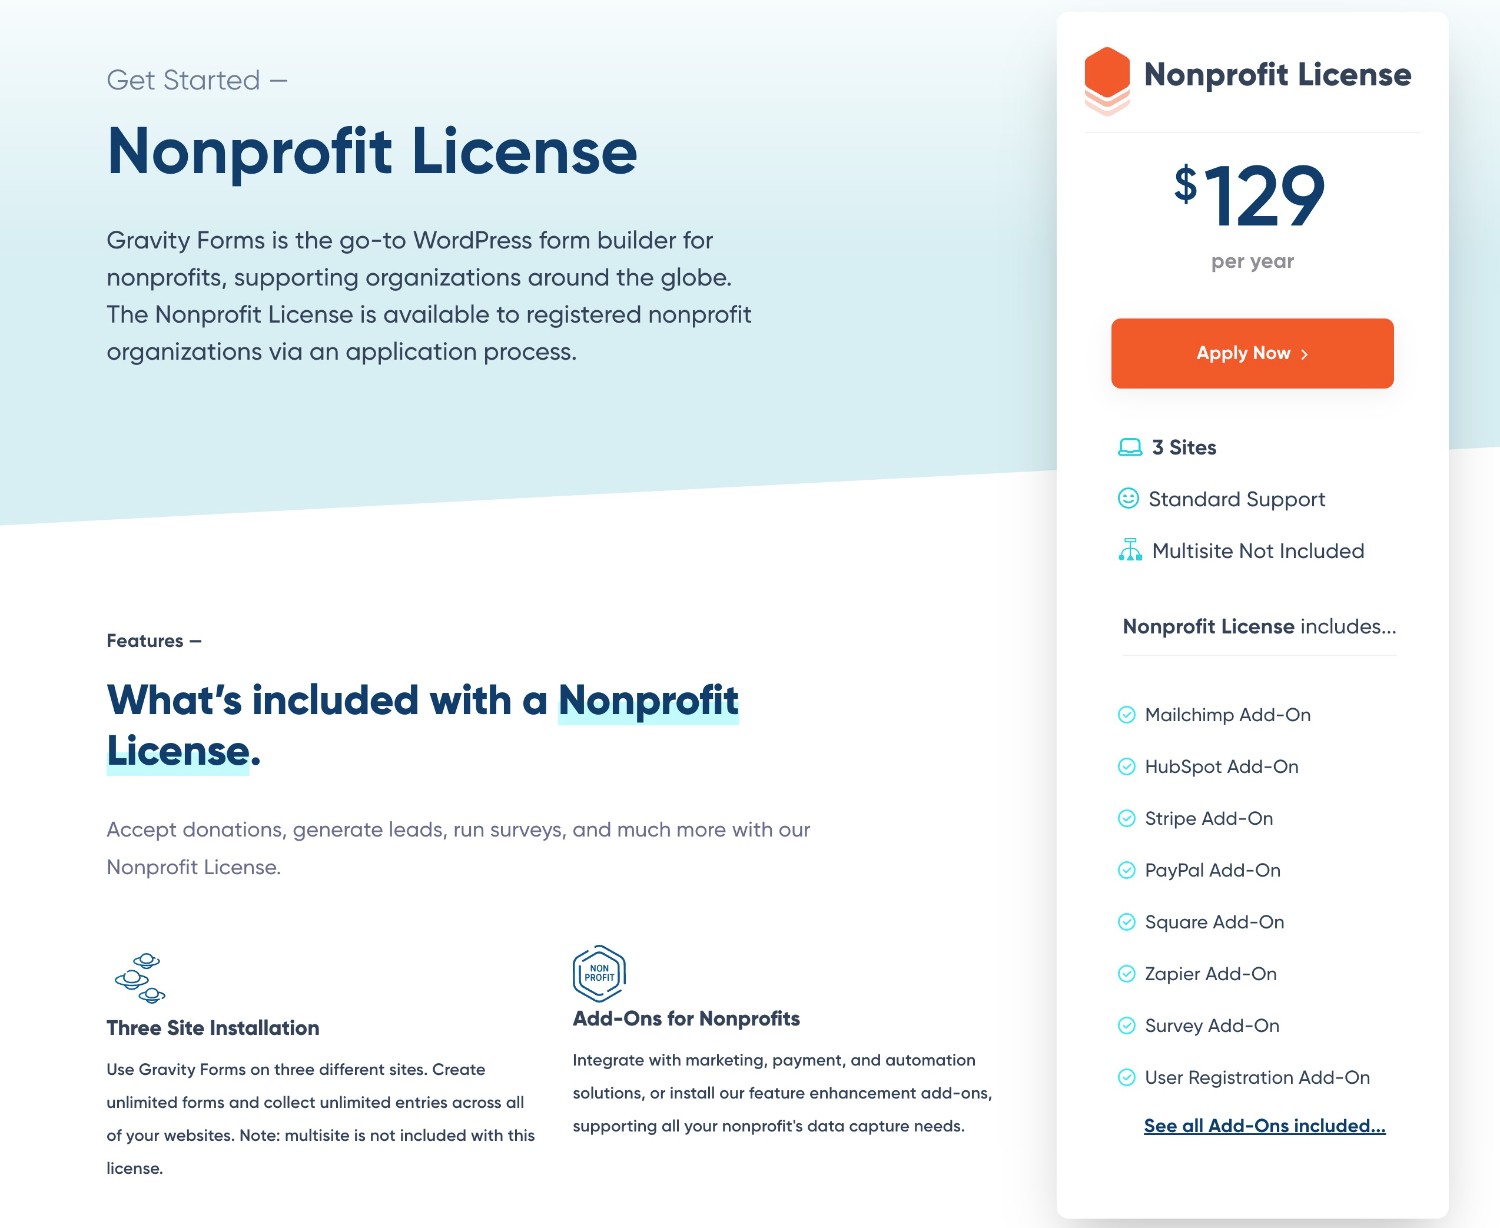
Gravity Forms has several license plans. As a registered nonprofit organization, you can check out our Nonprofit License. It comes with a reduced price tag as well as all current extensions and integrations, and you can use it on up to three sites for unlimited forms and form submissions. You can find more information in this article.
Check out these additional resources, including this list of add-ons that are especially useful for nonprofits, this list of forms your nonprofit website needs, and tips for how to start a monthly giving program. You can find even more articles here.
Creating a Church Donation Form in WordPress: Step-by-Step Instructions
Sound good so far? Then let’s see what this looks like in practice.
1. Install and Activate Gravity Forms
In order to create a church donation form you first need a WordPress website. For this tutorial we’re presuming that you already have a church website that’s up and running.
However, if you aren’t there yet, you can create a free demo site and use it to follow along this tutorial to get a feel for the plugin. It has all the features you need.
To get started with your donation form, you’ll first need to install and activate Gravity Forms.
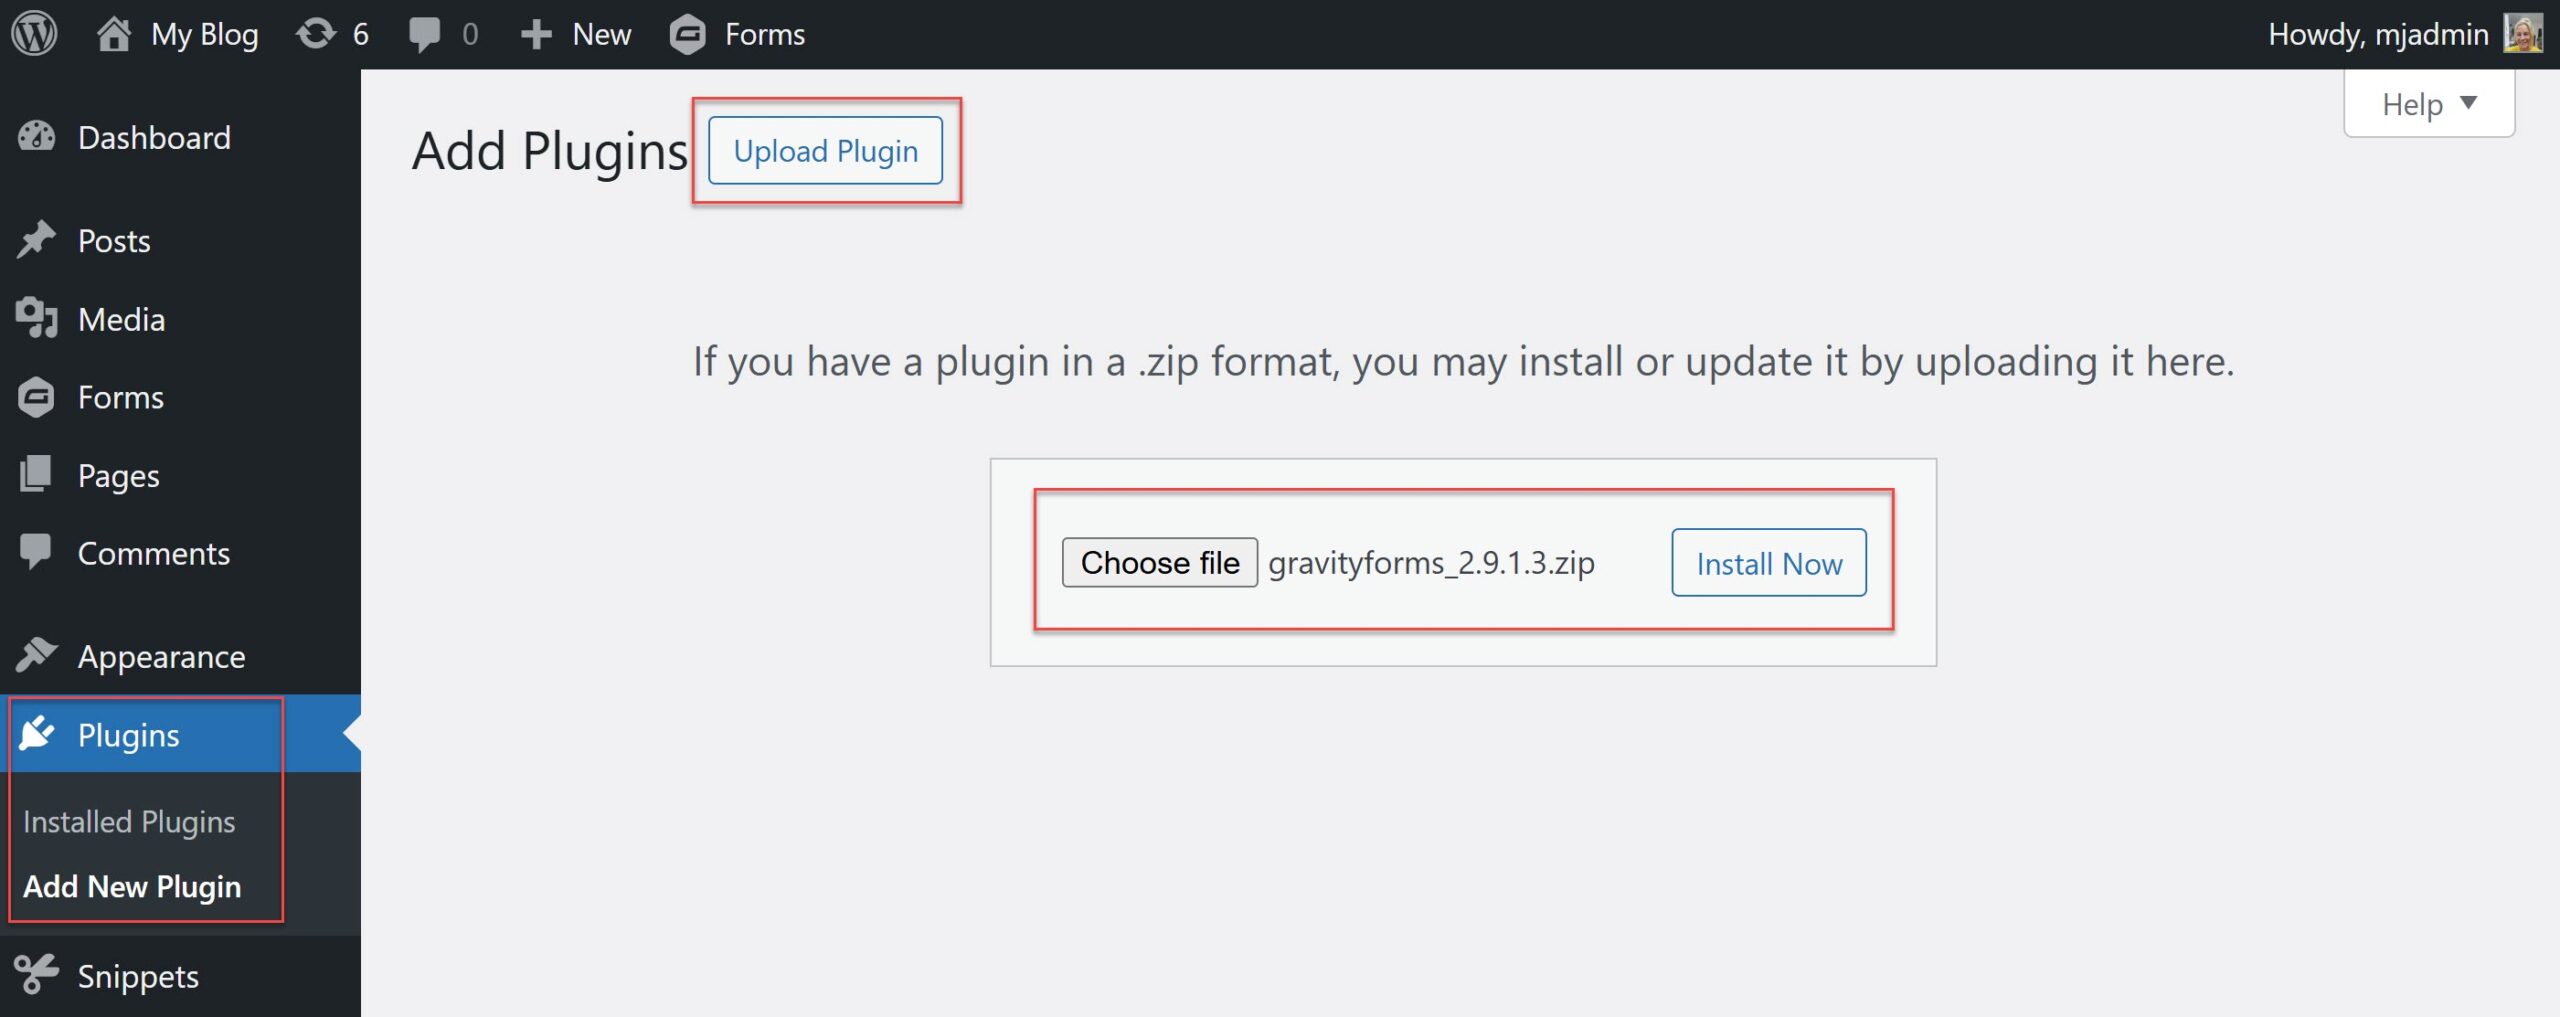
Download the Gravity Forms zip file from your Gravity Forms Account. Then, within your WordPress dashboard, head on over to Plugins → Add New. Here you’ll need to upload the Gravity Forms plugin, and then follow the Setup Wizard instructions to activate it.
2. Install and Configure the Square Add-On
In order to be able to accept donations, you need a payment provider. That’s a service that can process credit cards and other payment methods. For this tutorial we will use Square and the Gravity Forms Square Add-On.
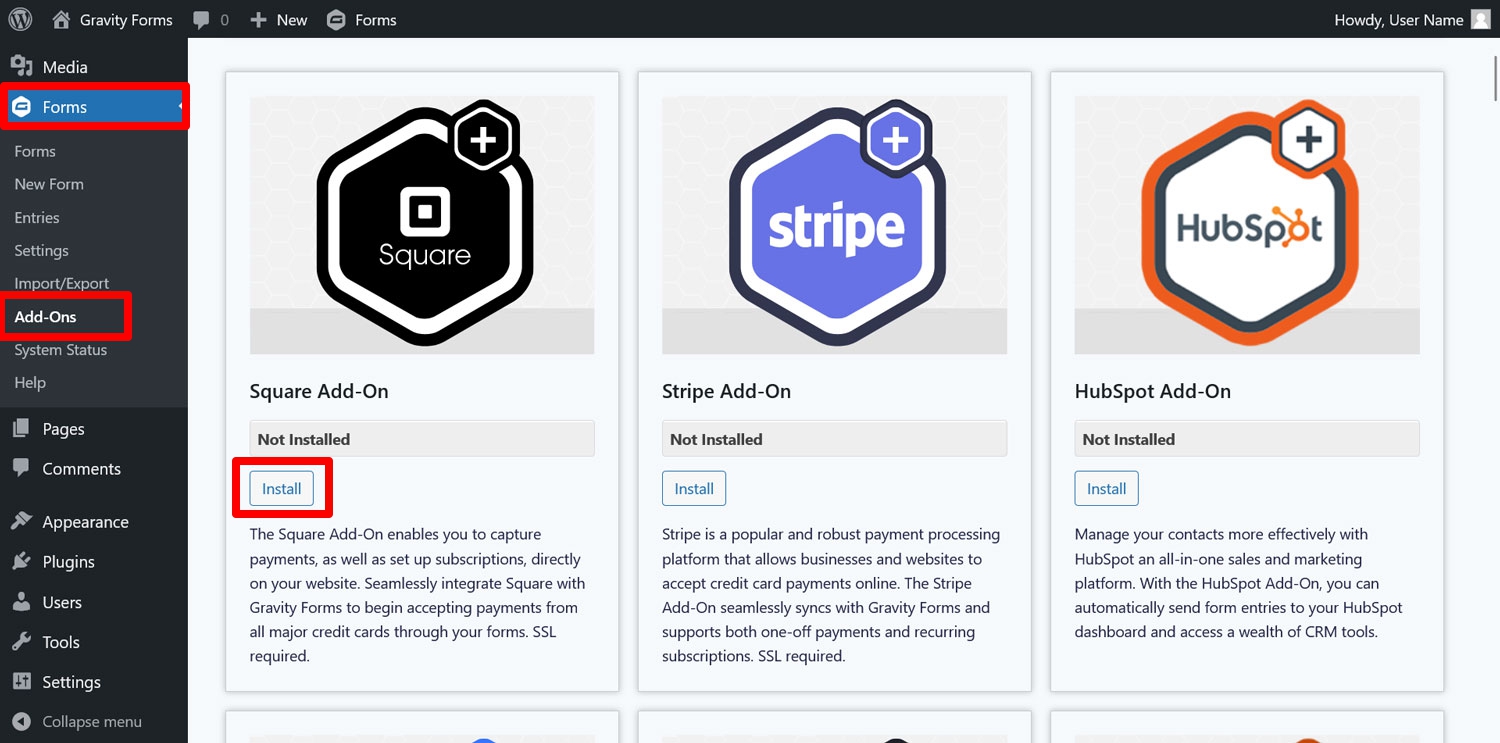
First, you’ll need to register for a free Square account in order to use the service. Then, from your WordPress dashboard, install the add-on by clicking Forms → Add-Ons. Find the Square Add-On in the list, then click Install. Activate it once downloaded.
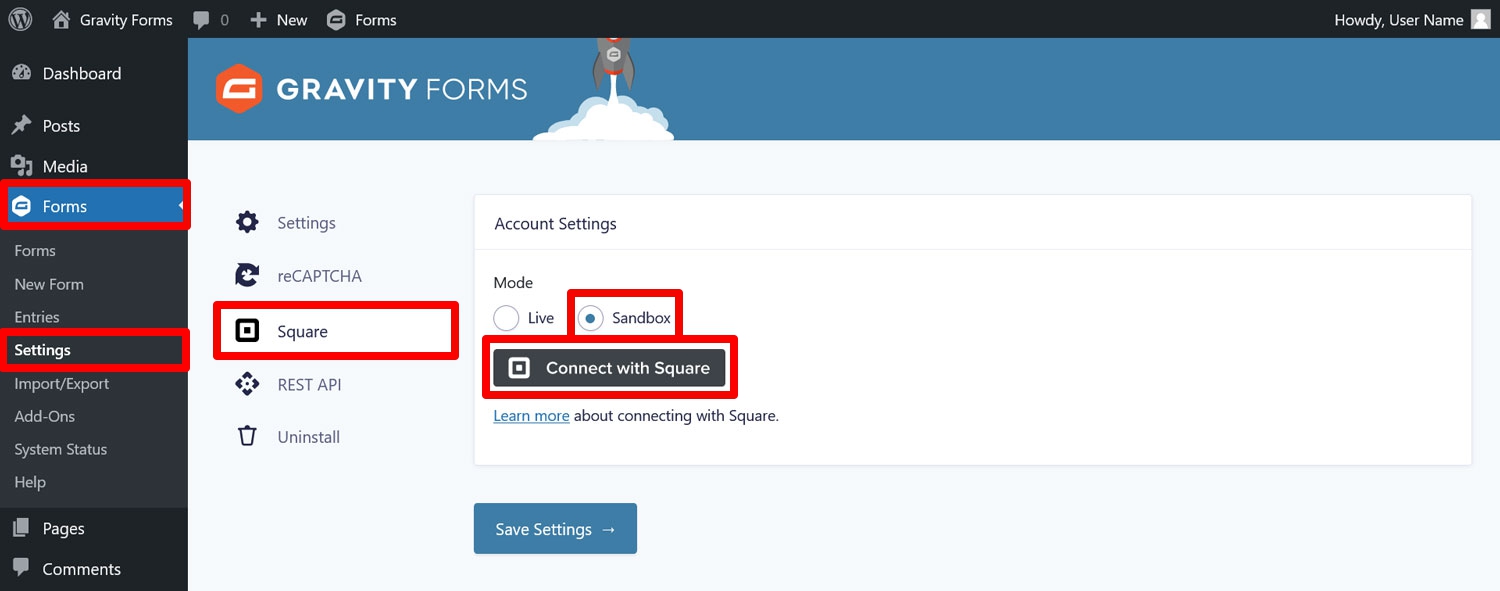
After that, you need to establish a connection between your site and your Square account. To do this, go to Forms → Settings → Square, set Mode to Sandbox, then click Connect with Square.
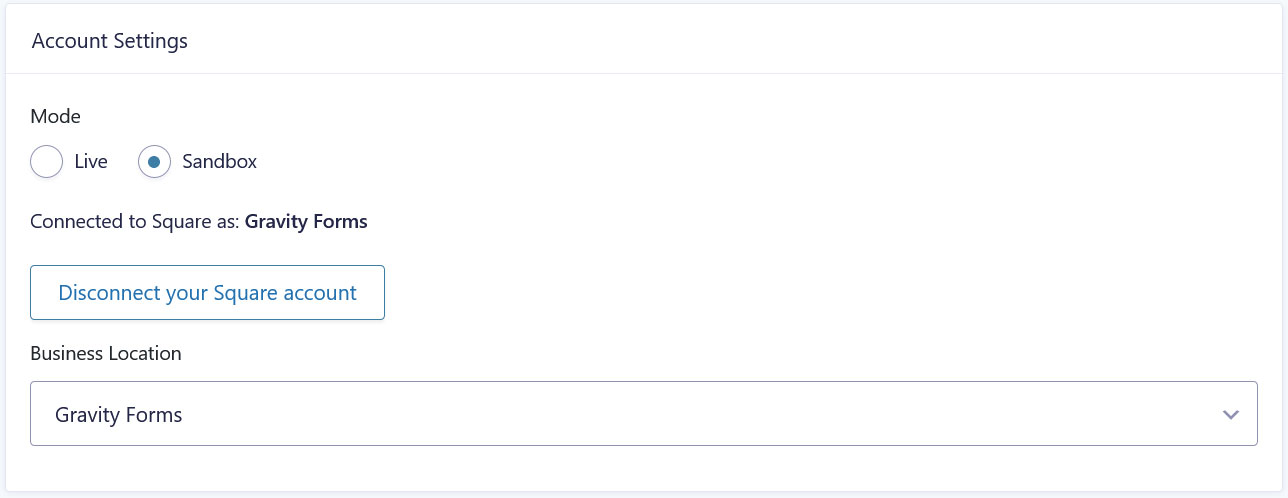
This will redirect you to the Square homepage where you’ll need to log in and grant permissions to Gravity Forms. You should automatically return to WordPress afterwards and see that you are logged in to Square.
Be sure to select a Business Location if you have more than one location listed in Square. Save the settings at the bottom, then continue.
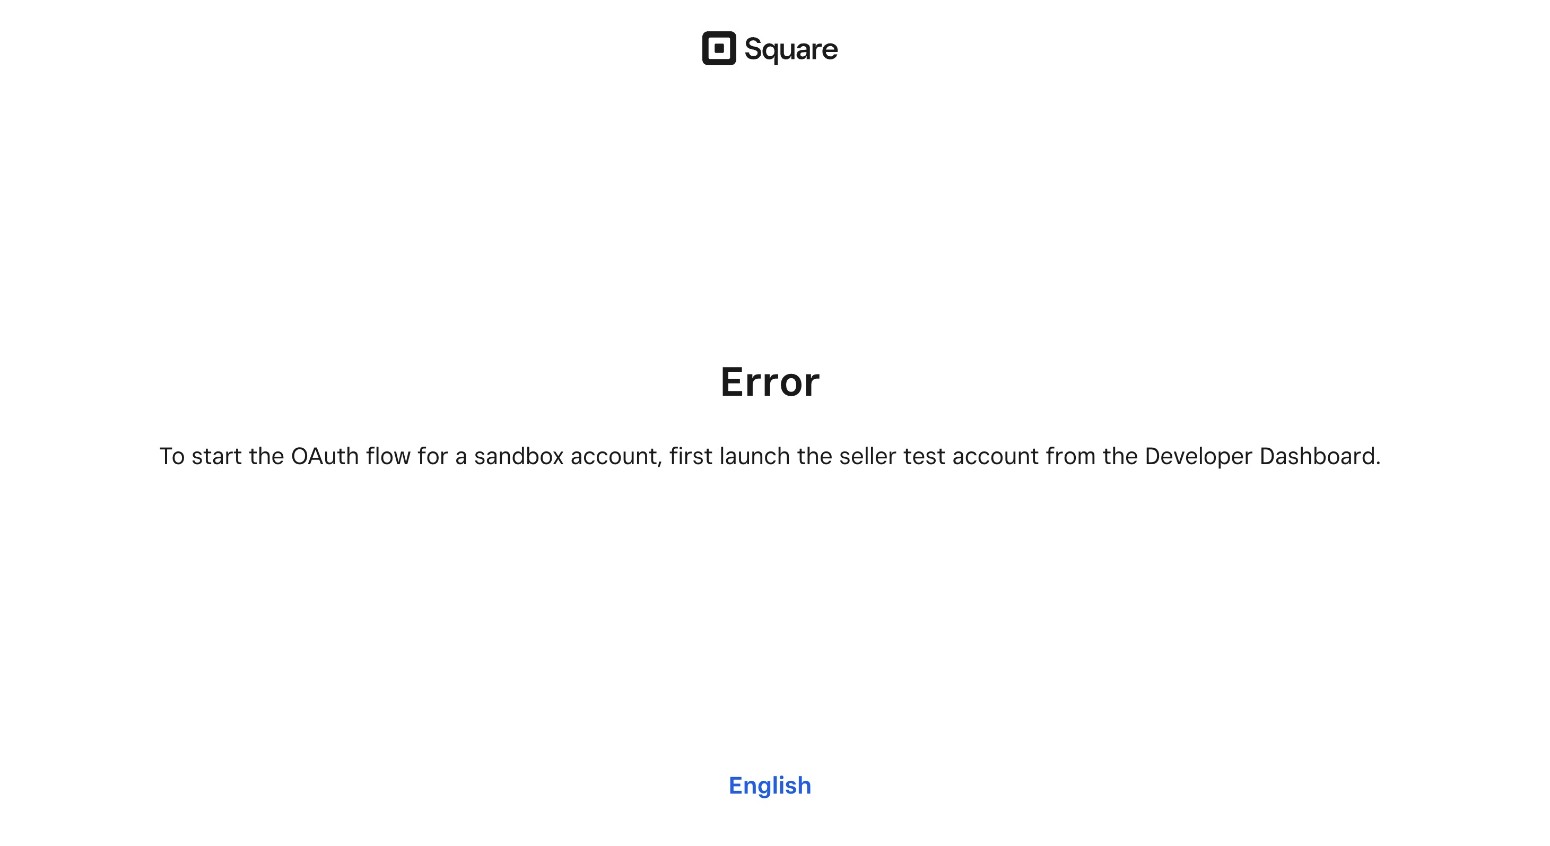
But wait, did you run into this warning?
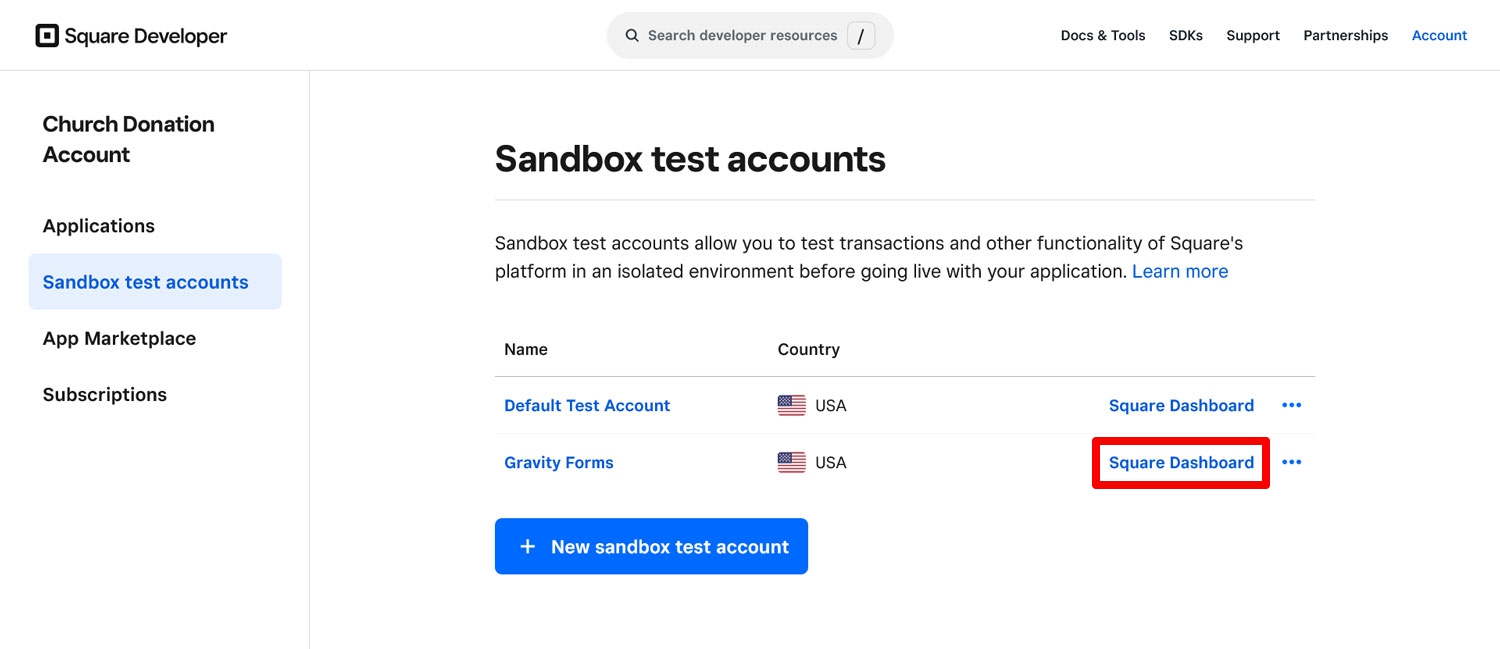
If so, here’s how to solve the issue:
- Log in to the Square sandbox dashboard.
- Here, create your own application and a user with permission to access it.
- Open that user in another browser tab.
- Retry connecting Gravity Forms to Square.
3. Create a New Donation Form
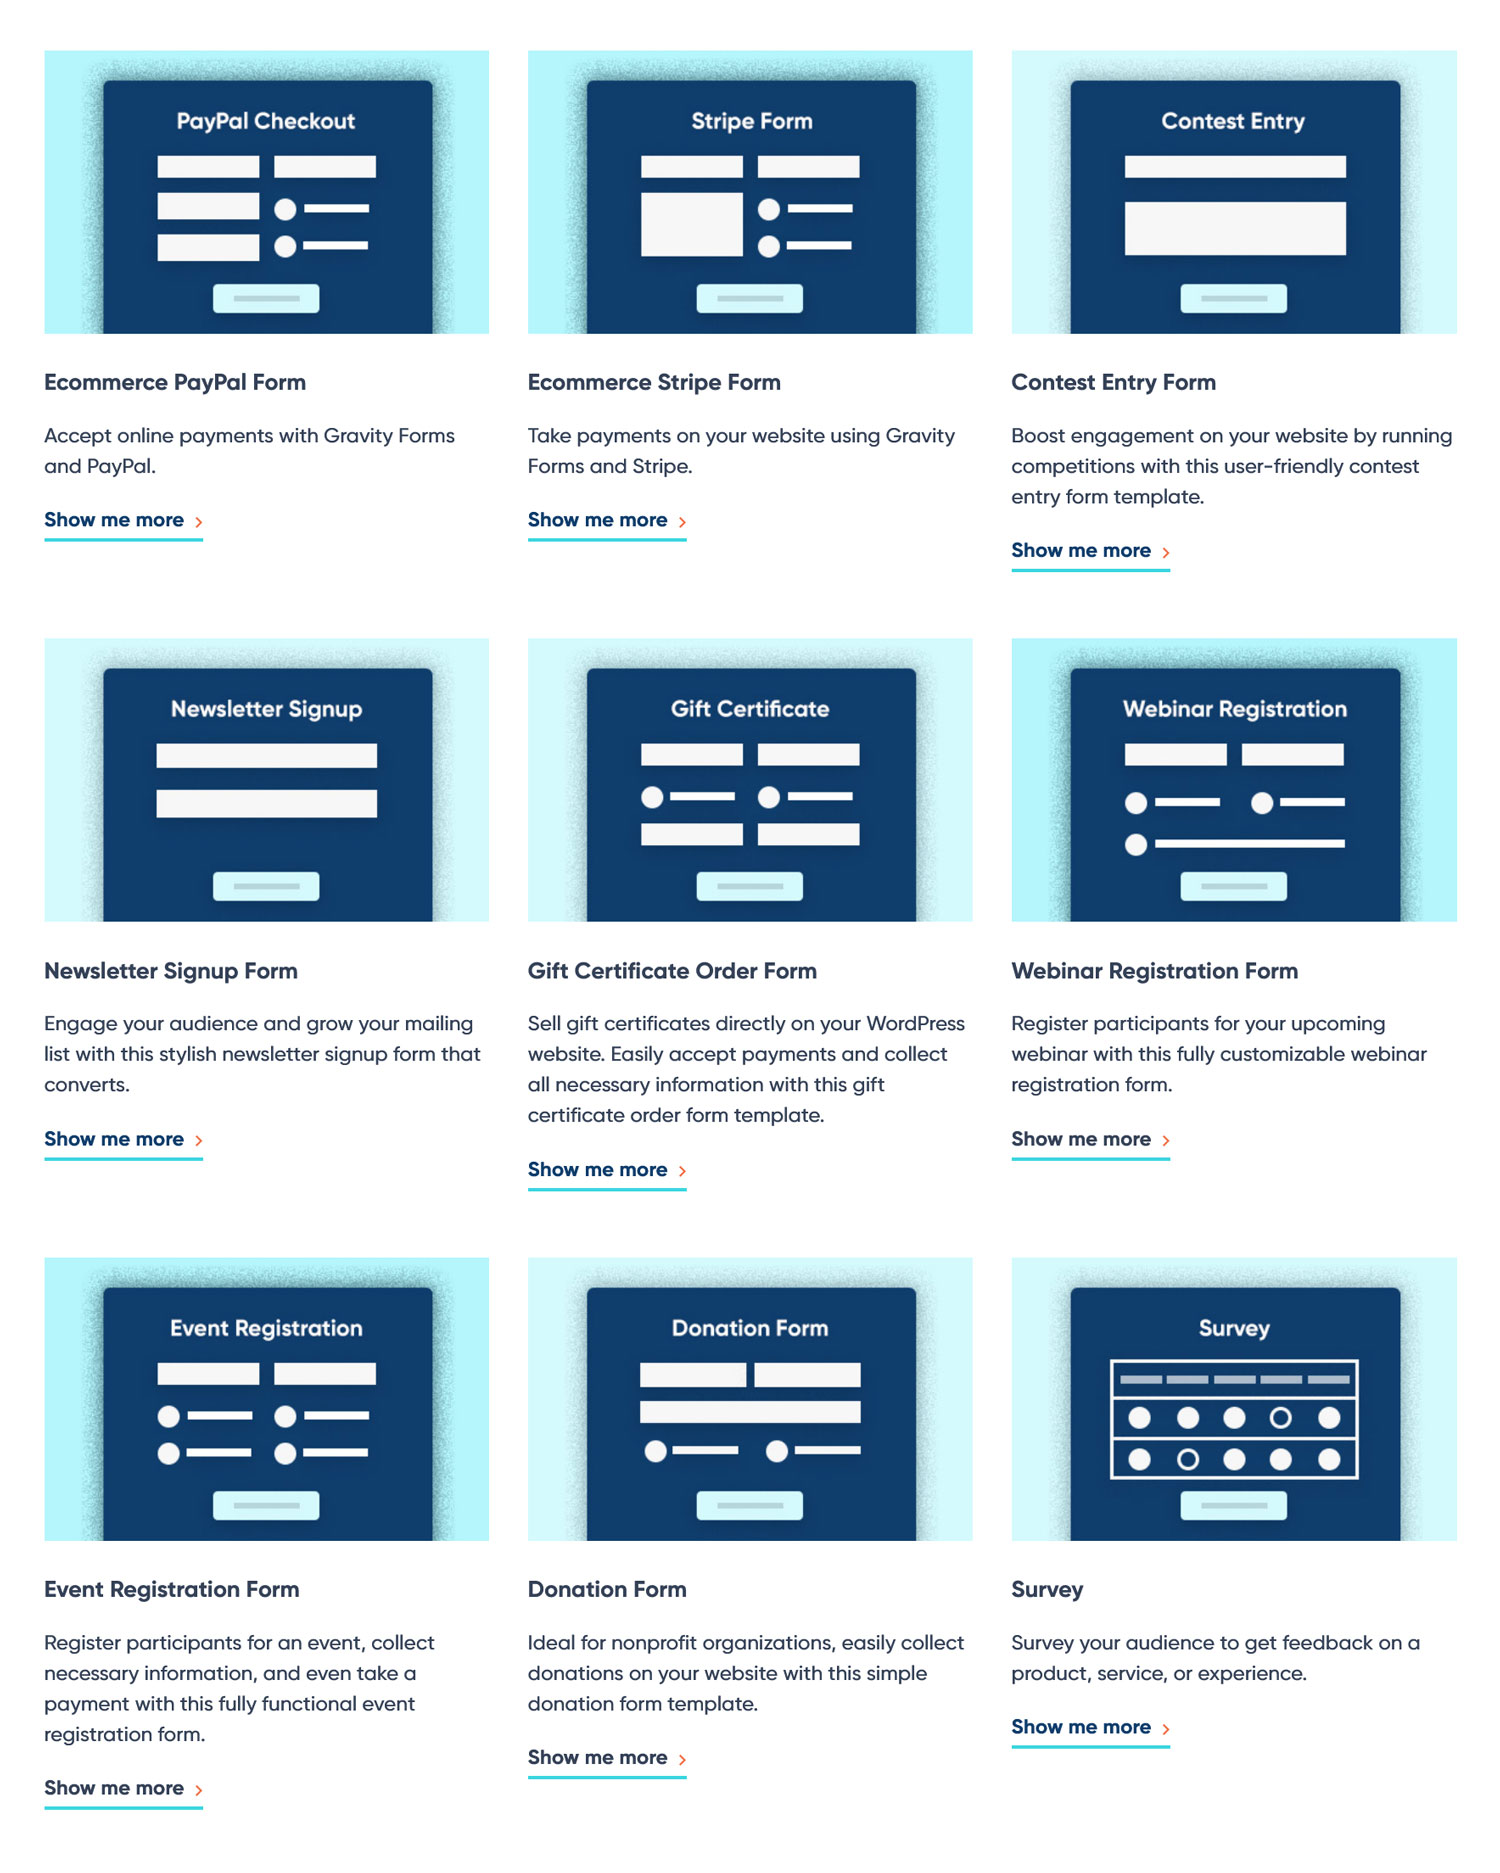
Now it’s time to create your donation form. Luckily, you don’t have to start from scratch since the Gravity Forms template library comes with the aforementioned donation form template.
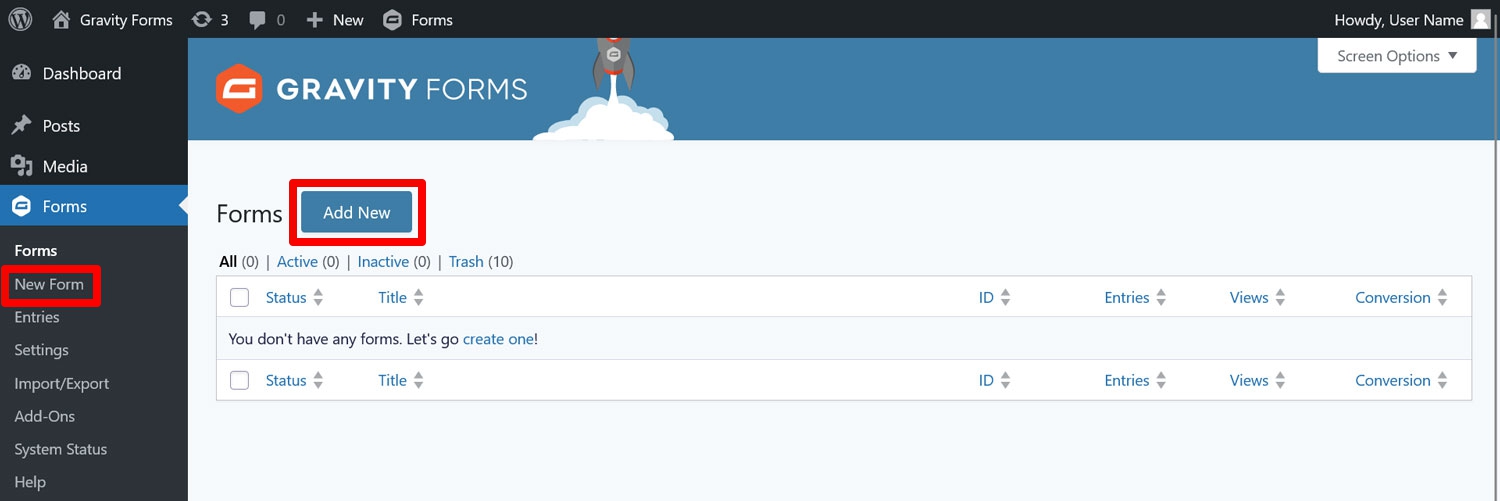
You can access the template library by clicking on Forms → Add New in your WordPress dashboard.
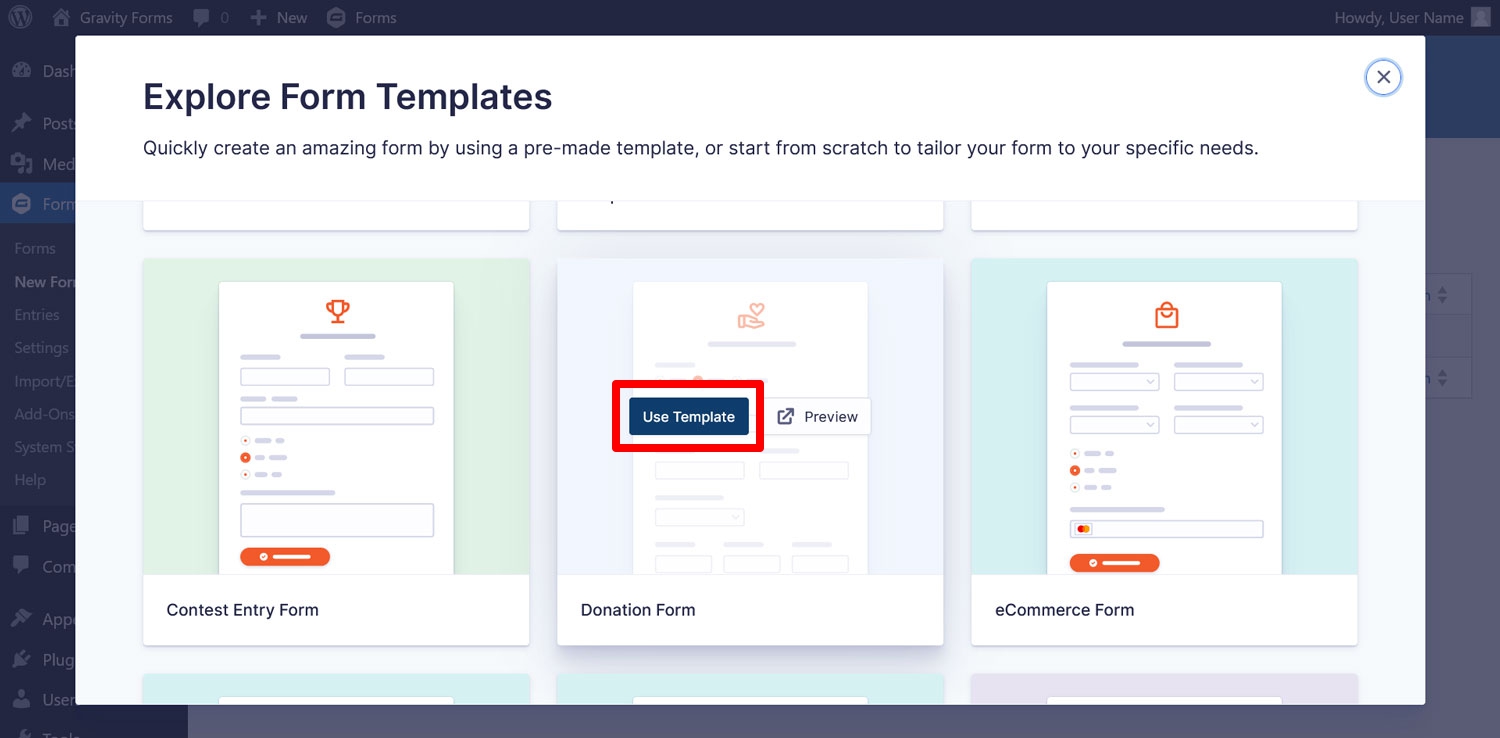
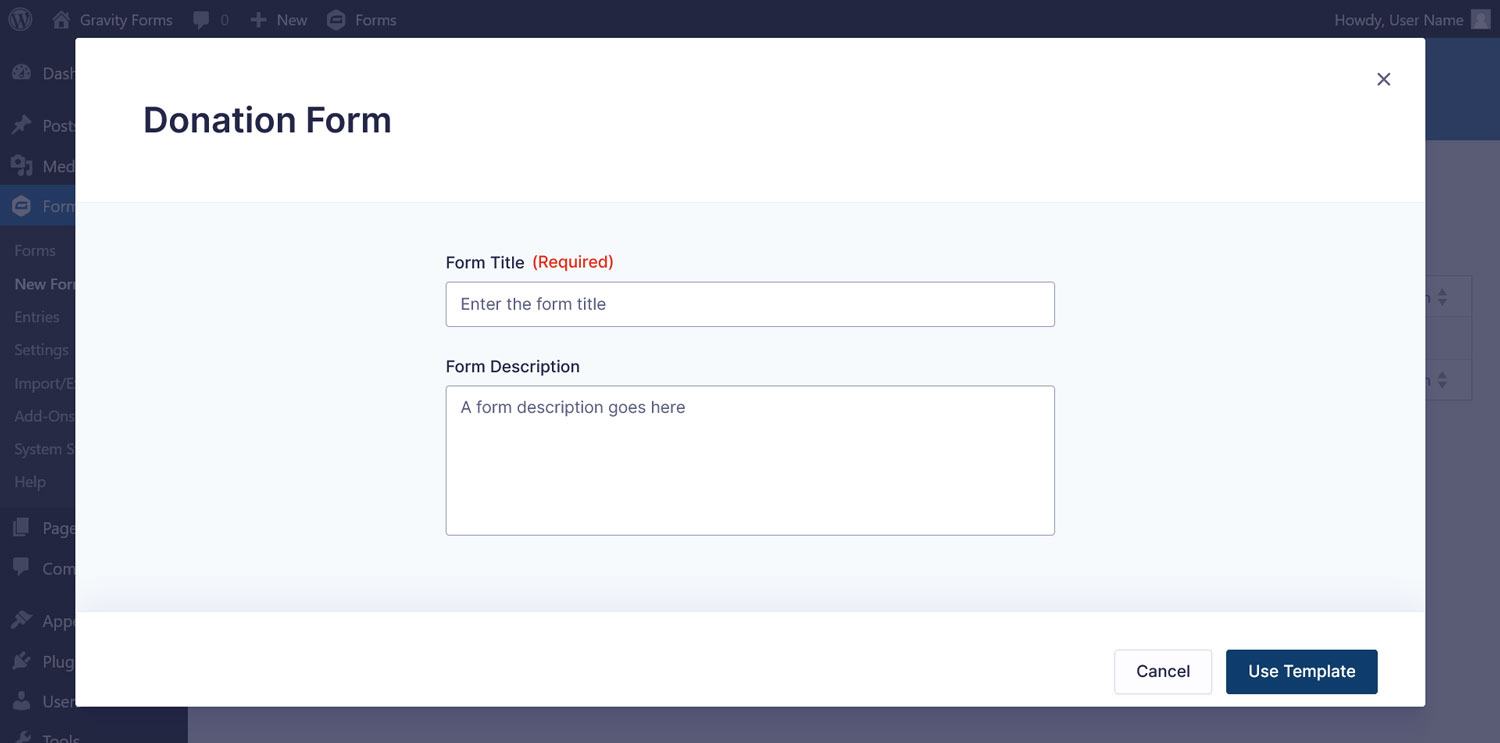
In the window that opens, find the Donation Form template in the list, hover your mouse over it, and click Use Template.
In the next screen, provide a name for your form and, if you want, a description, then move on.
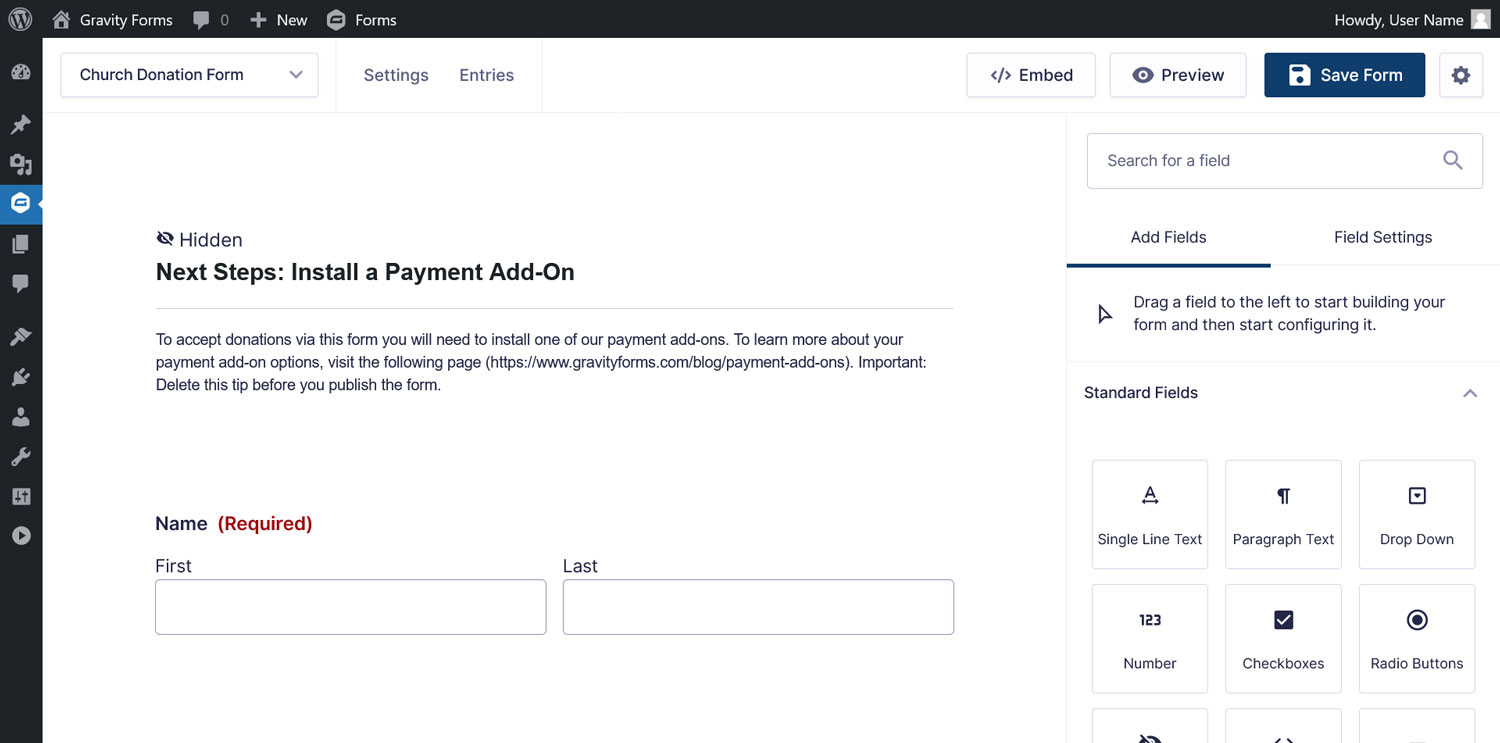
This will land you in the Gravity Forms drag-and-drop editor.
Thanks to the template, it already contains form fields to collect some useful information, like:
- Name
- Donation amount (including the option to input a custom amount)
- Total field to calculate the result
4. Customize Your Form
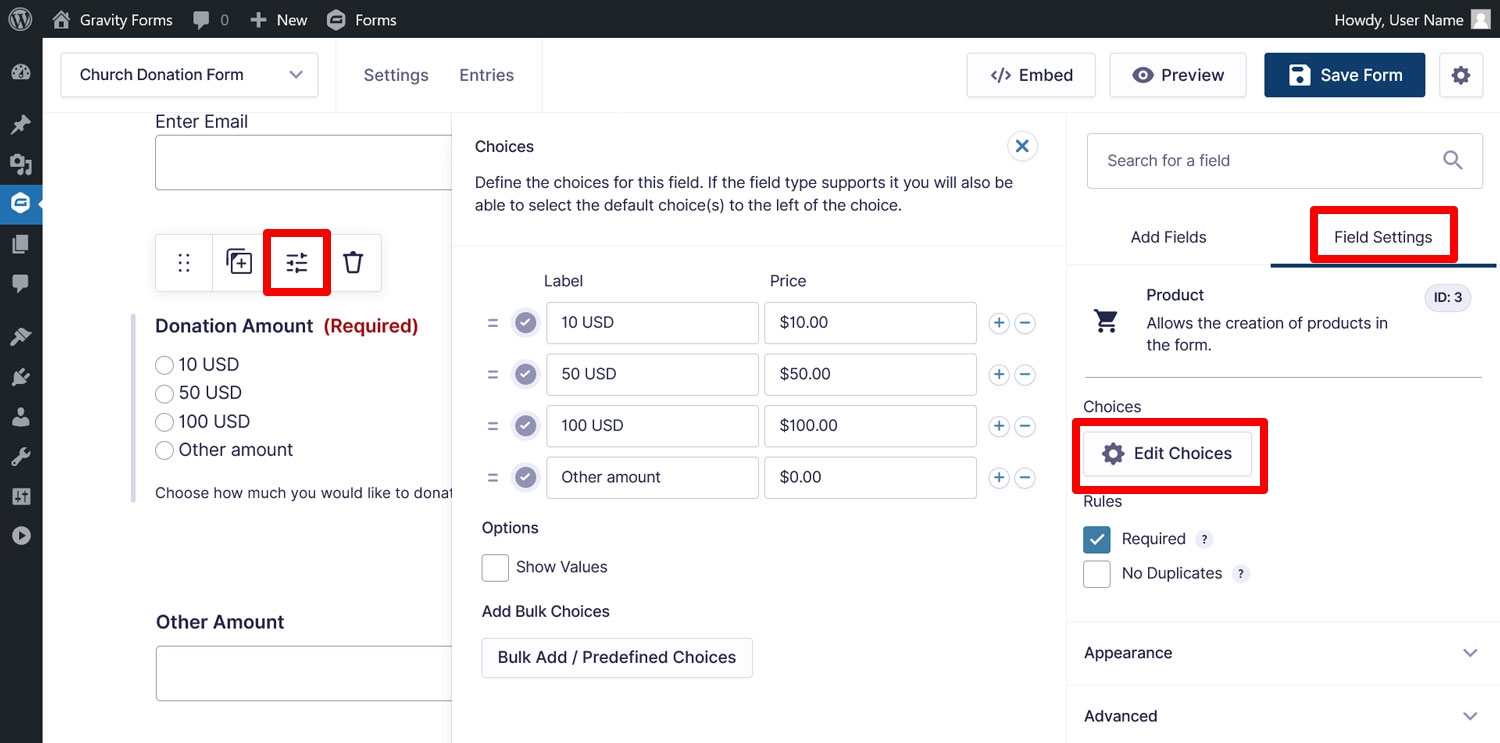
While the template is a great start, you can also easily completely customize the form to your needs. Modify existing form fields by clicking on them, then using the top toolbar to move, duplicate, and delete fields, or access their settings.
The settings are available in the right sidebar and allow you to make more decisive changes such as modifying field labels, switching certain parts of fields on and off, and much more. You can, for example, use this to adjust the default donation amounts given in the template to whatever you feel is appropriate.
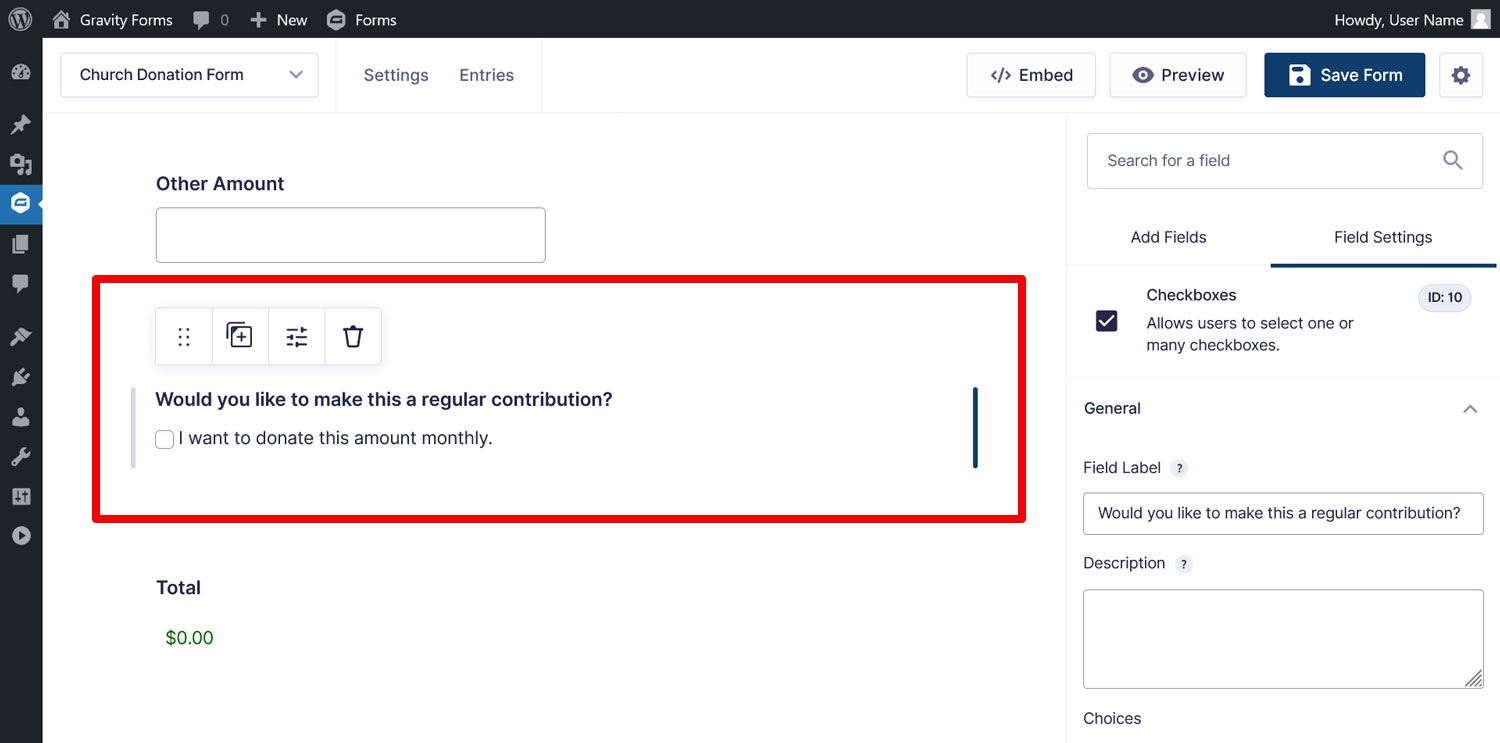
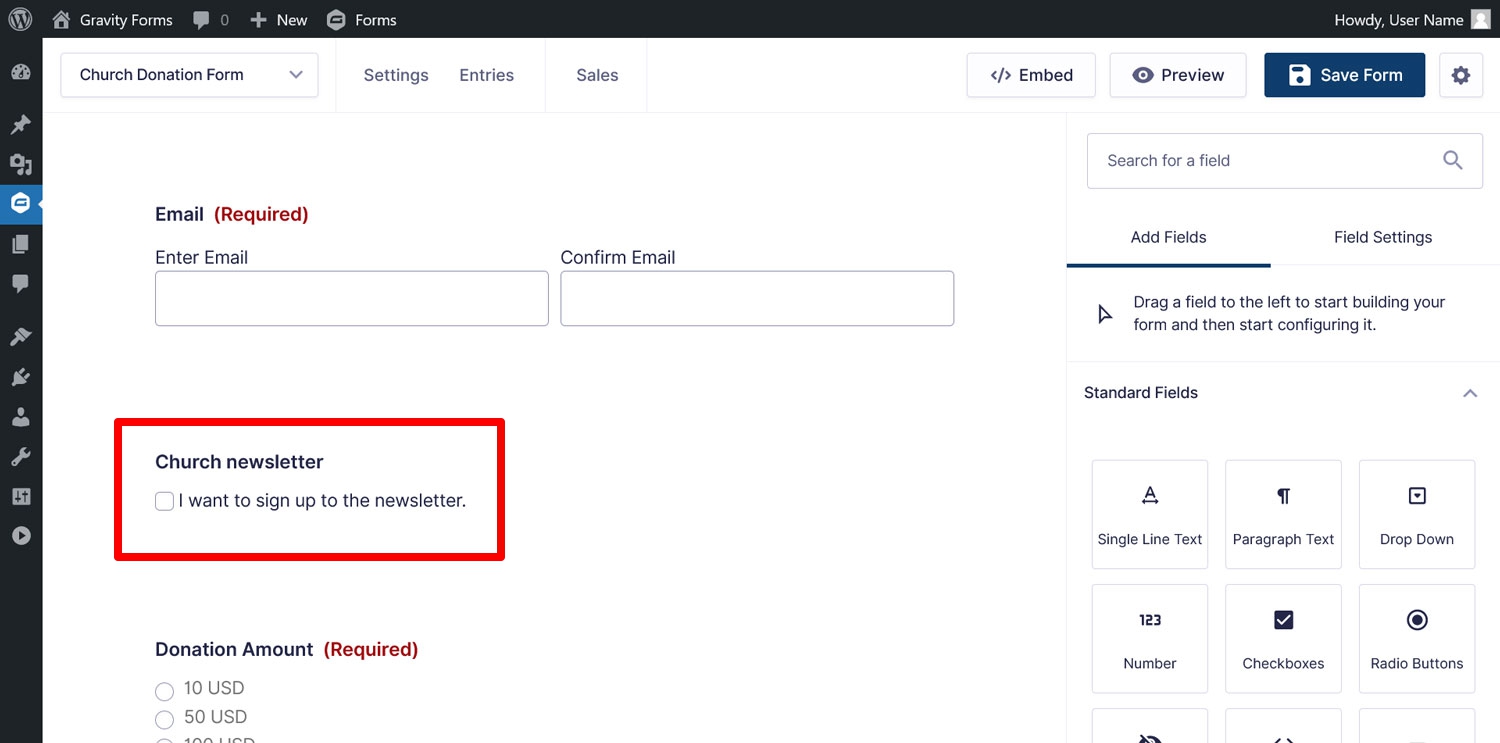
You can also add more form fields from the right sidebar. We will insert two additional fields. First, let’s add a Checkboxes field to allow donors to make their donation a monthly recurrence.
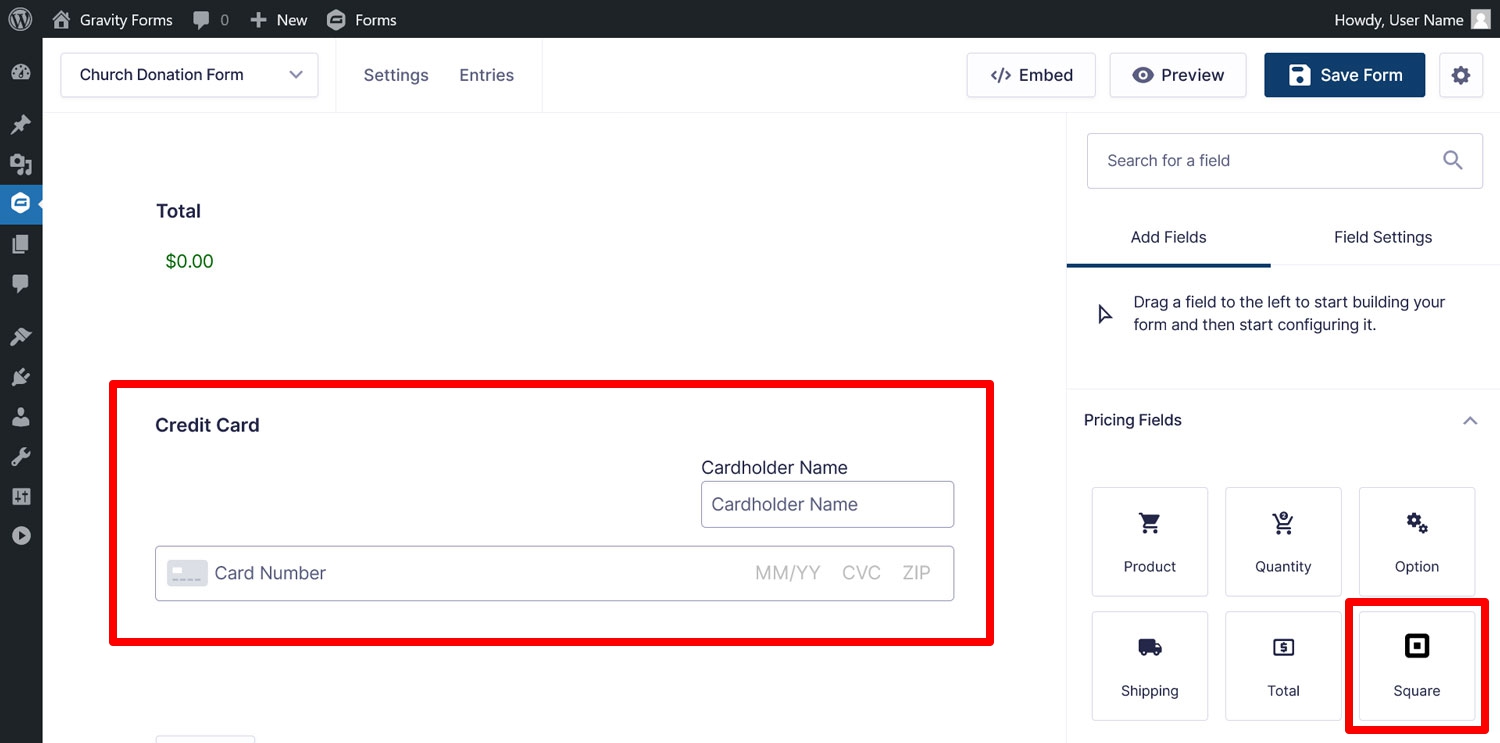
Next let’s add the Square field so we can collect the payment.
This replaces your normal Submit button and enables contributors to have their generous donations actually processed.
Depending on your goals, you could stop here, or continue adding fields. For example, if your church supports multiple projects, you could add a field which lets the donor indicate which project their donation should support.
Once satisfied, click Save Form in the upper right corner.
5. Set Up Your First Square Feed
In Gravity Forms, a “feed” determines how the information people enter on your forms will be processed after they submit it. In this case, we want it passed on to a payment provider.
To make sure this works correctly, among other things, the feed tells Square whether the donation will be one-time or recurring. Since our form is supposed to be able to do both, we actually need two. Let’s create a feed for one-time donations to start.
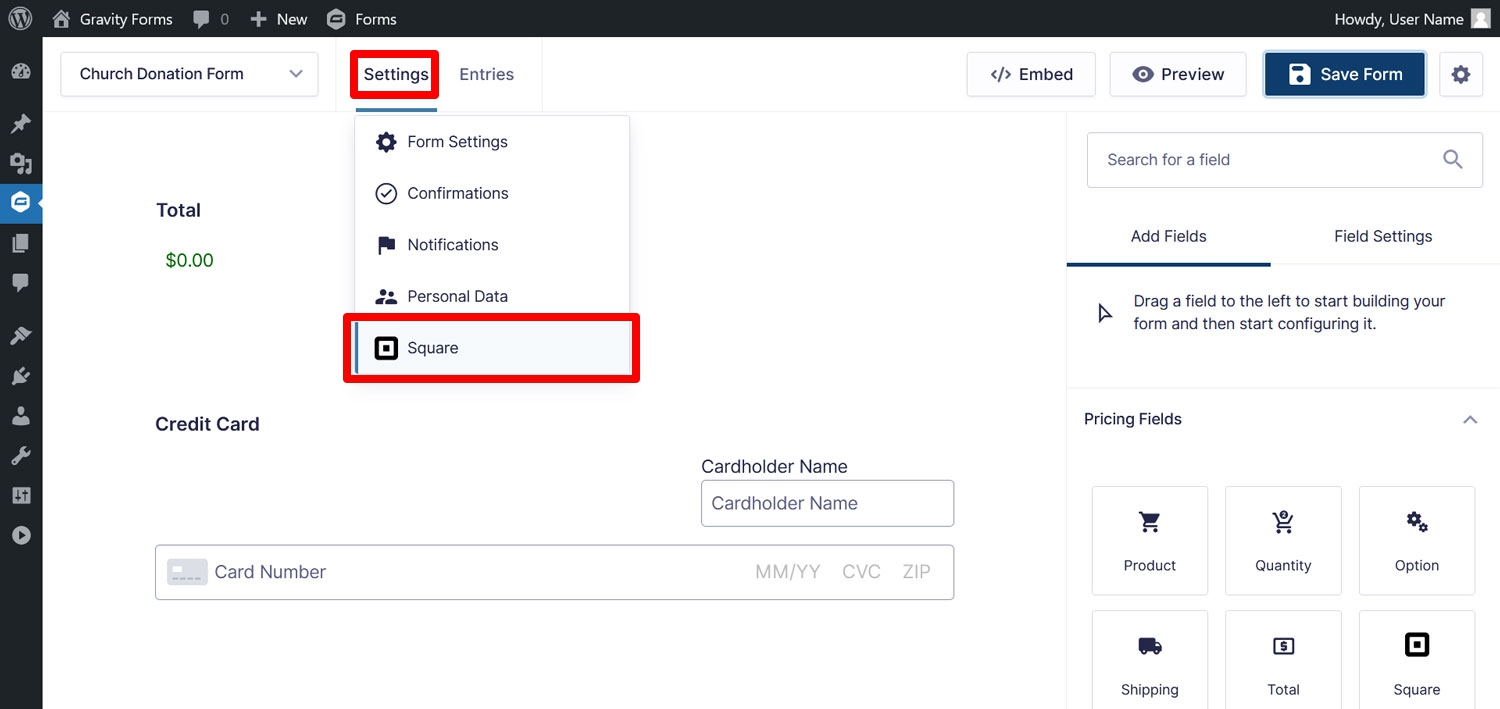
In the form editor, move your cursor over Settings in the top menu and click on Square to access the form settings.
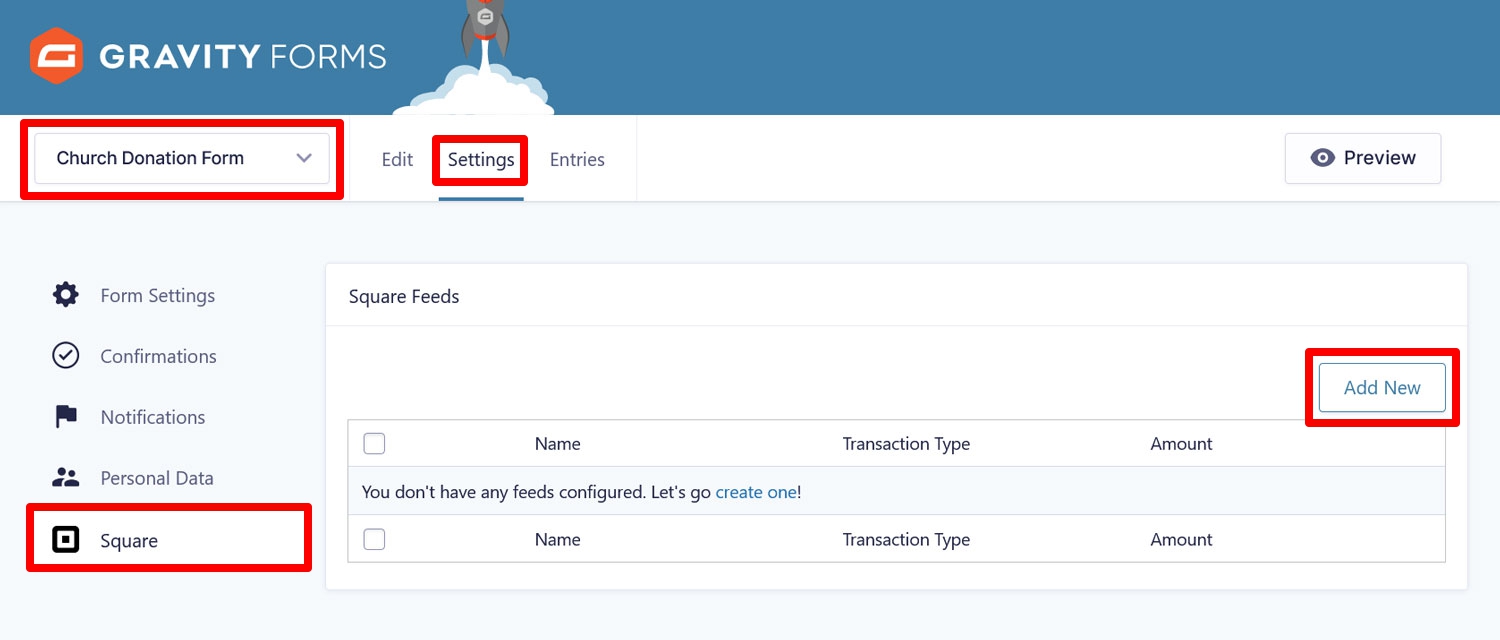
Once there, click Add New to start creating a feed.
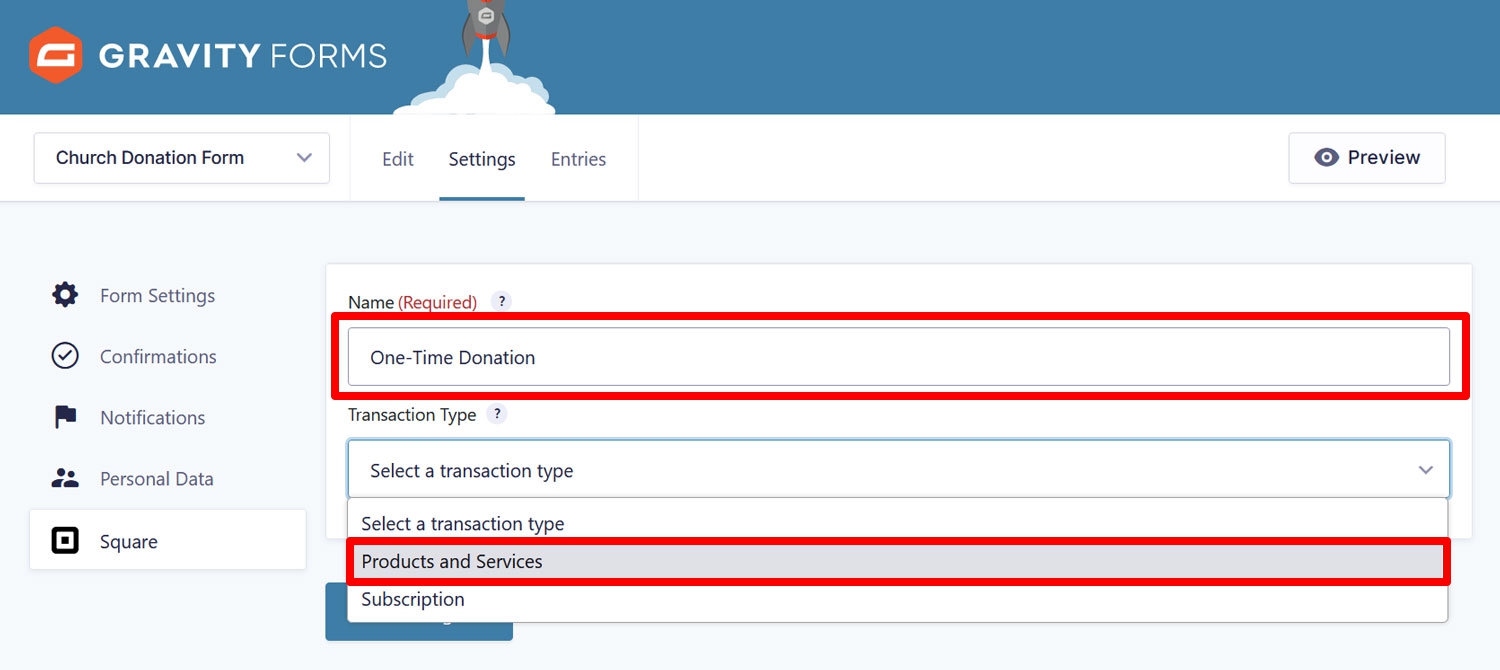
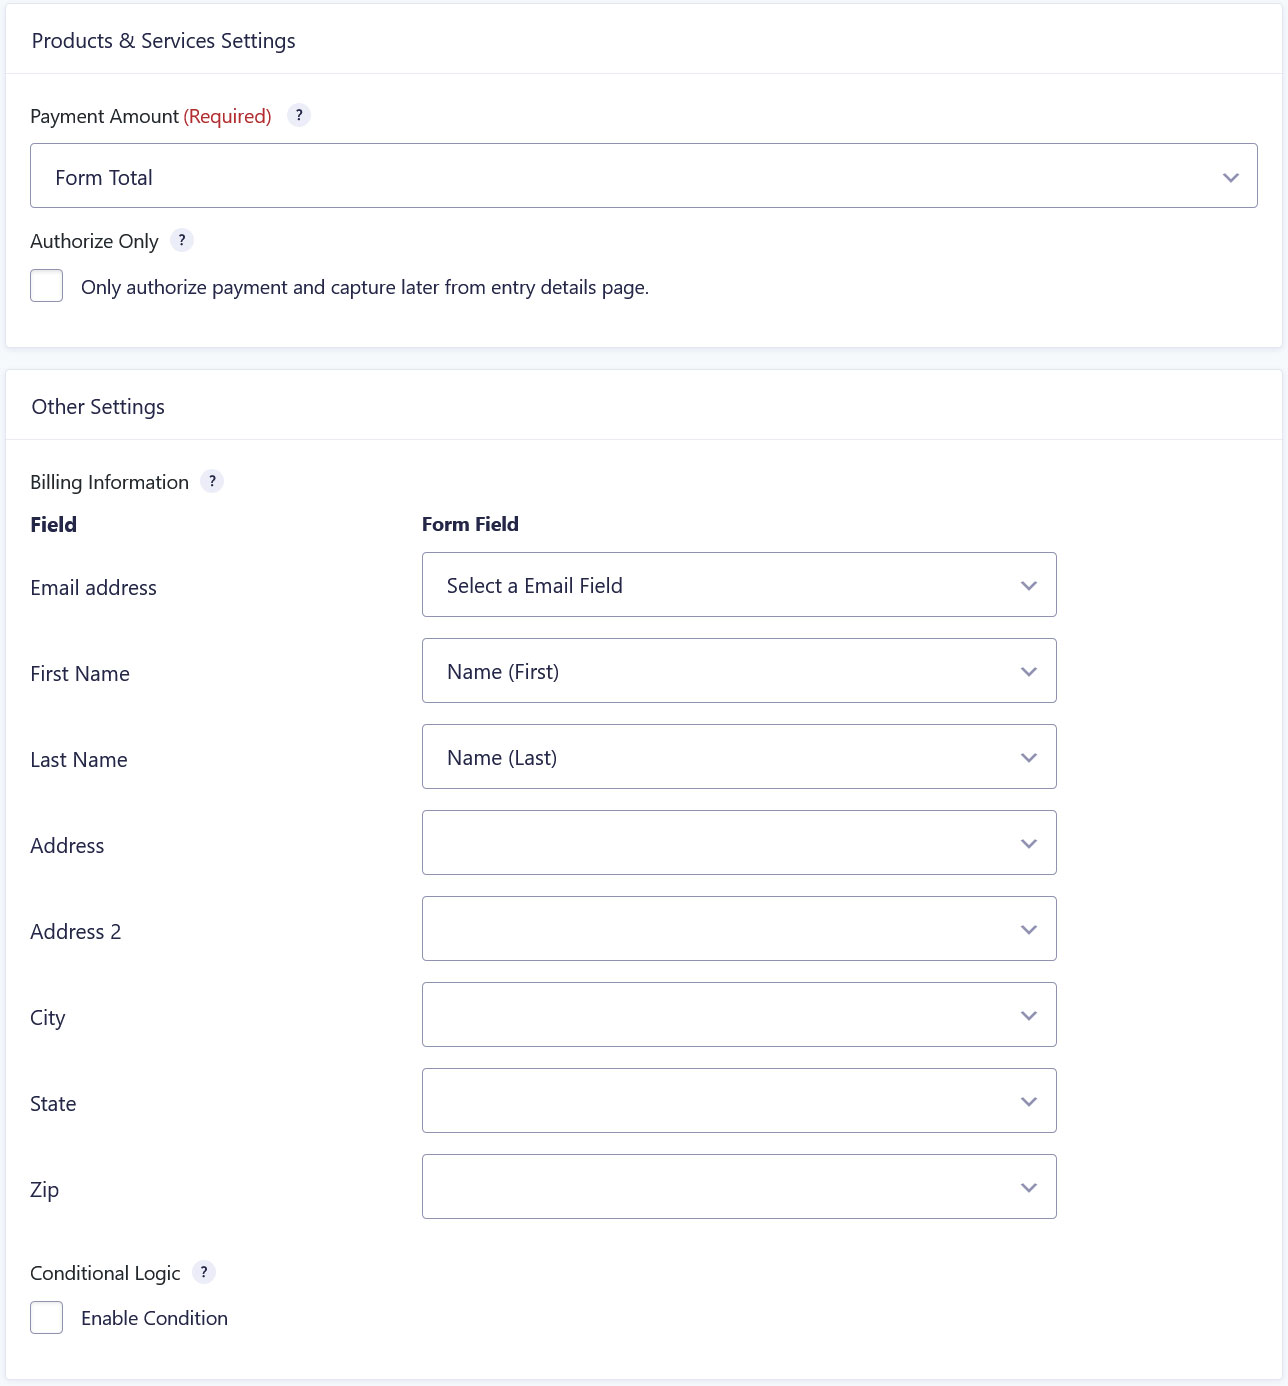
In the screen that follows, first edit the feed name at the top. As mentioned, we are creating two different feeds for the same form, so it’s really important to be able to distinguish them. Then, choose Products and Services under Transaction Type to create a one-time donation.
This will reveal additional options.
Under Payment Amount, choose Form Total if it isn’t already selected.
Under Other Settings → Billing Information, you need to connect form fields to the information Square will use for the billing address. In our example, that’s only the first name, last name and email address.
Your setup might be different, especially if you need to adhere to certain regulations when it comes to providing donation receipts, so make sure to inform yourself.
A very important part is the Conditional Logic section. Because we are creating two feeds for two different use cases, it’s imperative that you check the Enable Condition box here and then set the condition so that this feed only comes into play if the checkbox for regular donations has not been checked.
In other forms, you can use this feature to sort responses at the sources.
When you are all done, save at the bottom.
6. Enable Recurring Donations
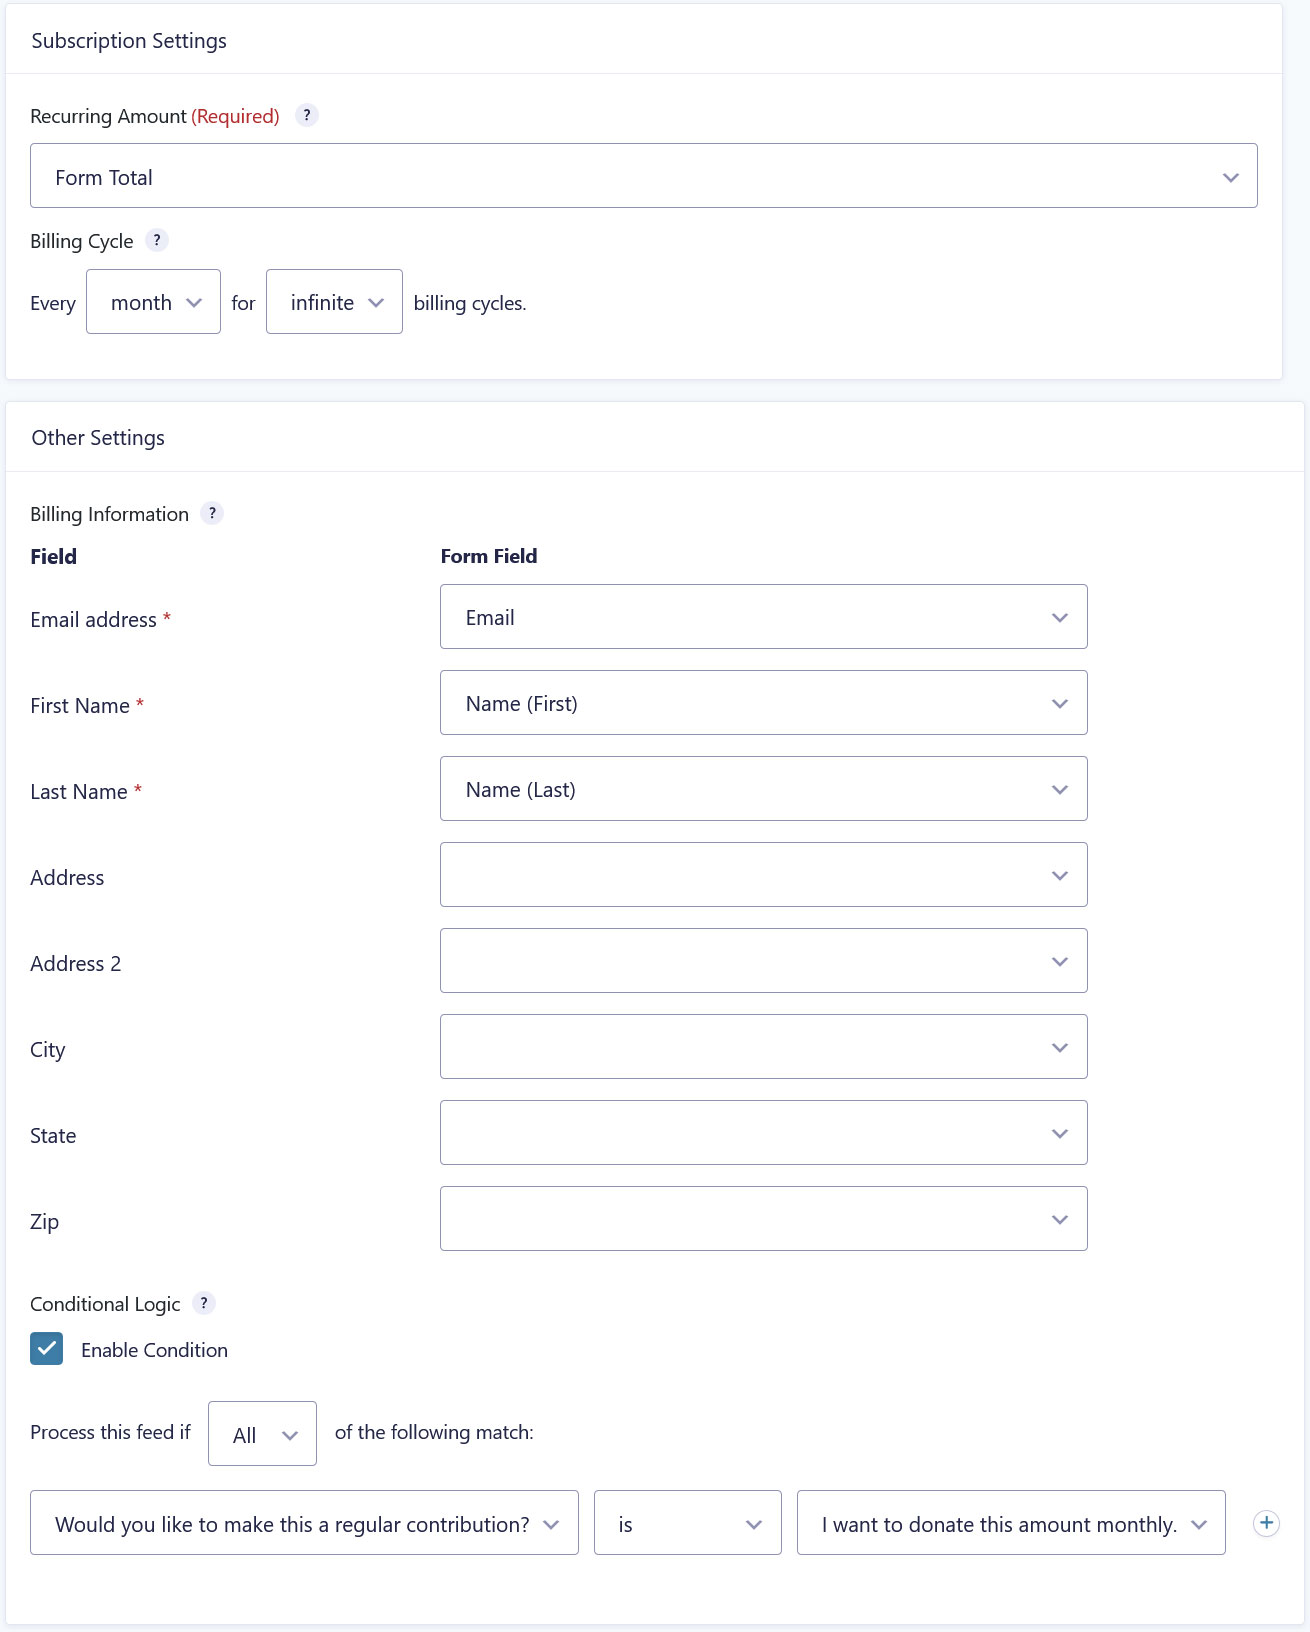
Next we need to create another feed for recurring donations. Go back to the Square settings and click Add New one more time. Again, provide a name but this time set Transaction Type to Subscription.
Here’s how to configure the rest of the options this time:
- Recurring Amount – Pick Form Total again.
- Billing Cycle – The drop-down menus let you determine after what period a donor should be charged again. Since the form is set up for monthly donations, make sure the settings reflect that. We are keeping the number of billing cycles set to Infinite so that it needs to be cancelled manually but you can also set it to end after a certain number of donations.
- Billing Information – Map your form fields to Square’s information as before.
Finally, under Conditional Logic, check the Enable Condition box and set the condition that this feed only comes into play if the checkbox for regular donations has been checked.
Save again.
7. Enhance Your Form (Optional)
By now, your basic church donation form is ready to use. If you want, you can still modify it in a few ways. Here are a few examples:
Add a Newsletter Sign-Up Option
Do you have a church newsletter? No? Maybe it’s time to start one. Email newsletters are one of the best ways to keep your community memebers informed about what’s going on with the church and let them know about upcoming events.
Gravity Forms has add-ons for many prominent email marketing providers such as MailChimp, ConvertKit, AWeber, Campaign Monitor, Constant Contact, and GetResponse. All you need to do is install them and create another feed for your church donation form to turn over the information to your email marketing tool.
This allows donors to jump on your newsletter list at the same time. The Consent field helps make the whole thing GDPR compliant.
Make Your Form Conversational
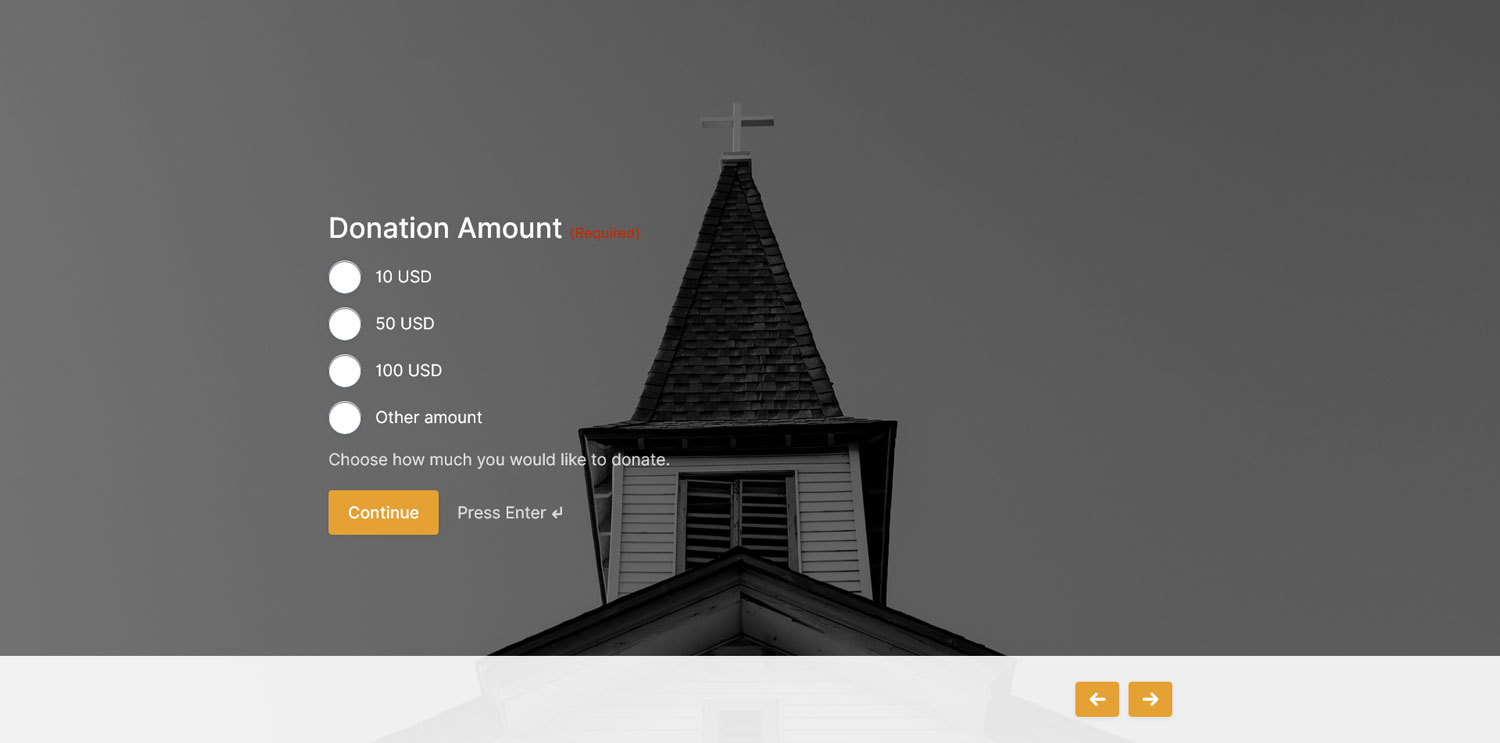
Conversational forms are a great way to make donations more engaging. Instead of all form fields at once, they show each section on its own so would-be donors can work through them step by step. Plus, this type of form has many more design options and ways to communicate what you will do with the donations.
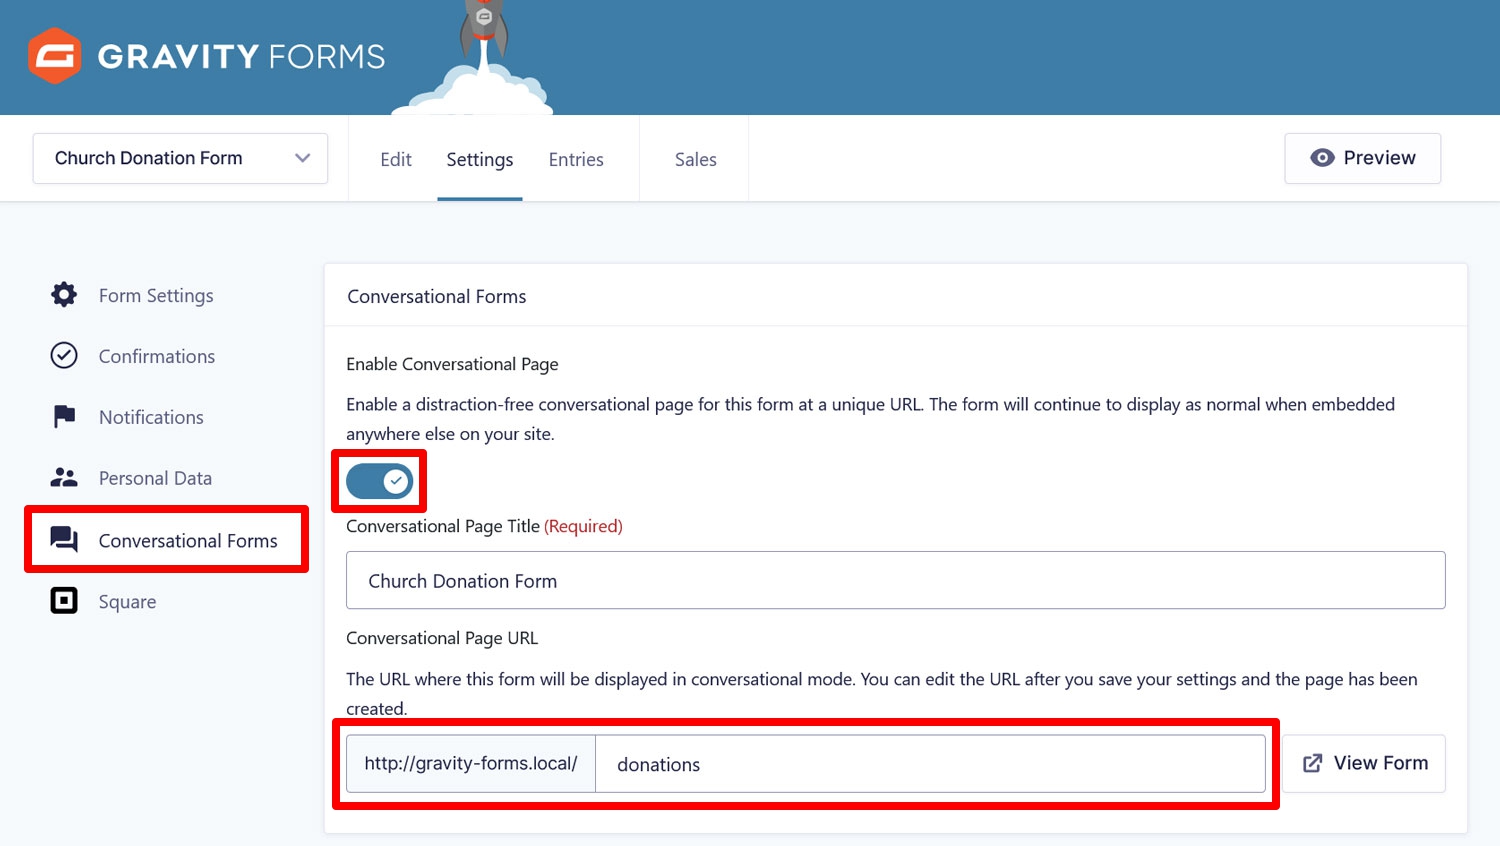
They are easy to set up, too. After installing and activating the Conversational Forms Add-On, simply switch this feature on in the form settings and define a URL where you want to make your form available.
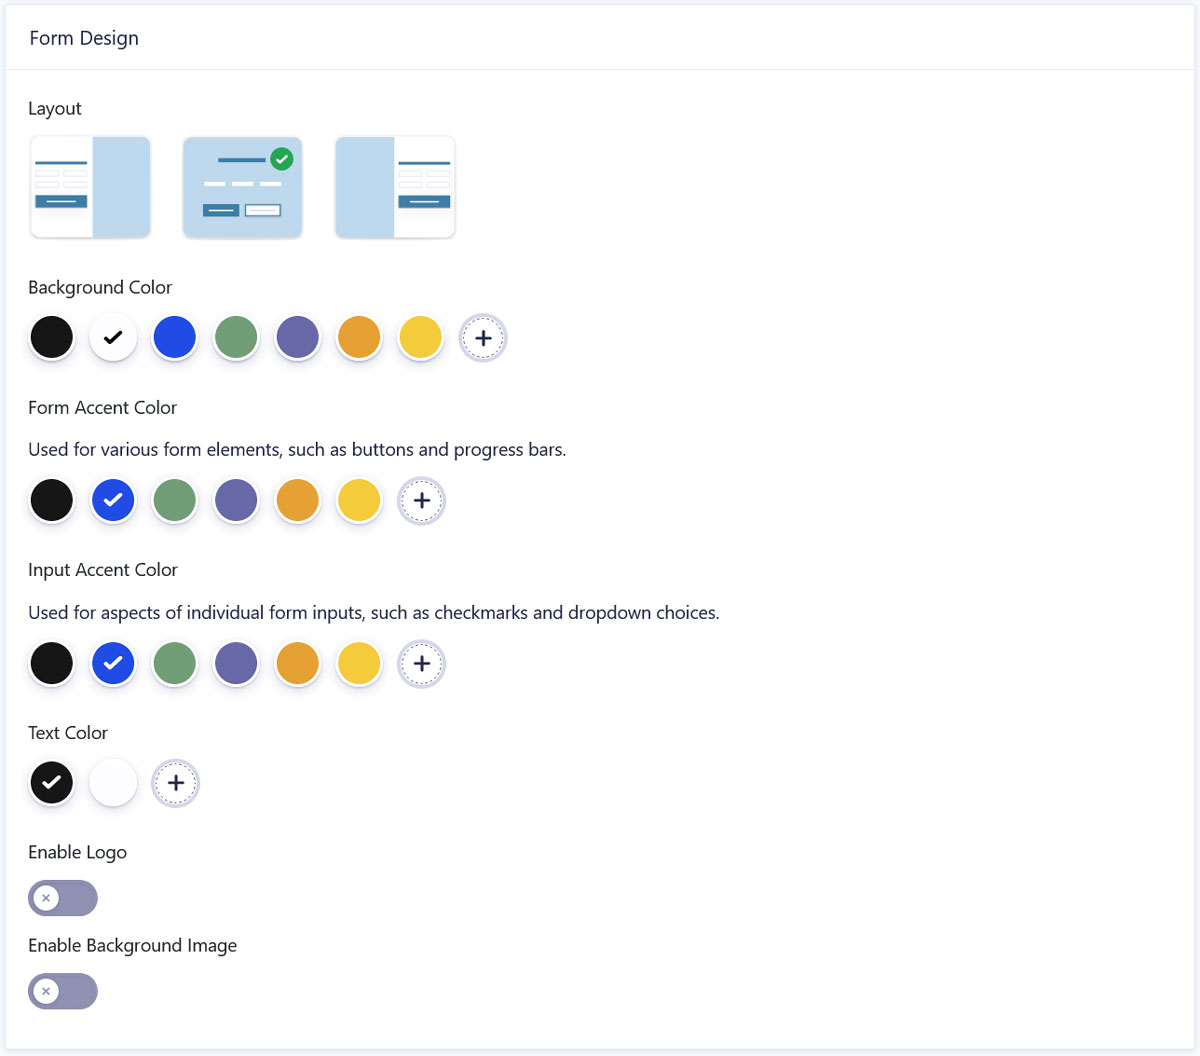
Then, use the form design options to style your conversational forms.
If you are looking for inspiration, you can find examples of conversational forms here as well as a detailed tutorial on how to use them.
Include Polls, Surveys, and Quizzes
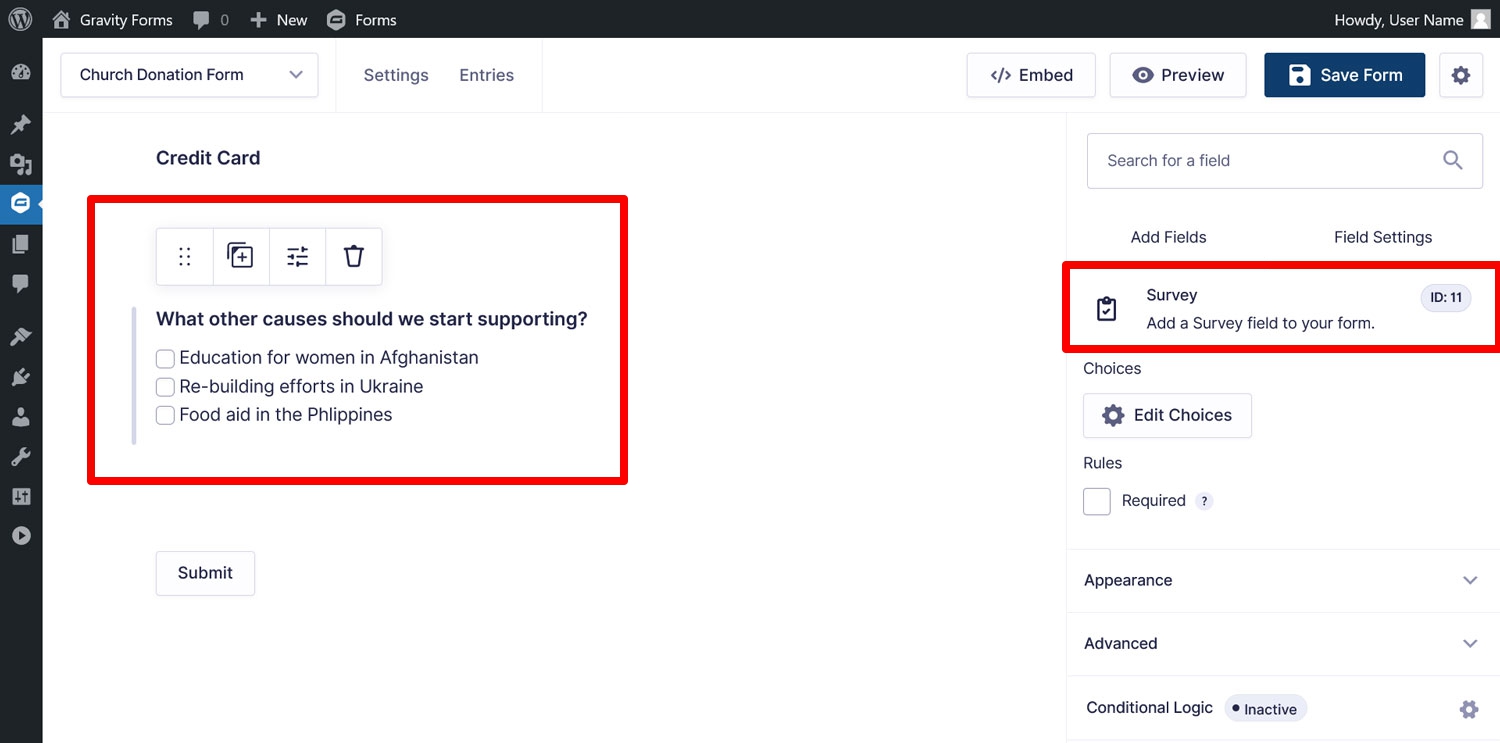
The Polls, Survey, and Quiz Add-Ons give you an opportunity to learn more about your church community.
You can get input from parishioners on important questions and have them vote on issues, and you’ll be able to see their opinions summarized in the WordPress dashboard.
Use Zapier to Connect to Countless More Applications
While Gravity Forms has many dedicated add-ons, we can’t cover all available online services. This is where the Zapier Add-On comes into play.
It allows you to connect your church website to the Zapier service and its 7,000+ supported applications. For example, it enables you to:
- Collect donor data in Google Sheets or Excel.
- Get notified on Slack when someone uses your donation form.
- Use email marketing services without their own add-on like Brevo.
In short, the cup of possibilities for what you can do with Gravity Forms and Zapier practically runneth over.
8. Personalize Form Confirmations and Notifications
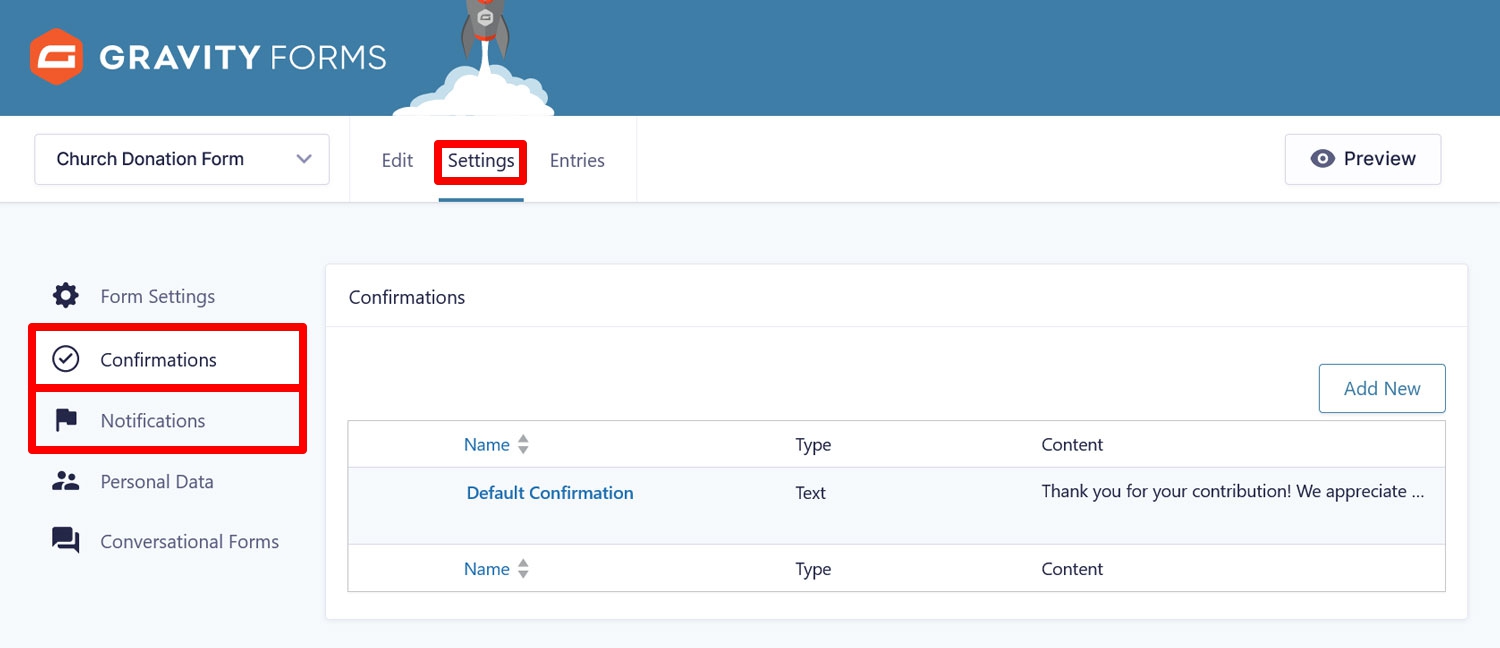
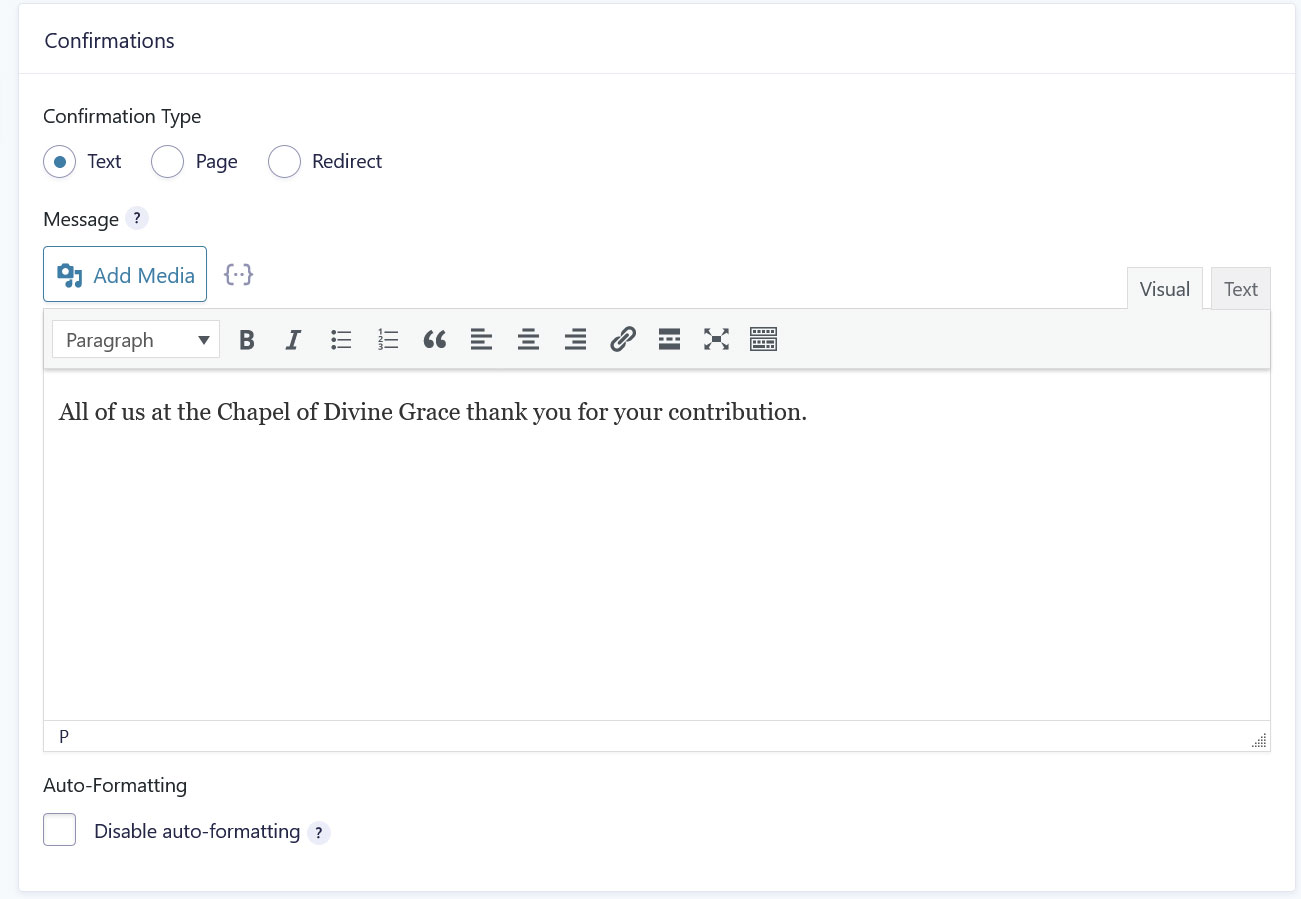
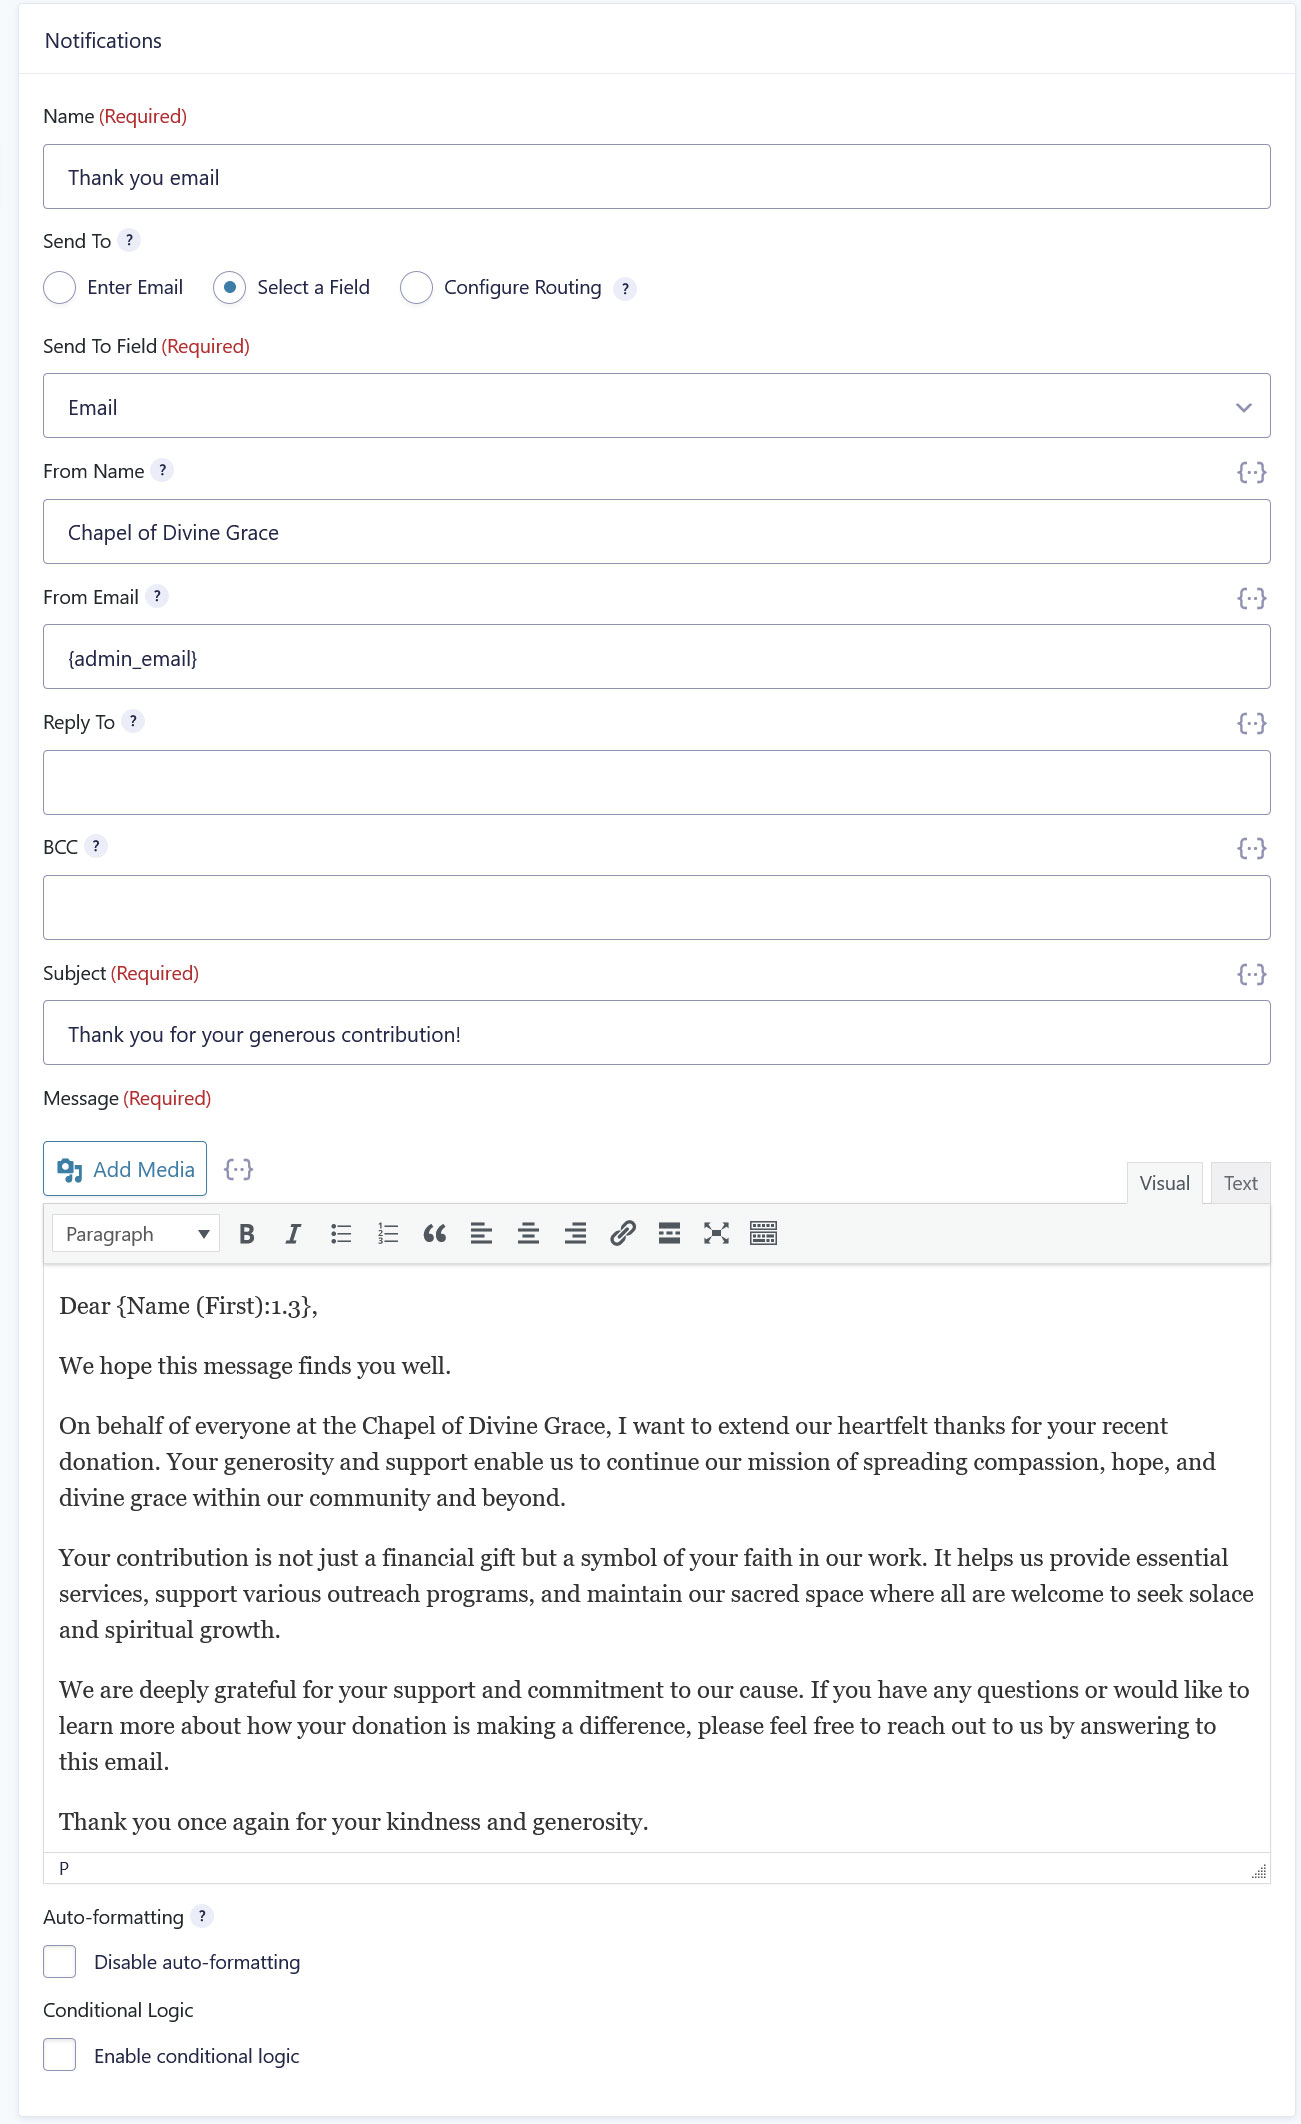
The last two parts of your form you will want to customize are confirmations and notifications. Those are a) the messages that appear on the page after a form is submitted and b) the email messages Gravity Forms sends to you and your donors.
Both of these are meaningful tools for engagement, which is why you have many options to configure them in the form settings.
Open the default confirmation message to edit it to your liking.
Alternatively, you can redirect people to a separate page which we cover in detail and you in this article. Learn more about confirmations in the Gravity Forms documentation.
Notification emails work very similarly. Edit the default messages and/or create your own.
Here, too, it makes sense to have a read of the documentation article.
9. Embed and Test Your Church Donation Form
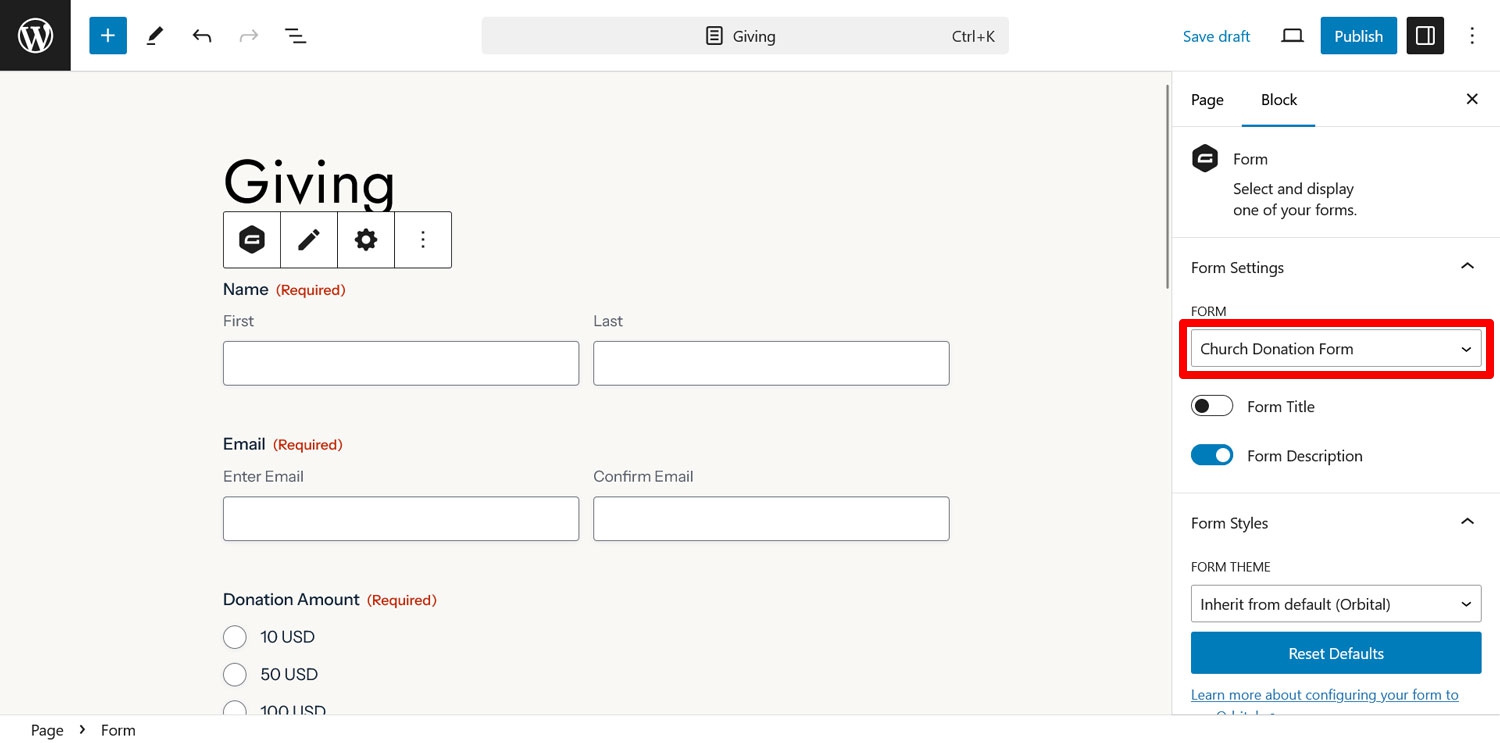
Once you have finished your form, it’s time to get it onto your site. You can do that with the Gravity Forms block or shortcode in the WordPress editor.
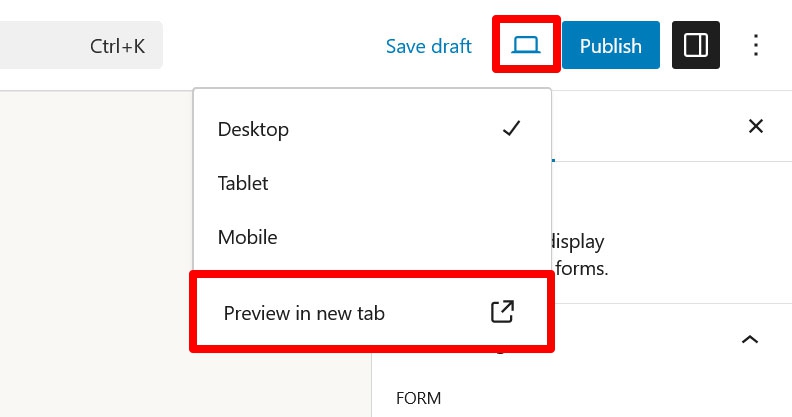
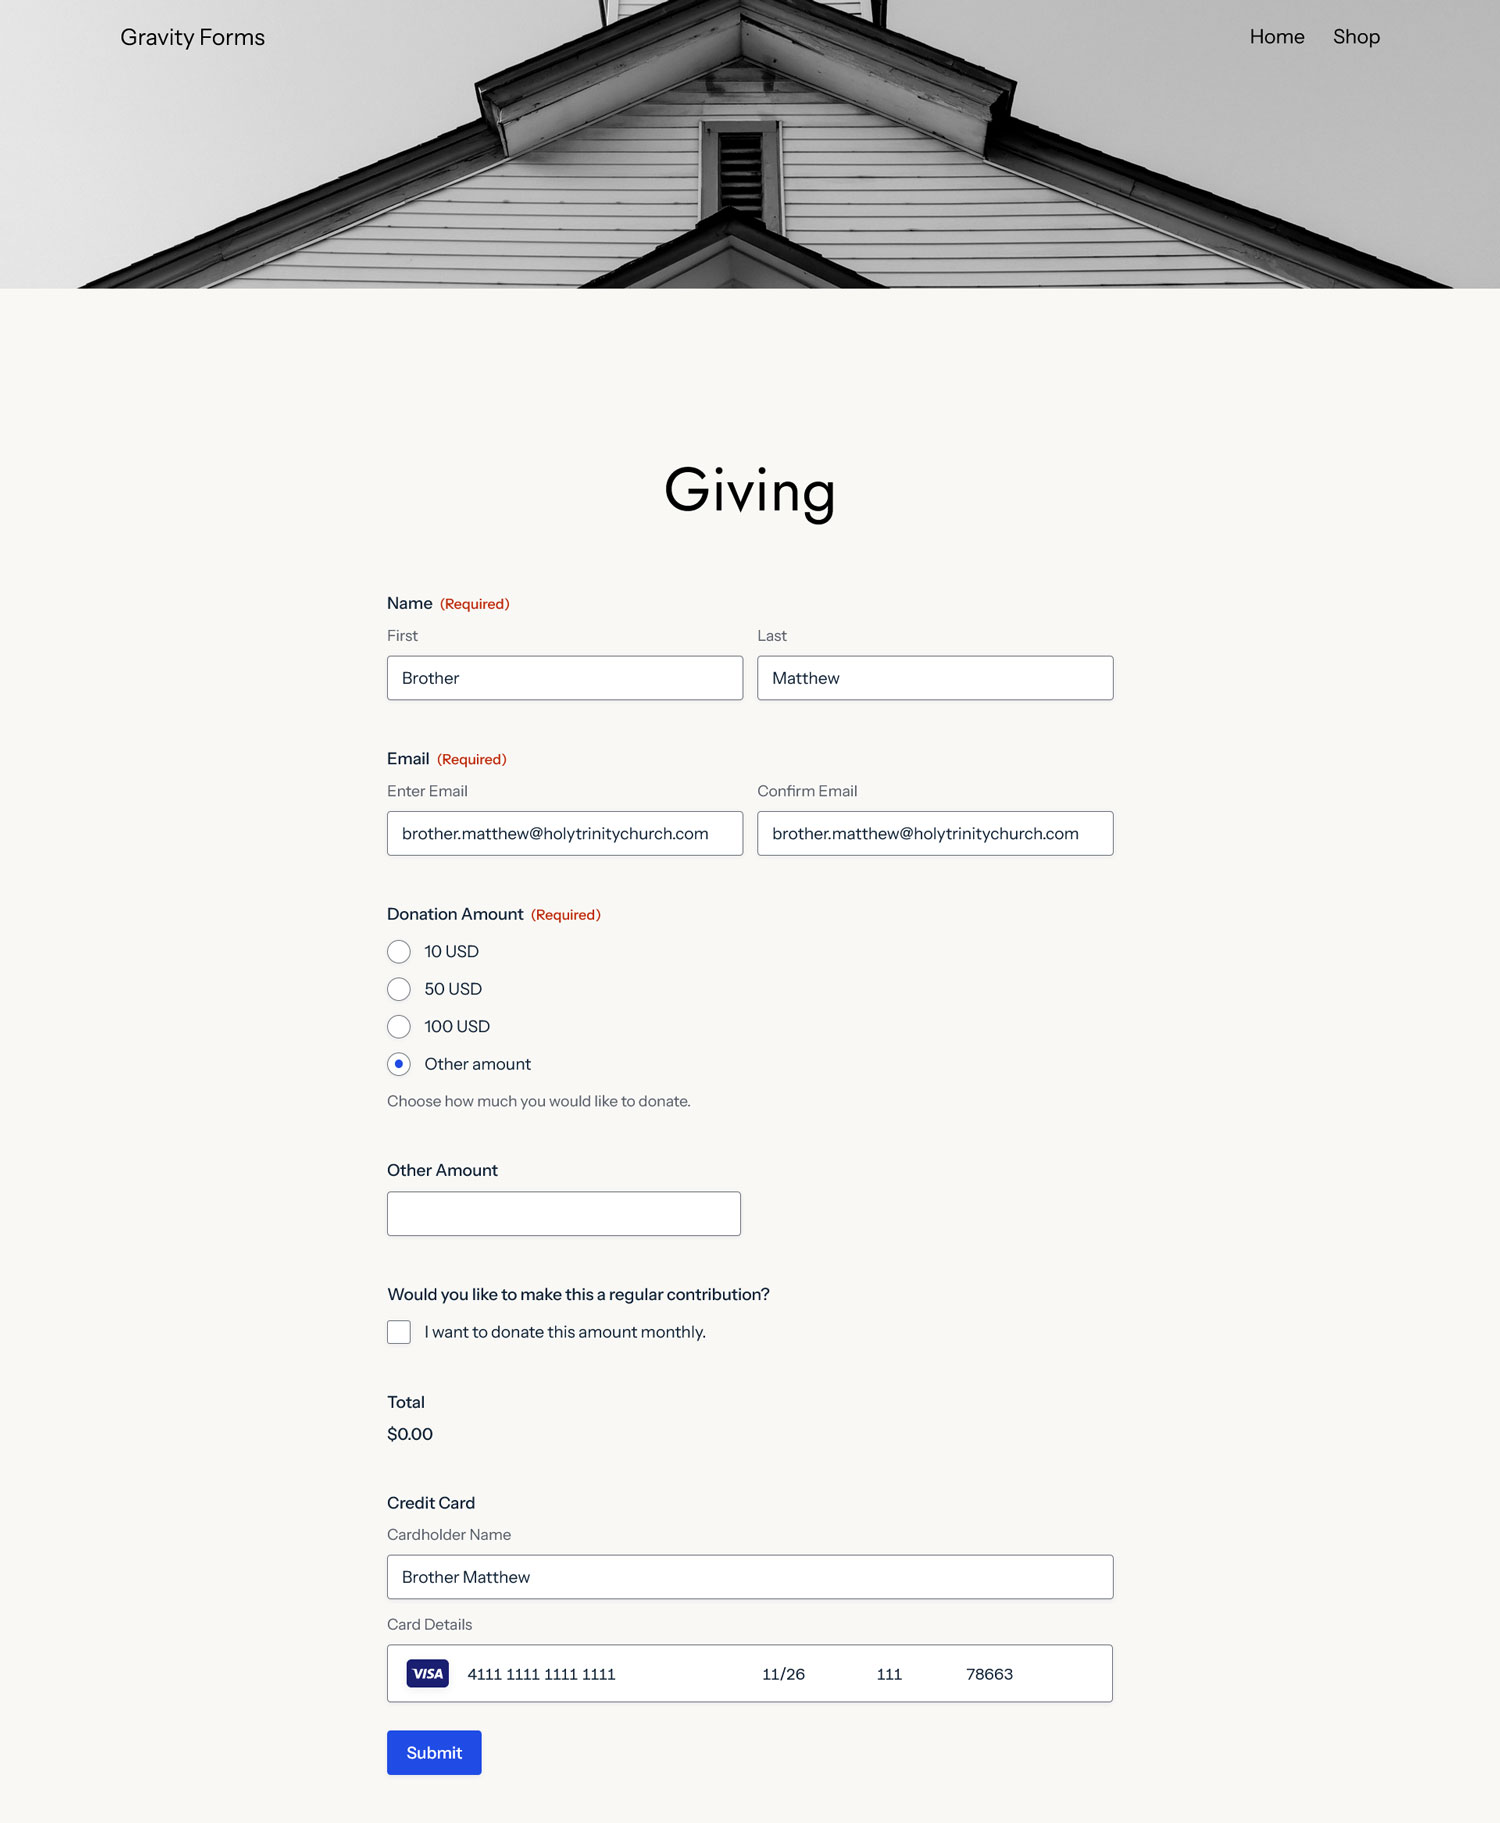
But before making your church donation form live, it’s a good idea to test it. The easiest and most risk-free way to do that is to preview the page by clicking the small laptop icon, then Preview in new tab.
On the page that opens, fill out your form with example information, and submit it. The goal is to see if everything works properly and that you receive the right notification emails, confirmation messages, etc. Use the Square sandbox credit card numbers to test the payment functionality.
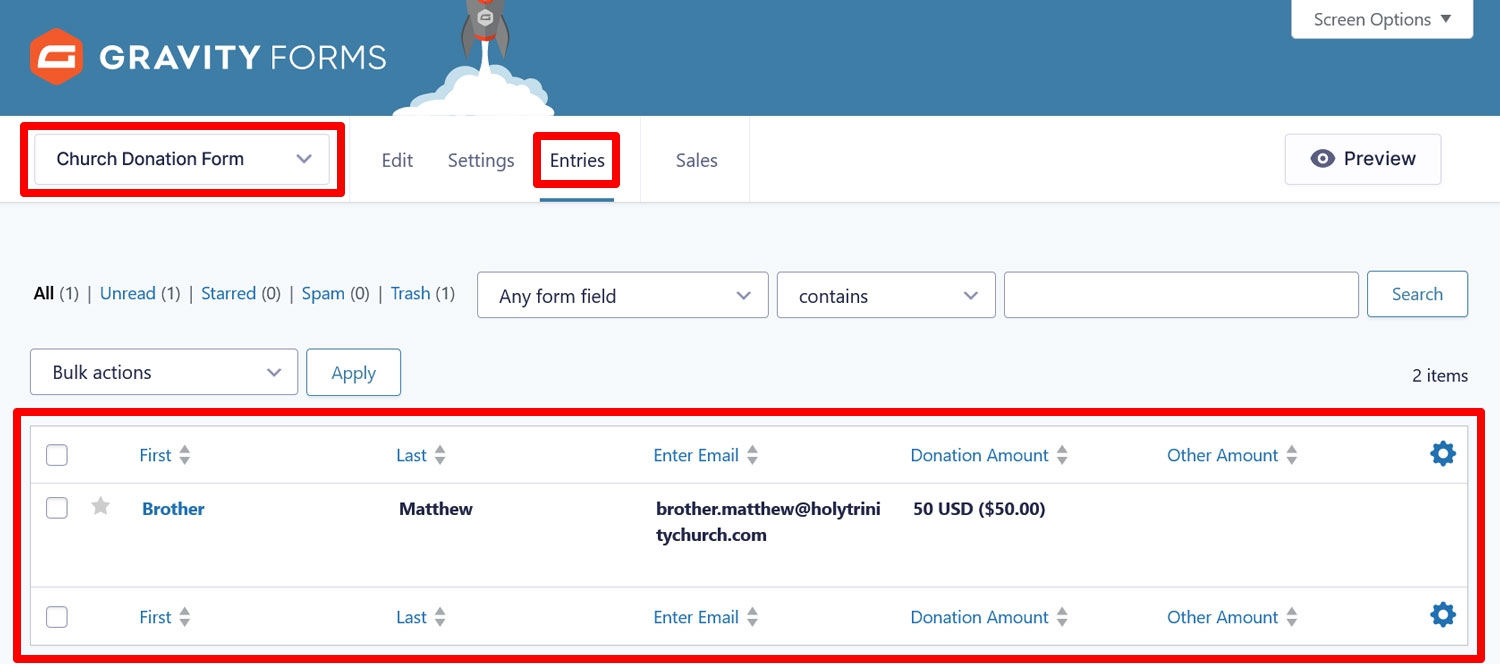
If everything is in order, the submitted donation should show up in your form’s Entries list.
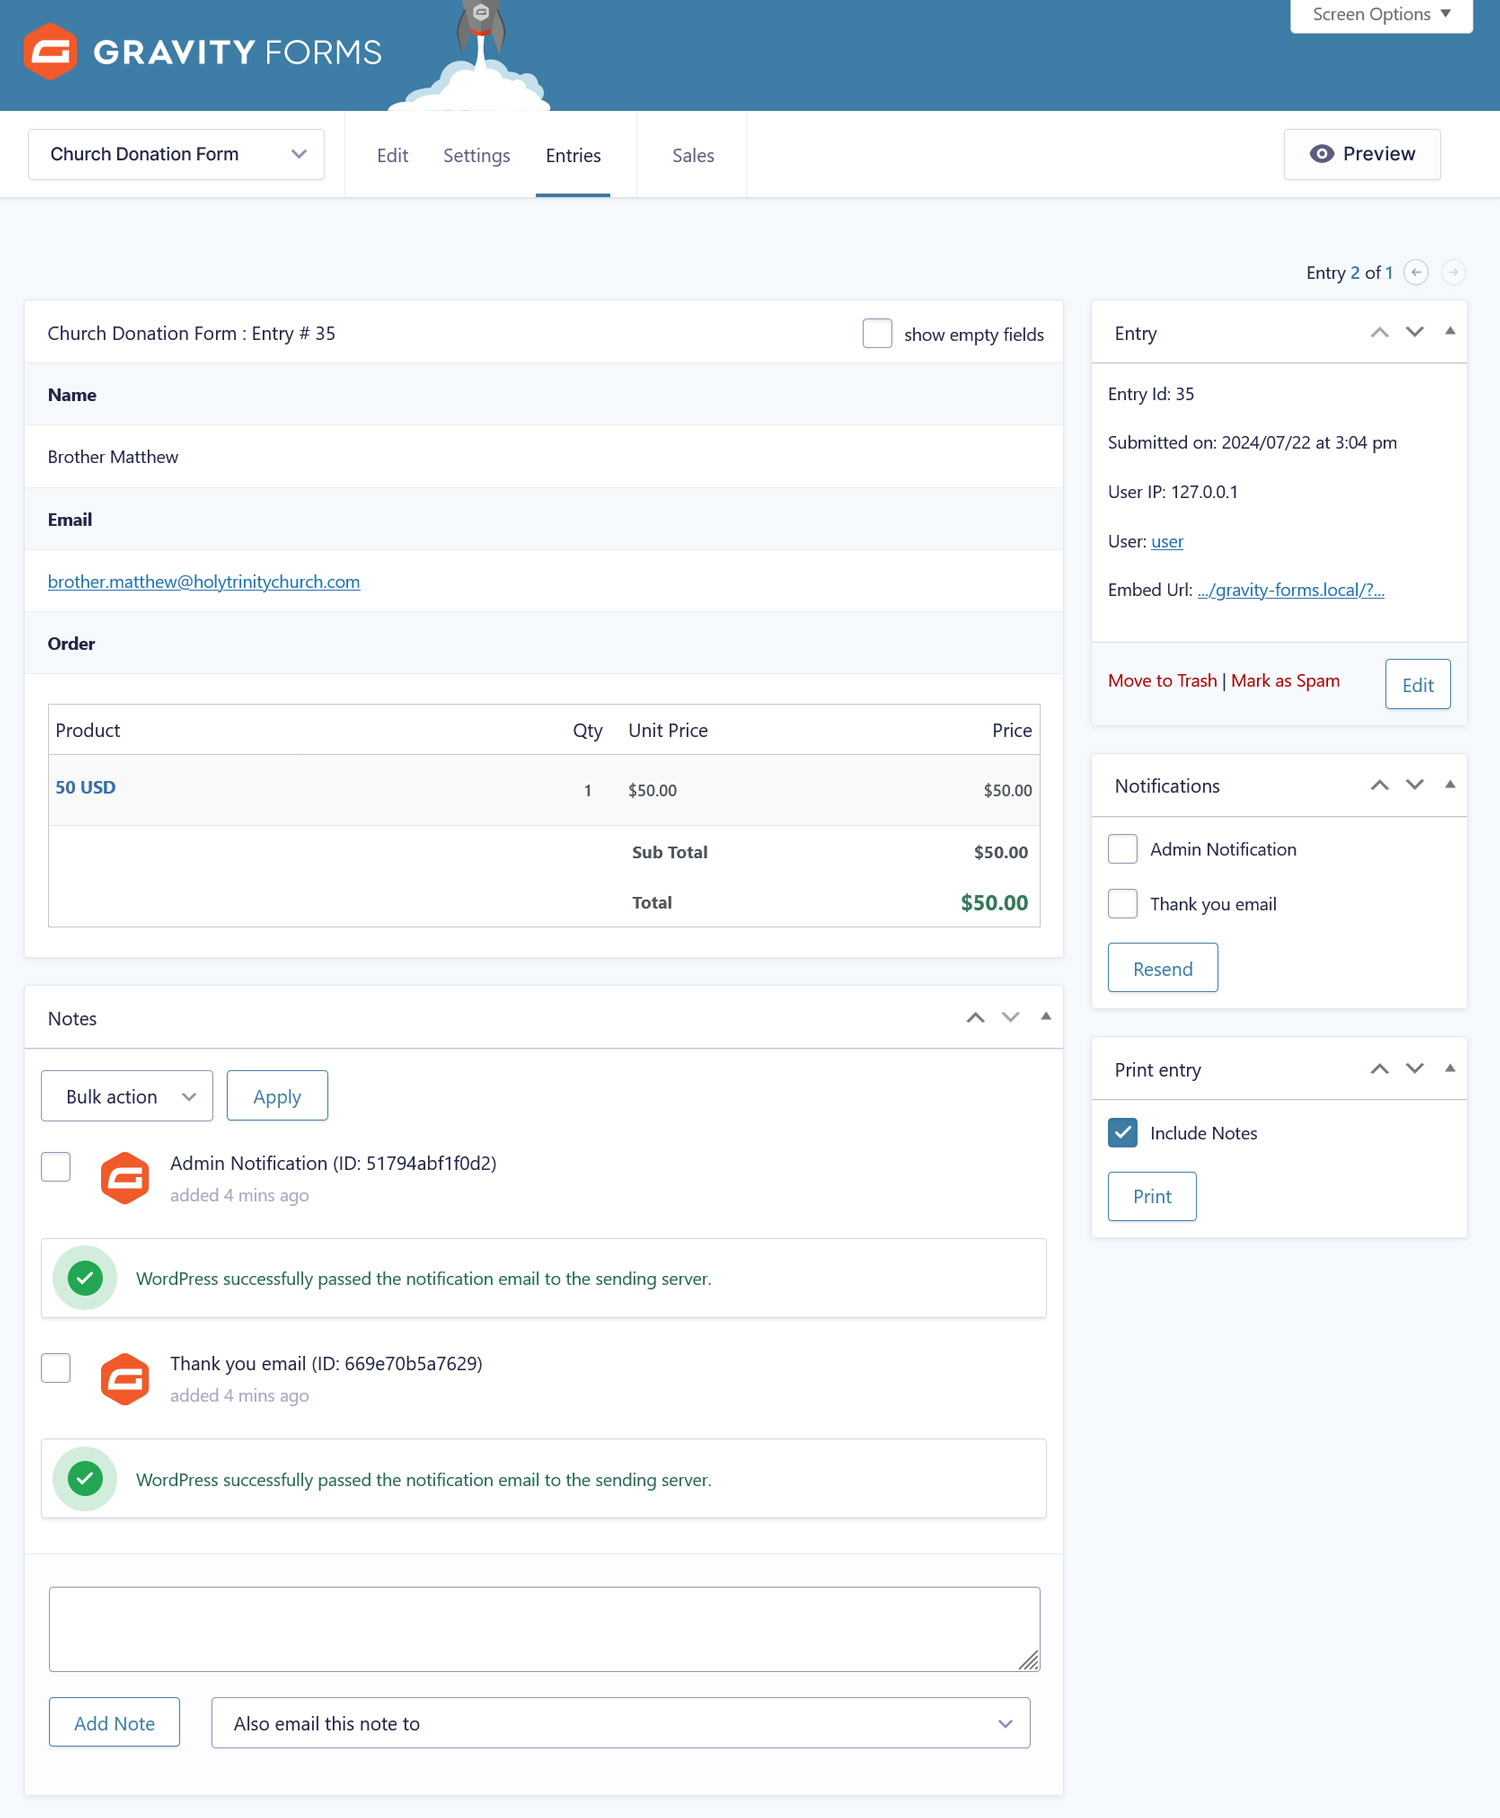
Click on any of the entries for additional details.
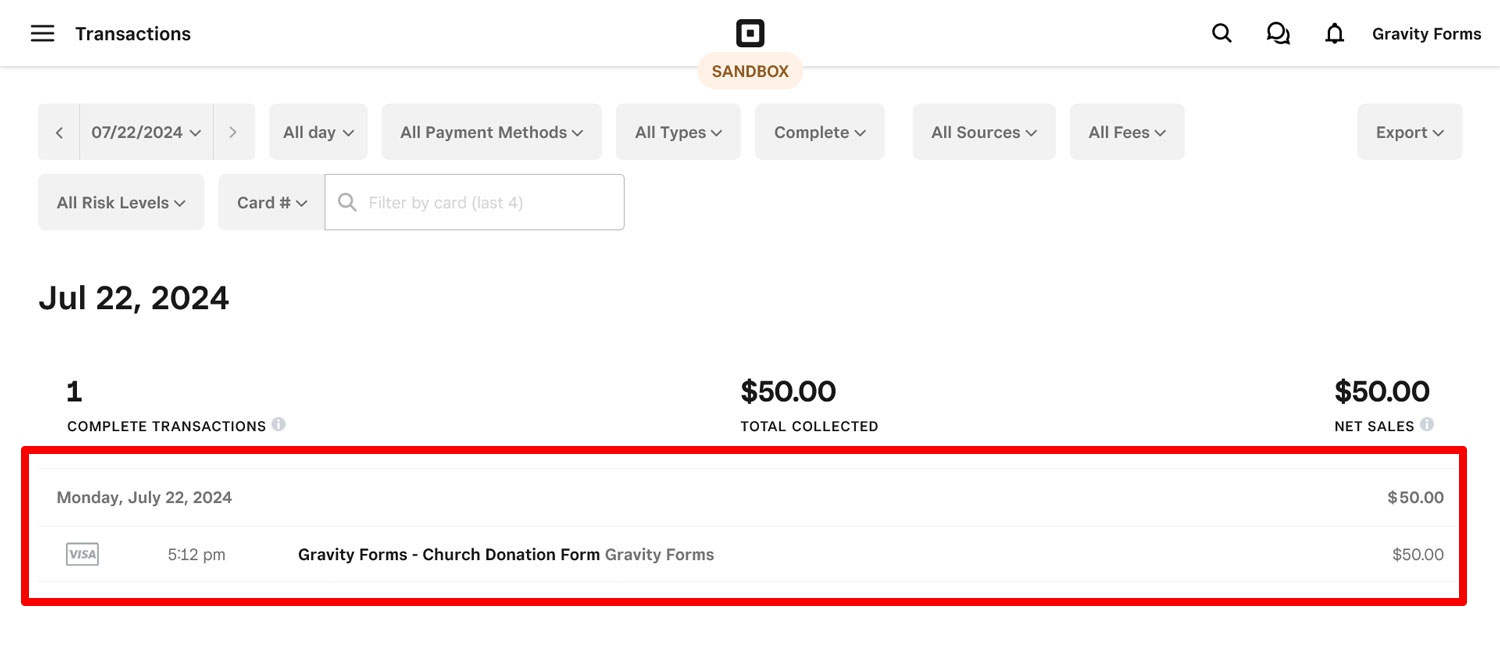
You should also see this in the Square Developer sandbox dashboard.
If all of that is the case, click Publish to make the donation form available on your church website.
10. Make Payment Options Live
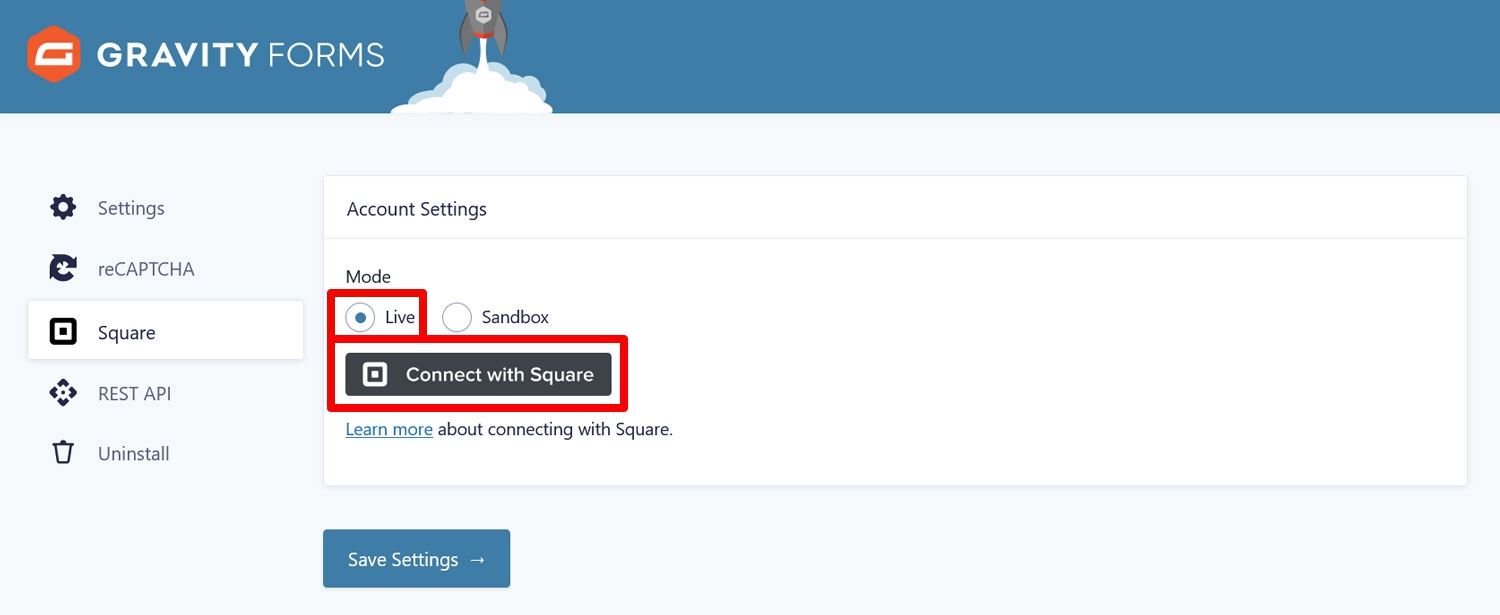
There is one more step but it’s an essential one. In order to start accepting real payments, you need to switch the Square account settings from sandbox to live mode. Here’s how to do it:
- Head on over to Forms → Settings → Square.
- Change the mode to Live.
- Click the Connect with Square button and follow the same procedure as before.
- Click Save Settings when done.
That’s it.
Set Up a Church Donation Form Today with Gravity Forms
With Gravity Forms, adding a donation form to your church website is quick and easy, and provides a safe and convenient way for your donors to give.
Once you’ve build your form (or used one of our handy templates), all you need to do is install and connect your payment provider’s add-on, configure your feed and publish.
Plus, don’t forget that if your church is registered as nonprofit organization, you can take advantage of the Gravity Forms Nonprofit License which comes with all the features and expansive add-ons at a reduced price.
If you want to try before you buy, you can keep exploring Gravity Forms by creating a free demo website.

If you want to keep up-to-date with what’s happening on the blog sign up for the Gravity Forms newsletter!
