How to Connect Gravity Forms and Notion

Written by the Editorial team from WP connect…
Do you use Notion to manage your organization or projects? Do you wish to visualize all data from Gravity Forms in your Notion dashboard? Look no further, you’re in the right place!
In this article, we’ll show you how the Notion for Gravity Forms Add-On can help you to transfer data collected via Gravity Forms to a Notion database. With this add-on, you’ll be able to automate the connection between Gravity Forms and Notion without the help of a third party such as Make (ex Integromat) or Zapier.
Let’s do this!
What’s Notion?
Notion is an incredible No Code platform that allows you to create a tailored workspace to manage all types of projects.
With Notion, you can create and manage notes, benchmarks, reports, articles, etc. But what makes Notion so unique is that you can create visual databases that are super easy to set up and share.
With Notion, you can rapidly create game-changing tools to boost daily productivity:
- Kanban tables to manage your tasks, and those of your teams
- A CRM to track prospects and commercial performance
- An editorial calendar to plan your posts on social media
- Tables to track requests from customers
- and much more!
You can use Notion for free; premium offers exist for more specific demands. All affordable!
Why Should You Connect Gravity Forms with Notion?
When collecting data from Gravity Forms on your WordPress website, you may need to:
- Centralize data from your forms in a shared environment beyond WordPress
- Organize the data, filter it, analyze it, etc.
- Categorize the data and feed it, especially after various requests (quotes, meetings, etc.)
Notion can do all that, and it’s really very easy.
Sounds good? So, let us show you how to connect Gravity Forms to Notion!
How to Connect Gravity Forms and Notion (without Make or Zapier)
Step 1: Install the Notion for Gravity Forms Add-On on Your Website
First, purchase the Notion for Gravity Forms Add-On and install it on your WordPress website.
Step 2: Activate Your Add-On License
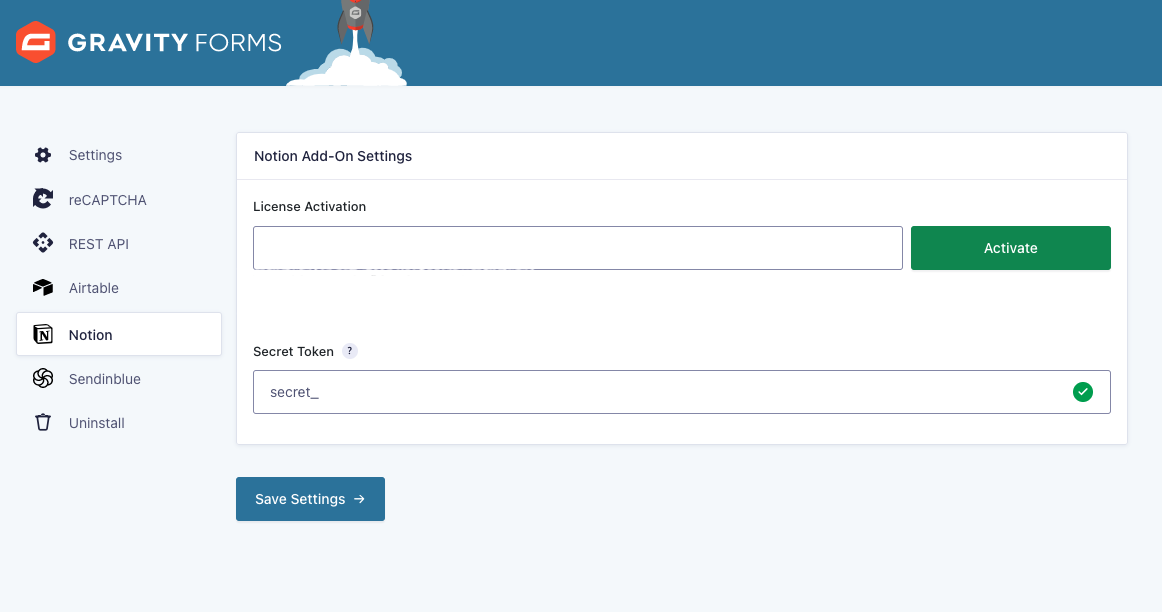
Once the Notion for Gravity Forms Add-On is activated, you must retrieve your license key to use the add-on: you will receive it by email or it can be accessed via your account.b Then go to your WordPress administration panel in the Gravity Forms settings (Forms > Settings) and click on the new Notion insert that has appeared in the left menu.
In front of License Activation, paste the license key of the add-on and click on Activate.
Step 3: Activate Your Notion Secret Key
Next, log in to your Notion account and go to the My Integrations page. This page allows you to create a connection between Notion Gravity Forms and retrieve a secret key.
On this page, click New Integration.
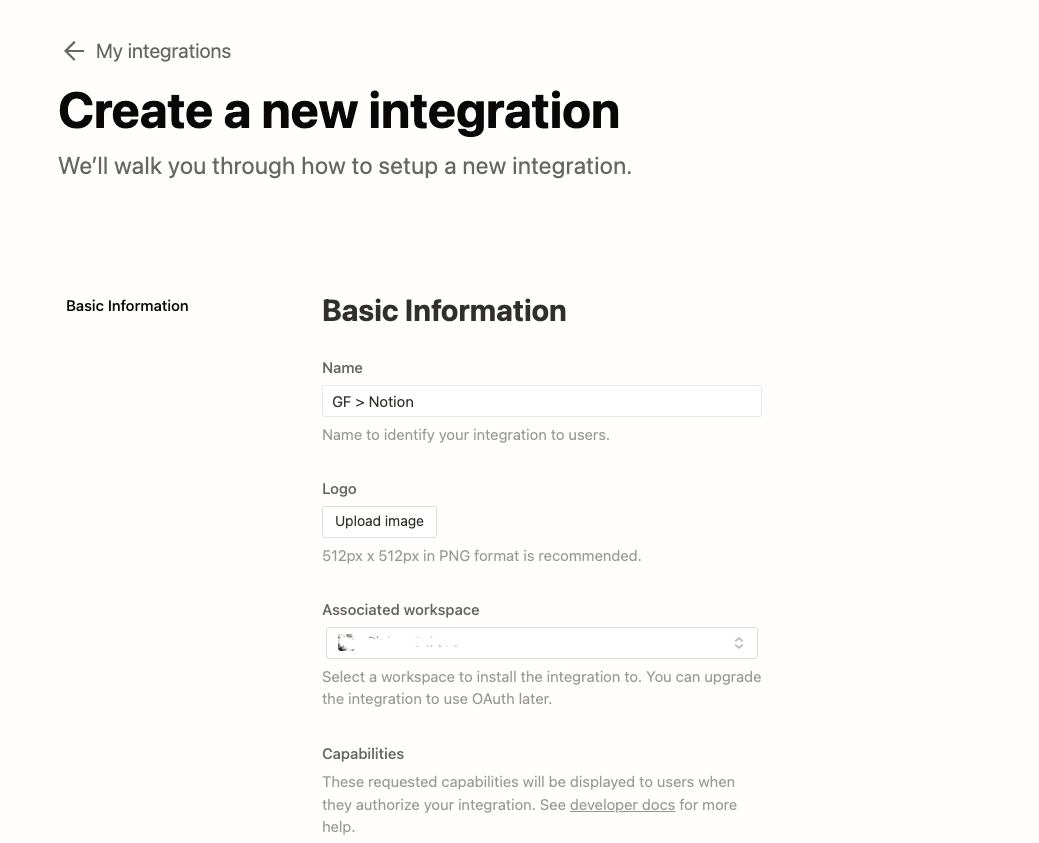
Give your integration an impactful name, for example, “Gravity Forms to Notion”. If your Notion account is associated with multiple Notion workspaces, select the one you want to push data to. Leave the other settings unchanged and click Submit.
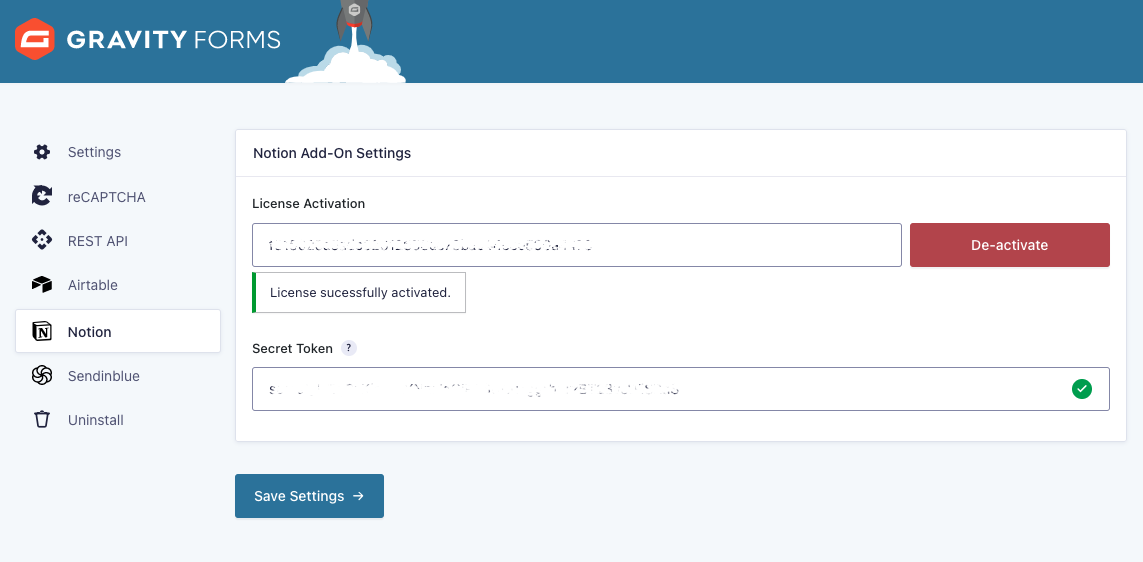
Notion then generates your Internal Integration Token, a secret key that starts with “secret_…”. Click on the show button to view this key and copy it to your clipboard.
Go back to your WordPress admin and select Gravity Forms > Settings > Notion tab. Then paste your Notion secret key in the Secret Token field.
Click on Save Settings: a green icon validates that your API key is activated.
Step 4: Create a Notion Database and Share it with Your Integration
Now you need a Notion database where your integration will be authorized to save data. (If you haven’t created this database yet, do it ASAP).
Add a column for each Gravity Forms field you want to view in Notion.

Then click on the three boxes at the top right of the screen and Add Connection. Select the integration name you just created from the list: your database is now shared!
Step 5: Create Your First Feed
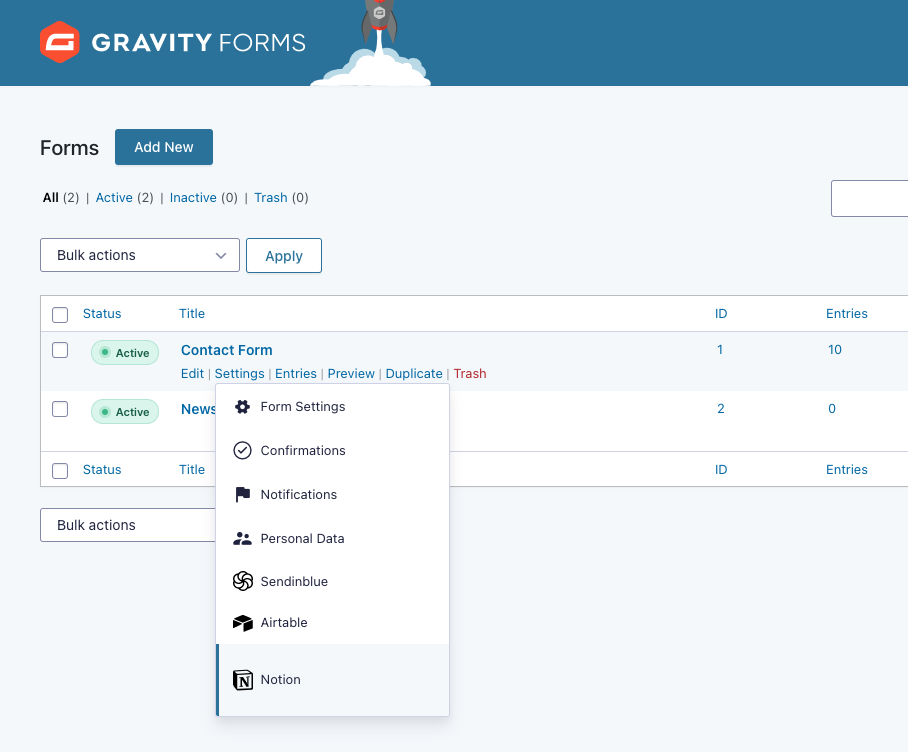
Go back to your WordPress admin – hover over the form of your choice and click Settings > Notion.
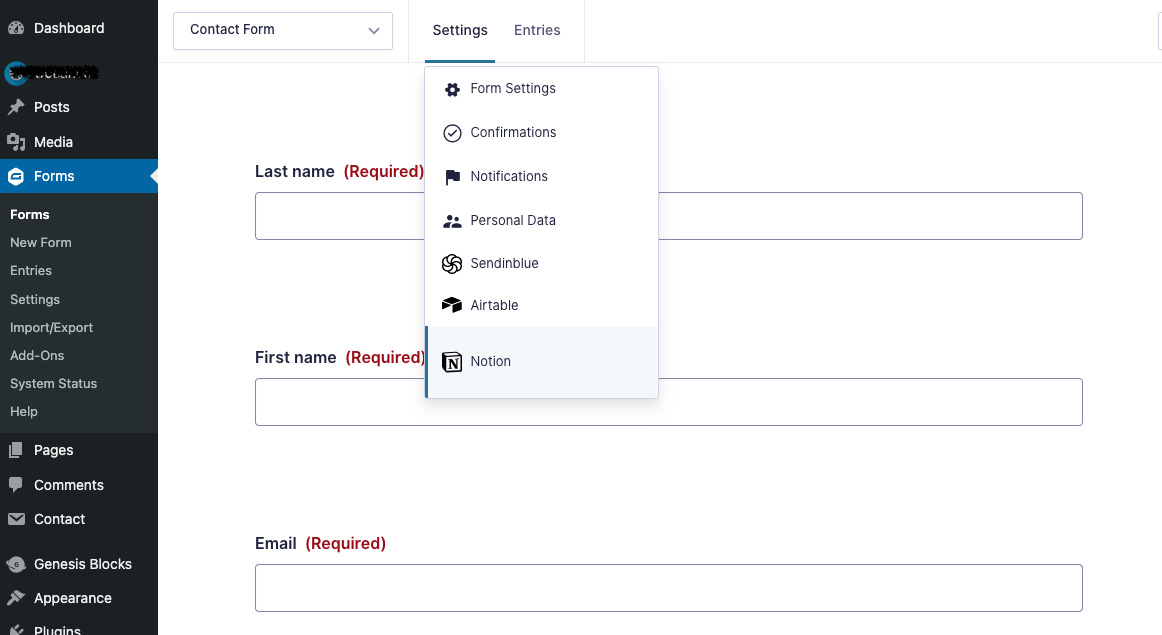
Equally, you can modify your form by clicking on Edit, and then, within the form editor, selecting Settings > Notion.
You then land on a page that will allow you to create connection flows between your form and Notion.
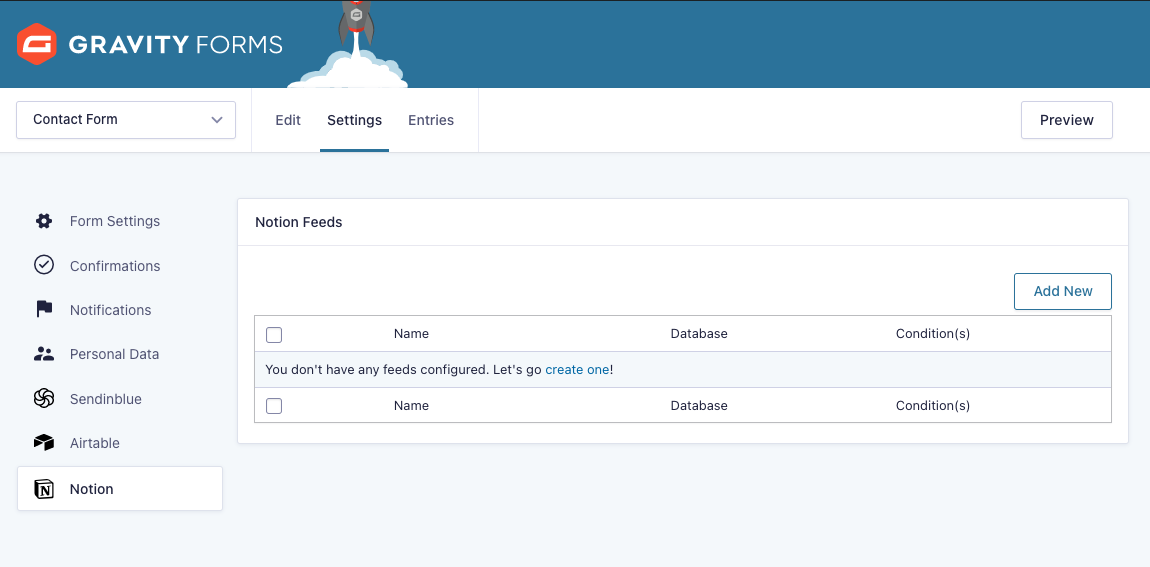
To create your first feed, click Add New. Then, within the configuration page of your feed, start by giving it a name of your choosing.
Now select the Notion database to which you want to send the form data.
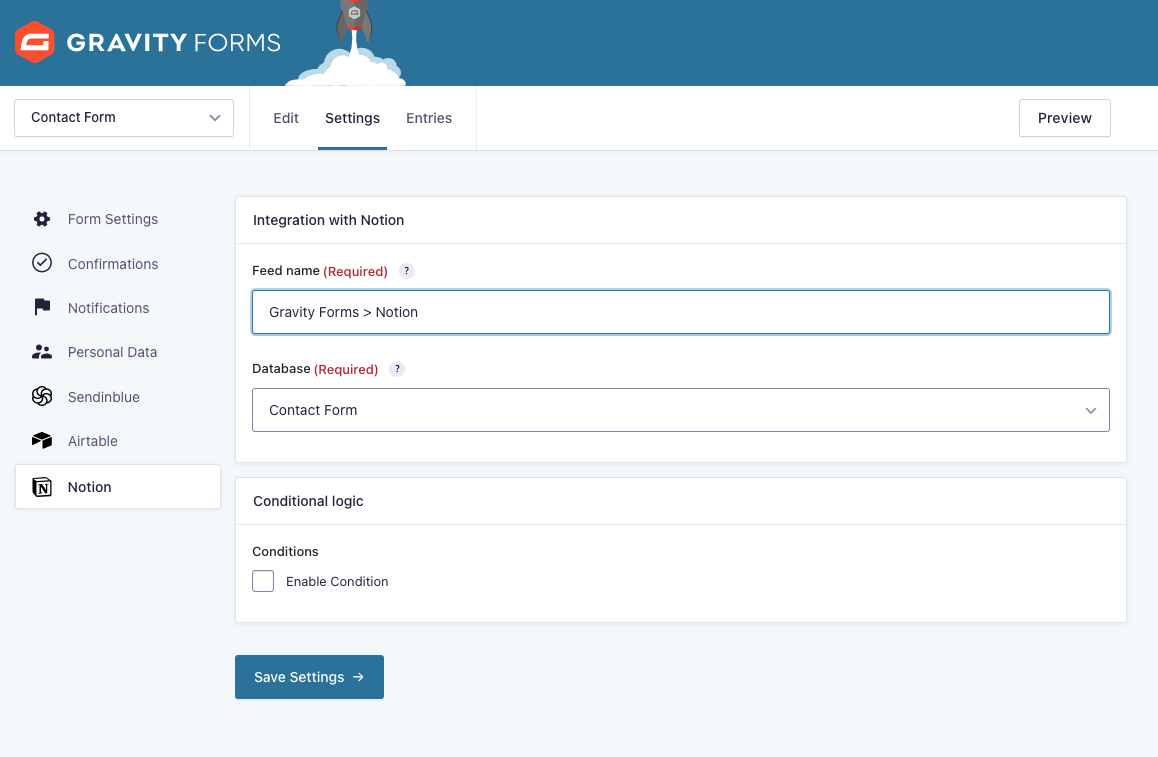
Please note that the drop-down list only displays databases you have shared with your Notion integration.
Click Save Settings.
Step 6: Map Your Form Fields to Your Database Columns
You will then be able to associate the columns of your Notion database with the fields of your Gravity Forms.
Below Notion Columns, click on Select a Field – the drop-down list displays the columns of your Notion database.
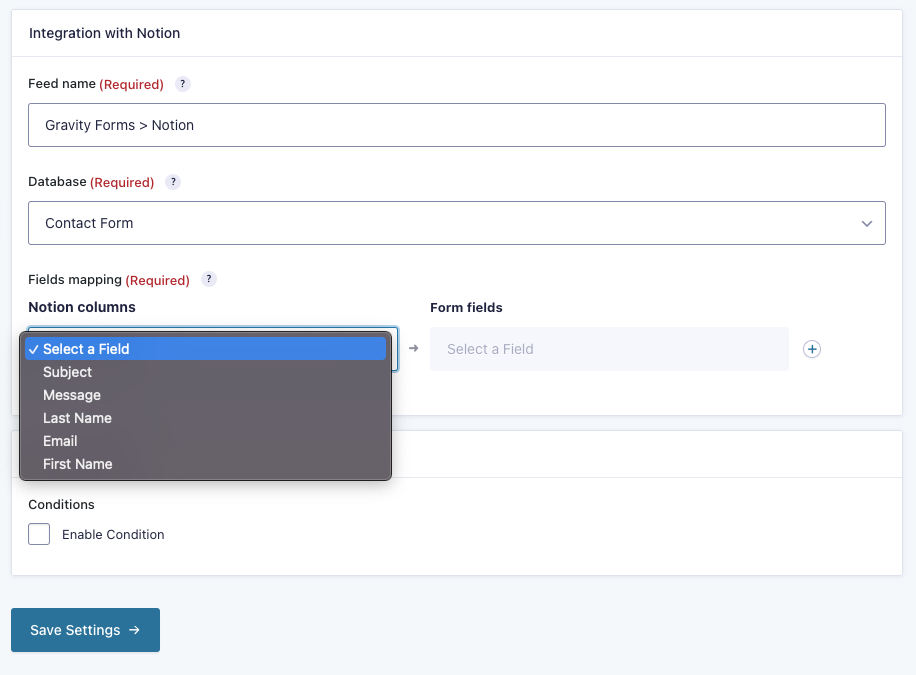
Select a column from the list. On the right, below Form Fields, you can choose the field associated with this column among all the fields of your form.
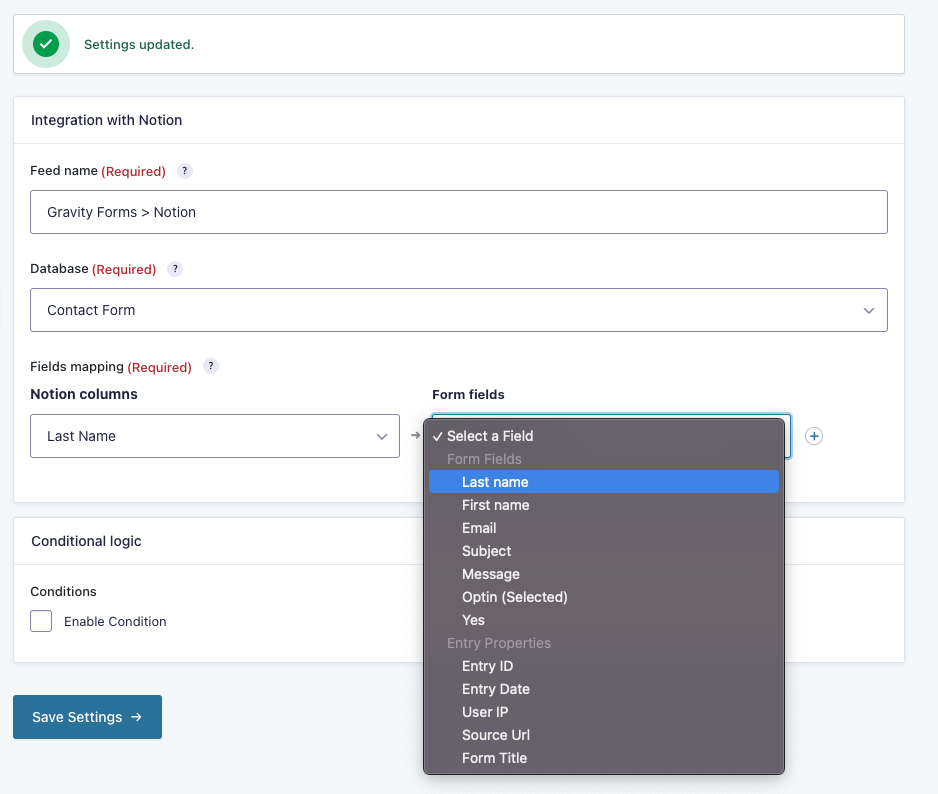
Click the + button to map a new field on your form – replicate for all the fields you want to transfer to Notion.
When you’re done, click Save Settings: that’s it; from now on, your form entries will be visible in Notion!
Step 7 (Optional): Add Filters and Conditions
Finally, you can create filters to send only part of the data collected by your form to your Notion database.
For example, you can insert a consent box in your contact form “I agree to be contacted”. By adding a condition, only people who have checked this box will be added to Notion.
You can also send the data to one database or another depending on the content of the form fields, for example: depending on the content of a “Subject of your request” field.
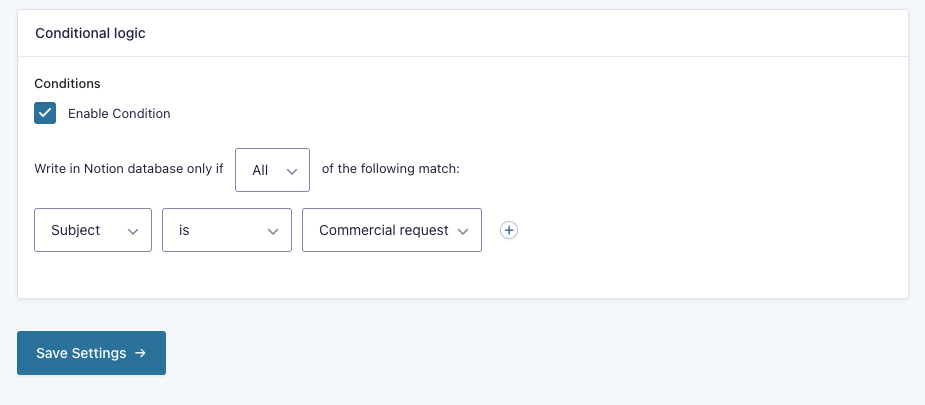
To create a filter or condition, click Enable Condition.
On the left, you can choose a field from your form and select the criteria that will activate sending to Notion, for example:
– Optin IS “Yes”
– Subject IS “Commercial request”
– Occupation IS NOT “Student”
– etc.
Click on Save Settings to validate.
Step 8: Test Your Feed
It’s simple – enter information into your Form, validate, and check your Notion database.
If all goes well, you should find the data you just submitted via your form in your database.
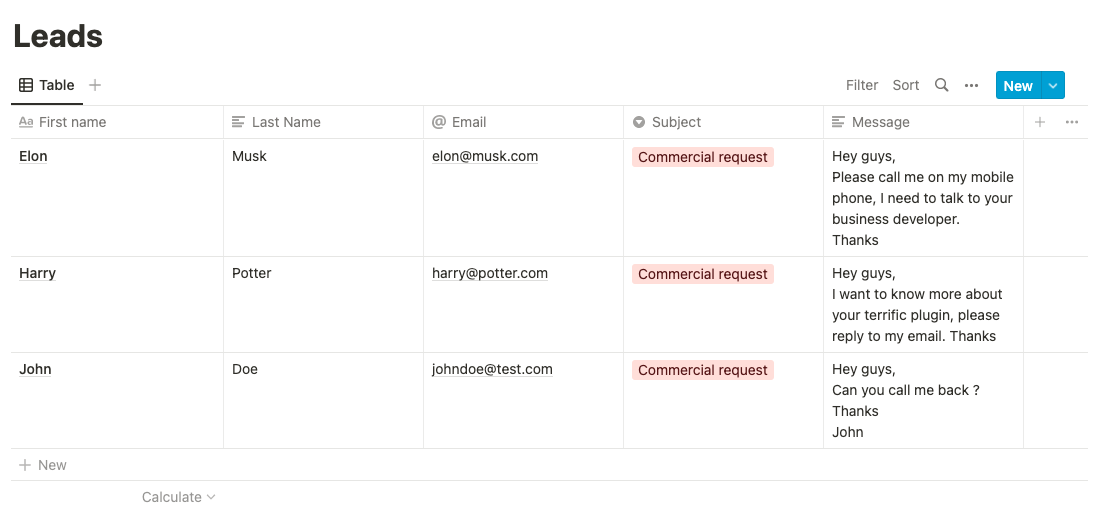
And there you go!
You have everything you need to organize, track, categorize, and share your Gravity Forms entries in Notion.
We hope you find our add-on helpful in managing your projects, leads, etc.
If you are a fan of Gravity Forms, have a look at our other great extensions:
- Gravity Forms to Airtable – A No Code tool to replace Excel and create easy-to-use and eye-catching databases to manage orders, products, customers…and much more.
- Gravity Forms to Sendinblue – Allows you to send data from your forms to the famous Sendinblue emailing and marketing automation tool.
- Gravity Forms to SendGrid – This integration sends your form entries to Sendgrid, a platform for transactional and marketing email.
Ready to get started sending form entries to Notion? Head on over to our website and purchase the Notion for Gravity Forms Add-On today!
About the Contributor:
 WP connect is a plugin creation studio for WordPress, created by a team of passionate developers and innovators. We focus on building bridges between WordPress and the No Code ecosystem. We create best-in-class plugins that seamlessly link WordPress and No Code tools. Our no-hassle approach is the cornerstone of our model, with an unconditional commitment to user experience and an inclusive pricing policy.

If you want to keep up-to-date with what’s happening on the blog sign up for the Gravity Forms newsletter!
