How to Display Donations Collected via Gravity Forms and Inspire More Giving

Written by the editorial team at GravityKit…
Gravity Forms integrates with several payment gateway add-ons, making it easy to accept donations on your website. But what about displaying the latest donations on a page or post? That’s where GravityView comes in!
Collecting and displaying donations on your WordPress website is a powerful way to enhance your fundraising efforts, increase transparency, and build trust with your supporters.
In this guide, we’ll show you how to display donations on the front-end of your site using GravityView and calculate the total amount raised using GravityMath!
How to Display Donations
Here’s a simple example of how you can display the latest donations received in a table next to your form. Above the table you’ll see we’re also showcasing the total amount raised and the total number of donations received. You can view the live demo here.
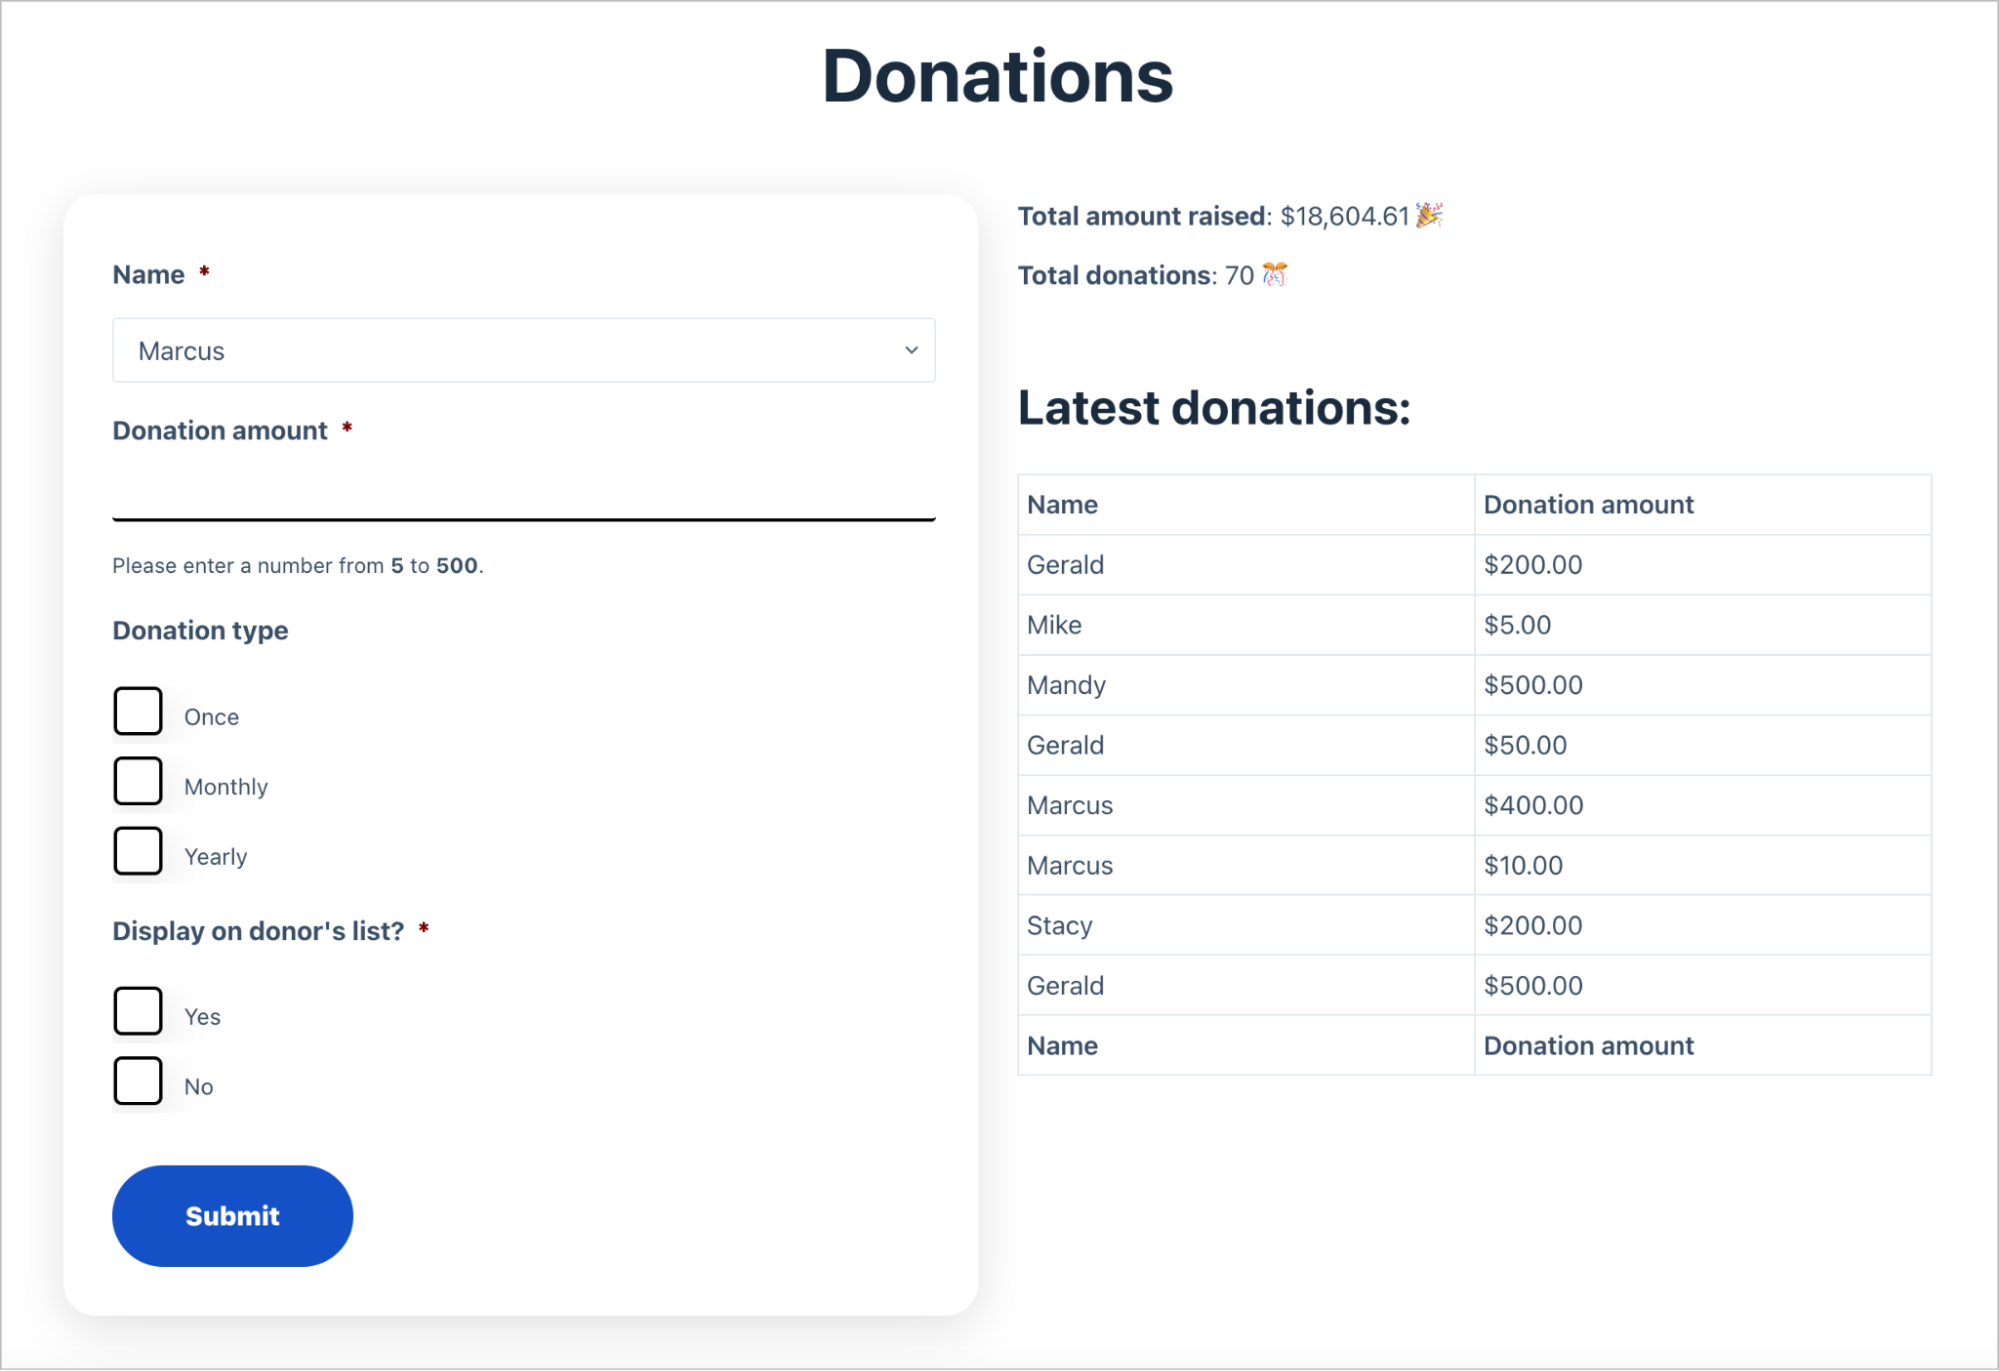
Keep reading to see how you can build something similar.
1. Set Up Your Donation Form
Start by creating a donation form that captures essential donor information. Ensure the form is short, with clear instructions to encourage contributions. To save time, you can use the Gravity Forms Donation Form Template!

Key fields to include are:
- Donor’s Name: Collect both first and last names.
- Contact Information: Email address and/or phone number for communication.
- Donation Amount: Allow donors to select predefined amounts or enter a custom amount.
- Personalized Message: Provide an optional field for donors to leave a message or dedication.
- Anonymous Donation Option: Include a checkbox for donors who prefer to remain anonymous.
2. Configure Payment Processing
After setting up the basic form fields, install a payment gateway add-on such as Stripe, PayPal, or Square (available with a Pro, Elite, or Nonprofit license) and configure the payment settings.
Next, navigate to the form settings and set up a feed for your chosen payment processor – you will need to edit your form again and add the correct field type to ensure that all payment fields are correctly mapped!
3. Use GravityView to Display Donations
Once you’ve started collecting donations, displaying them on your website can build credibility and encourage further contributions. GravityView allows you to present form entries on the front end in various layouts, such as tables or lists!
4. Create a New View
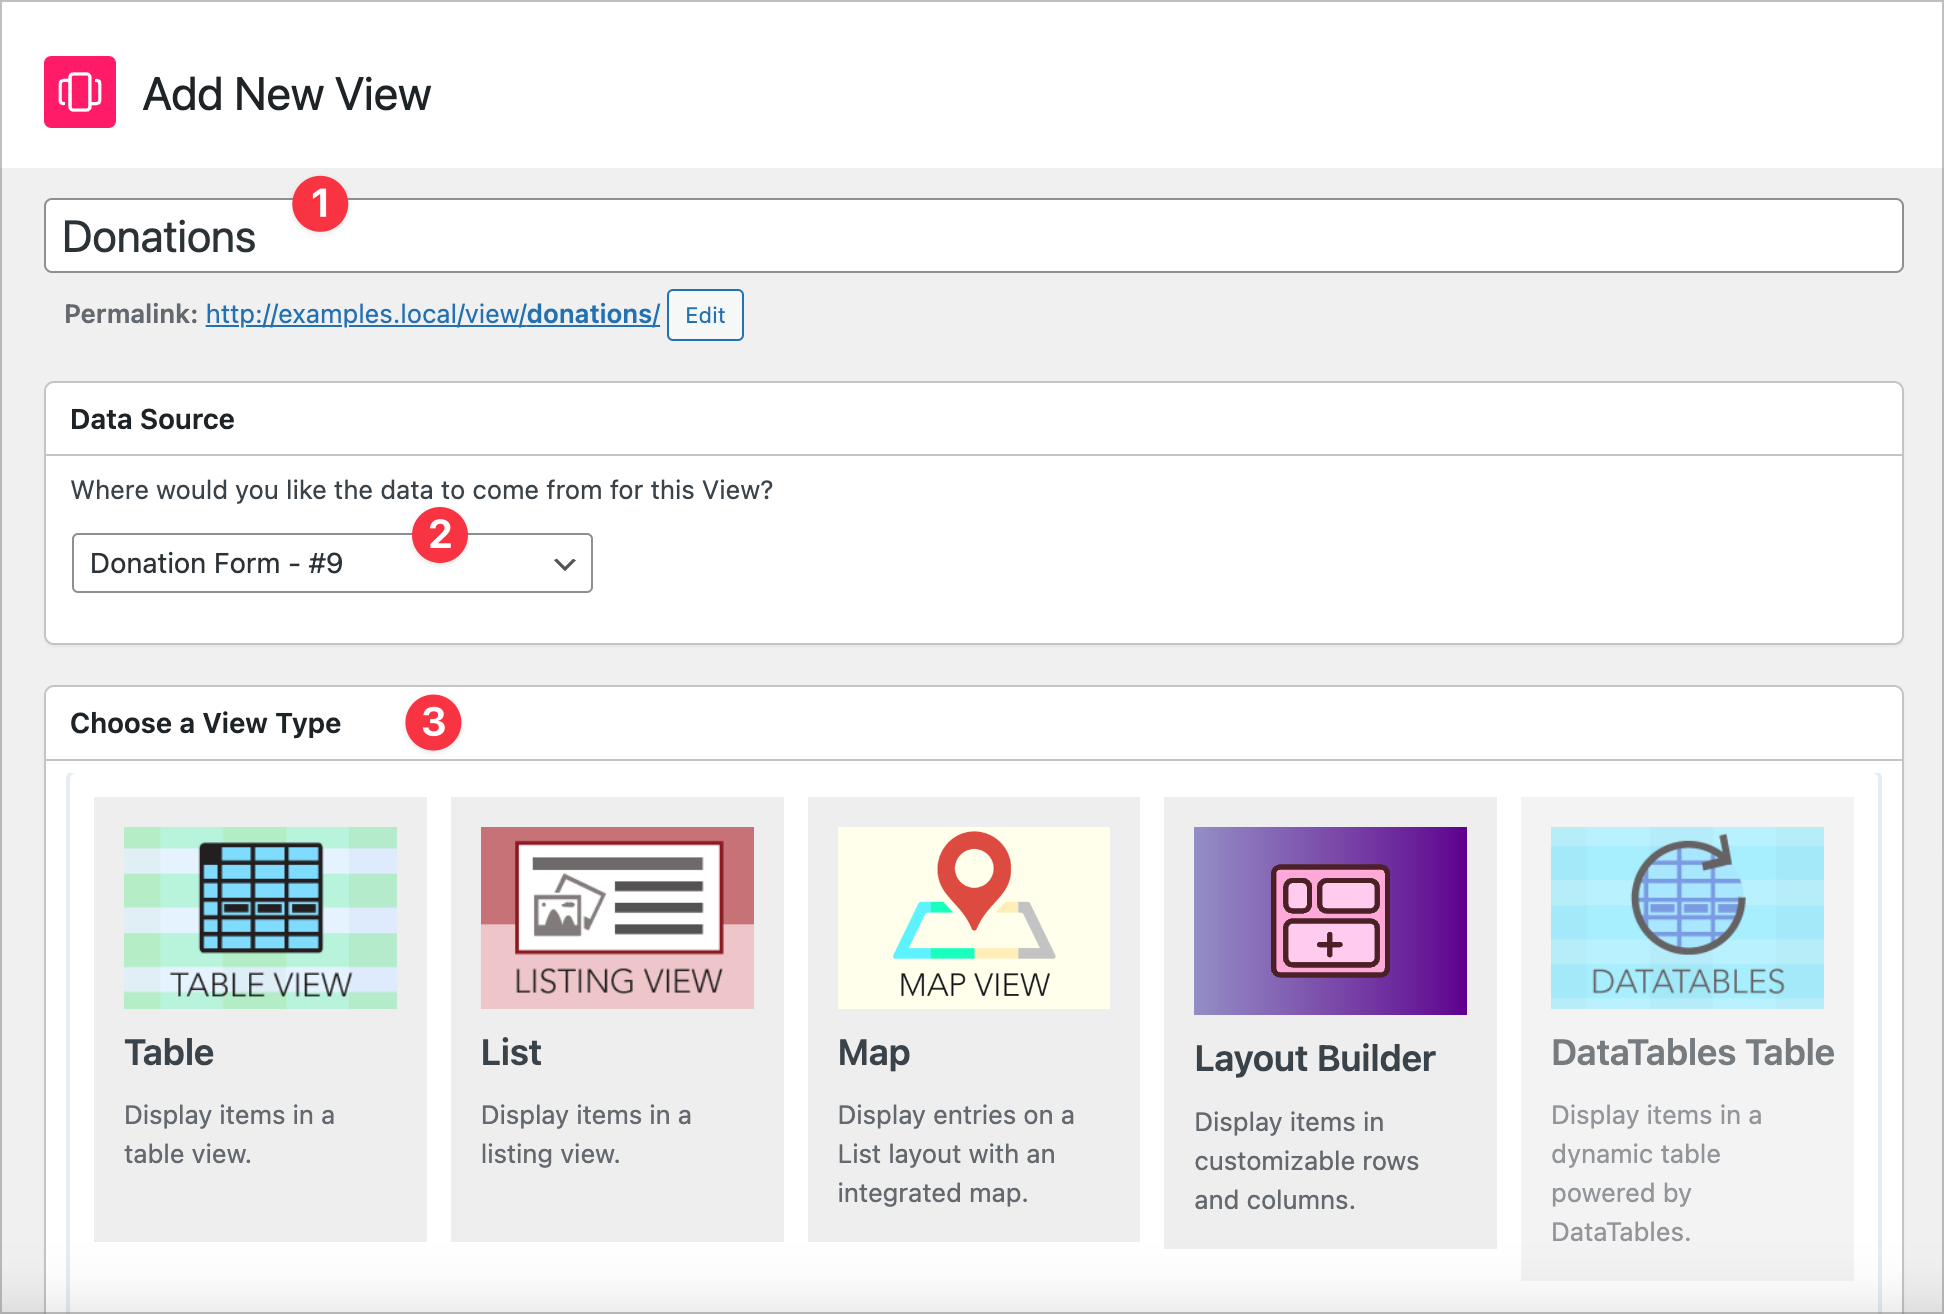
A “View” in GravityView enables you to display Gravity Forms entries on the front end. To create a new View: Navigate to GravityKit in your WordPress admin menu and select New View. Then:
- Provide a name for your View.
- Select your donation form as the data source.
- Choose a View Type that suits your needs – the Table or List options are both ideal for displaying donations.
5. Configure the View Layout
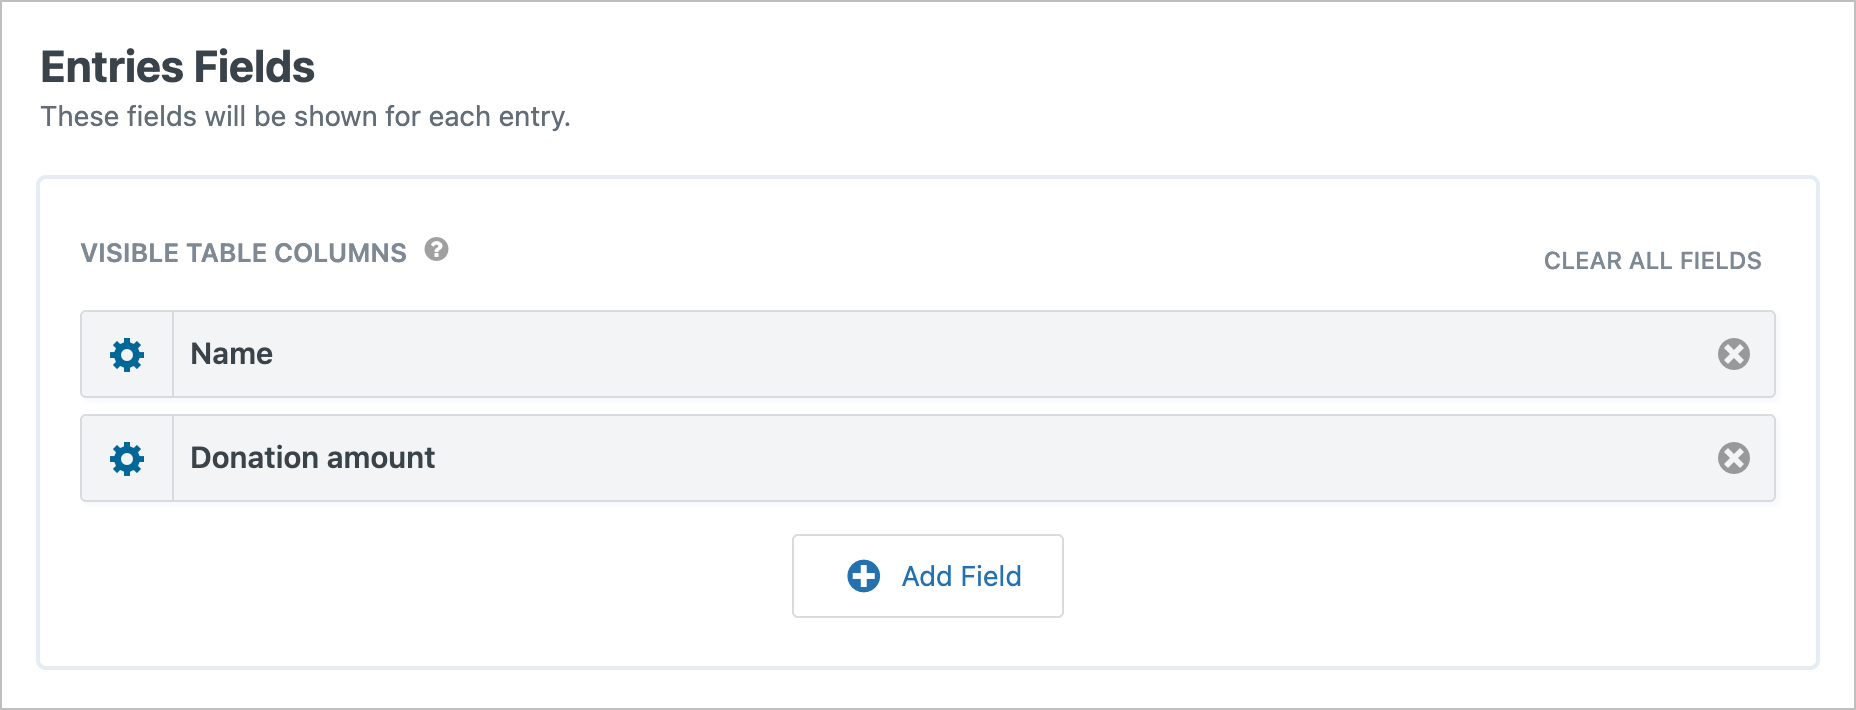
Using GravityView’s drag-and-drop builder, you can customize the View to display relevant donation information, such as:
- Donor Name: Display the donor’s name, with conditional logic to show “Anonymous” if the donor chose to remain unnamed.
- Donation Amount: Show the contribution amount.
- Message: Include any personalized messages left by the donor.
- Date: Display the date of the donation.
You can add fields to your View by clicking Add Field and selecting the desired form fields. Drag and drop them into your preferred order.
6. Approve Donations Before Display
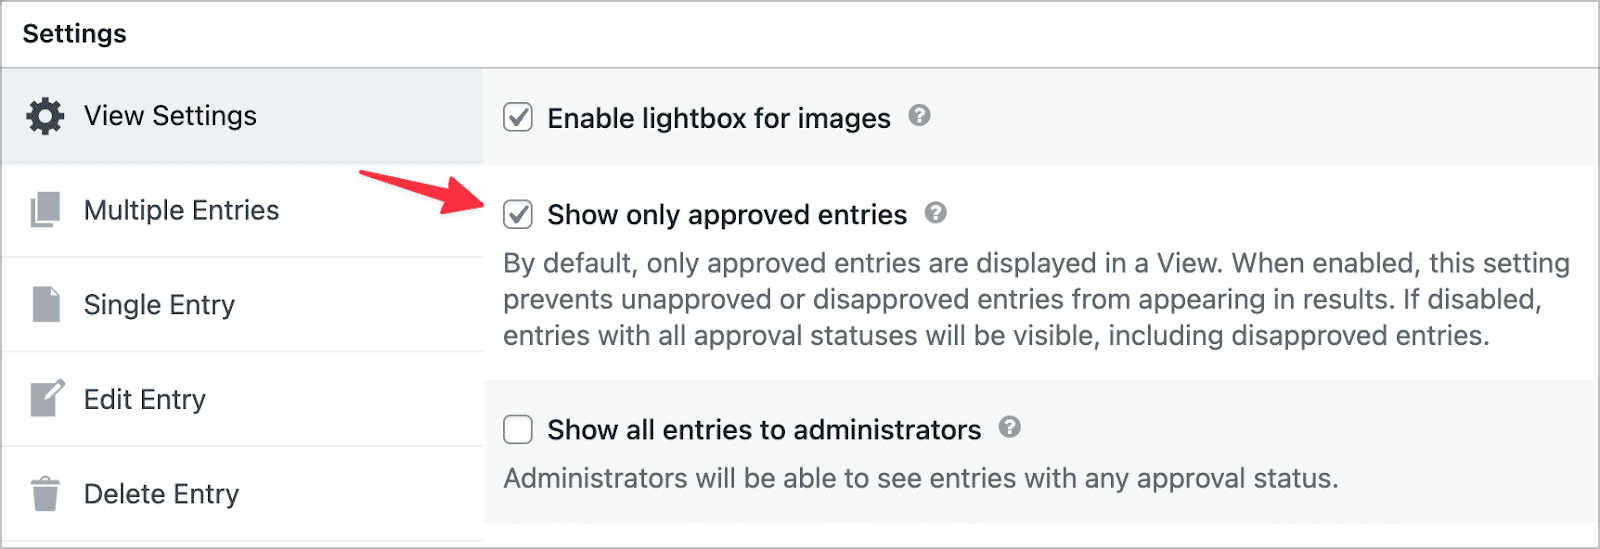
If you prefer to review donations before they appear publicly, you can enable GravityView’s powerful entry approval feature:
- In the View Settings, check the Show only approved entries box.
- Approve entries manually through the Gravity Forms entries page as they come in.
7. Calculate the Total Amount Raised
Highlighting the total amount you’ve raised so far can motivate potential donors by showcasing the impact of collective contributions. You can also use this as a way to track your fundraising goals.
Luckily, GravityMath makes it easy to perform advanced calculations on Gravity Forms entries and display the results anywhere on your website using a shortcode.
For example, use the [gravitymath] shortcode to sum all donation amounts. Here’s a working shortcode that you can use (just remember to replace the form ID and merge tag with your own!):
[gravitymath scope=”form” id=”1″] {Donation Amount:2:sum} [/gravitymath]
This shortcode calculates the sum of the “Donation Amount” field from form ID 1. Place this shortcode in a WordPress block or widget where you want the total to appear.
Similarly, you can use the GravityMath shortcode to calculate the total number of donations received by counting all donations:
[gravitymath scope=”form” id=”1″] {Donation Amount:2:count} [/gravitymath]
That’s it! Now we can put everything together by adding the shortcodes to a page and embedding our View.
Display Donations on Your Website
With Gravity Forms, you can easily accept donations on your website or run fundraising campaigns for your charity or nonprofit organization. In this post, we showed you how to display those donations on the front end to inspire more giving and track your progress.
To get started, check out GravityView and GravityMath today.