How To Export Entries From Multiple Forms to One File

Written by the Editorial team at CosmicGiant…
Gravity Forms makes it easy to export entries. Inside the Forms menu, you’ll find an Import/Export item where you’ll have the choice of importing or exporting entire forms and submitted form entries. You can even use Conditional Logic to drill down your exports even further, specifying any date range you need. It’s a super handy feature.
But what if you want to export entries from multiple forms?
While you can select one form at a time and repeat the process manually, there’s a more efficient method for handling multiple form entry exports.
Why Consolidate Form Entry Data
What’s a good use case for consolidating data from multiple Gravity Forms? Let’s say you have two very similar forms on your site and you want to analyze a set of data from both. Switching from one set of entry data to the other to analyze the entries can take a while.
If you could have unique data from both forms displayed in front of you in one document, analysis would be much easier. Entry Automation also allows you to export a file format that works for you: CSV, Excel, JSON, or PDF.
Consolidating entry data is an excellent marketing tool. For example, if you collect customer information across several forms, you could configure an export that will pull all demographic information from those forms. Analyzing that data can give you a clearer picture of where your marketing efforts are landing — and which areas you may need to target more heavily.
When sharing entry data with coworkers, sending one consolidated export file is super efficient. Even more efficient is the ability to automate the sharing. I’ll cover that now.
How to Export Consolidated Entries from Multiple Forms
In this tutorial, I’m going to share how to completely automate the export of entries from multiple forms. First, you’ll need at least two forms to work with — it doesn’t matter what type, as long as they’re created using Gravity Forms. You’ll also need to have the latest version of Entry Automation installed and activated.
Entry Automation is an add-on created for Gravity Forms by CosmicGiant. The add-on saves you tons of time by simplifying common tasks. You can easily export entries, delete specific entry data, and send reminder notifications.
With Entry Automation 6.0, you now have the capability to export entries from multiple forms! With an Agency or Pro license, you’ll have access to the Multiple Forms Extension, which will give you the functionality you need to consolidate your data in clean, professional-looking export files.
If you’re already comfortable using Gravity Forms to build your web forms, you’ll feel right at home with Entry Automation. It was created by certified Gravity Forms developers. It’s fully integrated so the UI will feel very familiar — no steep learning curve to master.
How to Automate Multi-Form Data Exports
Setting up an automated workflow is as easy as making some personalized choices. Once you have Entry Automation 6.0 and the Multiple Forms Extension installed and activated, configuration is straightforward.
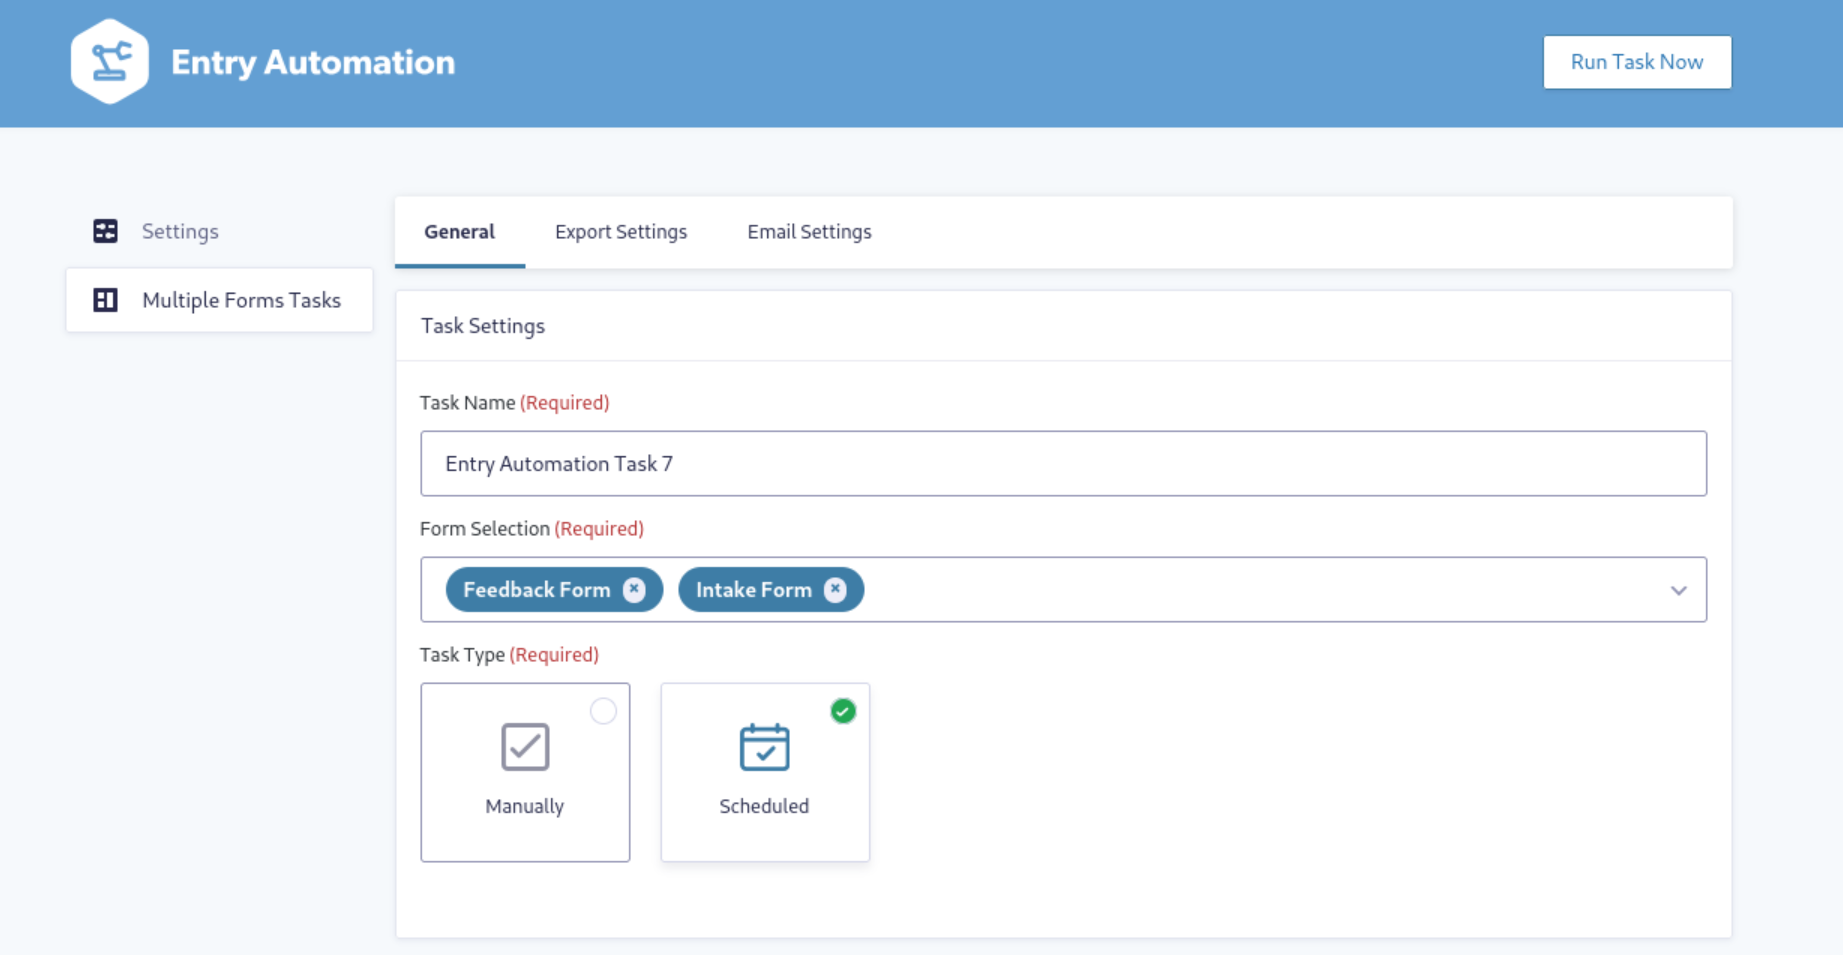
In your WordPress Admin, navigate to Forms → Entry Automation → Multiple Forms Tasks. Here, you’ll create a Task to handle multiple form entry exports. Click Add New to start configuring.
Begin by naming your Task. You can create as many Tasks as you like to accomplish different goals, so give each a unique name to differentiate them later on.
In the next section, choose the forms you want to include in the export under Form Selection. You can find any form you’ve created in the handy drop-down menu.
Next, choose whether to run the task manually or on a schedule. Choosing Scheduled helps you benefit most from Entry Automation’s features. Setting up a schedule will make your Task totally automated.
When Scheduling, you have options for:
- Start Running Task (when it should run the first time)
- Frequency (how often it should run)
- Run Task Every (several options for hour, day, week, and month)
- Run Task Until (when it should stop running)
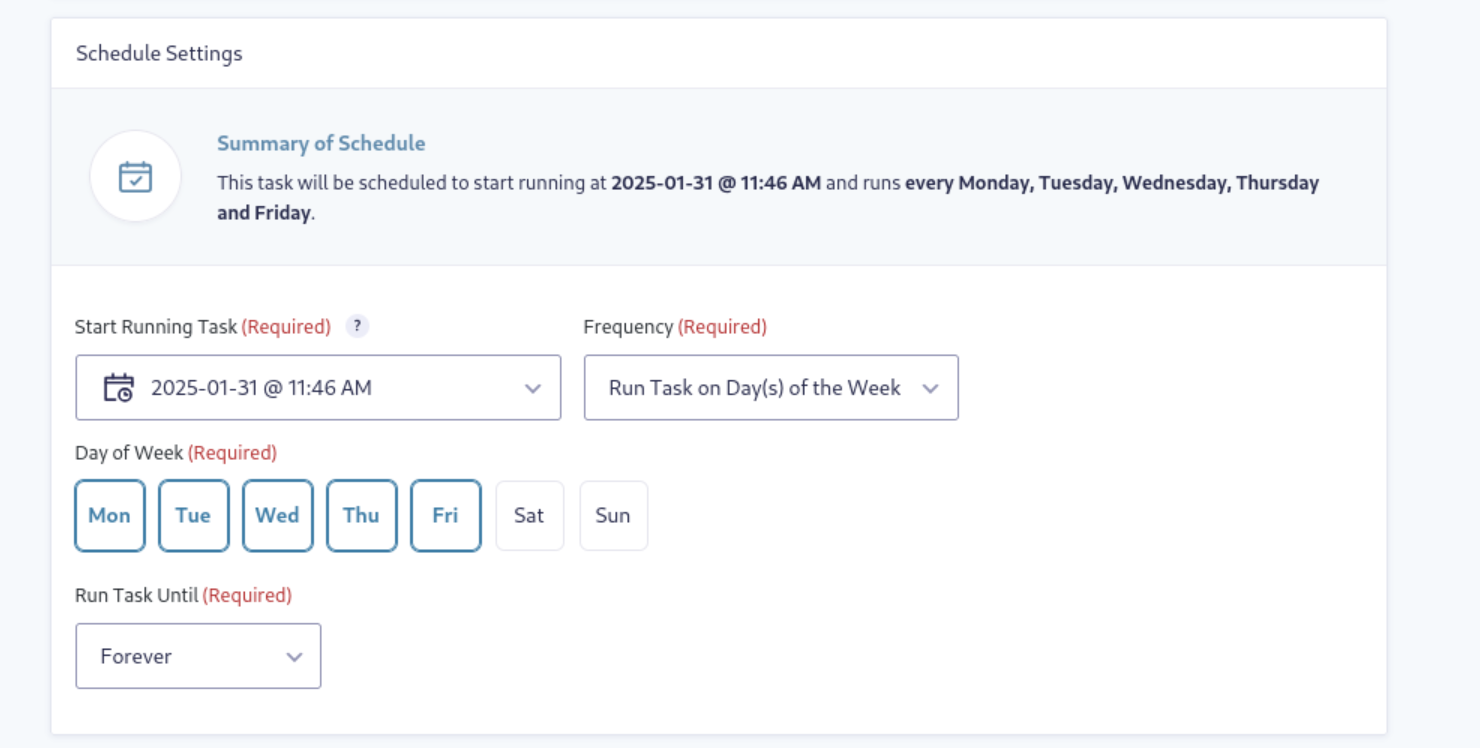
Determining the best schedule for your Task(s) is a highly individual choice that depends on your personal or team workflow. You can experiment with a schedule and adjust it later if necessary.
Now you’ll decide which entries should be targeted for the export. There are choices for:
- All Entries
- All Entries Since Last Task Run
- Custom Date Range
You have several options to help you choose beginning and ending dates under Custom Date Range. You can use plain English phrases such as “Yesterday,” “5 hours,” or “3 weeks.”
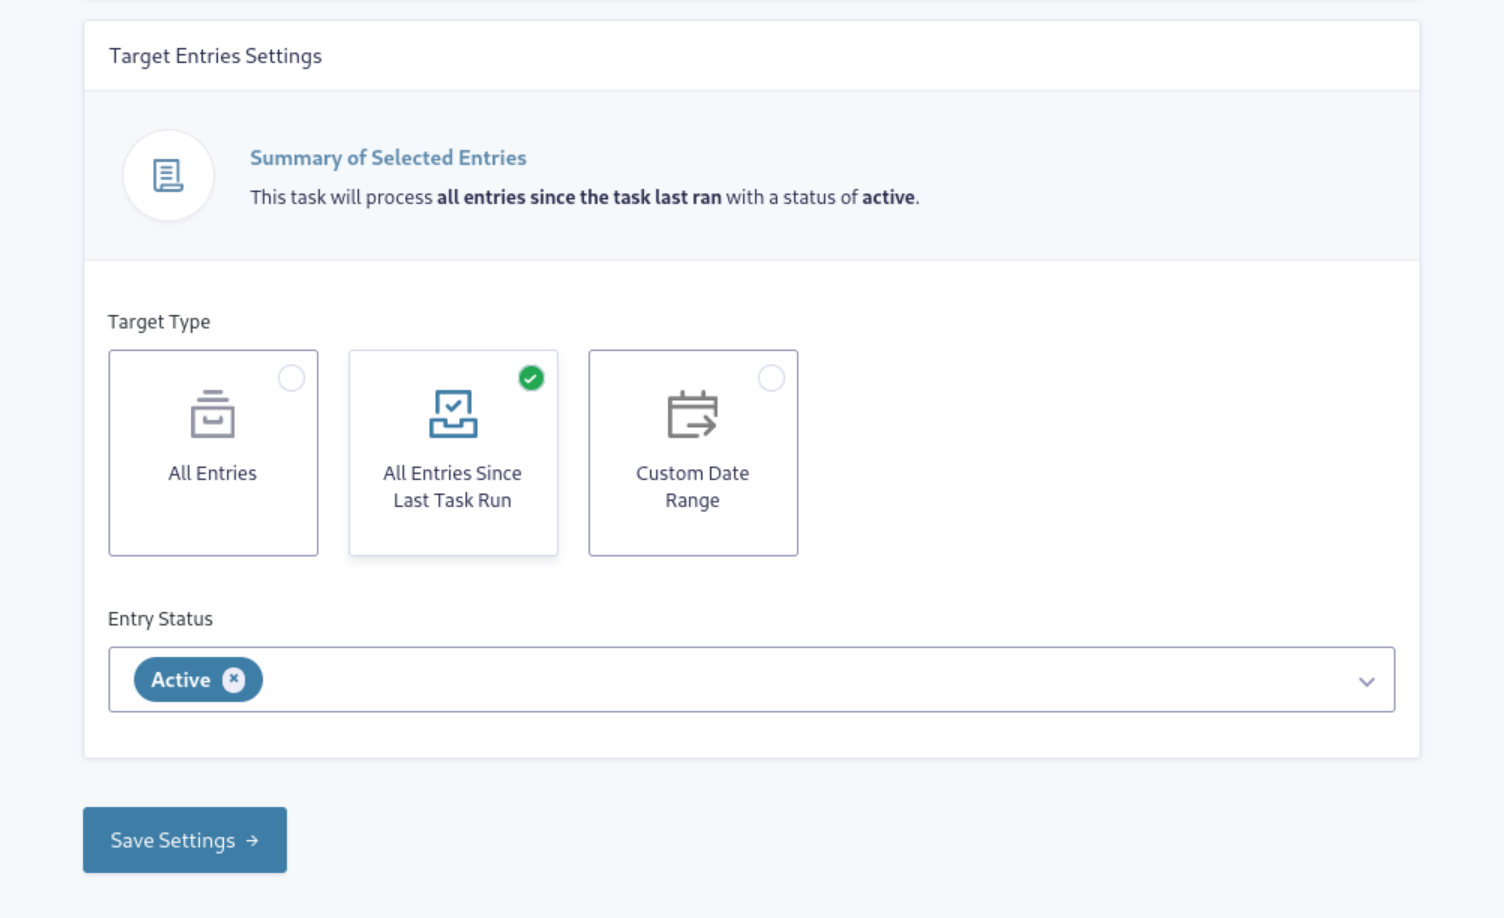
You’ll also need to select an Entry Status from which you want to export, such as Active, Unread, Read, Trash, and Spam. You can select as many or as few as you prefer from the drop-down menu.
Save your settings! Now let’s configure the export file.
Creating Efficient Export Workflows for Multiple Forms
As I mentioned earlier, you have several formats from which to choose: CSV, XLSX, JSON, or PDF. Select one format per Task. However, if you want to export in more formats you can set up multiple Tasks. This is where unique Task naming comes into play.
Enter your preferred filename. You can also keep the default filename, which uses merge tags to populate the name dynamically. Under Export Order Settings, select from the dropdown the column you’d like to use for ordering and whether the sort should be ascending or descending.
Now move to the Field Selection Settings section. Here you’ll set up your file export using all of the forms you previously selected under the General tab. You need to create at least one column to start.
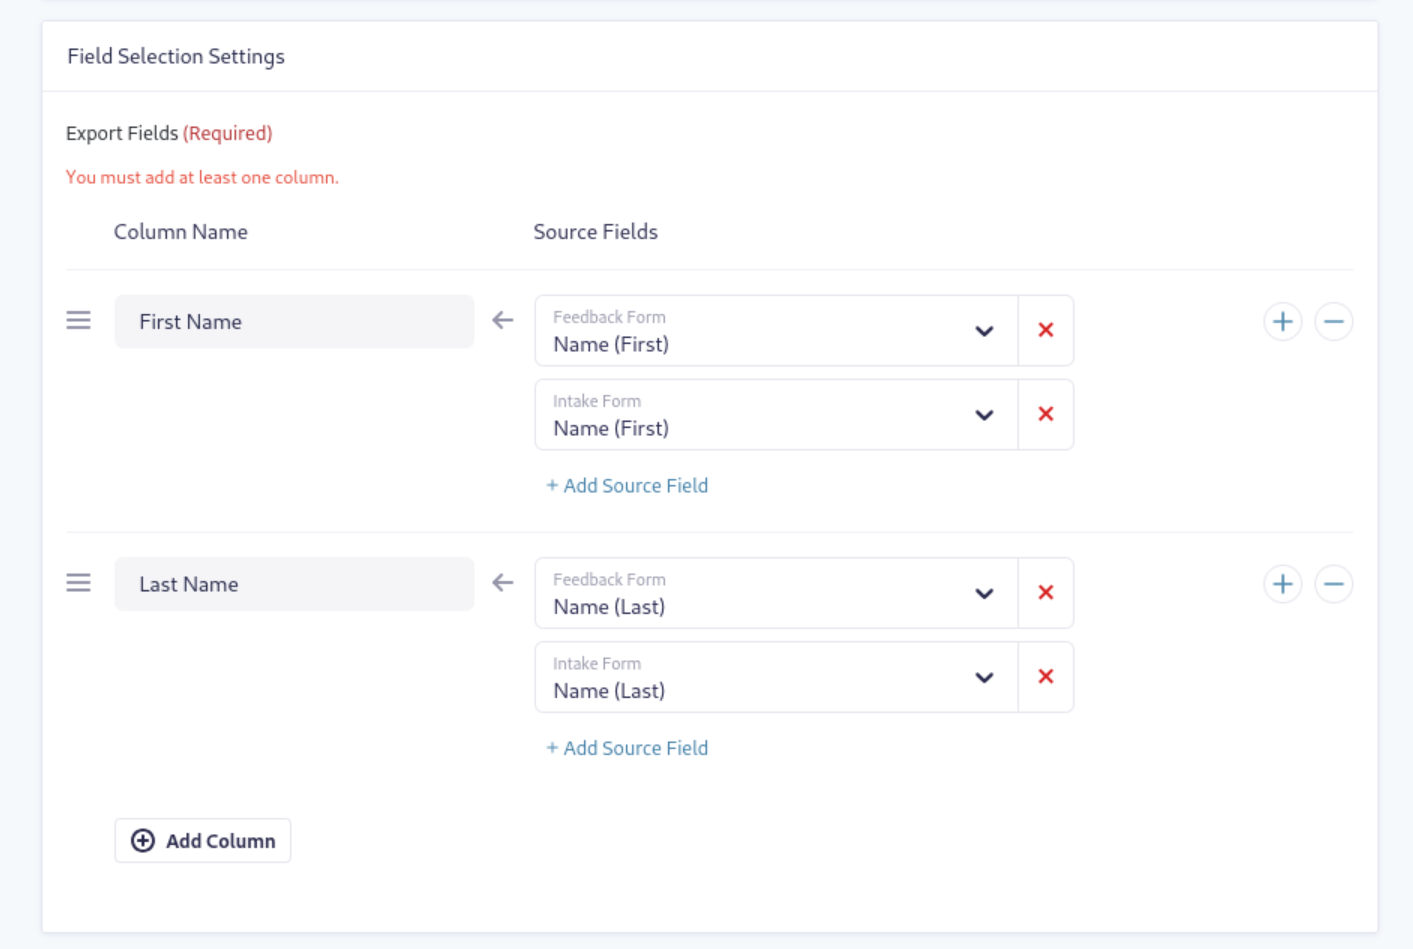
Give each column a name that makes sense for your export. For example, I’d like to export all the names from two of my forms: Feedback and Intake. The first column I’ll simply call “Name”. To the right, under the Source Fields dropdown, I’ll select the First Name fields from my Feedback form. Then, add another Source Field and choose First Name from my Intake form. I could continue adding as many columns and existing source fields as I want to include in my export file.
To make this process truly automated, you can configure the exported file to be automatically emailed to yourself or your coworkers. This is done under the Email Settings tab.
Once configured correctly, your entry data exports will come right to you!
One-Off Exports
Entry Automation makes your exports virtually hands-free and super efficient. But there may be times when you just need to do a quick export.
In Entry Automation 6.0, the Multiple Forms extension is integrated with Gravity Forms’ Import/Export menu. To accomplish a quick multi-form export, navigate to Forms → Import/Export → Multiple Forms Export.
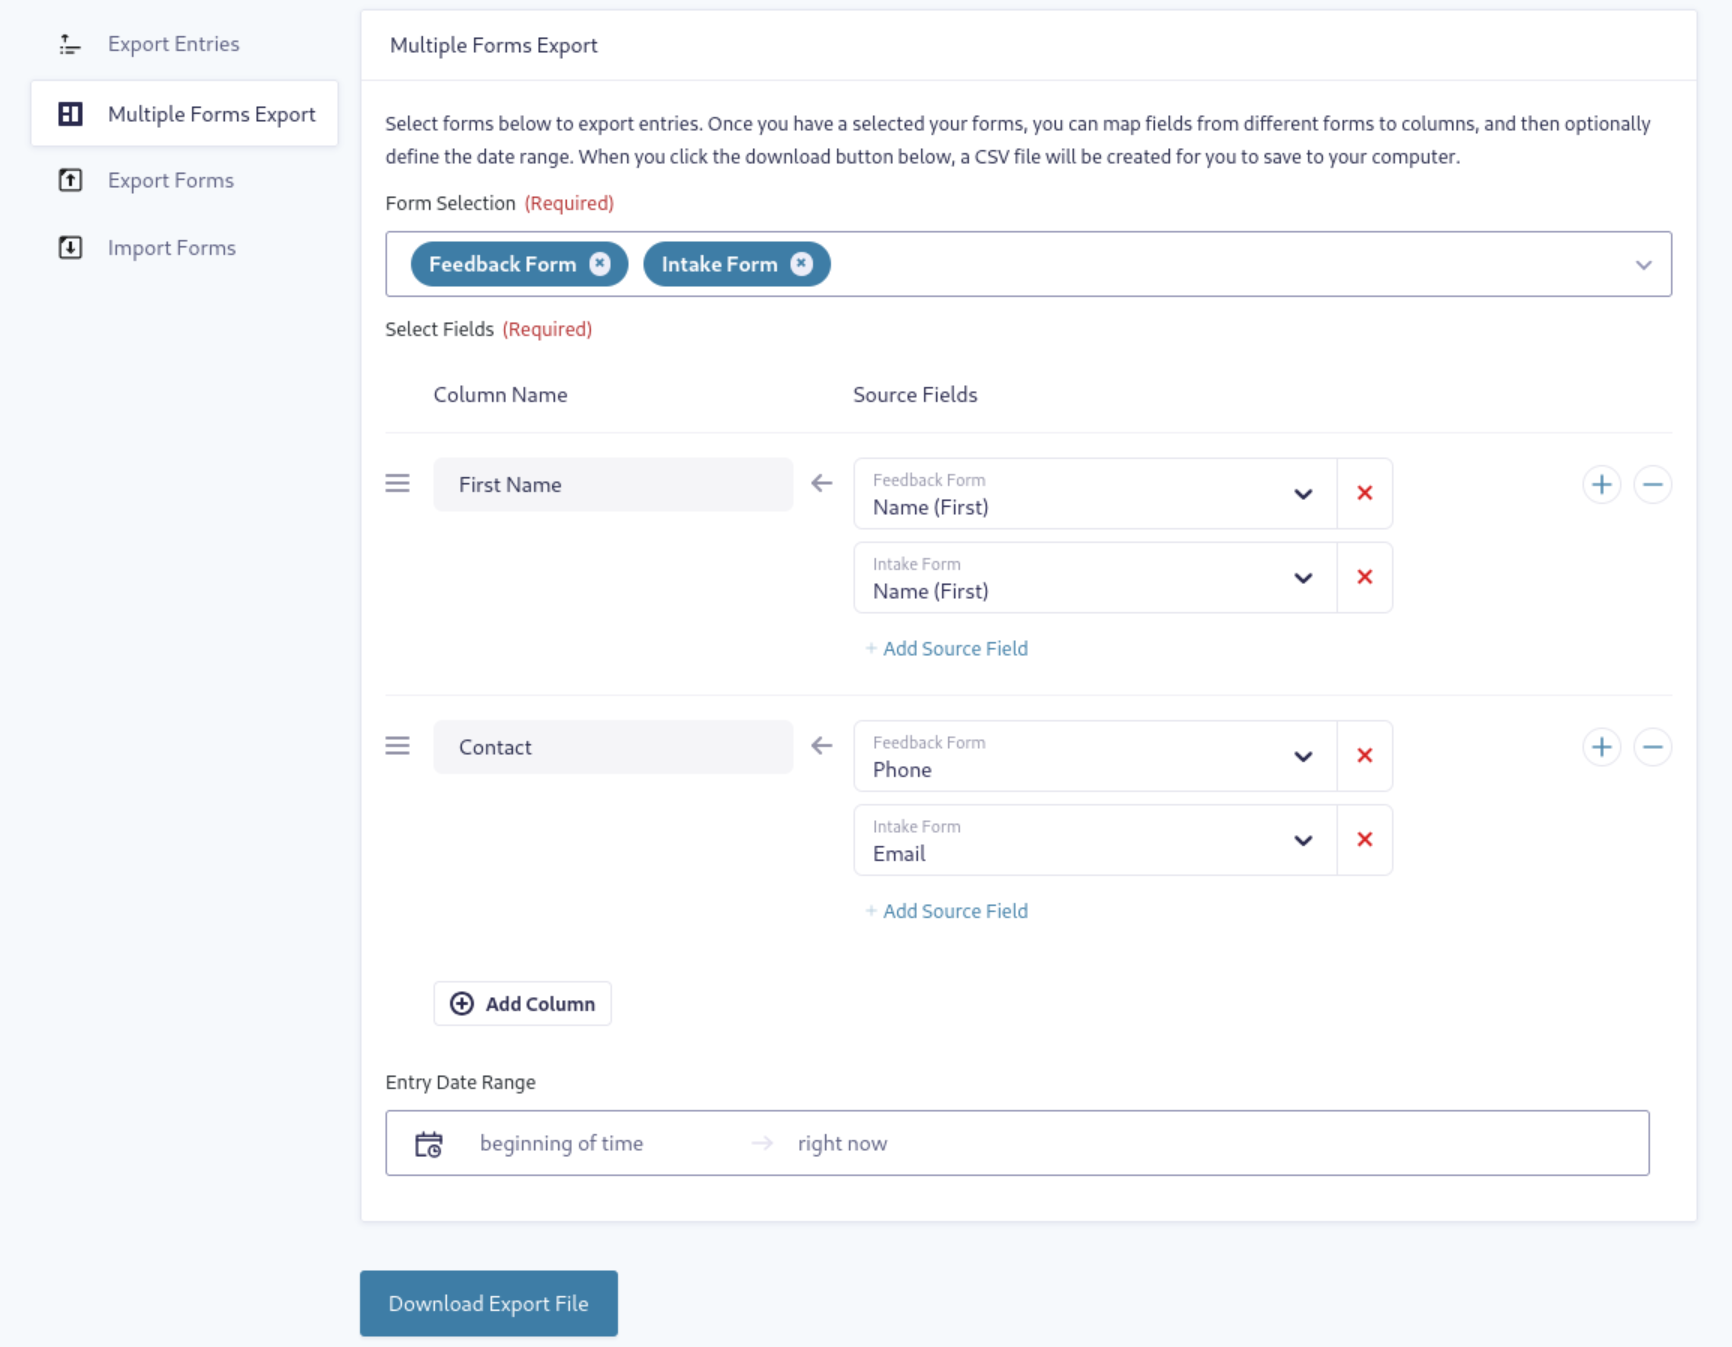
Similarly to setting up a Multiple Forms Task, you’ll select the forms you need from the dropdown. Then you can set up your columns and source fields. Configure an Entry Date Range, then click Download Export File. It’s as easy as exporting entries with the Gravity Forms tool, with the added capability of choosing multiple forms.
Transforming Your Form Data Management
Want to make your data analyzation workflow easier than ever? Consolidate your entry data into one concise file! It’s easier to read, easier to share, and you can customize it to fit your use case.
With Entry Automation, you can export entry data from multiple forms to a single file, plus automate the entire process. Streamlining your data exports couldn’t be easier.