How to Build a Directory Using Gravity Forms and GravityView
Written by the Editorial team at GravityKit…
A business directory is a powerful way to connect customers with local services, professionals, or industry-specific companies. Whether you’re building a community resource or a niche listing site, GravityKit and GravityView make it easy to collect, manage, and display directory listings—all without writing a single line of code!
In this step-by-step tutorial, you’ll learn how to build a directory submission form, display listings in a searchable interface, integrate an interactive map, and even allow businesses to edit their listings from the front end.
Let’s dive in!
Sneak Peek
Here’s a quick look at the business directory we’re going to build in this tutorial. As you can see, there’s a search bar, an interactive map, and a table of listings below.
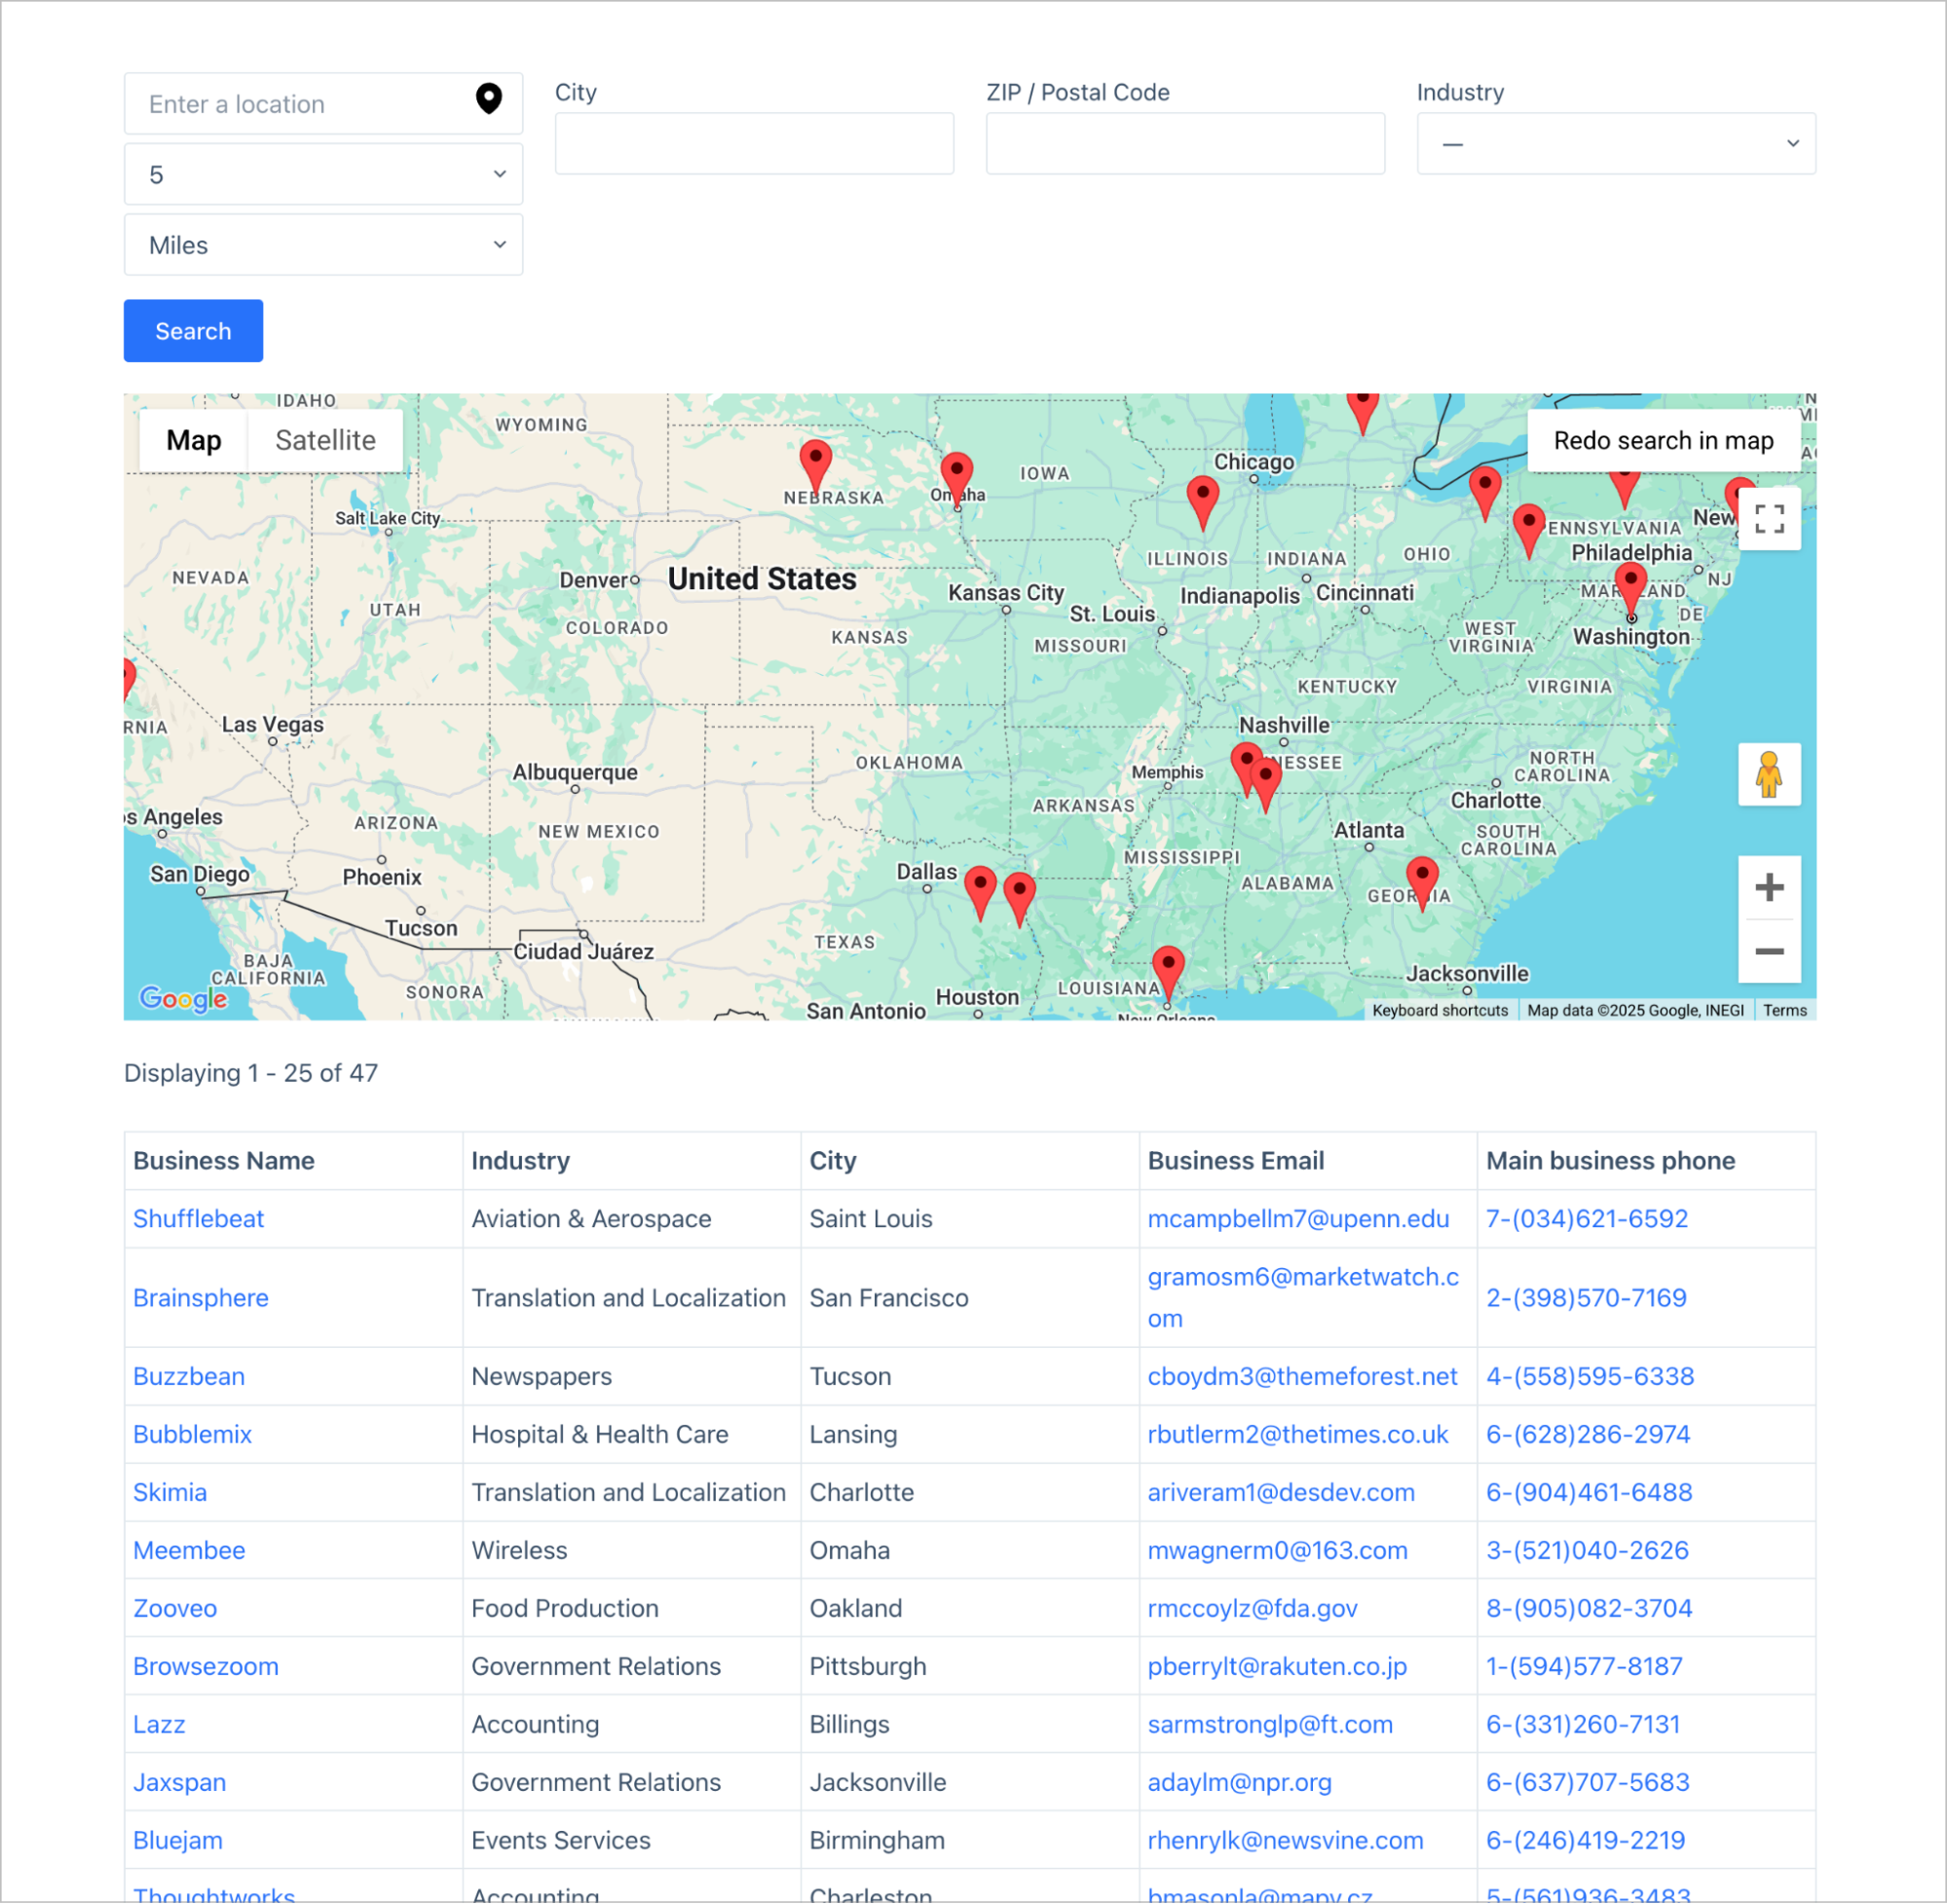
Clicking on a business name enables you to view more information about that specific business, including its location, description, and other important company info!

Follow along to see how we built it.
1. Create the Directory Listing Form
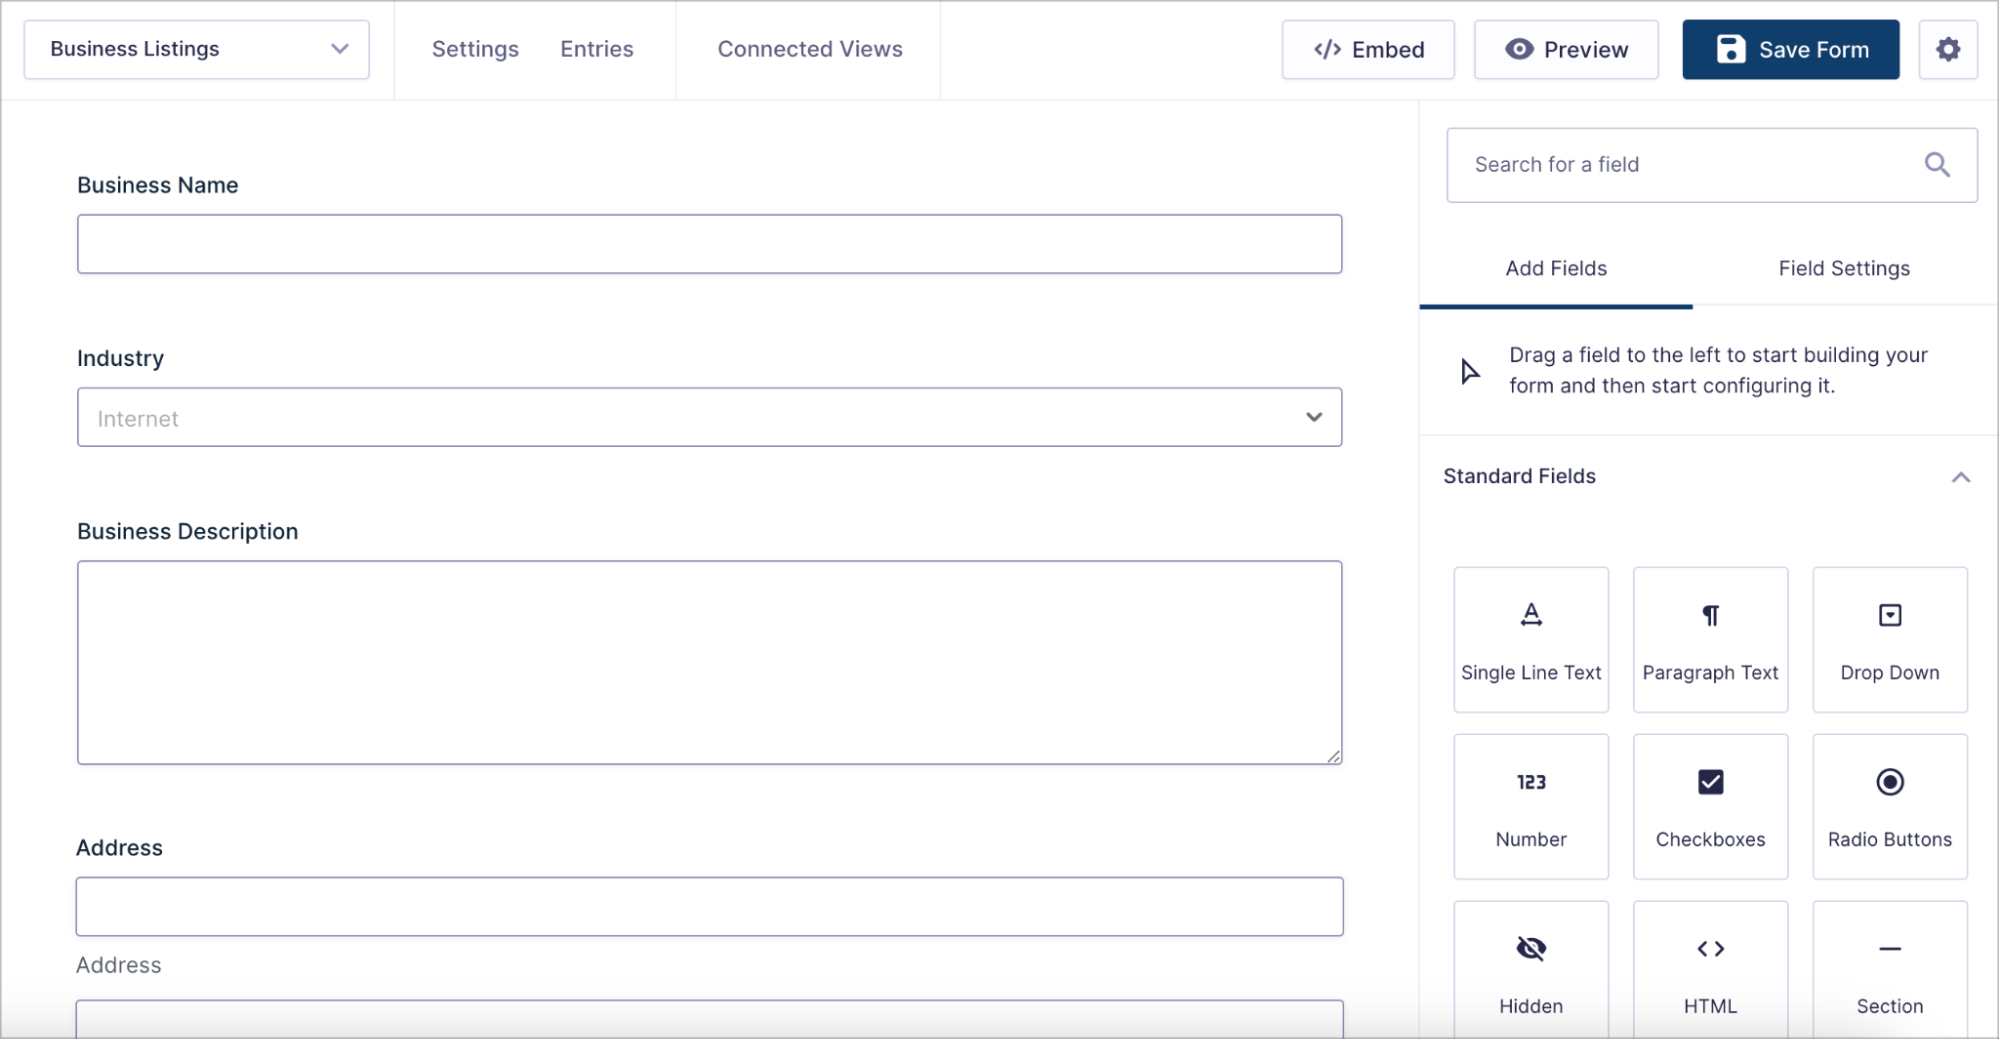
The first step in building a directory is to create a form for capturing directory listings. Since we’re building a business directory, our form will allow businesses to submit their profiles, including essential details like their name, industry, location, contact information, and more.
Using Gravity Forms’ intuitive drag-and-drop form builder, you can easily create a submission form tailored to your directory’s needs.
After creating our form, we’ll embed it on a page or post using the Gravity Forms block. Here’s what it looks like on the front end:
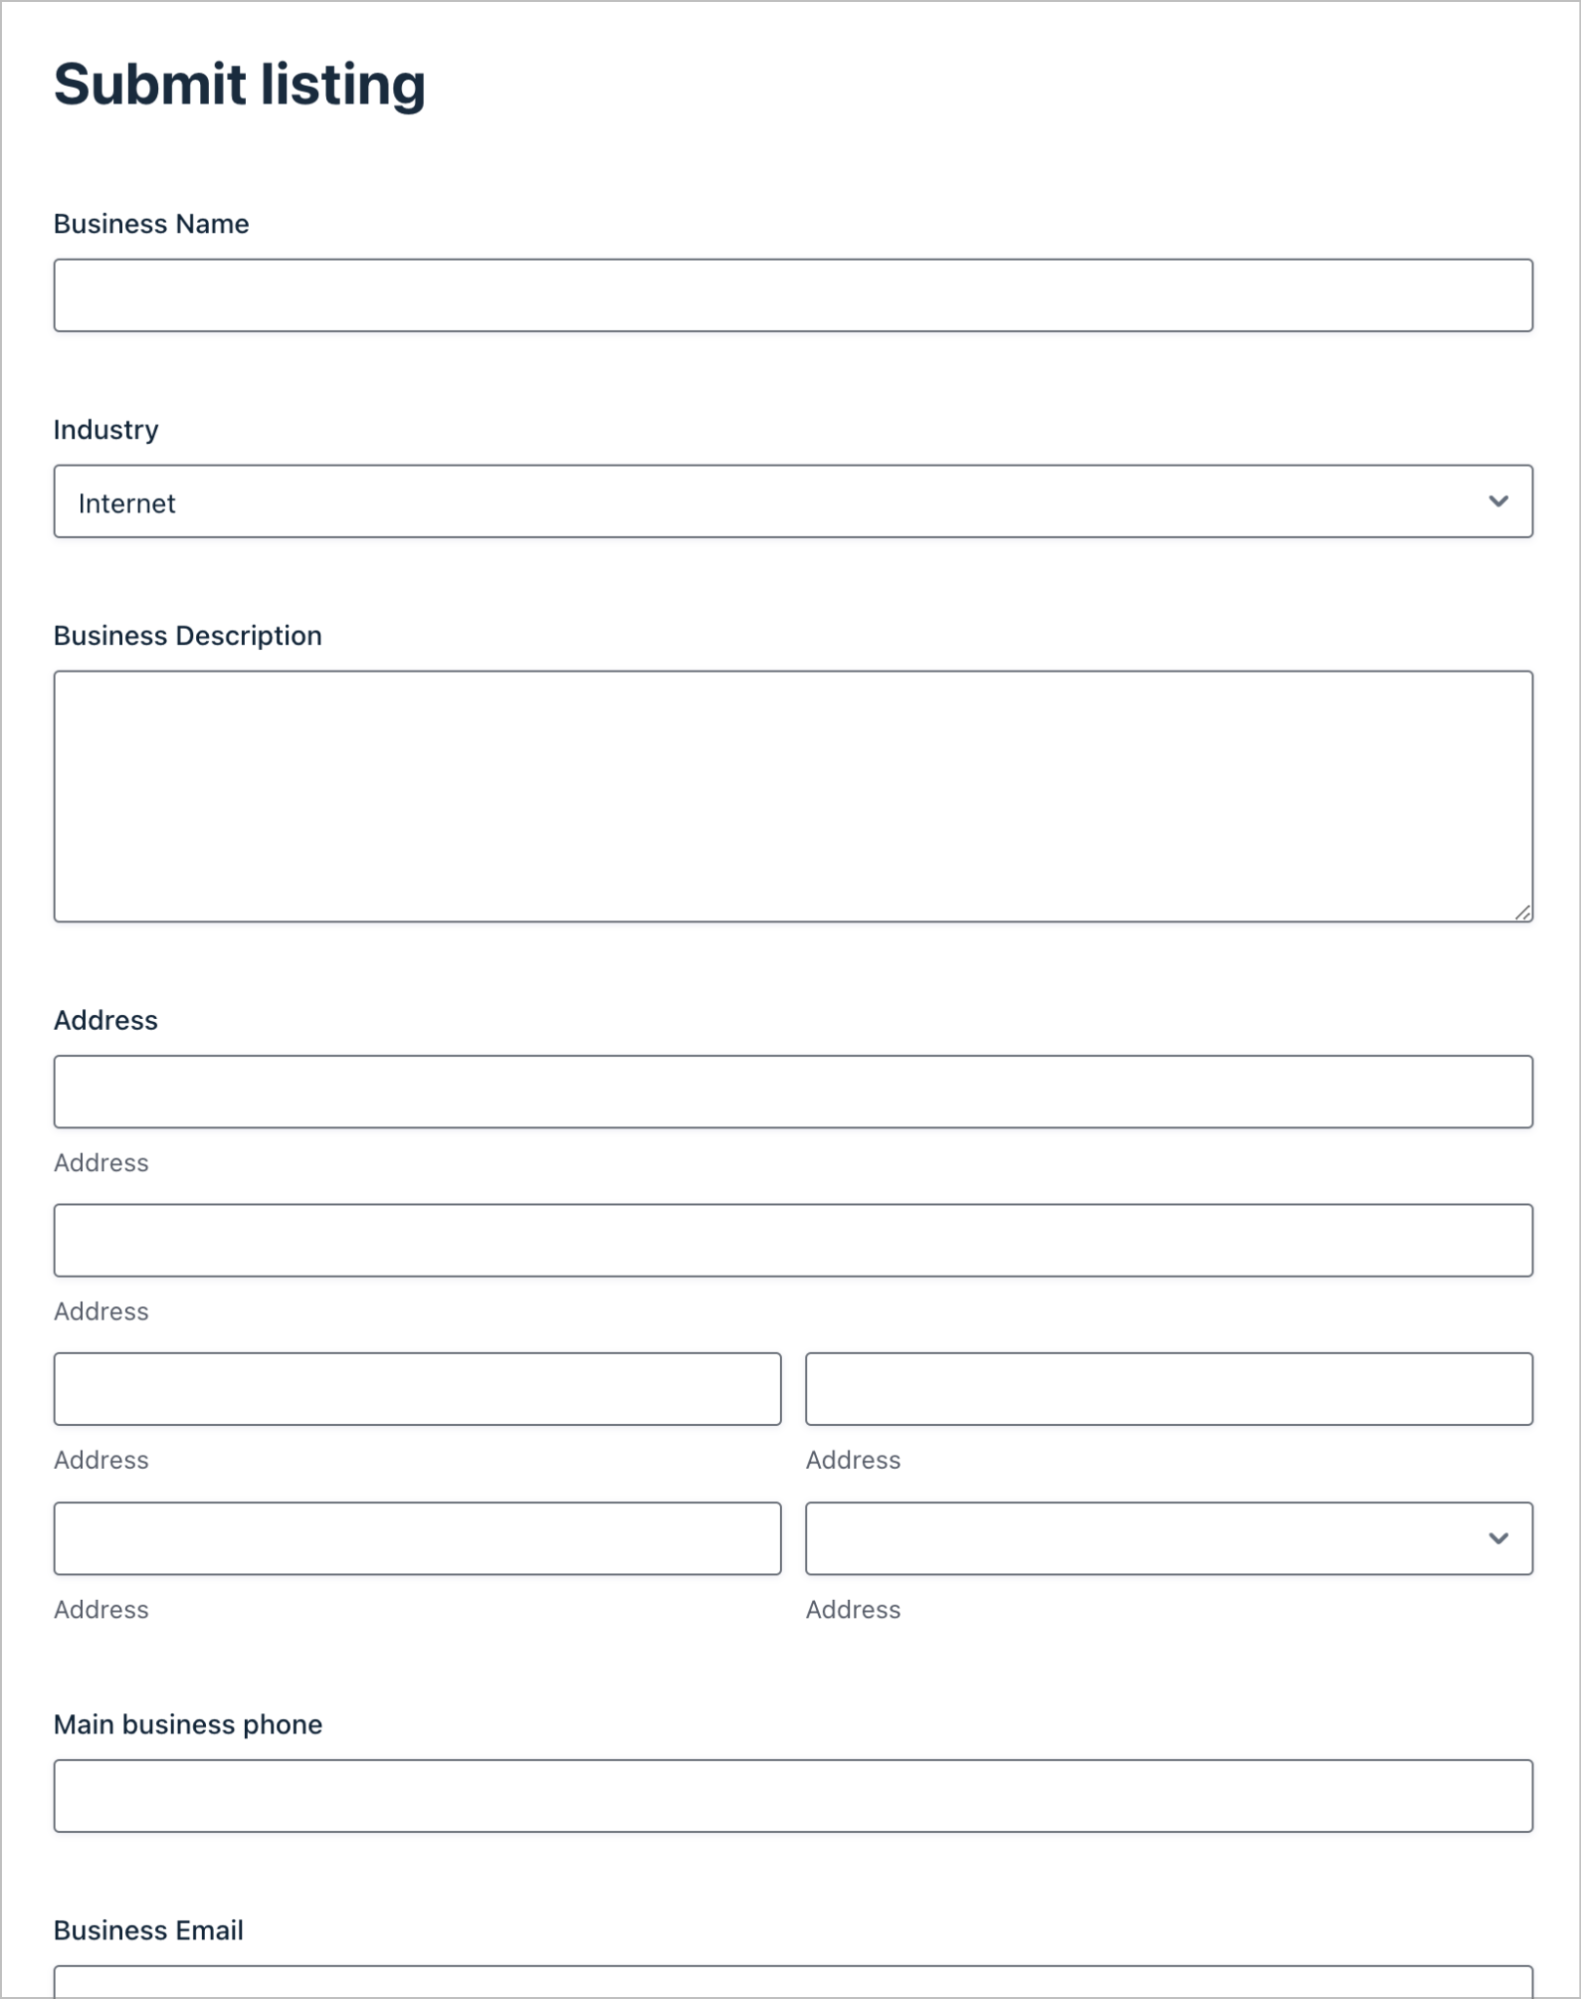
Once the form is set up, feel free to customize the confirmation message or redirect users to a thank-you page after submission. You could even integrate email notifications to confirm receipt of their listing and keep users informed about the approval process!
With our business submission form ready, the next step is to display these listings in a dynamic, user-friendly directory. That’s where GravityView comes in!
2. Create a View for Your Form Data With GravityView
GravityView is a GravityKit Add-On for Gravity Forms that enables you to build powerful web applications. It’s perfect for directories, job boards, task management systems and any other dynamic apps that you want to build.
Using GravityView, you can create Views—highly configurable interfaces for displaying Gravity Forms submission data on the front end of your website.
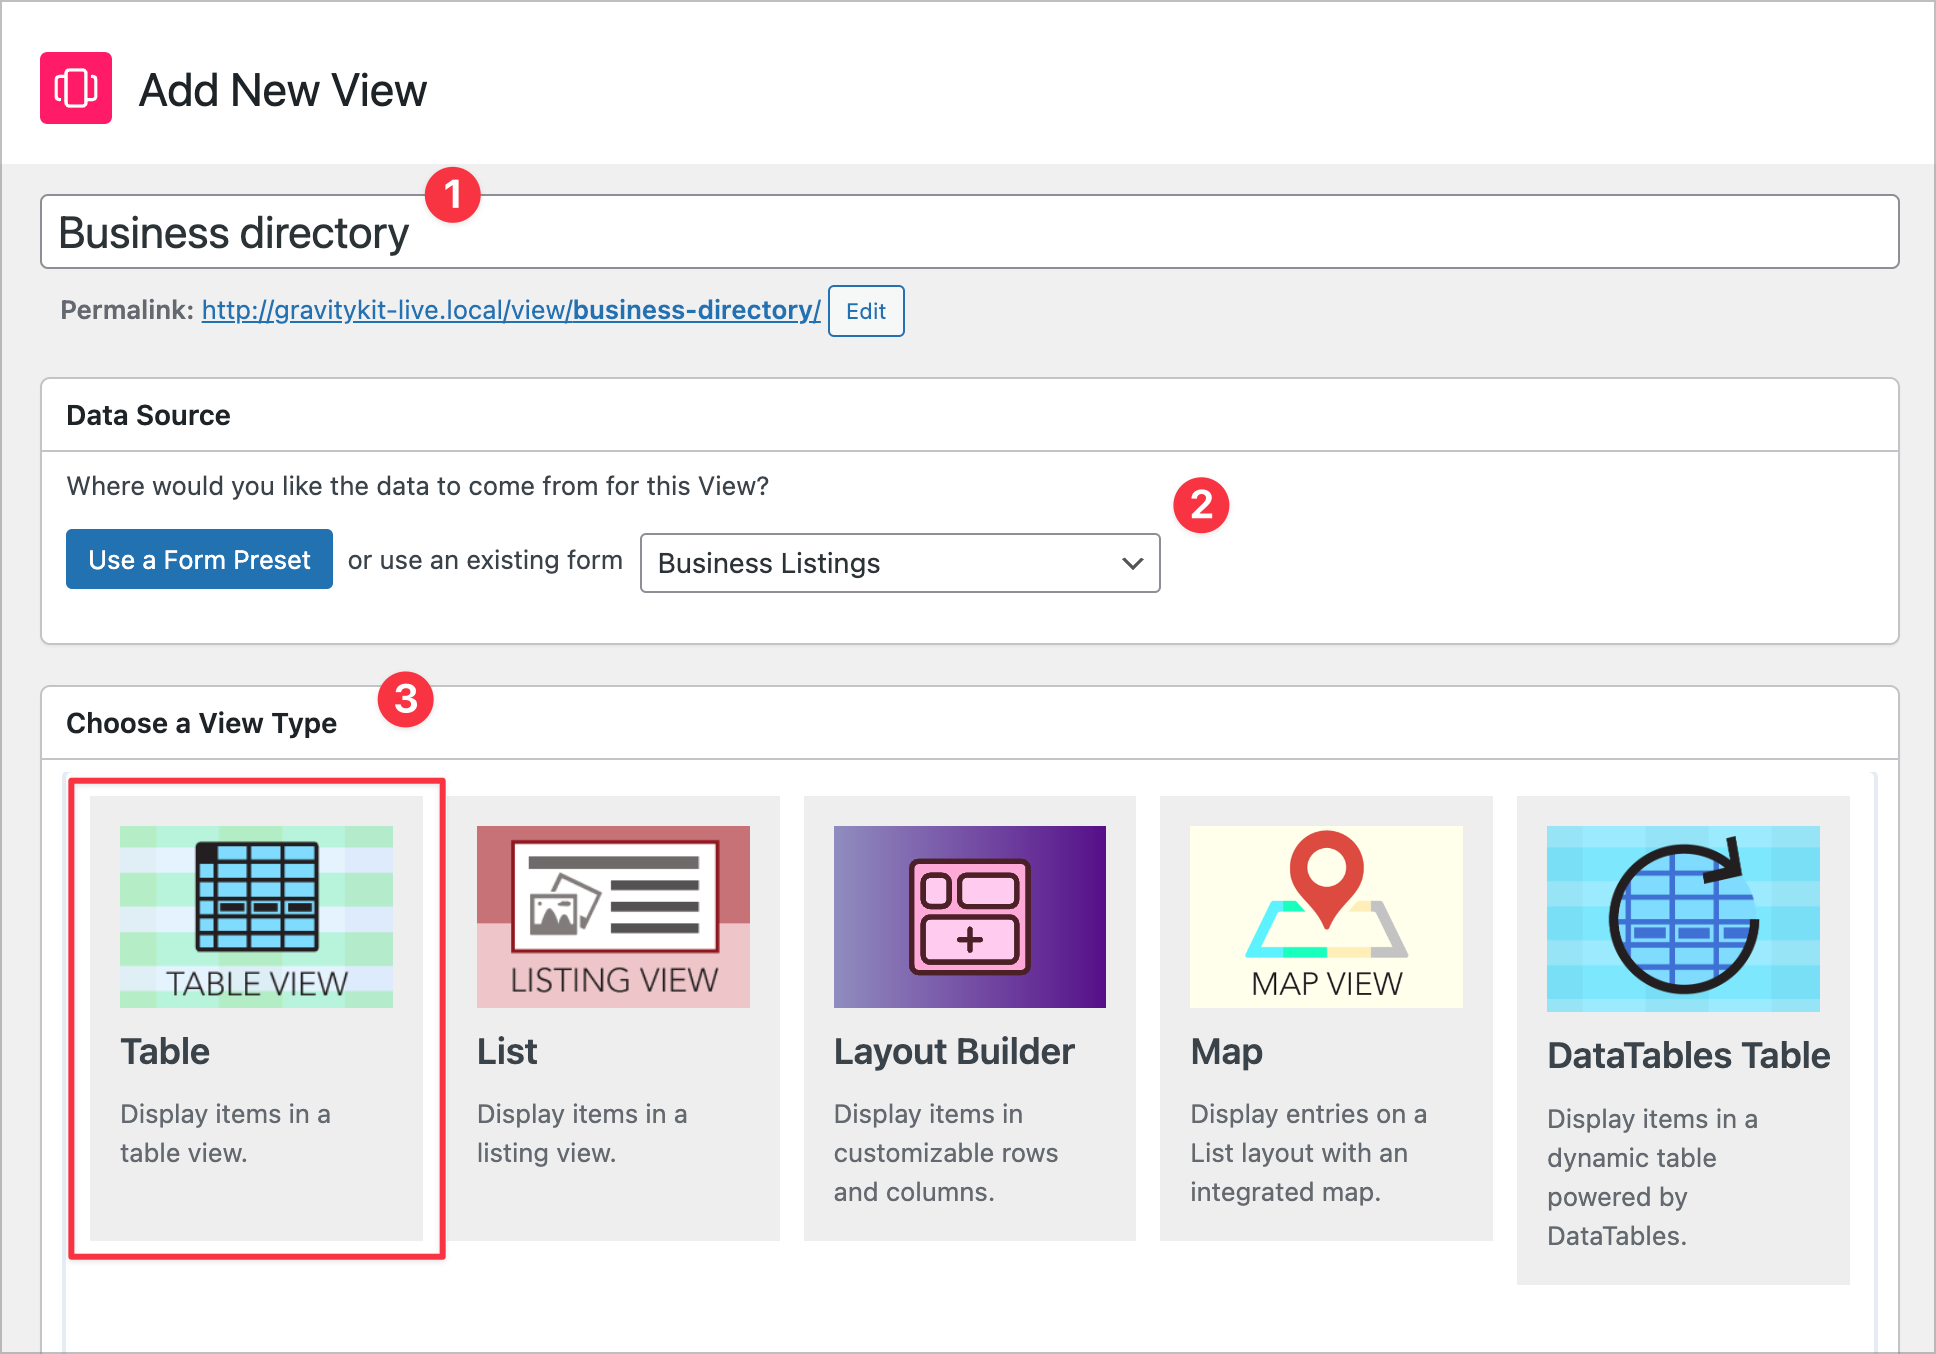
To create a new View, we’ll hover over GravityKit and click New View. Next, we will:
- Give our View a name.
- Connect it to our Business Listings form by selecting it as the data source.
- Select a View type: For this example, we’ll select Table.
Now we can start building our directory by adding fields and widgets!
Configure the Multiple Entries Layout
The Multiple Entries layout is the page where each of our directory listings will be displayed one after the other.

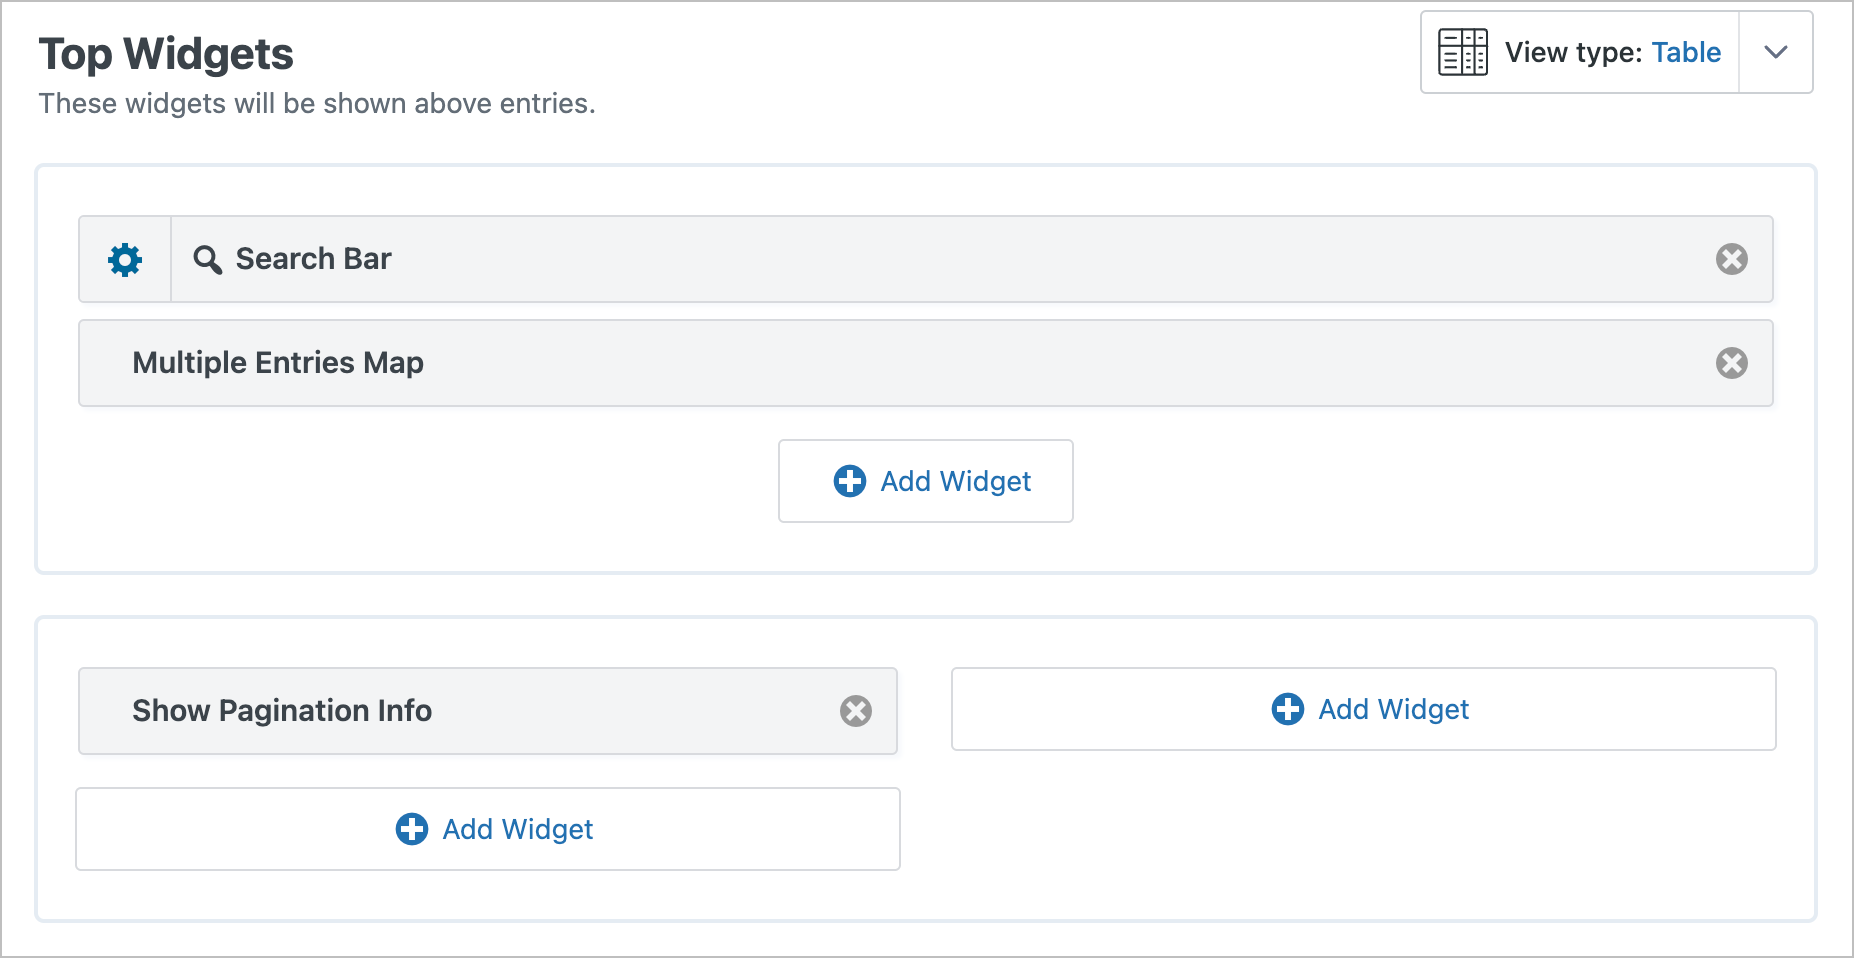
Let’s start by adding some widgets to the Top Widgets area. Here, we’ll add a Search Bar and a Multiple Entries Map widget.
The search bar will enable users to search for businesses based on various criteria, while the map enables us to display the locations of businesses as markers on a Google Map! Note that the map will only work if your form includes an Address field.
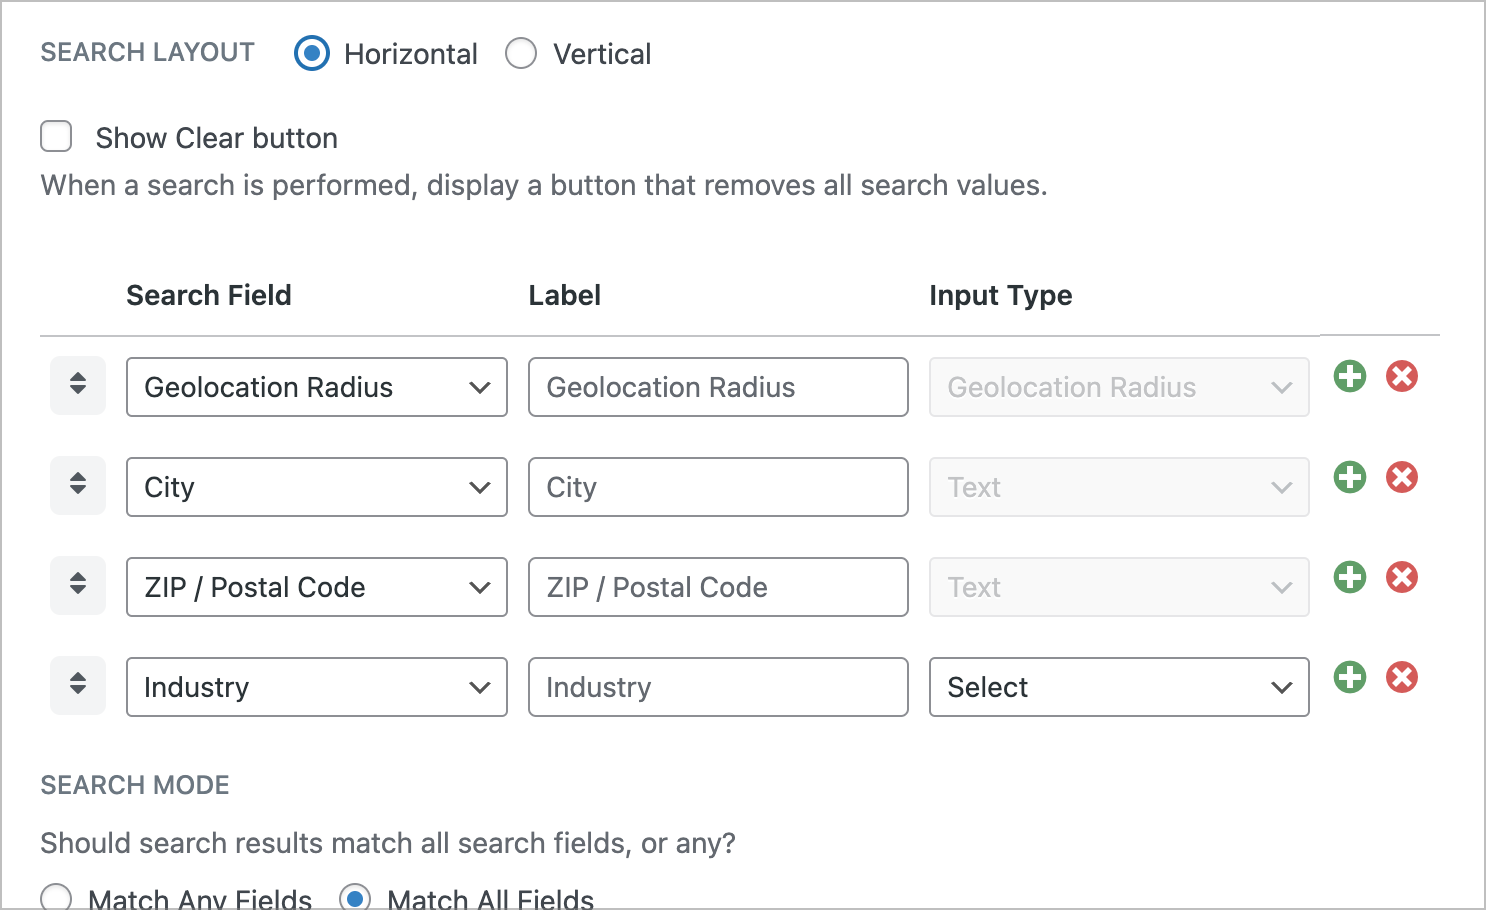
The search bar widget is fully customizable, enabling us to add or remove search inputs. It also supports a Geolocation Radius field, enabling users to find businesses close to their current location.
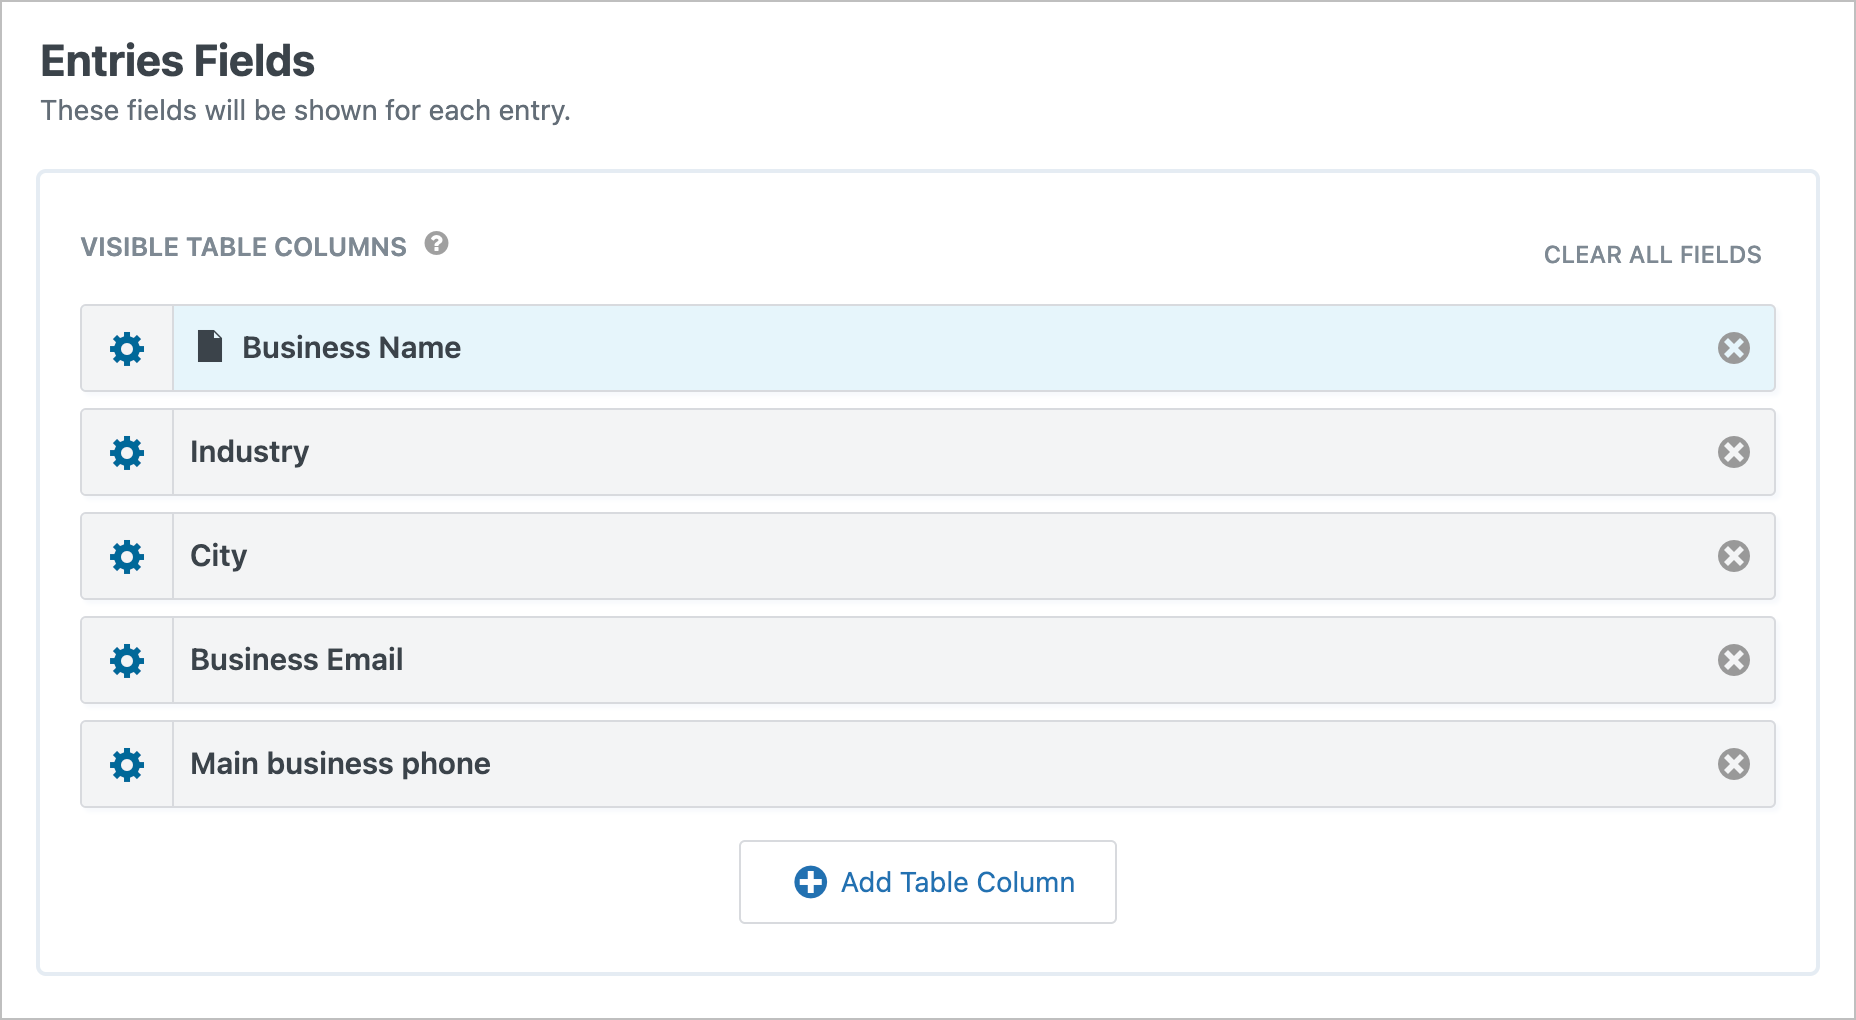
After adding our widgets, we can scroll down to the Entries Fields section where we can choose which fields to display for each directory listing. Since we’re using GravityView’s Table layout, each field will show up as a column in our table.
Let’s add the Business Name, Industry, City, Business Email and Main Business Phone fields.
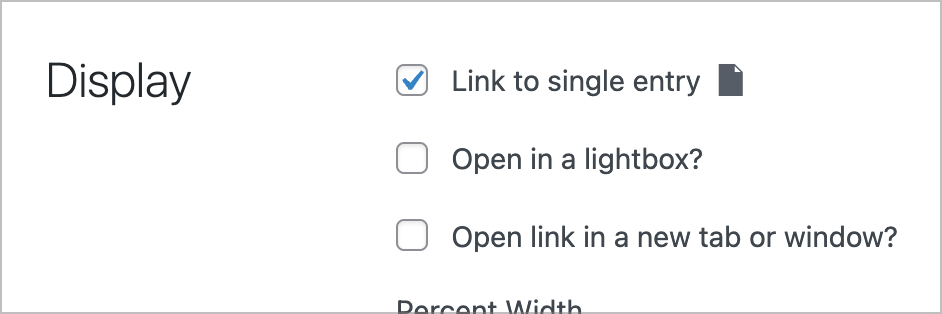
Finally, we’re going to make the Business Name field a link to the Single Entry page so users can click on it to view additional information! We can do this by opening the field settings and checking the Link to single entry box.
Here’s what the Multiple Entries layout looks like on the front end:
Now let’s turn our attention to the Single Entry layout.
Configure the Single Entry Layout
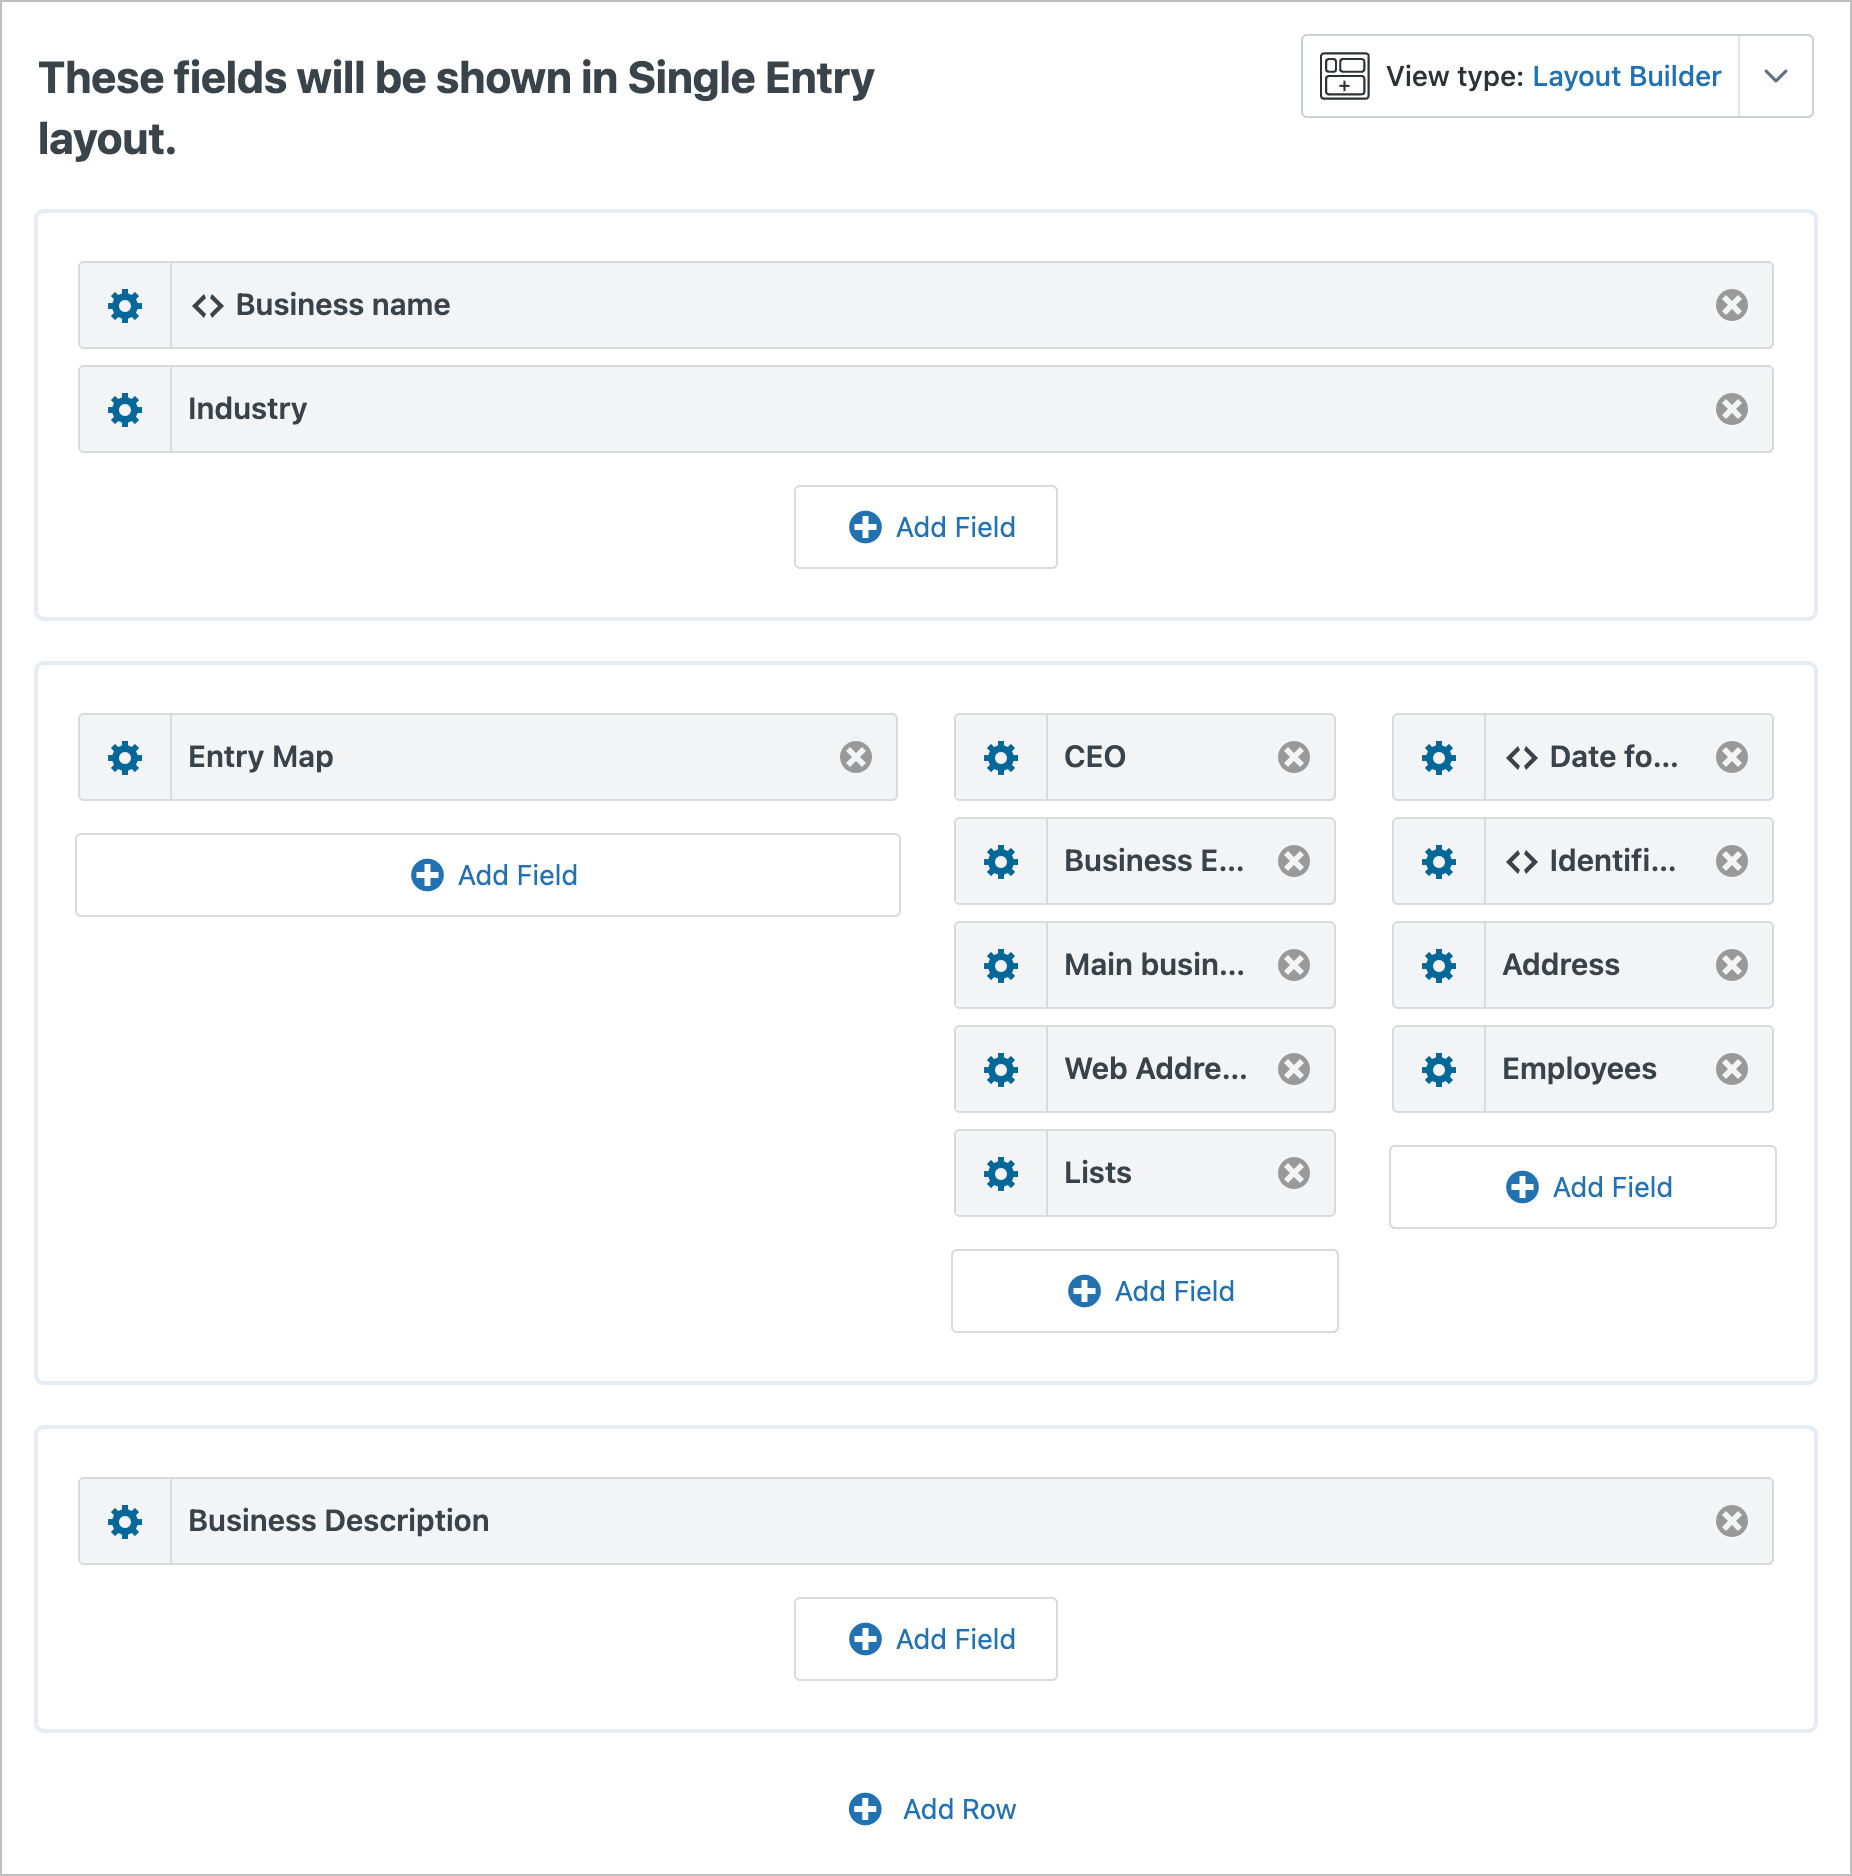
To configure the Single Entry page, we’ll click on the Single Entry Layout tab at the top of the View editor. Now, let’s change the View type to Layout Builder. This will enable us to create directory pages with rows and columns, like a page builder!

By clicking the Add Row button, we can add new rows to our layout with different column structures.

This enables us to create attractive listing pages for businesses that submit to our directory.
Here’s what the listing page looks like on the front end:
We’re almost there! Next, we need to enable entry editing.
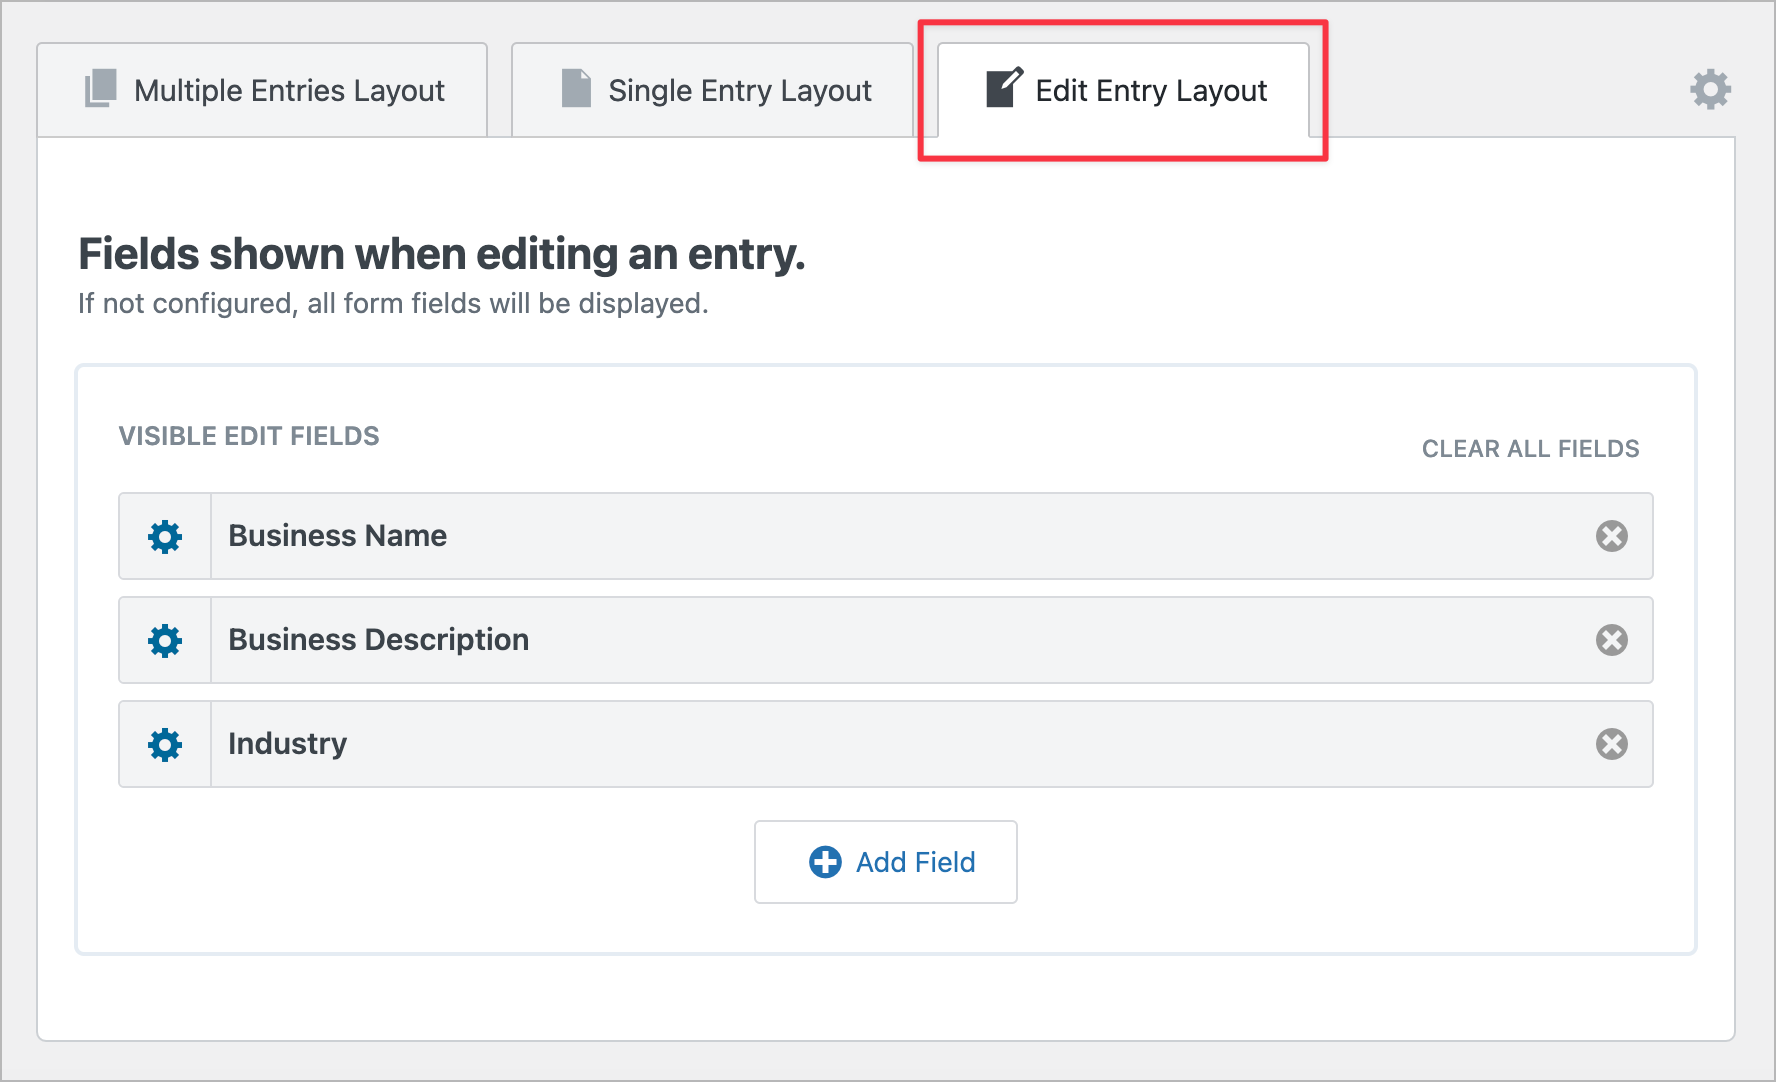
Configure the Edit Entry Layout
GravityView allows users to edit entries that they create—directly from the front end! Administrators can specify which fields are editable by adding them to GravityView’s Edit Entry layout. For this example, we’ll add the Business Name, Business Description and Industry fields.
Configure the View Settings
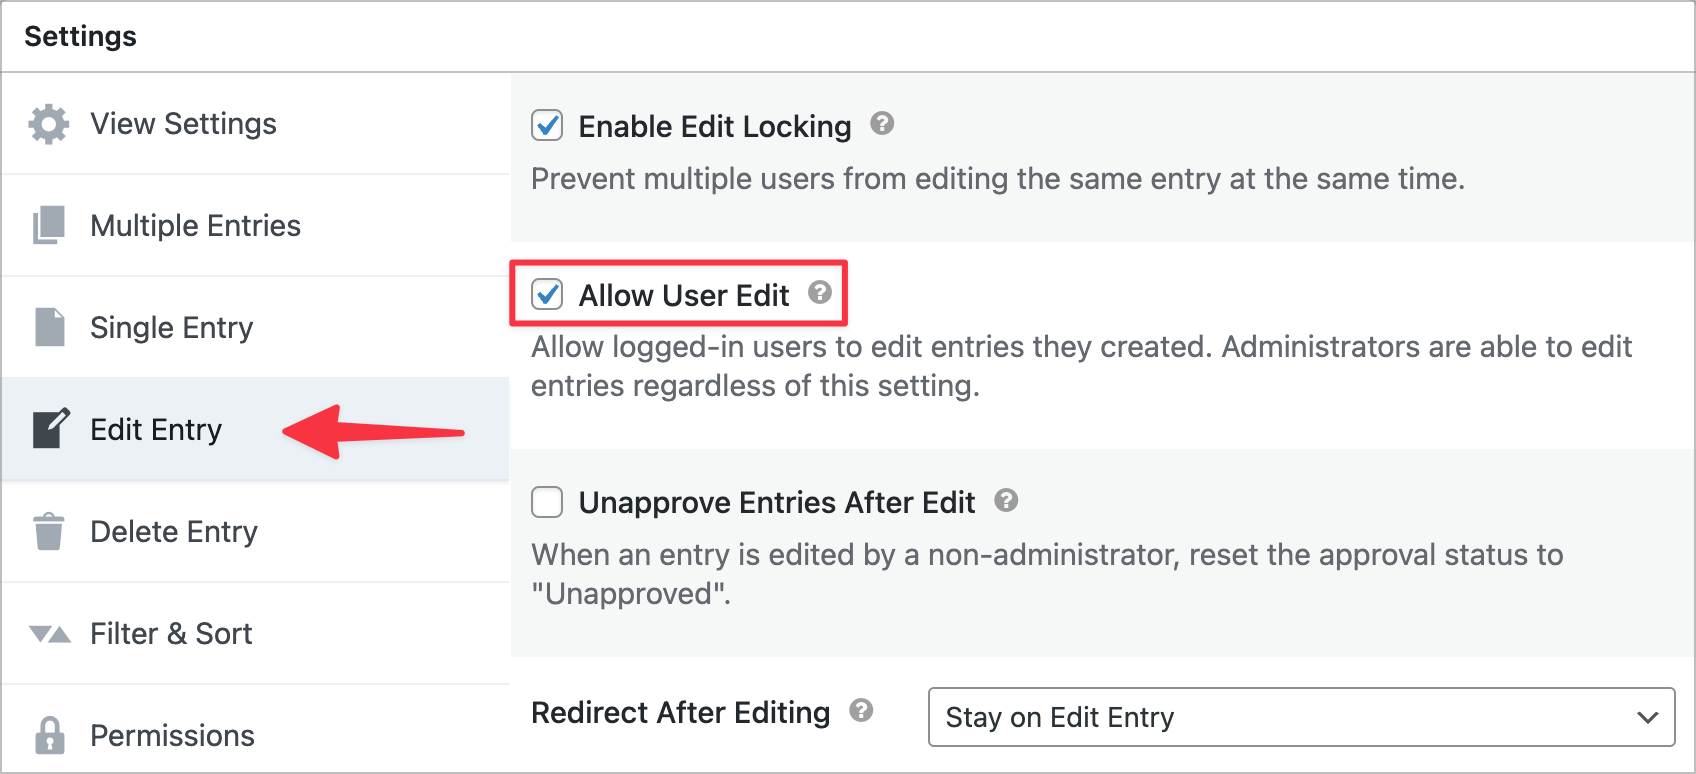
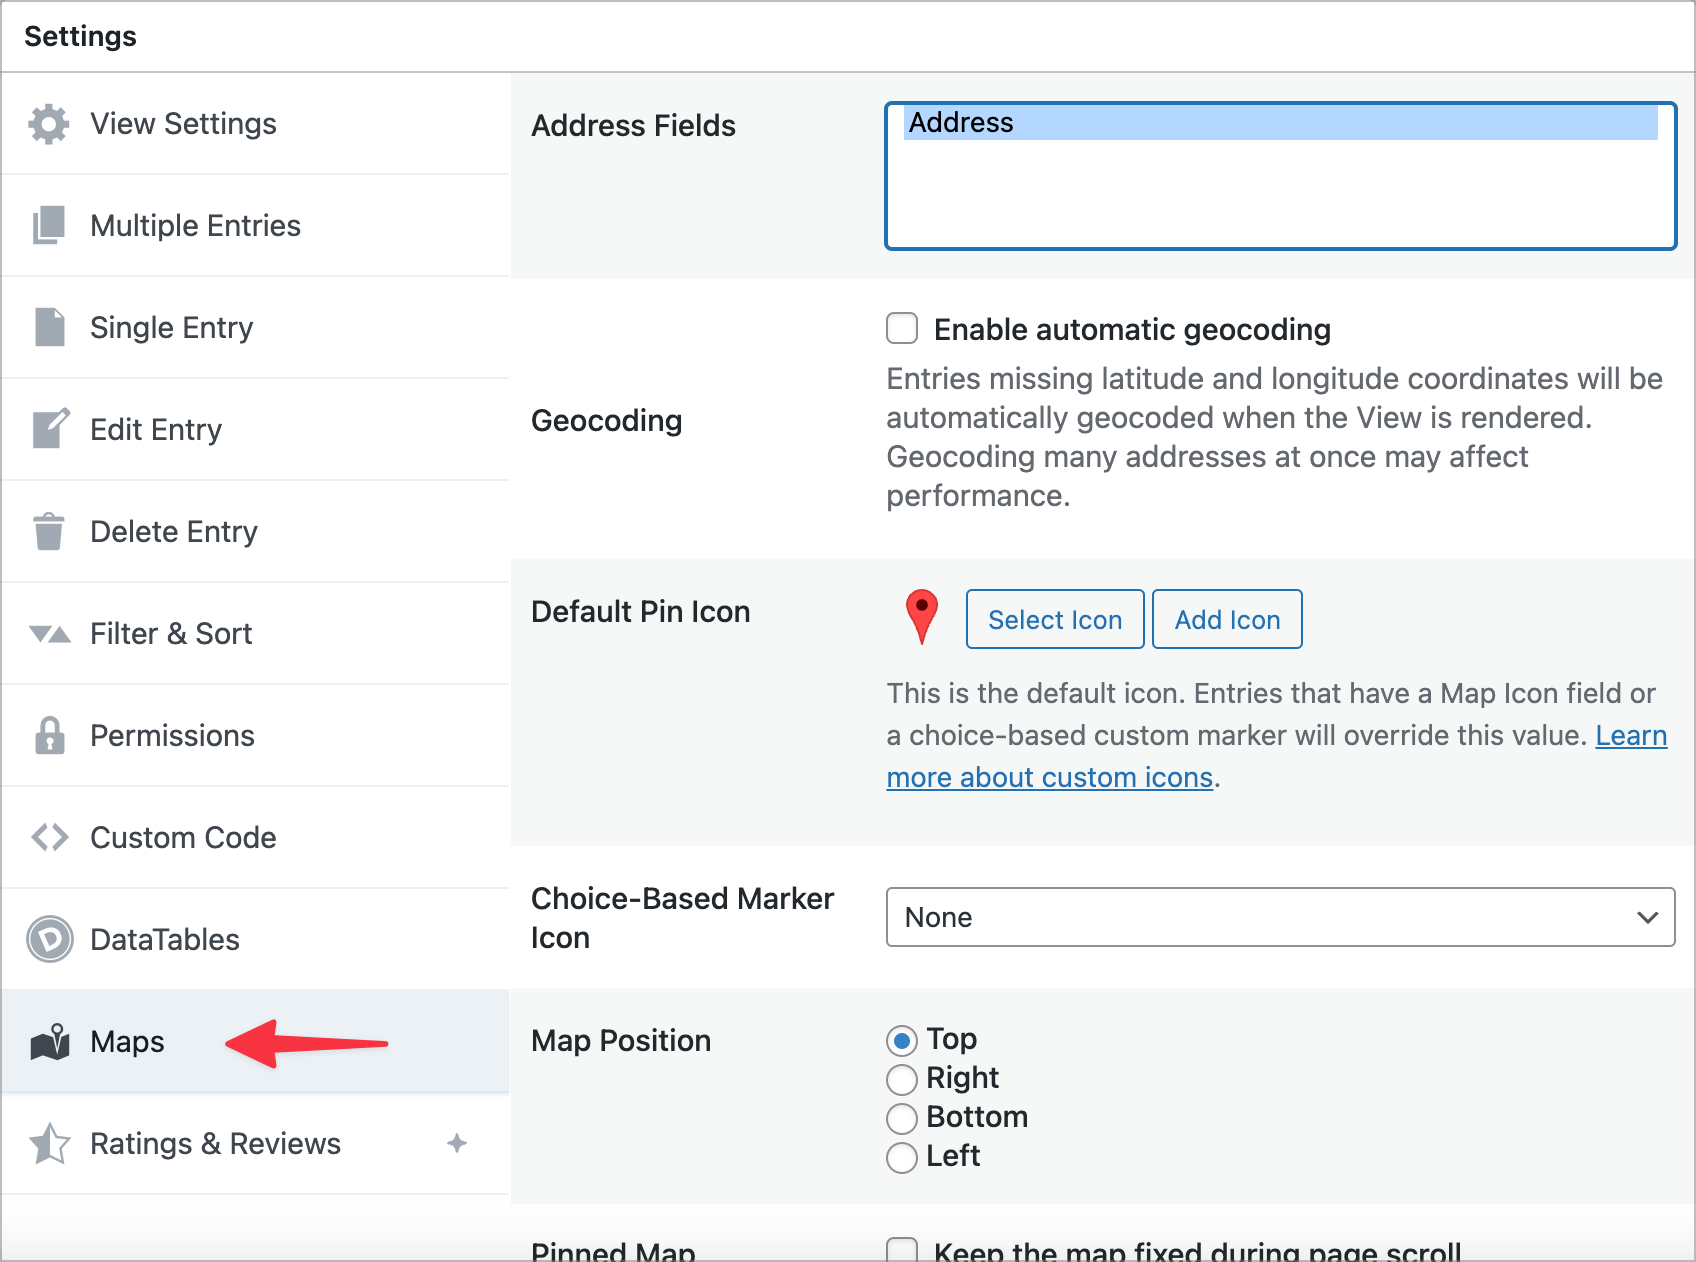
Finally, we need to configure the View settings. First, we’ll click on the Edit Entry tab and check the box labeled Allow User Edit. This will enable GravityView’s front-end editing feature.
Next, we’ll click on the Maps tab, and select the Address field that we want to show on the map. We can also configure the remaining map settings here.
That’s it!
Bonus: Add More Features
With GravityKit’s add-ons and extensions, you can add even more features to your directory:
- Turn your long submission forms into multi-page forms for an enhanced user experience.
- Use the GravityView’s Advanced Filter to only show entries created by the currently logged-in user.
- Use the GravityView’s DataTables Layout for extensive sorting, filtering and exporting options.
- Use the GravityView’s ratings & Reviews extension to allow users to rate and comment on directory listings.
- Lots more!
Start Building Your Gravity Forms-Powered Directory Today!
In this post, we showed you how to build a dynamic business directory using Gravity Forms and GravityView. Let visitors browse listings, search by keywords or location, and view detailed business profiles—all from an intuitive, user-friendly interface.
With GravityView Pro, you can take your directory even further by adding advanced search filters, custom layouts, or even monetization options like paid listings. The possibilities are endless!