How to Integrate Gravity Forms with the Drip Email Marketing Service
Integrating Gravity Forms with the Drip email marketing platform can help you automate how you manage and communicate with your audience. While the former excels at collecting subscribers, the latter is great at everything that comes afterwards.
In addition, making the two work together is super easy thanks to the Gravity Forms Zapier Add-On. In this guide, we’ll walk you through the entire setup process. You’ll learn all about the benefits of Drip, why it’s a great combination with Gravity Forms, and how to sync subscriber data between them.
Why Use Drip for Your Email Marketing?
Drip is an email marketing platform mainly focused on e-commerce but it can also be used for other purposes. Here’s what it offers for managing your email marketing:
- Targeted messages – Drip allows you to send personalized emails based on subscriber behavior, ensuring that your messaging is relevant and effective. This makes it easier to nurture leads and convert them into loyal customers.
- Automation workflows – With the visual workflow builder, you can create automatic messages for various stages of the customer journey. Whether it’s a welcome email series, cart abandonment emails, or event reminders, Drip does it all.
- Dynamic segmentation – The segmentation tools enable you to automatically categorize your audience based on their behavior, preferences, and other data.
- Multi-channel marketing – Drip integrates with email, social media, and onsite campaigns, giving you the ability to reach your customers through multiple channels.
Plans for the platform start at $39/month for 2,500 subscribers and unlimited emails (at the time of writing). There is a 14-day free trial if you want to kick the tires first.
Getting to Know The Gravity Forms Zapier Add-On
As mentioned above, we’ll connect Drip and Gravity Forms via Zapier. If you are not familiar with this service, Zapier lets you establish connections between different apps and automate how they interact with one another. Its library includes almost 8,000 options including:
- Google Sheets (you can also use Excel), Docs, Drive, and other Google products
- CRMs like Pipedrive and Zendesk
- Other email marketing platforms, e.g. Brevo
- Project management tools like Asana and Podio
To use Gravity Forms with Zapier, you need the Gravity Forms Zapier Add-On. It is one of our most popular extensions and available with Gravity Forms Pro and Elite licenses. Get yours today or upgrade your license and only pay the prorated fee. Alternatively, you can follow along with this tutorial by creating a free Gravity Forms demo.
Connecting Drip and Gravity Forms: Step-by-Step Instructions
Alright, let’s get to the main part of the show. In the following, we’ll walk through how to send Gravity Forms entries to Drip via Zapier.
1. Sign Up for Drip and Find Your API Key
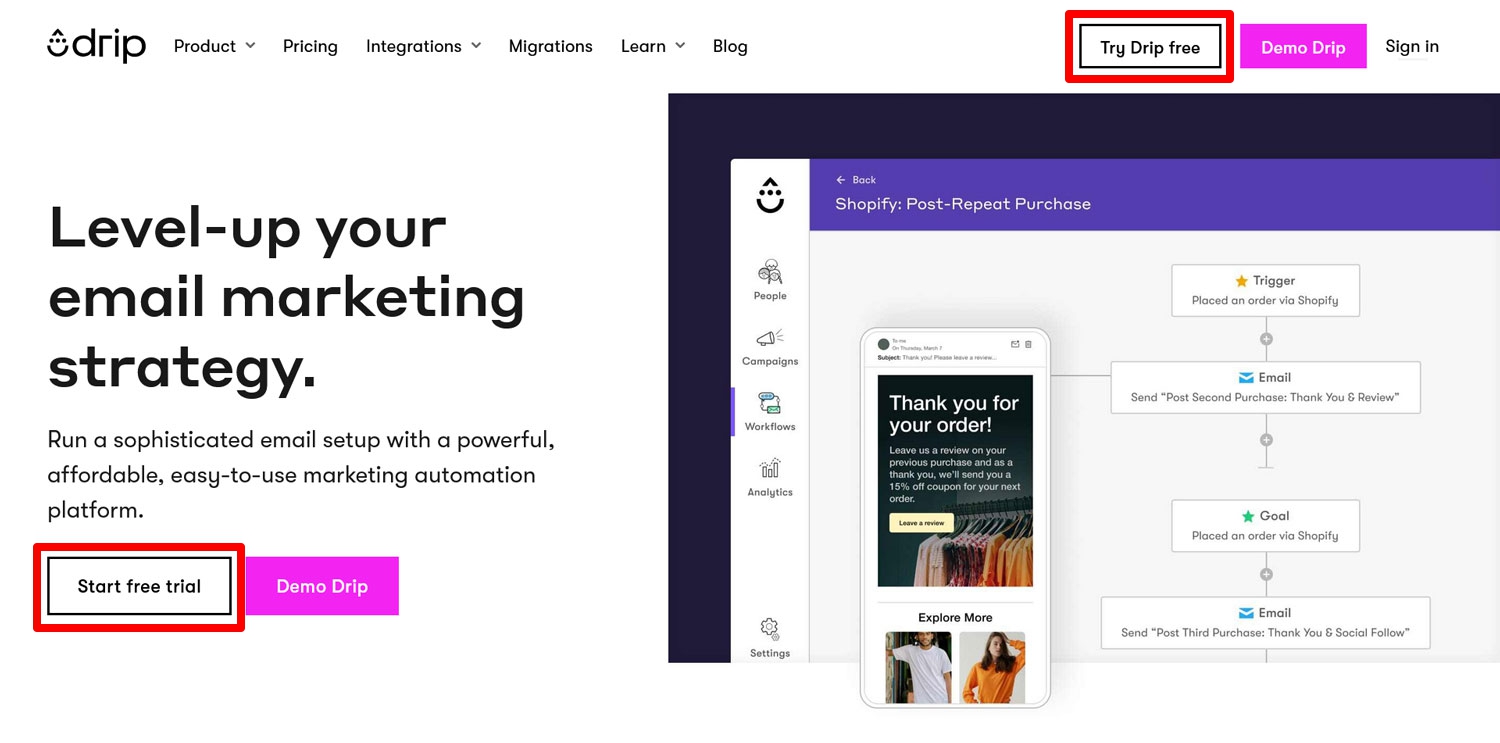
The first step is to create a Drip account if you don’t already have one. To do so, visit the Drip website and click on one of the buttons to start a free trial.
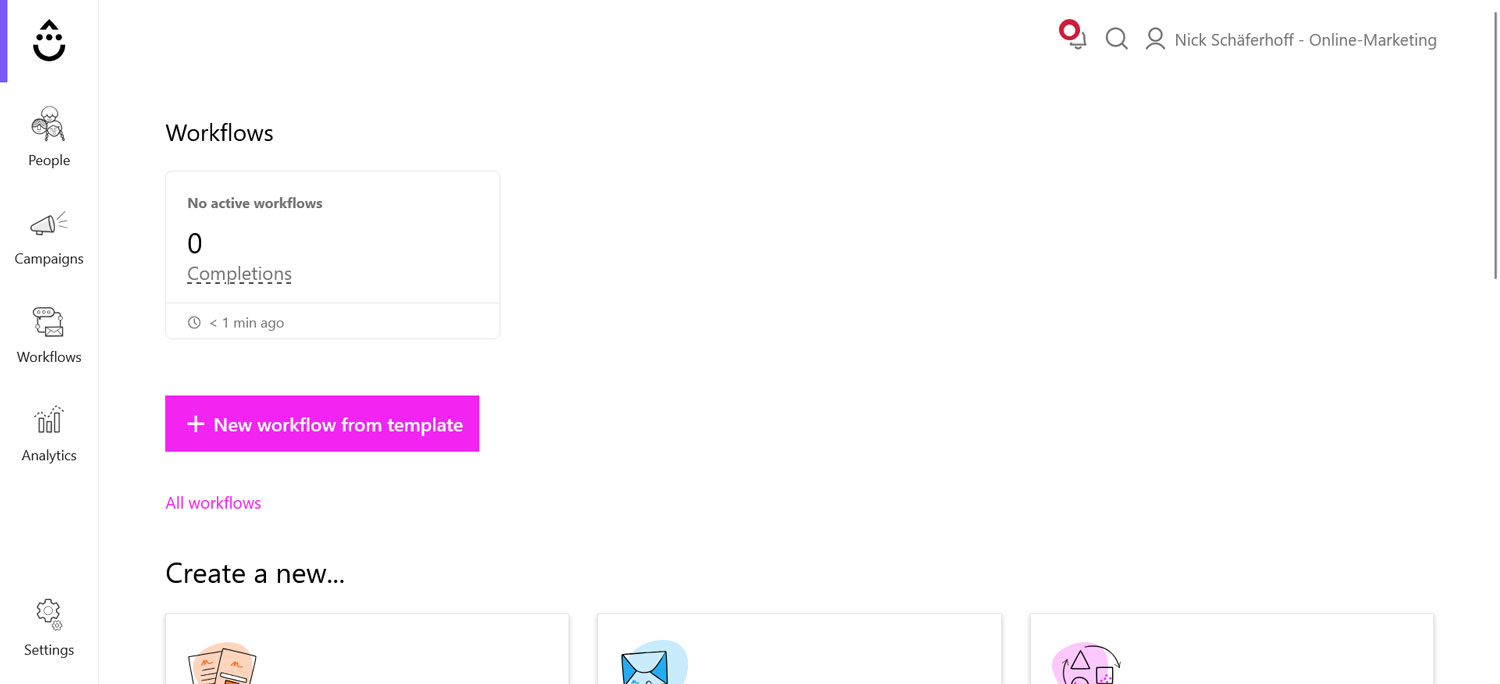
You can either sign up with an email address or your Shopify credentials. After setting up your profile, you’ll land straight in the Drip dashboard.
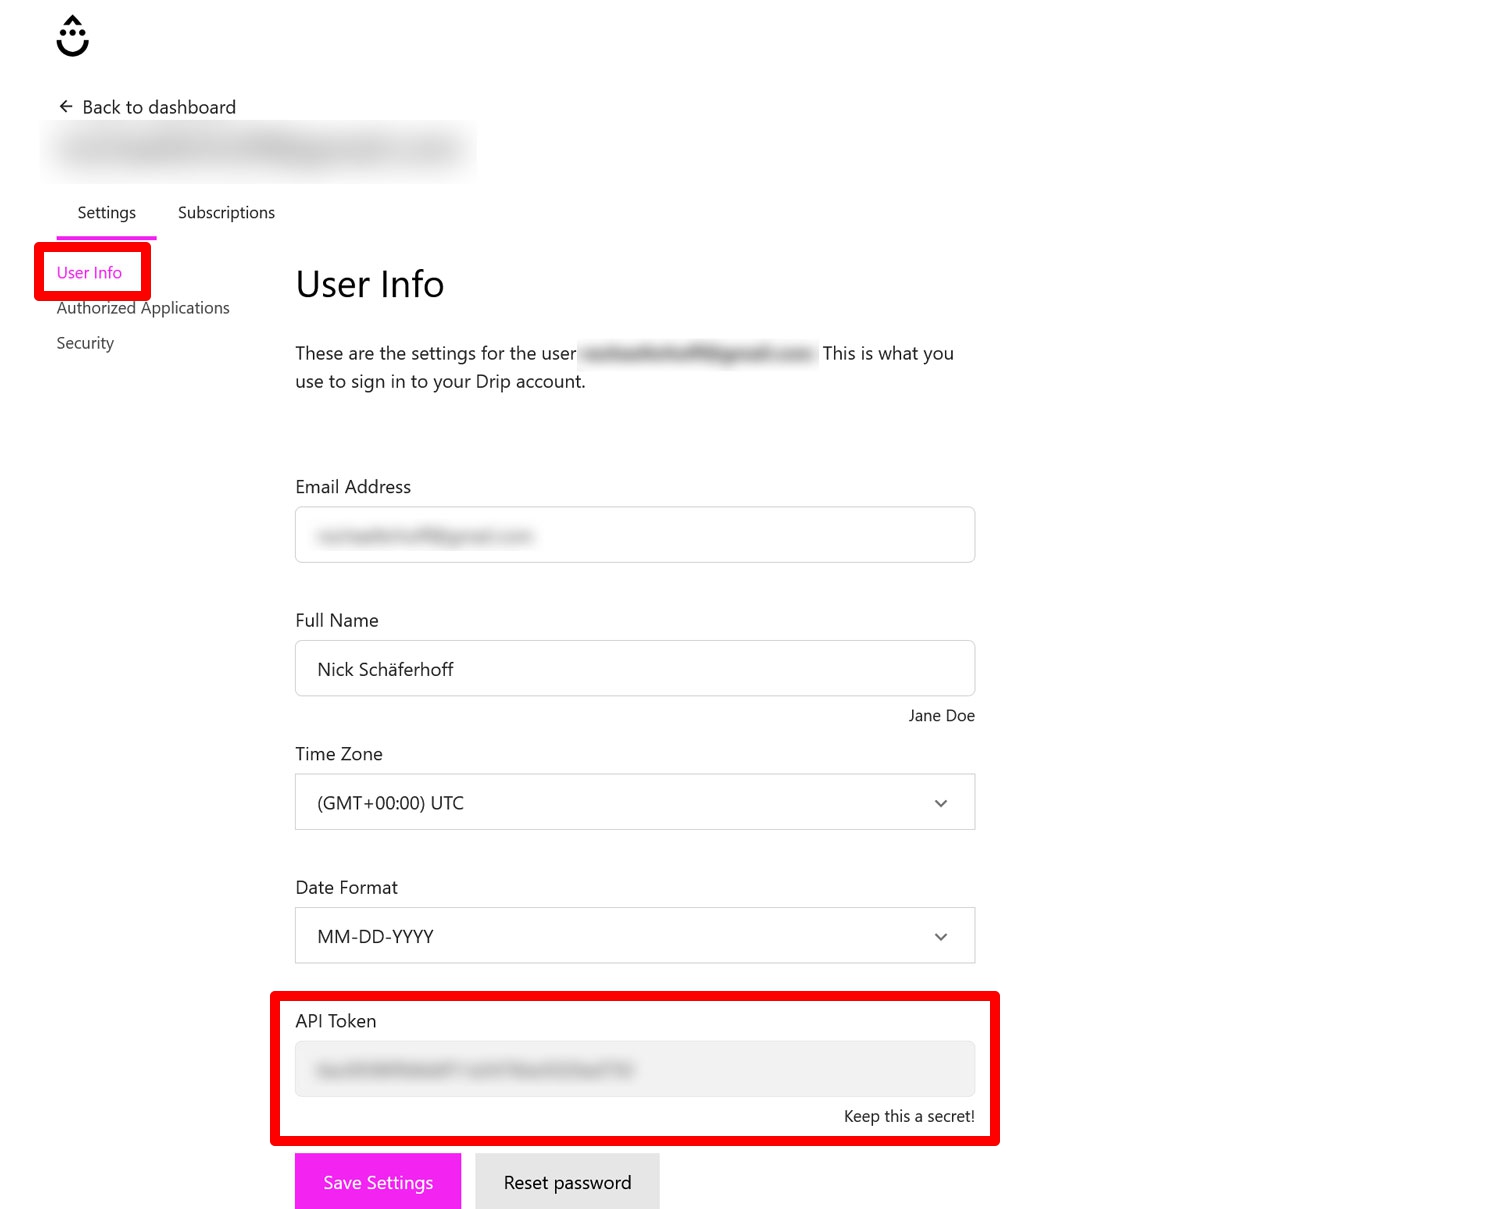
Your first task is to retrieve your API token. You will later use it to connect Drip with Gravity Forms.
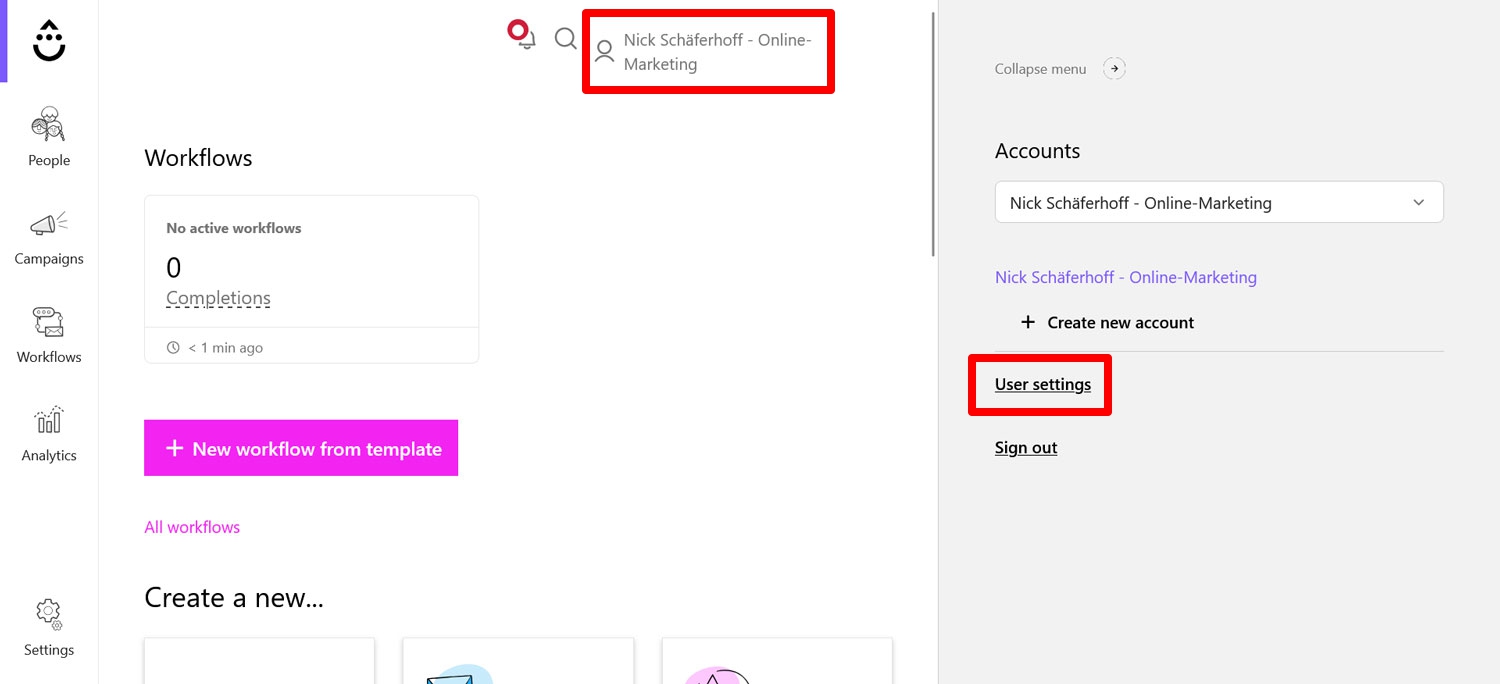
Click on your profile icon in the upper-right corner of the dashboard and select User Settings from the slide-in menu.
You can find your token at the bottom of Settings → User Info.
Keep it handy, you’ll need it soon.
2. Get a Zapier Account
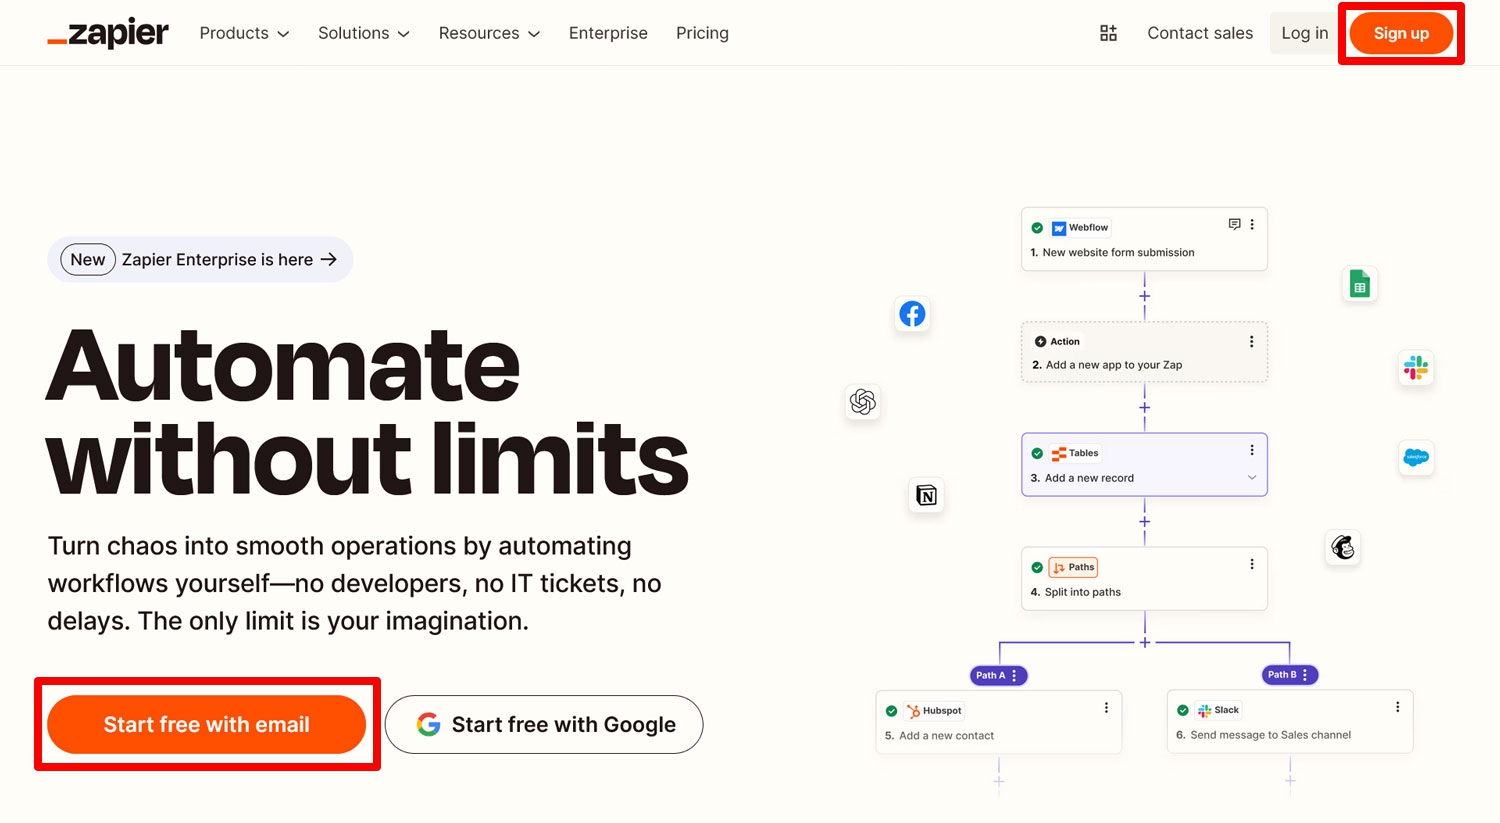
With your Drip API credentials ready, the next step is to sign up for Zapier. Go to Zapier’s website and click one of the many sign-up buttons.
You can create an account using your email address, or use a Google or Microsoft account. The free account is enough for our purpose.
3. Install the Gravity Forms Zapier Add-On
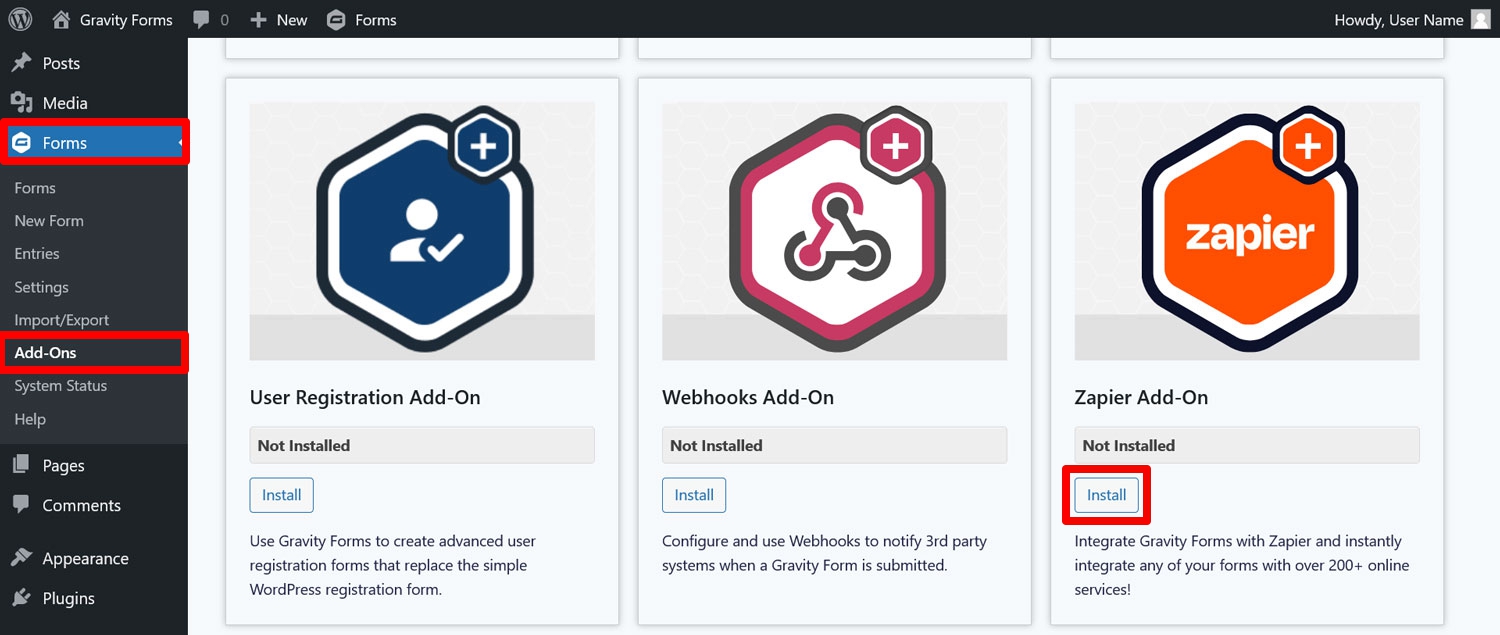
Next, install the Gravity Forms Zapier Add-On. For that, log in to your WordPress website and go to Forms → Add-Ons. Look for the Zapier extension and click Install.
Once the installation finishes, don’t forget to activate the add-on. After that, you need to create an API key for the Gravity Forms REST API. This will be important when connecting your site to Zapier later.
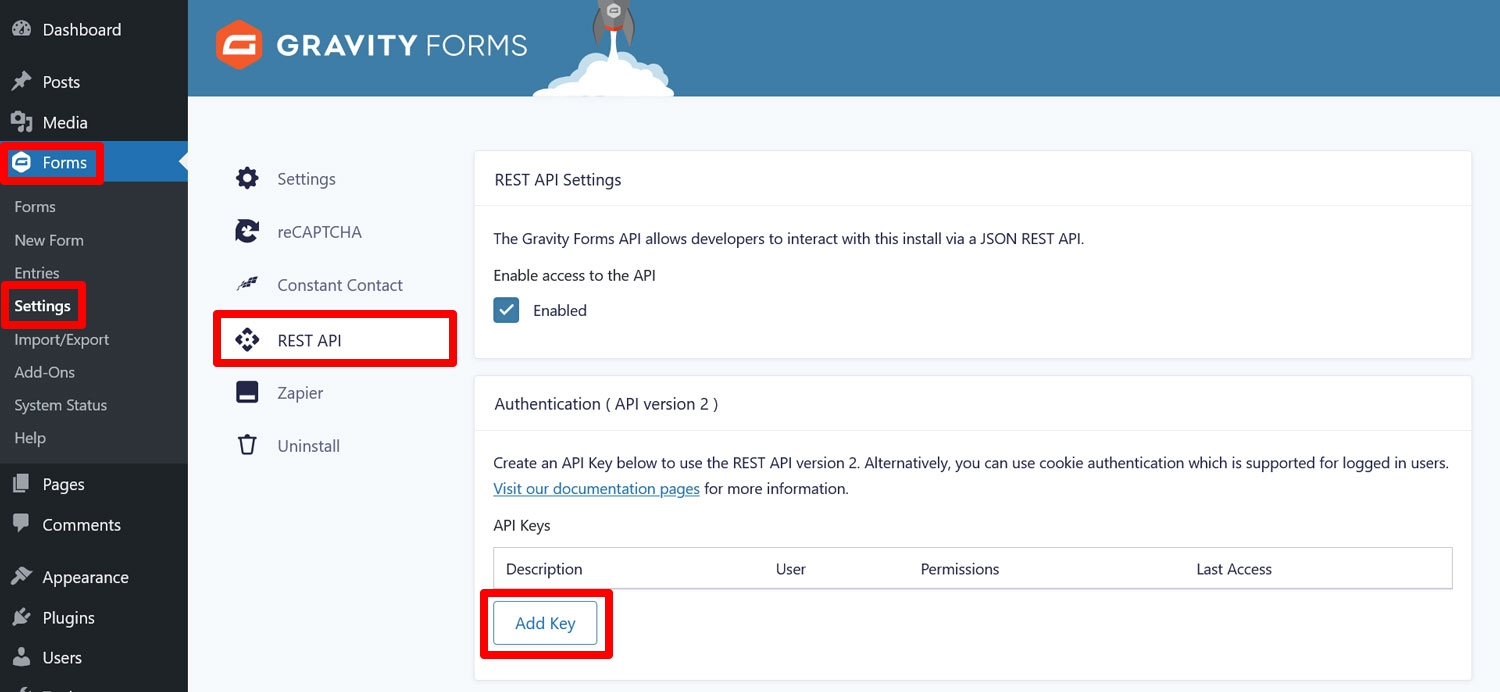
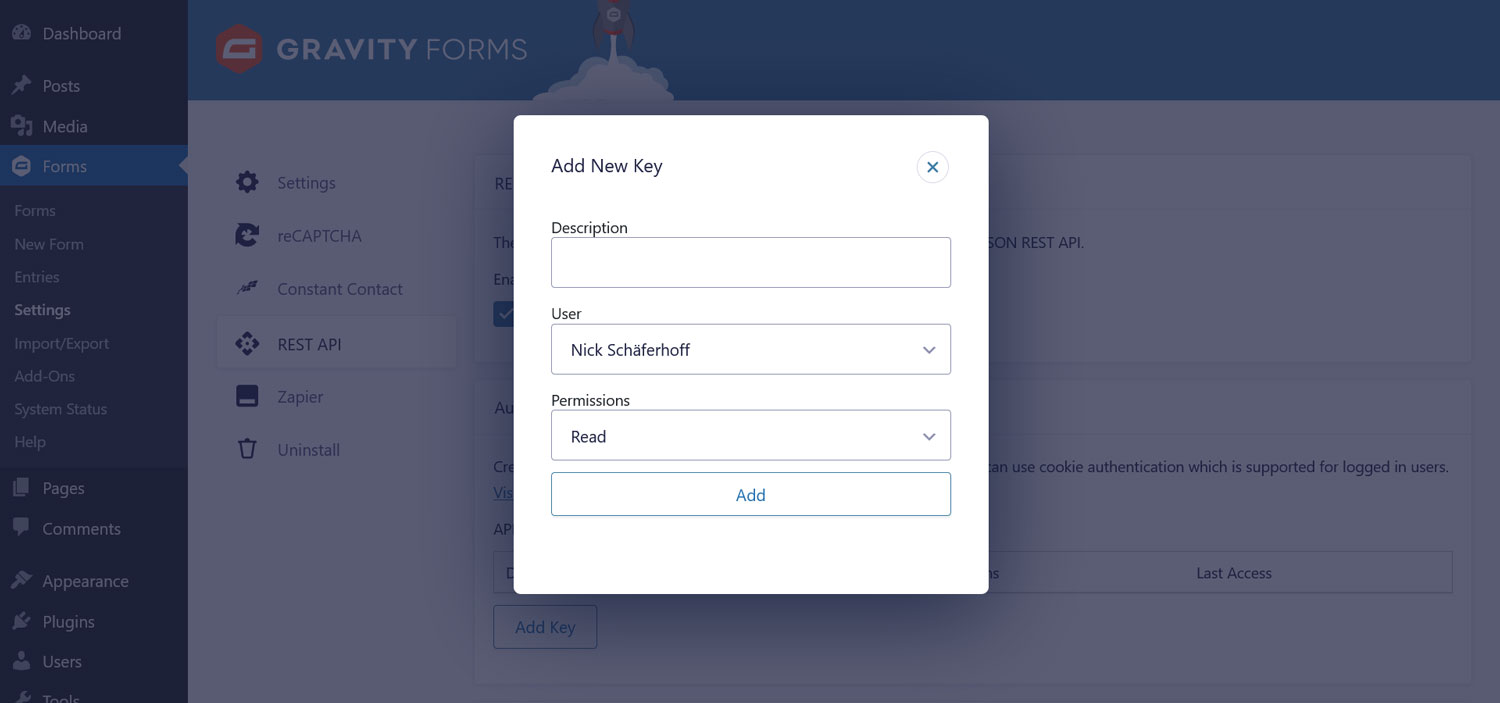
To do this, go to Forms → Settings → REST API. Check the box to enable the API at the top, then click Add Key under Authentication (API version 2). Be sure to also take note of the version number.
A panel will appear, in which you need to provide the following information:
- Description – To distinguish between different API keys.
- User – Pick one with the permission level to view and edit entries.
- Permissions – Make sure to set them to Read/Write.
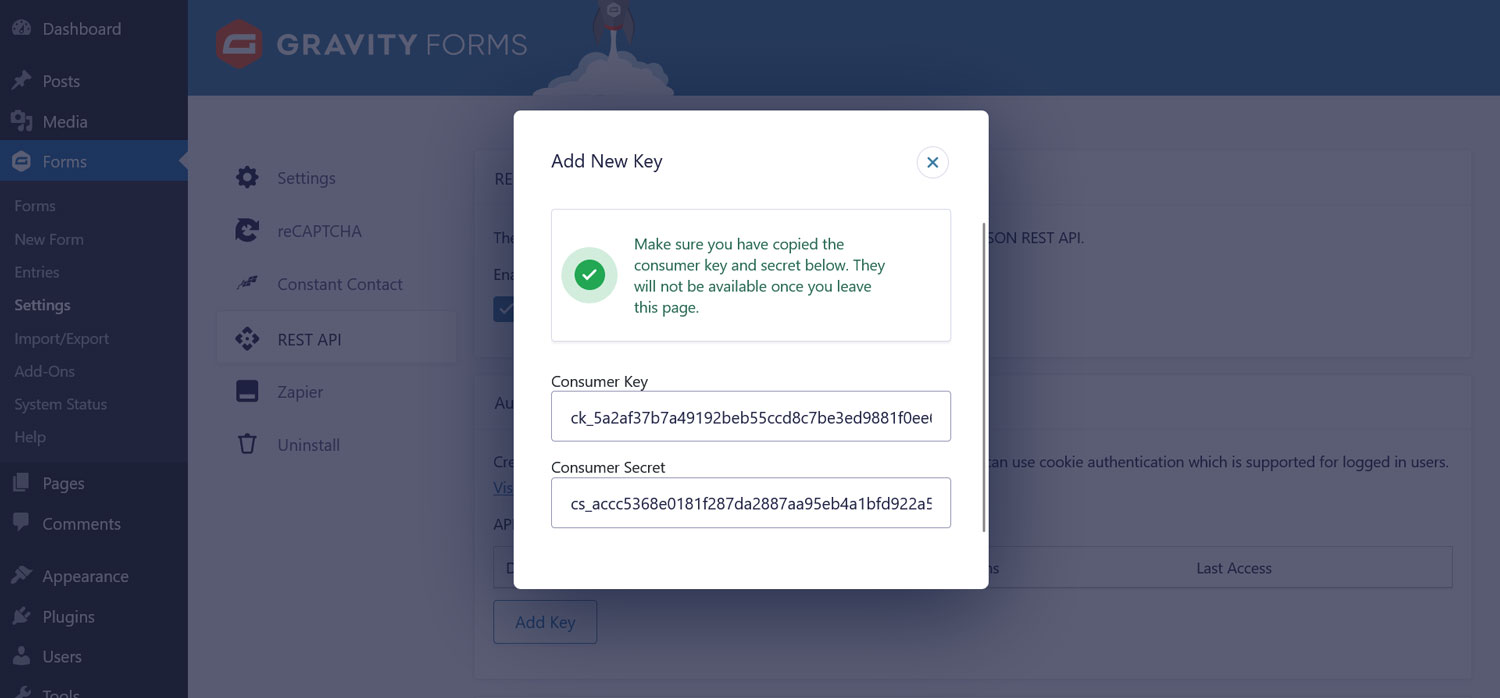
Once finished, click Add to display your consumer key and consumer secret.
It’s important that you copy and store them in a safe place, since they won’t show up again. When you have done so, save the settings by clicking Update at the bottom of the page.
4. Create and Customize Your Form
The next step is to create your form and customize it to capture the necessary data.
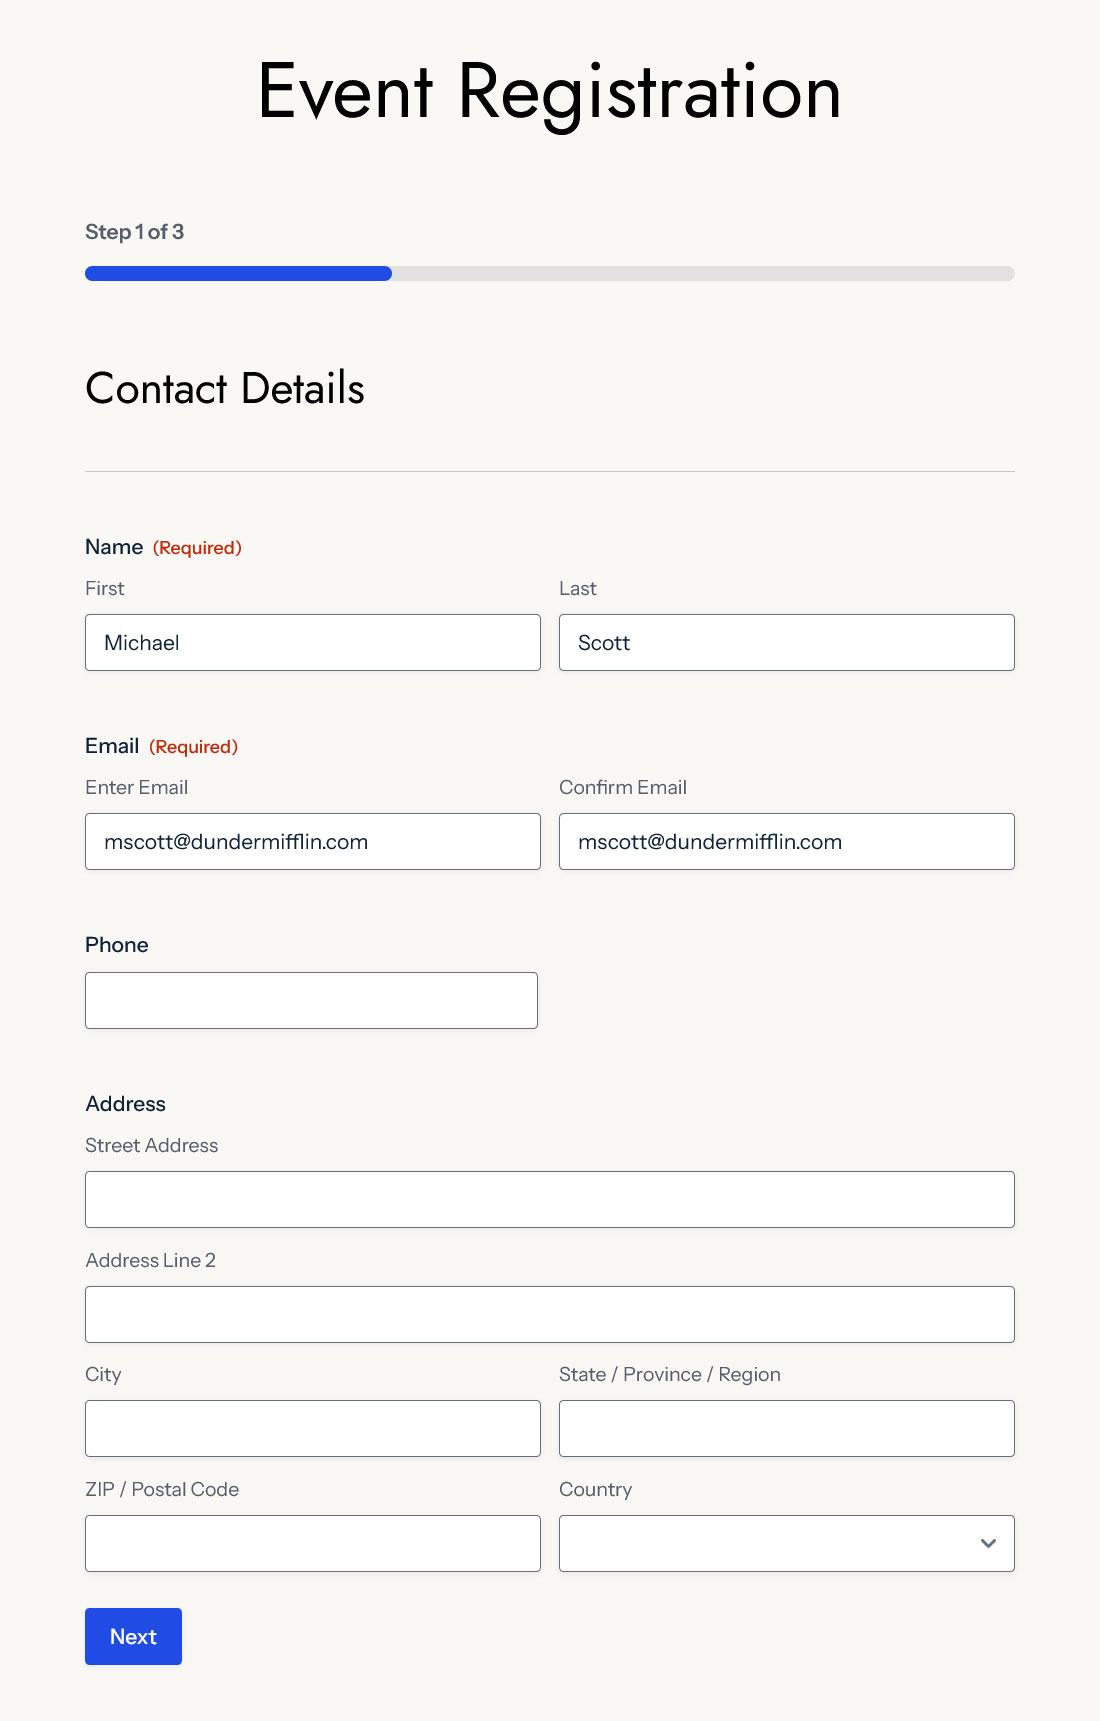
In this example, we’ll be using the Event Registration Form from the template library. It’s a good candidate for an email series and already has a number of useful form fields, which makes it quicker to customize. Naturally, you can also start with an empty form or a different template.
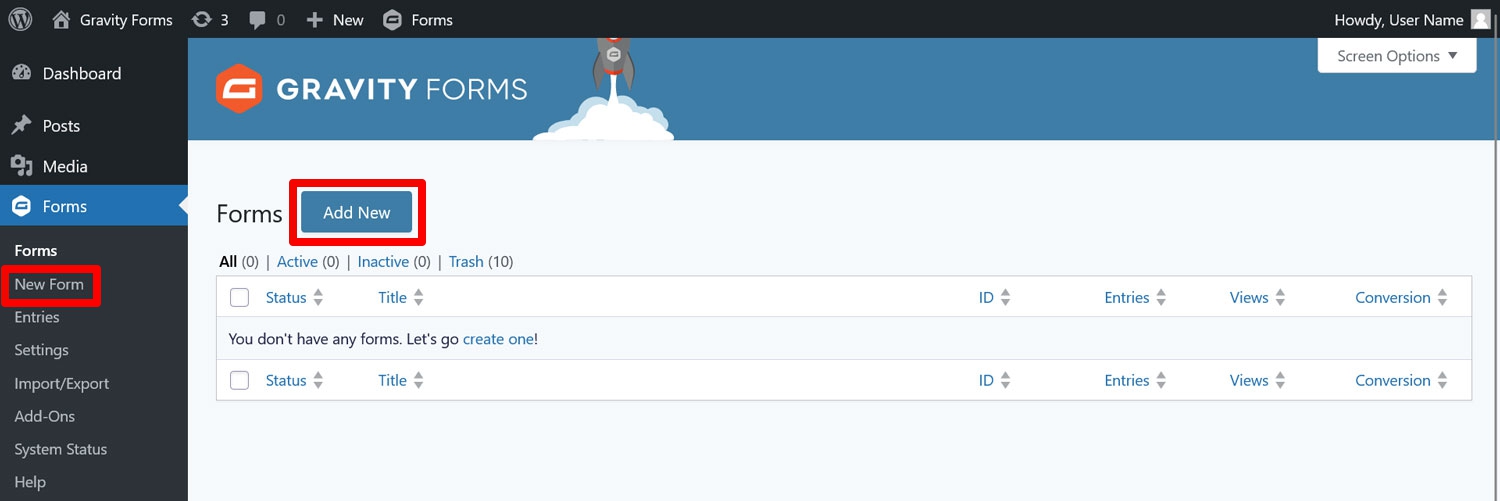
First, click on Forms → New Form/Add New in your website’s administration interface.
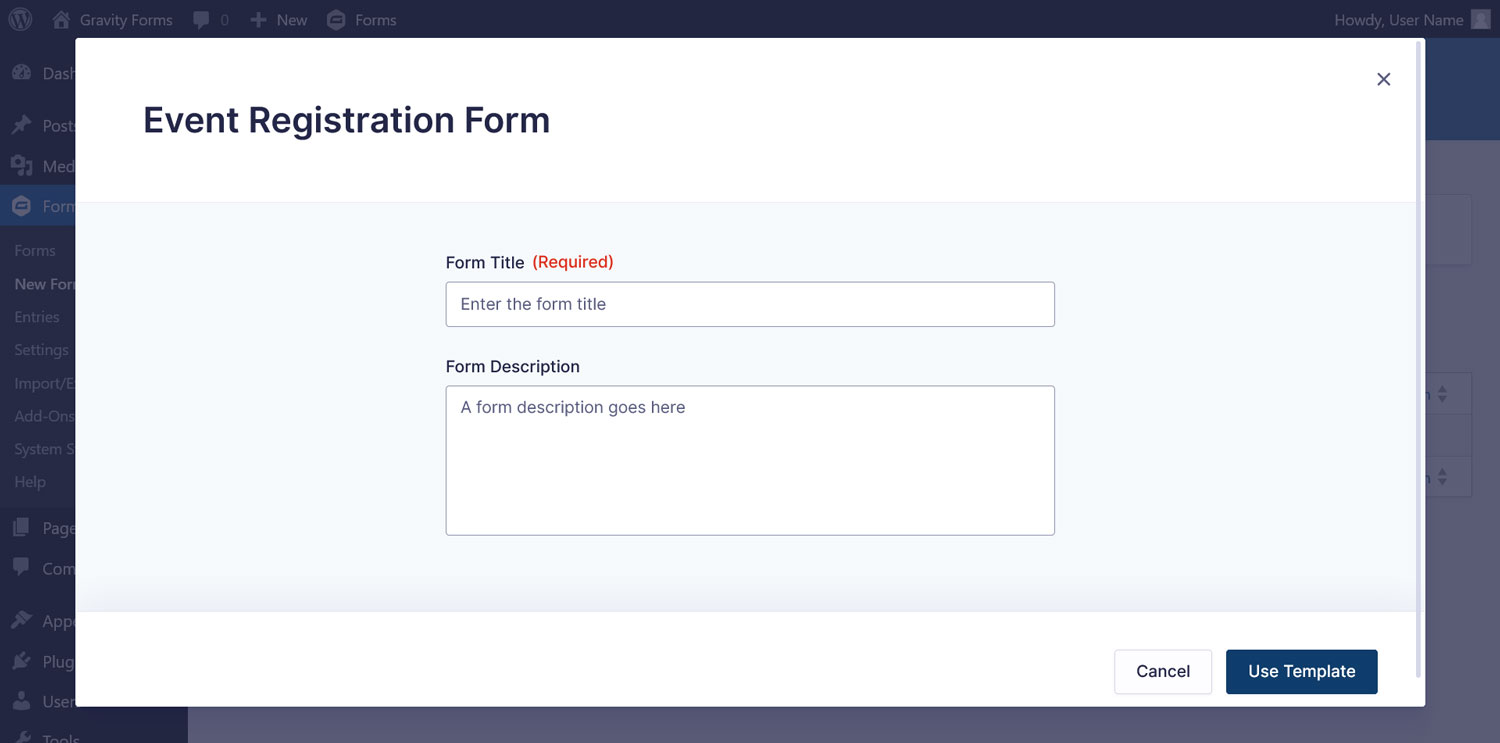
Next, find and hover over the Event Registration Form, then click Use Template.
Fill out the Form Title, then click Use Template.
This will bring you to the Gravity Forms drag-and-drop form editor.
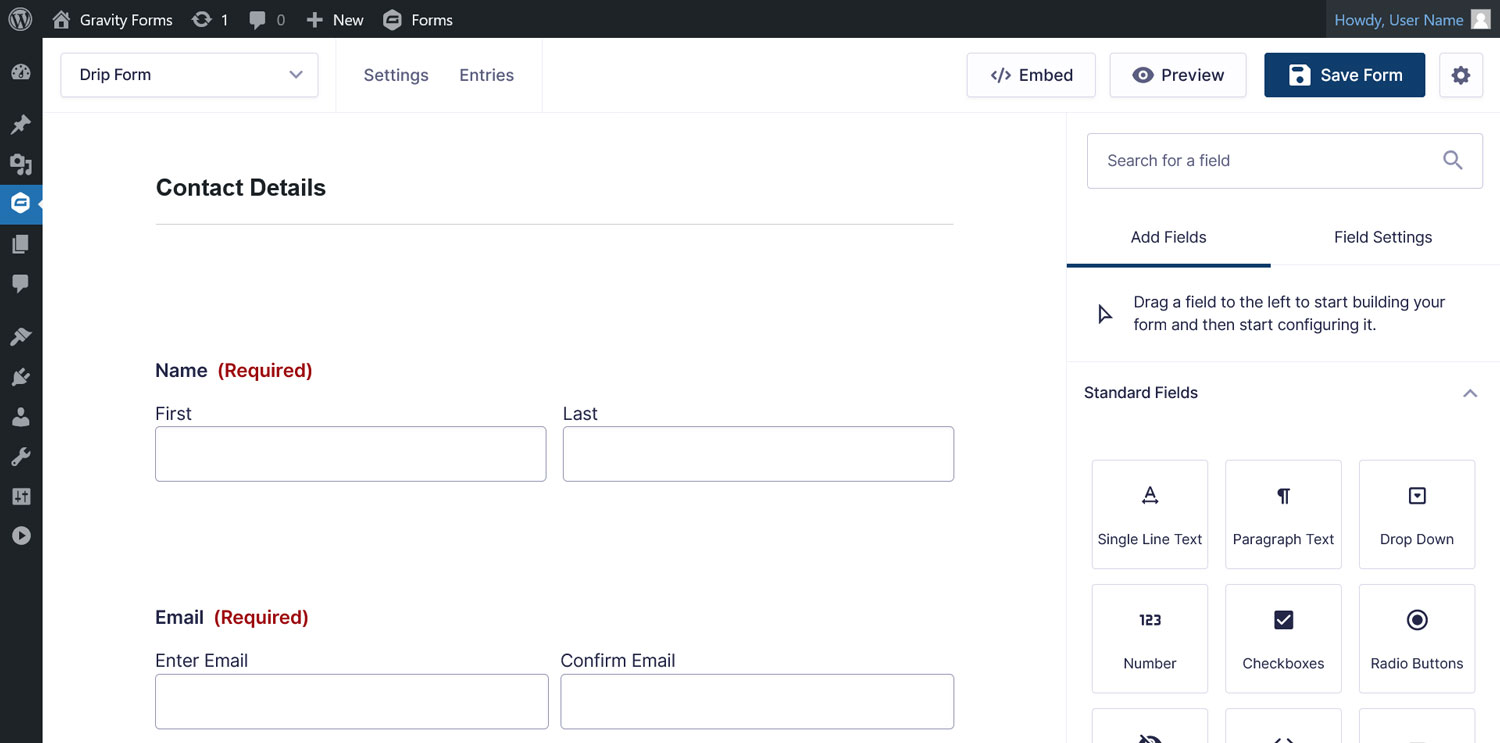
Since we are using a template, the form will already contain some fields:
- Contact details – name, email, phone number, address
- Event details – attendee gender, age, and how they heard about the event
- Payment details – type and number of tickets, payment option
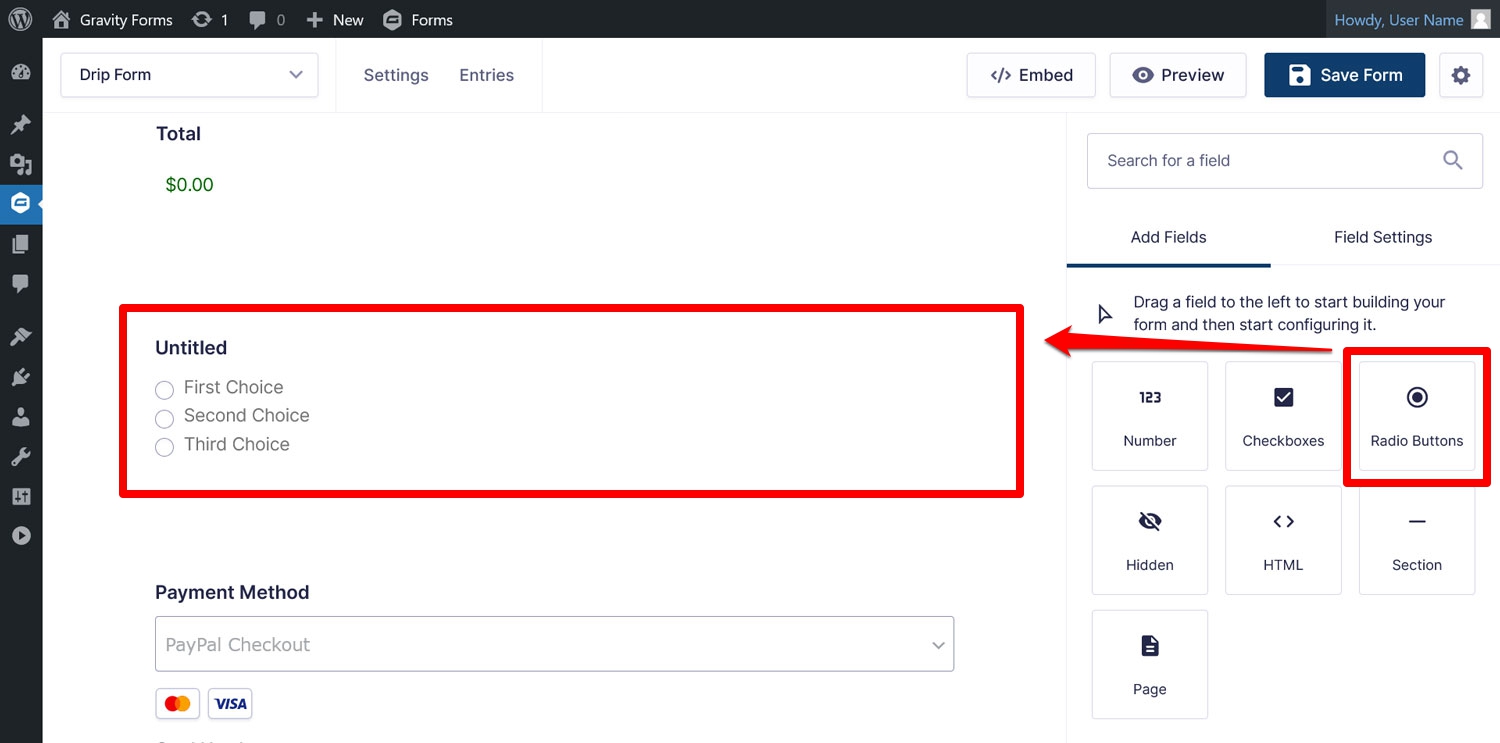
Every form template is fully customizable. You can easily add, duplicate, or delete form fields, as well as rearrange the order and position of the fields.
In addition, when you click on an existing form field, you can edit that specific, adjusting the content, appearance, and more.
Remember that the information you collect in these fields can later be mapped to Drip to segment your audience based on custom criteria.
For example, you could add a field where attendees can choose their dietary preferences and then use that information to make Drip’s automation more personalized and effective.
Once you are happy with your form, don’t forget to save it.
5. Connect Zapier to Gravity Forms
With your form in hand, it’s time to move over to Zapier. Here, we want to build a “Zap”, which is what Zapier calls their automations. You can build a Zap from scratch or use one of the many existing blueprints.
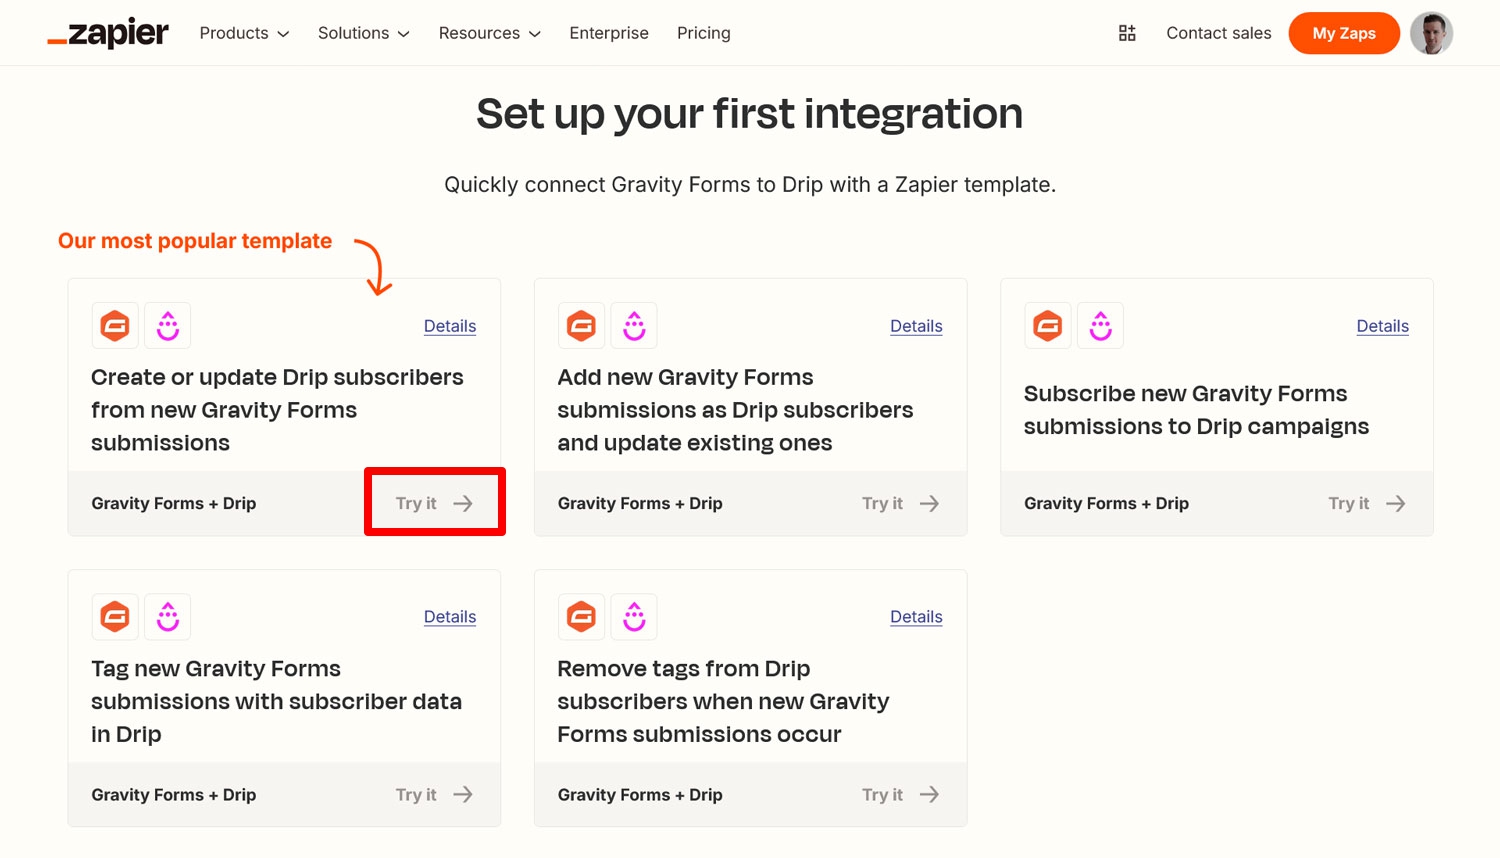
For example, Zapier’s Gravity Forms Drip integrations page has an existing Zap which can automatically create or update subscribers from form submissions.
That’s exactly what we want, so click Try it to get started.
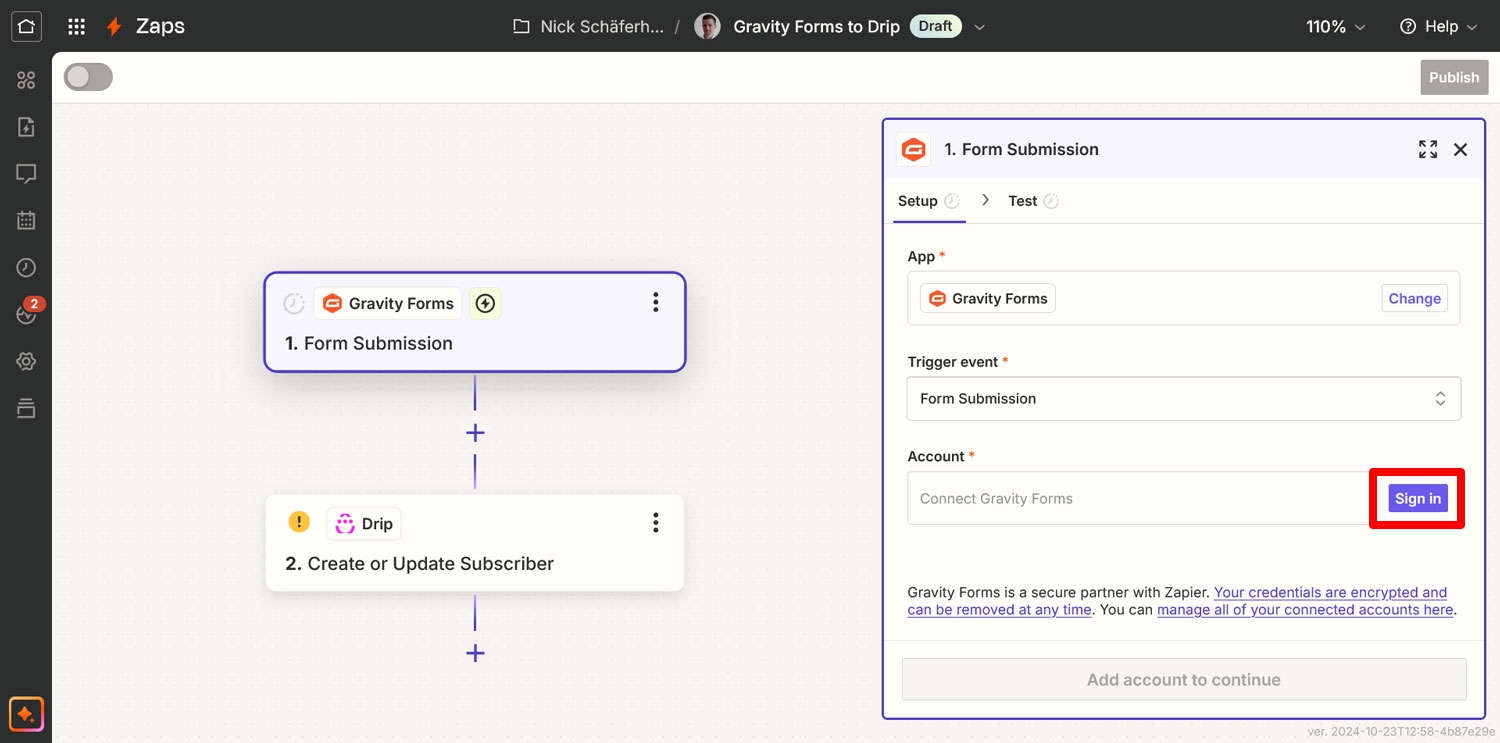
On the screen that follows, your first job is to name your Zap at the top. Next, click Sign in for your Gravity Forms trigger.
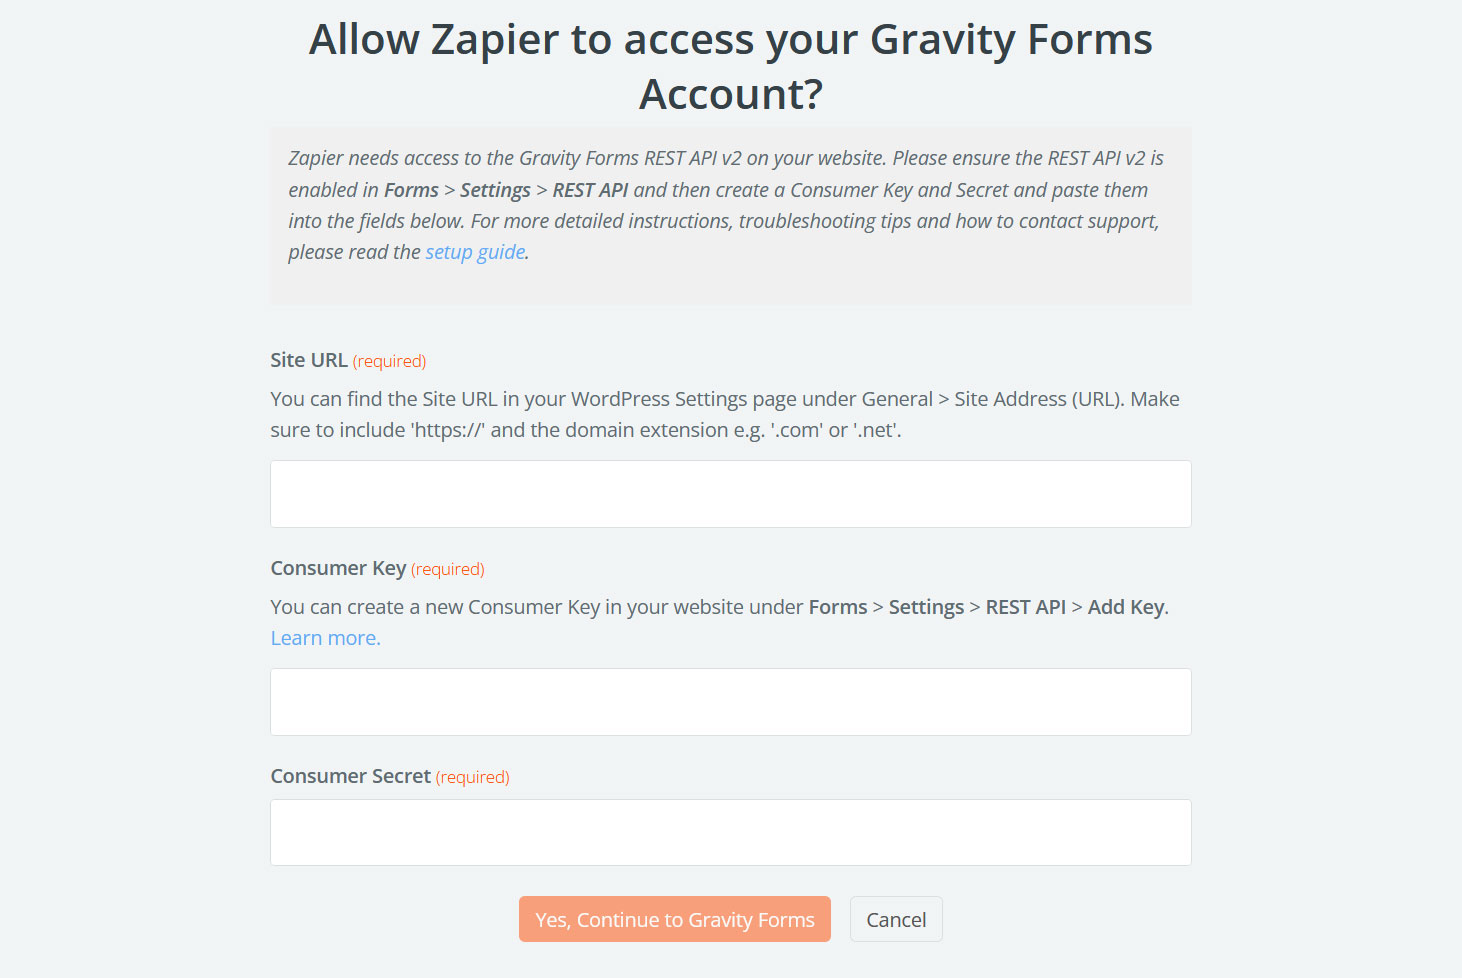
This will open a form in a new window where you need to provide your site URL as well as the consumer key and consumer secret from earlier.
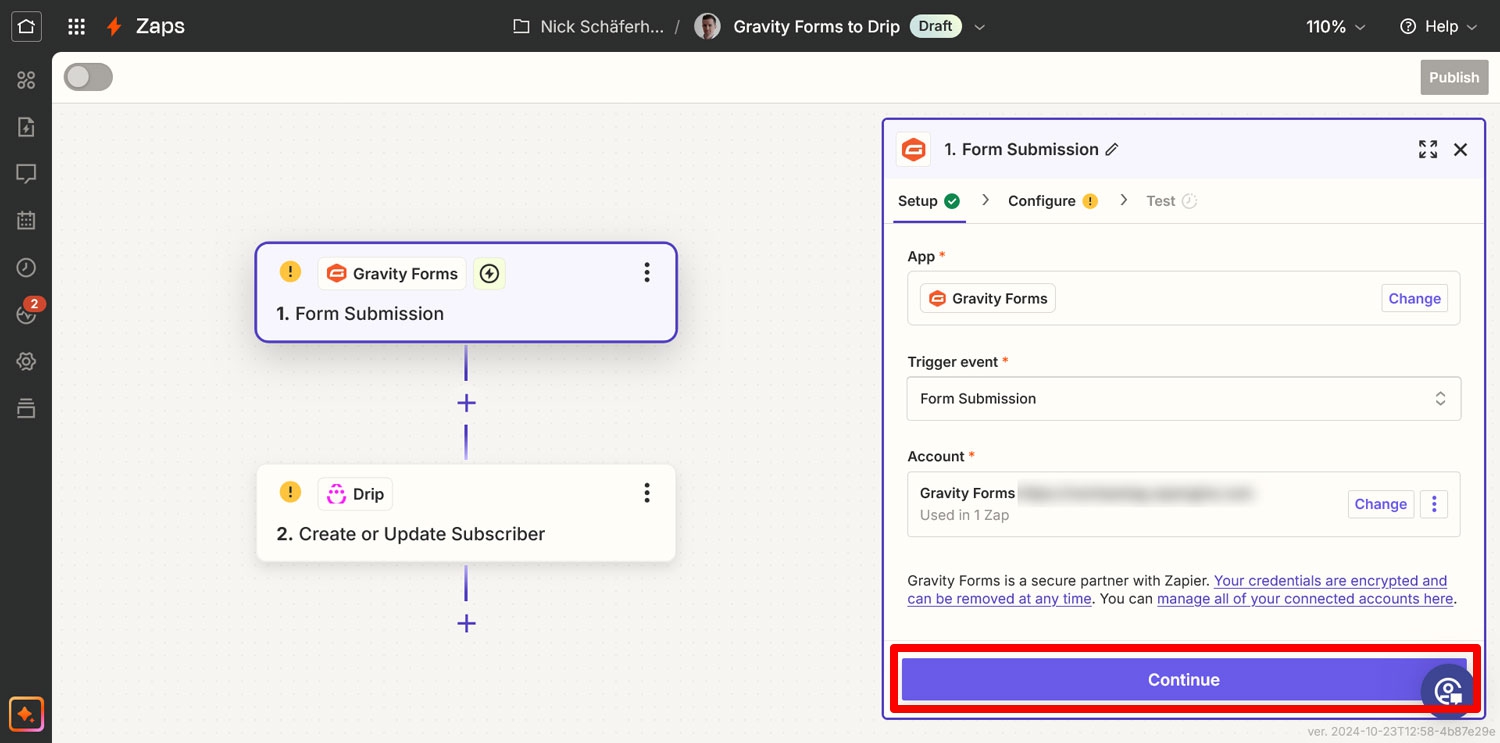
Input the information, then click Yes, Continue to Gravity Forms. This should show the connection as established in Zapier’s interface. Click Continue to move on.
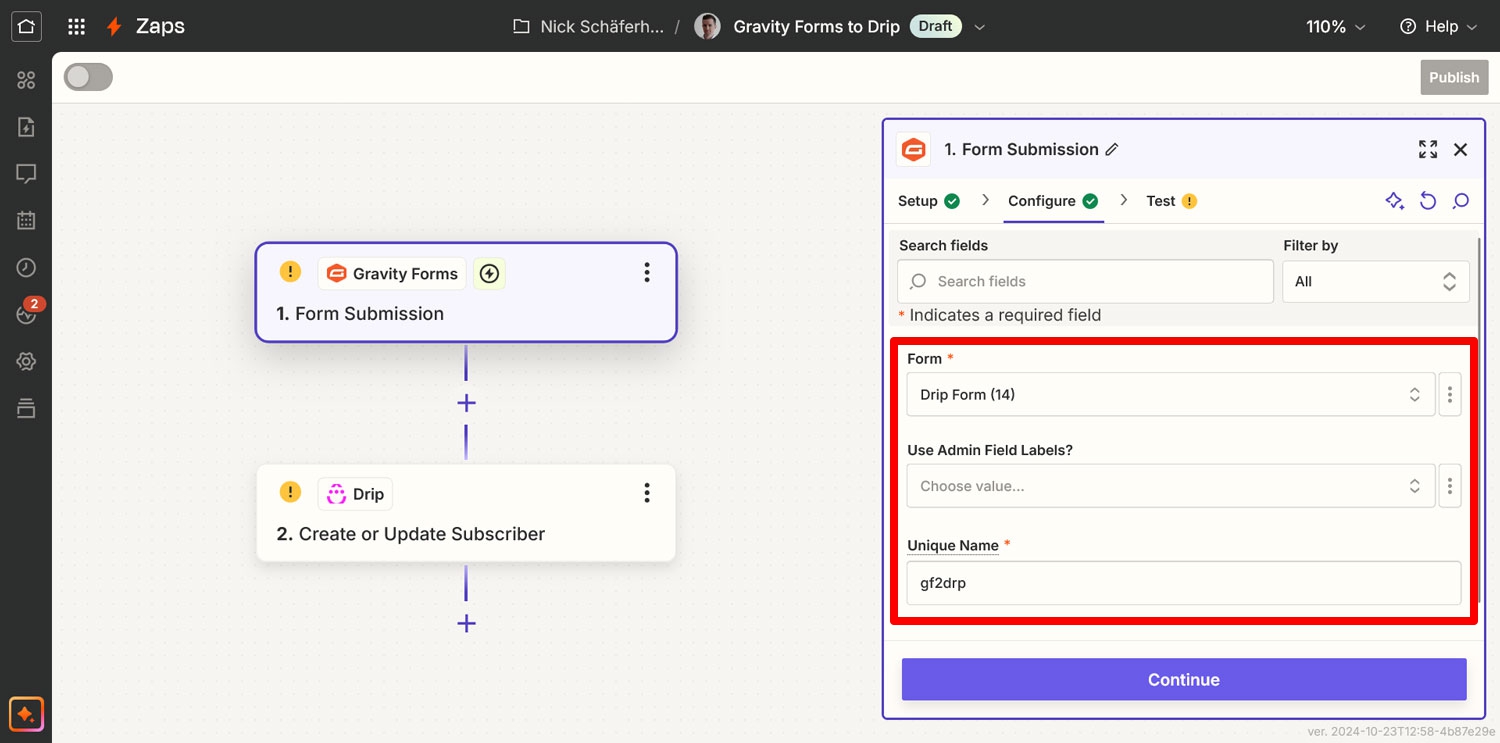
You will then encounter three fields.
First, choose the Form you want to use for this automation. Here, it’s our newly minted Event Registration Form.
The Use Admin Field Labels? is only relevant if you have added Admin Labels. Otherwise, you can leave this field and move on.
For Unique Name, provide a one-of-a-kind descriptor for this Zap and form so it can be processed. Check the example below if you are unsure about your own setup.
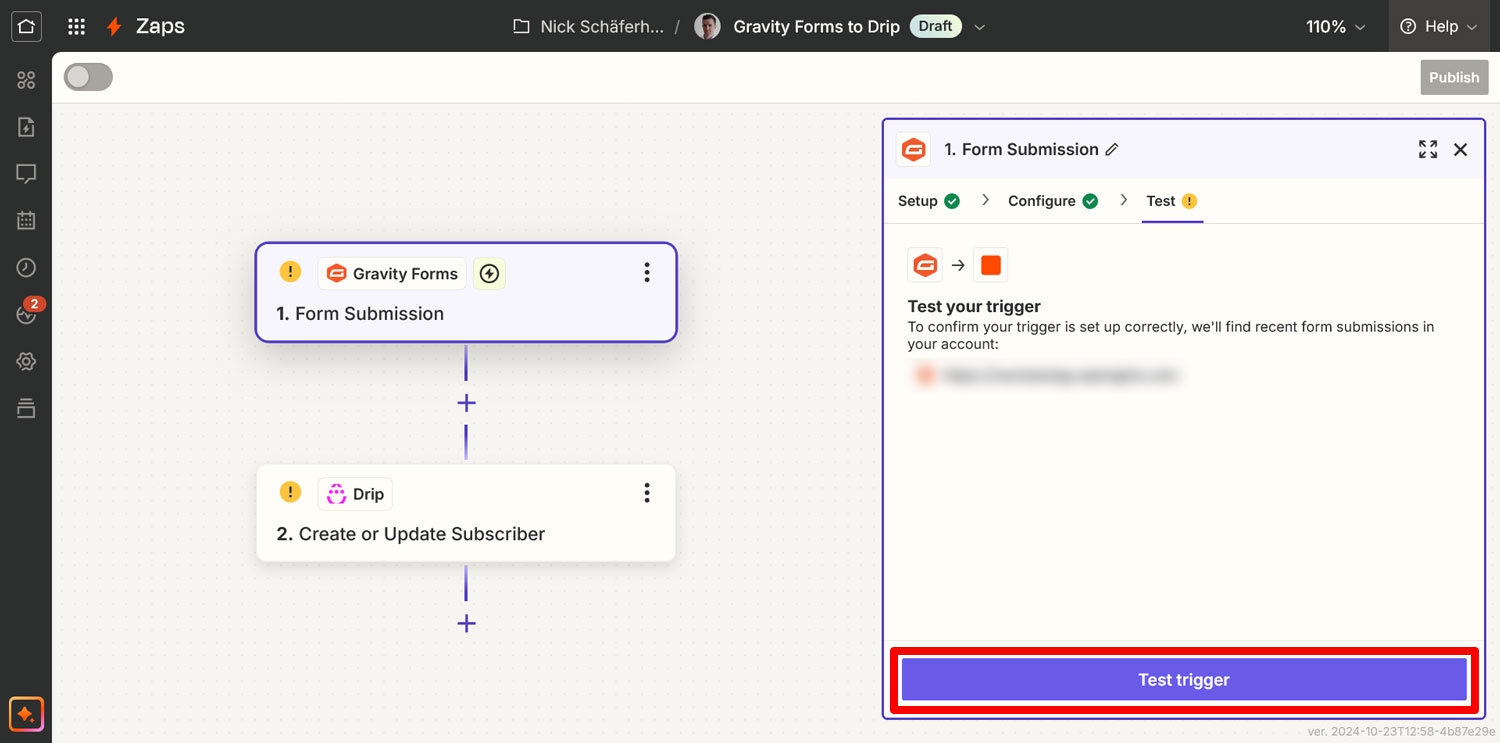
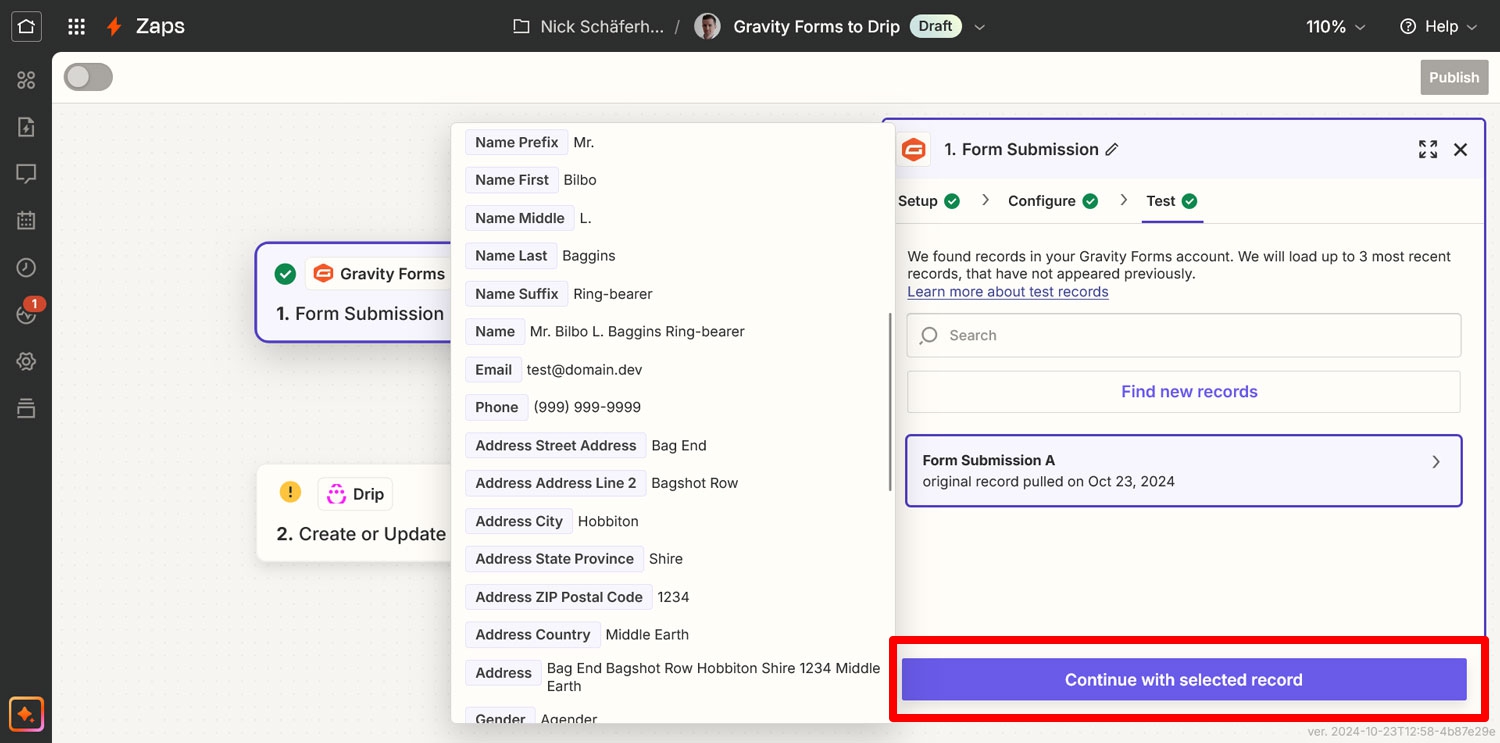
Click Continue again once finished. In the next screen, use Test Trigger to prompt Zapier to load example data from Gravity Forms.
If it all works, click Continue with selected record.
6. Establish a Connection to Drip
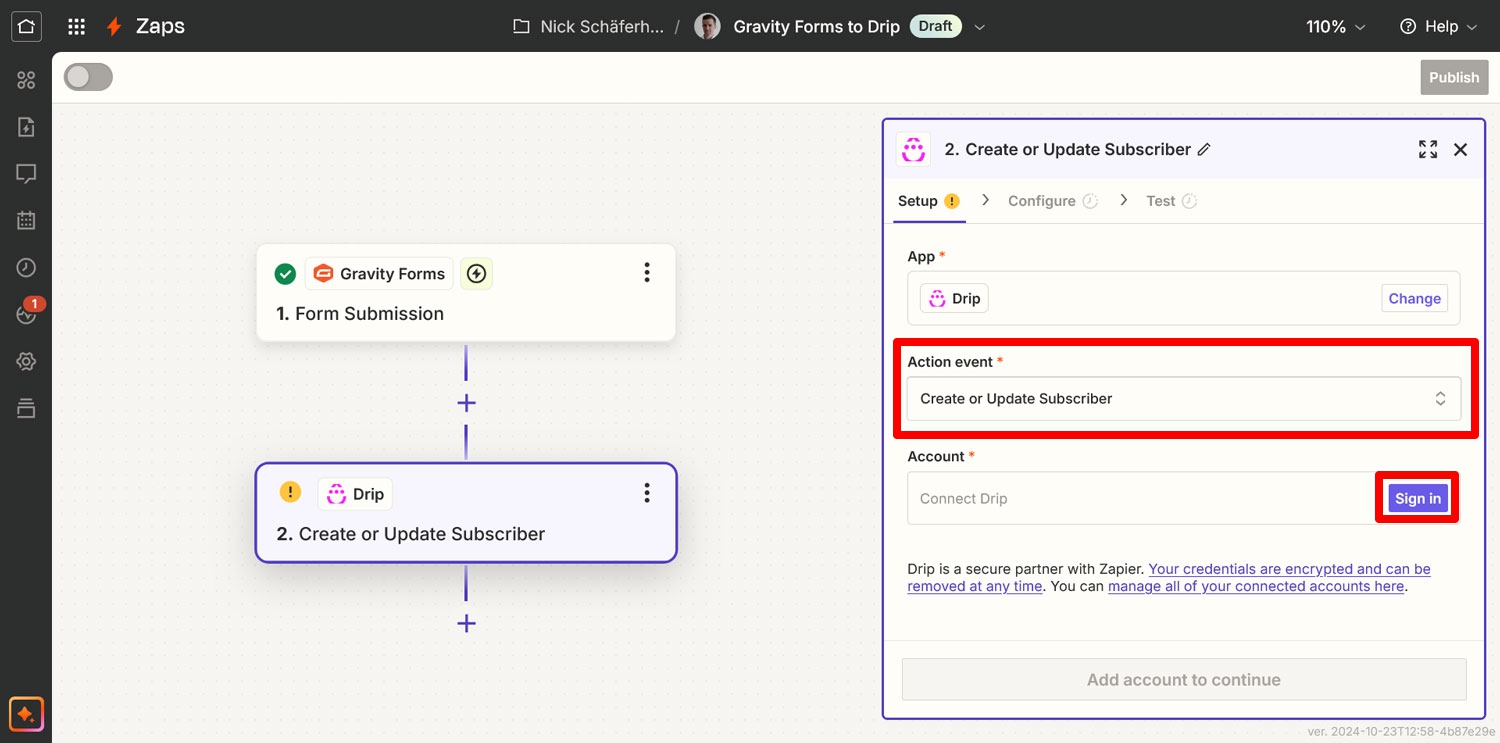
Next, Zapier will need to connect to Drip. In the first screen, check that the right action event has been selected, namely Create or Update Subscriber. Then, under Account, click Sign in.
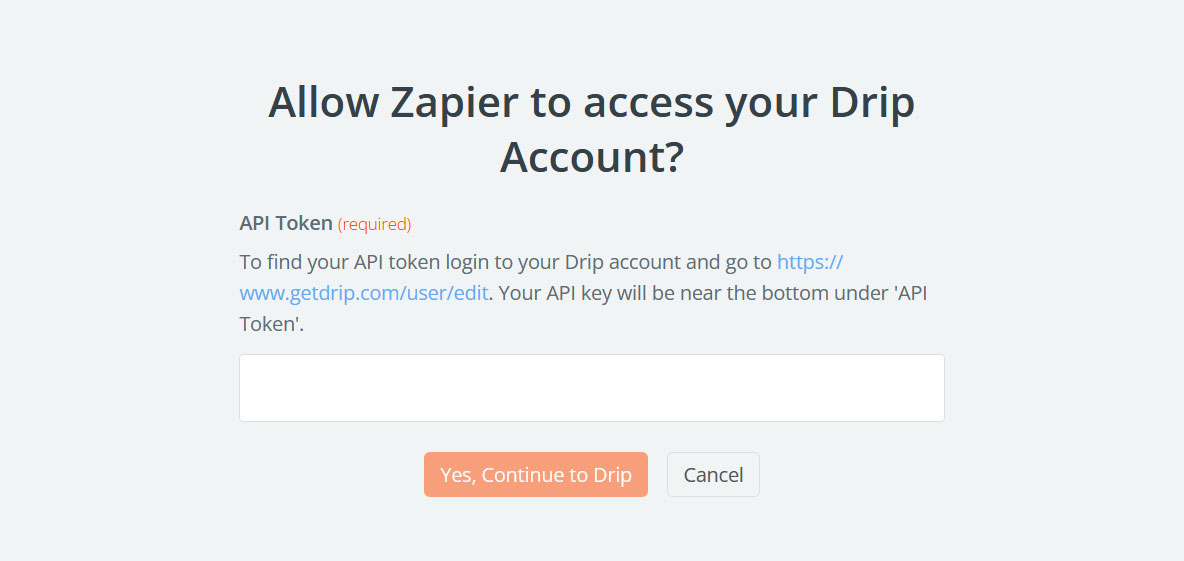
If you are already logged into your Drip account, a new window opens asking you to provide your API token. Copy it from the aforementioned location, then click Yes, Continue to Drip.
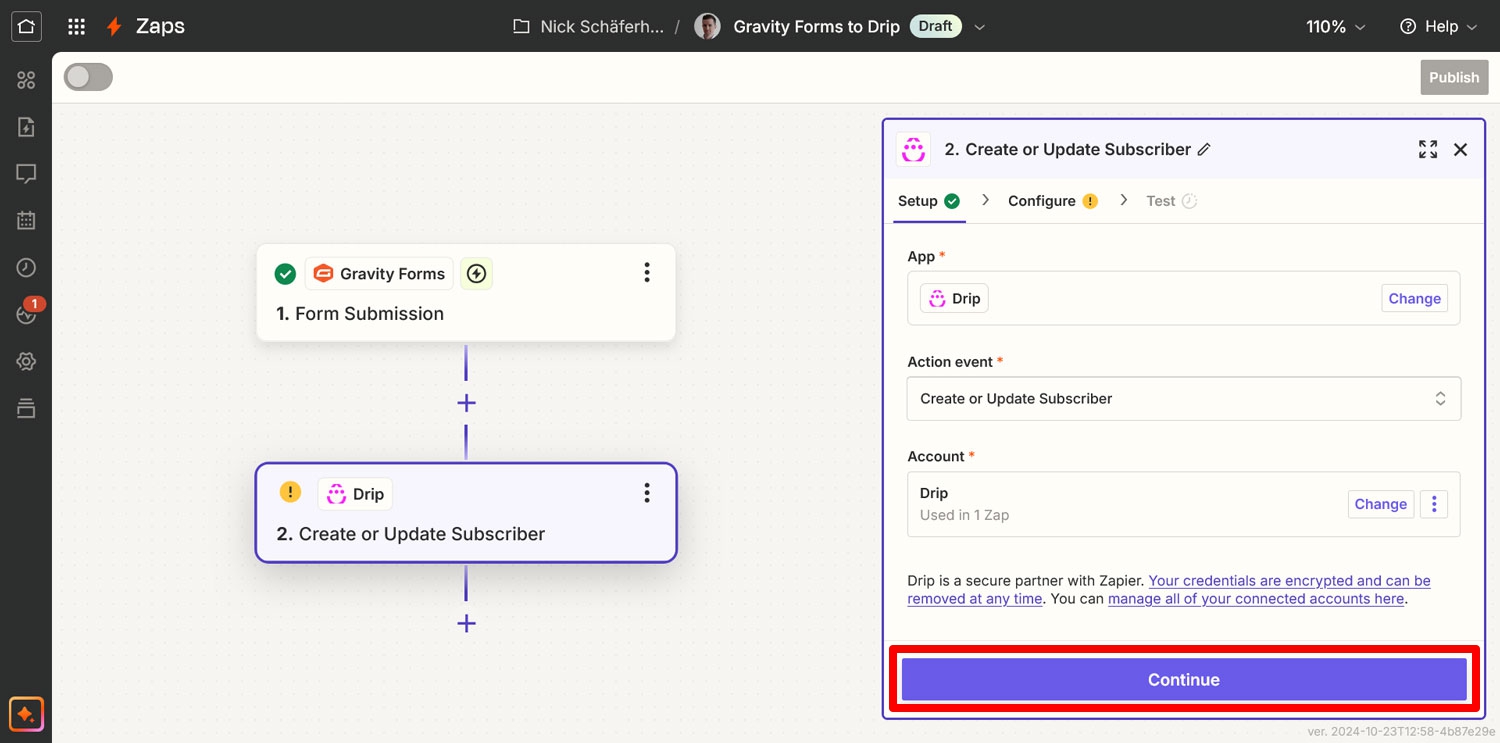
Sign into your Drip account if prompted. Either way, you should automatically return to the Zapier interface. Here, click Continue again.
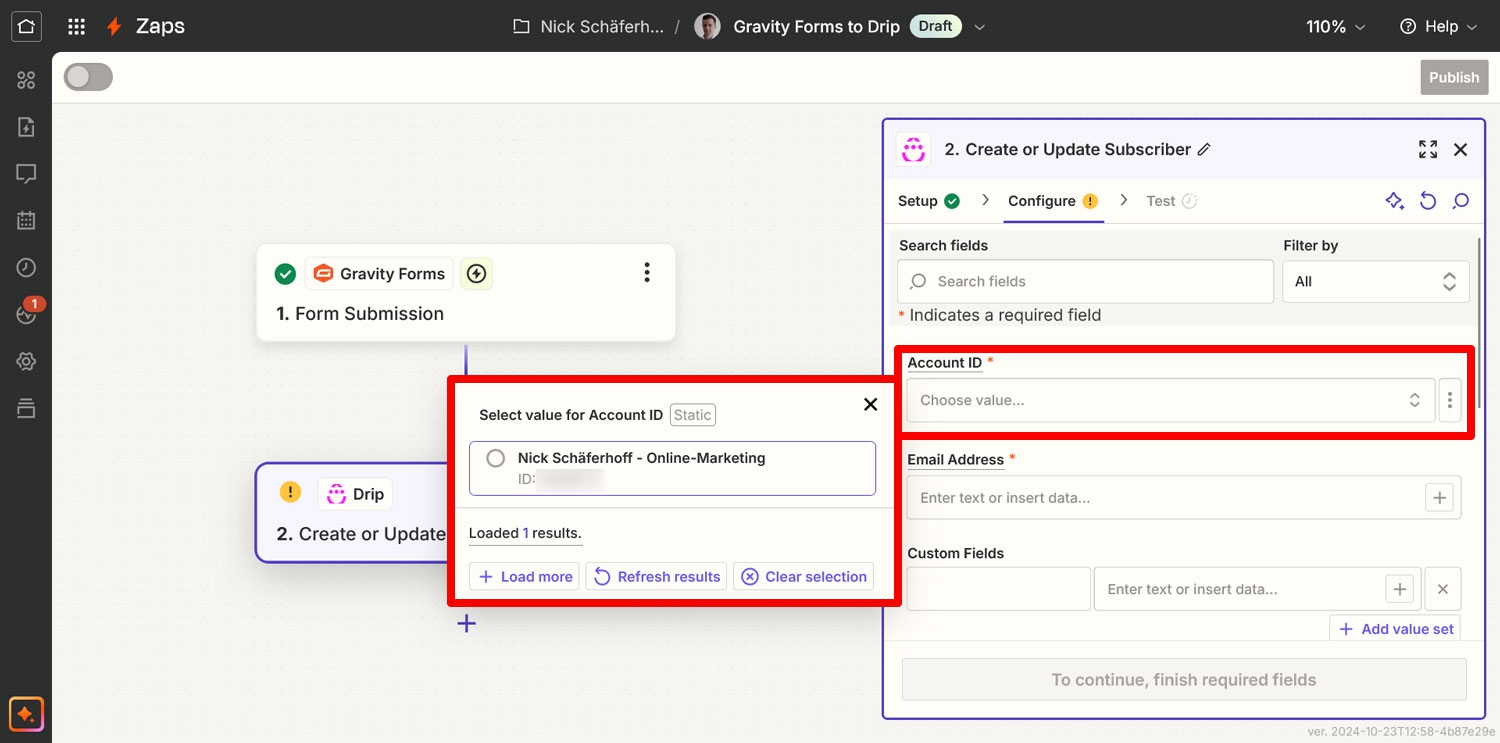
In the screen that follows, the first step is to choose your account ID. To do this, simply click into the respective field and select your account.
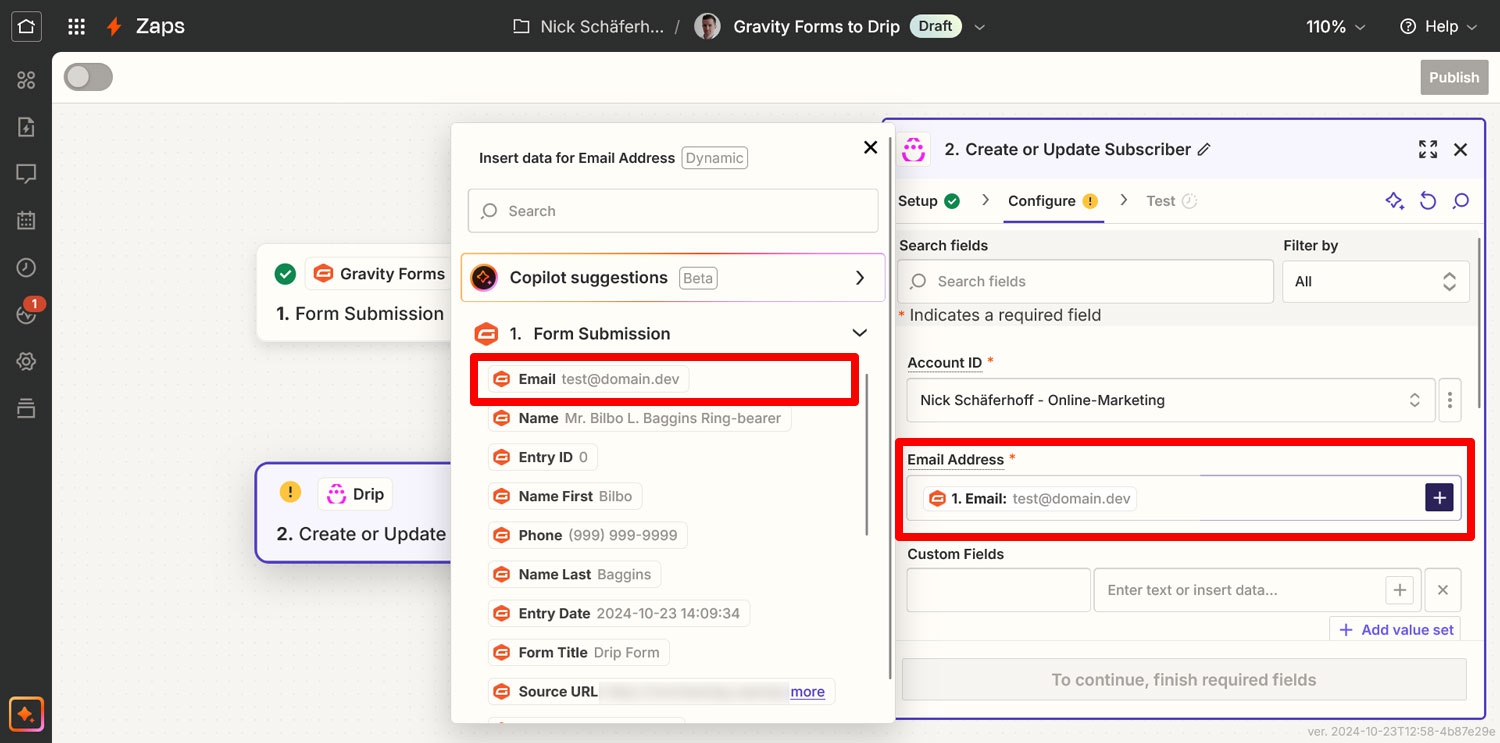
Next, it’s time to map the information Zapier passes on to Drip to your form fields. By default, Zapier only asks for the email address. You can select the form email field by either typing a forward slash (“/”) and then the field name, or by using the plus button in the search field to select it.
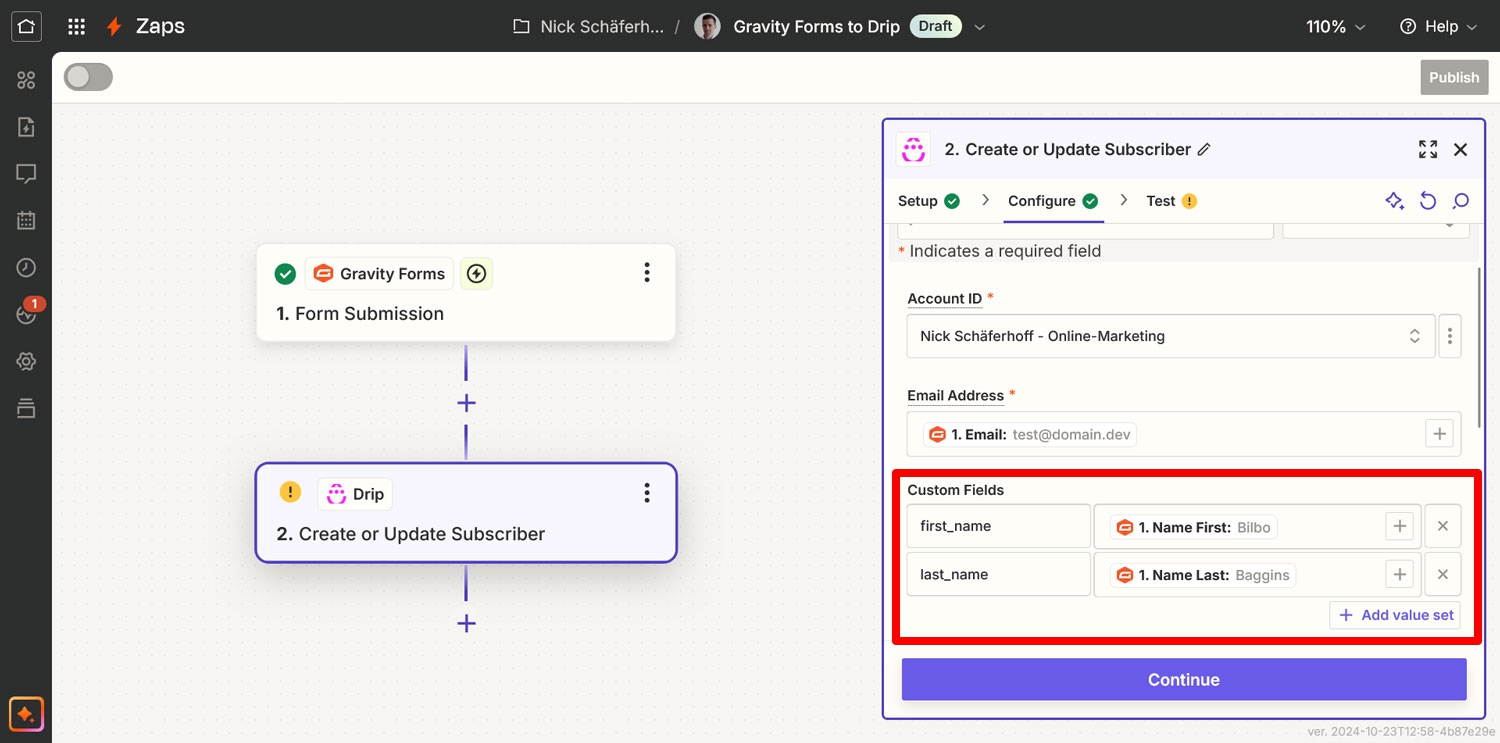
If you want to send more data over to Drip, use the Custom Fields section to create additional name/value pairs. Be aware, however, that you will have to first create custom fields in Drip.
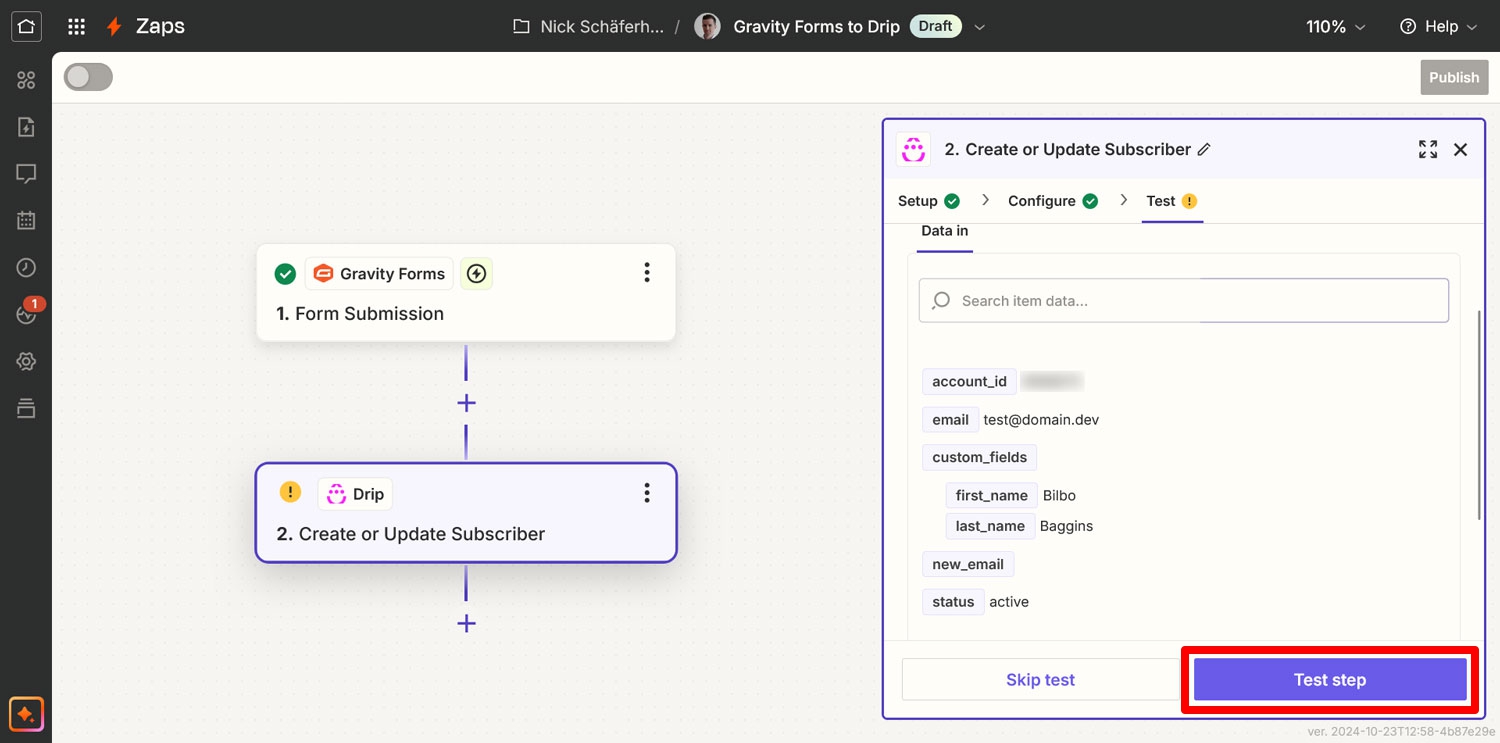
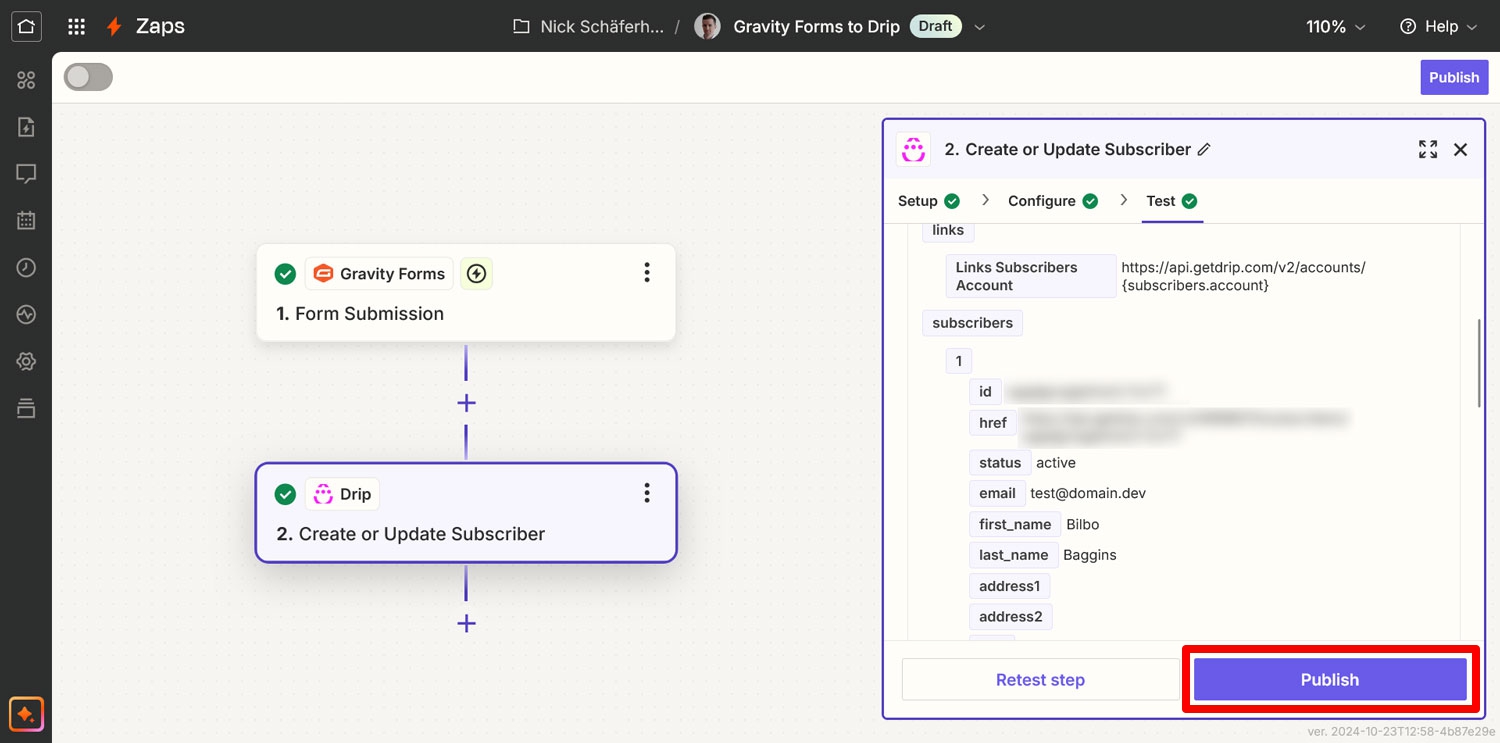
Once you have filled everything in, click Continue. Zapier will then show you a summary and give you the option to test your setup.
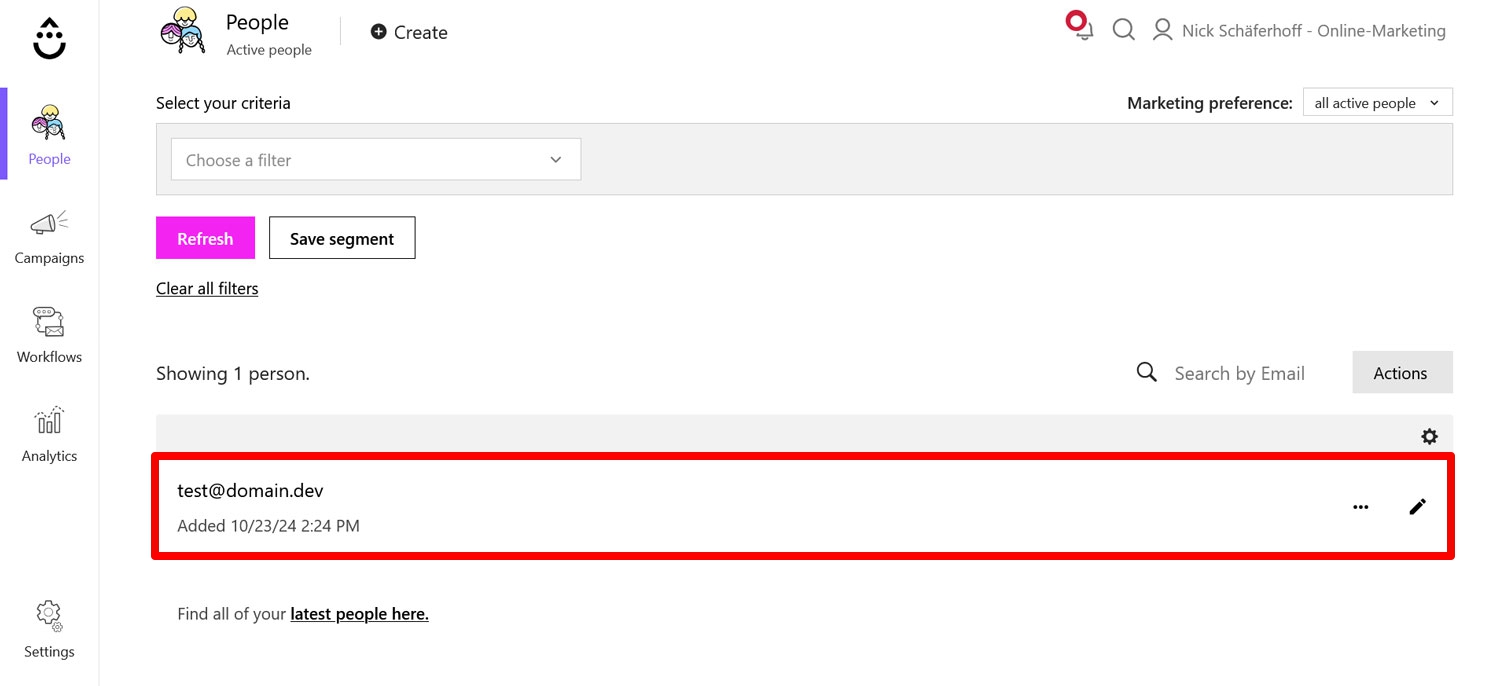
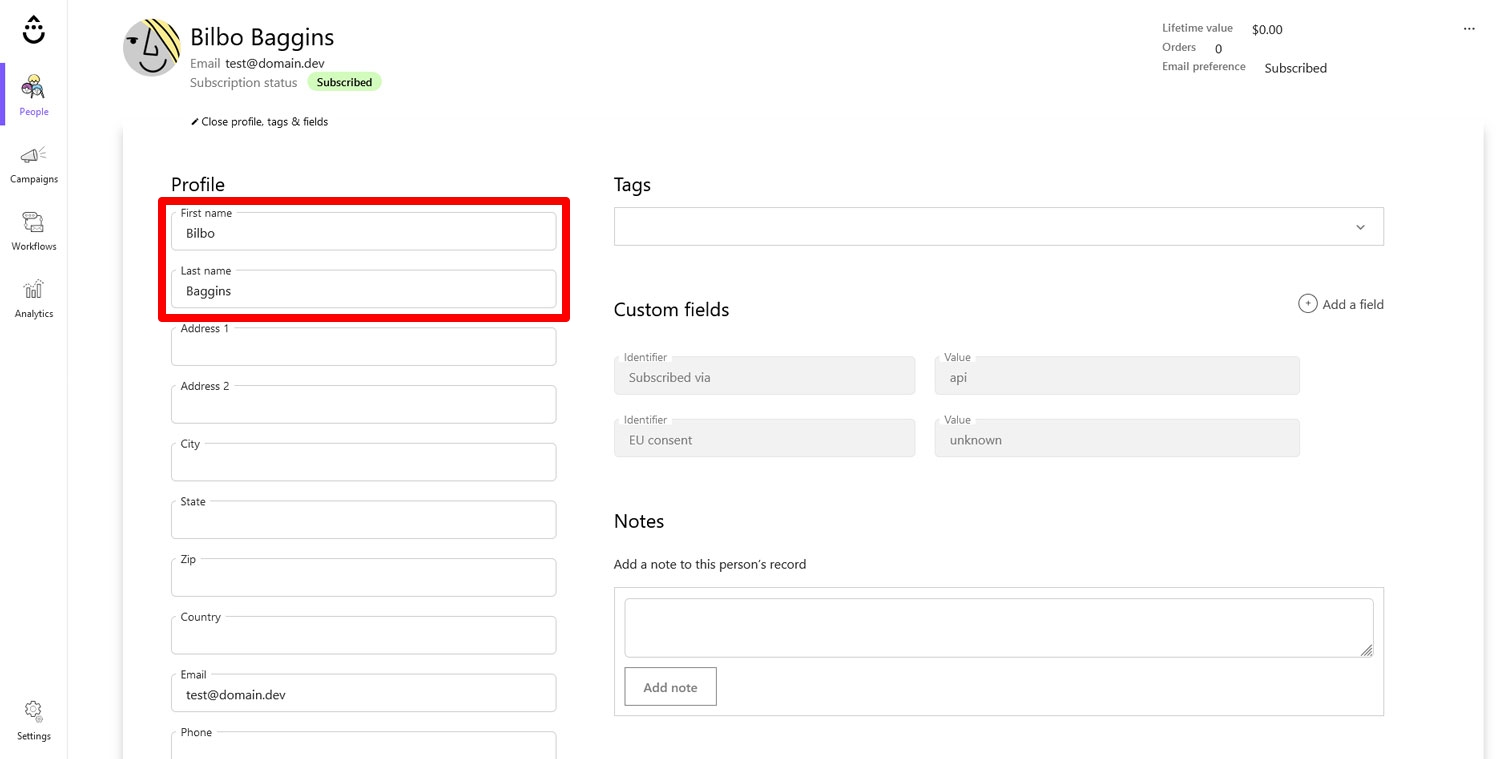
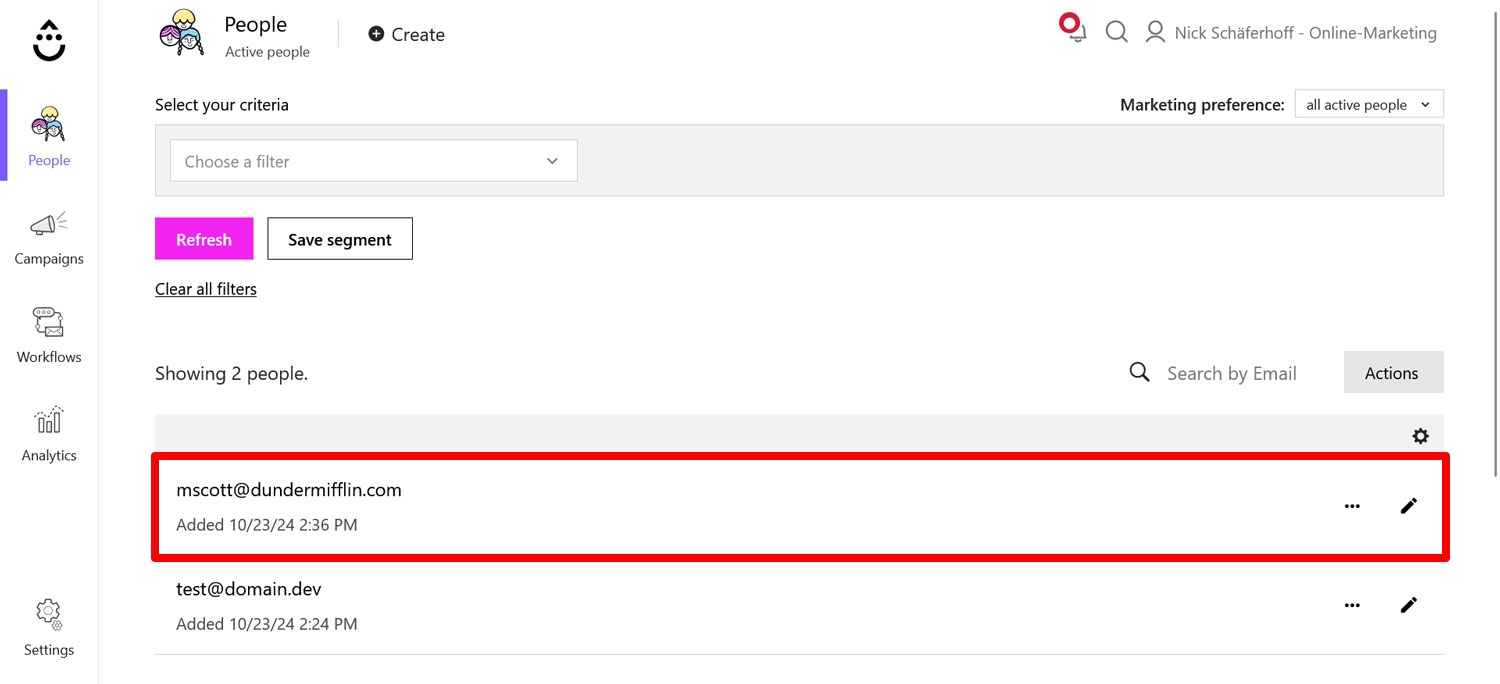
When you click the respective button and then go to People → Active in your Drip account, you should see the test information right there.
If you have attached any custom fields to it, be sure to check if they were passed along as well.
If that’s the case, your last task is to click Publish to activate the Zap.
7. Embed Your Form and Test It
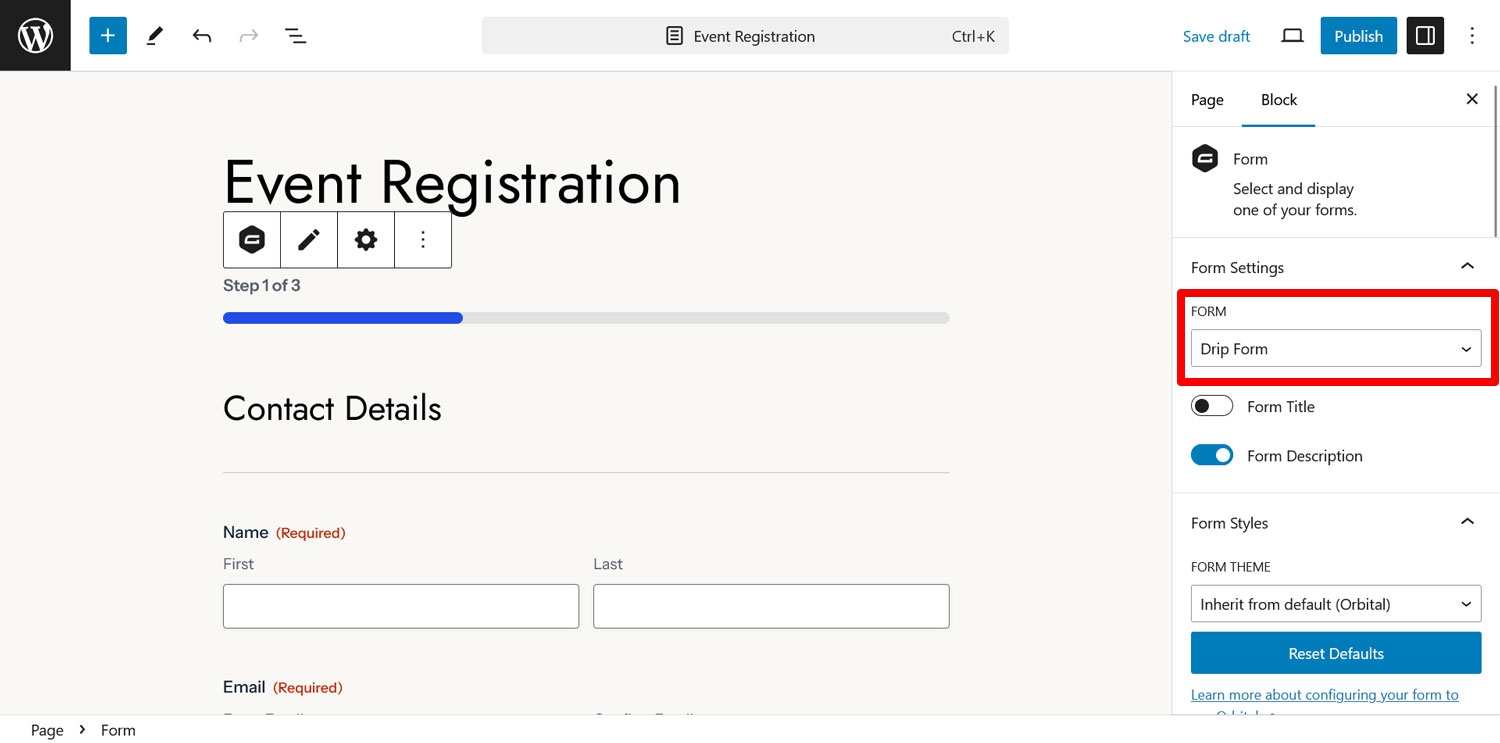
The final step is to embed your form and do a test run. You can embed your form on a page using the Gravity Forms block or shortcode.
Then, use the page preview to view your form. Fill it with some test data and submit it.
Make sure to check that your test subscriber information appears in Drip afterwards.
If that’s the case, all that’s left is to do is publish the page. Well done!
Automate Your Email Workflow with Gravity Forms and Drip
By integrating Gravity Forms with Drip, you can streamline your email marketing. The two tools are an ideal combination and, as you have seen, very easy to integrate with each other.
You can test this out for yourself by signing up for a free Gravity Forms demo site.
Or, if you’re ready to take advantage of what Gravity Forms and Drip have to offer together, purchase your Pro or Elite license or upgrade your existing license today!

If you want to keep up-to-date with what’s happening on the blog sign up for the Gravity Forms newsletter!
