Send Gravity Forms Entries to Asana Using Zapier Integration
Gravity Forms is a powerful form plugin that you can use to create both simple and complex forms. It also makes it easy to see all the form entries in your WordPress dashboard.
However, that’s not always the best solution for viewing and manipulating the submitted information. In some cases, you might want to transfer that information into project management software.
Asana is one such project management tool. Thanks to the Gravity Forms Zapier Add-On, it’s easier than ever to send your form submissions to a designated project in your Asana dashboard.
In this article, we’ll discuss the benefits of sending form entries to Asana and look at how easy it is to do so with the Gravity Forms Zapier Add-On. We’ll also give you a step-by-step walk-through of the entire setup process so you can get started with Zapier automation and begin sending your form entries to Asana.
Gravity Forms to Asana Using Zapier Integration
Asana is a powerful project management tool that enables companies and businesses to manage and execute projects that span multiple teams. Projects are broken down into tasks and assigned owners, helping to easily organize teams and keep work on track. Asana can also be easily customized, helping to mould workflows to best fit your organization and long-term goals.
Sending your Gravity Forms submission data to Asana has several benefits. They include:
- Make your form data actionable — turn form submissions into tasks in Asana and easily assign them to yourself or team members to ensure nothing falls through the cracks.
- Easier to manage large amounts of data — if you receive a lot of submissions or if your forms are more complex, you’ll have an easier time managing and organizing the data in a project management tool.
- Easier collaboration — not only can you assign form entries as tasks to your team members, but you can also invite your clients as guests and collaborate with them on relevant projects.
To send your form entries to Asana, you need to set up Zapier integration between Gravity Forms and your Asana account. To do this, you need to use the Gravity Forms Zapier Add-On. Let’s next find out more about how the Zapier Add-On works…
Gravity Forms Zapier Integration
The Gravity Forms Zapier Add-On allows you to connect your forms with thousands of third-party apps and services. This means that you can connect all the forms built with Gravity Forms to other apps and services that you use in your business. The various automated workflows that you can create with Zapier between these apps ultimately free up your time, so you can focus on other areas of your business.
You can integrate your existing forms as well as any new form you create with Zapier. All you have to do is install the Zapier Add-On and create the desired zap in your Zapier account.
You can also use premade zaps, helping you to get started quickly…
Before moving on to the tutorial part of this article, keep in mind that the Zapier Add-On is only available with a Gravity Forms Pro or Elite license. Be sure to check out the benefits that the Pro and Elite licenses have to offer and select or upgrade your plan accordingly.
How to Send Gravity Forms Entries to Asana
Now that we’ve covered how our Zapier Add-On works, let’s take a look at how to set it up so you can integrate Gravity Forms with Asana. This tutorial presumes you already have Gravity Forms installed and activated.
Install And Configure The Zapier Add-On
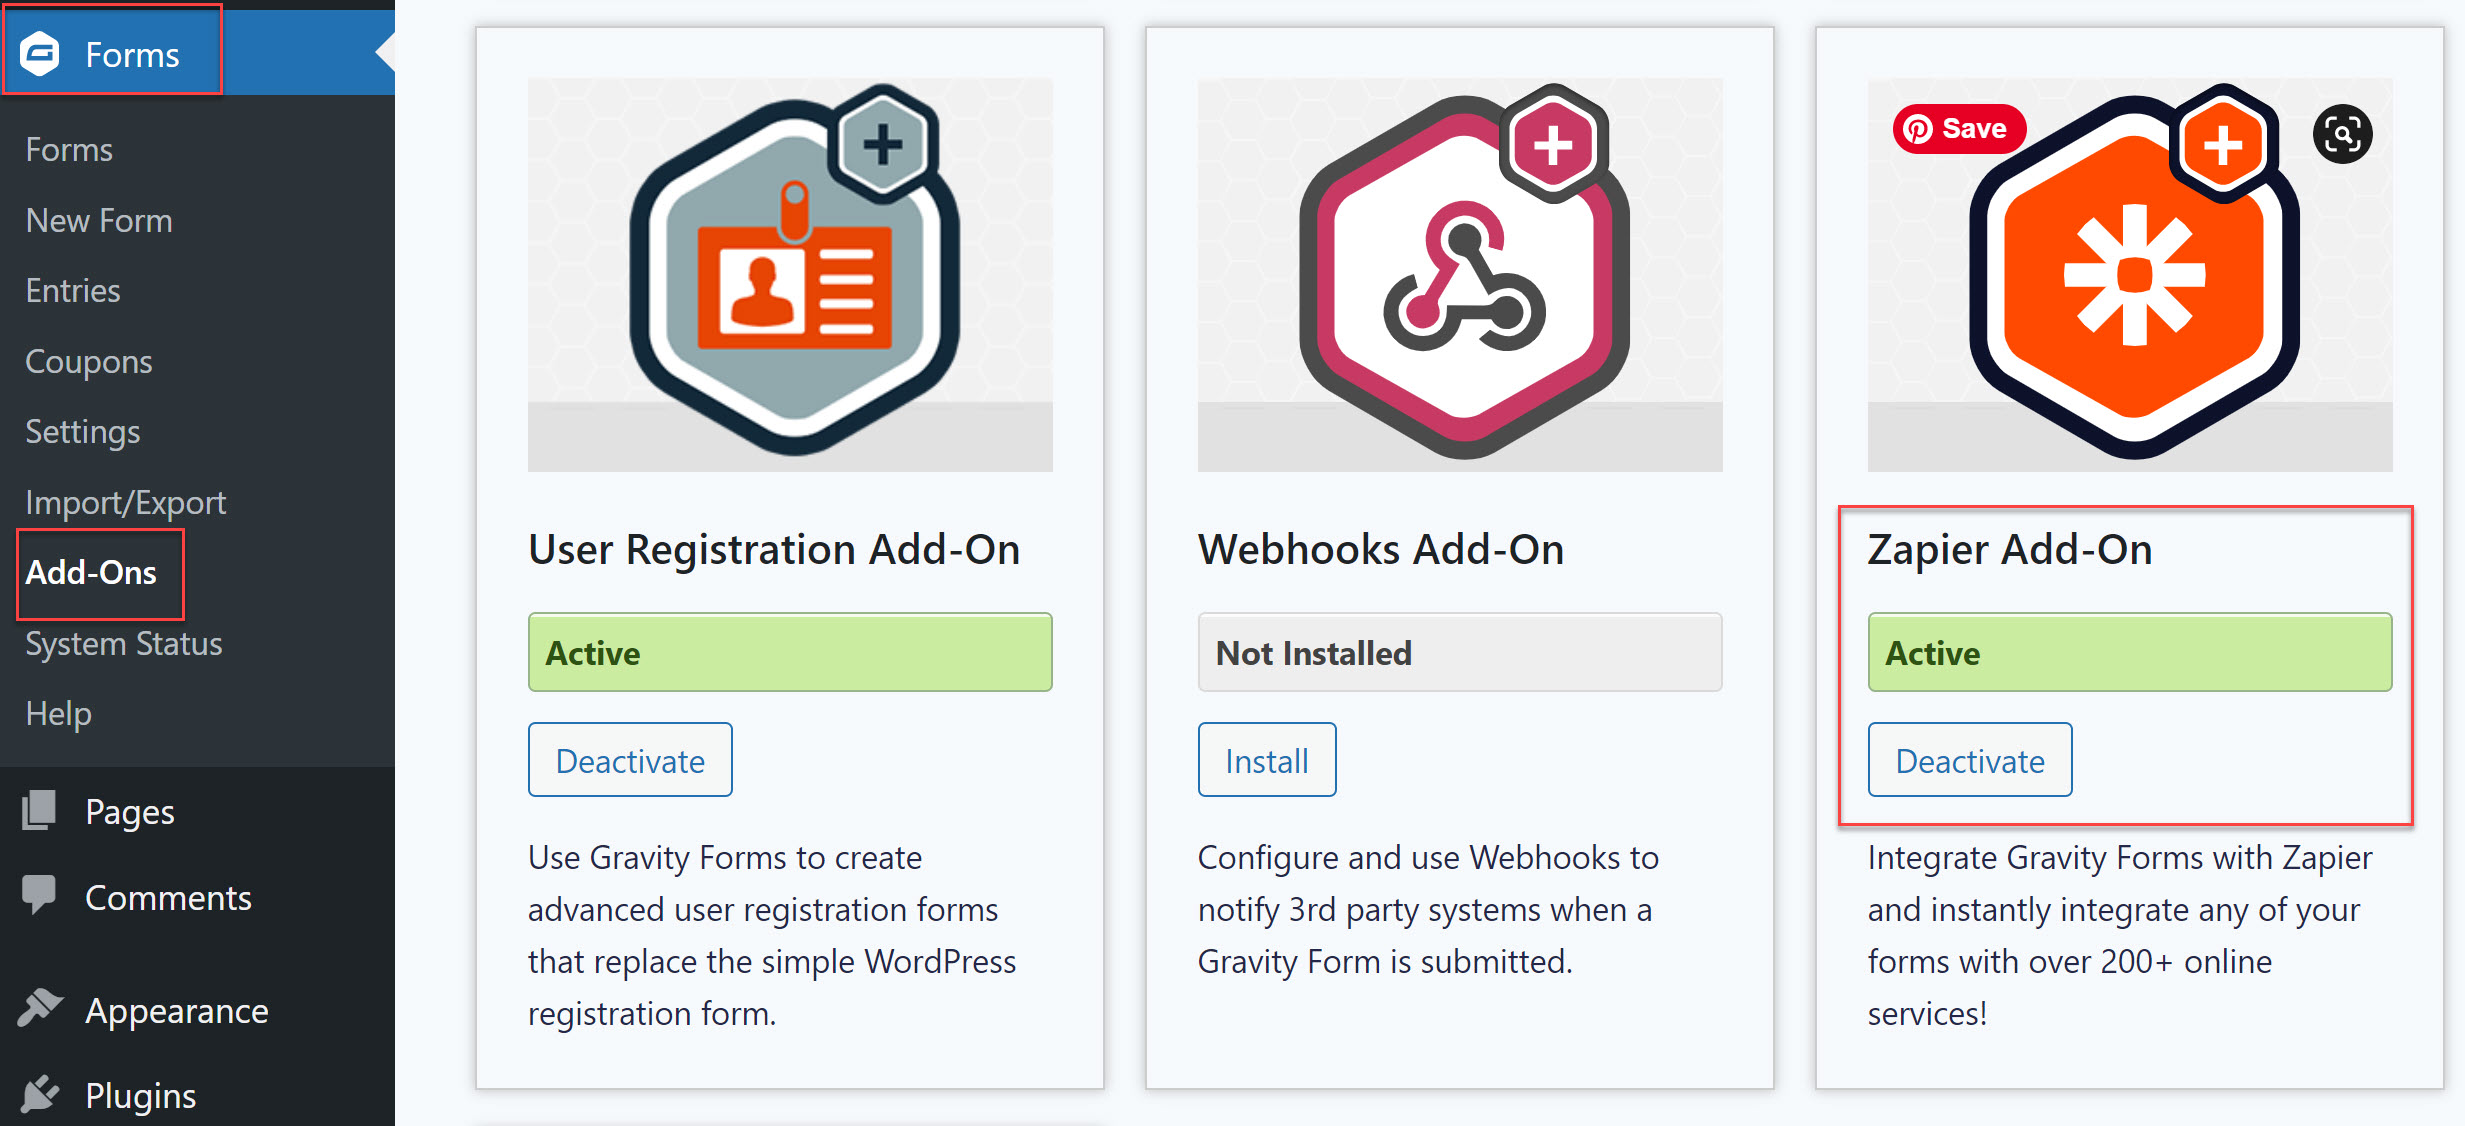
Let’s start by installing the Zapier Add-On first. In your WordPress dashboard, navigate to Forms > Add-Ons. Scroll down to find the Zapier Add-On and then click Install > Activate.
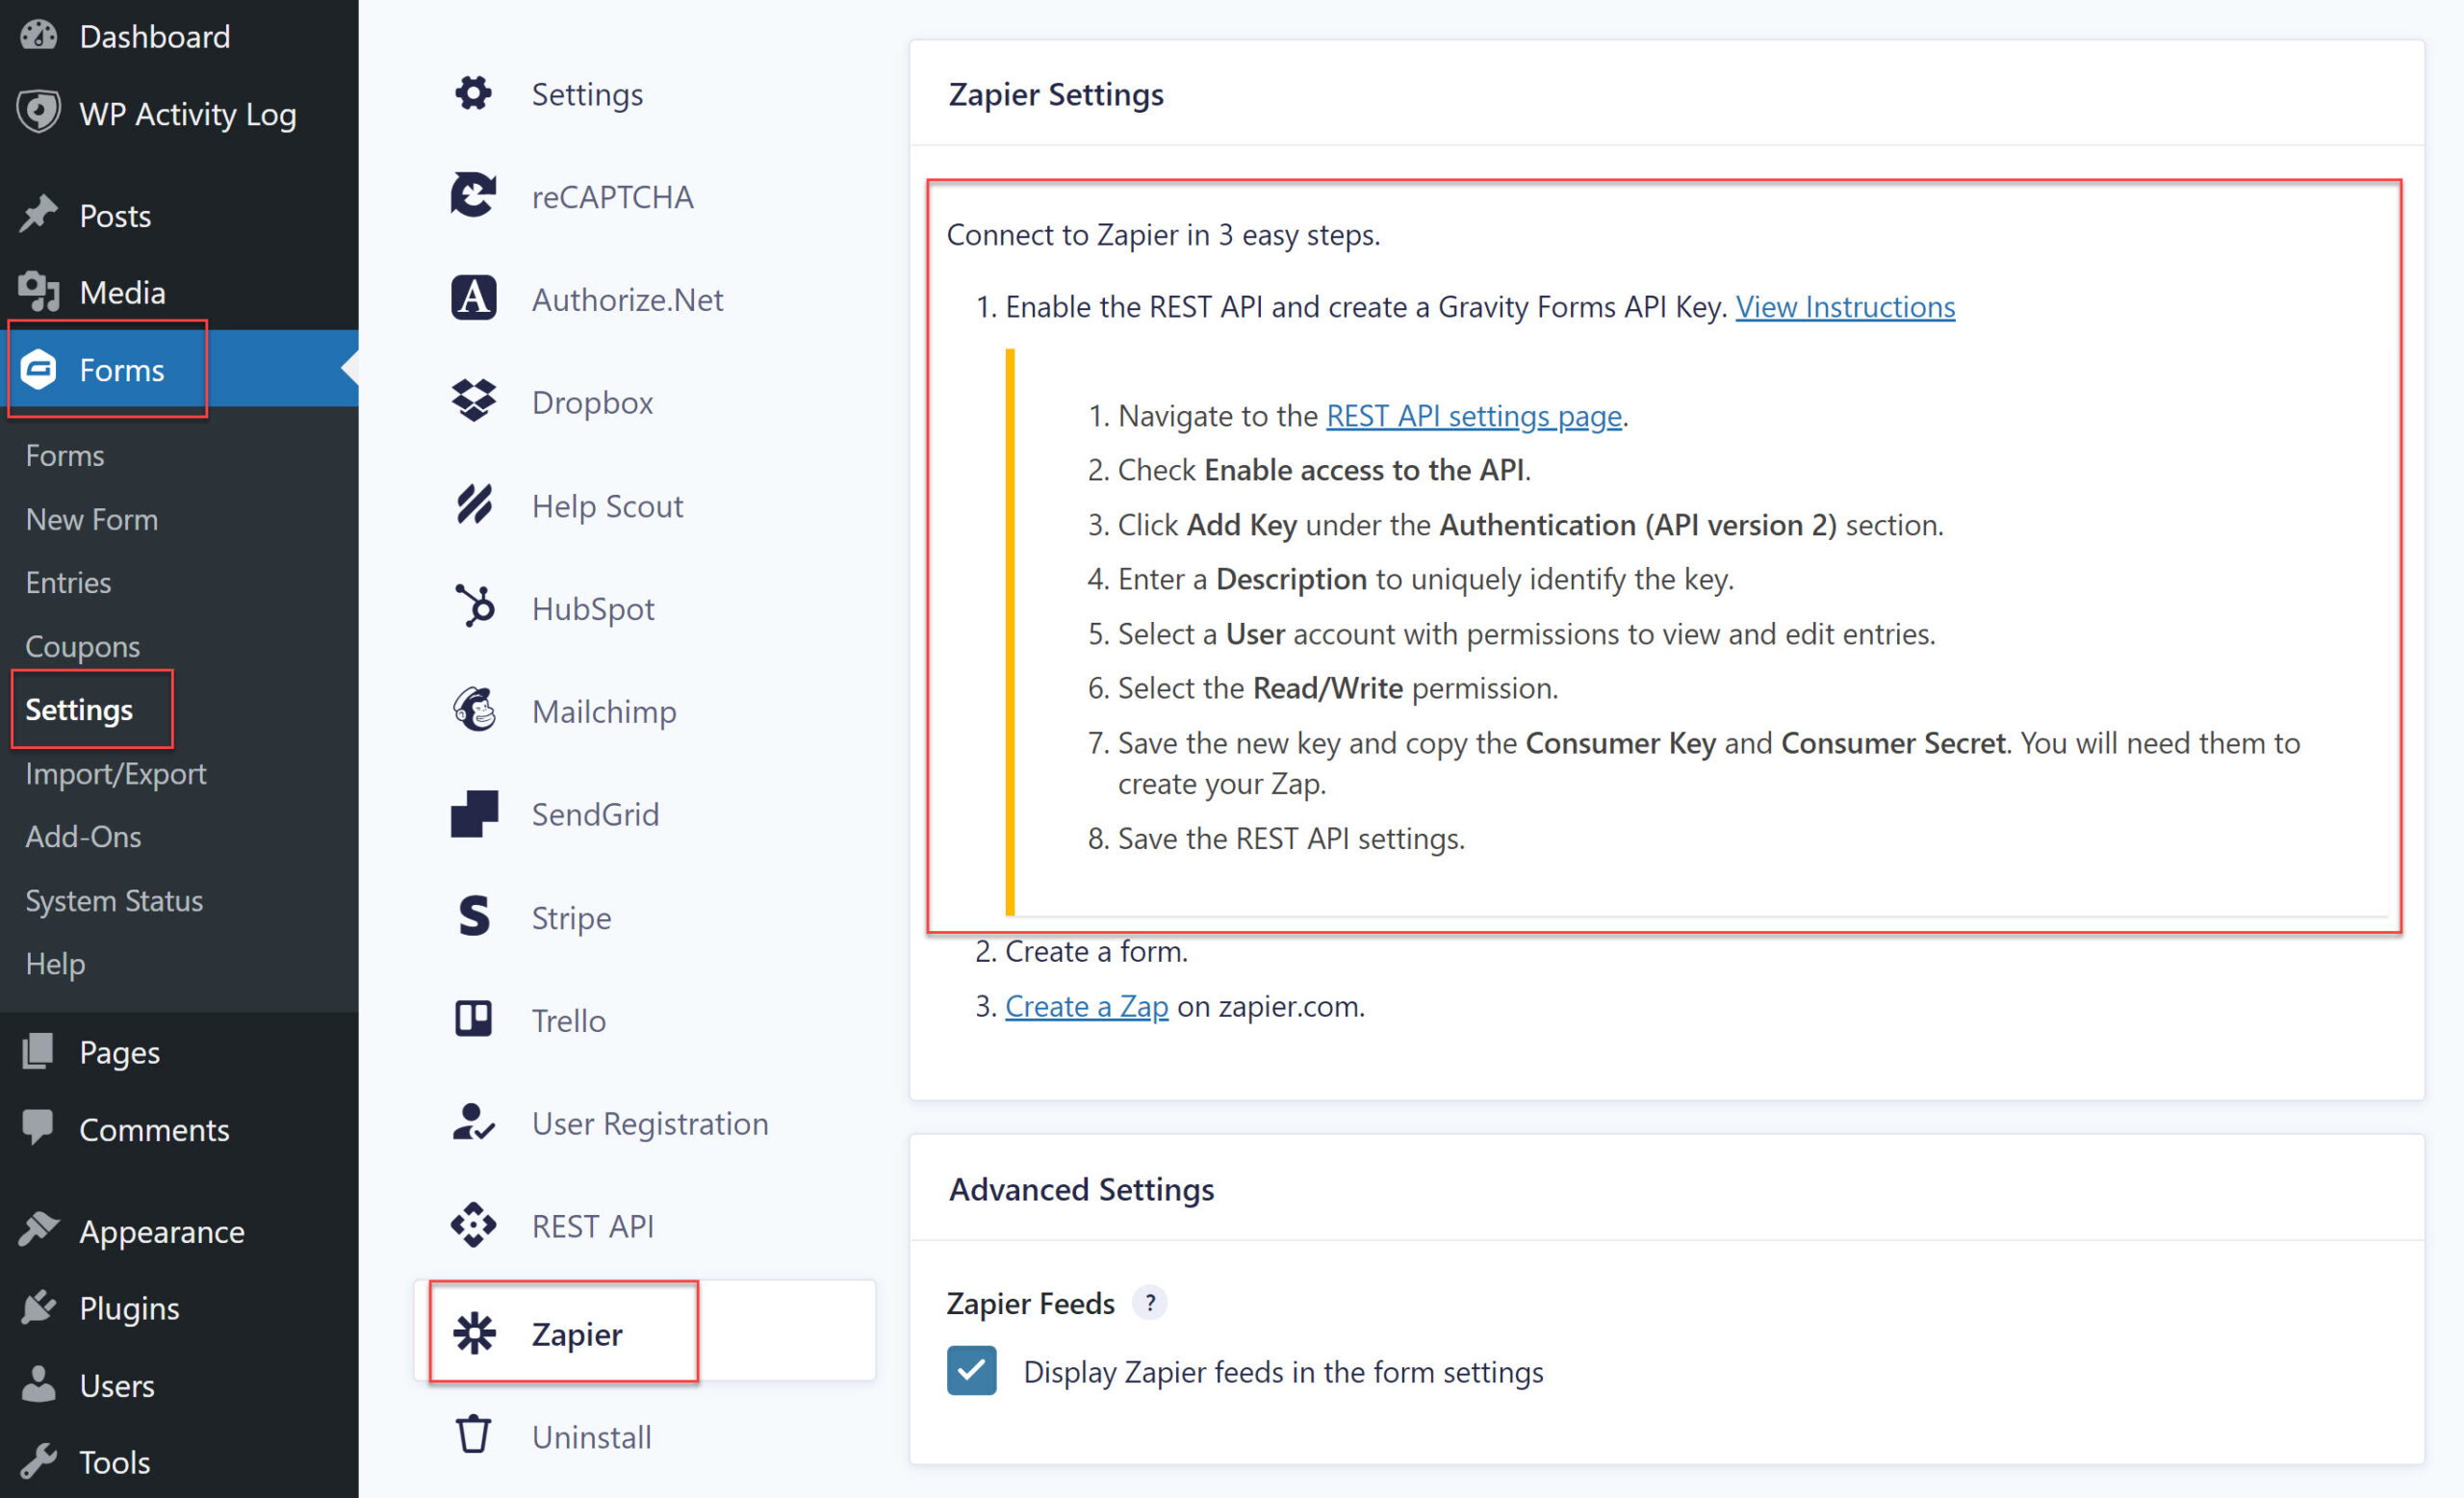
Next, you need to configure the add-on so you can establish a connection between Zapier and your website. This is necessary so Zapier can retrieve the submissions from your website and send them to Asana.
Go to Forms > Settings > Zapier and follow the instructions to enable the REST API. In short, you’ll need to create an API 2 key by giving it a name and enabling the Read/Write access. Once the consumer key and consumer secret have been generated, copy them as you’ll need them in the next part of the process.
You can learn more about setting up the Zapier Add-On in the Gravity Forms documentation.
Create a Form to Use with the Zapier Integration
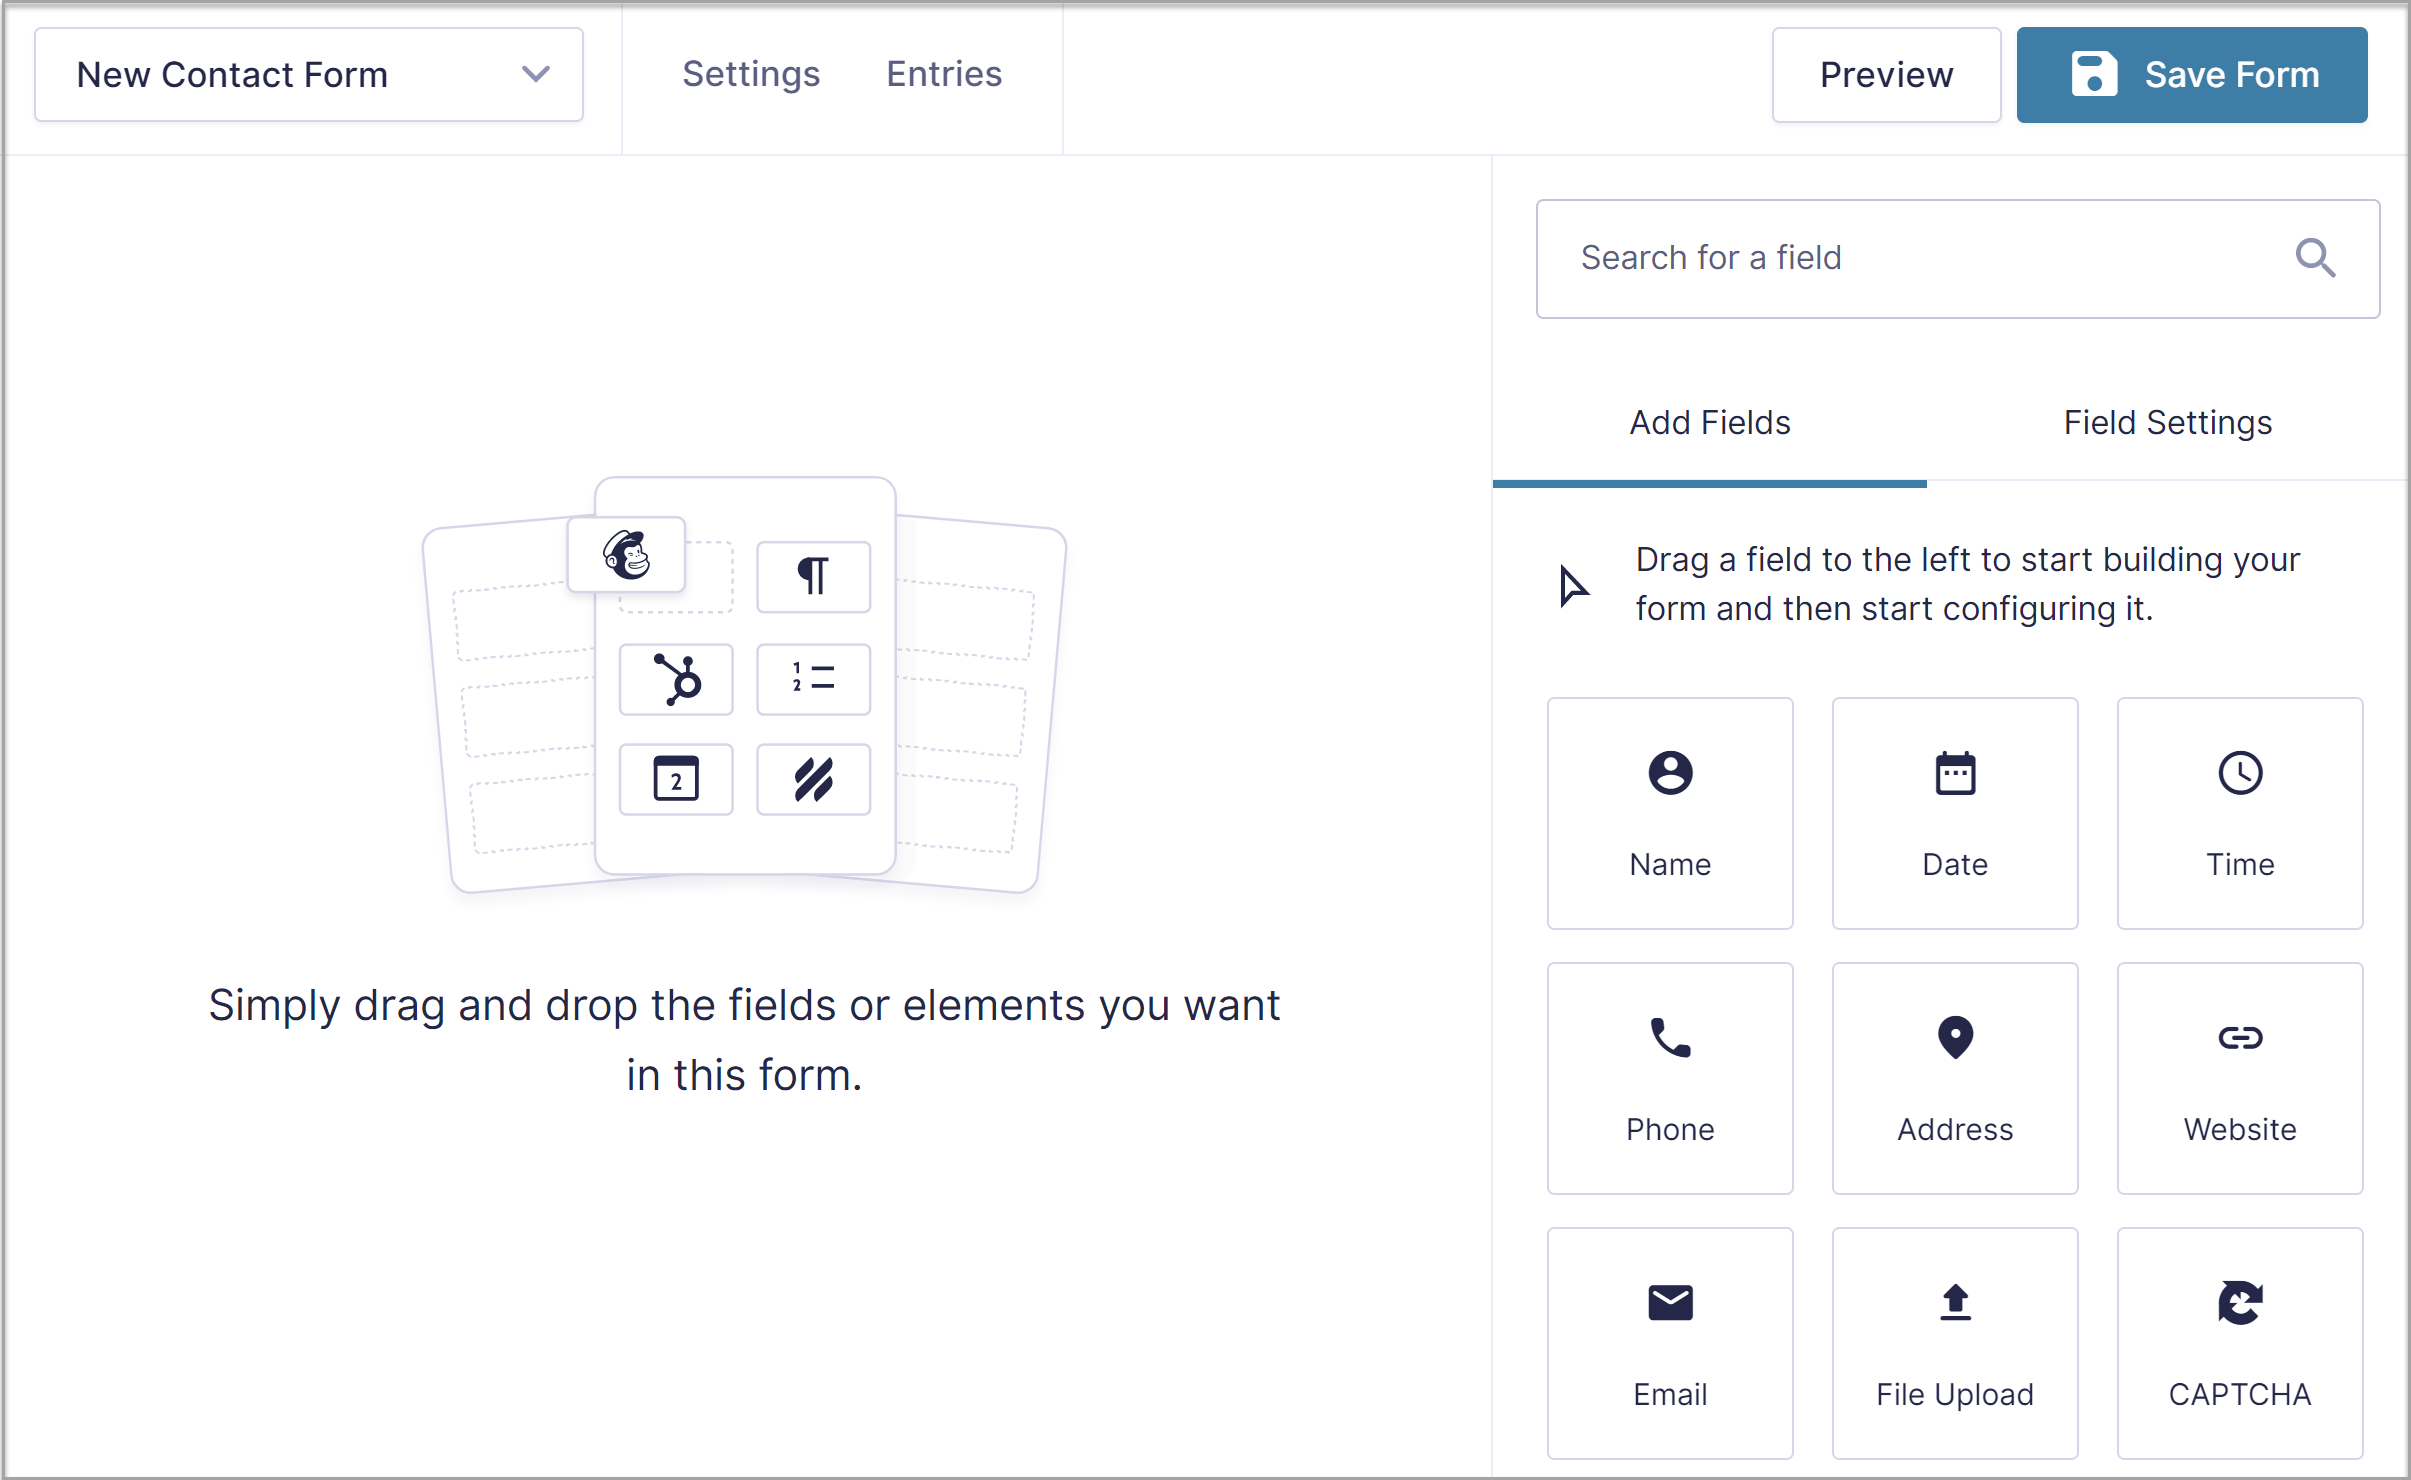
Next, you’ll need to create a new form or select an existing one that will collect the data you need. You can create a form from scratch using our drag and drop builder. Simply go to Forms > New Form and enter a name for the form. Then, add the appropriate fields to your form and customize it as you need within the form editor.
You can also use a premade form from the template library if you don’t want to start from scratch. We have a selection of different forms that you can use so simply choose one that meets your needs best and download it to your computer.
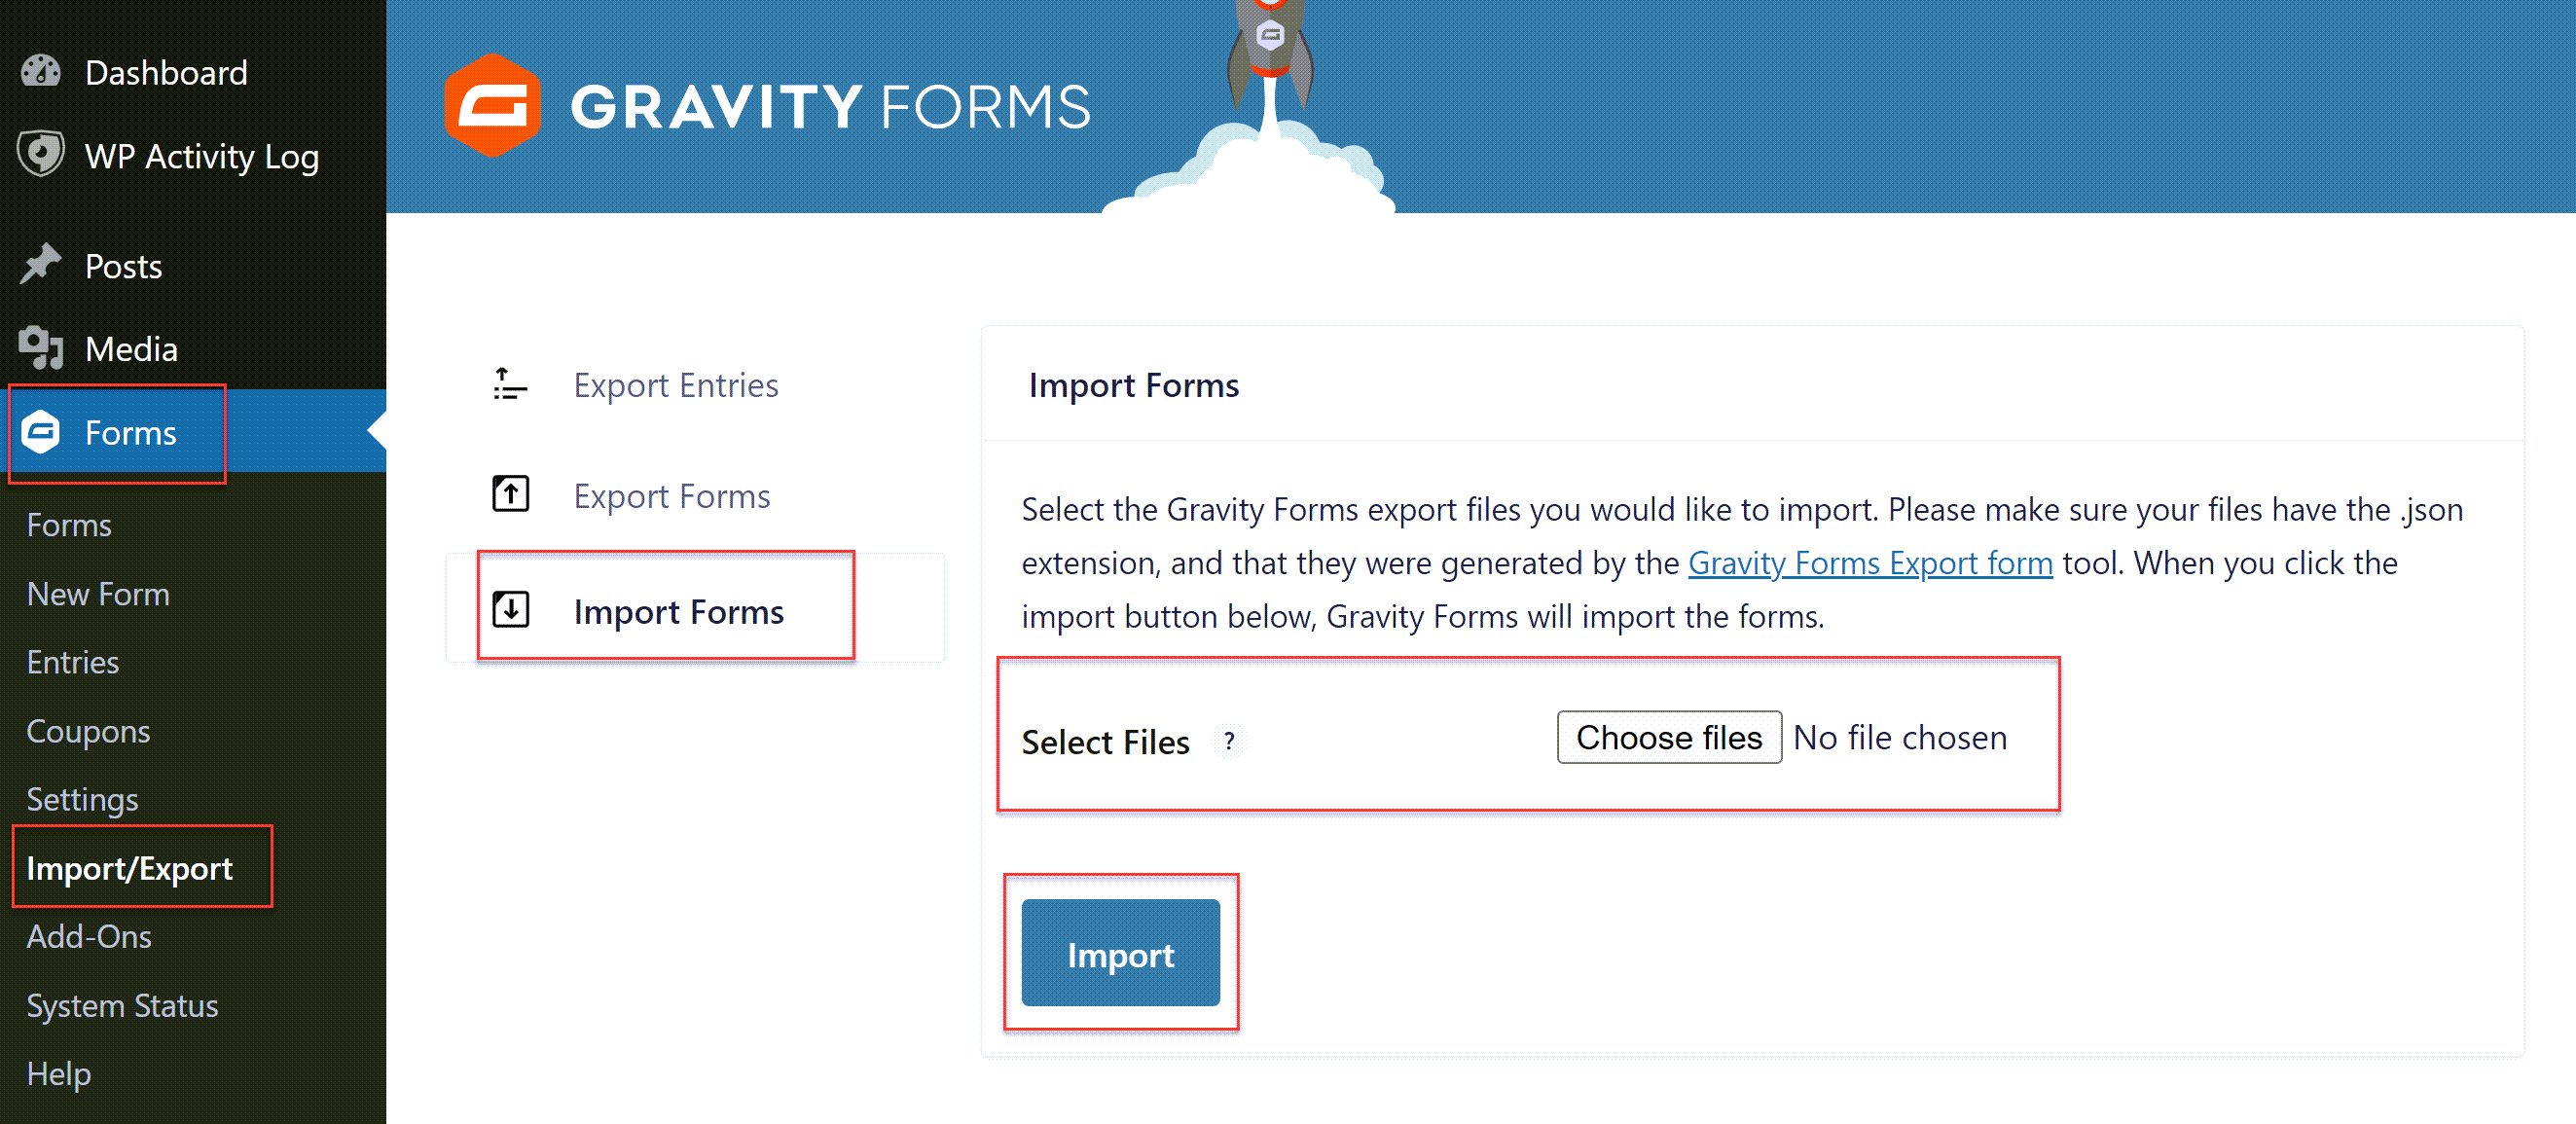
Then, navigate back to your WordPress dashboard, click on Forms > Import/Export > Import, and locate the downloaded form template file on your computer. Upload it and make any necessary customizations within the form editor, then publish the form on a page or post on your website.
For more information on how to create a new form, check out this article – How to Create a Form in WordPress.
Create a Zap
The last step is to create the zap. If you don’t have a Zapier account, start by signing up for one. Zapier offers both free and paid plans. The free plan allows you to create up to five zaps so this is a good place to start. If you already have a Zapier account, head on over to their website and log in.
You can now start the process of integrating Gravity Forms with your Asana account. Similarly to form creation, you have two choices. You can build a zap from scratch. This is a good choice if you already know how Zapier works and are comfortable creating zaps.
But if you’re just getting started, start by going to the Asana & Gravity Forms integrations page. Here you’ll find a number of Zap options for connecting Gravity Forms to Asana. For this article, we’ll select ‘Create Asana tasks from Gravity Forms new submissions’.
You will now begin the process of customizing the zap within the zap editor.
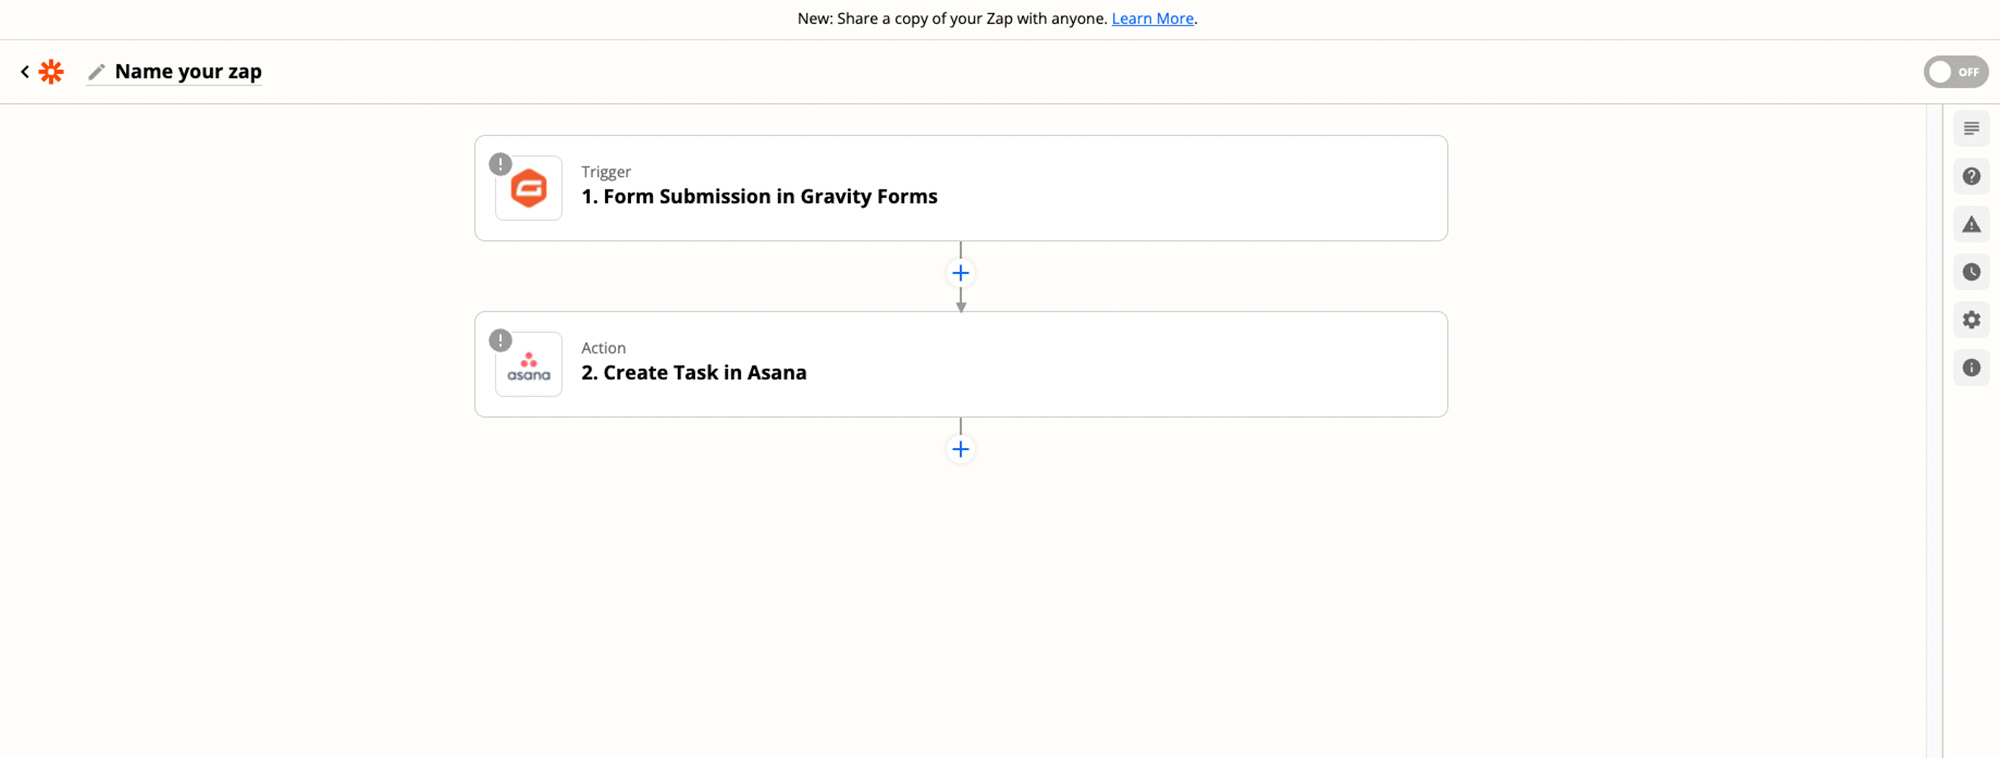
Click on the Edit button on the first step to configure the Gravity Forms integration. You’ll have to connect your Gravity Forms account with Zapier. This is where you will need to add your Consumer Key and Consumer Secret that you created and saved earlier.
Once you’ve connected the account, click Continue. You’ll then need to choose the form you want to use to sync your submissions with Asana and give it a name that Gravity Forms will use to know where to send submissions. Click Continue.
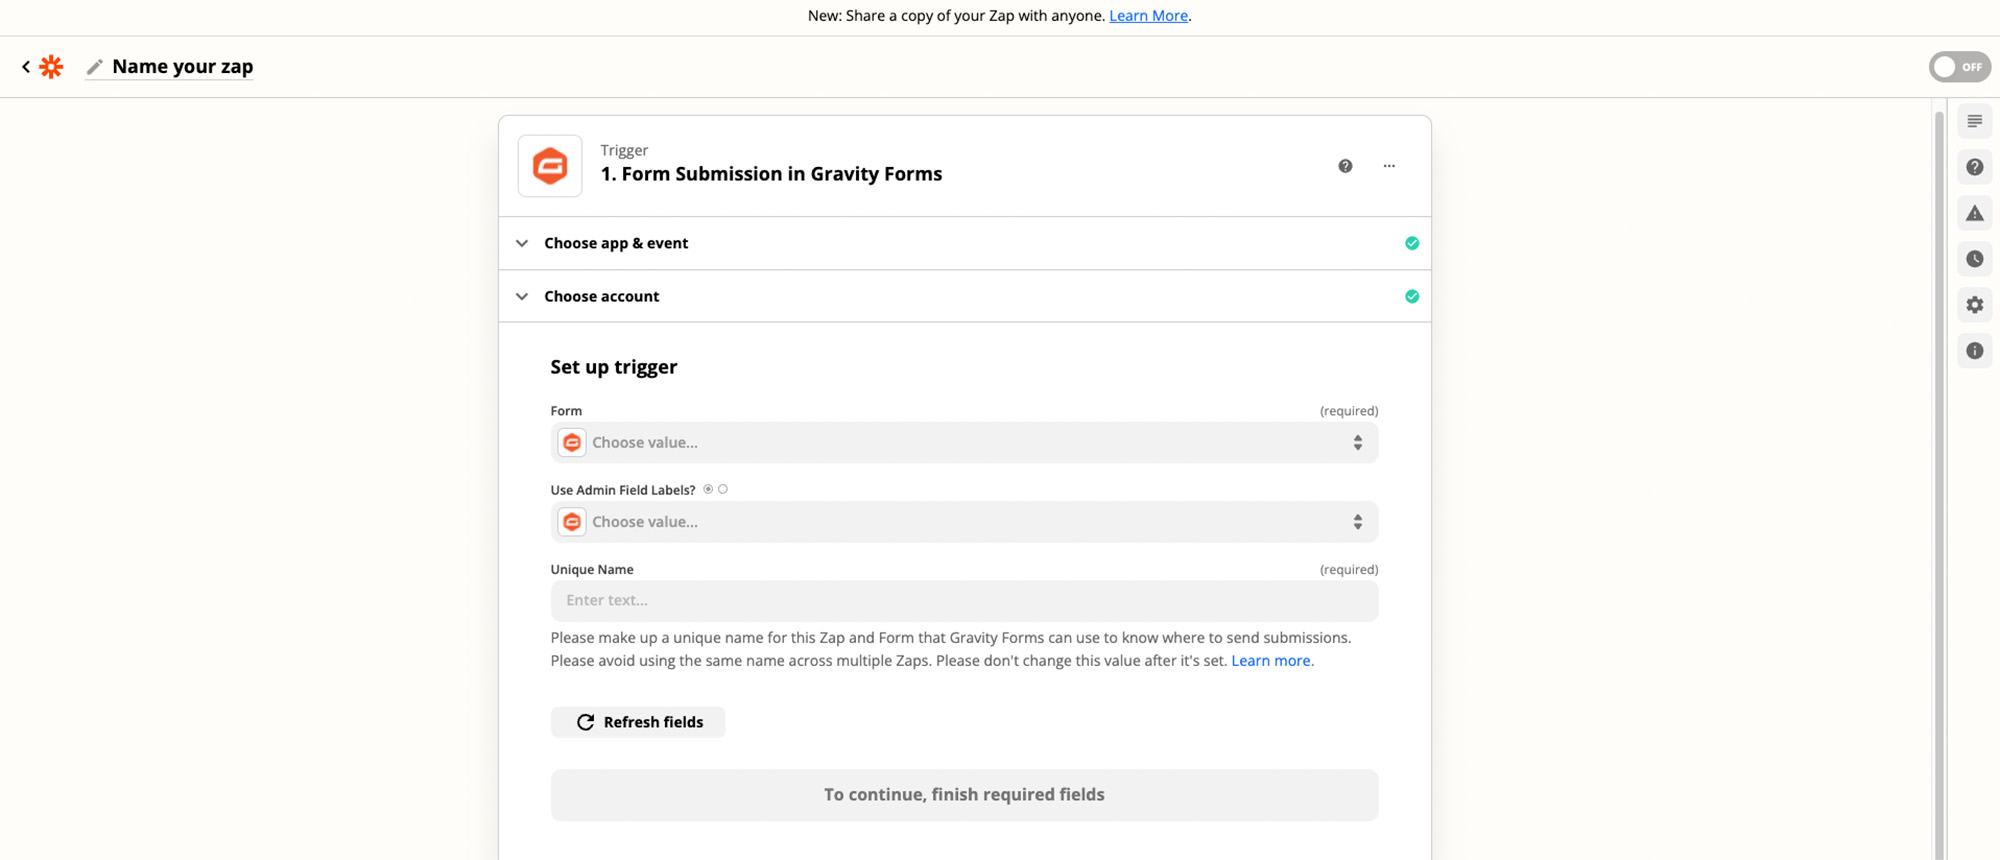
Zapier will then test the trigger to ensure it’s set up properly. After you get the message that the test was successful, click the Continue button once more.
The next part of the Zap is to create a task in Asana so go ahead and start by connecting your Asana account to Zapier, if you haven’t already.
Then, select the workspace you want to use for this Zap, and choose the Project where the form submissions will be sent.
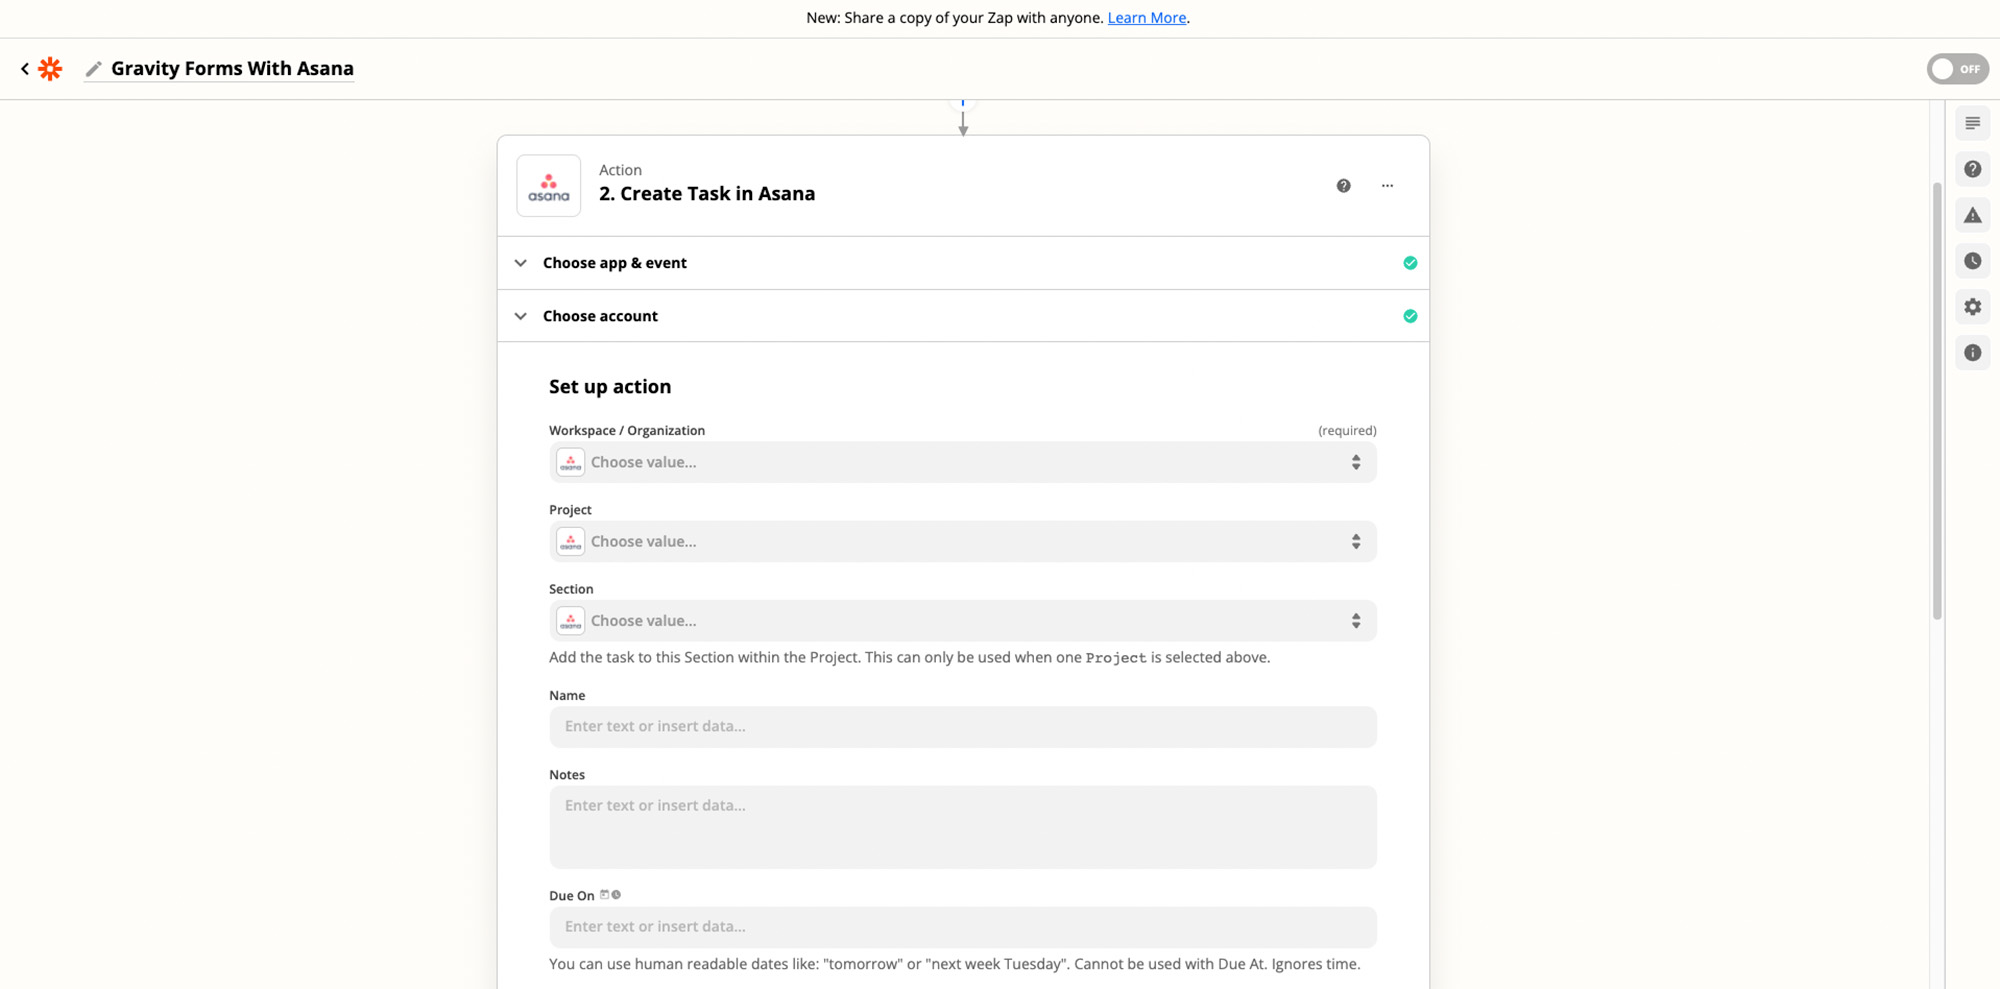
A few more options you can configure in this step include:
- Specifying the section of the project.
- Adding a name and a description to the task.
- Assigning the task to a specific team member.
- Setting the due date, followers, and even tags.
It’s a good idea to use the Description field to add all the necessary information from Gravity Forms. For example, you can include their name, address, and message, as well as when the form was submitted.
Once you’ve configured this step, click Continue. Zapier will then test that this part of the zap was set up correctly. All you have to do then is click Turn On Zap and Zapier will send the specified form data to your Asana project whenever someone fills out that form.
Ready To Get Started With Gravity Forms And Asana?
As you can see, thanks to the Gravity Forms Zapier Add-On, you can easily send your form data to a wide assortment of apps and services. Asana is a great choice for businesses, a powerful and robust tool that will help you manage your form entries and turn them into actionable tasks.
Interested in what else you can do with Gravity Forms and Zapier? Check out these articles to find out more…
- Salesforce WordPress Integration: How to Get Started
- Gravity Forms to Google Sheets Using Zapier Integration
- This Month’s Featured Add-On… Zapier!
- Gravity Forms Zapier Integrations
- Zapier Add-On Documentation
Gravity Forms Zapier Transfer
Last month, the Gravity Forms Zapier Add-On has seen added Support for Zapier’s newest feature, Transfer by Zapier, which will allow data to be moved between apps in bulk!
This is a real game-changer for Gravity Forms users, as you will now be able to transfer all prior form submissions – even if those entries are months (or years!) old – in one go. Data can also be transferred in bulk from an outside service into a form, processing those entries through the form workflow.
Key features include…
- Manage Historical Data – Move data that is months or years old, giving you immediate access to records that, up until now, haven’t been easy to manage.
- Select the Data You Need – Select the exact records you want to transfer, or dig down deeper and opt to send specific record attributes, so you only move the data you need.
So if you have historic Gravity Forms entries that you want to transfer in bulk into Asana, this is now possible with Gravity Forms Zapier Transfer.
Find out more about Zapier Transfer and the possibilities this feature offers.
Don’t Have Gravity Forms Yet?
If you don’t have Gravity Forms or the Zapier Add-On, don’t worry. You can still test out everything in this article for free inside your own personalized Gravity Forms demo and see why Gravity Forms is the top choice for WordPress sites worldwide.
Already in love? Purchase our premium WordPress form plugin today!

If you want to keep up-to-date with what’s happening on the blog sign up for the Gravity Forms newsletter!

