Connect Gravity Forms to Make.com: Form Automation Made Easy

Searching for a way to supercharge your forms? With Gravity Forms and Make.com, you can easily integrate Gravity Forms with thousands of other apps, like Google Sheets.
In this article, we’ll discuss Make.com and some of the ways in which you can use it with Gravity Forms. Then we’ll show you how you can use the two together to send your form entries to Google Sheets.
What is Make.com?
You might already be familiar with Zapier and how you can use it to connect your web forms to Podio, Zendesk, Google Drive, and other popular services with it.
Make.com is very similar, in that it allows you to join web applications and services via trigger-action workflows. For example, when someone submits a form on your website, you could use Make.com to automatically send the data to a spreadsheet, CRM, or elsewhere. Everything happens automatically, reducing manual work and saving time in the process.
All of this is possible thanks to APIs (Application Programming Interfaces). APIs are software interfaces that act as bridges, allowing different programs to communicate and interact with each other. Much like how USB ports allow devices to connect.
While developers have been using APIs for a long time, the cool thing about Make.com is that you can accomplish the same thing without any coding skills. You can set up even complex interactions with your computer mouse in a visual interface.
Whether you want to combine just two applications or several in sequence, Make.com lets you do it all. What’s more, you can set up conditional statements and filters to process your data exactly how you need it. You can also run your automations ad-hoc or on an automated schedule.
Finally, Make.com has a free plan, so you can try it before you buy it.
Why Use Gravity Forms With Make.com?
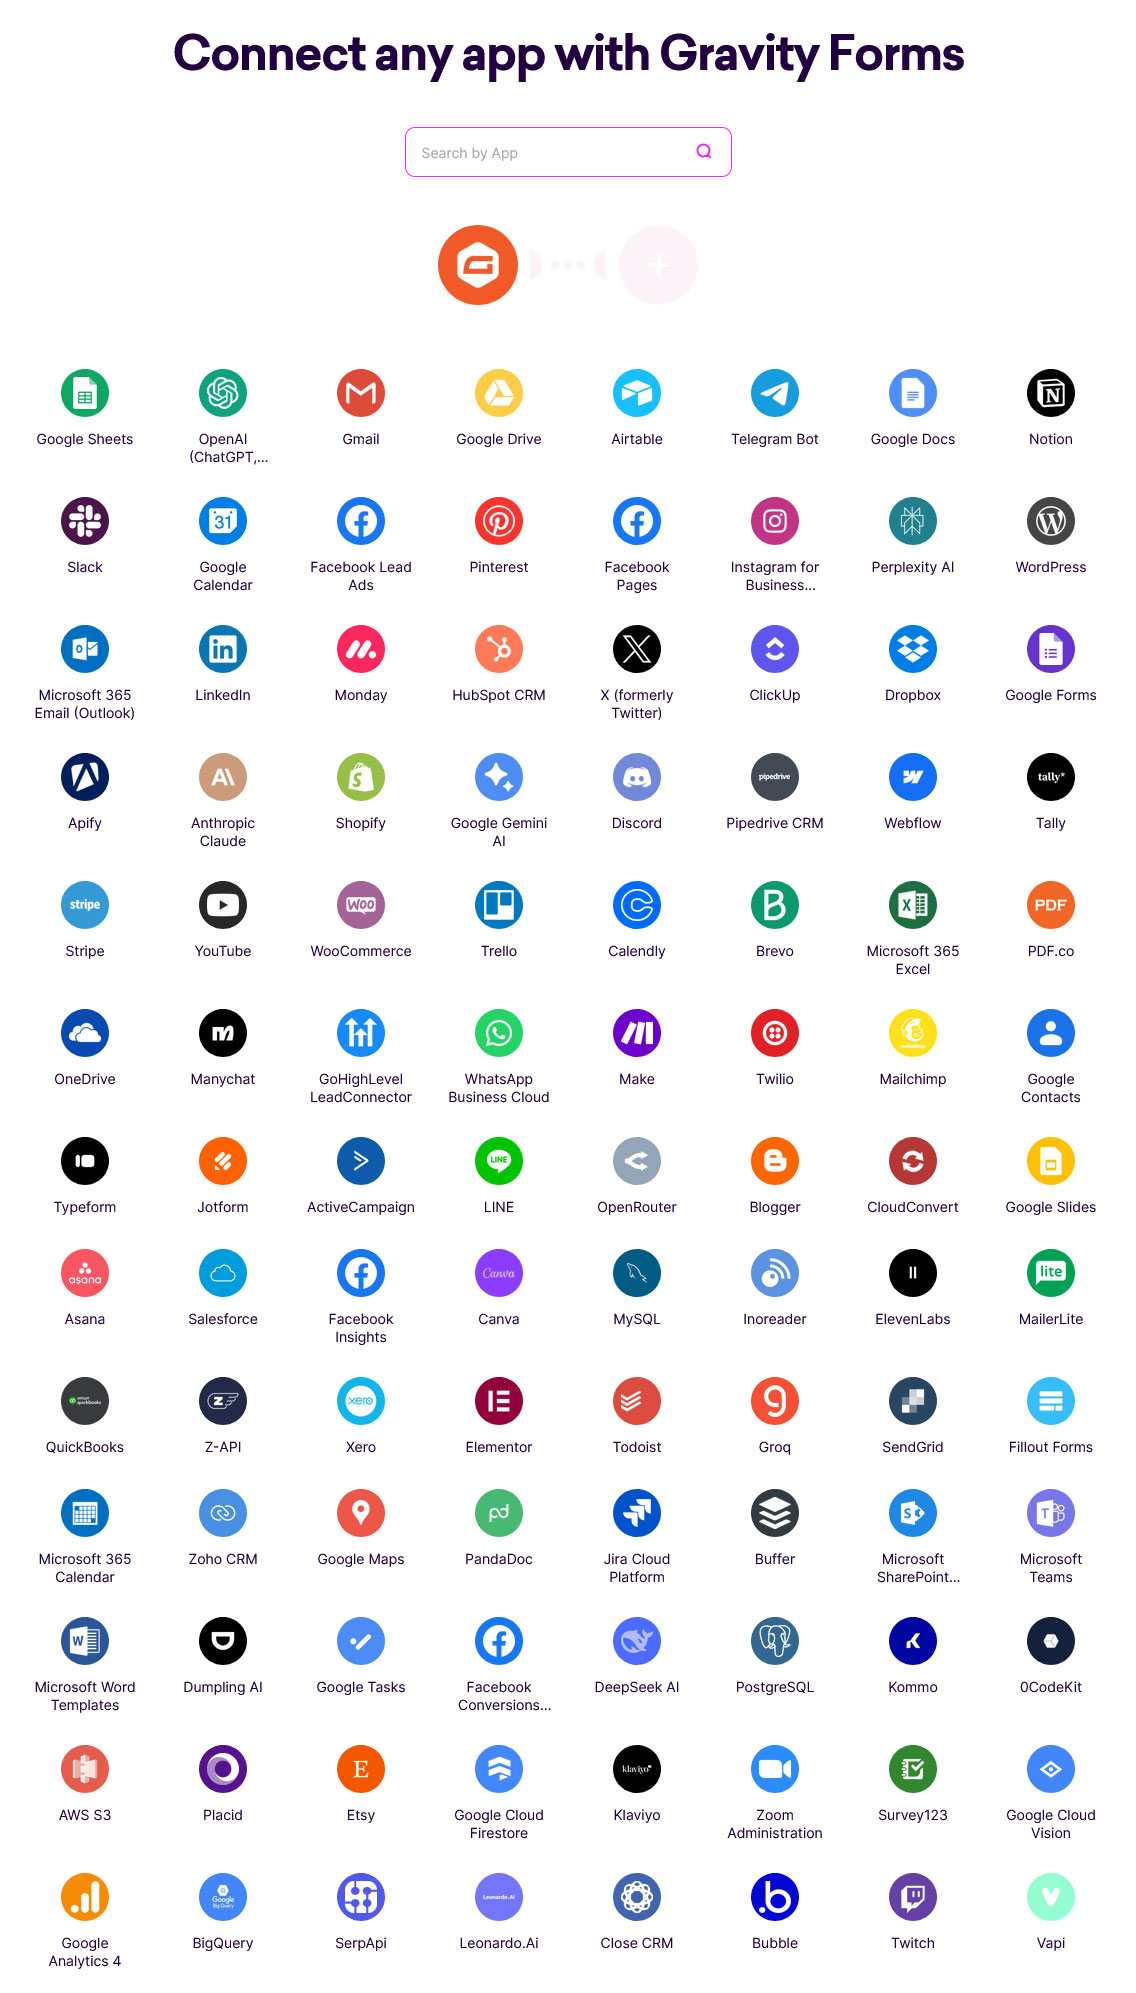
Besides its ease of use, powerful abilities, and convenience, the main draw of Make.com is its large library of possible components. Make.com’s library sports more than 2,000 apps, including many names you have probably heard before.
Examples include LinkedIn, Excel, Hubspot, MailChimp, Gmail, ChatGPT, Claude, Canva, Google Docs, and—of course—Gravity Forms. The result: almost endless possibilities to automate how your data is processed.
Introducing Modules
In Make.com, the components you use to determine what happens in your automations are called modules. There are three different types:
- Trigger – This is what initiates the automation. When a specific event occurs, it sets the workflow in motion. In Gravity Forms the only trigger is a form submission.
- Action – The outcome that occurs when a trigger is activated.
- Search – An intermediate step you can use to find a particular record or piece of data before processing it. For example, you can use this to check if a user profile already exists before saving it again.
While Make.com has only one type of trigger for Gravity Forms, there are multiple search and action modules that can be used. Besides sending your form data to applications, it also allows you to do things, like signaling back to Gravity Forms to delete an entry after it has been passed on.
Use Case Examples
To give you a better impression of what all of this means, here are some practical ways you can use Make.com with Gravity Forms:
- Send notifications to Slack, Telegram, WhatsApp, Facebook Messenger, Discord, and other messaging services when you receive a form submission.
- Send an SMS confirmation to customers who use your support form.
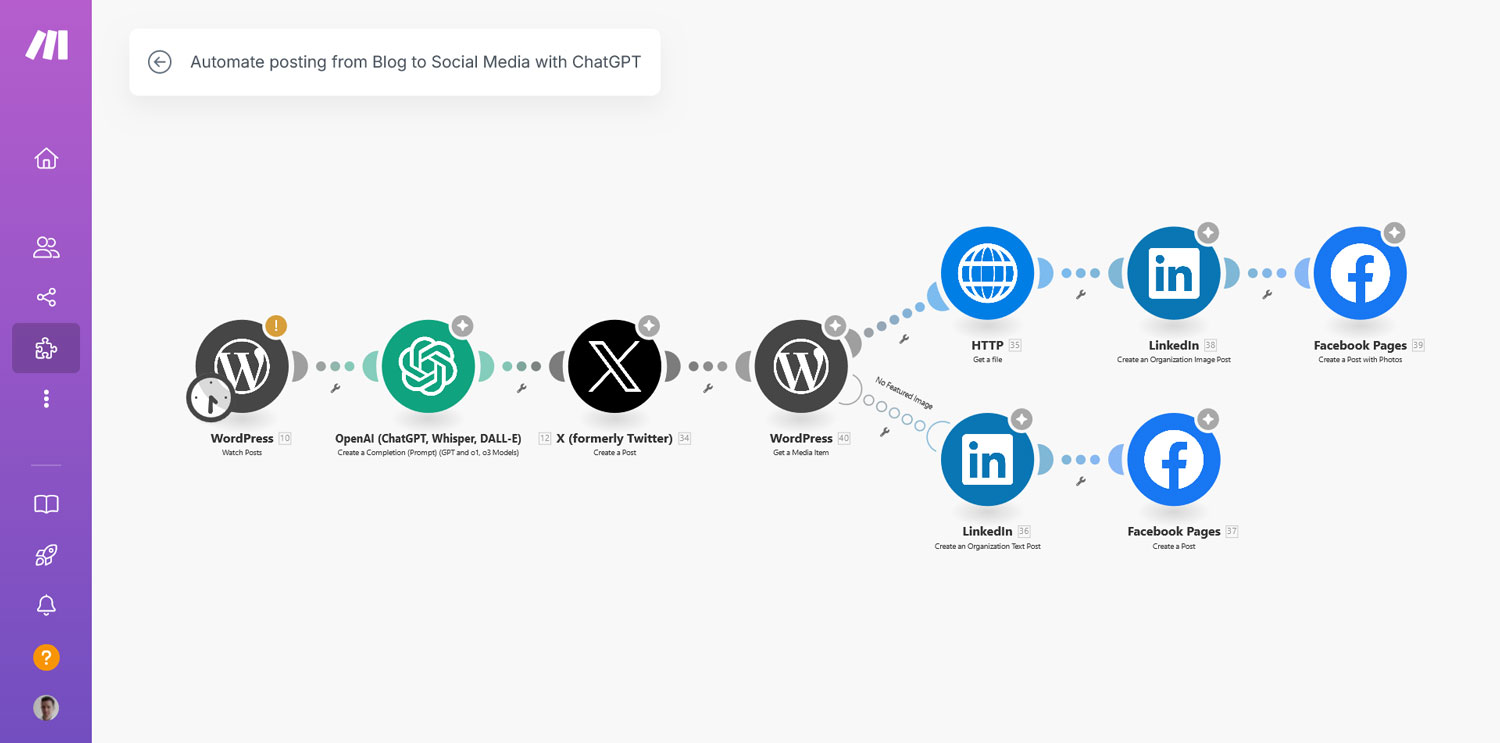
- Create a post in WordPress from information submitted through a form on your website.
- Pre-formulate an answer to an incoming contact request via ChatGPT before sending it to your CRM.
- Create an invoice in QuickBooks when someone uses your payment form.
- Compile the results of an employee engagement survey and other questionnaires in Excel.
- Automatically register people who use a webinar registration form to a Zoom meeting.
- Send entries from a job application form to your HR system
- Create an event in Google or Microsoft Calendar based on a contact form submission.
- Create a new task in Trello or Asana when a form is submitted.
- Save form entries in Google Sheets for further analysis (that’s what we’ll do below).
Now, let’s look at how to send Gravity Forms submissions to Google Sheets.
How to Use Gravity Forms With Make.com
One of the best things about Make.com is how easy it is to automate your web forms. Thanks to the REST API, which is available with all Gravity Forms licenses, it only takes a few mouse clicks and a bit of copy-paste.
Don’t believe it? Let’s go over a quick example. All you need to follow along is to have Gravity Forms installed on your WordPress site. If you don’t have a license yet, you can also use a free demo website.
1. Create a Form
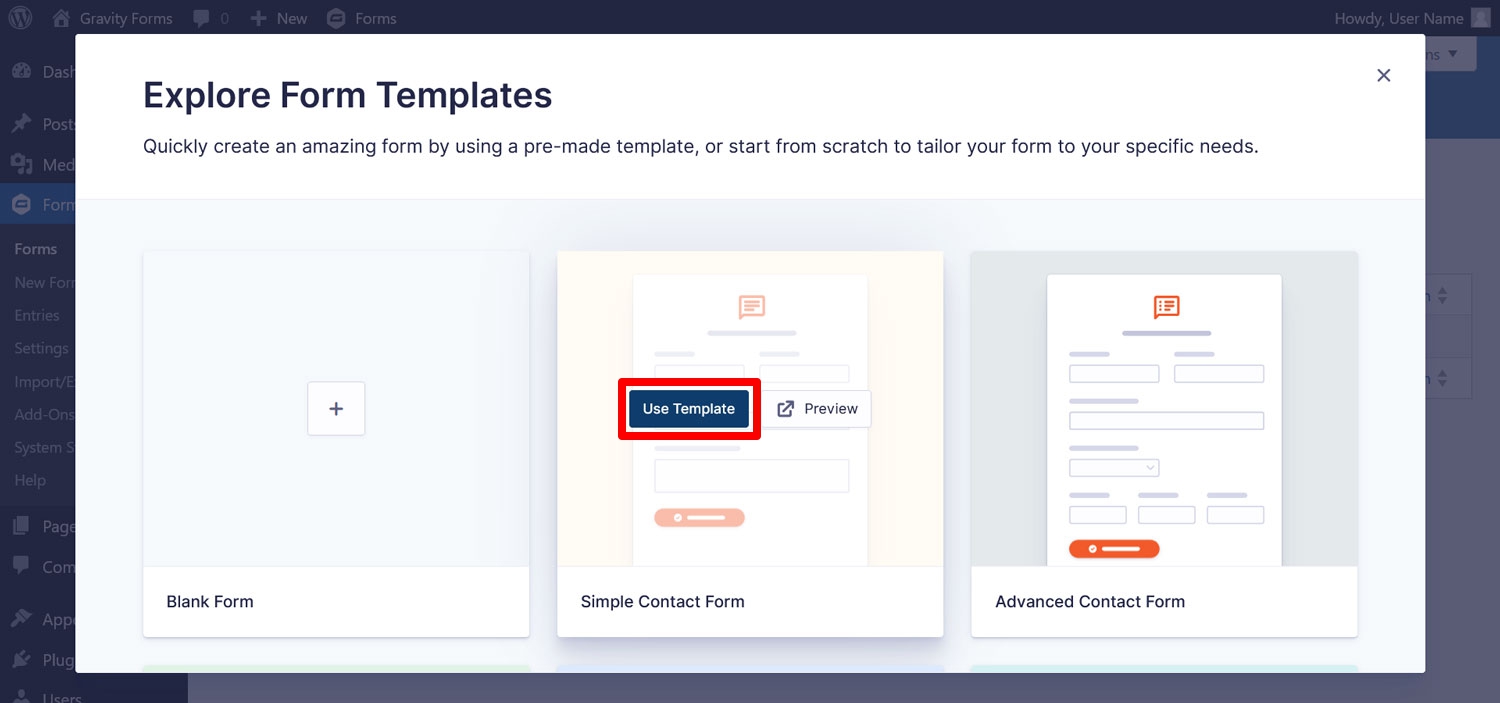
As a first step, set up a new form via Forms → New Form/Add New in your WordPress dashboard.

The fastest way is to go with one of the many available templates. Hover your cursor over one, click Use Template, and give it a name.
Next, you’ll land in the Gravity Forms editor.
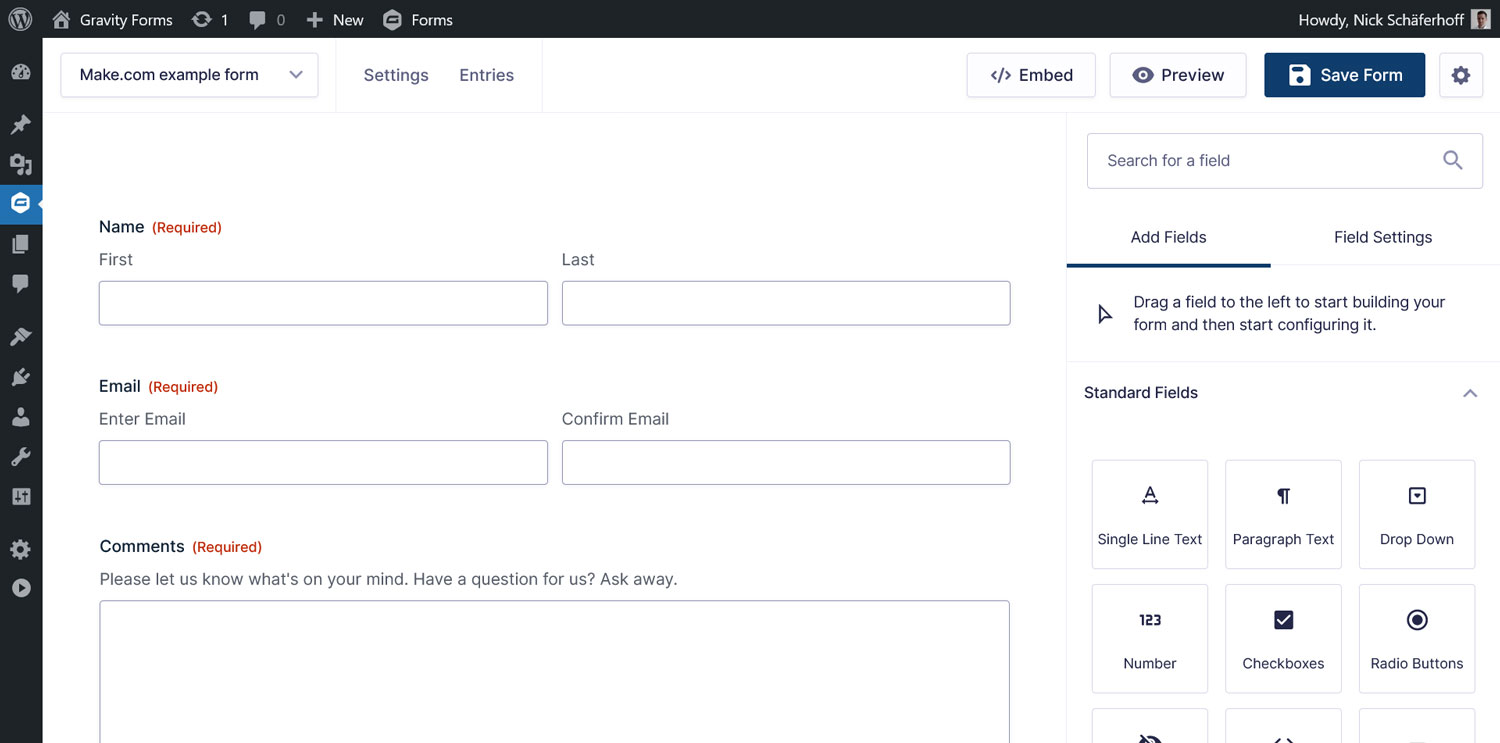
Customize your form as needed and click Save Form.
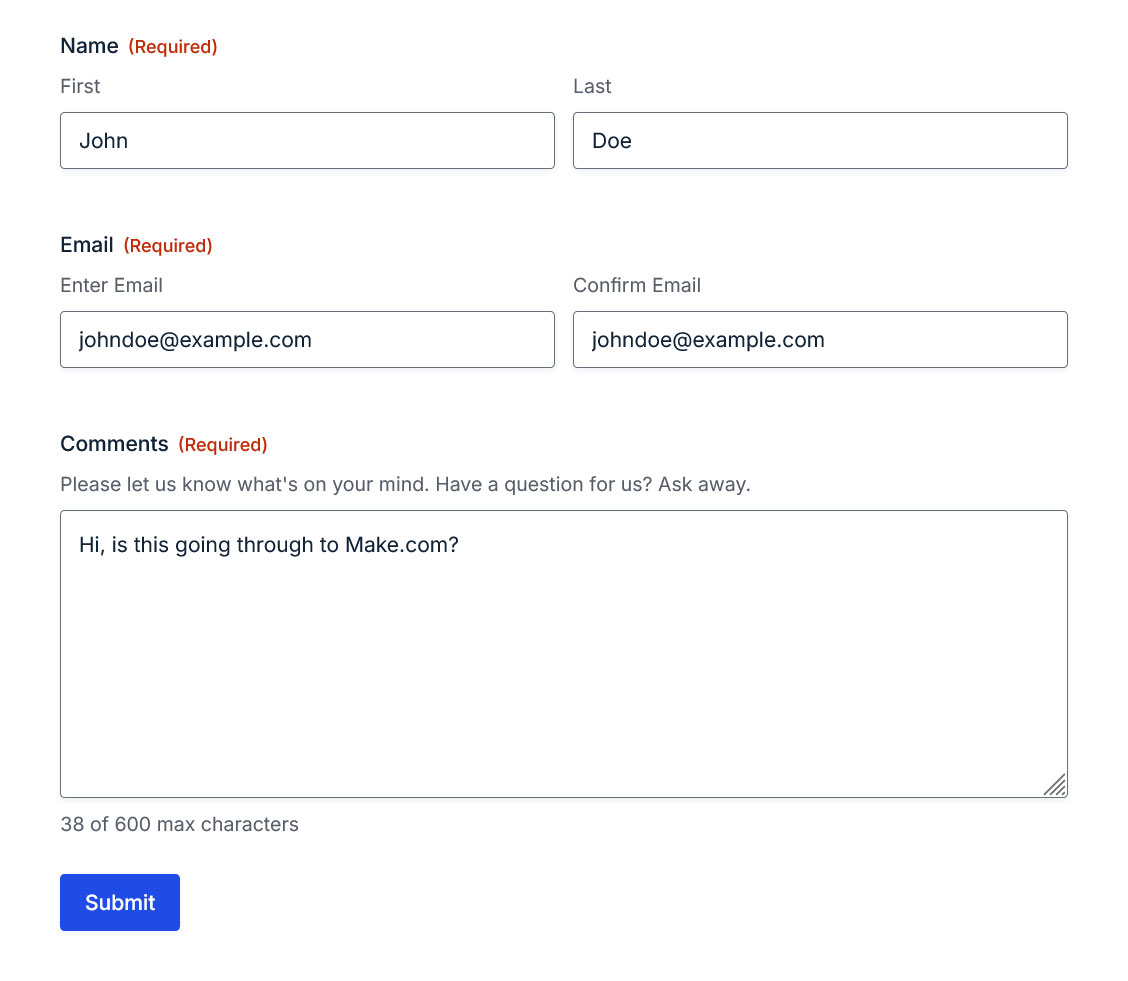
Next, embed your form on a page and publish it. Then fill it out and then click Submit. This text entry will be used later.
2. Set Up the Gravity Forms REST API
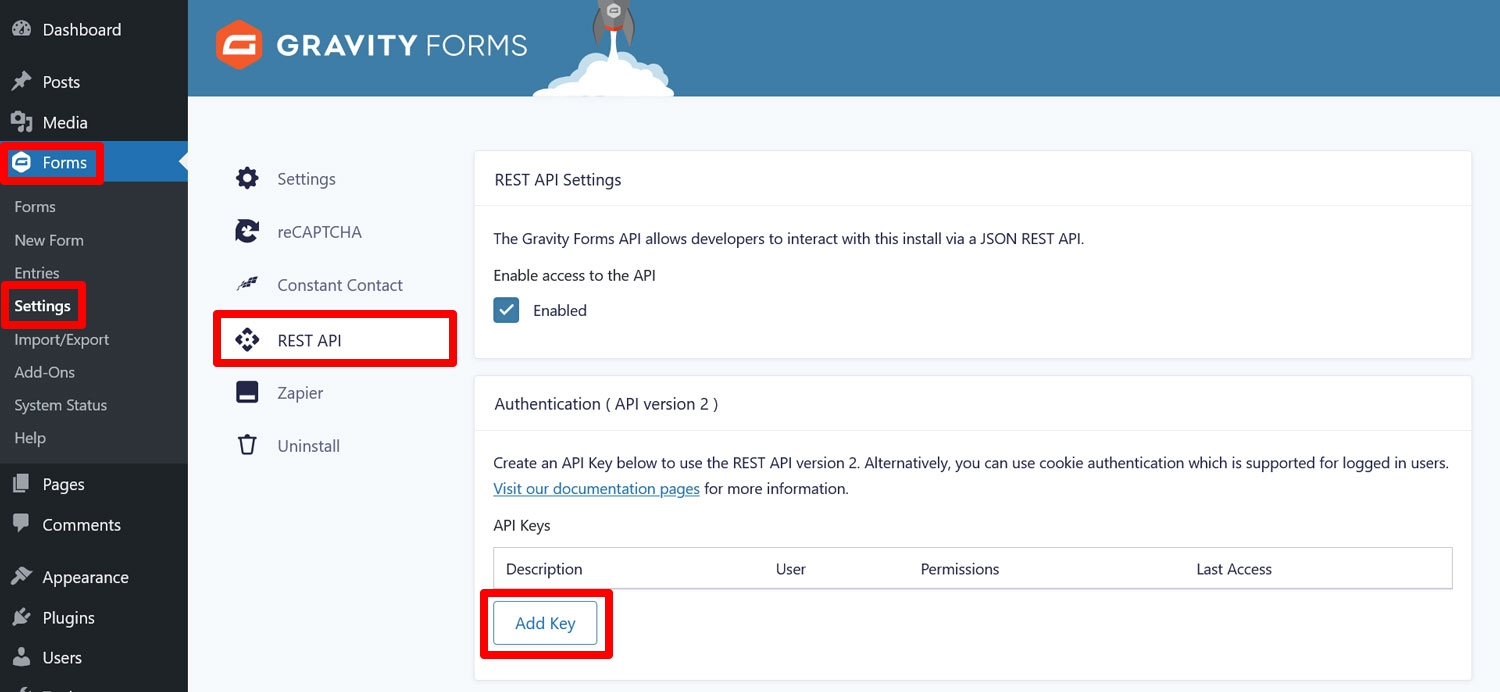
To connect to Make.com, you need an API key for the Gravity Forms REST API. For that, go to Forms → Settings → REST API. Check the box to enable the API, then click Add Key under Authentication (API version 2).
Here’s how to fill out the pop-up that appears:
- Description – Helps you distinguish between different API keys.
- User – Select a user with the permission level to view and edit entries.
- Permissions – Pick Read/Write from the drop-down menu.
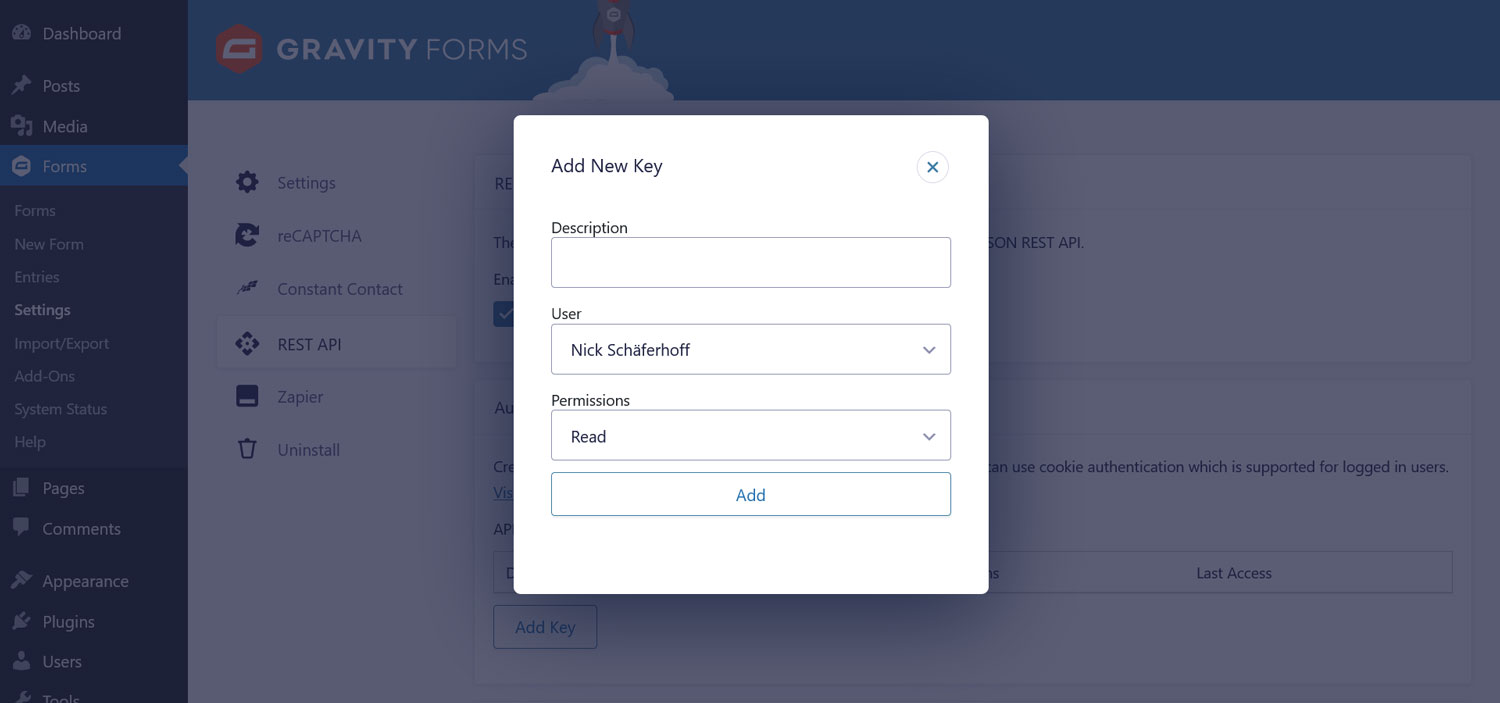
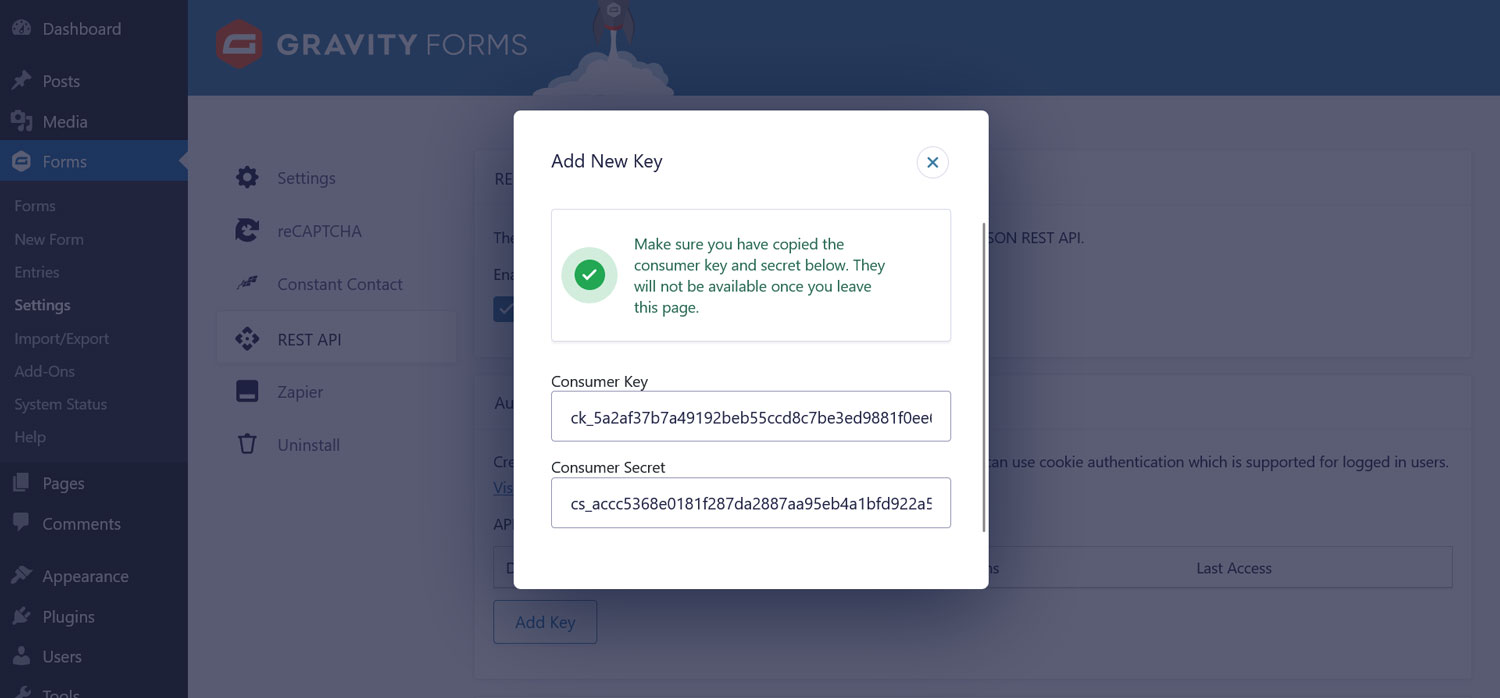
When ready, click Add to reveal your consumer key and consumer secret. Copy these and store them somewhere safe. Once you close the window, you won’t be able to access them again. Finally, save the settings by clicking Update.
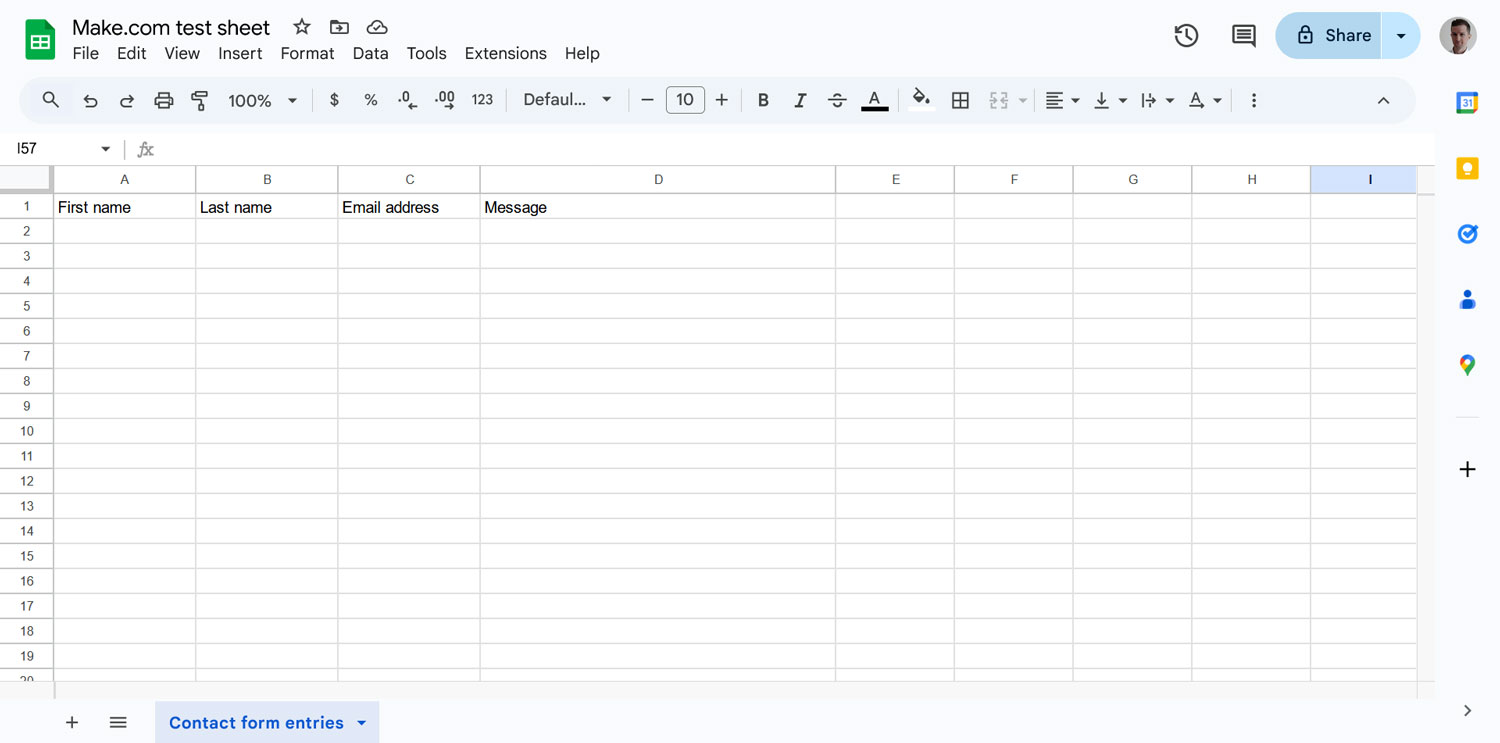
3. Prepare Your Google Sheet
The next step is to send form submissions over to Google Sheets to collect and analyze them in bulk.
To do this, log in to your Google account (or create one, if you don’t have one already), and create your spreadsheet using Google Sheets. Name the columns according to the data you want to collect.
4. Sign Up to Make.com
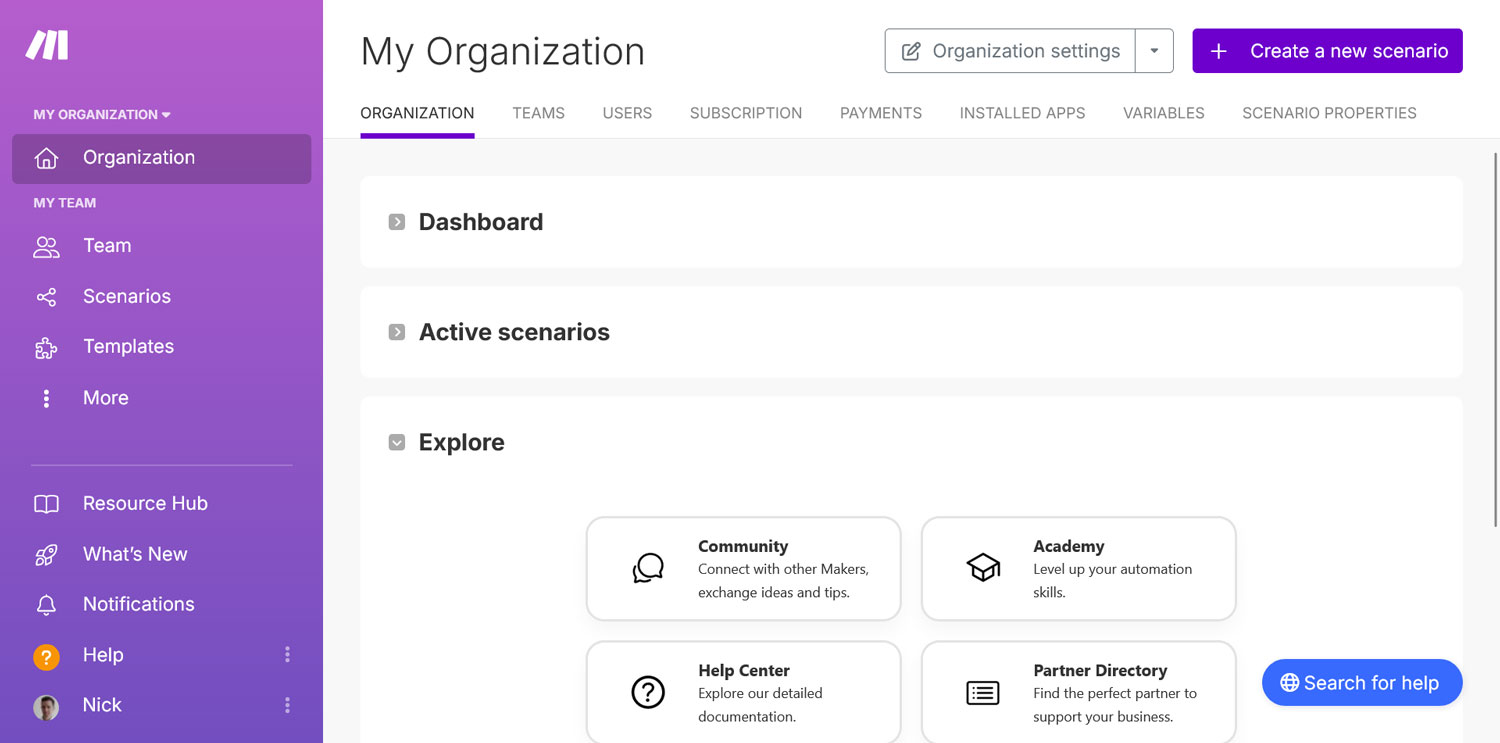
After that, you are ready to set up your automation. Go to the Make.com website and click Get started free.

Go through the sign-up process until you land on the dashboard.
5. Create Your Scenario
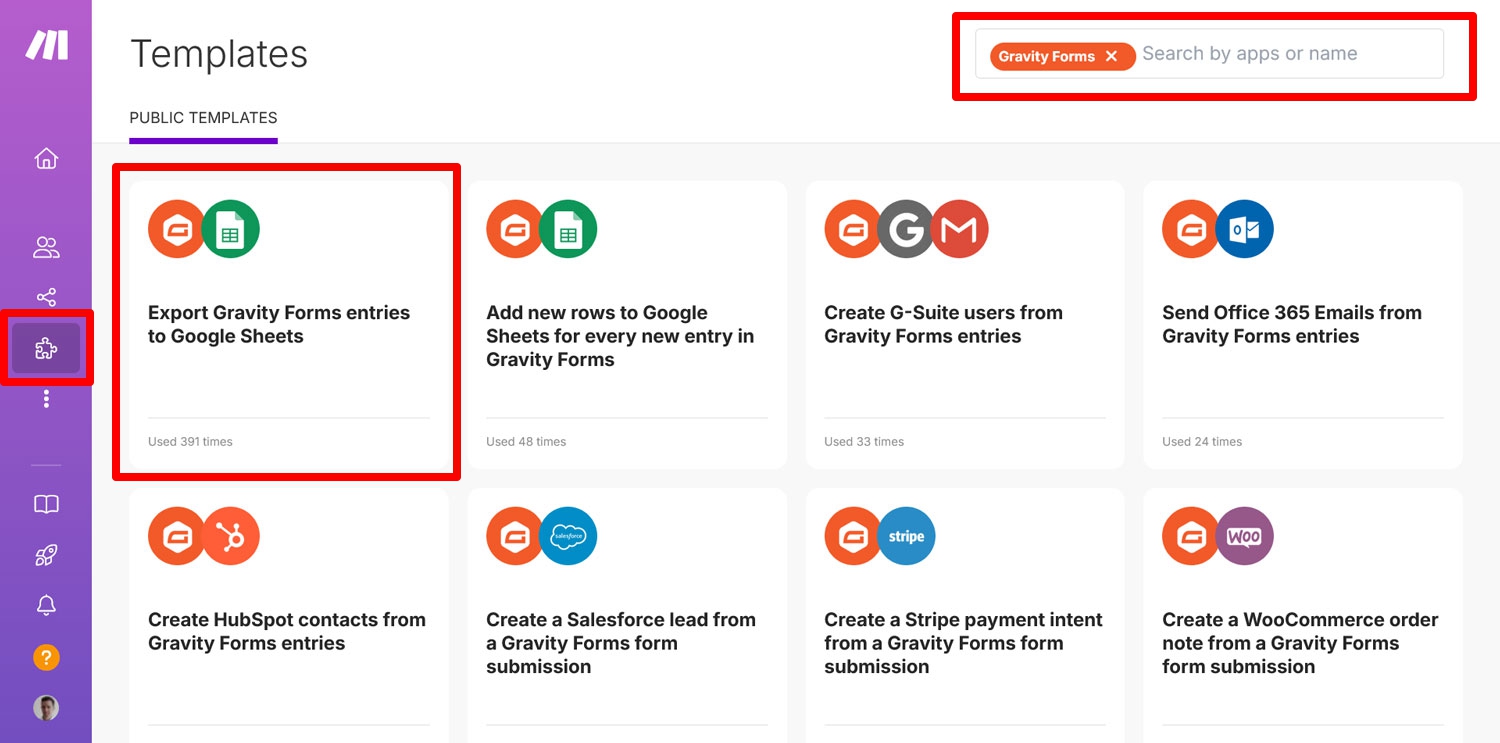
Make.com calls automations “scenarios”. You can create them from scratch, use an existing template, or get help from AI.
Since there is already a template for exporting Gravity Forms entries to Google Sheets, this is the easiest option. Simply go to Templates, search for Gravity Forms in the upper right corner, and click the correct template.
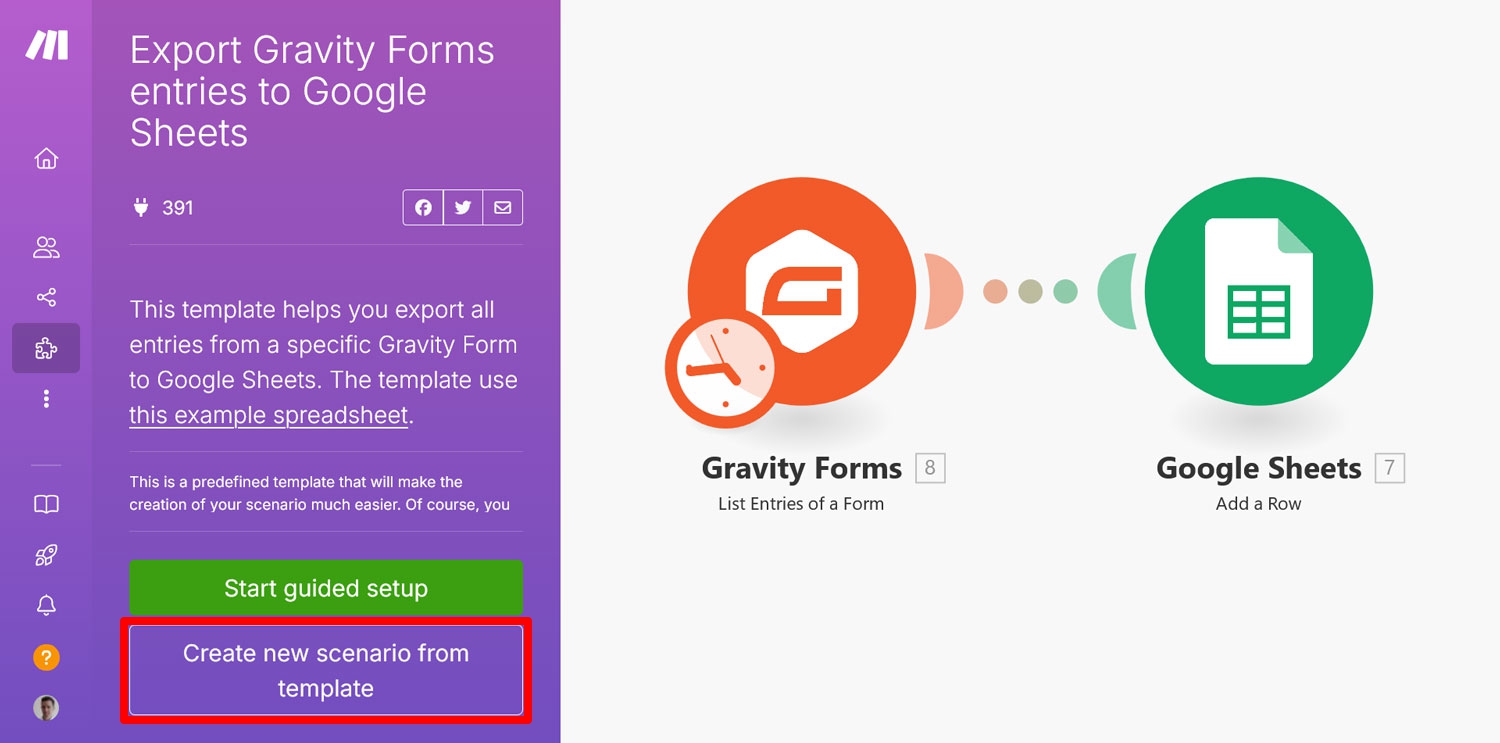
On the next screen, click Create new scenario from template.
6. Connect and Configure Your Apps
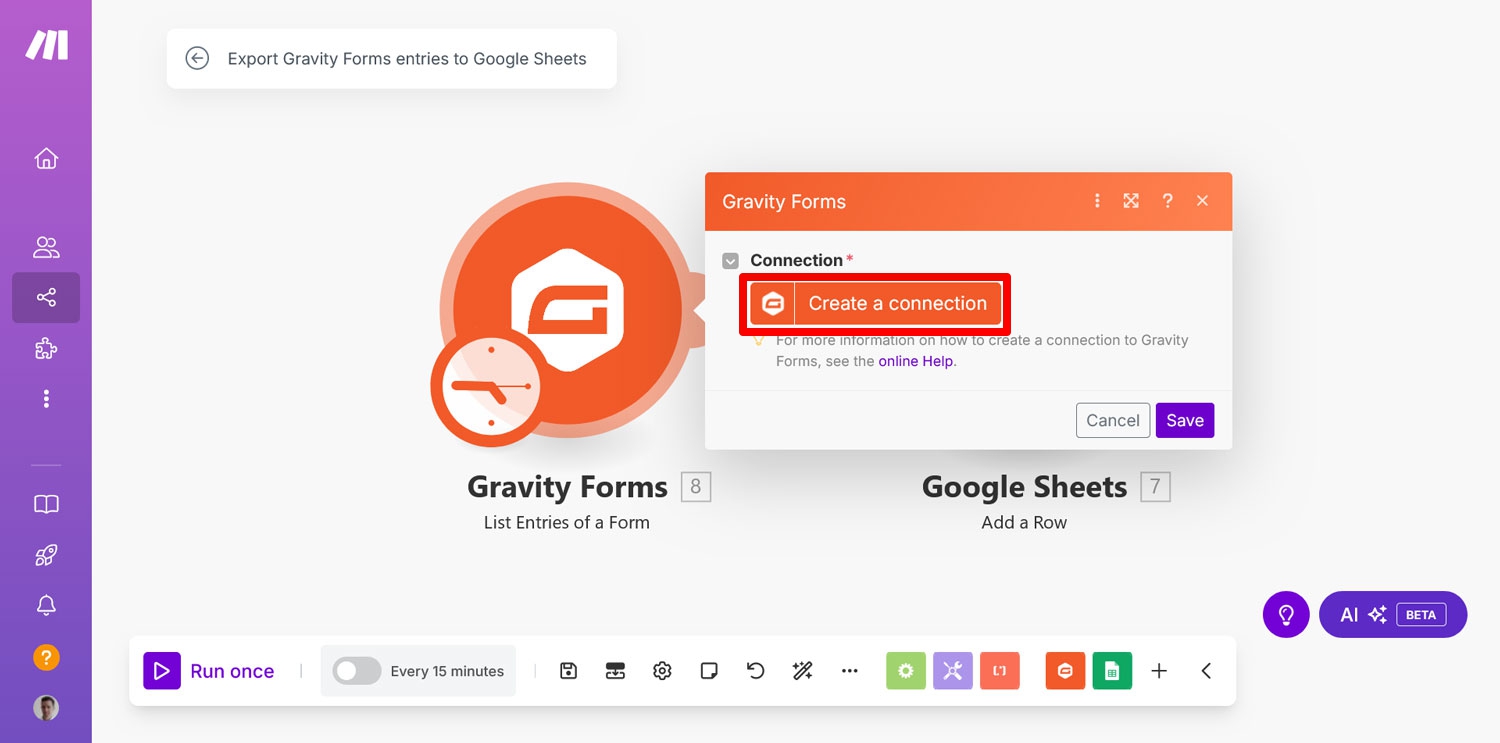
In the Make.com scenario editor that follows, click the Gravity Forms logo, then Create a connection.
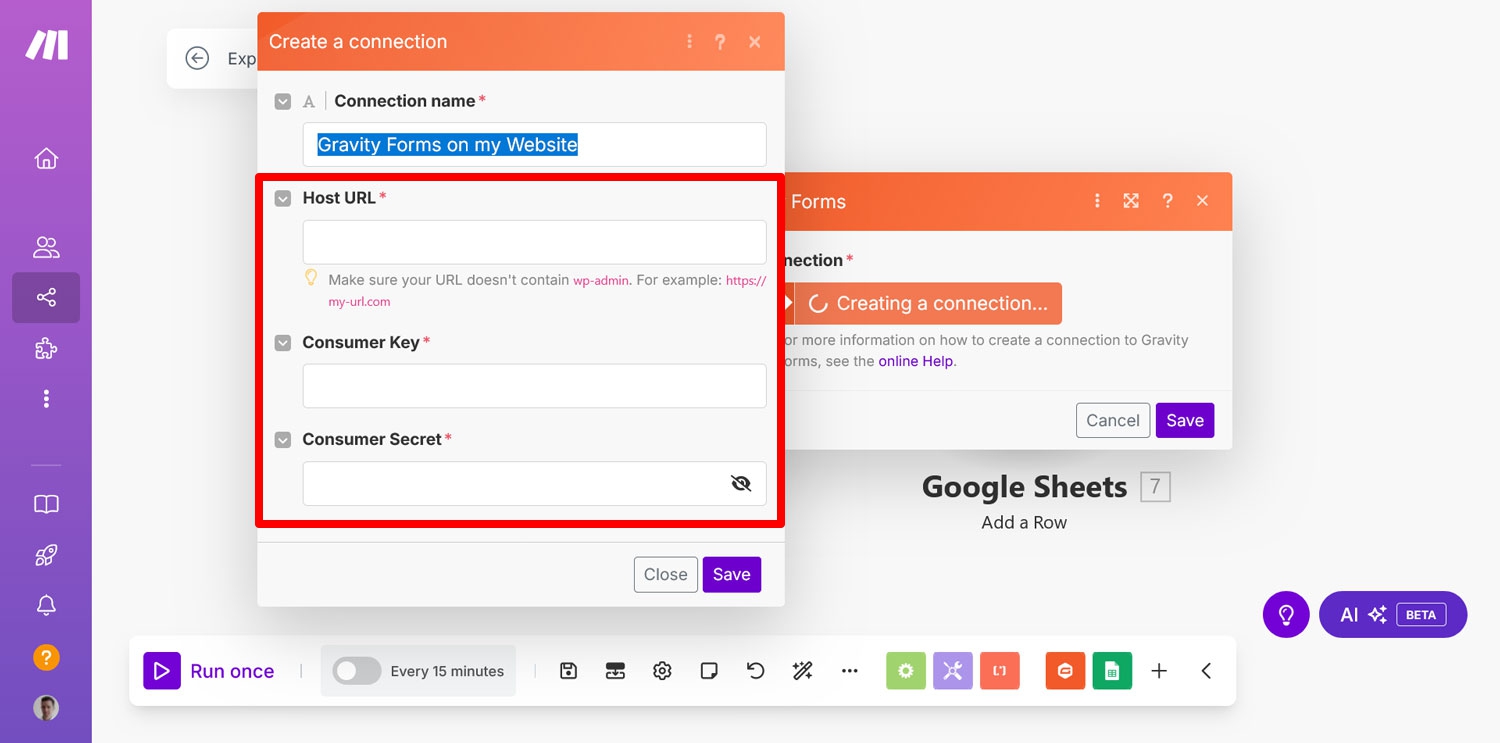
Next, enter your site Host URL, Consumer Key, and Consumer Secret in the respective fields, then click Save.
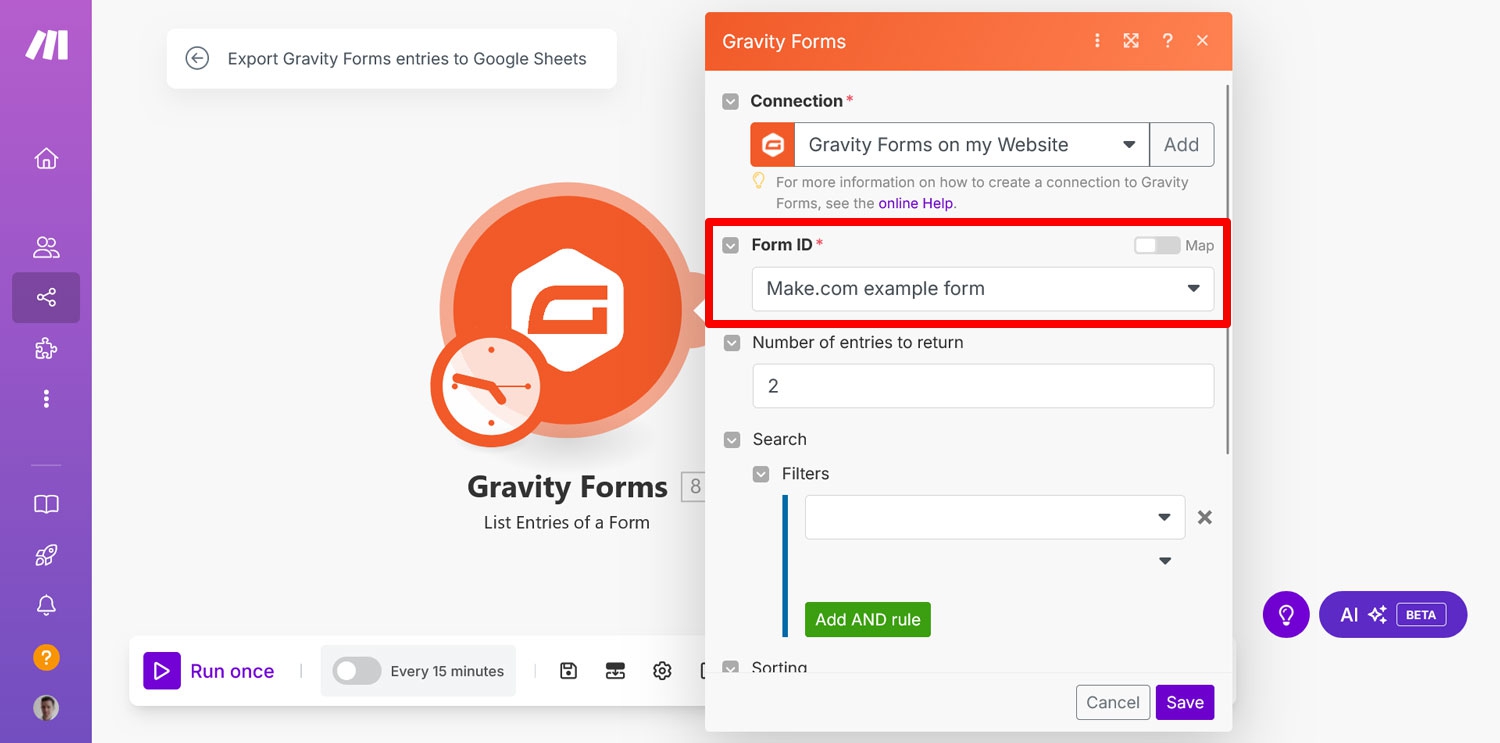
Next, choose the form you want to use from the drop-down menu and save again.
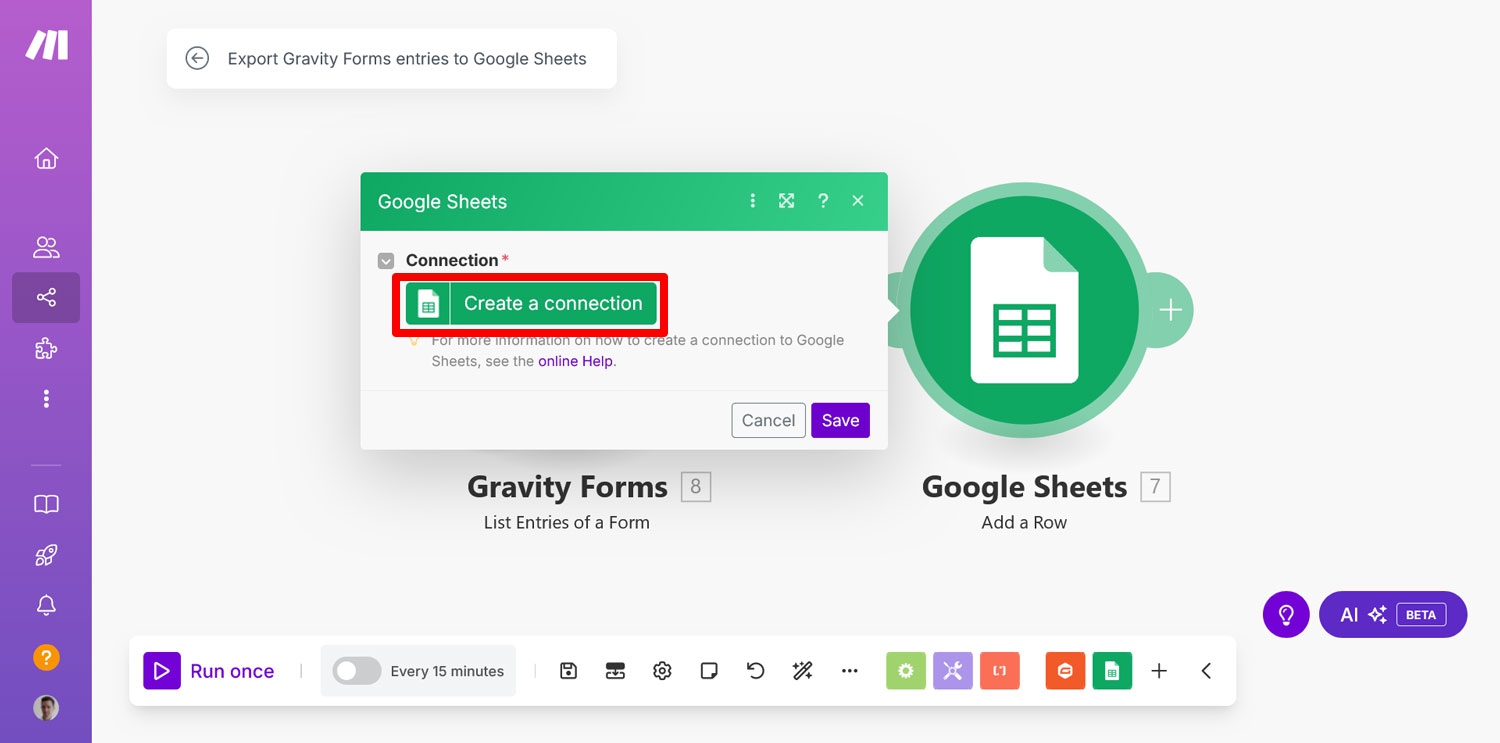
Do the same with Google Sheets. Simply click the logo, Create a connection, sign in with your Google profile, and grant the required permissions.
Next, use the drop-down menus to choose your Spreadsheet ID and Sheet Name.

Once you do, Make.com should show the available columns with their names. It might also pre-populate it with field data from your chosen form.
Customize it to your needs. To map the data, click into the column’s field and then select from the Gravity Form field values that appear.
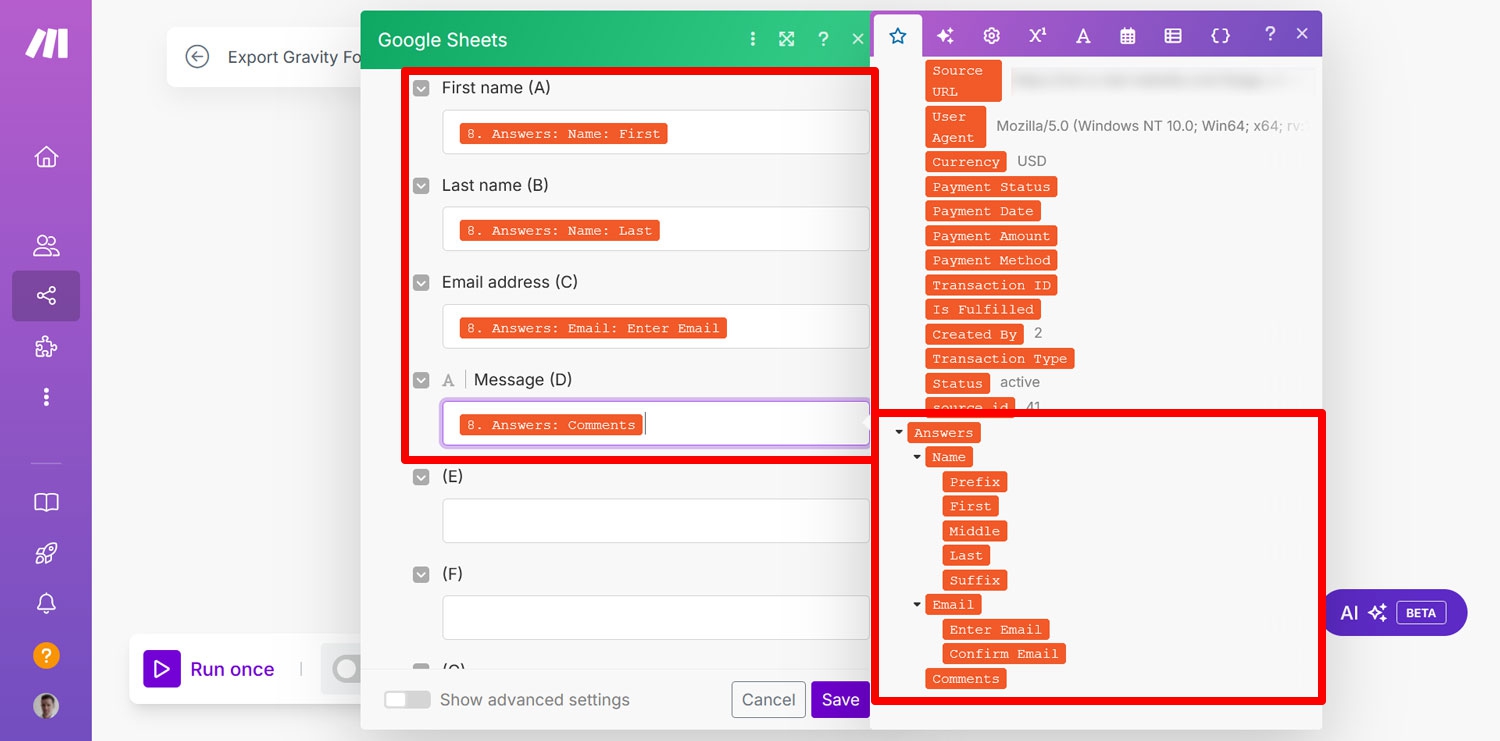
When you are done, click Save.
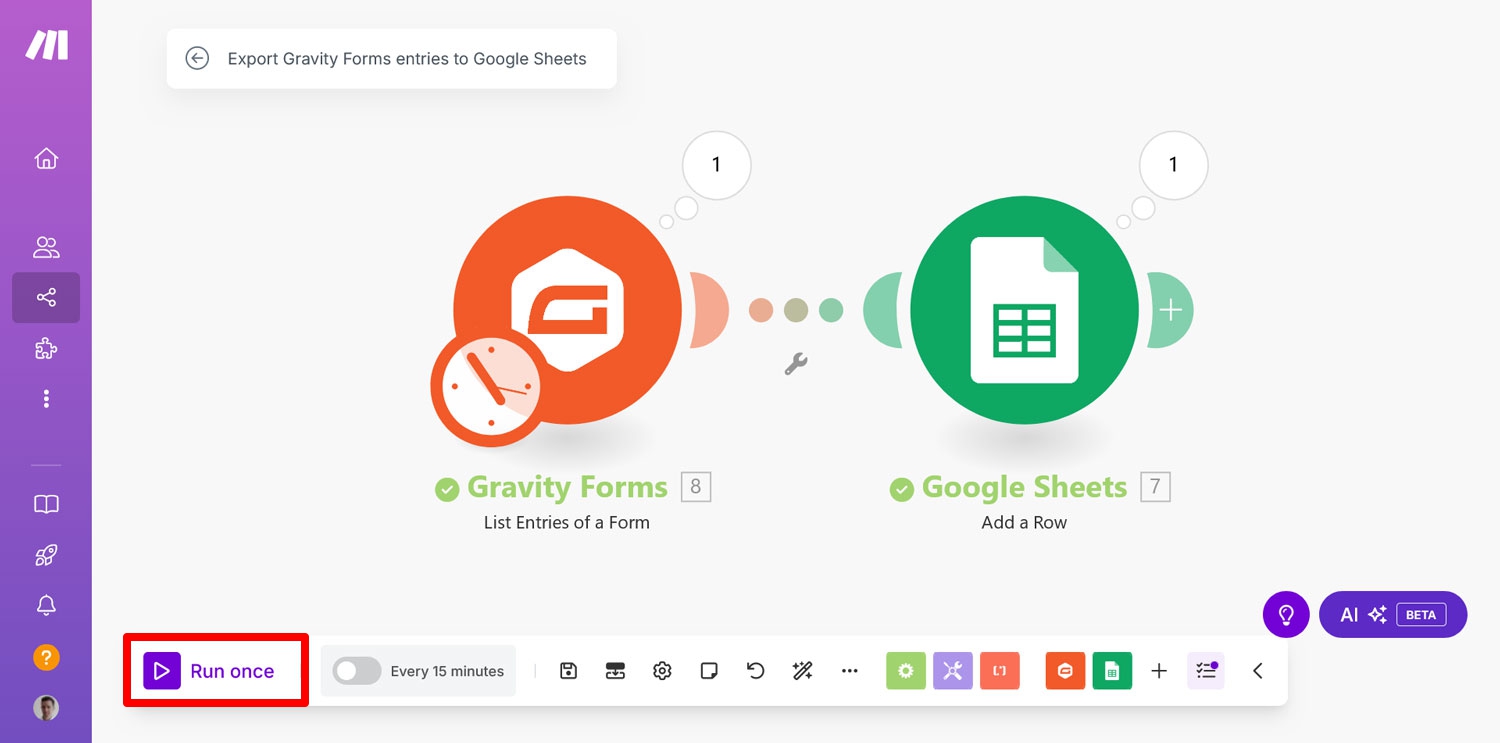
7. Run Your Scenario
To test your scenario, click Run once.
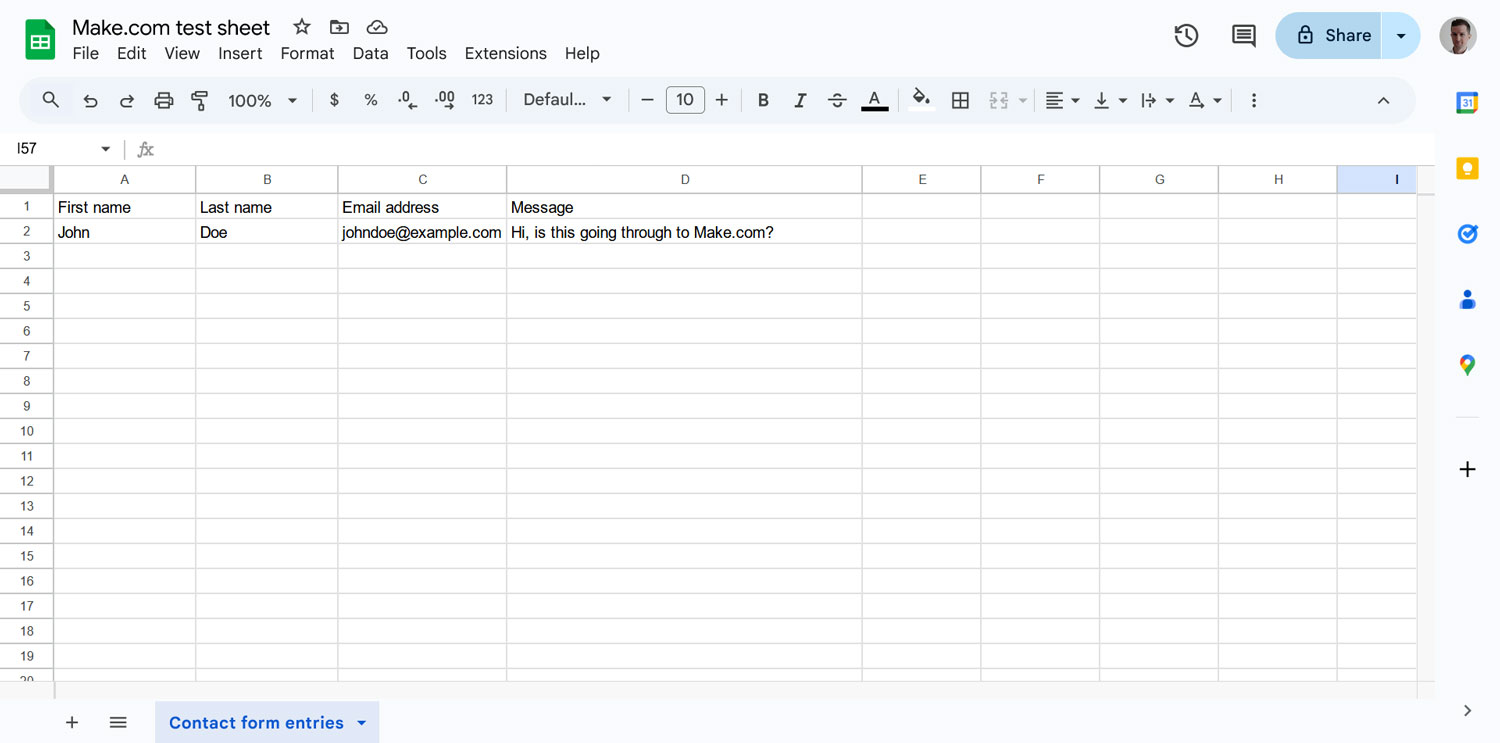
If you completed the earlier step and submitted an entry to the form, your test data should appear in the respective columns of your Google Sheet.
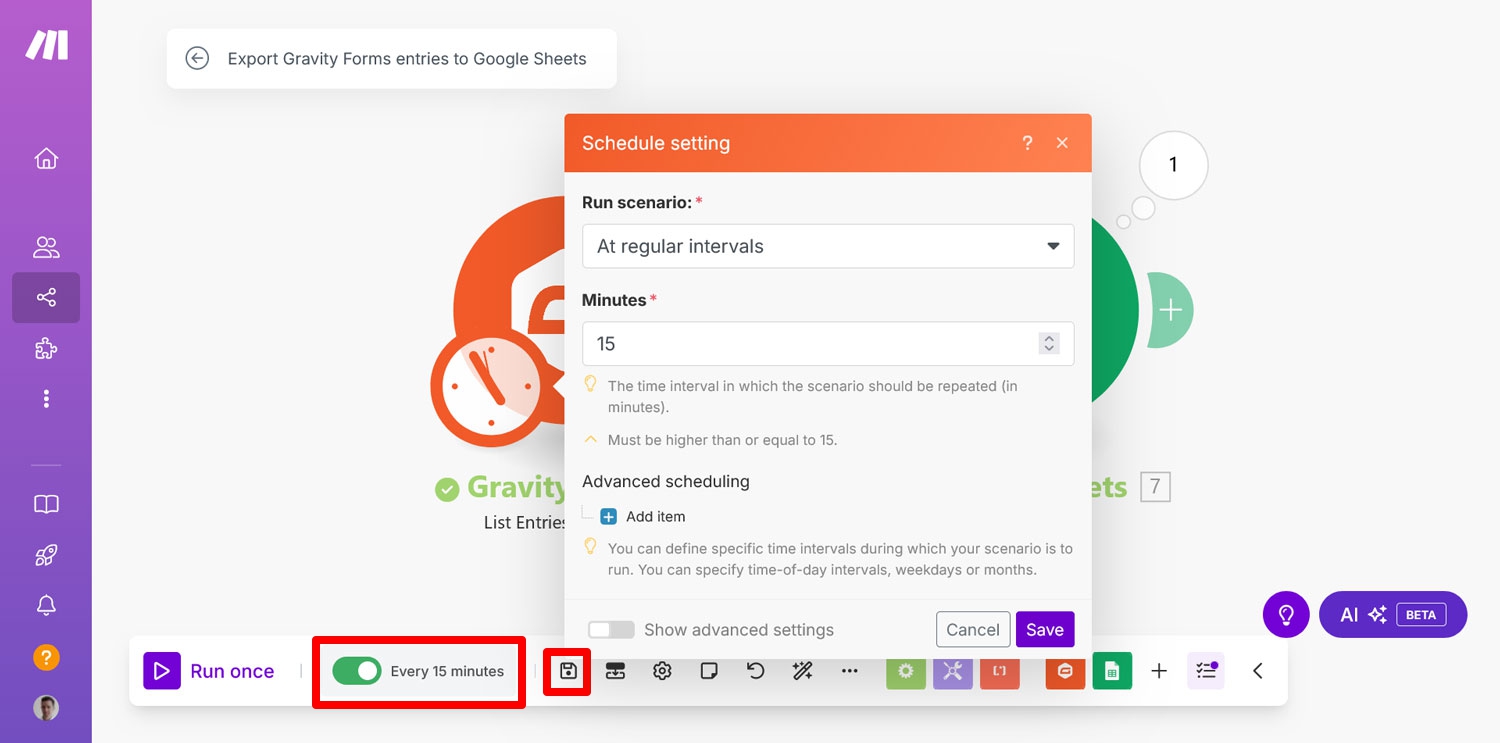
Once confirmed, save your scenario and, optionally, set the interval at which it should run automatically.
Try Gravity Forms and Make.com Today!
Excited to explore more from Gravity Forms and Make.com? This tutorial is just the tip of the iceberg. And the best part? This can all be done with any Gravity Forms license.
Make.com’s user-friendly interface makes it easy for beginners and experienced users alike to create powerful, automated workflows.
Start automating today and watch your productivity soar!

If you want to keep up-to-date with what’s happening on the blog sign up for the Gravity Forms newsletter!