How to Connect Gravity Forms to One Tribe to Run Climate Sustainability Initiatives
Written by the Editorial team at One Tribe…
With Gravity Forms and One Tribe, you can start making climate sustainability a more prominent part of your WordPress forms and website.
In a nutshell, One Tribe is a sustainability-focused tech platform that you can integrate with Gravity Forms to do cool things like offering climate incentives based on users’ interactions with your forms.
For example, you could pledge to plant a certain number of trees for everyone who signs up to your email list or makes a payment via one of your forms. One Tribe also lets you track the results of these incentives and even display them publicly on a certified page.
In this guest post, we’re going to briefly introduce you to One Tribe and what it offers in a little more detail.
Then, we’ll take you through how to connect Gravity Forms to One Tribe so that you can start offering climate incentives for your forms.
What Is One Tribe?
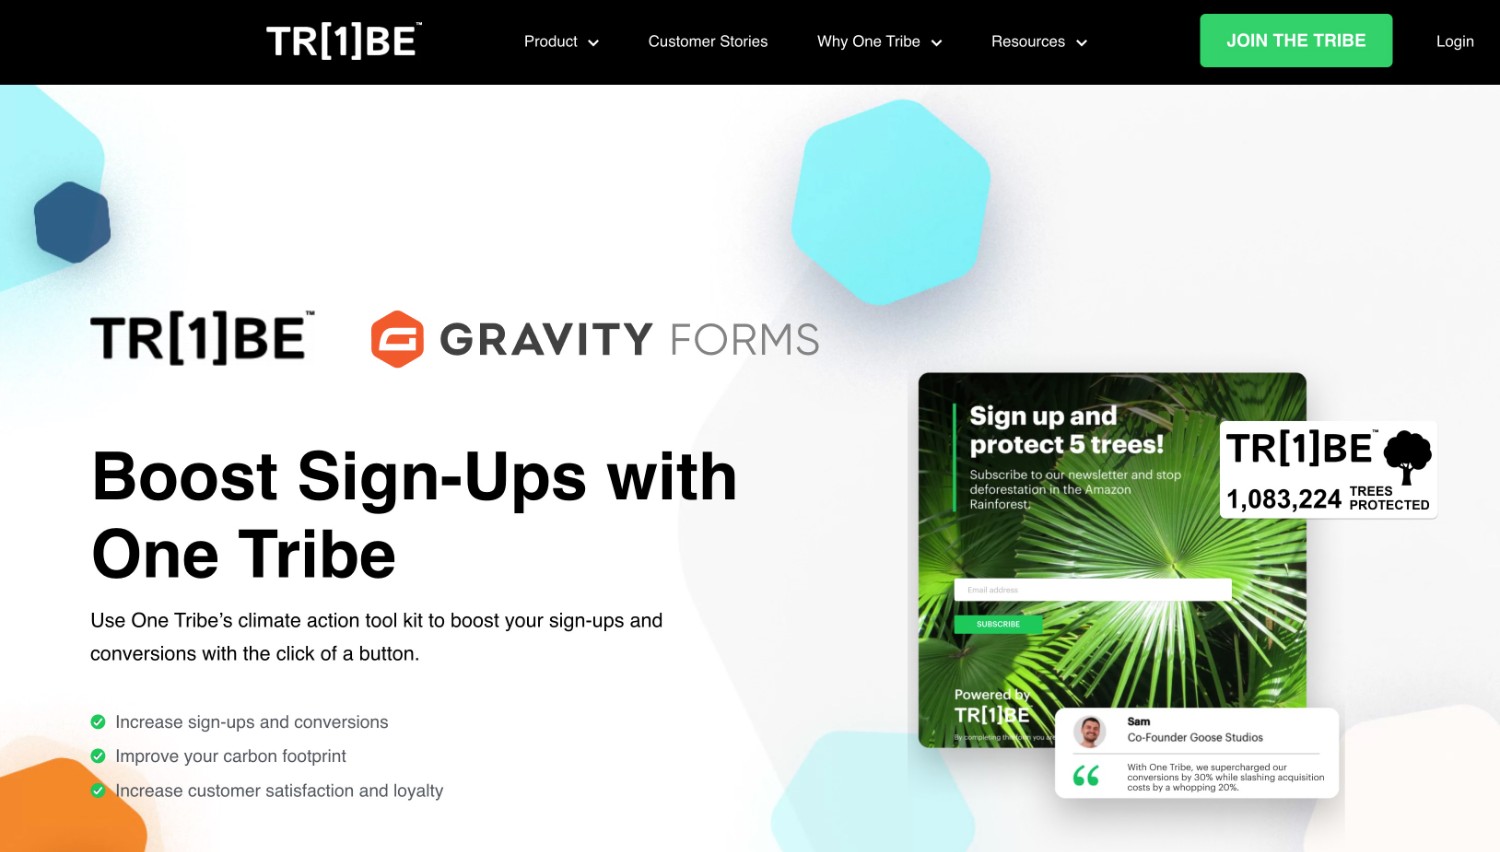
One Tribe is a sustainability-focused tech platform that helps businesses reduce their carbon emissions and certify their climate impact.
To make that happen, One Tribe offers a few different types of features that are relevant for businesses using WordPress.
- Climate incentives – you can offer climate pledges/incentives based on actions that users take. For example, you could plant a certain number of trees every time someone submits your form.
- Certified impact page – you get your own page that you can show off to display your climate action statistics, such as the number of trees you’ve planted, amount of carbon stored, and more.
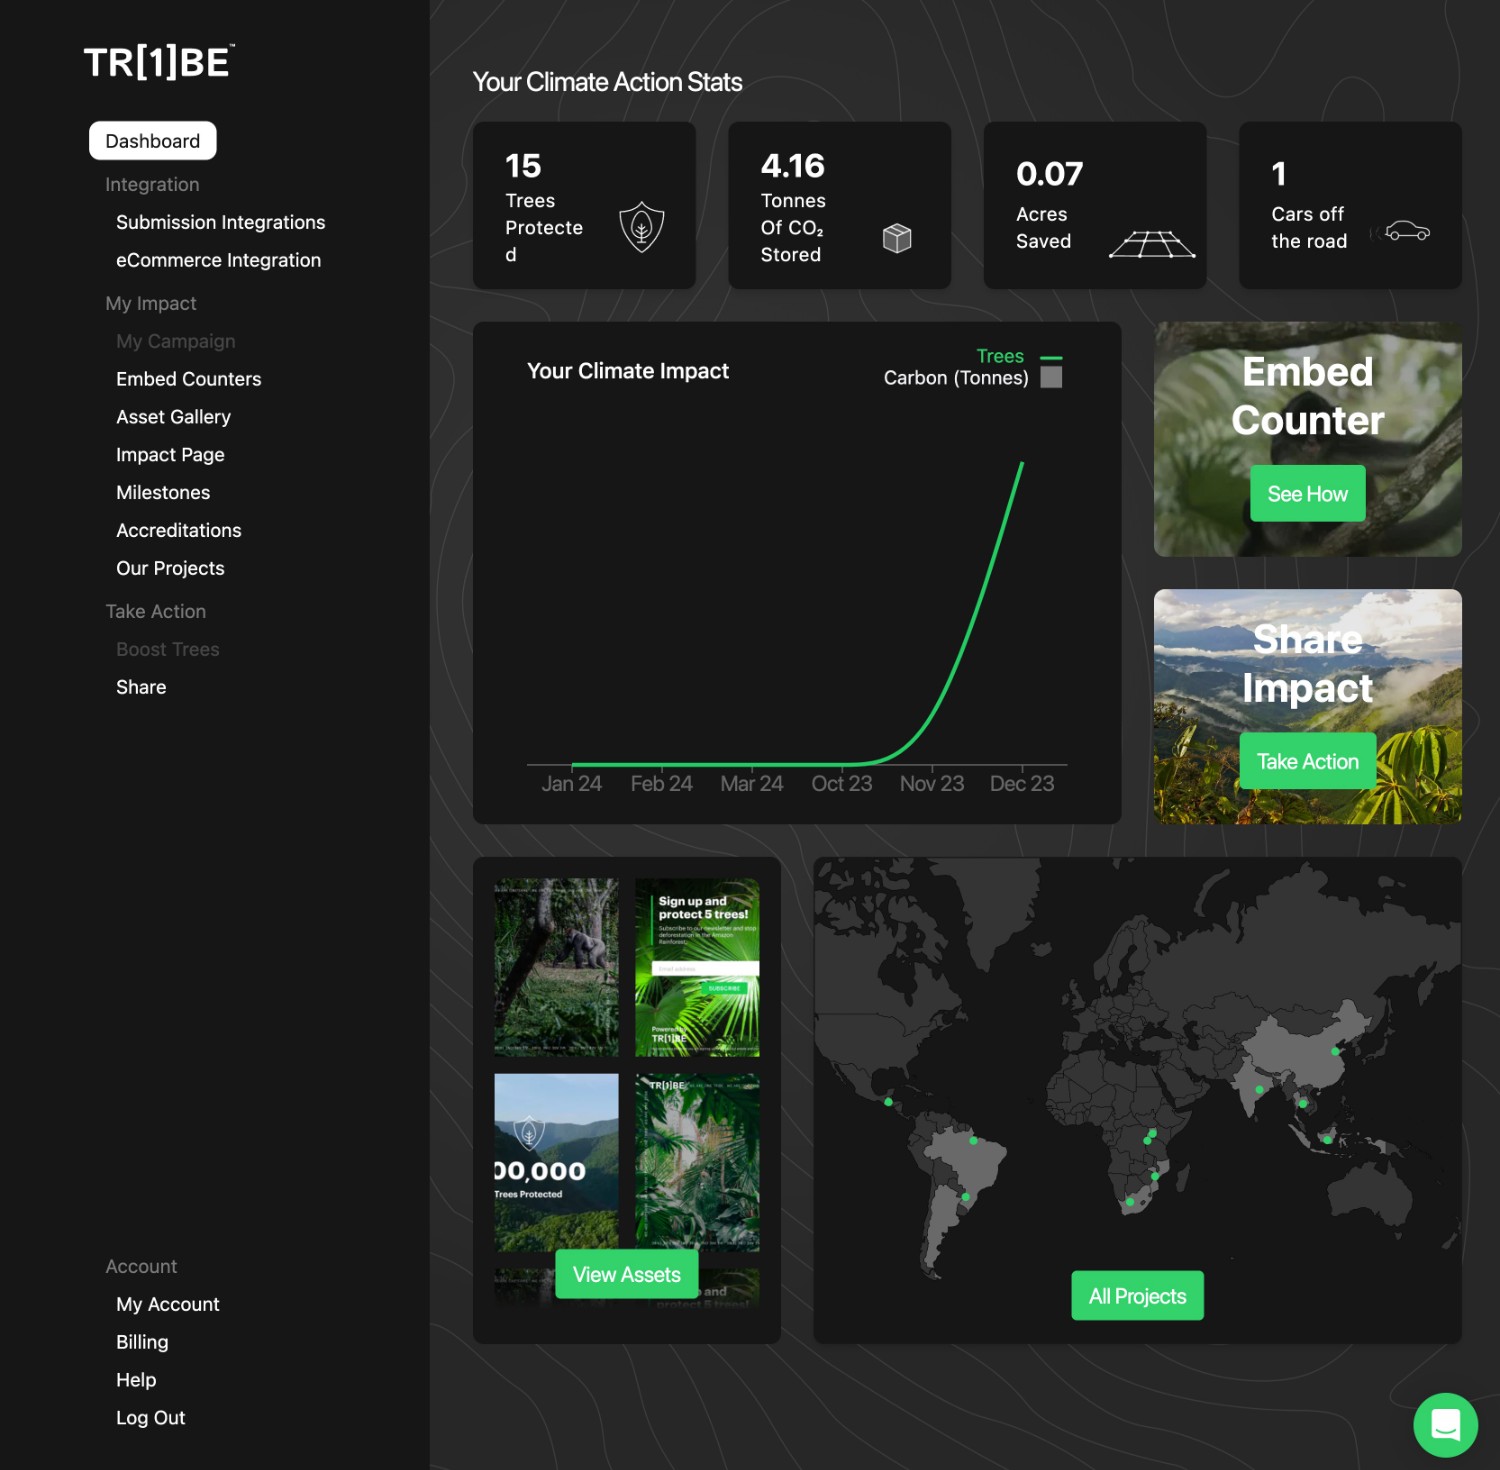
- Detailed insights and reporting – in addition to showing your public impact page, you’ll also get your own monitoring dashboard to track your business’s impact over time.
Why You Should Consider Integrating One Tribe With Gravity Forms
There are a few reasons why you might want to connect Gravity Forms to One Tribe.
First off, connecting to One Tribe will help you better track and understand your climate impact, as well as the potential impact of any sustainability initiatives that you want to implement. One Tribe can also help you more easily implement those initiatives for your business.
In addition to the public certified impact page that you can share with others, you’ll also get a reporting dashboard to track various aspects of your initiatives, which helps you better analyze them internally as well.
On a more business metric-focused note, highlighting your business’s focus on sustainability might be able to help you increase your conversion rates, especially if sustainability is something that’s important to your audience.
Some of the companies that use One Tribe have achieved noticeable increases in their conversion rates after adding One Tribe’s climate incentives. Here are a few examples:
- Goose Studios increased its newsletter signup form conversion rate by 32%.
- Nuzest increased its sales conversion rate by 12.6%.
- Walk London increased its sales conversion rate by 16%.
How to Connect Gravity Forms to One Tribe
Now that you understand what OneTribe is and some of the advantages of connecting Gravity Forms to OneTribe, let’s get into an actual step-by-step tutorial on how to set all of this up.
The exact process to set things up will depend on which Gravity Forms license you have:
- Basic or Pro – you can add a code snippet.
- Elite or Nonprofit – you can use the Gravity Forms Webhooks Add-On.
We’ll cover how it works with both methods.
But before we break it off into different tutorials, you’ll first want to go through the process of setting up your One Tribe account, which will be the same regardless of your Gravity Forms license.
Set Up Your Basic One Tribe Account
To get started with either method, you’ll first want to register for your One Tribe account, which will require choosing (and paying for) a subscription and entering some basic business details.
First, go to the One Tribe Gravity Forms landing page and click Get Started. You should use this Gravity Forms-specific page, rather than the main One Tribe landing page.
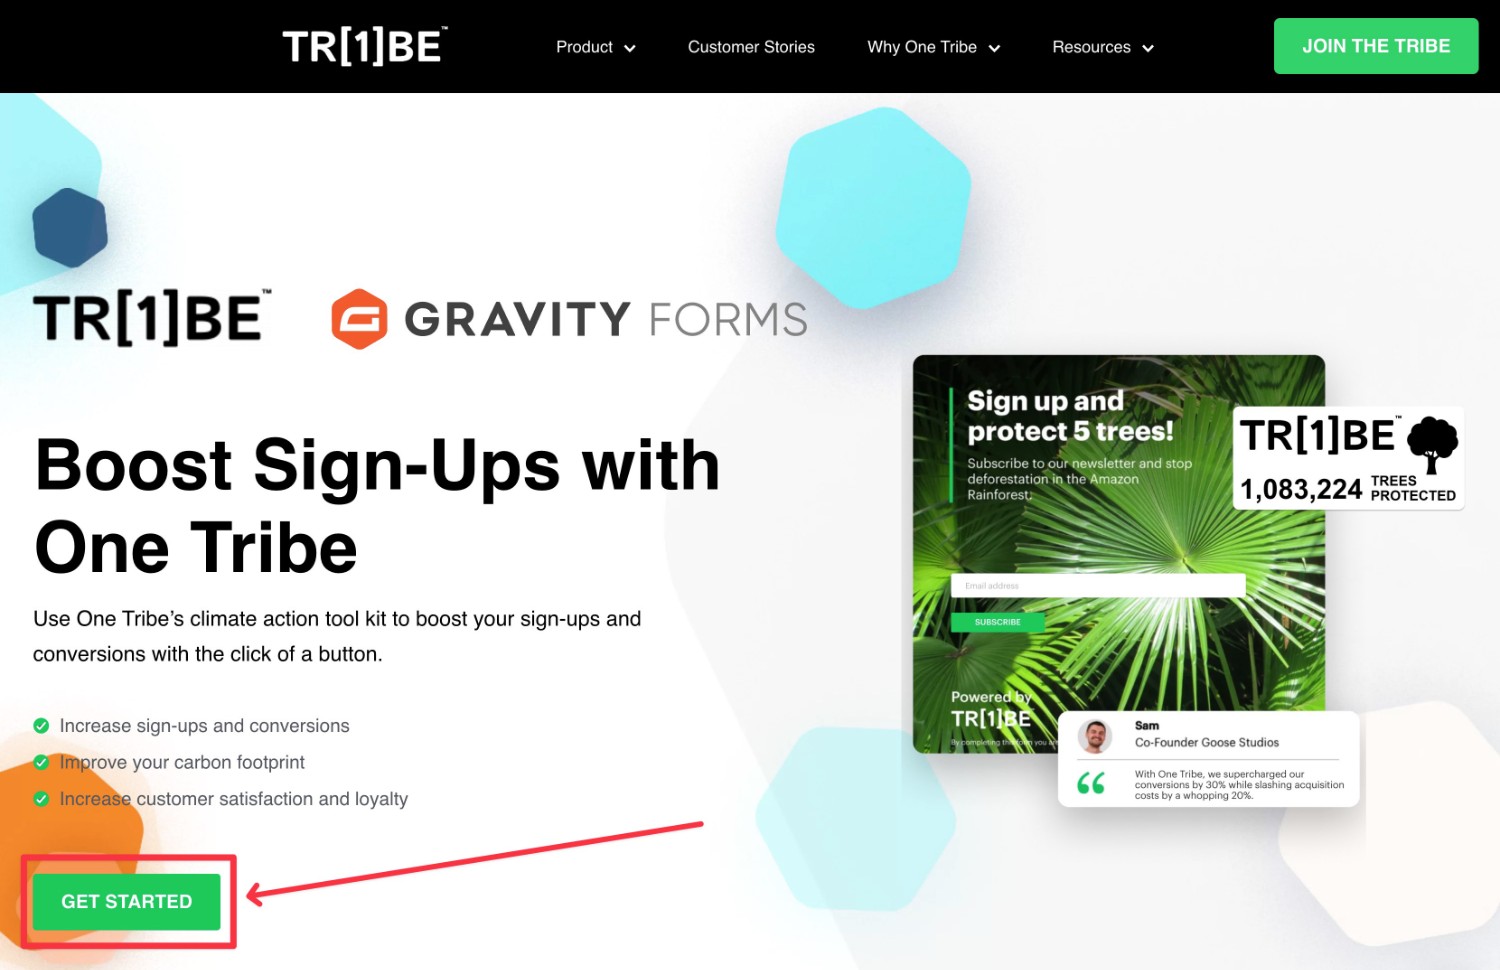
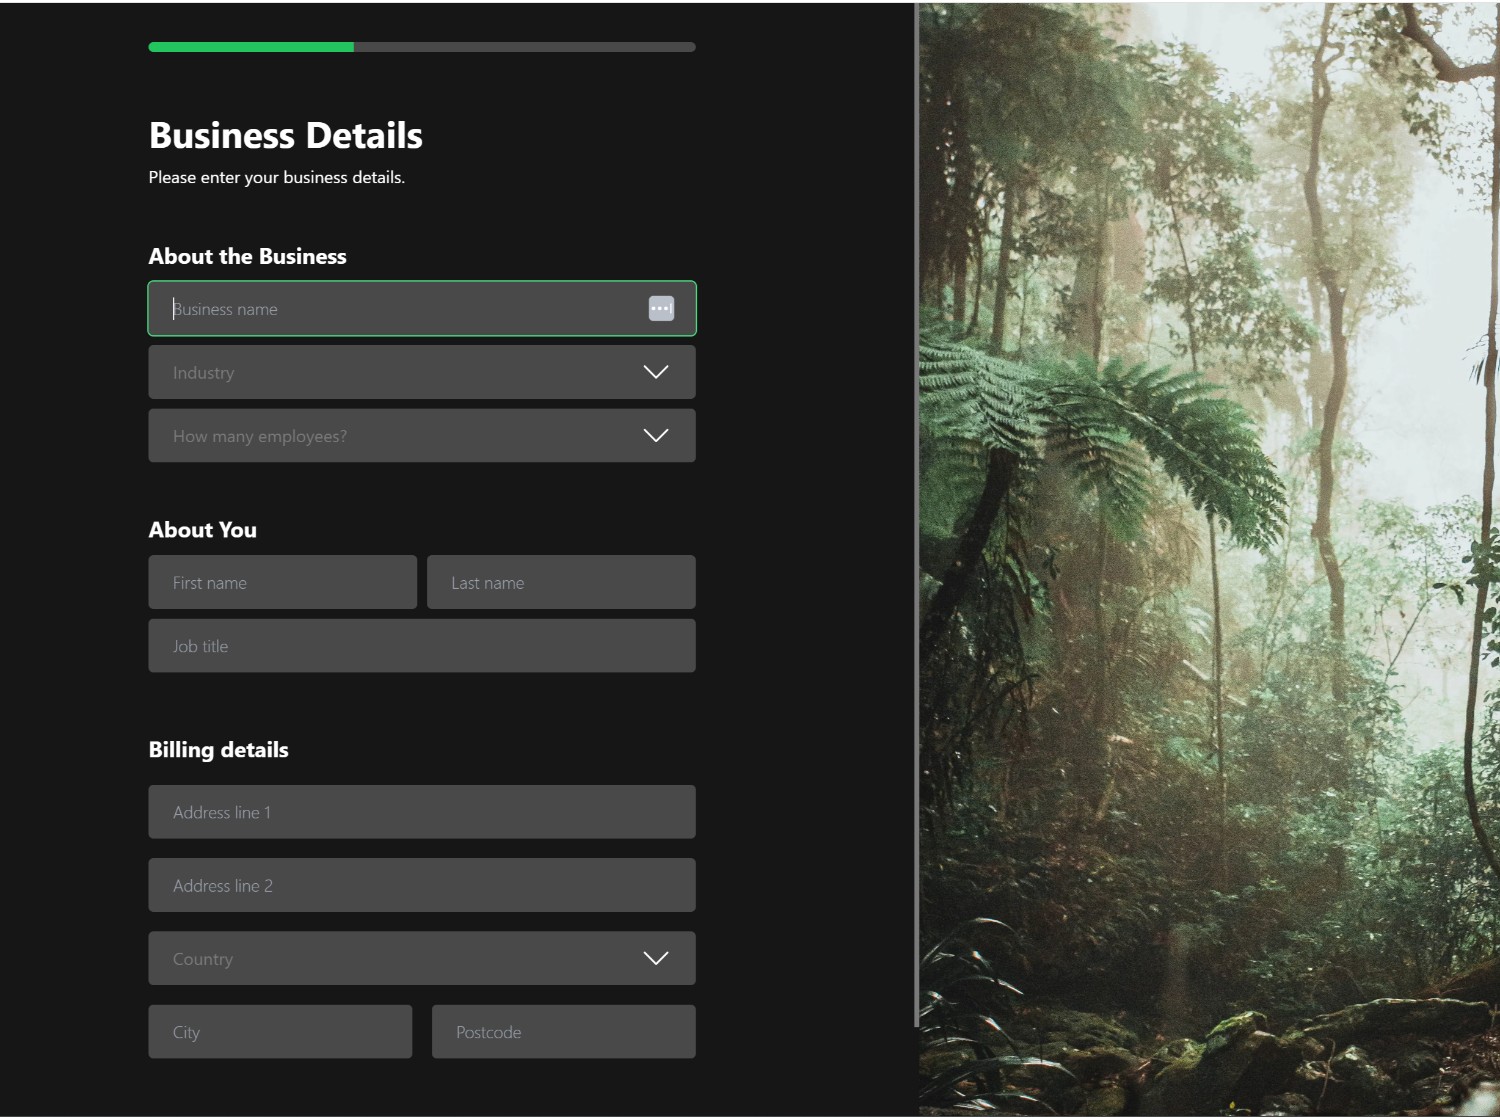
You’ll then need to choose your plan, enter a username/password, make your payment, and enter some basic business details.
Once you make it to the Integrate with One Tribe part (which should be after you make your payment), make sure to choose Gravity Forms from the Integrations drop-down.
Then, you’ll see two separate tabs for the different Gravity Forms licenses.
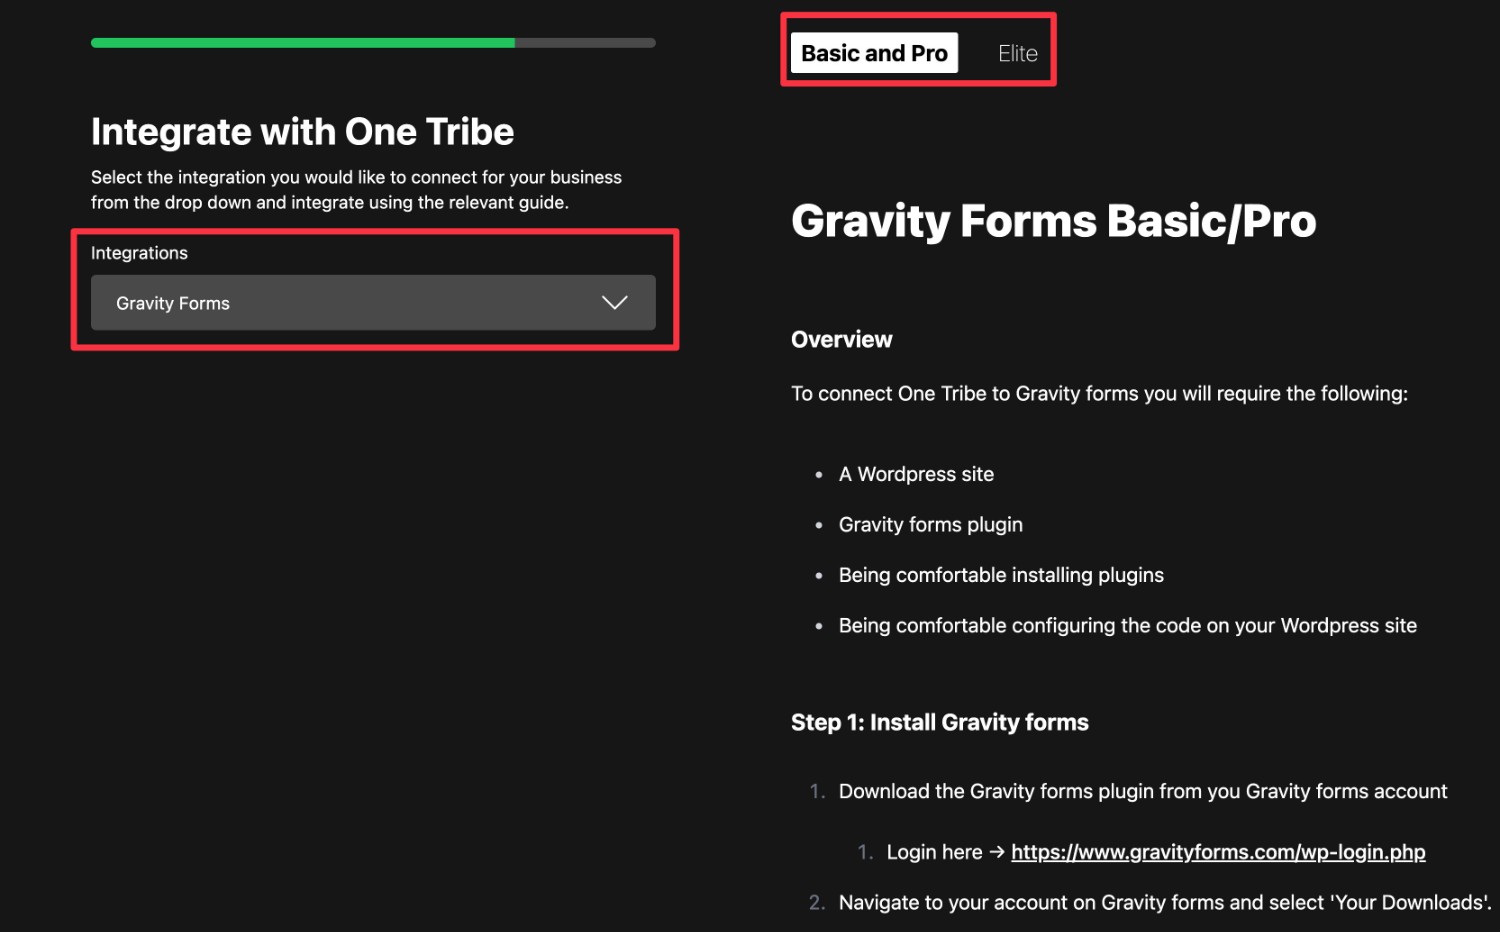
We’ll cover both methods below…
Basic or Pro License: Connect Gravity Forms to One Tribe
If you’re using the Gravity Forms Basic or Pro license, you can connect One Tribe to Gravity Forms by using a code snippet that One Tribe provides to you.
Create Your Form
To begin, you’ll want to create the form that you’re planning to connect to One Tribe, if you haven’t done so already.
You can configure everything just like any other form, including setting up integrations as needed using Gravity Forms Add-Ons. For example, connecting your form to an email marketing service or CRM, or making a payment form.
For this example, we’re going to use the premade Newsletter Signup Form template, but feel free to use a different template or build your form from scratch.
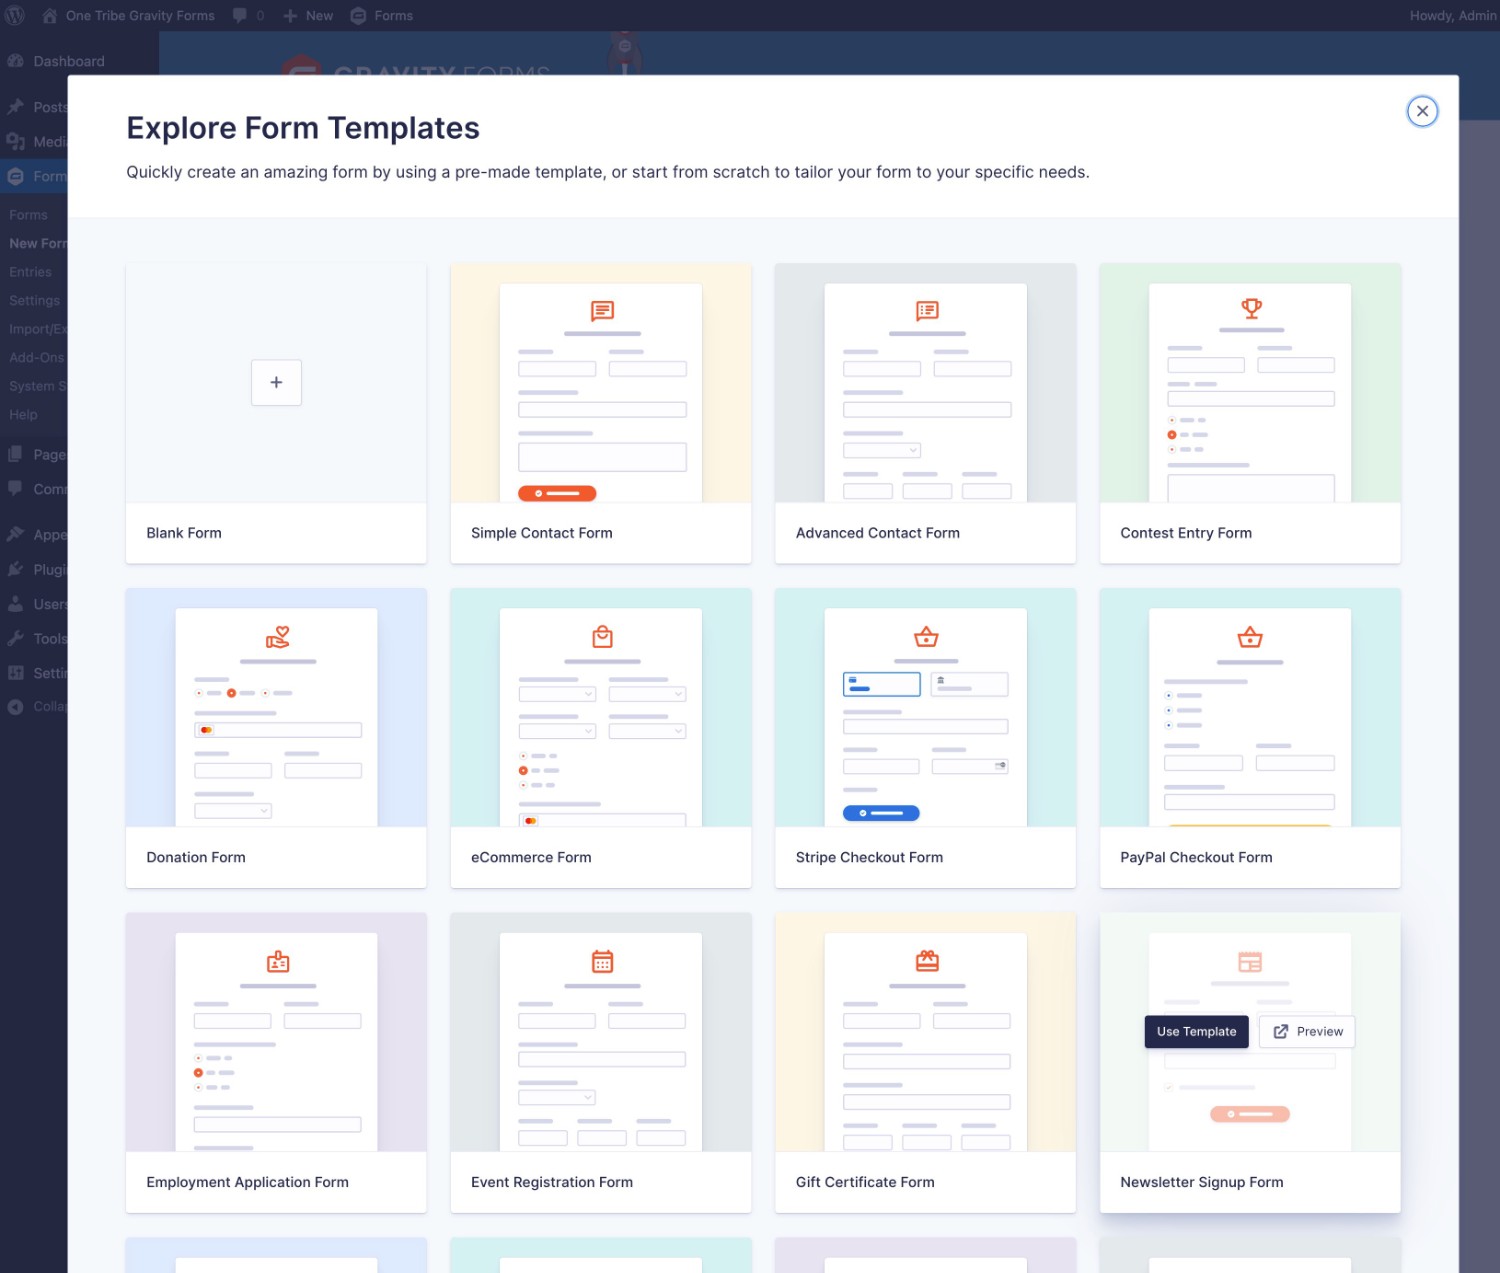
You can then fully customize your form using the editor.
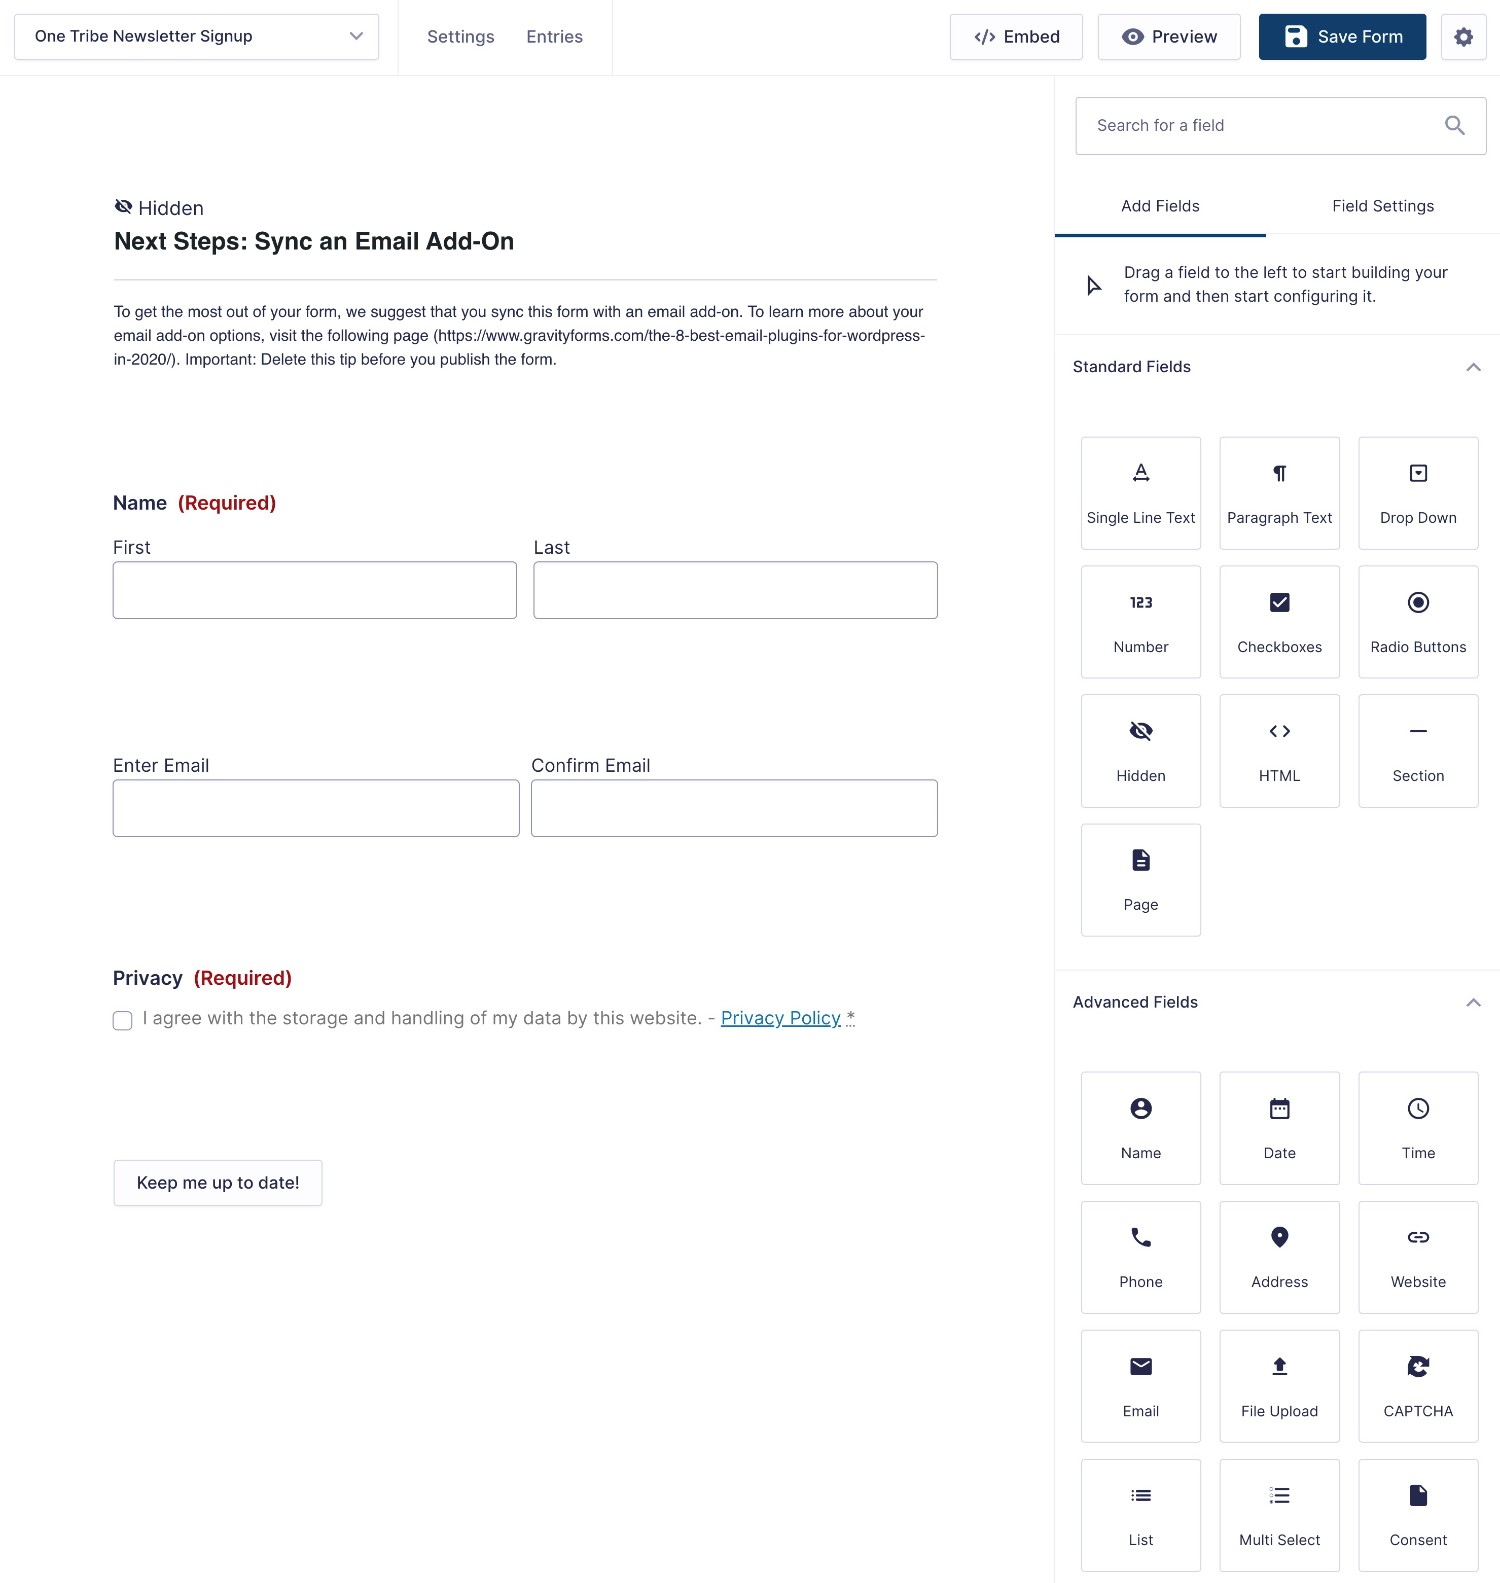
Add the Webhook Code to Your Site
Once you’ve set up your form, you need to add the One Tribe webhook code snippet to your WordPress site.
The easiest way to do this is by using a code snippet manager plugin like Code Snippets, but you can also add the code snippet to the functions.php file of your child theme or a custom functions plugin.
You can find the base code snippet in the One Tribe setup wizard:
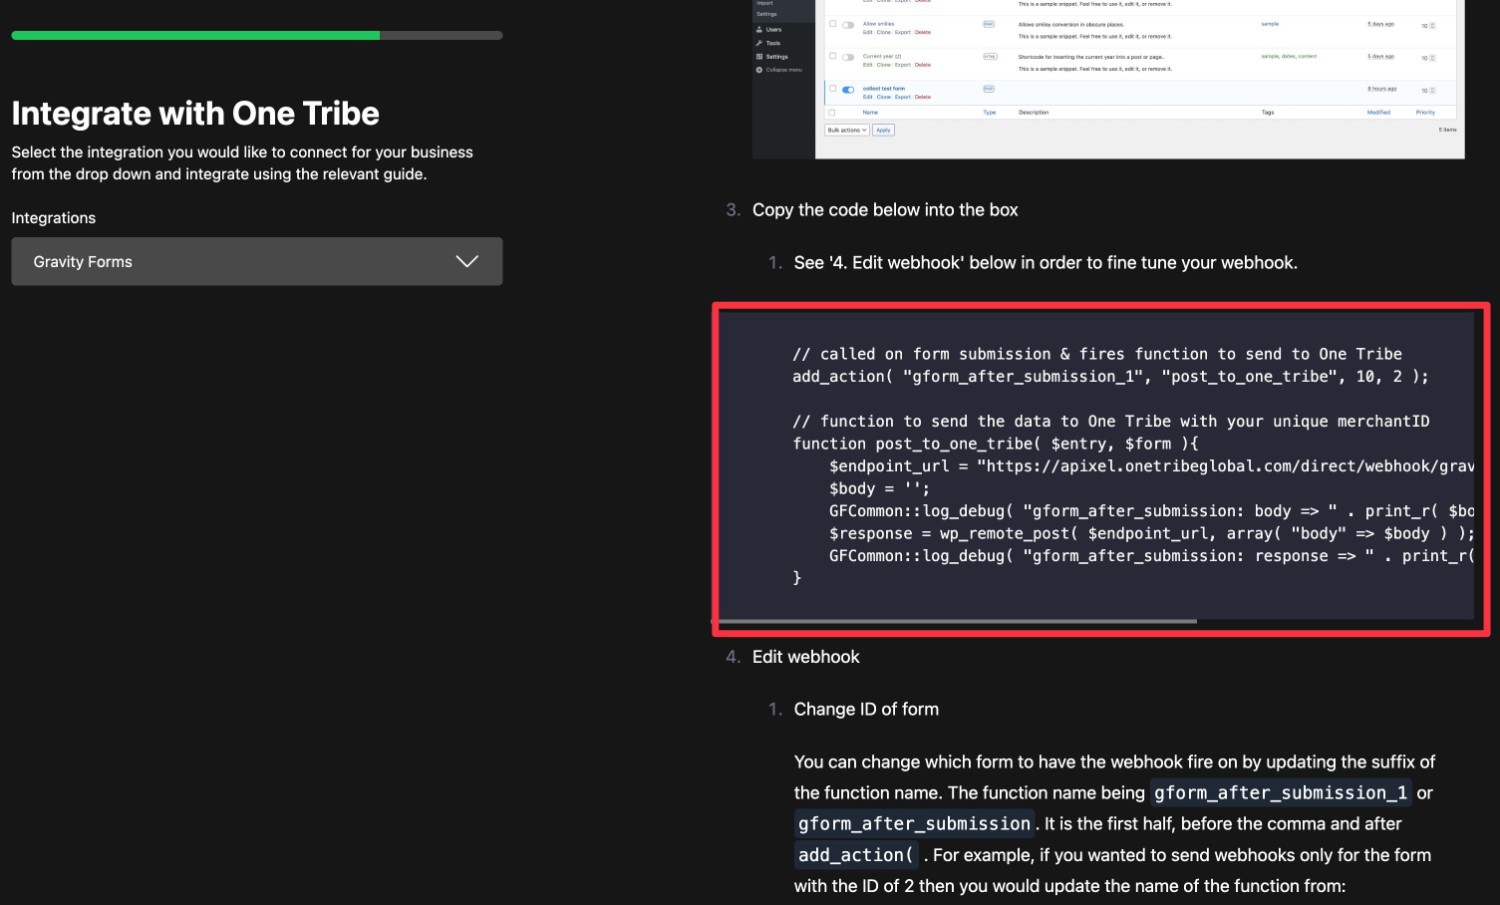
However, you’ll need to slightly modify this code snippet to make it work for your form.
Find this line near the beginning of the code snippet:
add_action( "gform_after_submission_1", "post_to_one_tribe", 10, 2 );
The _1 that appears in the gform_after_submission part indicates the ID number of your form.
To find the actual ID number of your form, go to Forms → Forms in your WordPress dashboard and look at the ID column next to your form.
In our example, the ID number for the “One Tribe Newsletter Signup” form is “52”.
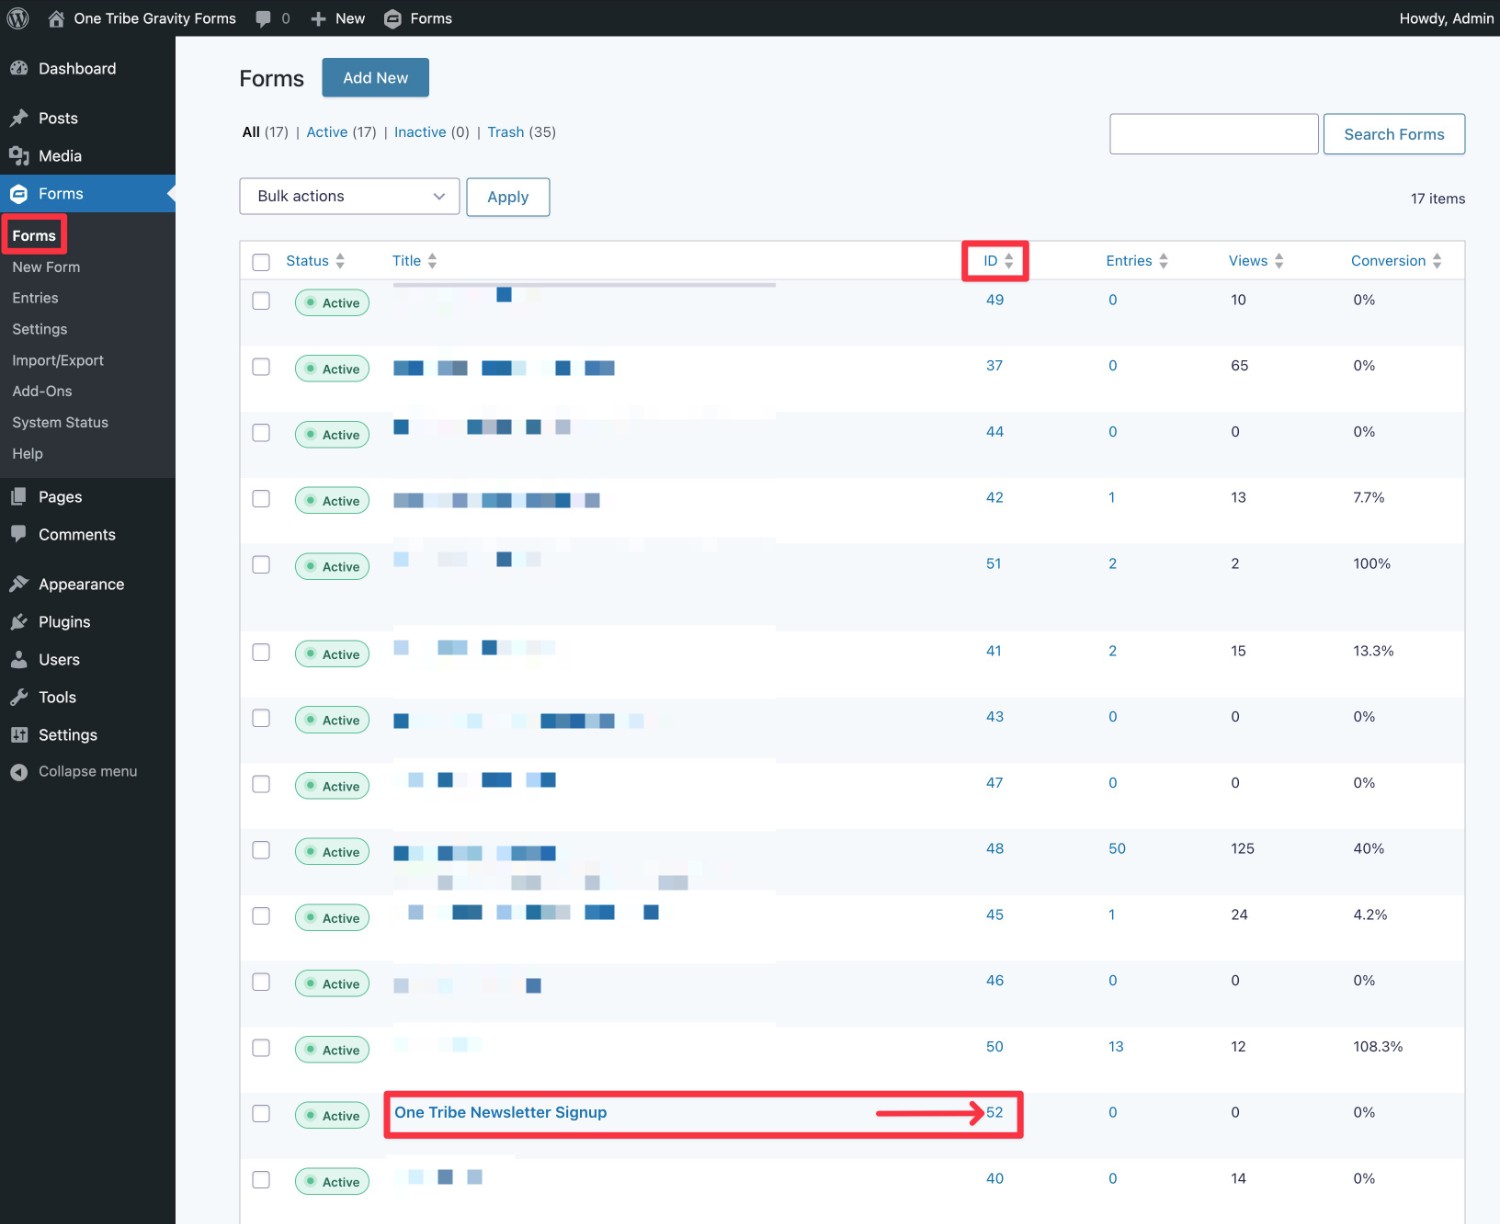
Given that, we would adjust that line of code to replace _1 with _52 like this:
add_action( "gform_after_submission_52", "post_to_one_tribe", 10, 2 );
You can leave the rest of the code snippet exactly the same.
Here’s how to add this code snippet using the free Code Snippets plugin at WordPress.org:
- Install and activate the Code Snippets plugin if you haven’t done so already.
- Go to Snippets → Add New.
- Give the snippet a name to help you remember it – e.g. “Gravity Forms One Tribe integration for Form ID 52”.
- Paste the full edited code snippet into the box – make sure that the Functions (PHP) tab is selected (which it should be by default).
- Select Run snippet everywhere.
- Click Save Changes and Activate.
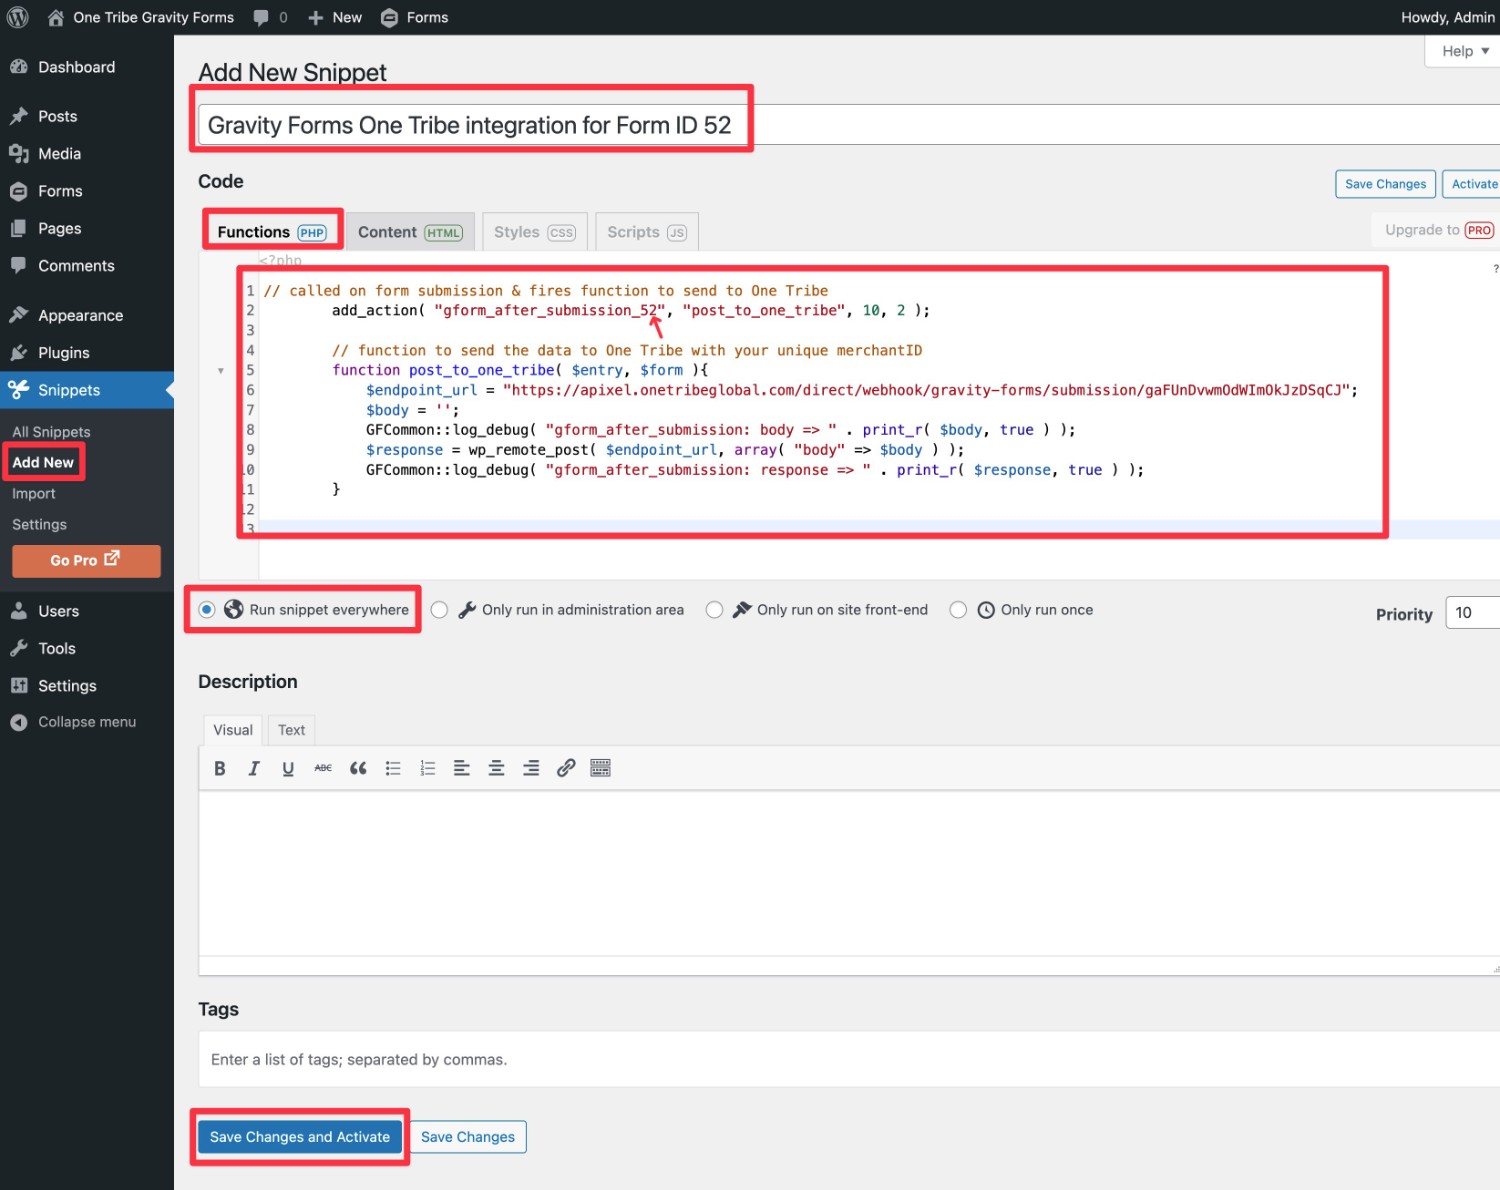
And that’s it! The integration should now be live for your form.
We’ll show you how to test it below. But first, let’s cover the setup process for the other Gravity Forms licenses.
Elite or Nonprofit License: Connect Gravity Forms to One Tribe
If you’re holding the Gravity Forms Elite or Nonprofit license, you can connect Gravity Forms to One Tribe using the official Gravity Forms Webhooks Add-On, rather than needing to add a code snippet to your site.
Install the Gravity Forms Webhook Add-On
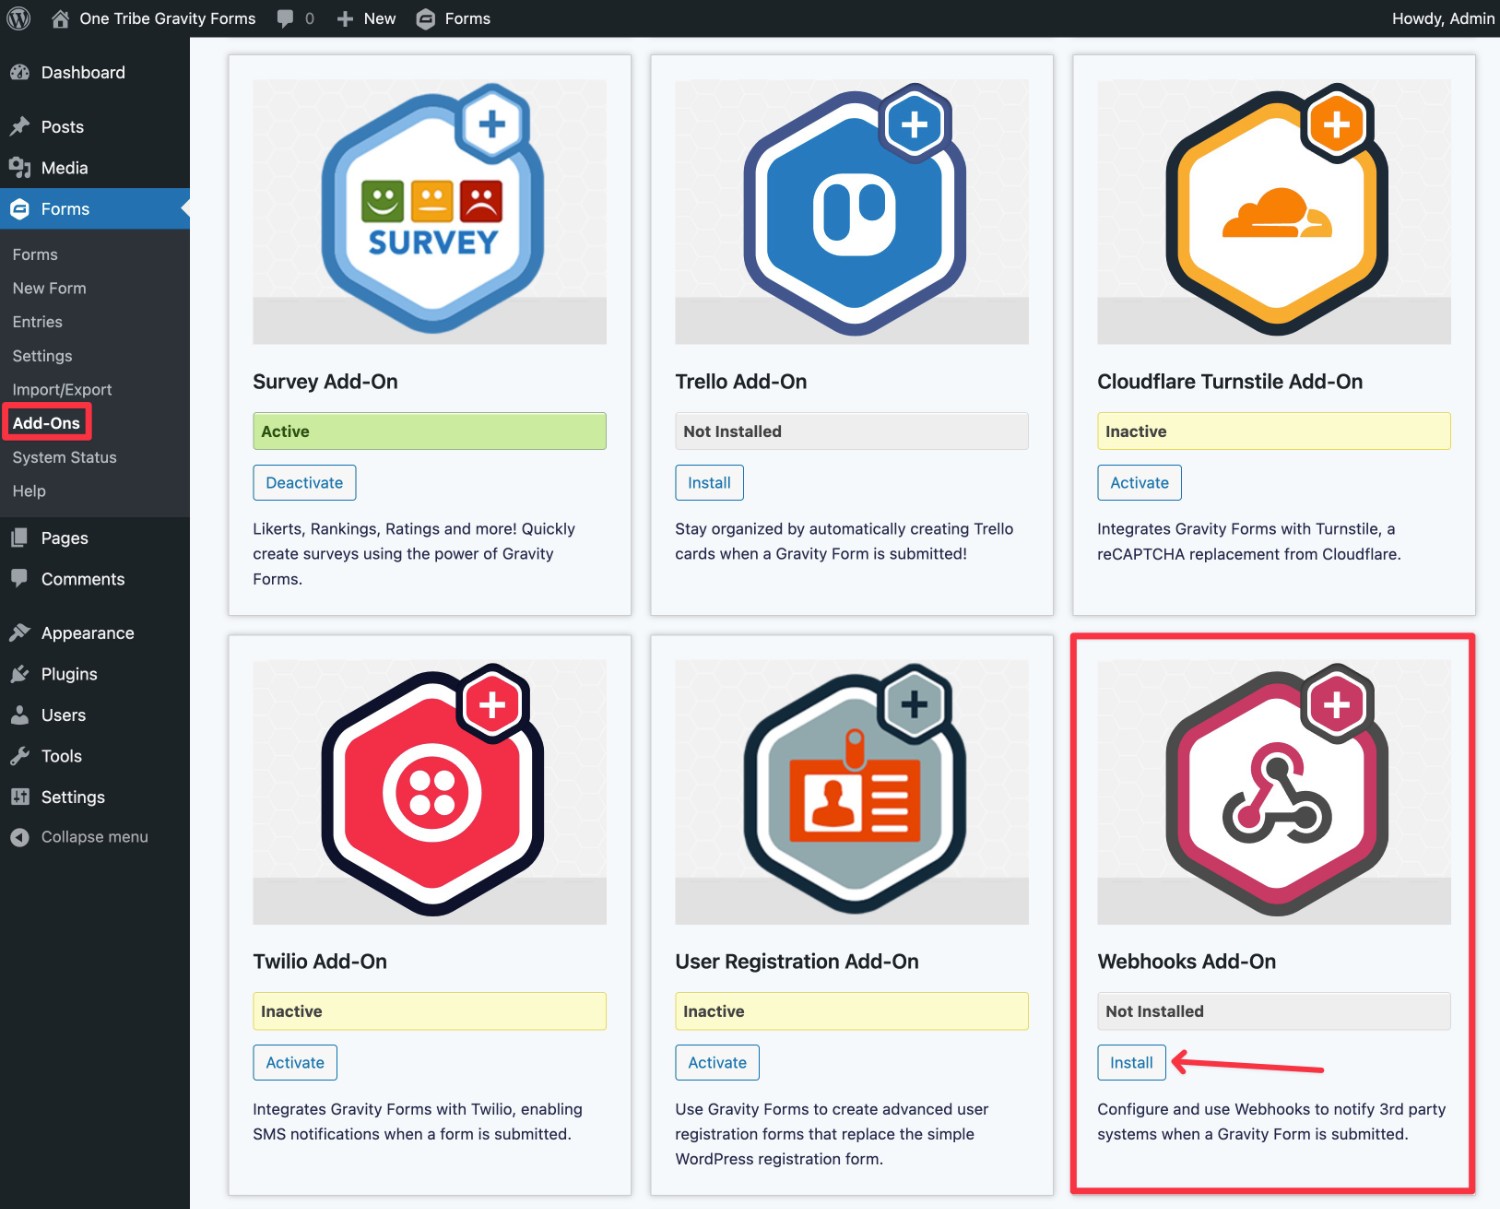
If you haven’t already, you’ll want to make sure that you’ve installed the official Gravity Forms Webhooks Add-On alongside the core Gravity Forms plugin:
- Go to Forms → Add-Ons.
- Find the Webhooks Add-On in the list (it should be near the bottom).
- Click the Install button.
- Once the installation process finishes, make sure to activate it.
Create Your Form
Next, you should create the form that you want to connect to One Tribe, if you haven’t done so already.
You can set up the form just like you would any other form you build with Gravity Forms.
Again, for this example, we’ll use the premade Newsletter Signup Form template, but you could also use a different template or design your form from scratch.

You’re then free to customize your form using the editor.

Set Up Webhook In Your Form
Once you’ve set up your basic form, you can connect it to One Tribe using webhooks.
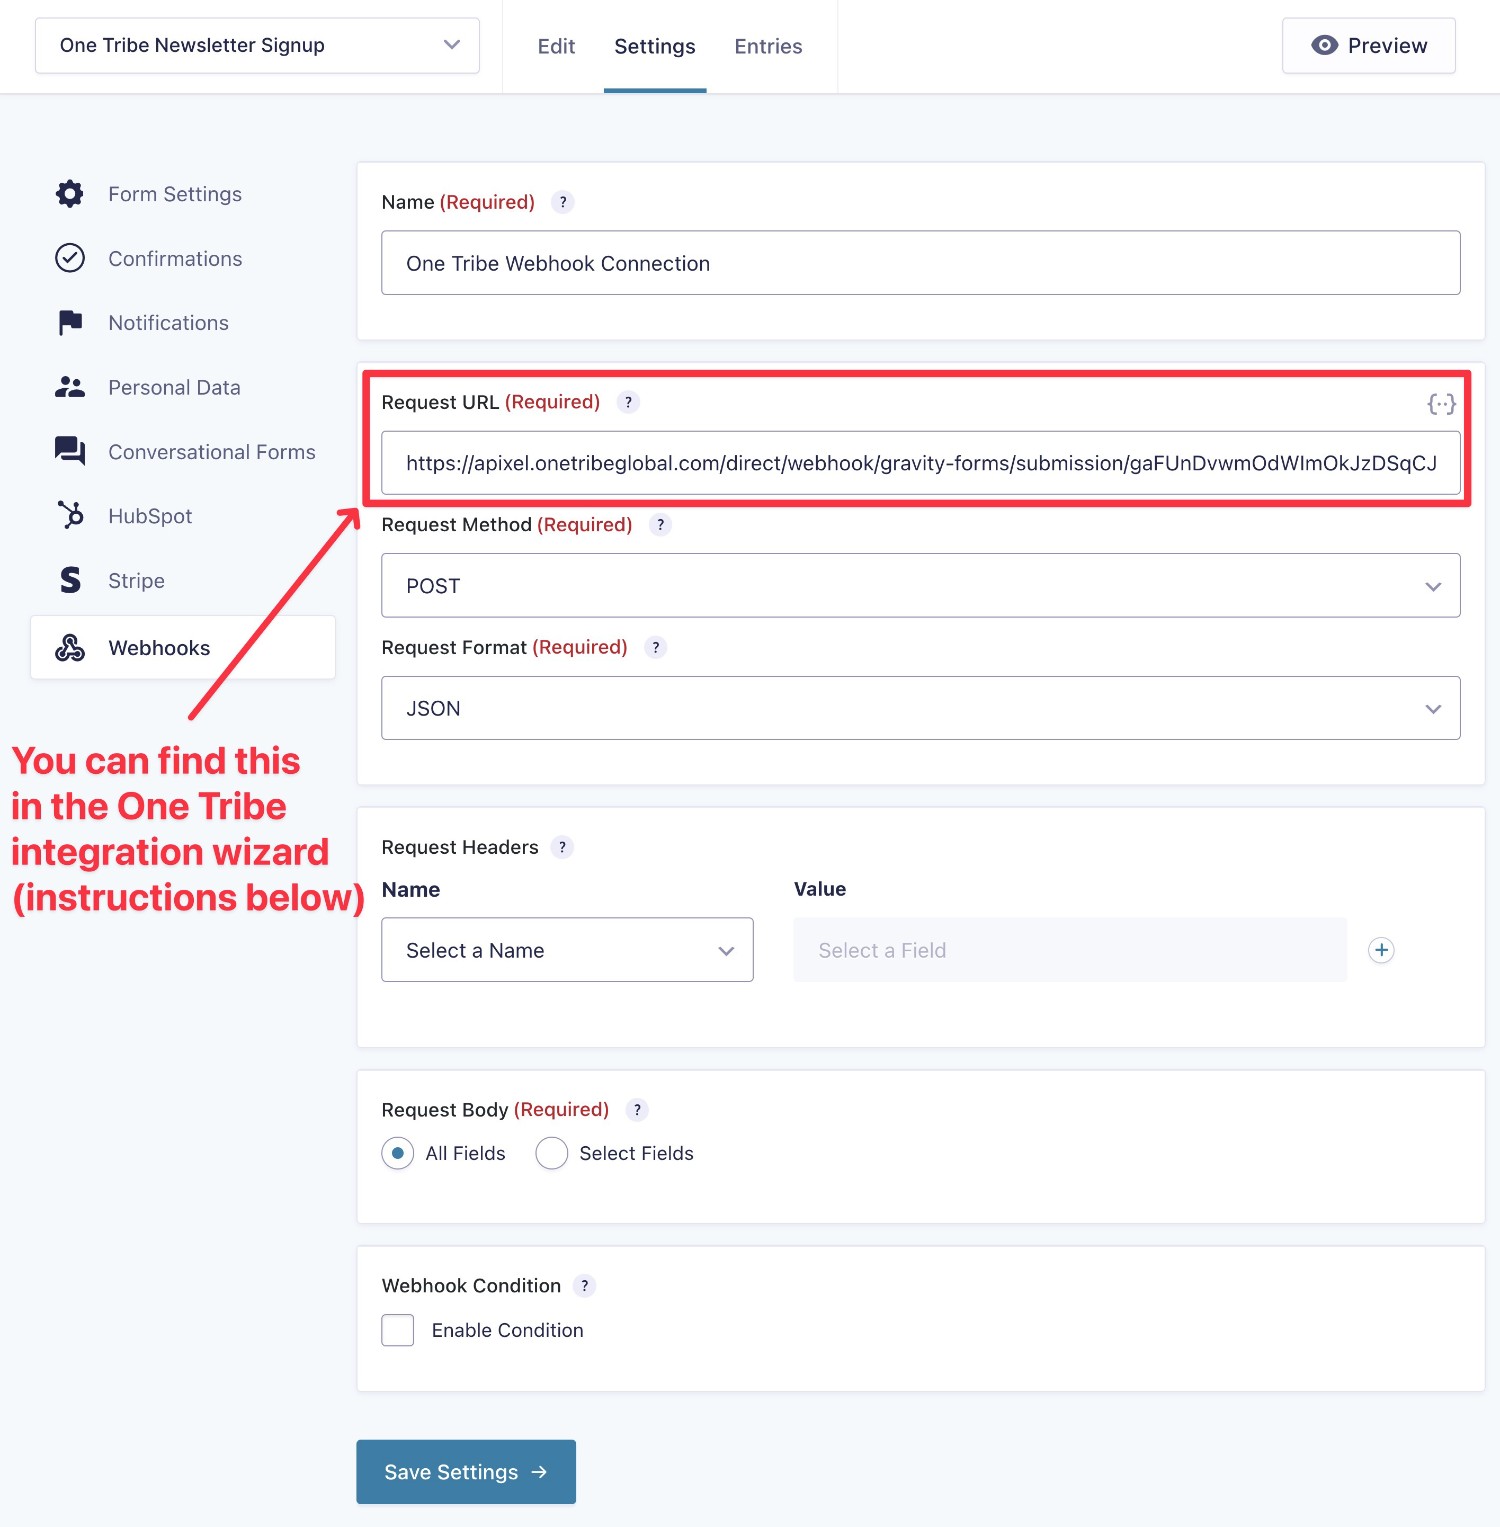
To begin, go to Settings → Webhooks in the form builder interface. If you don’t see this option, make sure that you installed and activated the Gravity Forms Webhooks Add-On.
Then, click Add New to create a new webhooks feed.
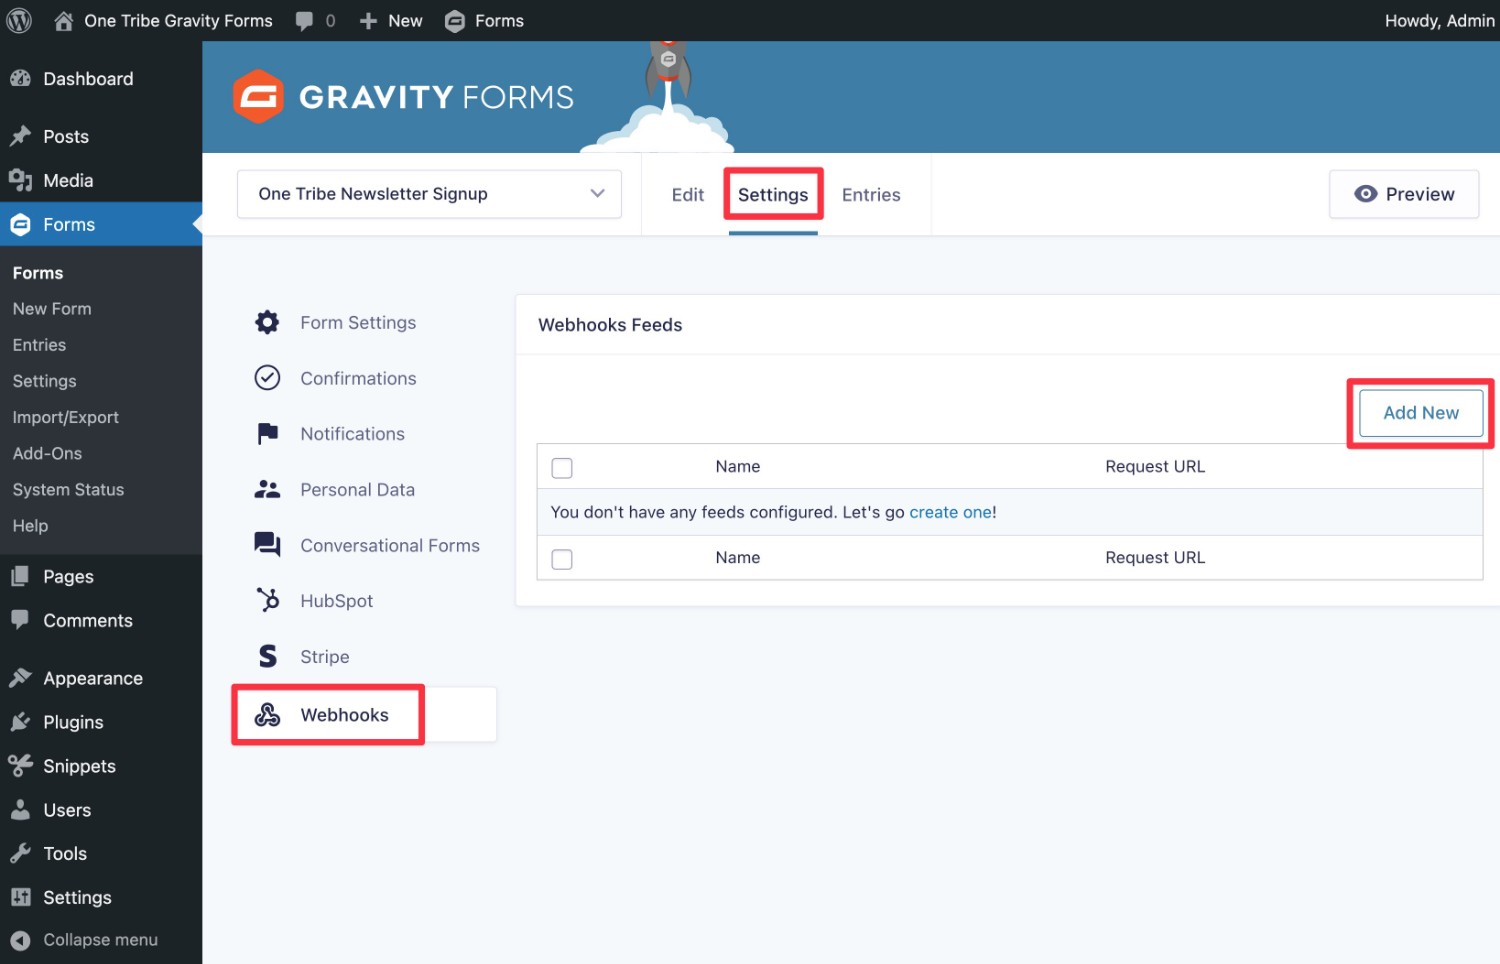
Fill out the webhooks feed as follows:
- Name – give it an internal name to help you remember it.
- Request URL – paste in the request URL that you get from the One Tribe integration wizard (we’ll show you how to find this below).
- Request Method – POST
- Request Format – JSON
- Request Headers (Name) – leave unselected (the default).
- Request Body – All Fields
When you’ve added everything, click the Save Settings button at the button.
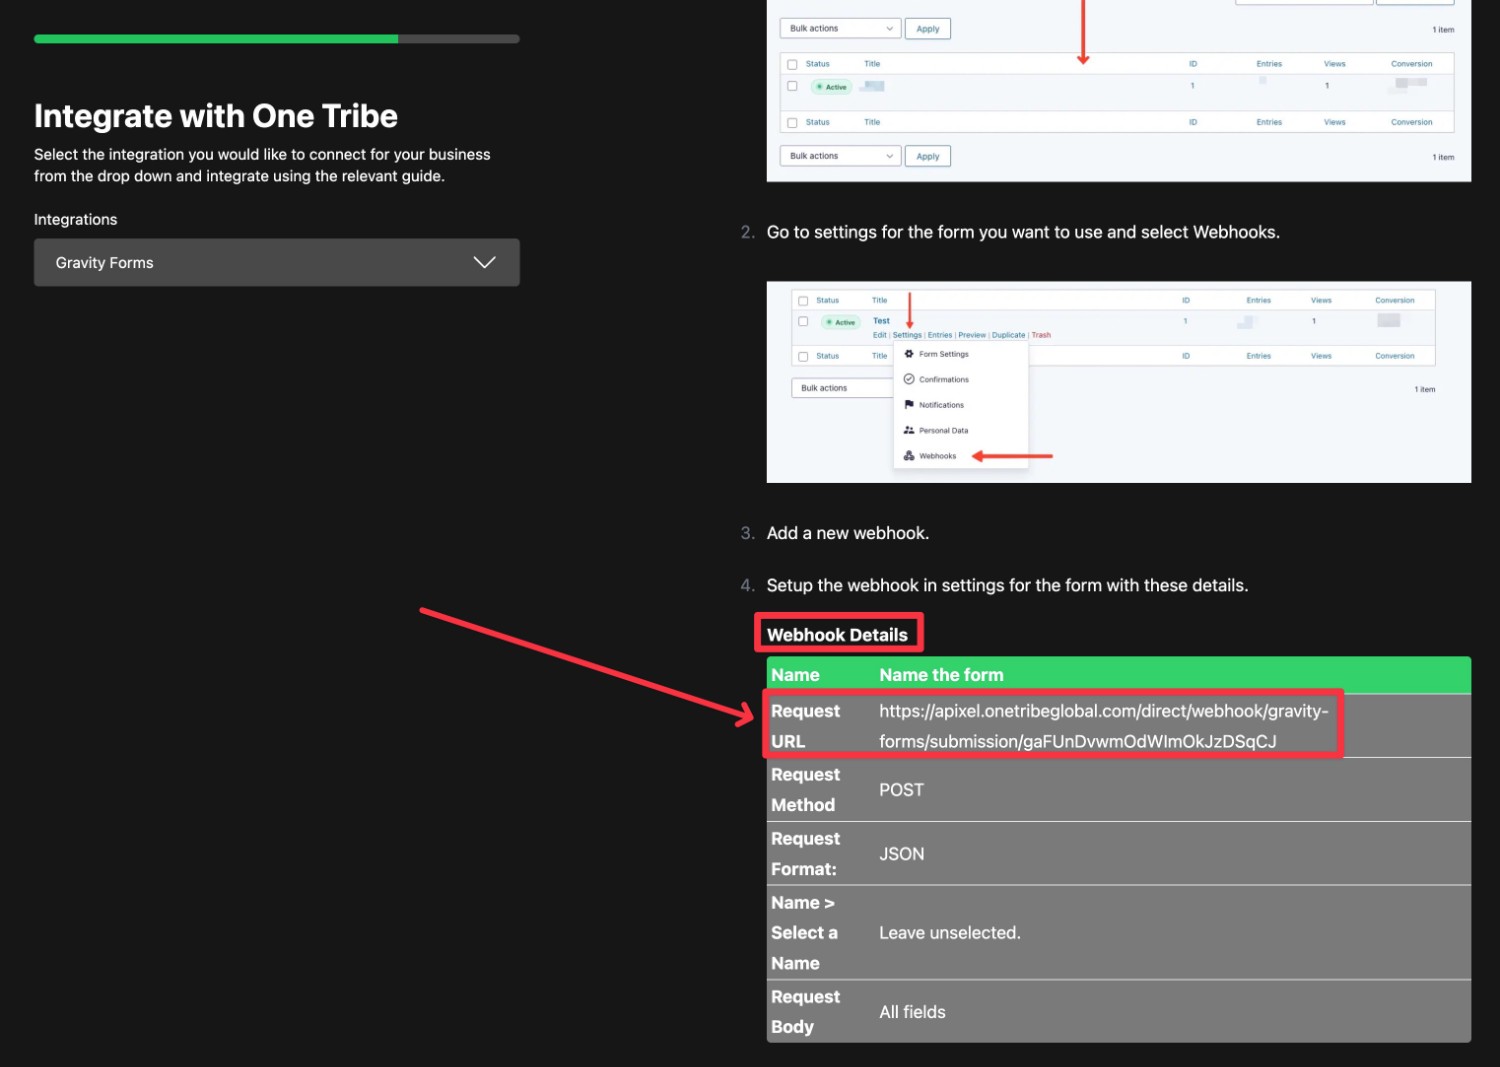
You can find the webhook request URL in the Webhook Details table on the One Tribe integration wizard page. Make sure that you’ve selected the Elite tab at the top and then scroll down until you find the Webhook Details box.
Once you’ve saved the settings of your webhook feed, your form should be integrated with One Tribe.
Test the Gravity Forms One Tribe Connection
At this point, your integration should be set up. Here’s how you can test that it’s working:
- Go back to the One Tribe integration wizard.
- Scroll to the bottom of the instructions on the right side of the interface – the process is the same regardless of which integration method you use.
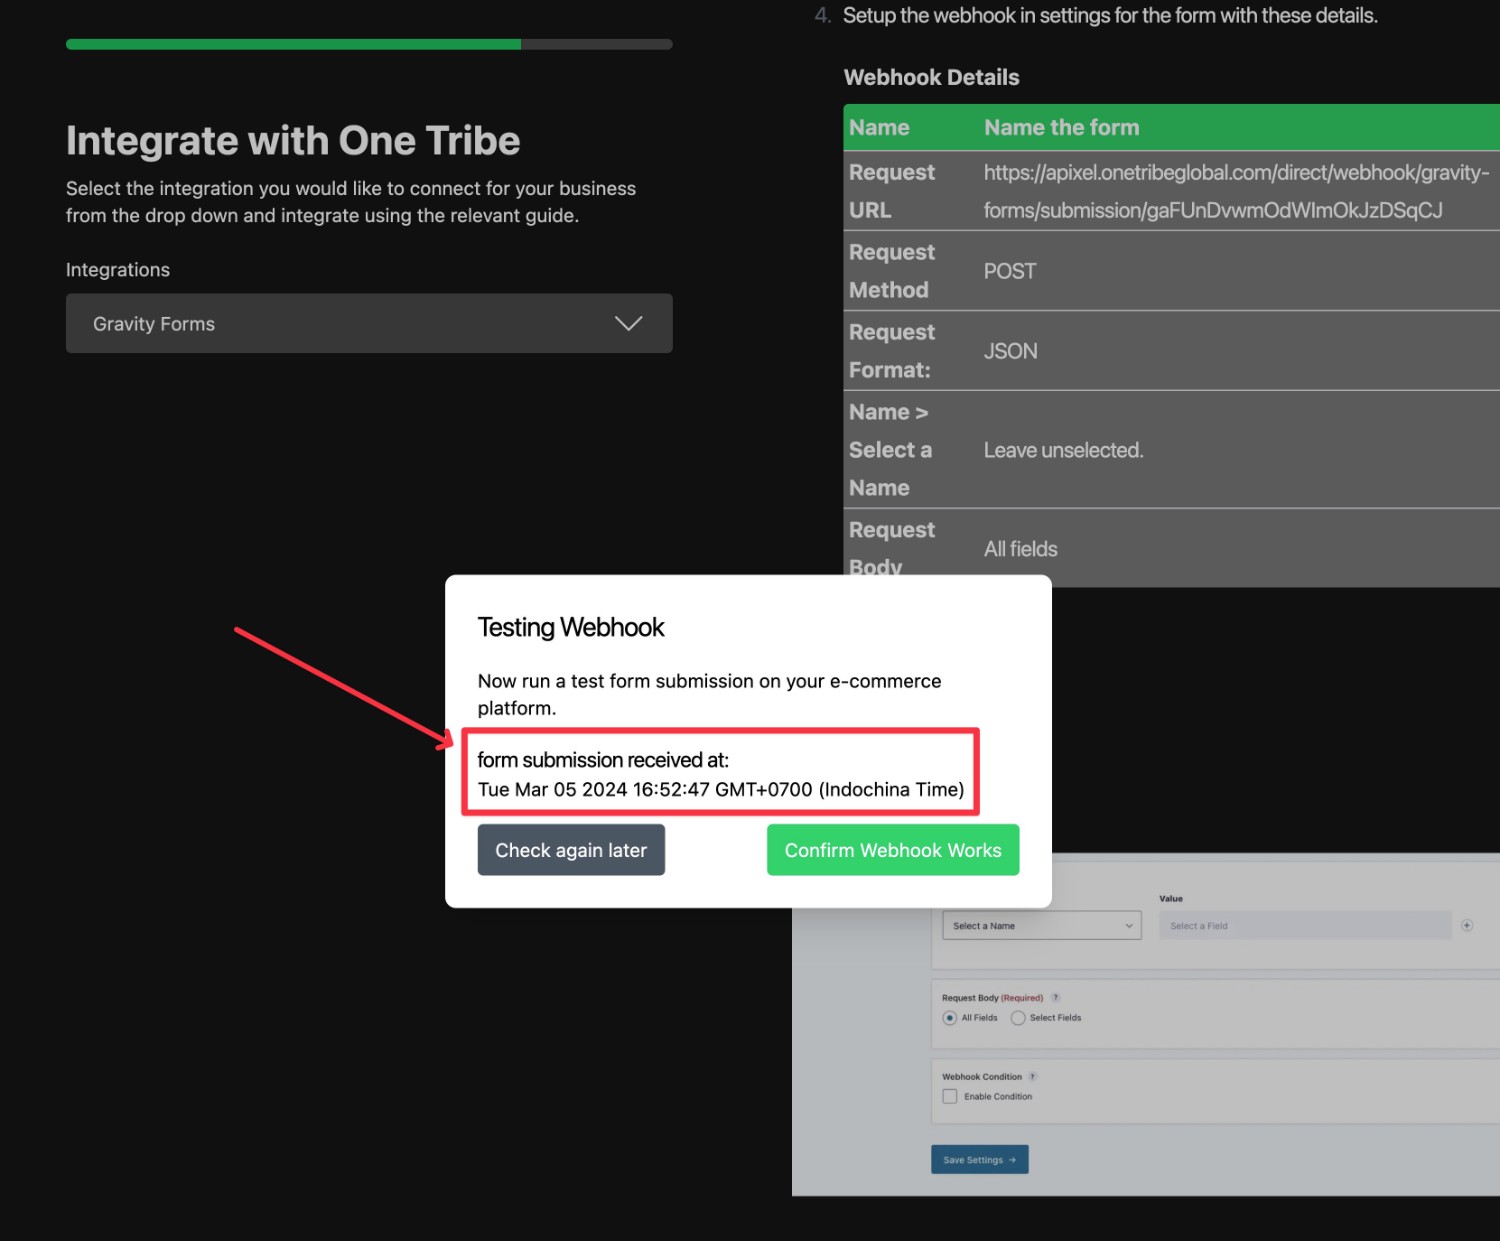
- Click the green Check Integration again button. It should open a popup on the page, which you’ll want to leave open.
- Open a separate browser tab that contains the page with the form that you’ve connected to One Tribe. If you haven’t embedded the form on a live page yet, you’ll need to do that first.
- Submit the Gravity Forms form on your WordPress site.
If the integration is working properly, you should see a success message appear in the popup. You can then click the green Confirm Webhook Works button to continue.
Set Up Your One Tribe Impact Page and Finalize Setup
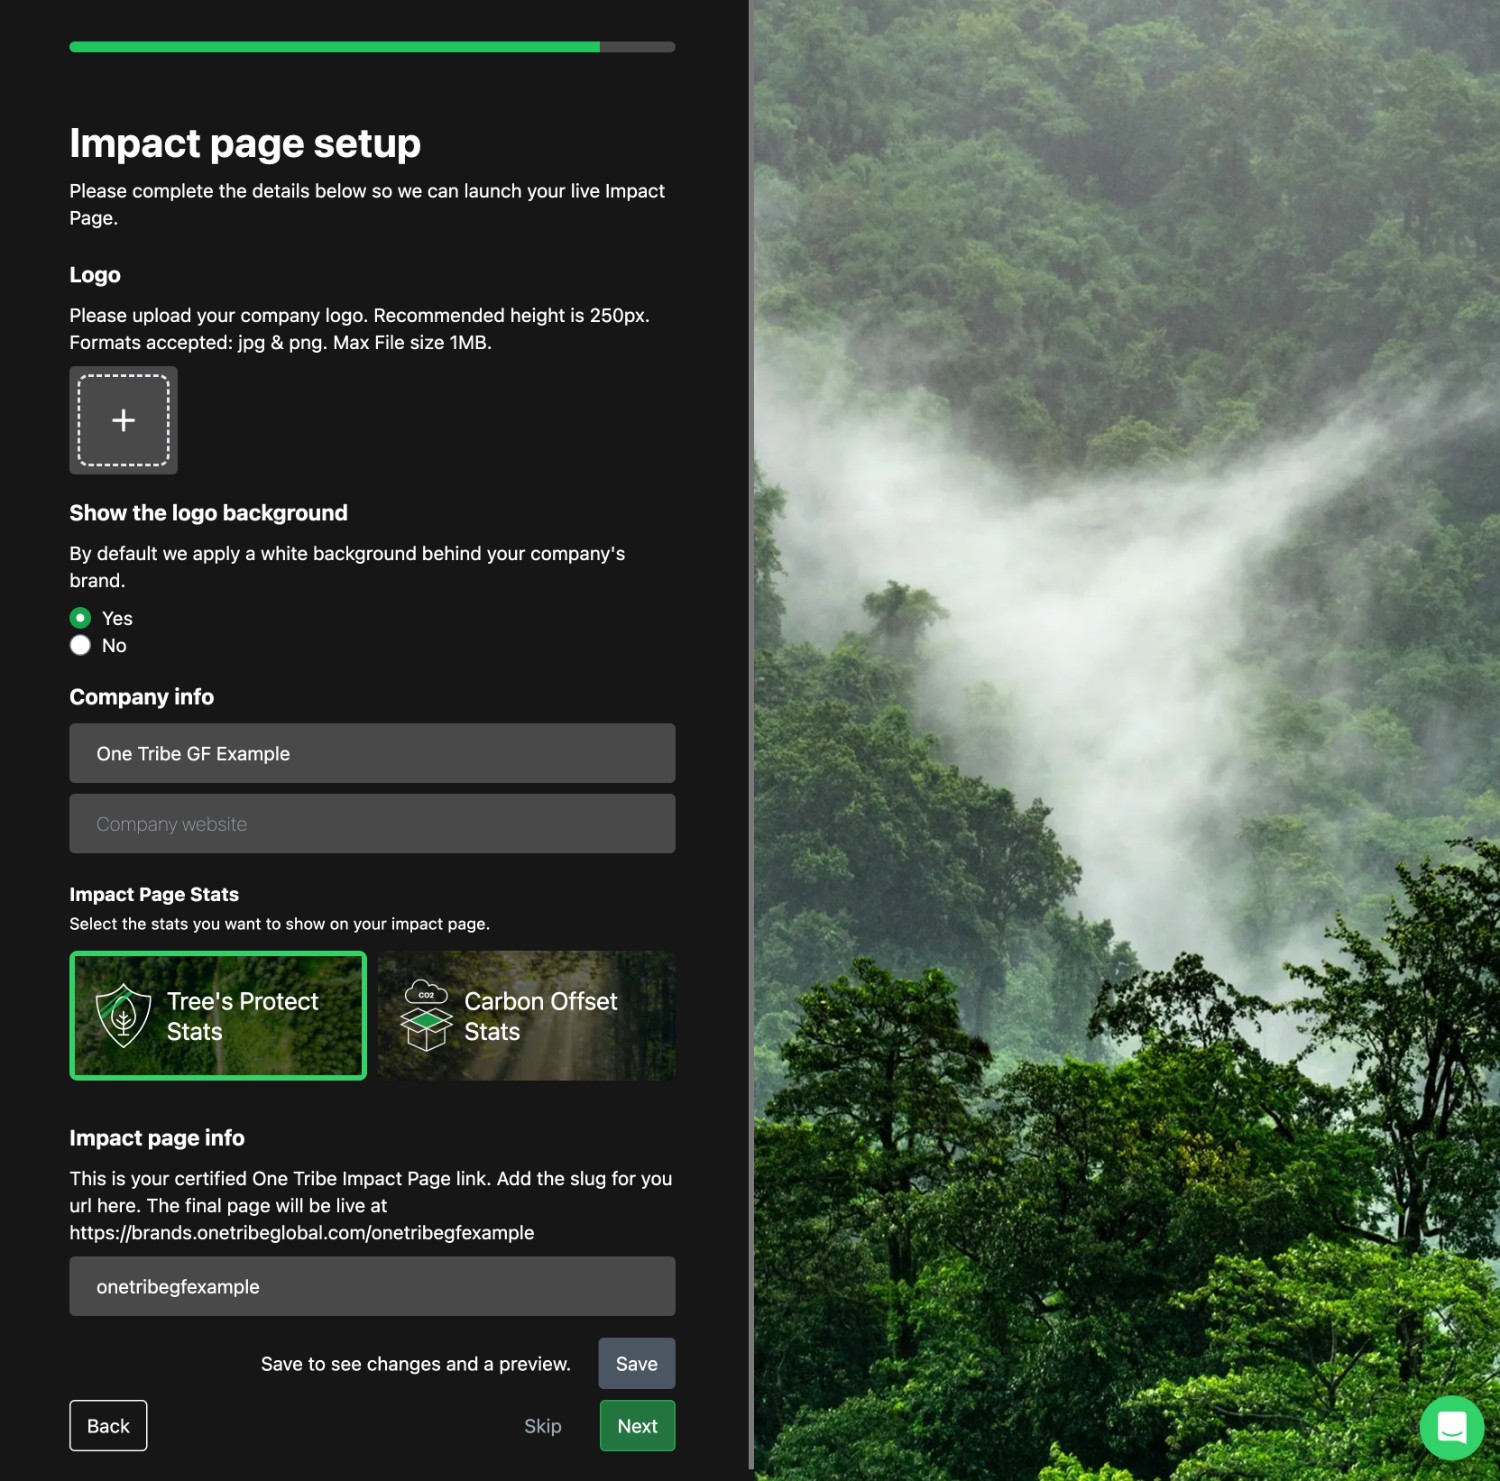
Once you’ve confirmed that the Gravity Forms integration is working, you can click the Next button in the setup wizard to advance to the next step, which is setting up your business’s impact page.
Again, this is the page that shows certified results for your climate incentives.
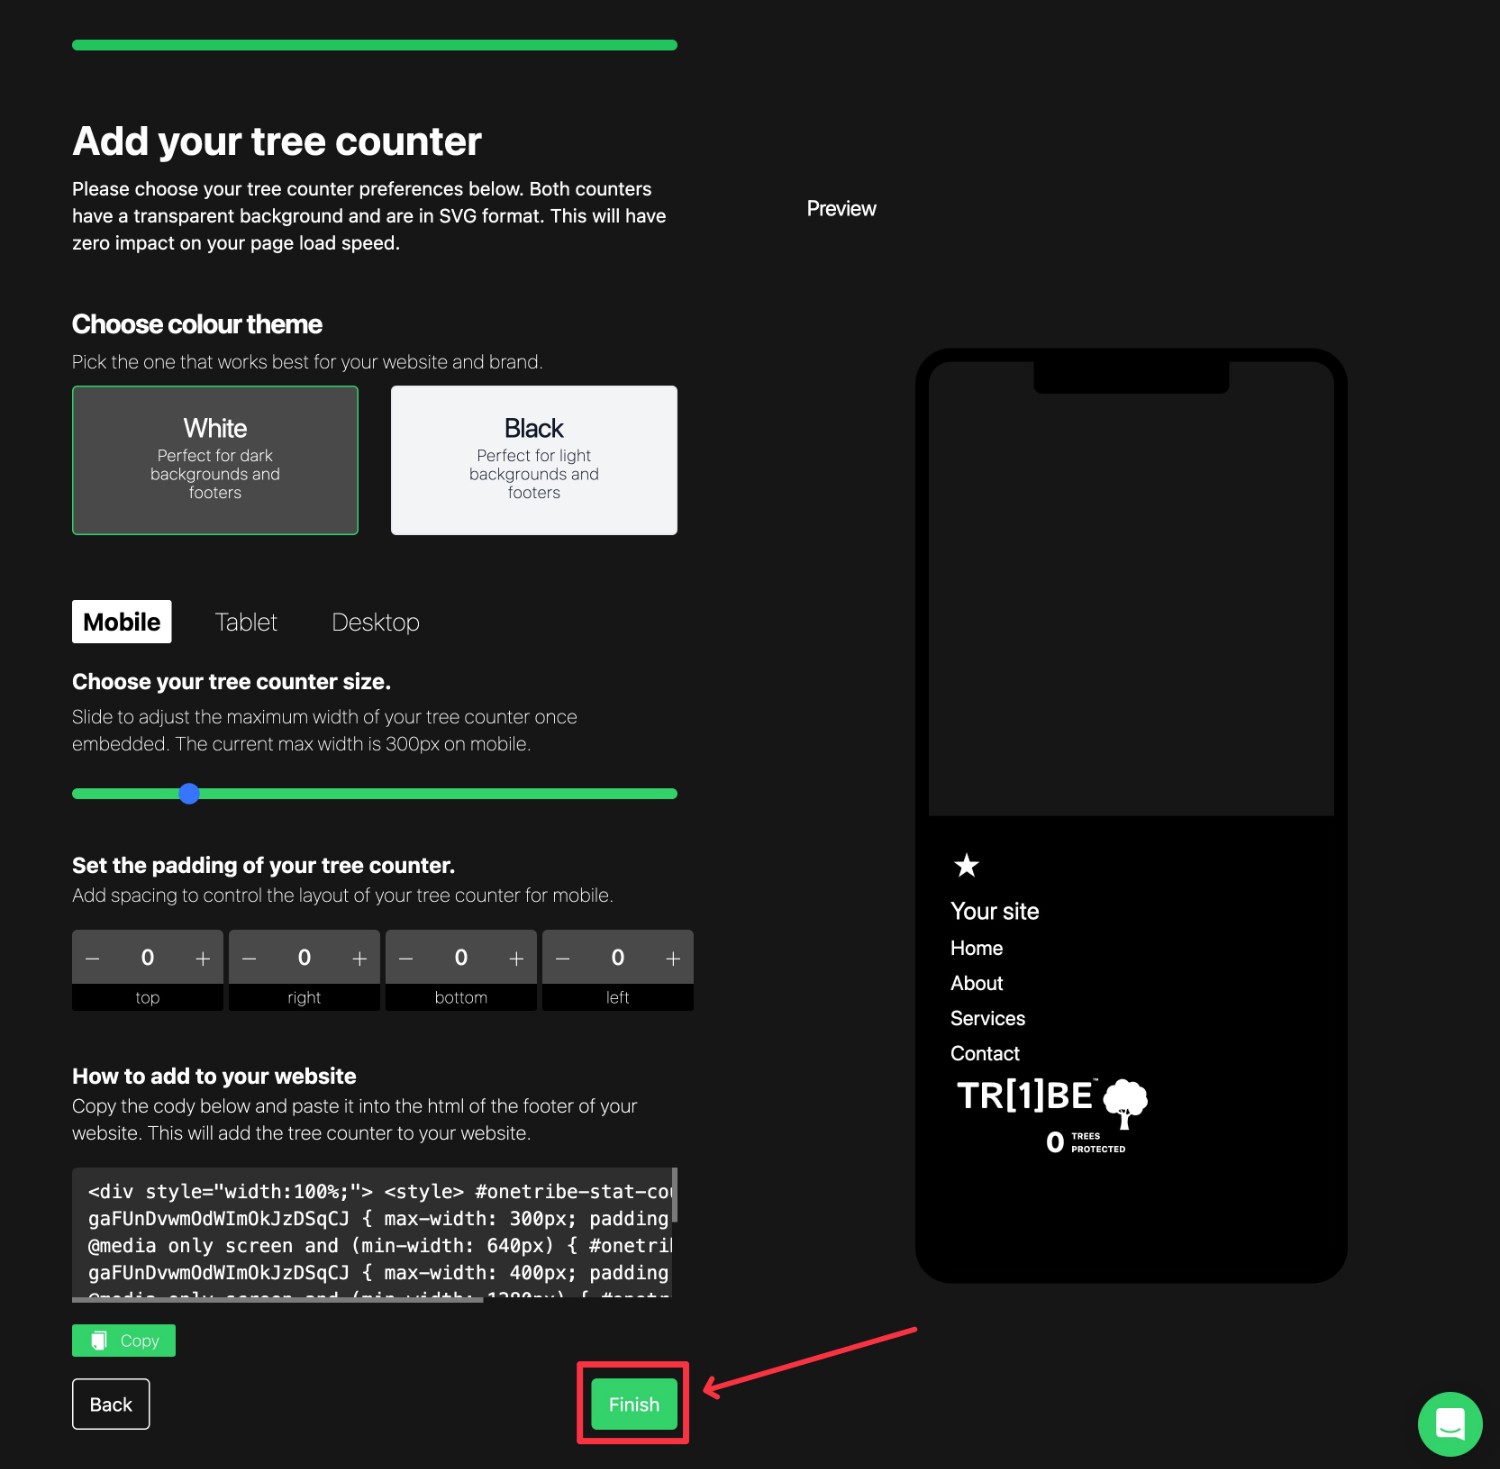
Once you click Next, you’ll also have the option to add a tree counter to your website by adding a code snippet.
Then, you can click Finish to finalize the setup process.
And that’s it! You’ve officially connected Gravity Forms to One Tribe and you’ll be able to manage everything from your One Tribe dashboard.
Try One Tribe With Gravity Forms Today
That wraps up our guide on how to connect One Tribe with Gravity Forms.
While the exact integration method will depend on your Gravity Forms license, you can connect your forms to One Tribe using any Gravity Forms license.
If you’re interested in implementing climate pledges for your business (and maybe even using it as a marketing strategy), give One Tribe a try to see how it works for you.
To get started, here’s what you can do:
- Purchase a Gravity Forms license, if you haven’t done so already.
- Sign up for your One Tribe account.
- Follow the tutorial that applies to your license to get up and running in no time.

If you want to keep up-to-date with what’s happening on the blog sign up for the Gravity Forms newsletter!
