How to Get Started with the MailerLite Add-On for Gravity Forms

If you’re using MailerLite for your newsletter/email marketing efforts, we have great news!
With the launch of the official Gravity Forms MailerLite Add-On, you now have an option to connect your forms to MailerLite. You’ll be able to sync form submissions to MailerLite, including assigning people to specific MailerLite groups and/or mapping data to custom fields in MailerLite.
In this post, we’ll introduce you to MailerLite and the Gravity Forms MailerLite Add-On. Then, we’ll show you step-by-step how to set up the add-on and start syncing subscribers to your MailerLite lists.
Who Is MailerLite For?

MailerLite is a popular email marketing service that offers competitively priced plans, which has made it especially popular with a lot of creators and solopreneurs (though anyone can benefit from it).
You can use it to build an email list and then send subscribers emails using MailerLite’s premade templates and drag-and-drop builder. In addition to manually sending emails, you can also set up automated emails or sequences, such as sending an automated series of welcome emails.
You can also organize subscribers into different groups and segments, which lets you send more personalized emails to certain types of subscribers. And if you want to store extra information about subscribers beyond their names and emails, you can also add as many custom fields as needed.
MailerLite has a forever-free plan that can be great for people just getting started. It lets you have up to 1,000 subscribers and collectively send them up to 12,000 emails per month.
If you ever need to exceed those limits, the paid plans start at just $9 per month for up to 500 subscribers and unlimited monthly email sending (plus other added features). Prices go up from there based on the number of subscribers that you have and all of the premium plans support unlimited email sending.
What Does the Gravity Forms MailerLite Add-On Do?
The new MailerLite Add-On gives you an official way to connect the forms that you build to MailerLite.
When someone submits a form on your site, you can add them as a subscriber in your MailerLite account, including the option to add them to a specific group in MailerLite.
In addition to adding the user’s name and email address, you can also map fields in your form to custom fields that you’ve added in MailerLite. This could include a user’s company, country, or any other type of information that you’ve added MailerLite custom fields for.
Finally, you can use the conditional logic functionality in Gravity Forms to only subscribe people to MailerLite if they answered your form in a certain way.
You could use this to add people to different MailerLite groups depending on how they answered your form (great for personalization). Or, you could add an opt-in option to any form on your site (e.g. a user registration form) and only subscribe people to your lists if they check that box.
How to Connect Gravity Forms to MailerLite
Now, let’s get into the actual step-by-step guide on how to connect Gravity Forms to MailerLite using the new official MailerLite Add-On.
For this guide, we’ll only assume two things:
- You already have a working WordPress website with the Gravity Forms plugin installed. The MailerLite Add-On is available with all Gravity Forms licenses . If you don’t have a license yet, you can purchase one here.
- You already have a MailerLite account. If you don’t, you can register for a free MailerLite account here (no credit card needed). You’ll get a 30-day free trial of all the premium features. After that, your plan will automatically downgrade to the forever-free plan unless you choose to sign up for a paid plan.
With those assumptions out of the way, here’s how to set up everything…
1. Install the Gravity Forms MailerLite Add-On
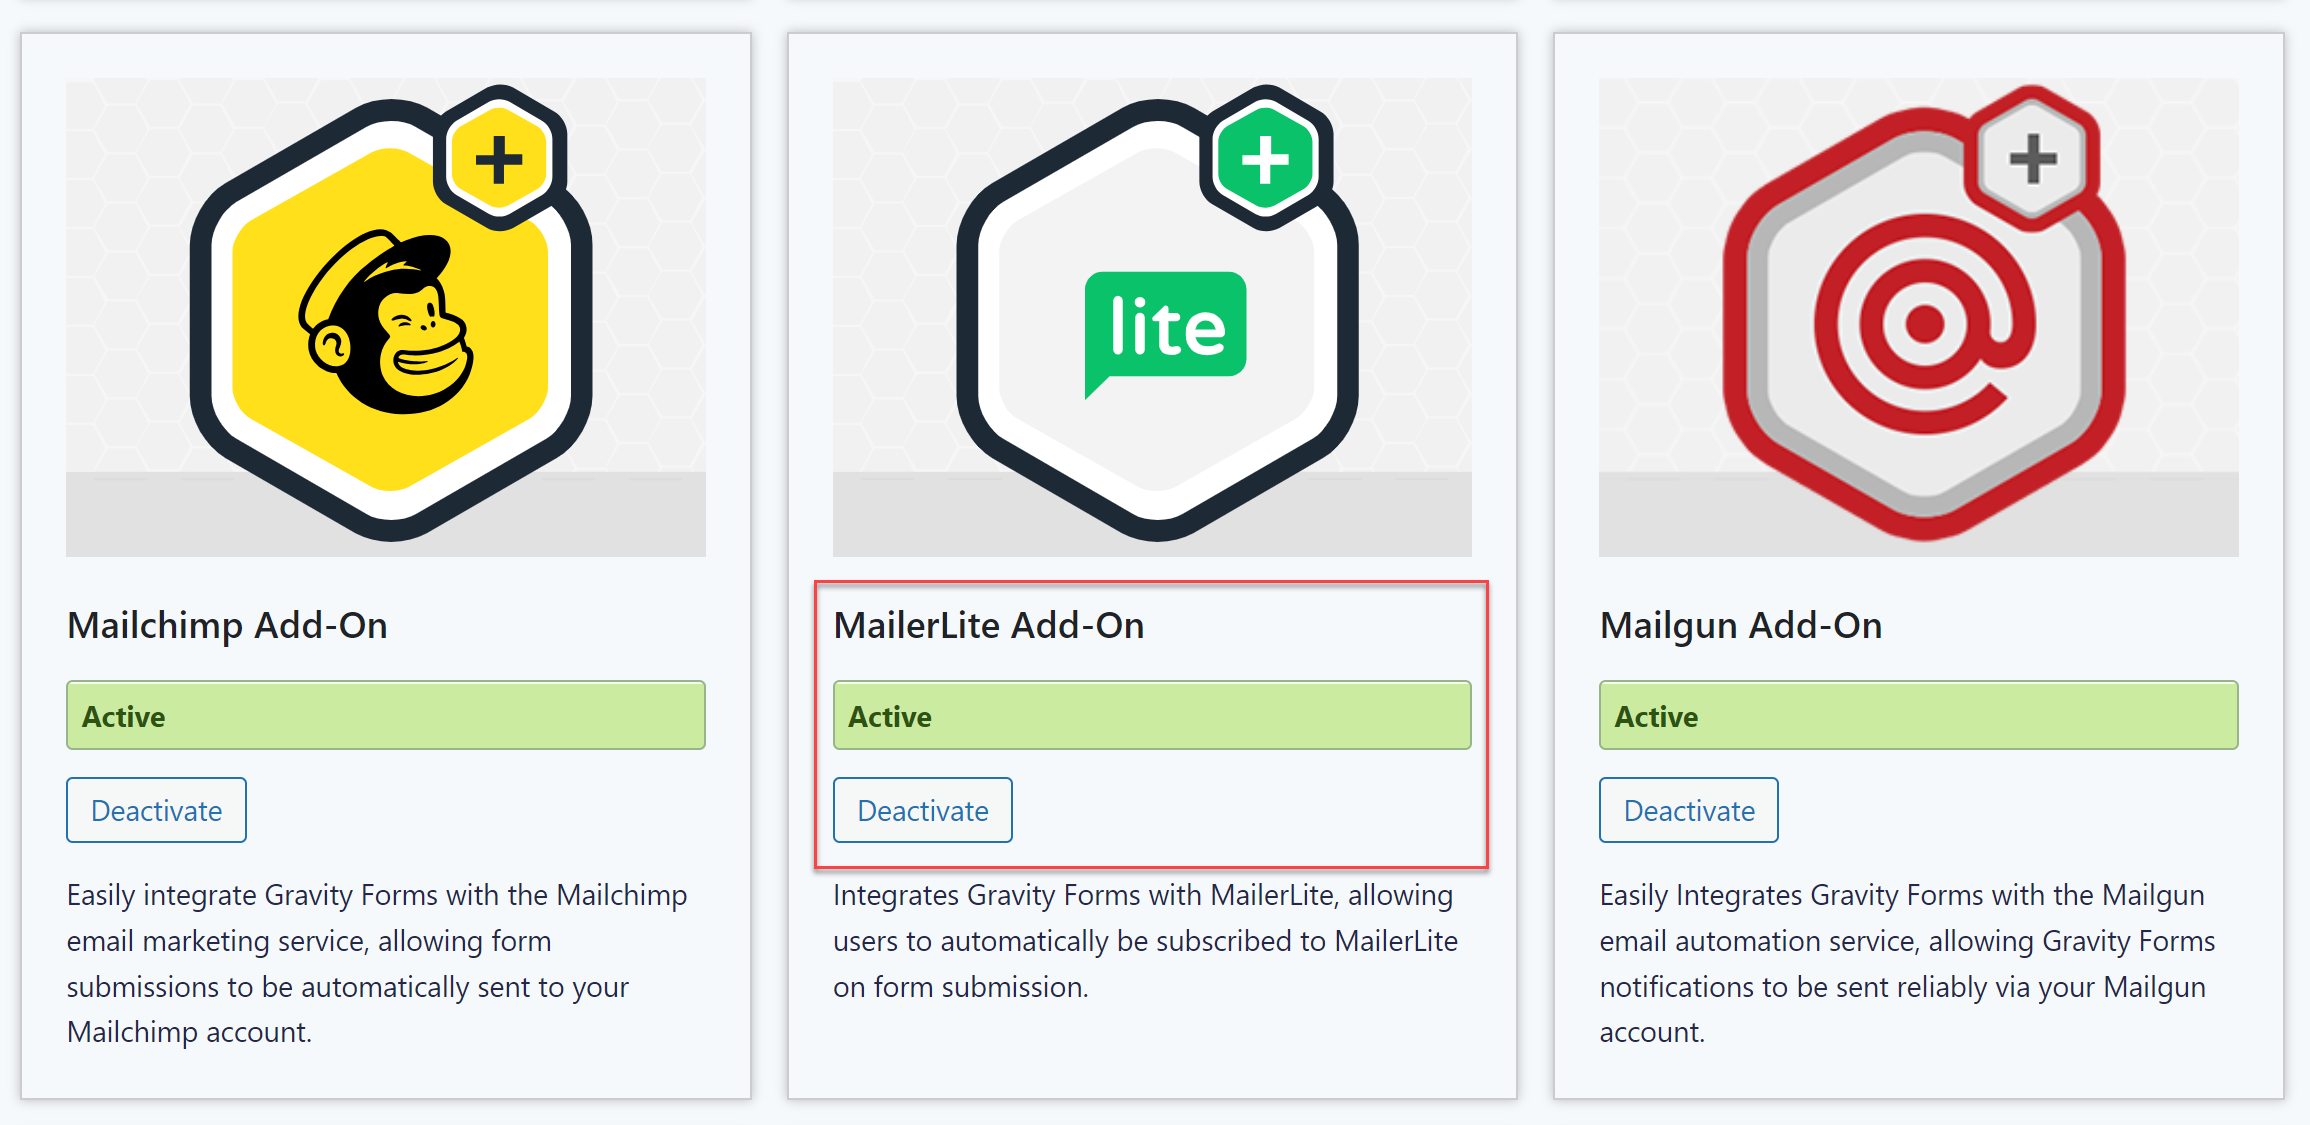
To begin, you’ll want to make sure that you’ve installed and activated the official MailerLite Add-On on your site:
- Open your WordPress dashboard.
- Go to Forms → Add-Ons.
- Find the MailerLite Add-On in the list.
- Click the Install button.
- Once the installation finishes, make sure to activate the plugin.
2. Connect Gravity Forms to MailerLite
Once you’ve activated the add-on, you need to connect Gravity Forms to your MailerLite account by using your MailerLite API key.
To start, you’ll need to locate your MailerLite API key:
- Open your MailerLite dashboard.
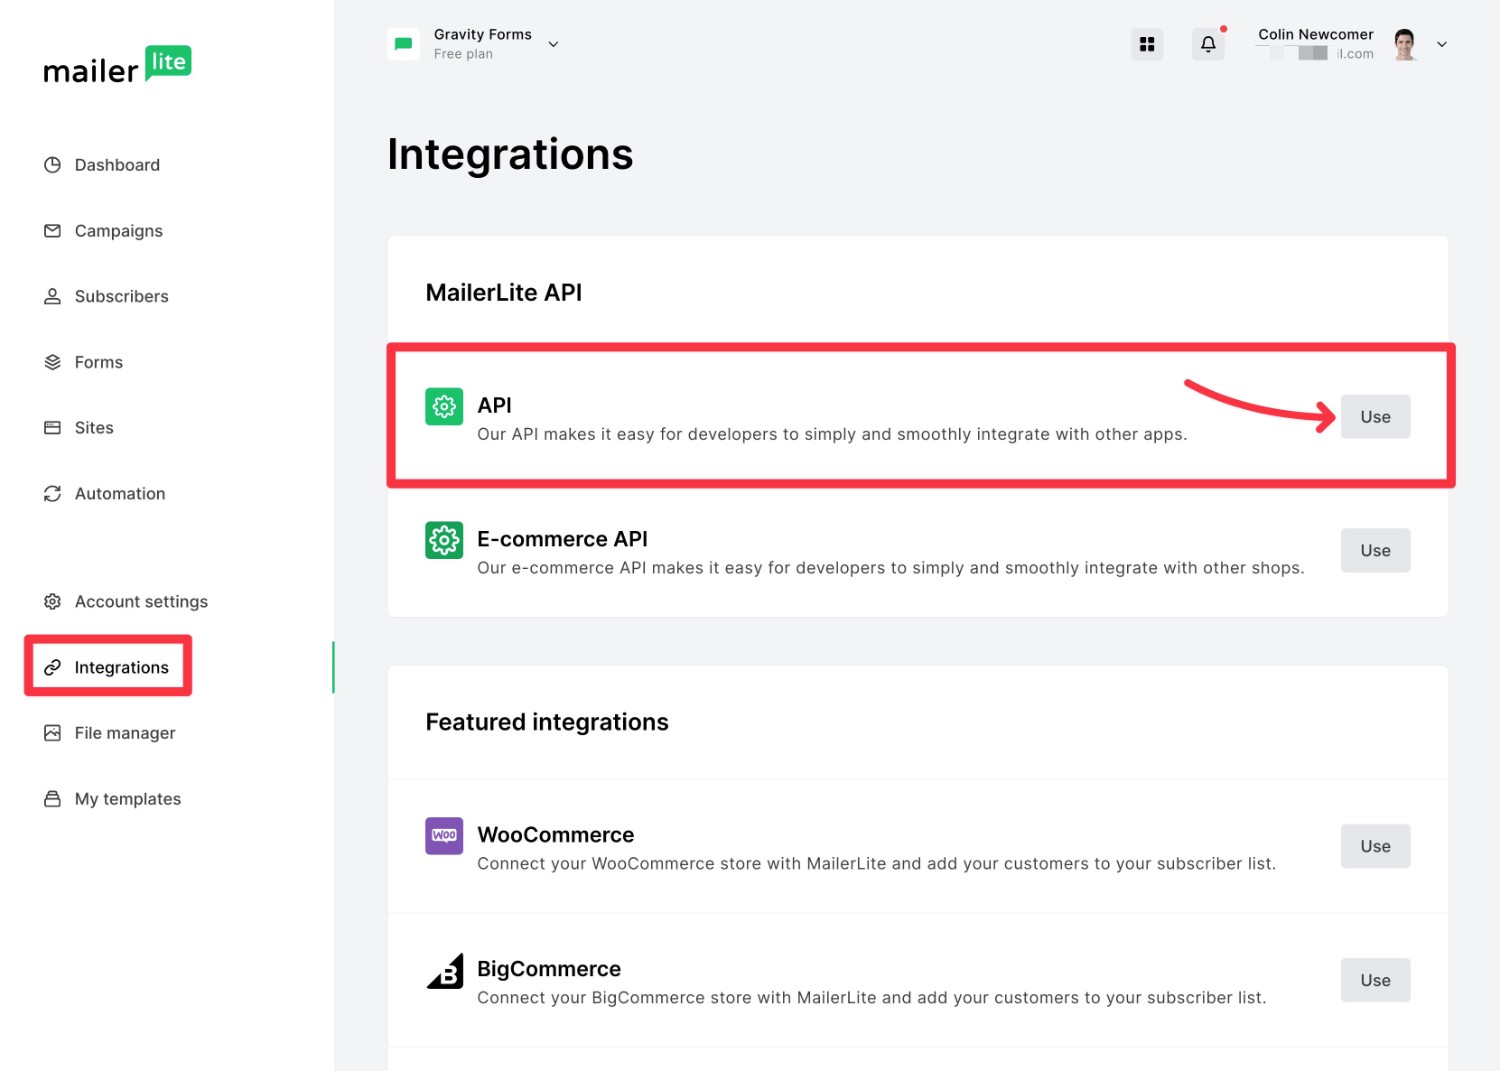
- Select the Integrations tab in the sidebar on the left.
- Click the Use button next to the API listing under MailerLite API.
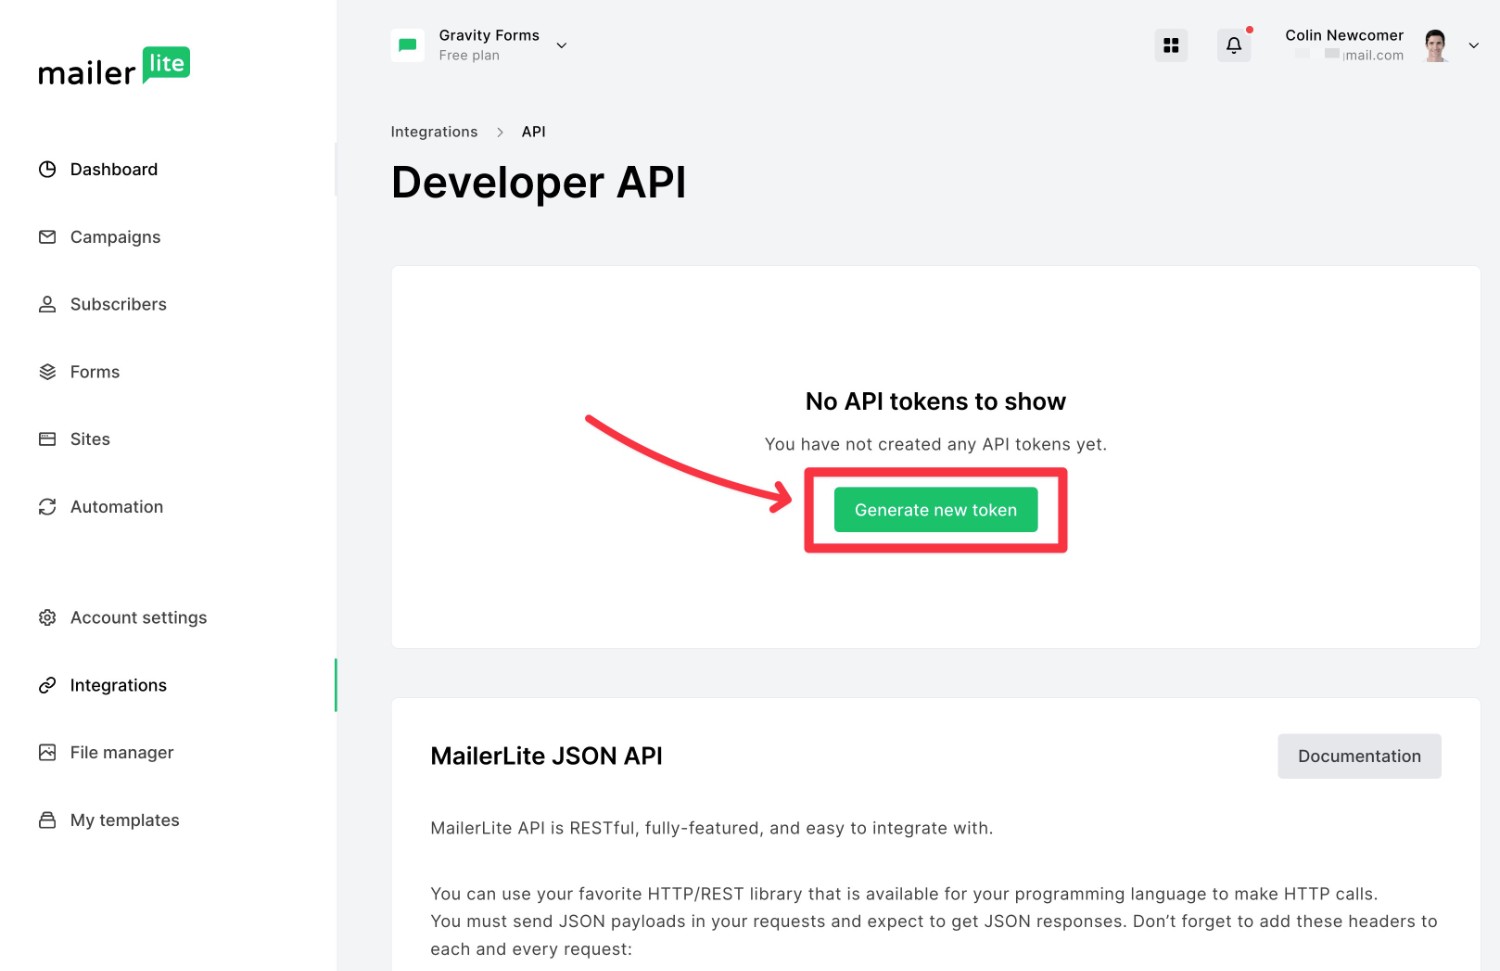
On the next screen, click the Generate new token button to create a new MailerLite API key.
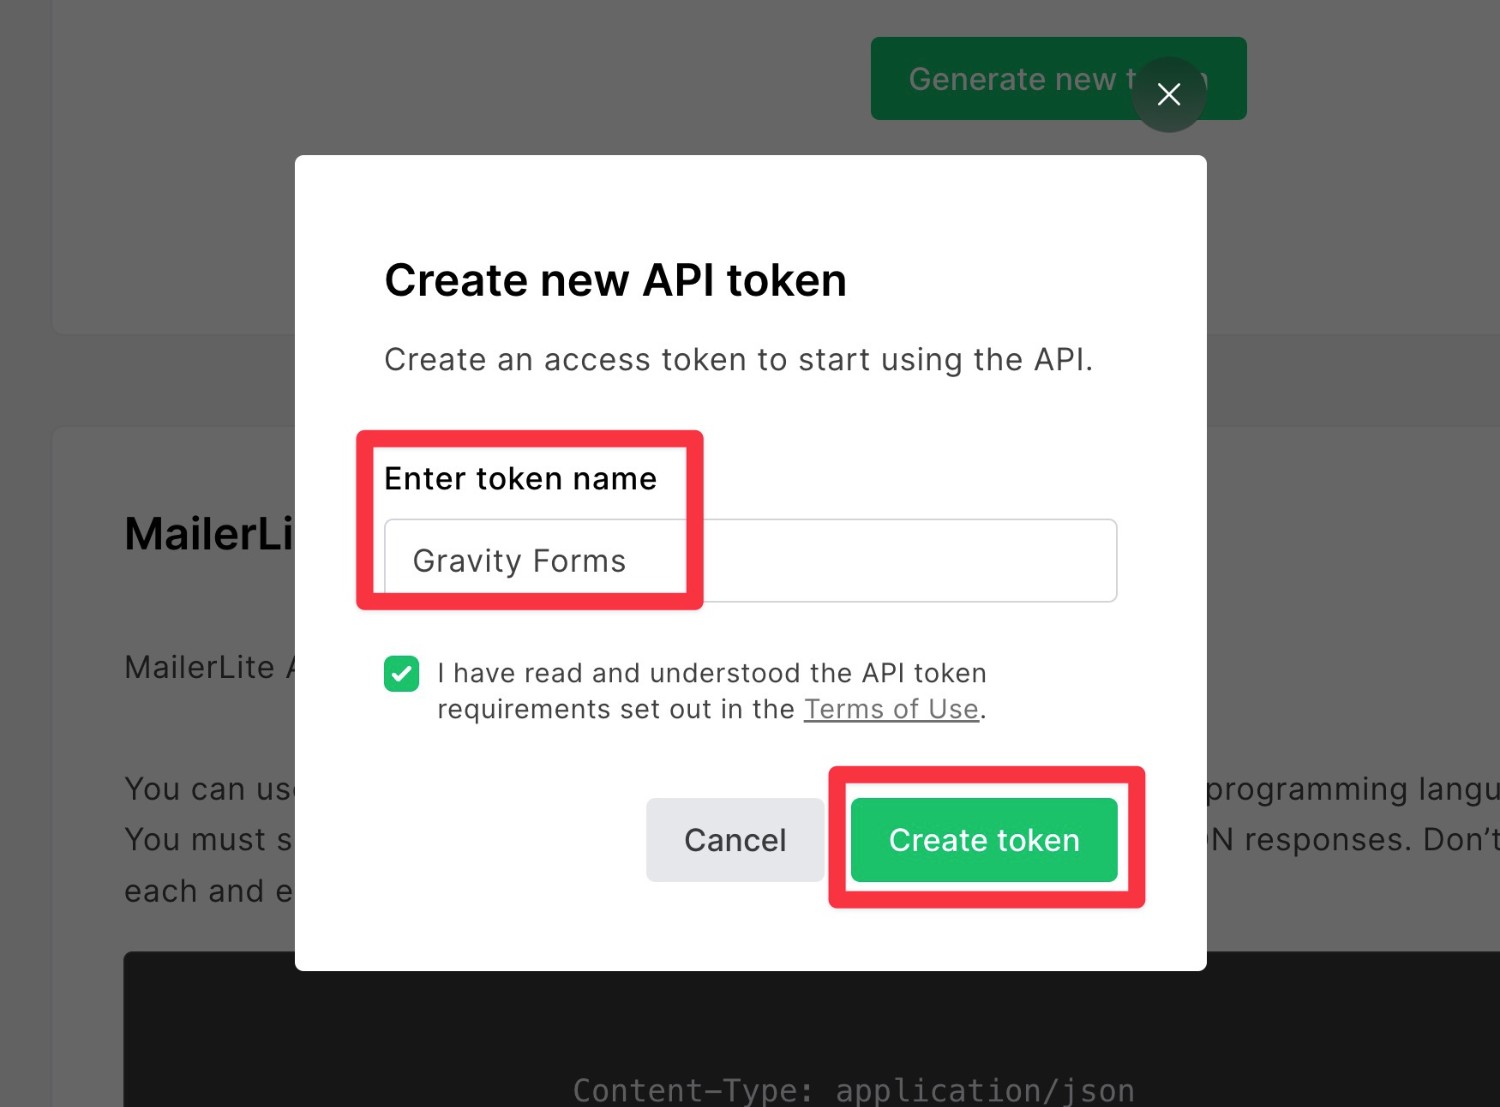
This will open a popup where you can enter a token name to help you remember it – e.g. “Gravity Forms. Then, click the Create token button.
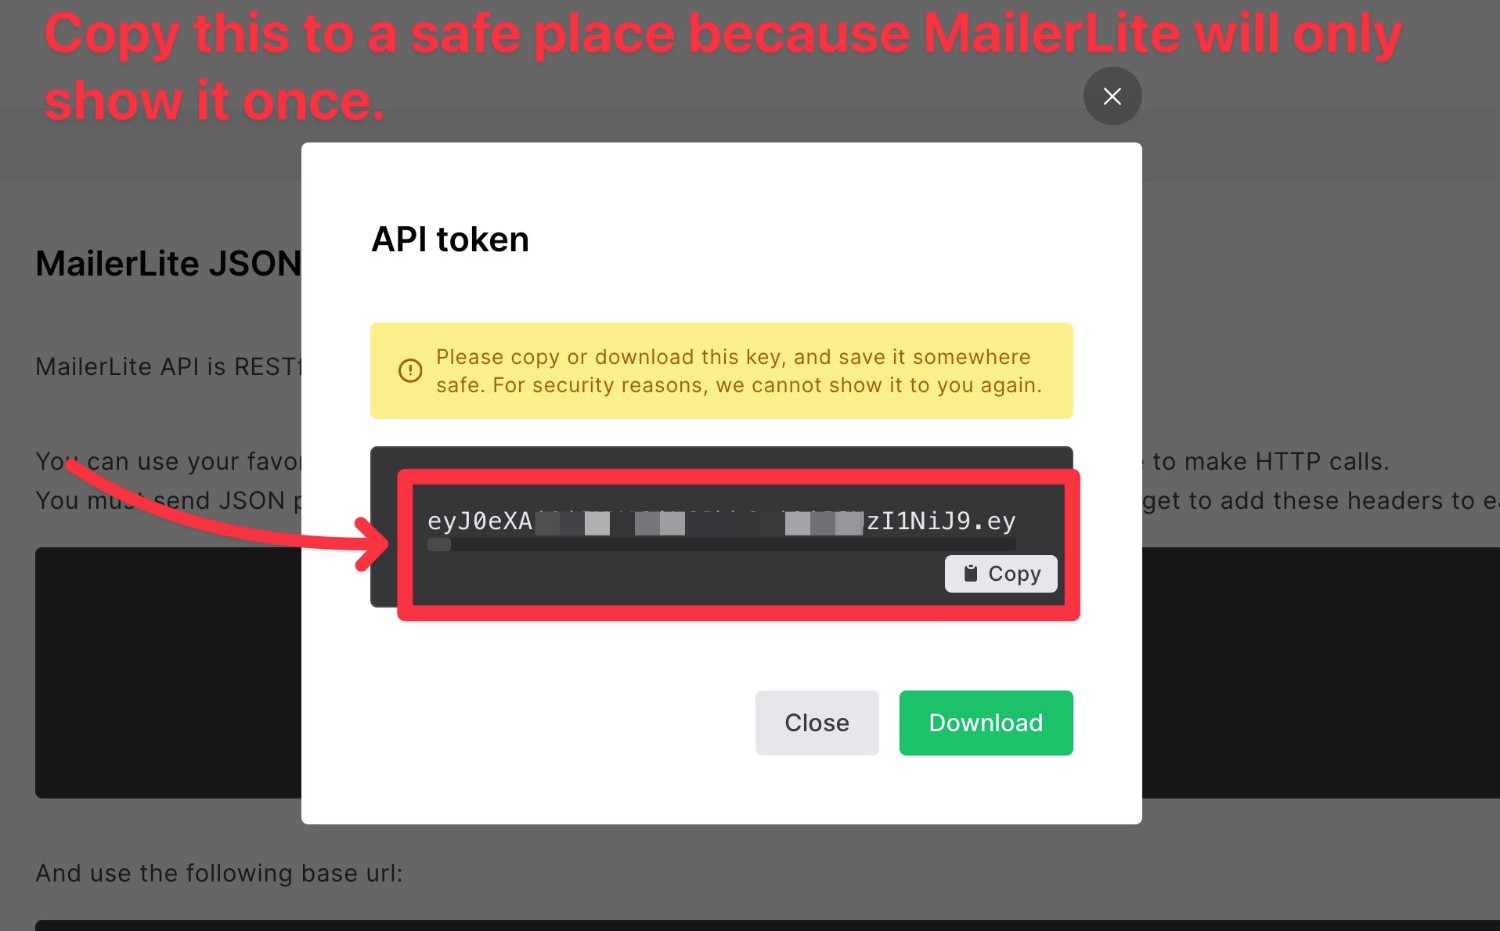
MailerLite will then display your API token. Copy this value to a safe place because you’ll need it in the next step and MailerLite will only display the value once.
The value is longer than most API tokens, so make sure you copy the entire thing. We recommend clicking the Copy button instead of trying to manually select the text.
If you accidentally lose track of your API token, you can just follow the same steps to create a new one. Don’t worry!
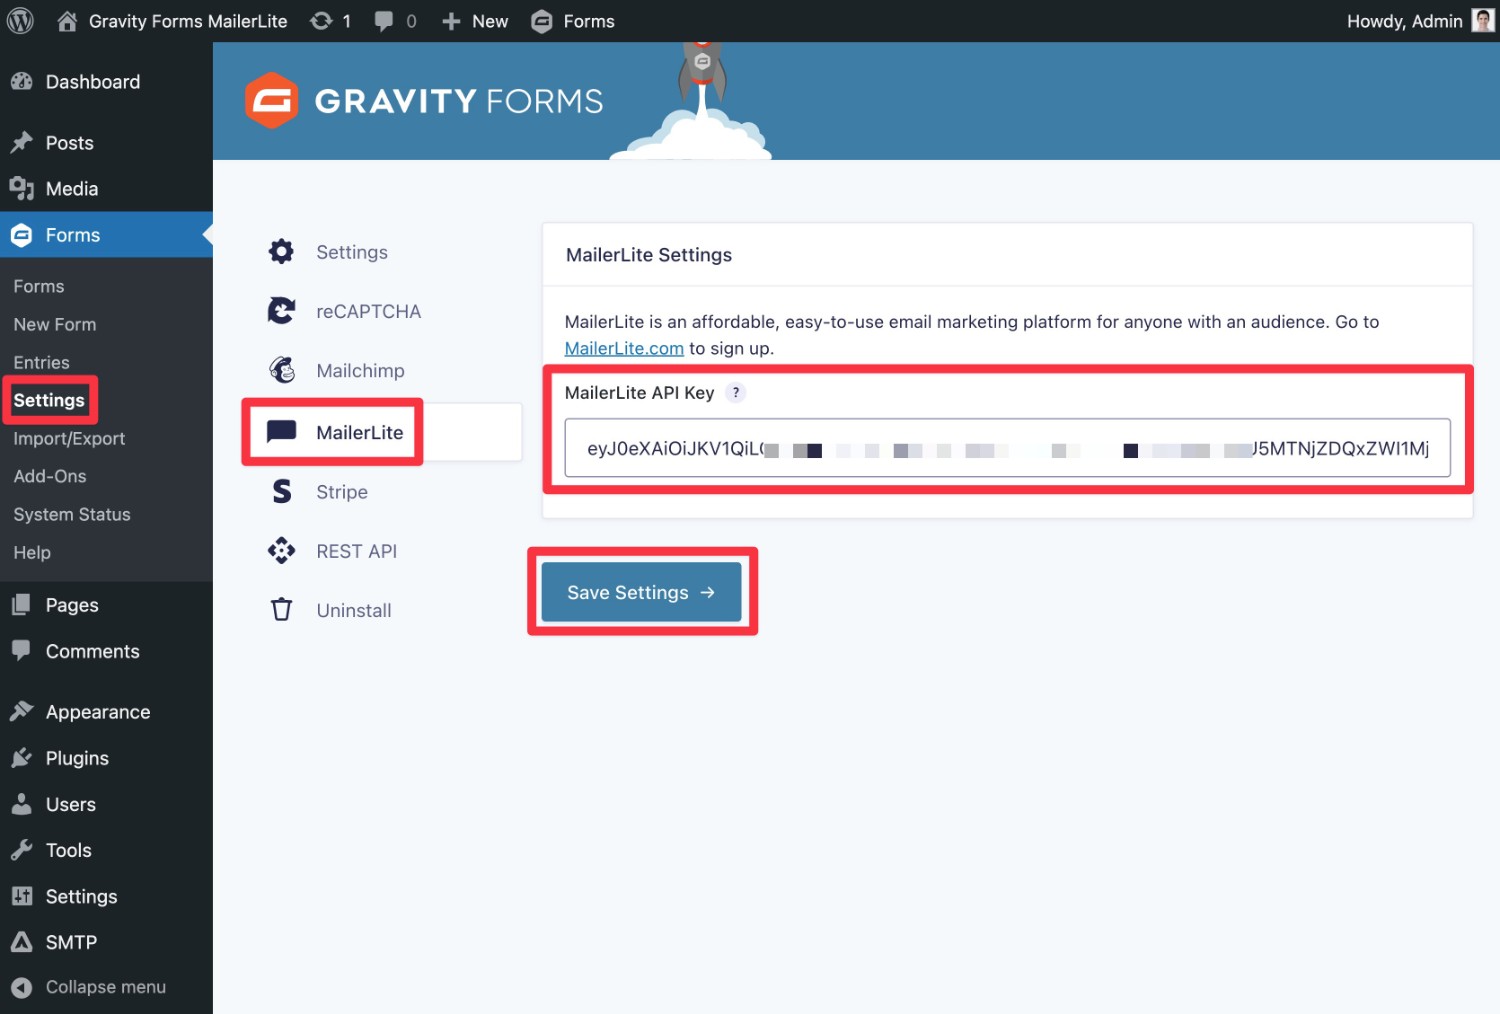
Once you’ve copied your MailerLite API key to a safe place, you need to add it to the Gravity Forms settings area by following these steps:
- Open your WordPress dashboard.
- Go to Forms → Settings.
- Select the MailerLite tab in the sidebar of the settings area. If you don’t see this, make sure that you activated the MailerLite Add-On as we showed you in the previous step.
- Paste the MailerLite API key that you obtained above into the MailerLite API Key box.
- Click Save Settings.
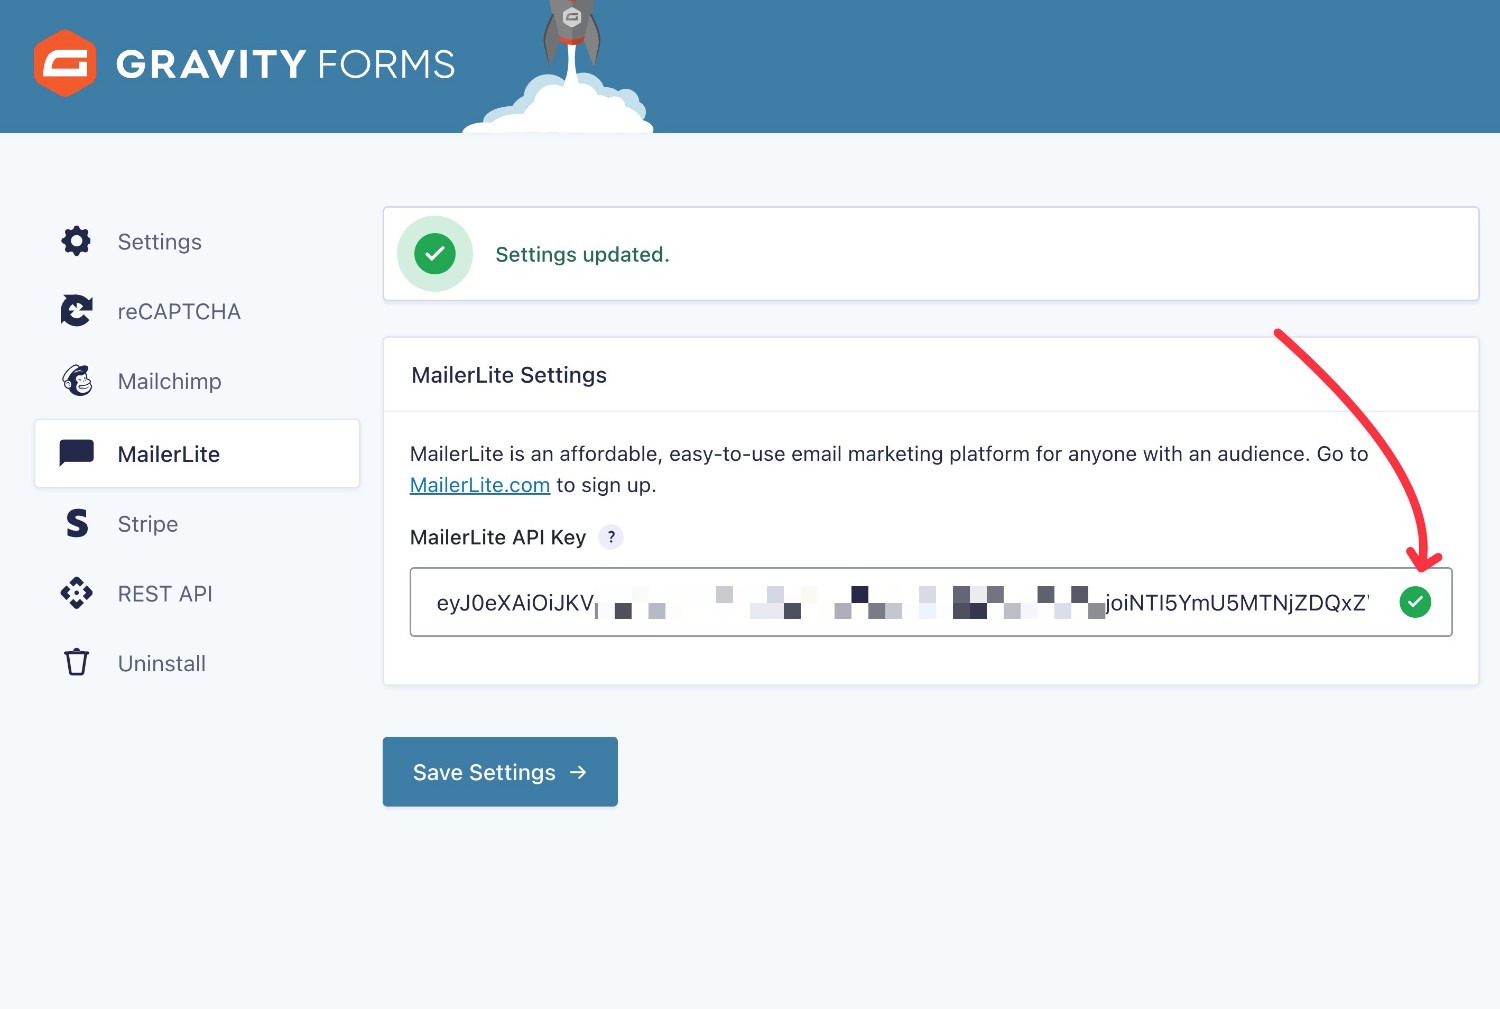
Once you click the Save Settings button, you should see a green checkmark appear to the right of the API key. This indicates that Gravity Forms was able to successfully connect to MailerLite.
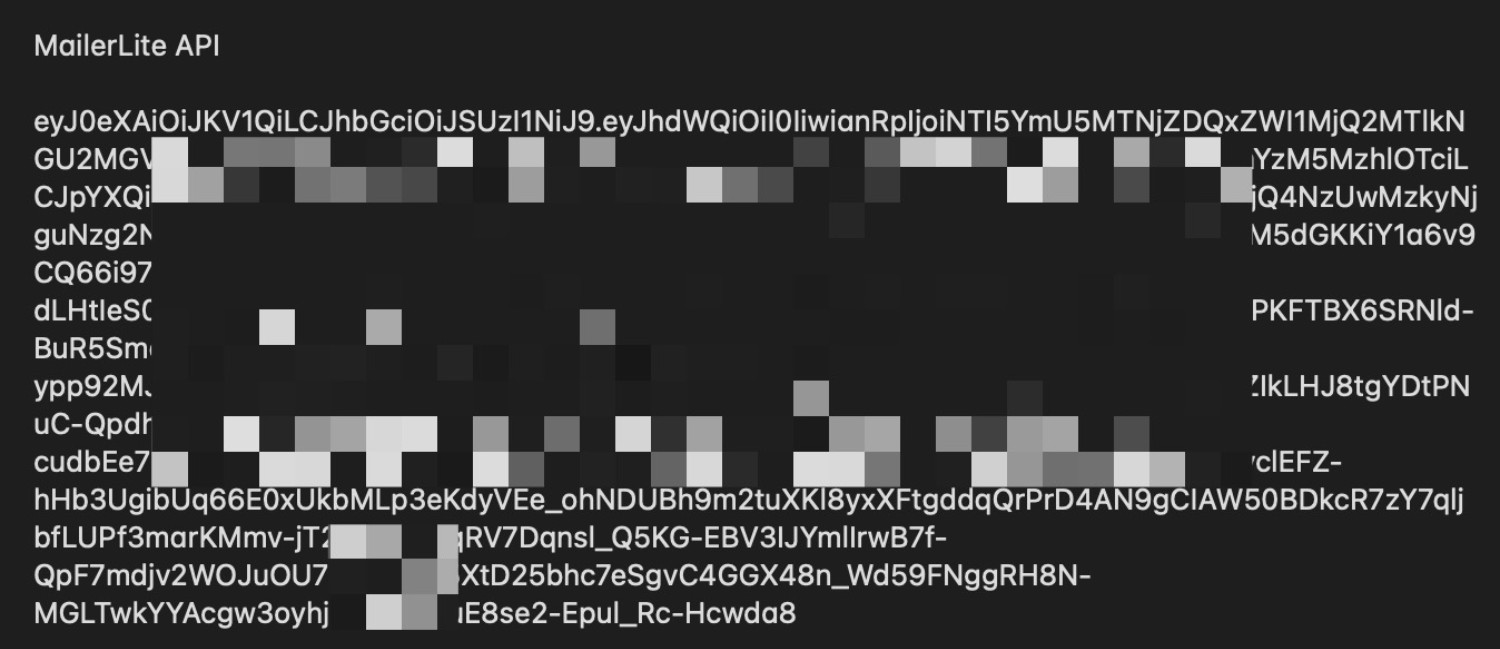
If you’re seeing a red “X” appear instead, make sure that you copy and paste the entire MailerLite API key. Again, it’s a lot longer than most other services, so you might’ve accidentally only copied part of the value.
Here’s the full length of the key, to give you an idea of what you should be using.
3. Create or Edit the Form That You Want to Connect to MailerLite
Now, you’re ready to actually connect your first form to MailerLite.
You could use a dedicated newsletter signup form. Or, you can add email signup functionality to other forms. For example, you could give users an option to subscribe to your MailerLite list as part of a webinar registration form or as part of a donation form.
You can either create a new form for this purpose or edit one of your existing forms – it’s totally up to you.
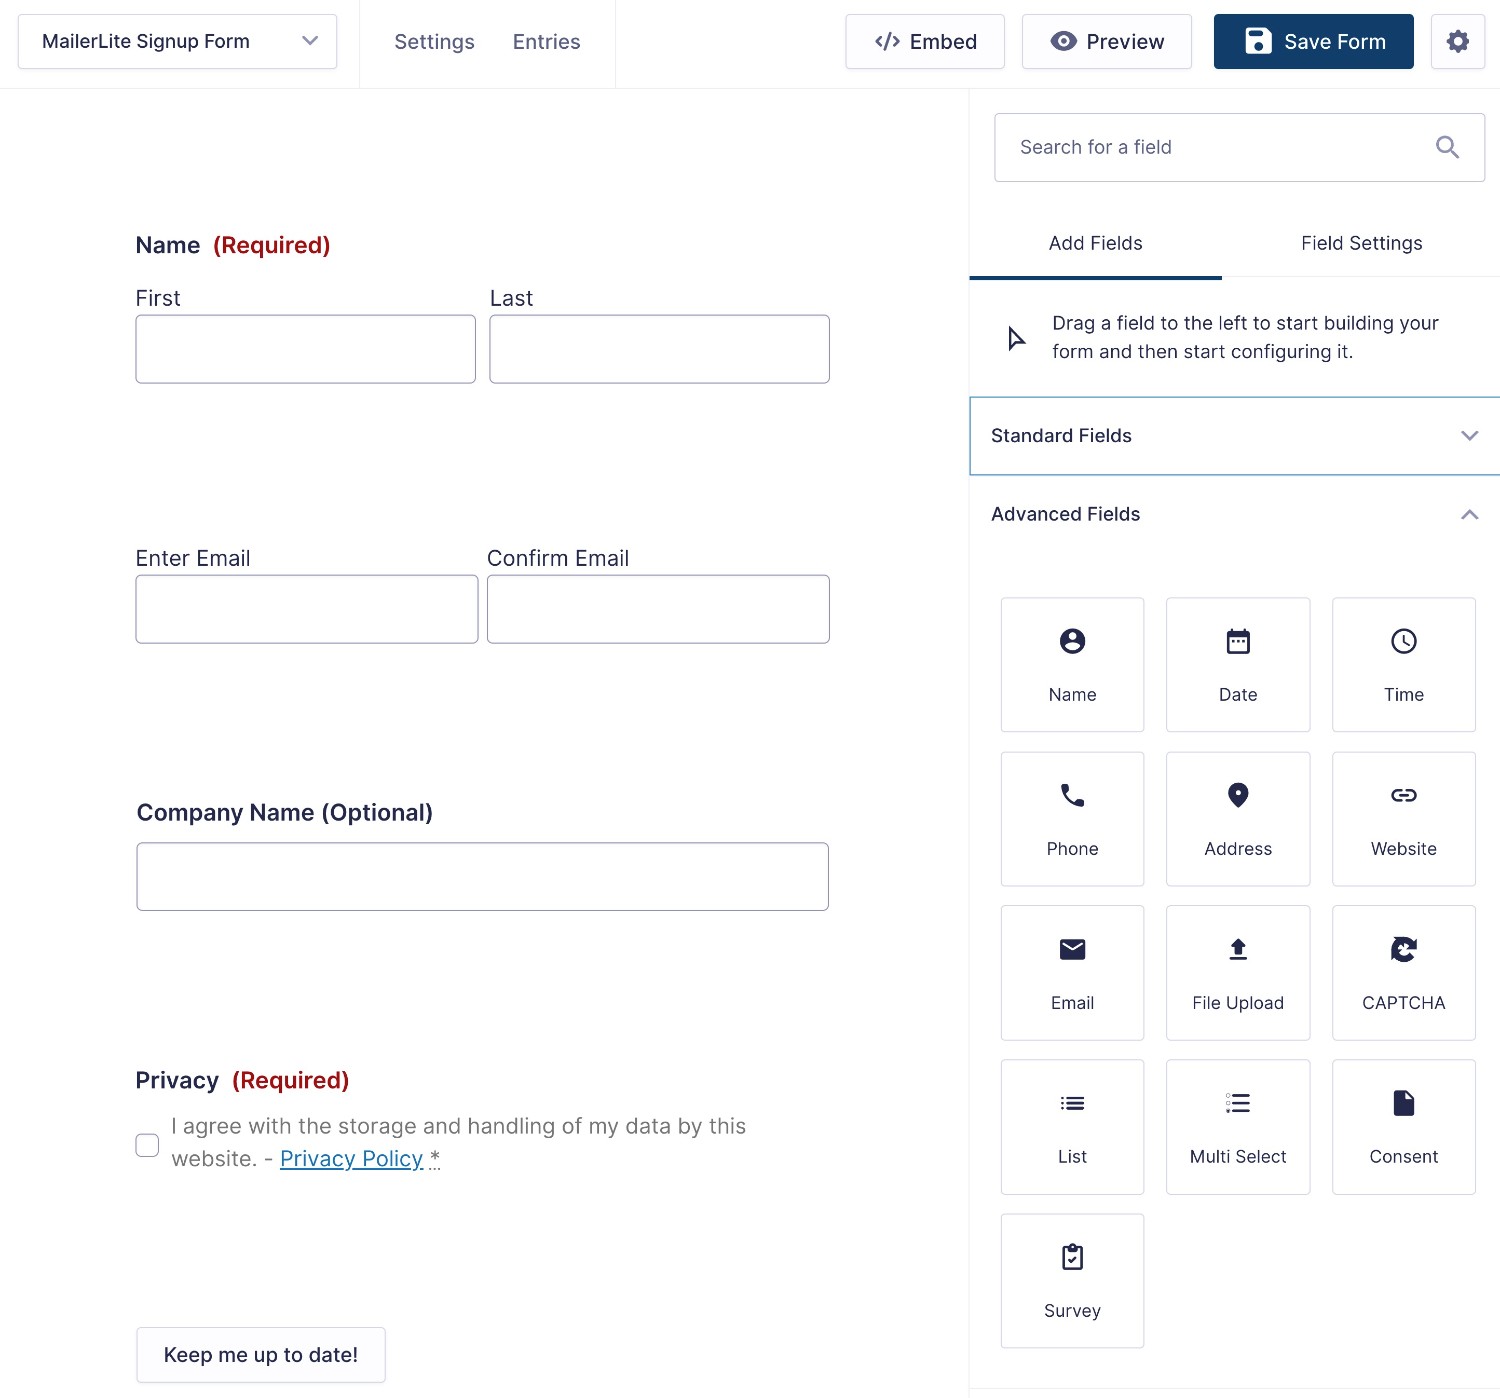
At a minimum, you’ll need to add fields for a person’s Email, First Name, and Last Name.
For this example, we’re just going to create a new form using the premade Newsletter Signup template, which already includes those fields.
If you want to collect any non-email information to sync to MailerLite, make sure that you add fields for that information to your form. For example, a person’s company or country (which MailerLite adds as custom fields by default).
We added a “Company” field to the Newsletter Signup template.
4. Create a MailerLite Feed for Your Form
Once you’re happy with the content of your form, you can create a MailerLite “feed”, which lets you control what information to sync with MailerLite and how to map the data.
To do this, go to Settings → MailerLite in the form editor. Then, click the Add New option to create a feed.
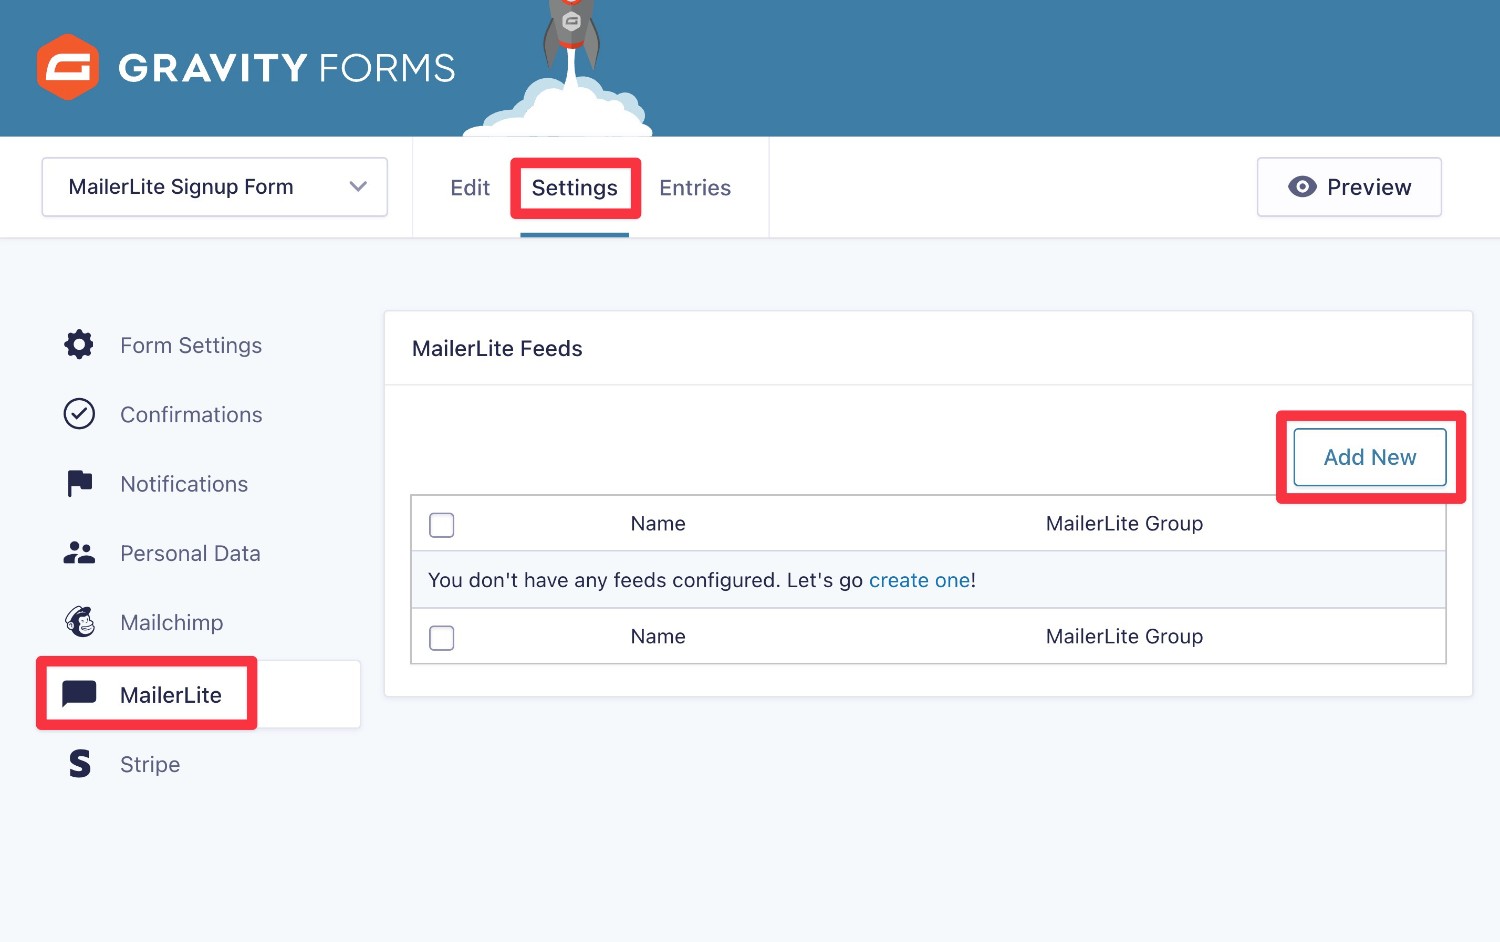
You can now configure how to sync users to MailerLite.
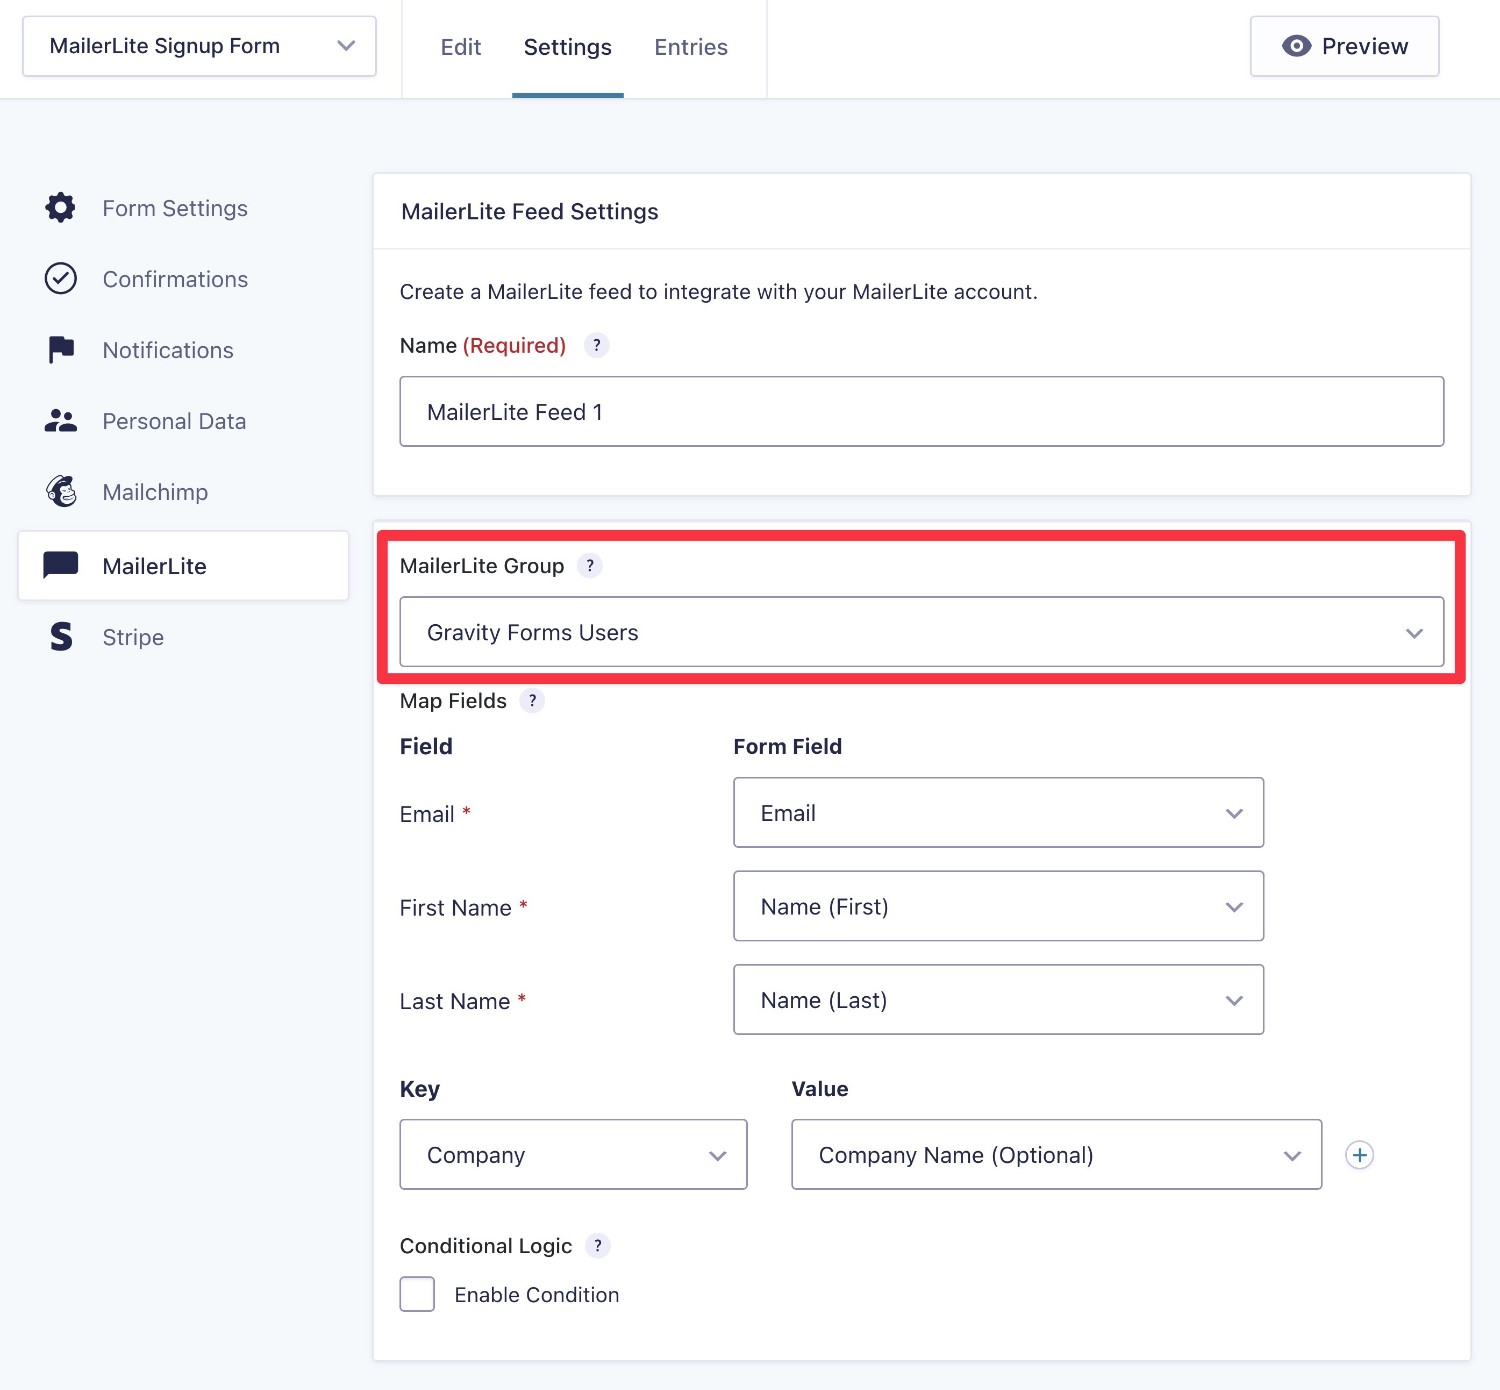
First, you can choose which MailerLite Group to assign people to if they use this form.
You’ll only see this drop-down if you’ve created multiple Groups in MailerLite. You can create Groups in the MailerLite dashboard by going to Subscribers → Groups → Create group.
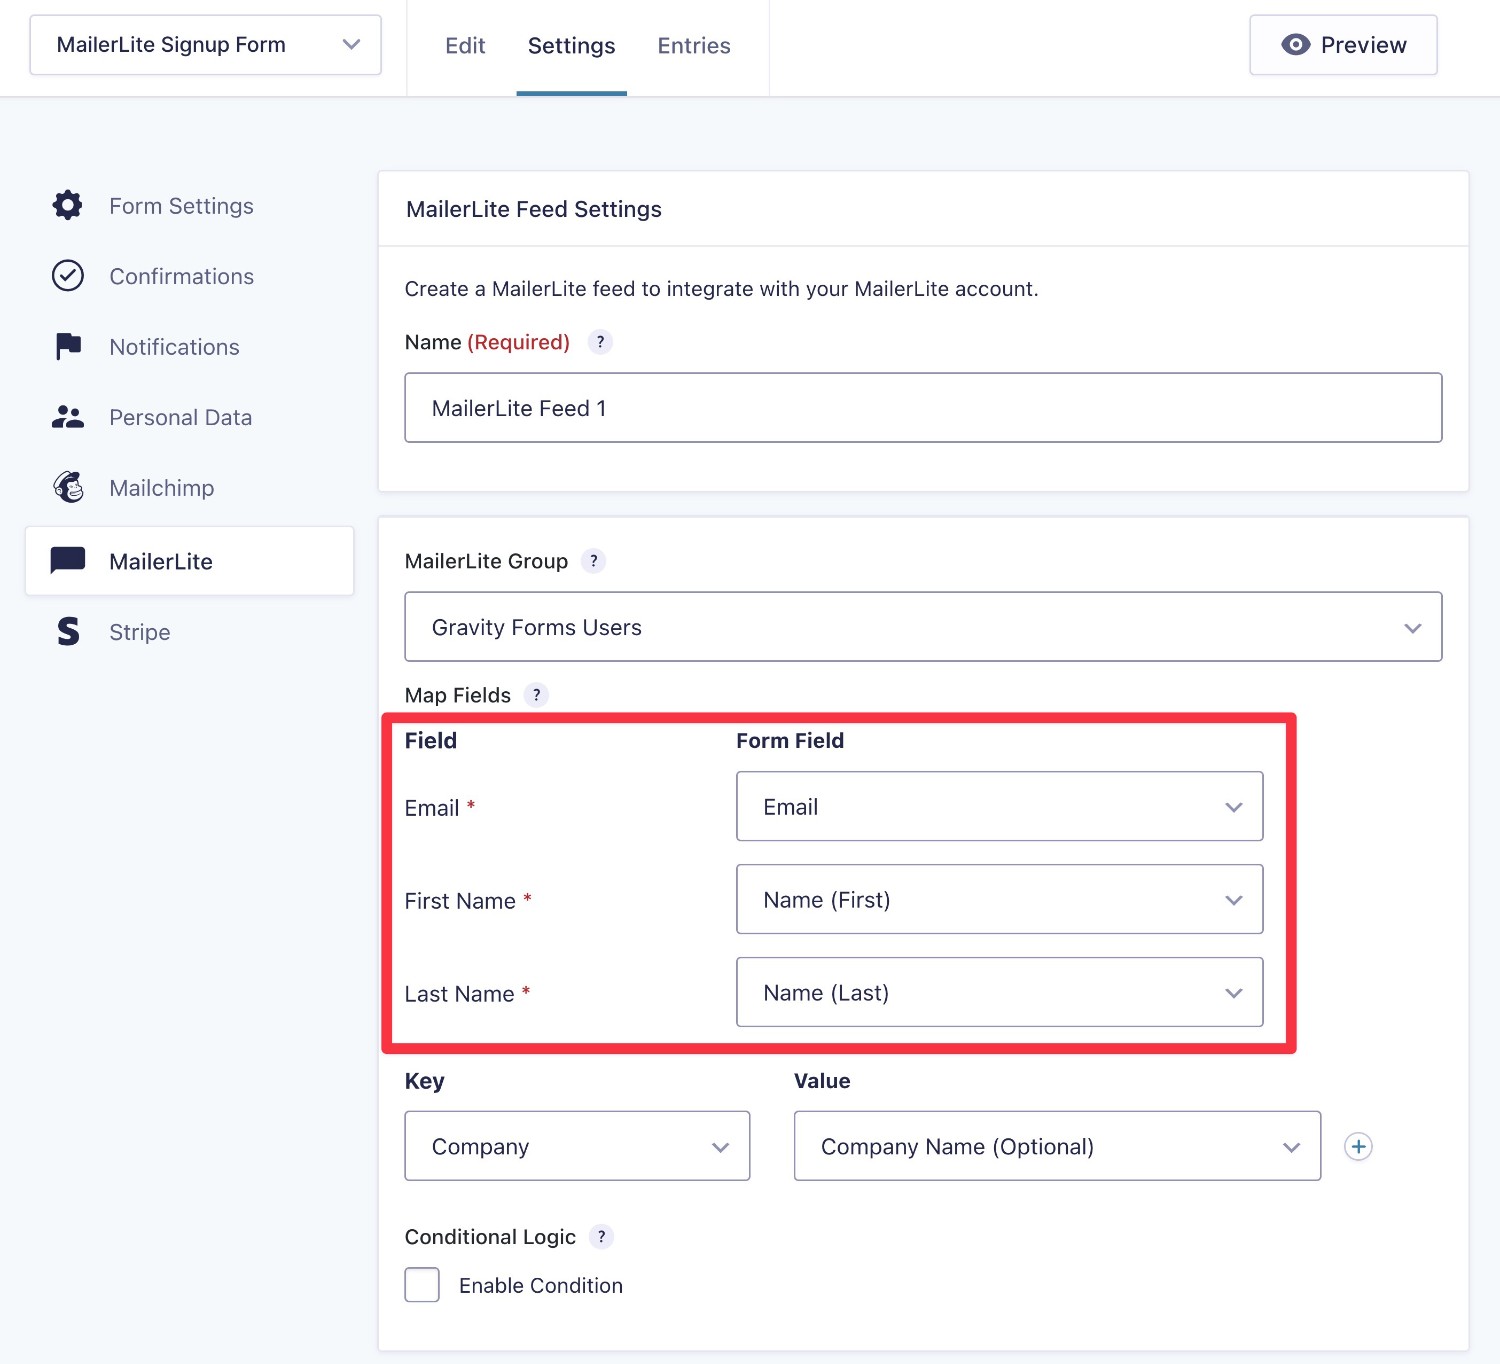
Next, you can map the fields from your form to the required MailerLite fields, which are Email, First Name, and Last Name. Gravity Forms should automatically map these for you, but you’ll want to check to make sure that they’re correct.
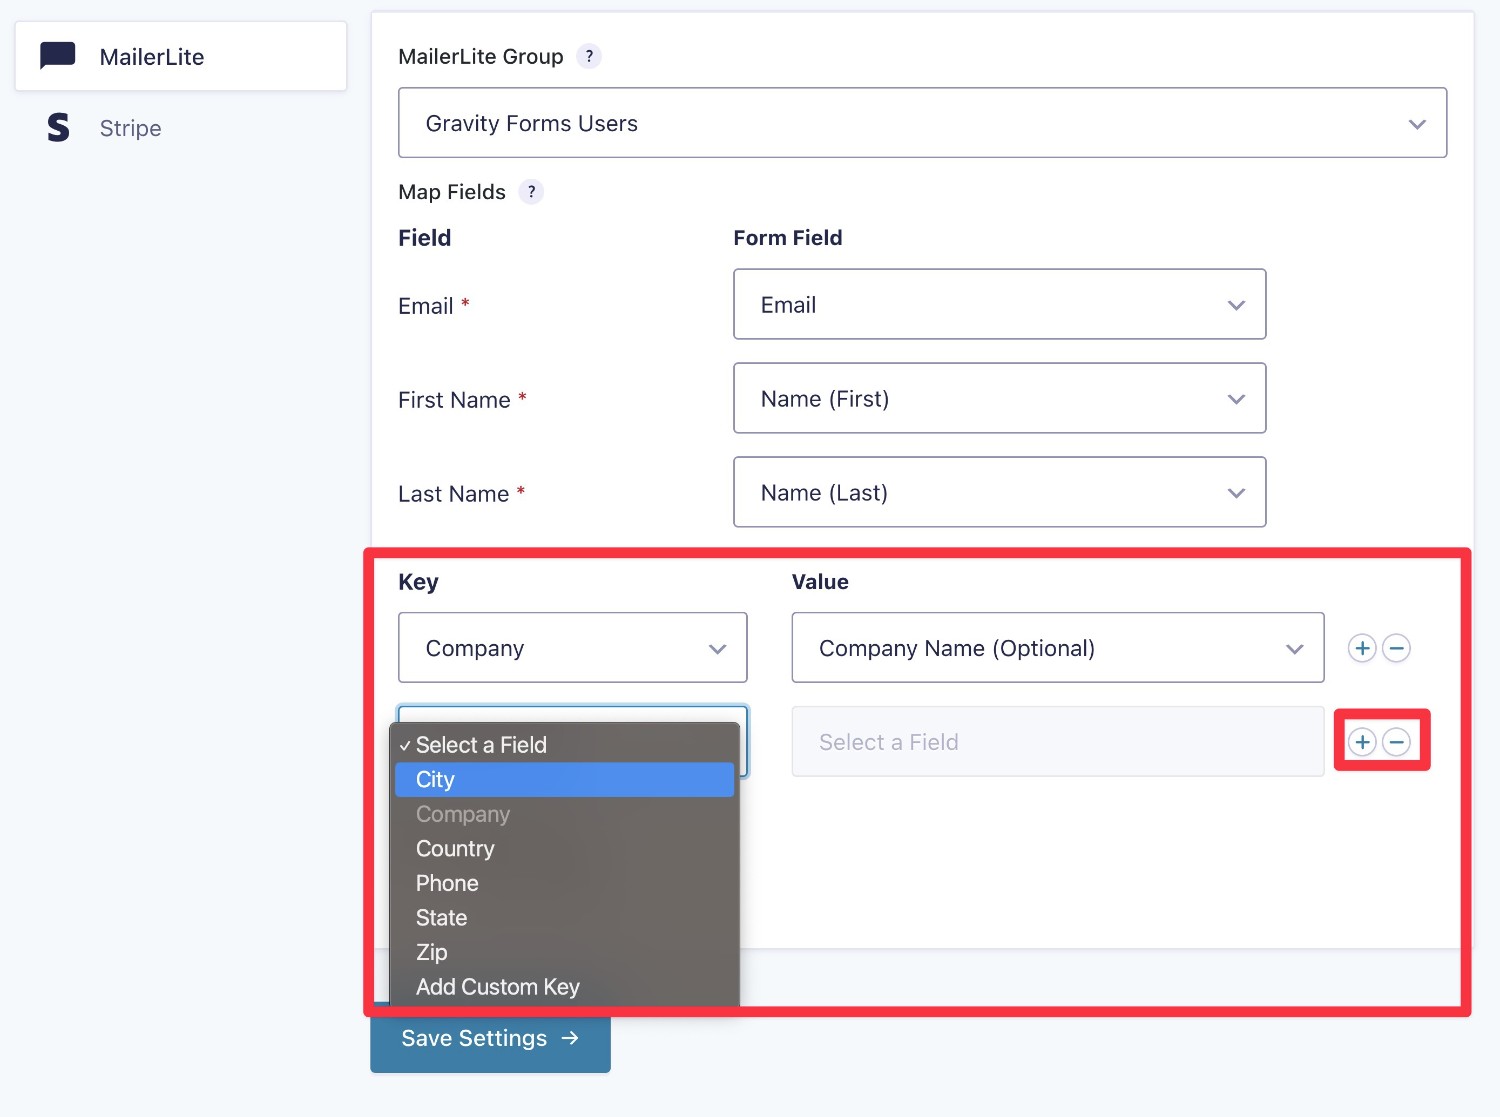
You can also use the Key / Value options to map form fields to custom fields in MailerLite.
First, use the Key drop-down to select the field in MailerLite.
You’ll automatically see a list of all the fields from your MailerLite account. You can also add new fields in your MailerLite dashboard by going to Subscribers → Fields → Create field. Once you’ve added them to MailerLite, they should appear as an option right away.
Then, use the Value drop-down to select the Gravity Forms field to map to that MailerLite field.
You can click the plus icon to map additional fields as needed.
Finally, you also have the option to use conditional logic to only sync subscribers to MailerLite if they answered your form in a certain way.
Here are two example use cases for adding conditional logic to your feed:
- Whether or not the user opted in – for example, maybe you want to add an option to your user account registration form that lets people also subscribe to your newsletter. You could only add them to MailerLite if they checked the box to join your newsletter.
- Adding users to different groups – you could assign users to different MailerLite groups based on how they answered the form. In this case, you would create a separate MailerLite feed for each group. Then, you would use conditional logic to only execute the feed that applies to how that user answered the form.
To add conditional logic, you just need to check the Enable Condition box.
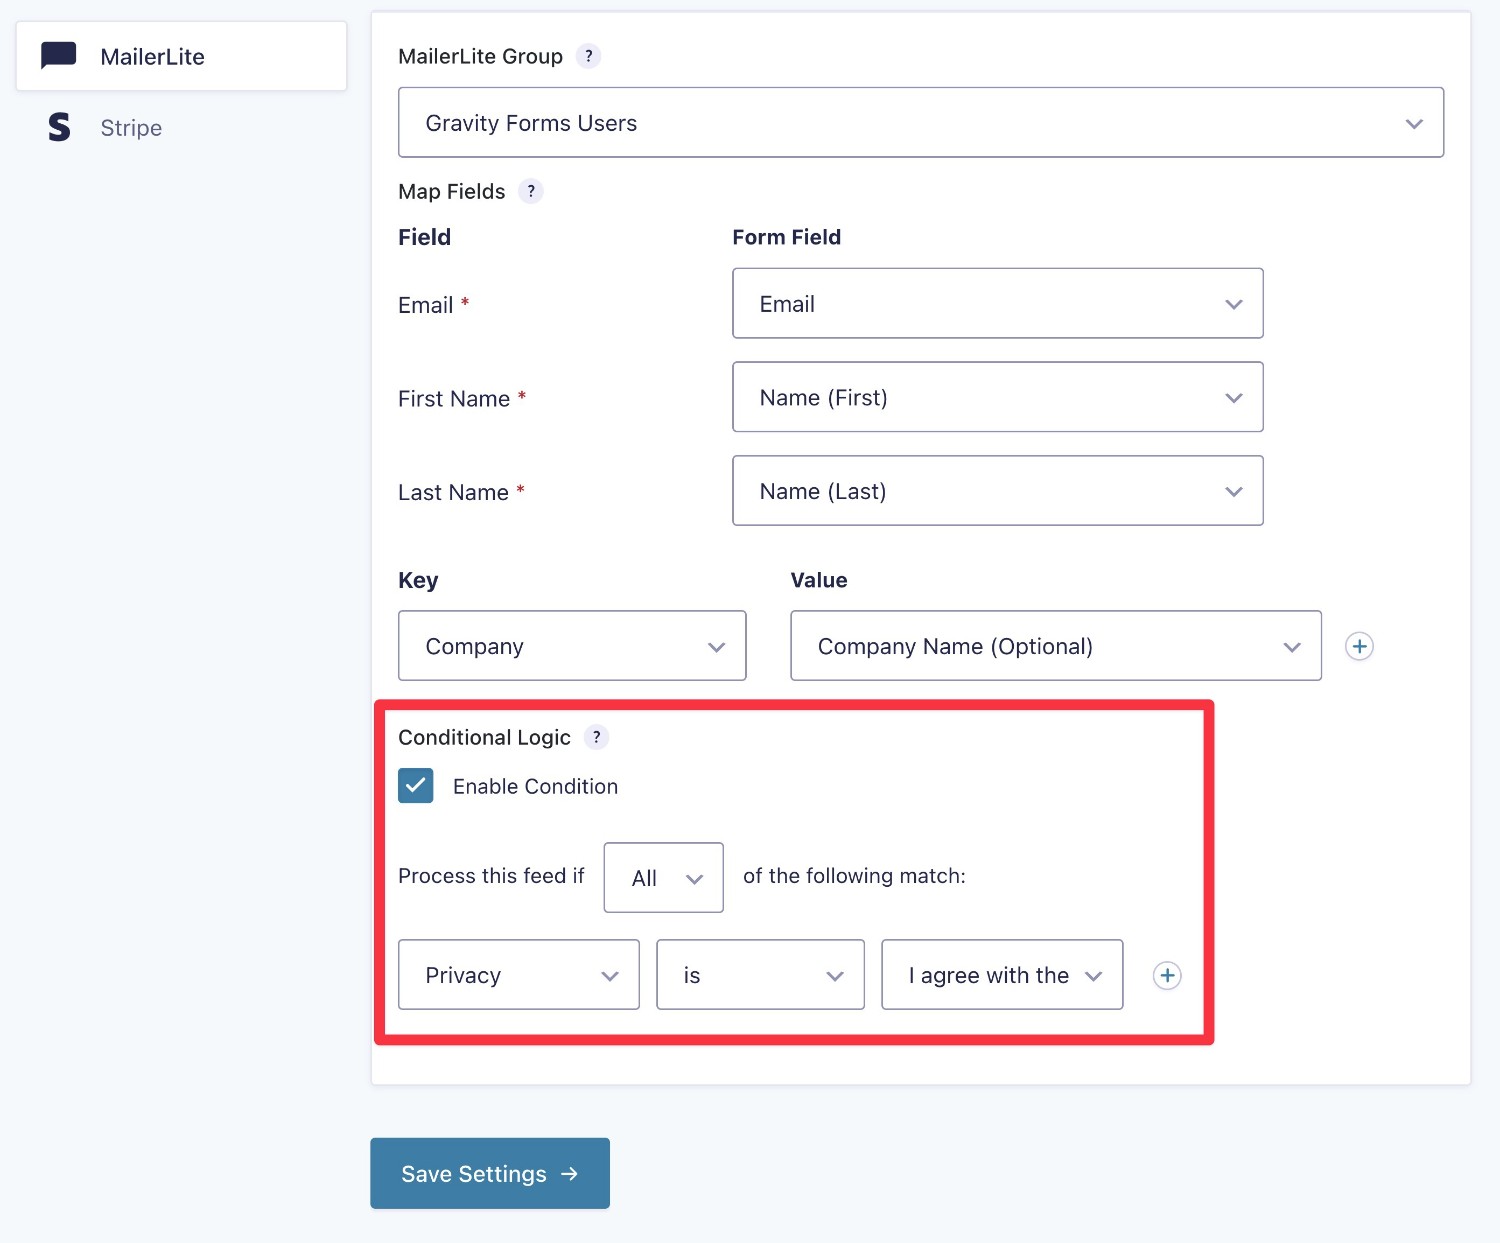
When you’re finished, make sure to click the Save Settings button to save your feed.
5. Embed Your Form and Test It
If you added your MailerLite feed to an existing form on your site, Gravity Forms will start syncing contacts to MailerLite for that form.
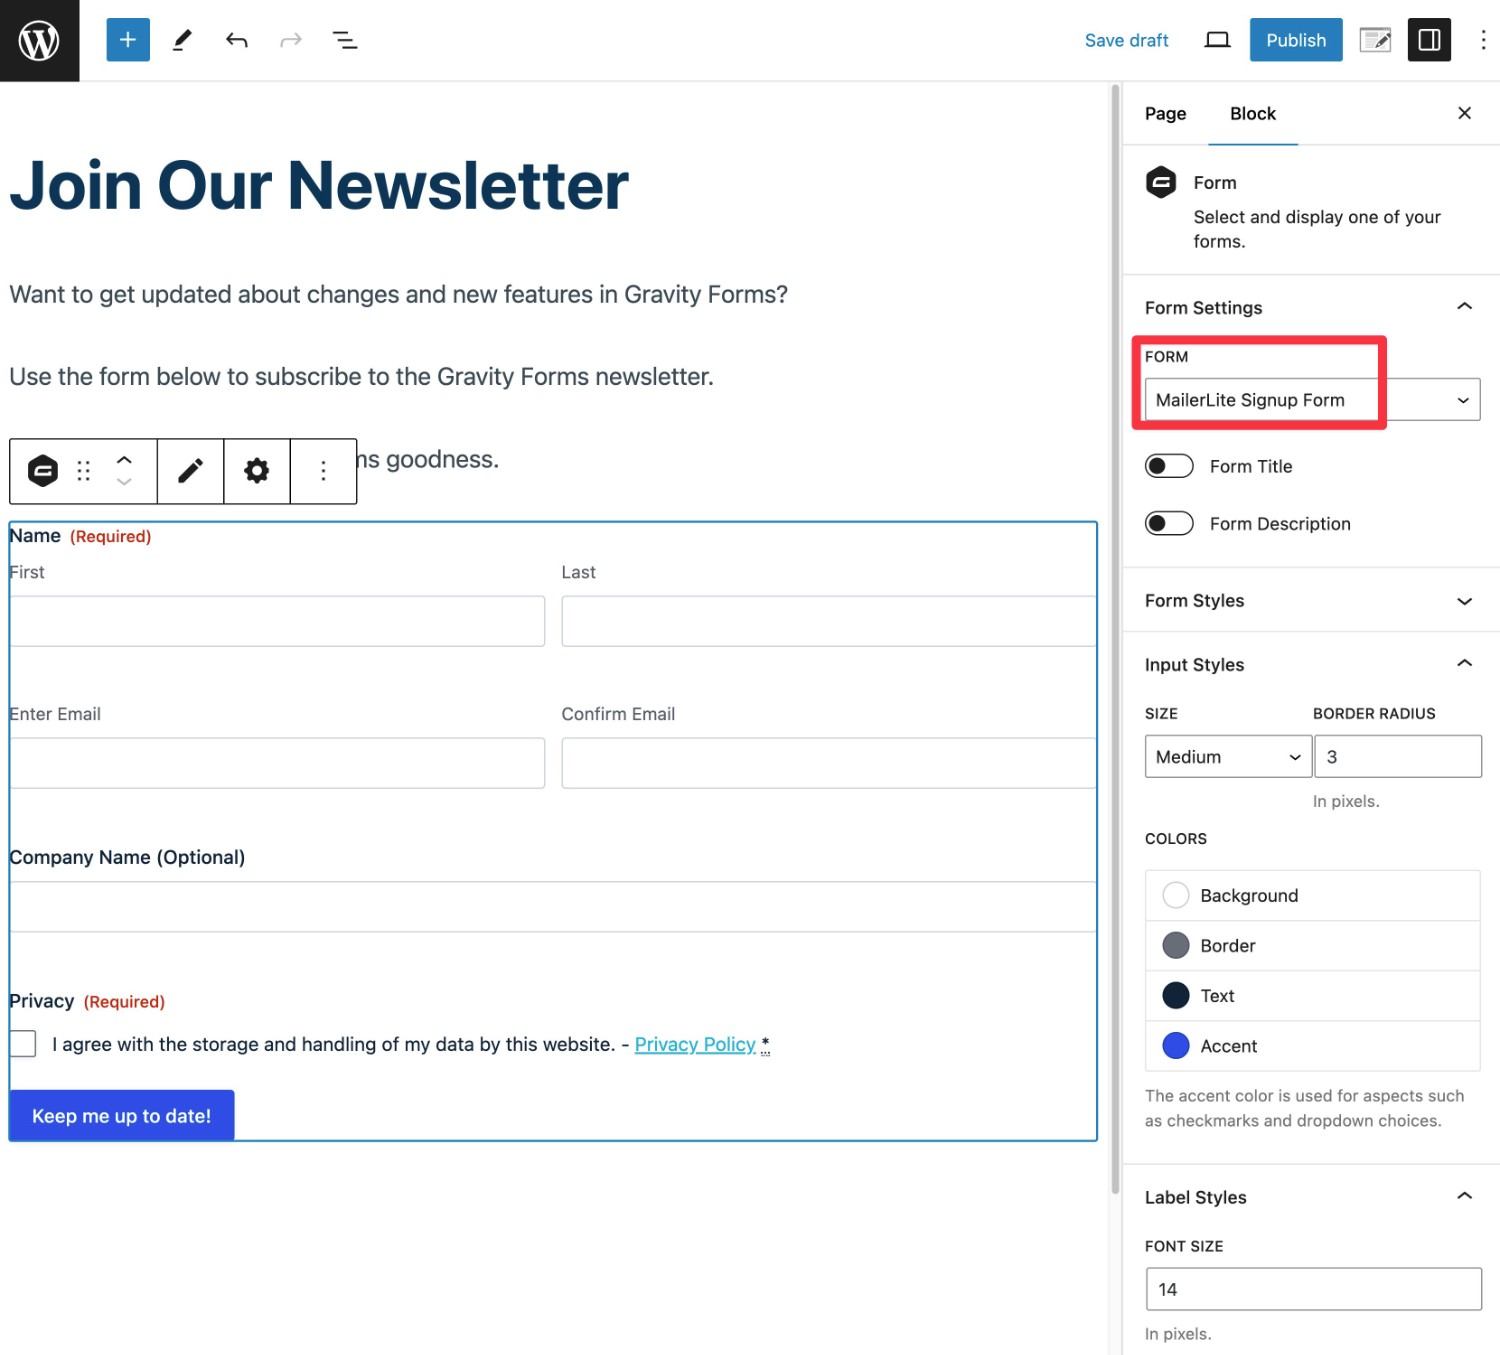
However, if you created a new form, you’ll need to embed the form to start collecting contacts, which you can do so using the Gravity Forms block or shortcode. If you use the block, you can style your form right there in the editor.
Once you’ve embedded the form, we recommend testing it by submitting some dummy information so that you can ensure the connection is working as you want it to.
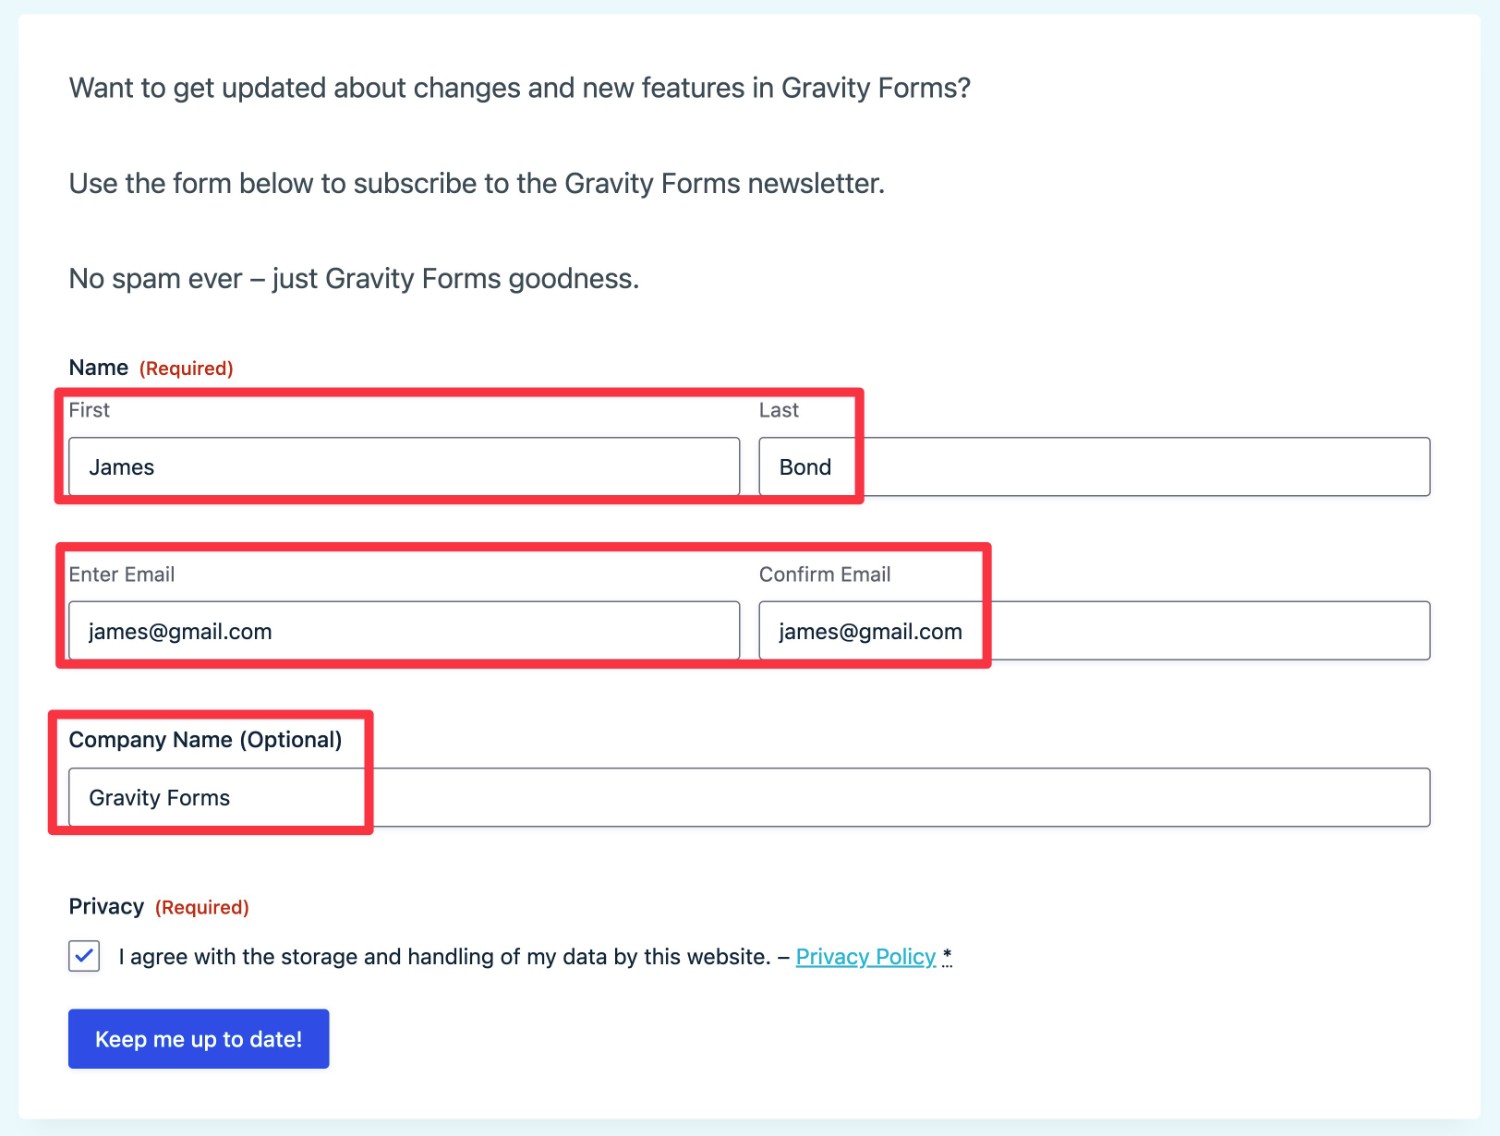
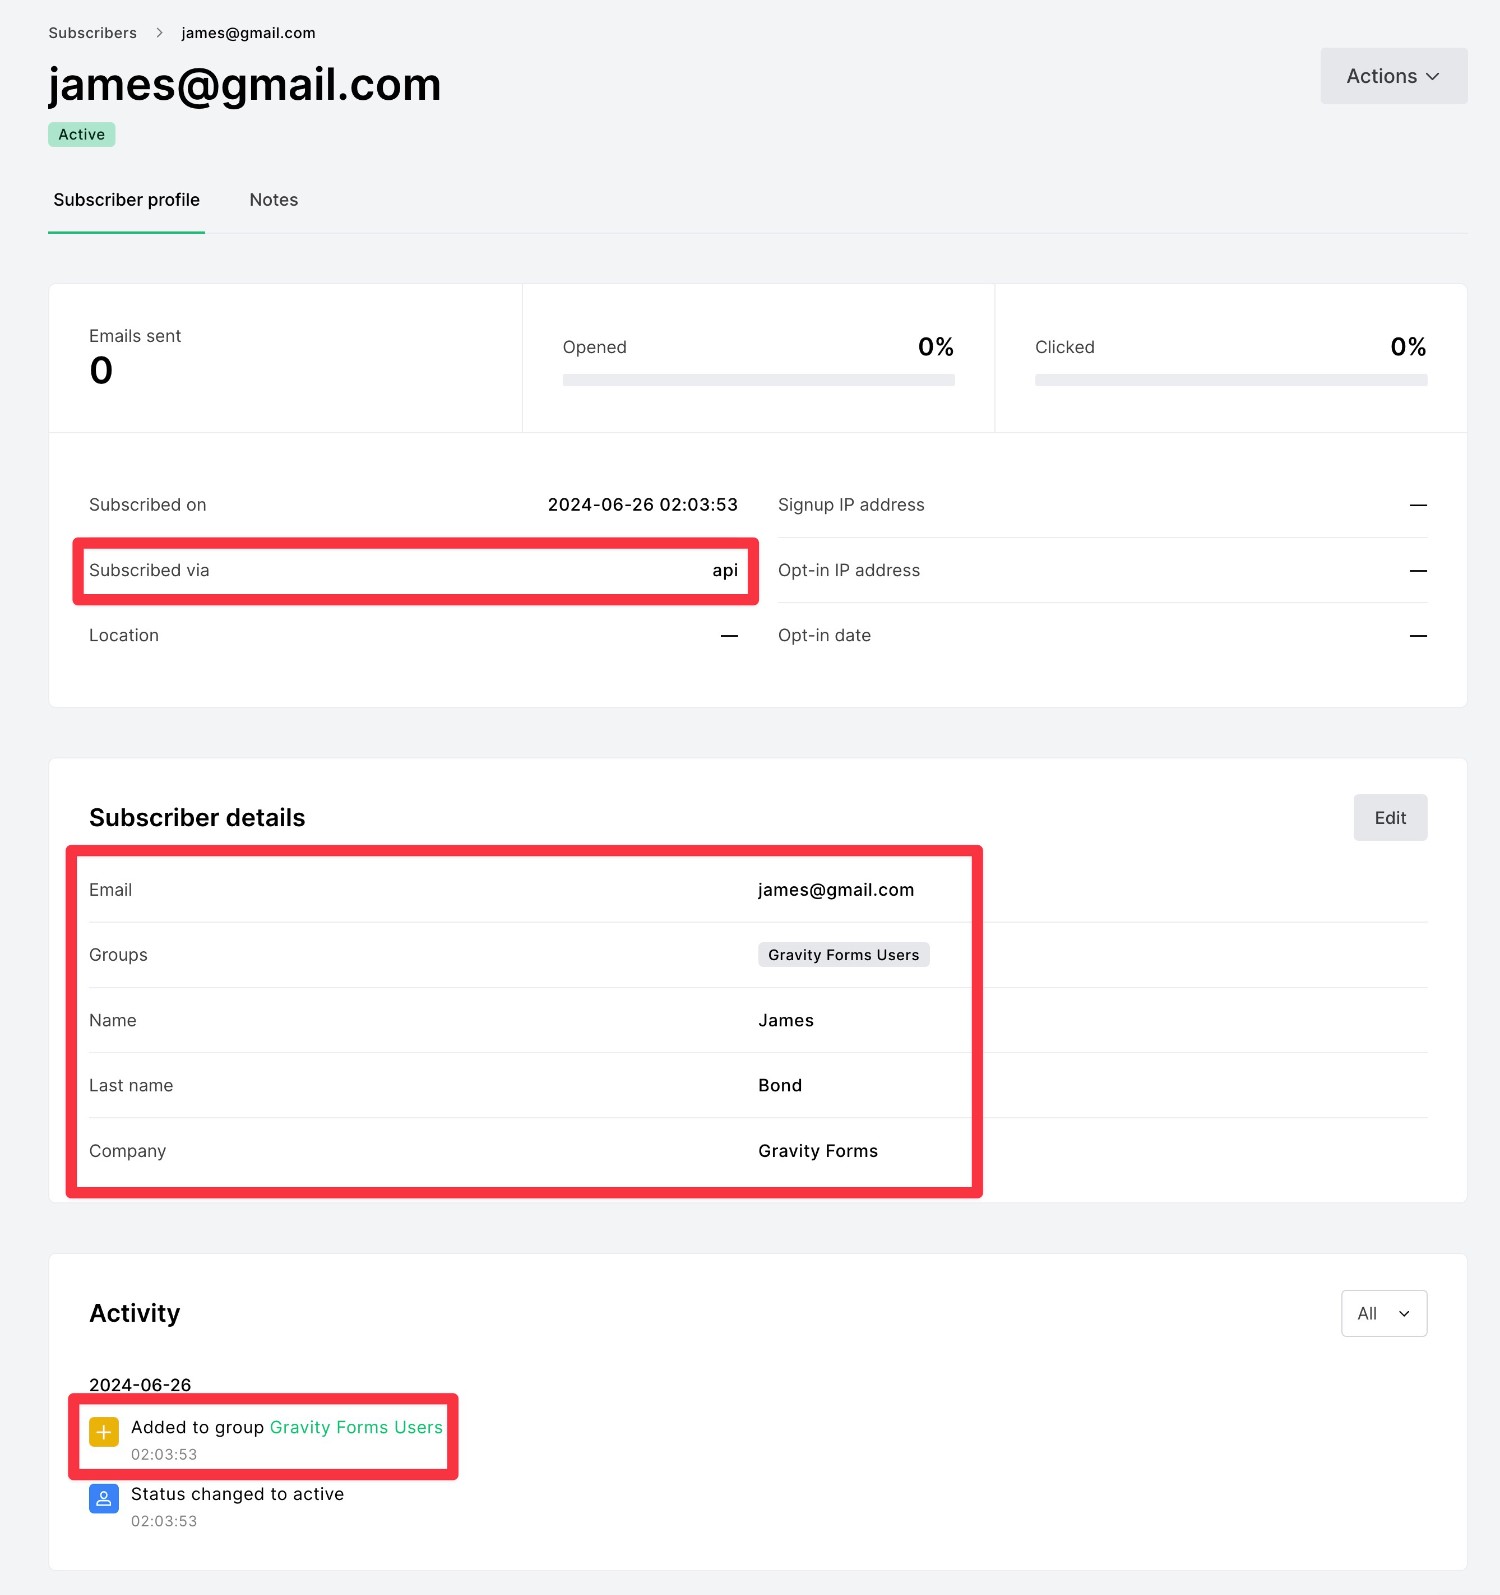
Beyond checking to see if the contact shows up in your MailerLite subscribers, you’ll also want to make sure that subscribers are being added to the correct group(s) and all of the other data is being mapped as you want it to.
Get Started With the Gravity Forms MailerLite Add-On Today
That wraps up our guide on how to use the new Gravity Forms MailerLite Add-On to connect your forms to your MailerLite lists.
Whether you’re already using MailerLite or you’re just getting started with it, the add-on will let you easily sync subscribers to your lists, including mapping data from your form fields to fields in MailerLite.
The official MailerLite Add-On is available with all active Gravity Forms licenses and above. If you’re a Gravity Forms customer, you can install the add-on today and follow this guide to get started.
Alternatively, you can purchase a license here to access not just the MailerLite Add-On, but also tons of other add-ons that you can use to enhance your forms.

If you want to keep up-to-date with what’s happening on the blog sign up for the Gravity Forms newsletter!
