How to Take Subscriptions with Stripe and WordPress

Are you looking to accept recurring subscription payments through your WordPress website?
Enabling your audience to set up subscriptions via your website is an effective way to grow a reliable recurring monthly revenue, as well as create an impressive user-friendly experience for your customers and clients.
With Gravity Forms you can easily accept one-off payments on your website, allowing customers to buy products, pay for a service, or make a donation. But did you know that you can also use Gravity Forms to accept subscription payments through your WordPress website?
In this article, we consider the benefits of taking subscriptions via your website, discuss the features of the Gravity Forms and Stripe, and run through how to use these tools to set up recurring payments. Let’s jump in…
Taking Subscriptions on your WordPress Website

There are many occasions when you might want to set up subscription payments on your WordPress website. These include:
- Charging a Monthly Retainer for Your Online Services – Agencies or freelancers often retain clients on a monthly retainer for online services – for example, web design agencies that provide on-going monthly website maintenance. This contract can be set up, agreed, and paid for all via Gravity Forms.
- Running a Membership Site – If you run a membership site, you may want to charge your users a monthly fee to access your content. With Gravity Forms, you can set up different pricing plans and charge users a subscription based on the plan they select.
- Charging a Recurring Fee for Physical Products – Your business may deliver particular physical products on a weekly or monthly schedule. This may include magazines, wine, or a family box of organic veg, to name a few options. If you charge a recurring fee for this product, this can be set up via the order form on your website.
- Recurring Donations – If you run a nonprofit and want to accept recurring donations on your website, then setting up a donation form that enables your organization to take monthly payments from donors is a quick and easy option with Gravity Forms and Stripe.
So now we have a clear idea of when we might want to set up a subscription service via your WordPress website. Let’s now find out a bit more about the payment processor Stripe that, in conjunction with Gravity Forms, can enable this functionality…
Stripe

Stripe is a popular payment processor platform, used globally by businesses of all sizes – from small stand-alone websites and startups to public companies and multinationals.
The Gravity Forms Stripe Add-On allows you to integrate Stripe seamlessly with any form you create on your website. Importantly, Stripe allows you to take both one-off payments and recurring subscriptions via your site.
Here are some of the other benefits of using Stripe to take payments on your WordPress website…
- All Major Payment Methods Covered – Stripe accepts all major credit and debit cards, as well as Apple Pay and Google Pay. You can also accept payments in over 35 countries, making it easy to launch into new markets and helping you to connect with customers across the world.
- Ease of Use – Create an account in minutes, easily integrate your account with Gravity Forms, and then immediately start accepting payments on your site. It’s as easy as that!
- Transparent Fees – With Stripe there are no hidden fees (no signup fees, monthly fees, etc), so there are no nasty surprises!
- Discounts for Non-Profits – Stripe offers discounted fees for all non-profits.
- Machine Learning Fraud Protection – Stripe Radar helps detect and block fraud for any type of business using machine learning that trains across the entire Stripe network. It’s built into Stripe and requires no additional setup to get started.
- World-Class Security – Stripe is certified to PCI Service Provider Level 1, the most stringent certification available in the payments industry. Your customers’ card data never touches your servers, protecting you from complexity, costs, and risk.
So let’s find out how to set up subscriptions on your WordPress website with Gravity Forms and Stripe…
Step 1: Install the Gravity Forms Stripe Add-On
To install the Gravity Forms Stripe Add-On, select Forms > Add-Ons from your WordPress dashboard menu. Then scroll down the page to the Stripe Add-On and click on Install > Activate.
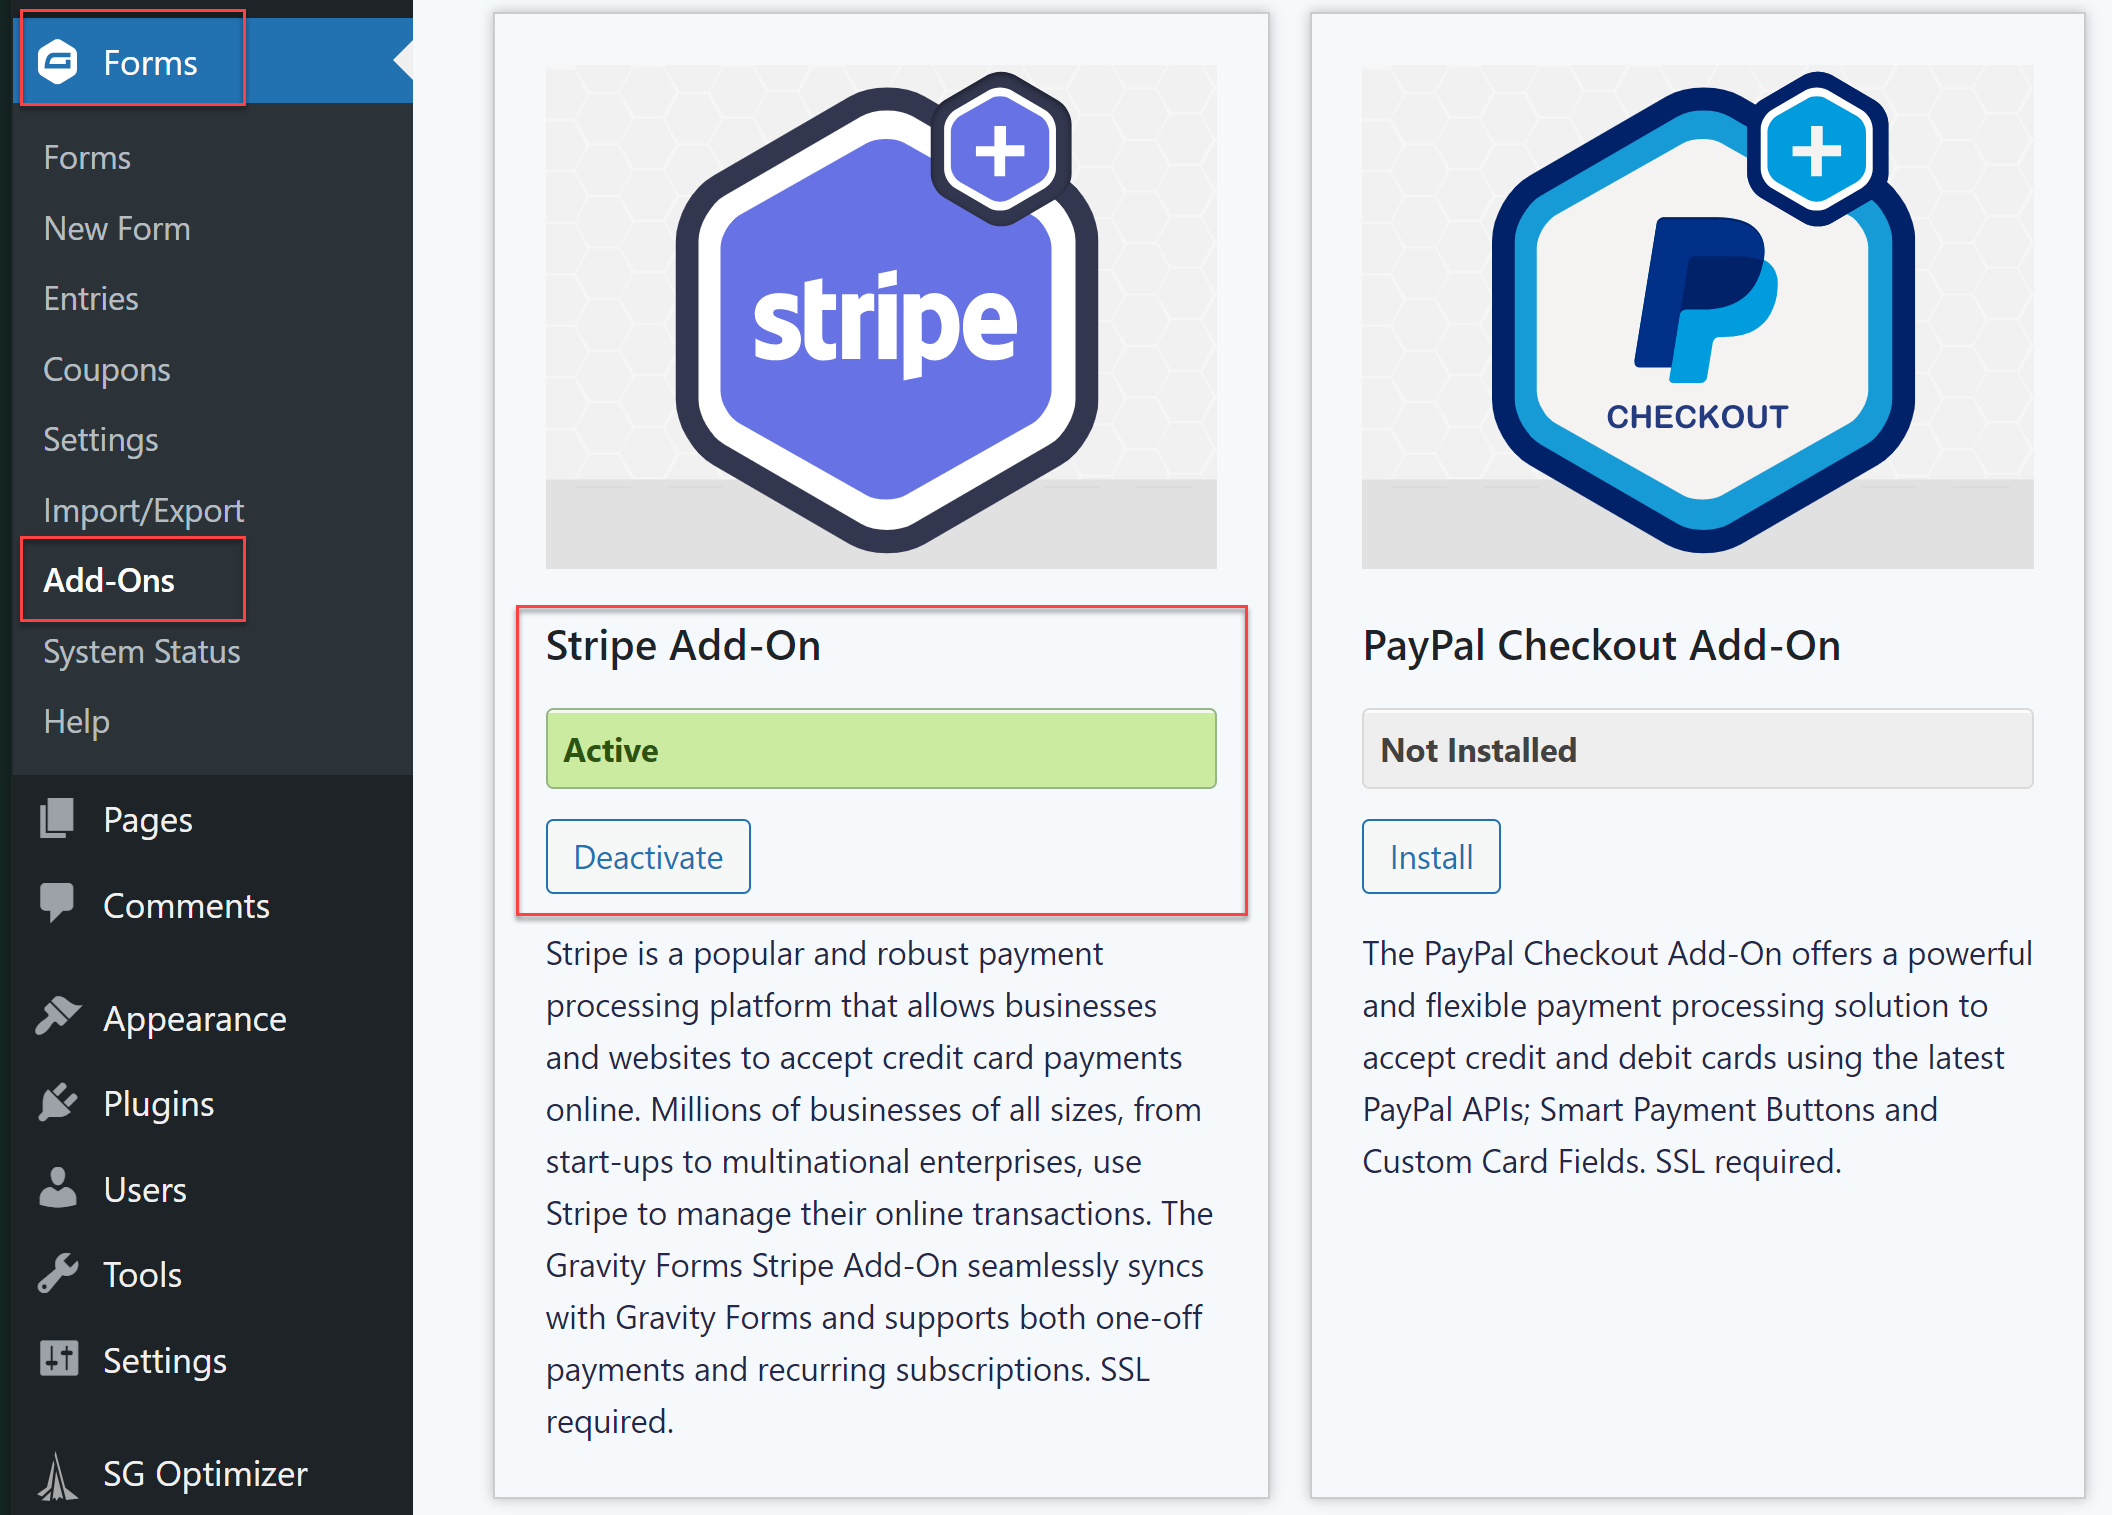
It’s important to note that, because of the nature of capturing credit card information, you will need to have an SSL certificate installed on your website to use Stripe – your hosting provider can assist you with this if necessary.
Step 2: Integrate Gravity Forms with Stripe
Once the Stripe Add-On has been installed, you now need to integrate Stripe with your Gravity Forms installation. Firstly, if you have not already done so, you will need to create a Stripe account.
Then within your WordPress dashboard, select Forms > Settings > Stripe. Here you will need to follow the instructions to authenticate your website with Stripe and to set up webhooks to communicate events between Stripe and Gravity Forms.
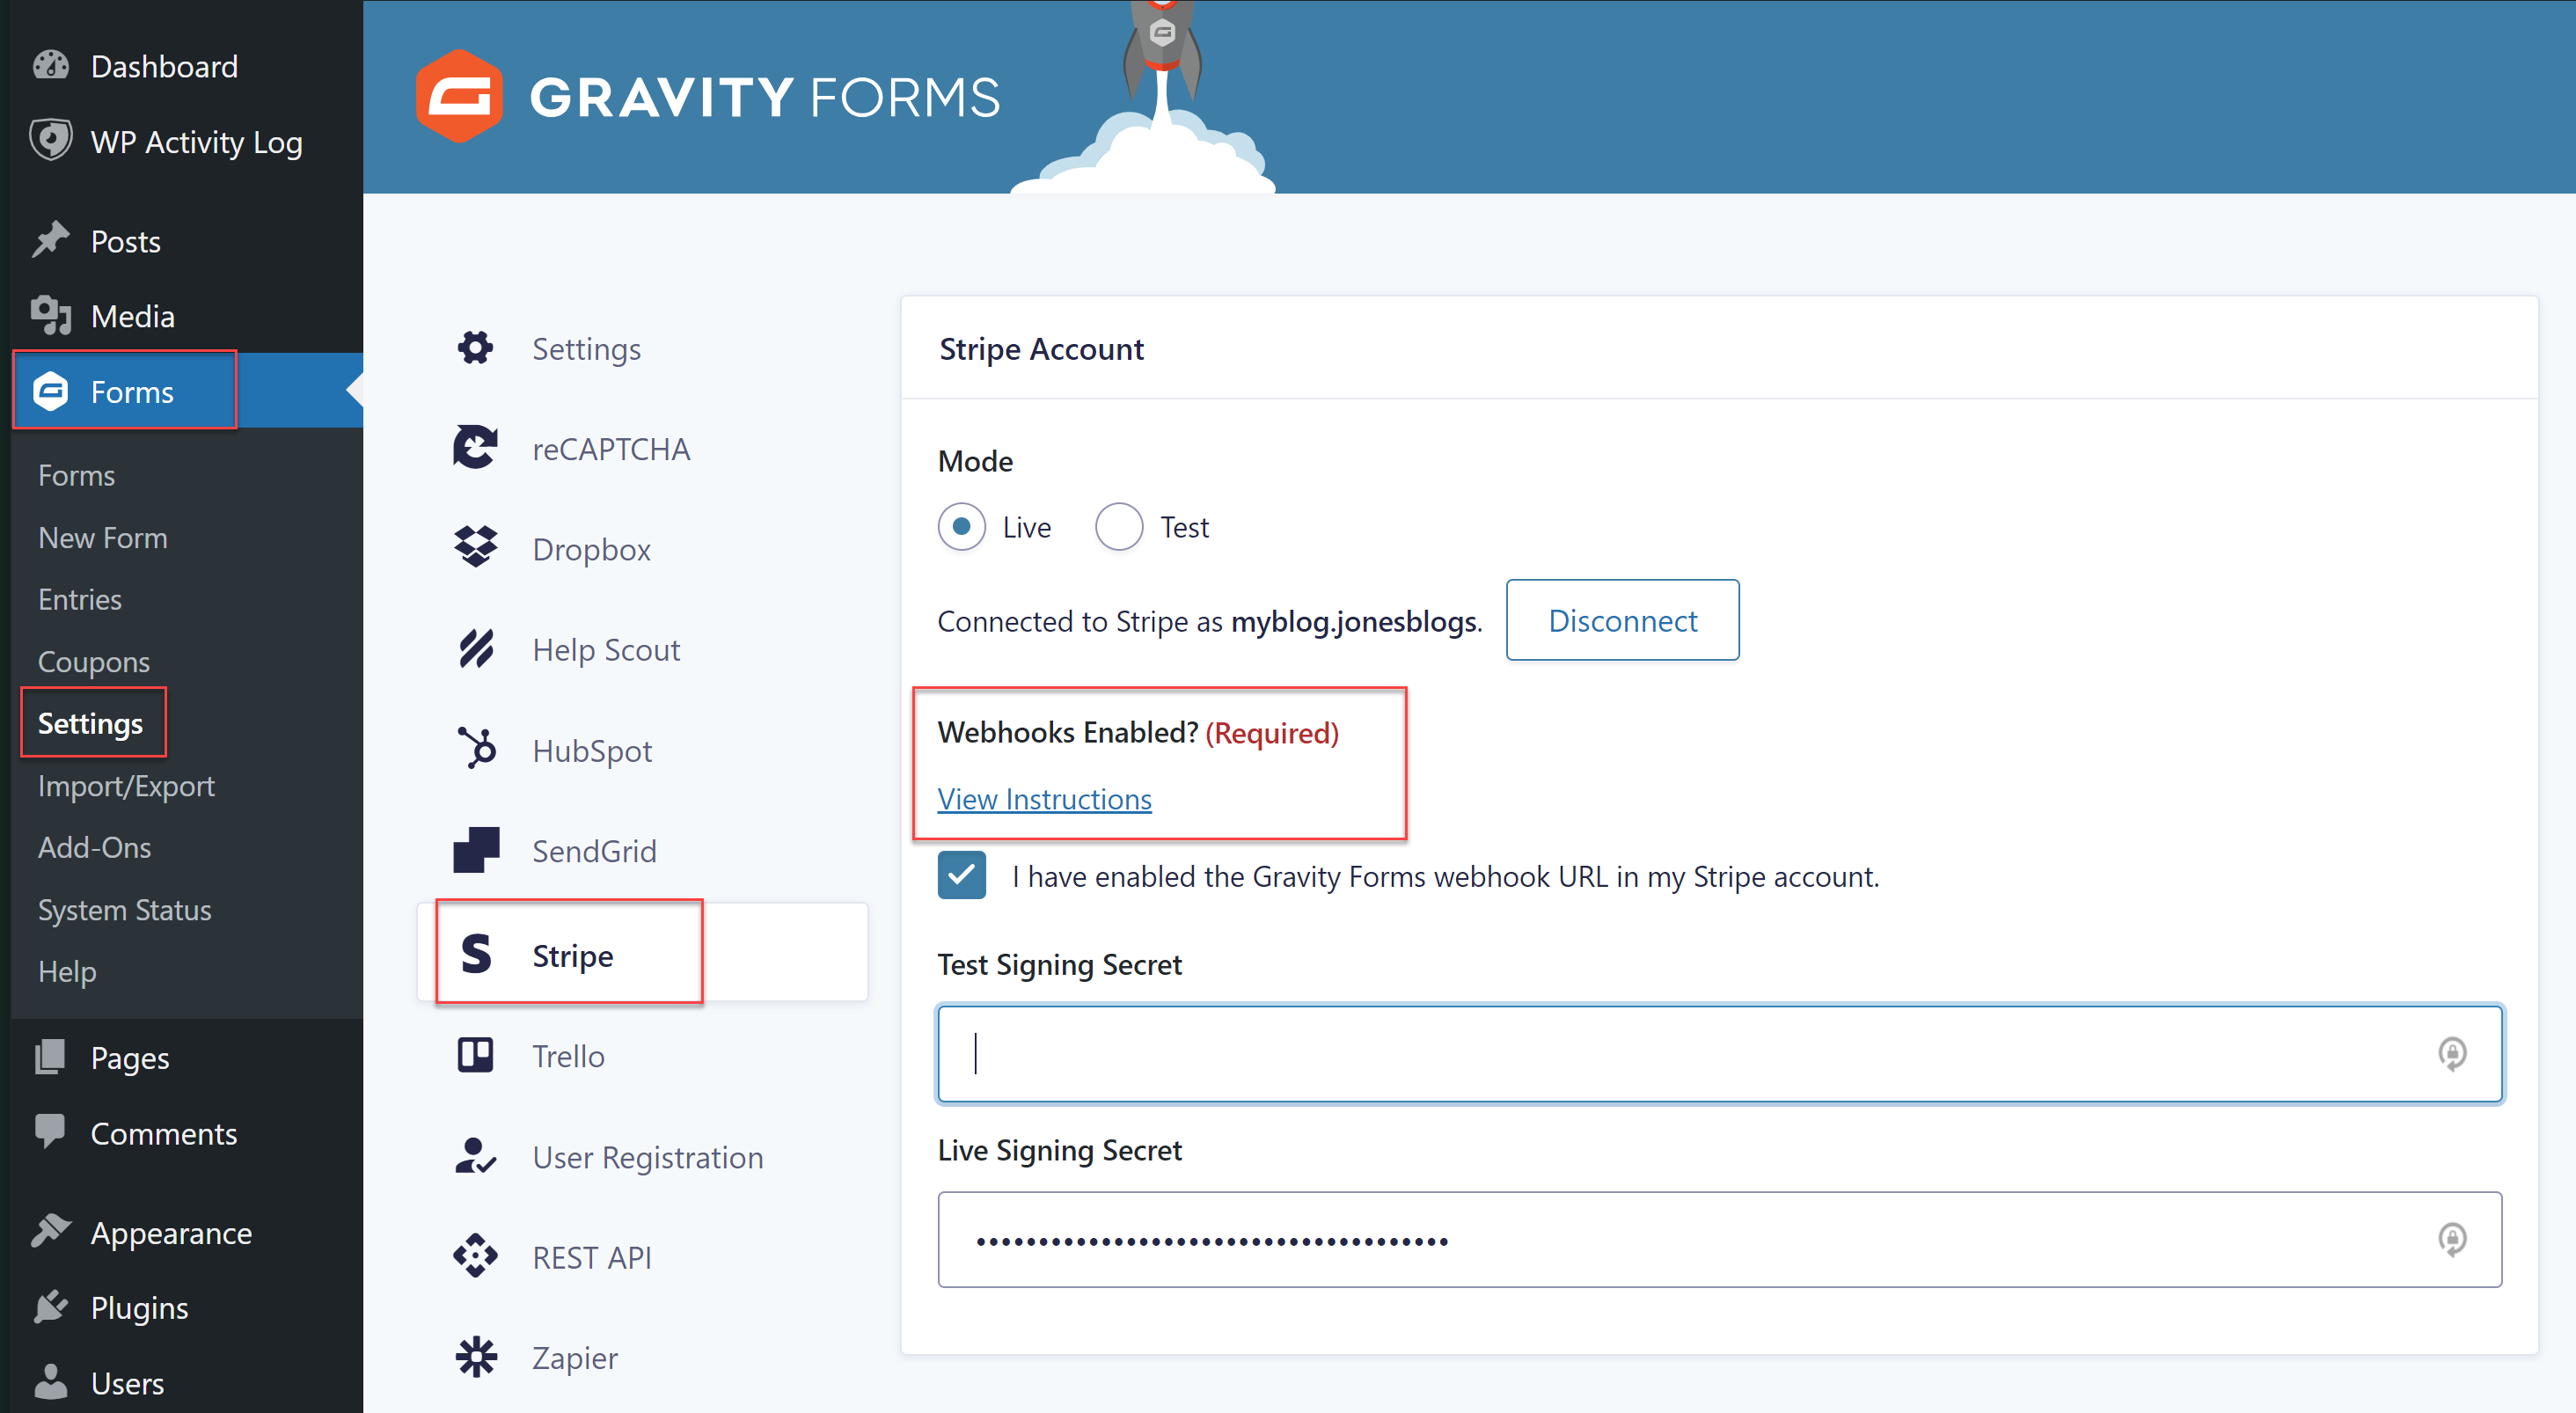
For extra help, we have extensive documentation on this integration process in the Gravity Forms documentation.
Step 3: Add Payment Fields to a Form
Once Gravity Forms and Stripe have been connected, you can then go ahead and create a new subscription form (or select any existing form that you may want to use to take payments).
To take payments via your form using Stripe you will need to select these Pricing Fields…
- Product
- Total
- Stripe Card
Edit the text on the Product Field and add a monetary amount.
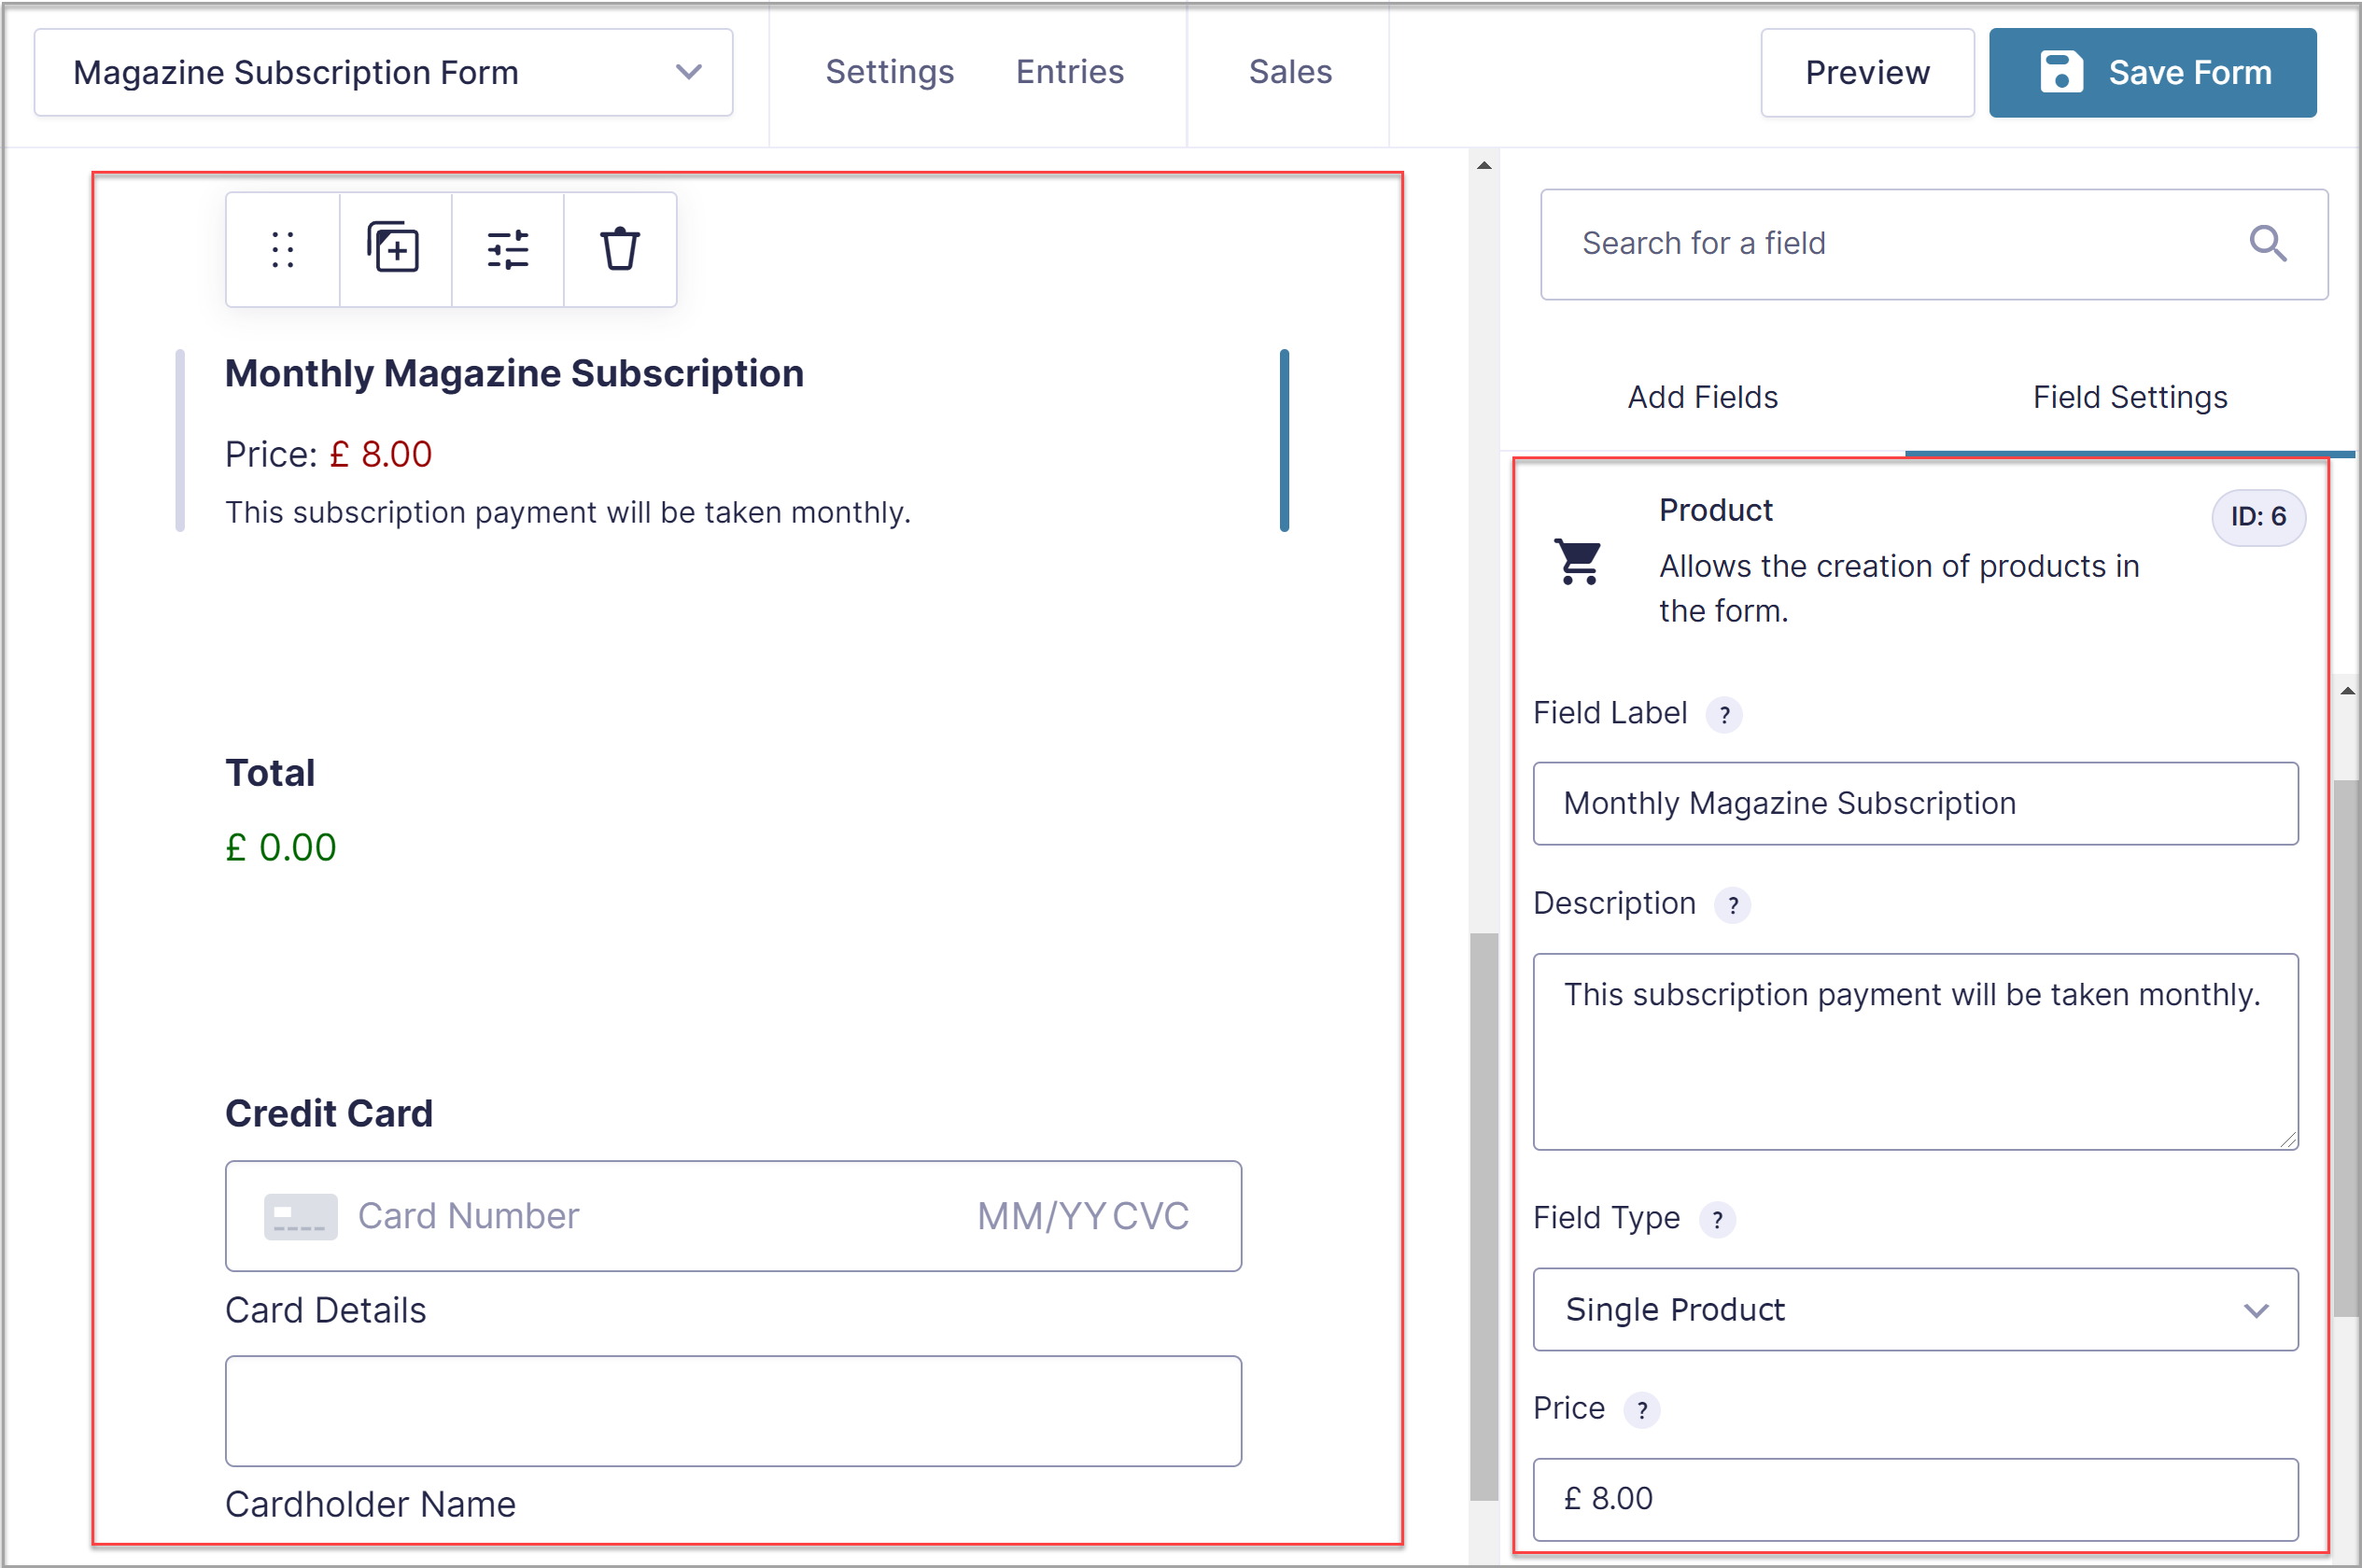
Click Save Form and then Preview your form.
Step 4: Create a Stripe Feed
The last step to setting up a subscription service is to create a Stripe Feed. To do so, select the Form Settings > Stripe > Add New. Then, under Transaction Type, select Subscription.
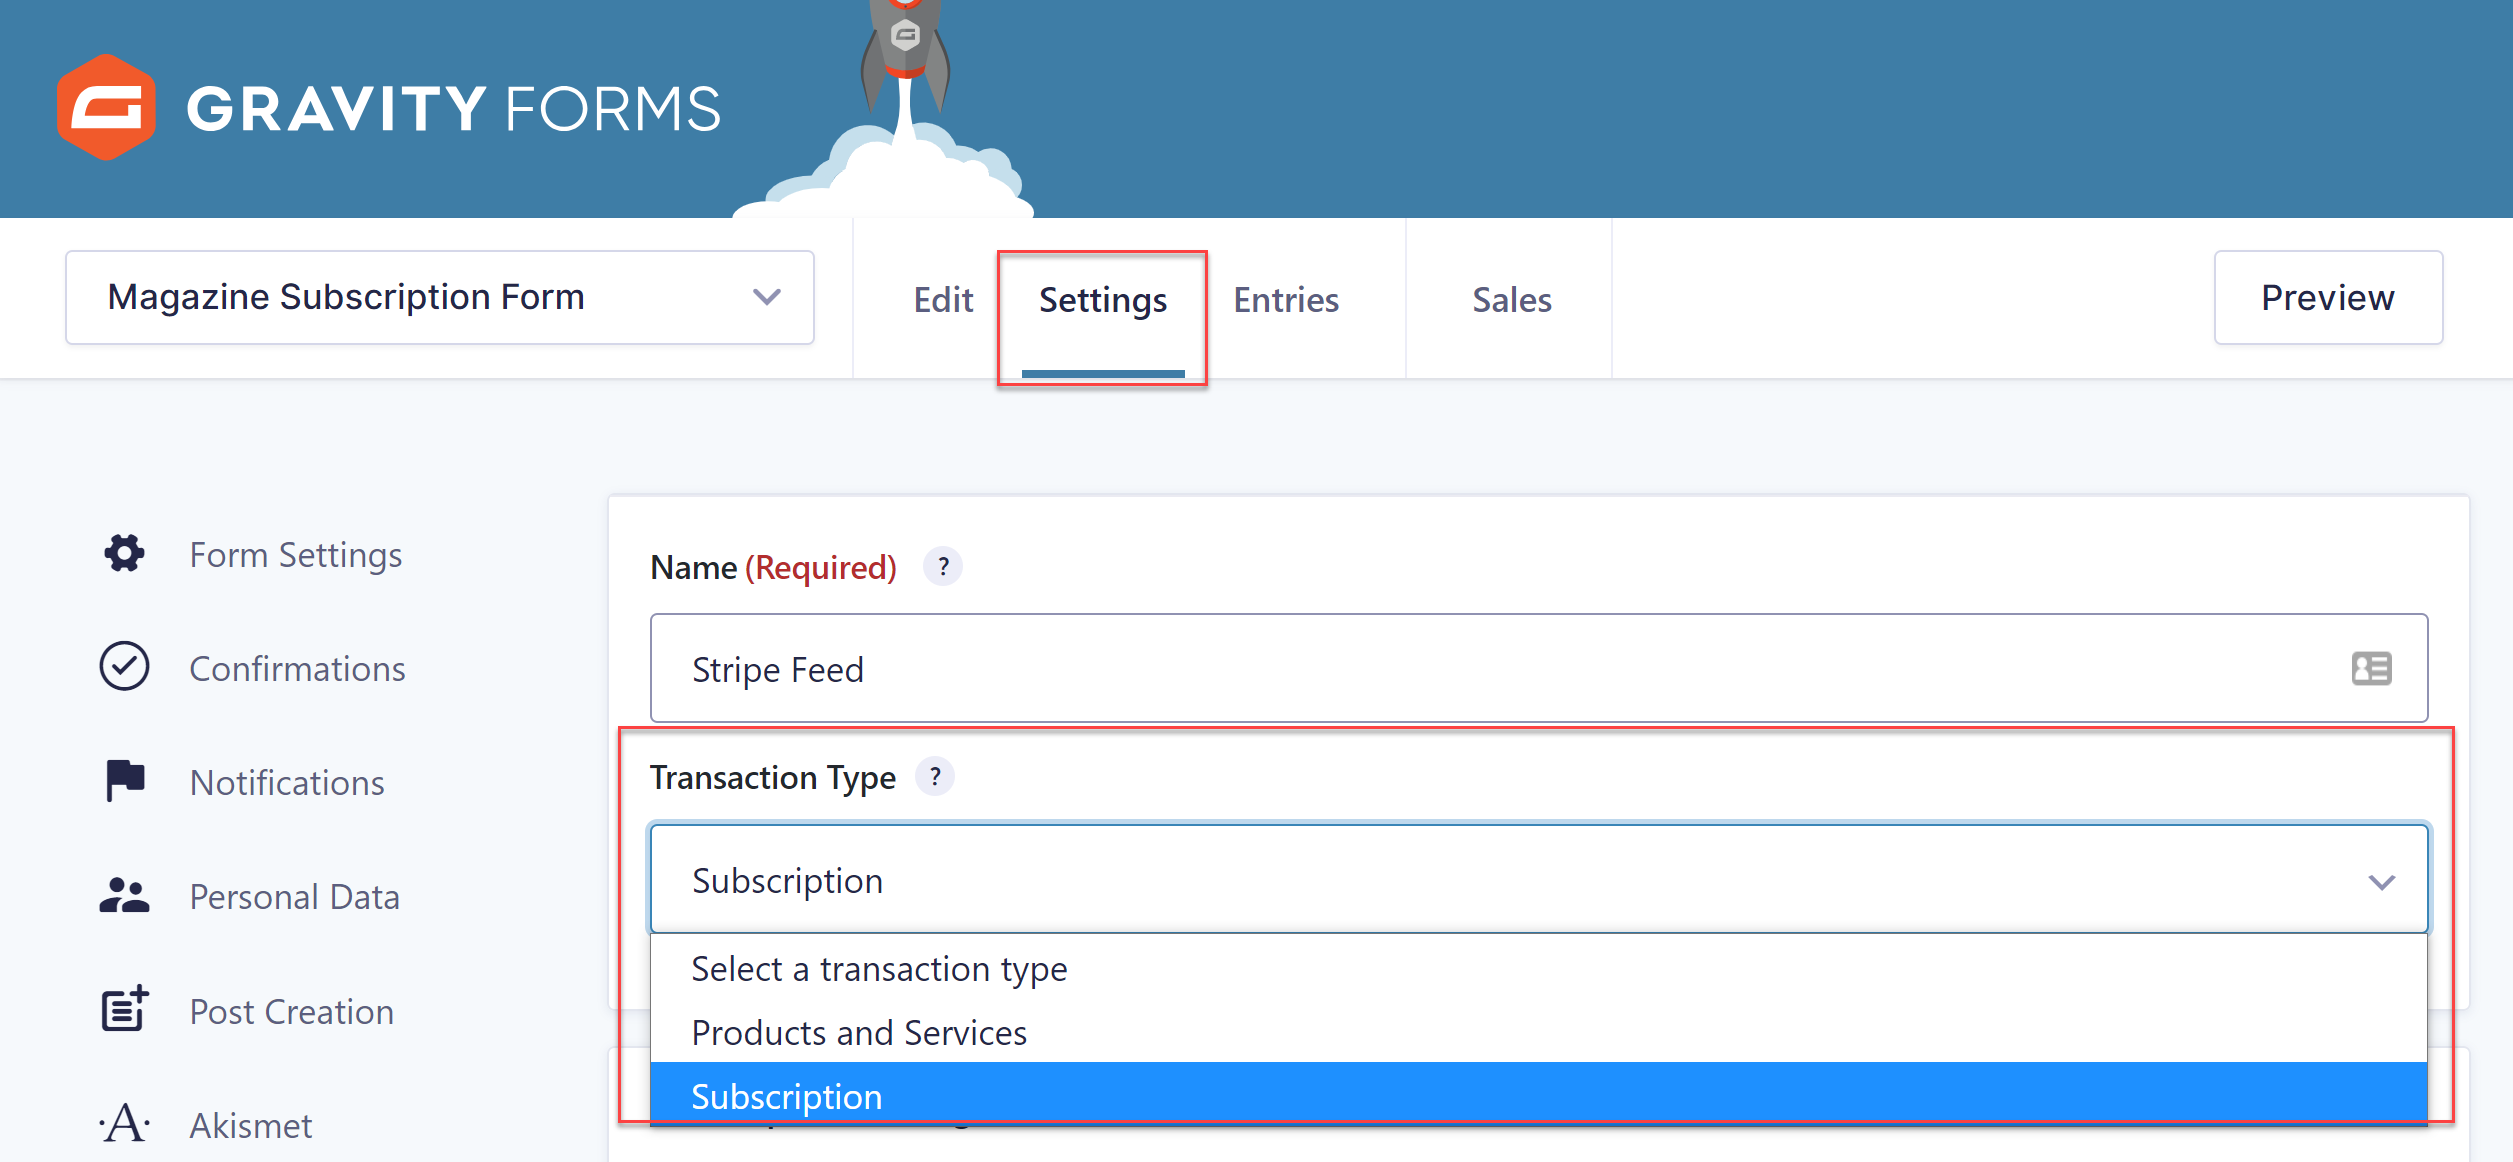
You will now need to go ahead and configure the rest of the Stripe Feed Settings. Some useful settings to be aware of include…
- Billing Cycle – Select how often the recurring payment should be taken.
- Setup Fees – Enable a one-off set up fee.
- Trial Period – If you select a trial period, your users won’t be charged a fee until after the trial has ended.
For further reading on configuring the Stripe settings, check out this article in the docs – Creating a Feed for the Stripe Add-On.
Your form is now complete. You may want to customize the form’s Confirmations or Notifications, then embed the form into a page on your website. And don’t forget to test it to make sure it is working!
After Form Submission
As we discussed, there are many reasons why you may want to take subscriptions via your website. In some instances, your customers and clients may want an invoice, receipt, or some type of confirmation of payment for their records and accounts.
Gravity PDF, one of the Gravity Forms Certified Developers, is a premium third-party add-on that will automatically generate and email PDF documents to users once a form has been submitted.
Gravity PDF also provides a range of fully customizable invoice templates – upload your company logo, add company details, and more – making it a great match for anyone charging subscriptions for a product or service.
Don’t Have Gravity Forms Yet?
If you don’t have Gravity Forms or the Stripe Add-On, don’t worry. You can still test out everything in this article for free inside your own personalized Gravity Forms demo and see why Gravity Forms is the top choice for WordPress sites worldwide.
Already in love? Purchase our premium WordPress form plugin today!

If you want to keep up-to-date with what’s happening on the blog sign up for the Gravity Forms newsletter!
