Monthly Featured Add-On: CleverReach
One thing we can all agree on is that Gravity Forms is a great tool for capturing leads and email subscribers. But what do you do with subscribers information after collection?
That’s where email marketing services like CleverReach come in. CleverReach enables you to stay connected with your audience via targeted email campaigns, helping to nurture leads and turn them into life long customers.
In this article, we’ll discuss the features and benefits that make Gravity Forms and CleverReach a great team and then how to connect the two solutions using the official Gravity Forms CleverReach Add-On.
Are you ready? Then let’s do this.
CleverReach: Standout Features
There are multiple reasons why you should consider using CleverReach to power your email marketing campaigns. Here are a number of standout features the service offers:
- AI-powered drag-and-drop email editor — Create professional-looking email designs without knowing any code. Use their free email templates as a starting-off point or start from scratch. You can even get help from AI to write your email content as well as offer products for sale directly inside your emails.
- Email automation — Create campaigns in a visual interface and send sequences automatically. This includes abandoned cart emails and the ability to personalize emails according to tags.
- Feedback collection — Do A/B split tests to find out what your audience most responds to. CleverReach also has detailed analytics to understand subscriber behavior, plus the ability to connect to Google Analytics and other conversion tracking software.
- Audience management — You have lots of options to segment your users, for example, by tag, interests, behavior, location, occupation, etc. CleverReach also automatically purges your lists and does bounce management so you only have active recipients as subscribers and maintain your reputation.
- Fair terms — You can cancel all plans on a monthly basis and there are no limits to the number of emails you can send. There is even a free plan (which we’ll be using in this tutorial).
- Many integrations — CleverReach integrates with a lot of third-party tools and services besides Gravity Forms.
- Privacy-friendly and GDPR compliant — The email marketing service has a strong focus on data privacy. It comes with double opt-in, servers located in the EU, high privacy standards, and high delivery rates. They even have a GDPR consultation hour where you can submit questions (though it’s only in German).
Why CleverReach Works so Well With Gravity Forms
We mentioned in the introduction that Gravity Forms and CleverReach make a great team. Here’s what Gravity Forms and the dedicated CleverReach Add-On bring to the party:
- Custom fields — Thanks to custom fields, you can collect any information you want with your forms and pass it on to CleverReach. You can use it to better segment your audience and personalize your emails.
- Double opt-in support — Easily switch on double opt-in during form creation so subscribers are only added to the mailing list after confirming their subscription in an email.
- Conditional logic — You can set up conditions for when and how subscriber makes it to your list. This allows you to segment users at subscription time, ensure GDPR compliance, and more.
Besides that, you benefit from all the form-building features Gravity Forms comes with. These include pre-built templates and a drag-and-drop form builder with more than 30 different types of form fields.
With Gravity Forms you tcanbuild pretty much any form, from contact to e-commerce, quizzes, polls, surveys, and more. Plus, Gravity Forms comes with advanced features like conversational forms and pagination to make your forms more engaging.
Additionally, you can benefit from the other numerous Gravity Forms Add-Ons and enhance your email sign-up forms with features like connecting them to a CRM, project management software like Trello, or collecting partial entries. The CleverReach Add-On is available with all Gravity Forms licenses.
Connecting Gravity Forms and CleverReach: Here’s How to Do It
Alright, enough with the theory, let’s get to the practical part. In the following, we will give you detailed instructions on how to connect your web forms with CleverReach, using the Gravity Forms CleverReach Add-On.
1. Sign Up to CleverReach and Create a List and Form
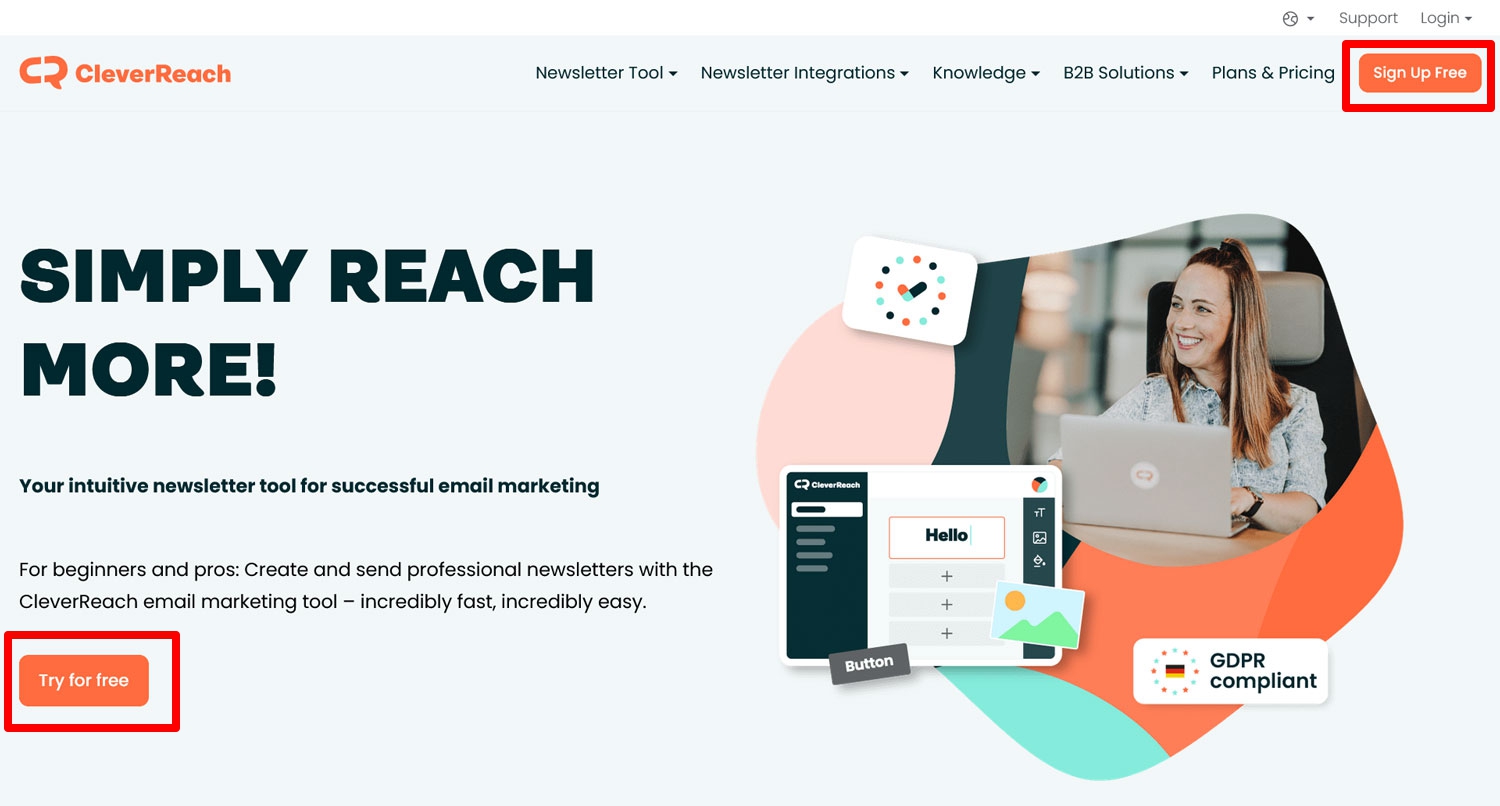
The first step is to make sure you have a CleverReach account. If that’s already the case, you can skip this step. Everyone else, head over to the CleverReach homepage and use one of their CTAs to create your account.
You can use your Google account or an email address and password. It automatically signs you up to free CleverReach account, which gives you a maximum of 250 subscribers and an email send limit of 1,000.
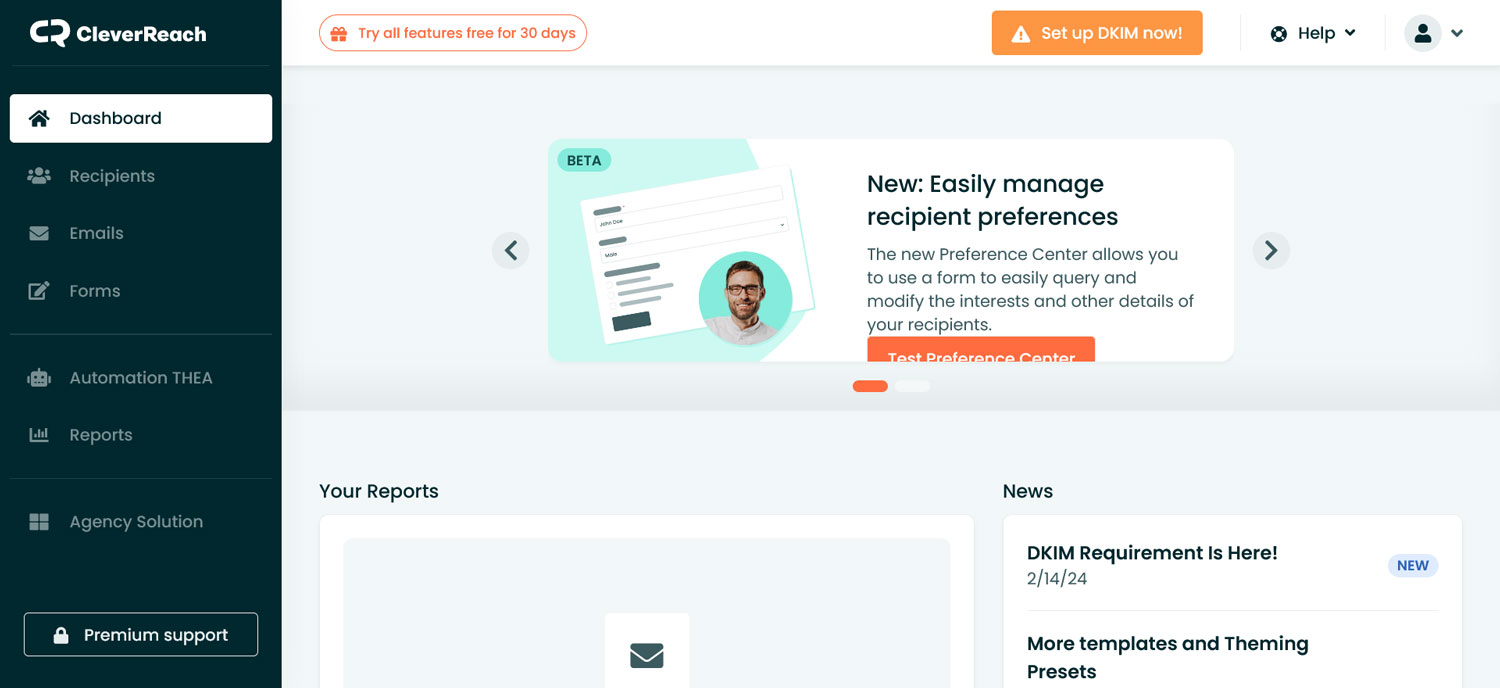
Once the process is done, you immediately land on the CleverReach dashboard.
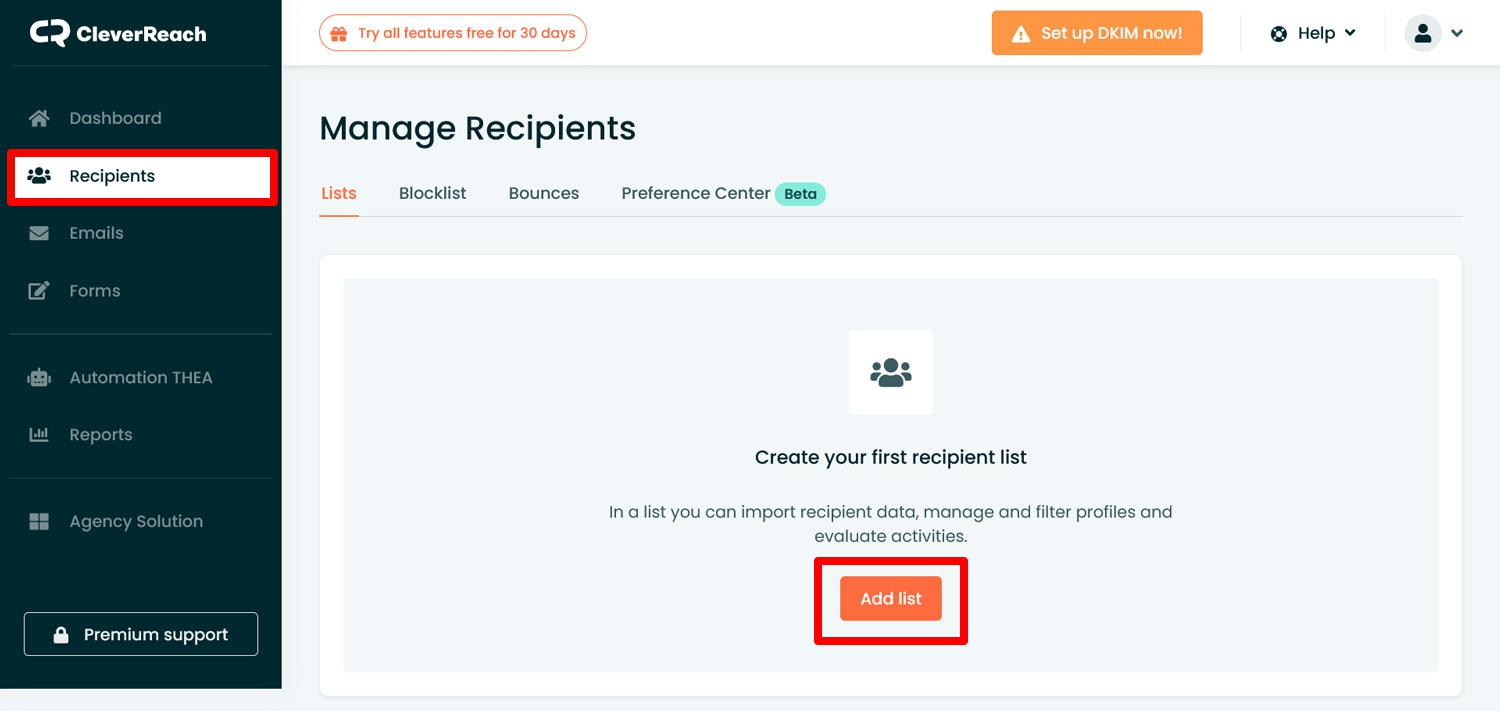
Here, your first task is to create a list of recipients. This is where the subscribers from your web form will go. To do so, go to Recipients → Add list.
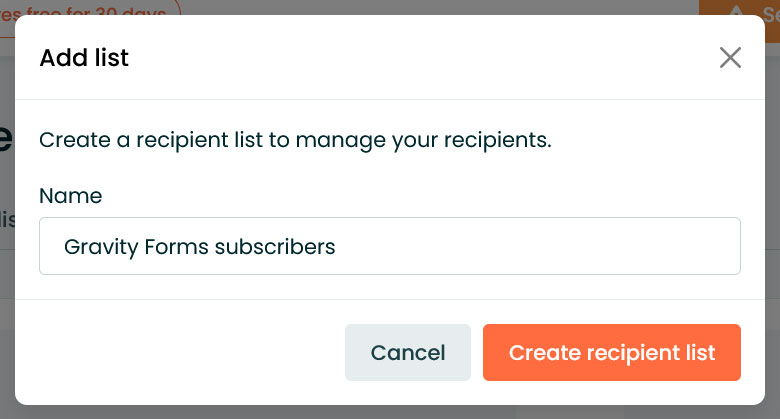
Give it a name, confirm, and you’re done.
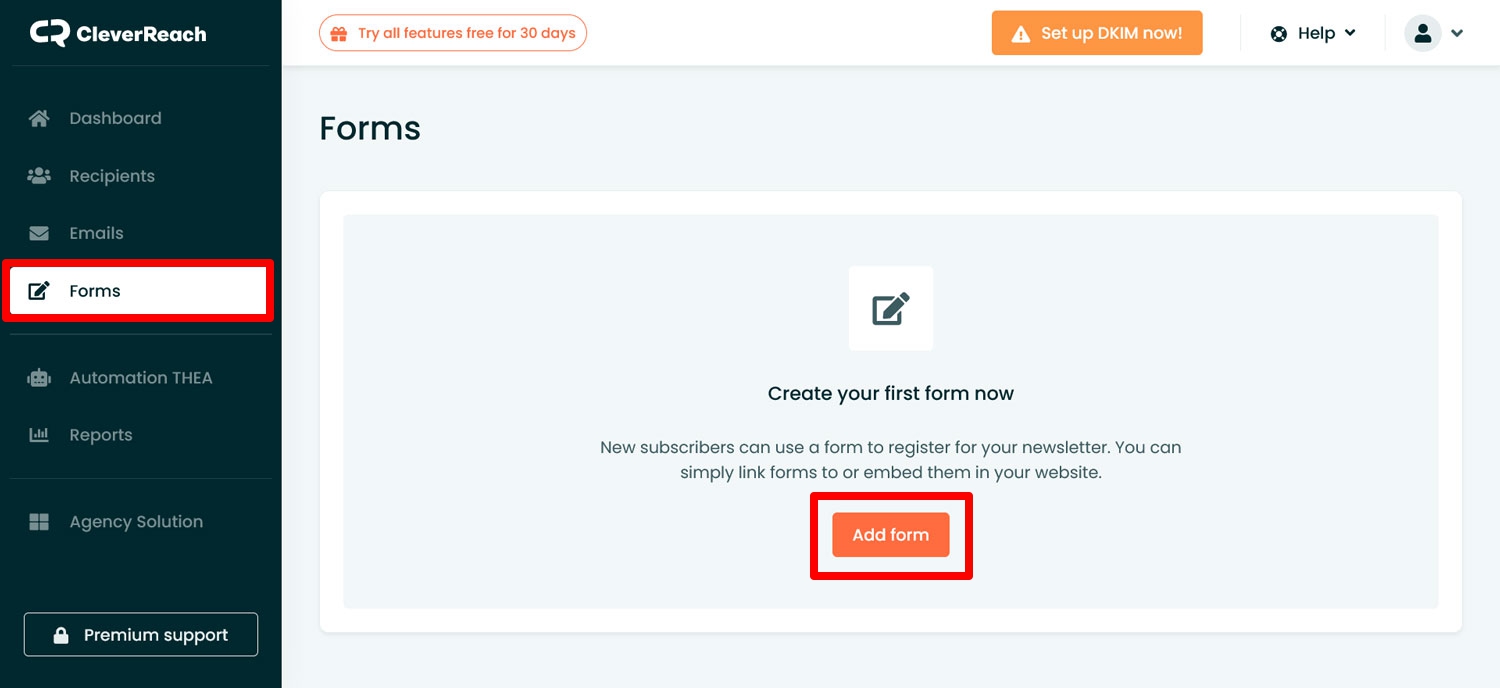
If you want to use double opt-in, you also need to create a form belonging to this list. CleverReach will use it to implement the double opt-in functionality. You do this under Forms → Add form.
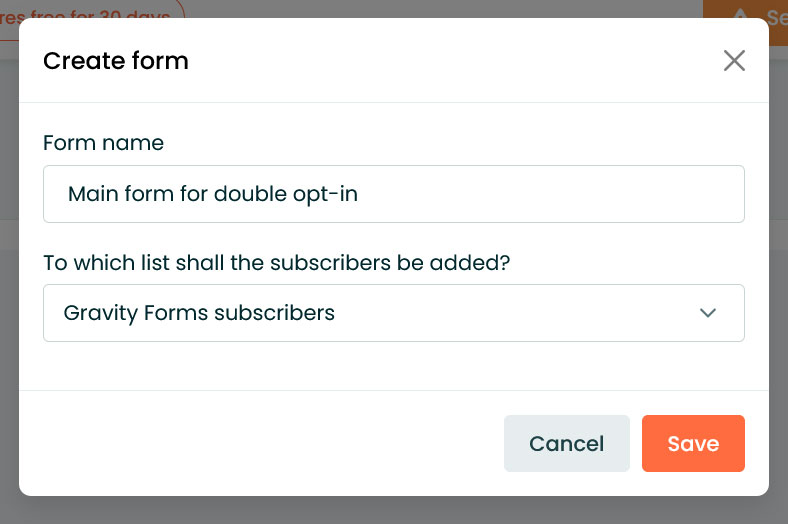
Simply name the form, make sure it is assigned to your newly created list, and save it.
No need to configure anything else. Since you’ll be building your actual web forms with Gravity Forms, the important part is only that the form in CleverReach exists.
2. Install the Gravity Forms CleverReach Add-On
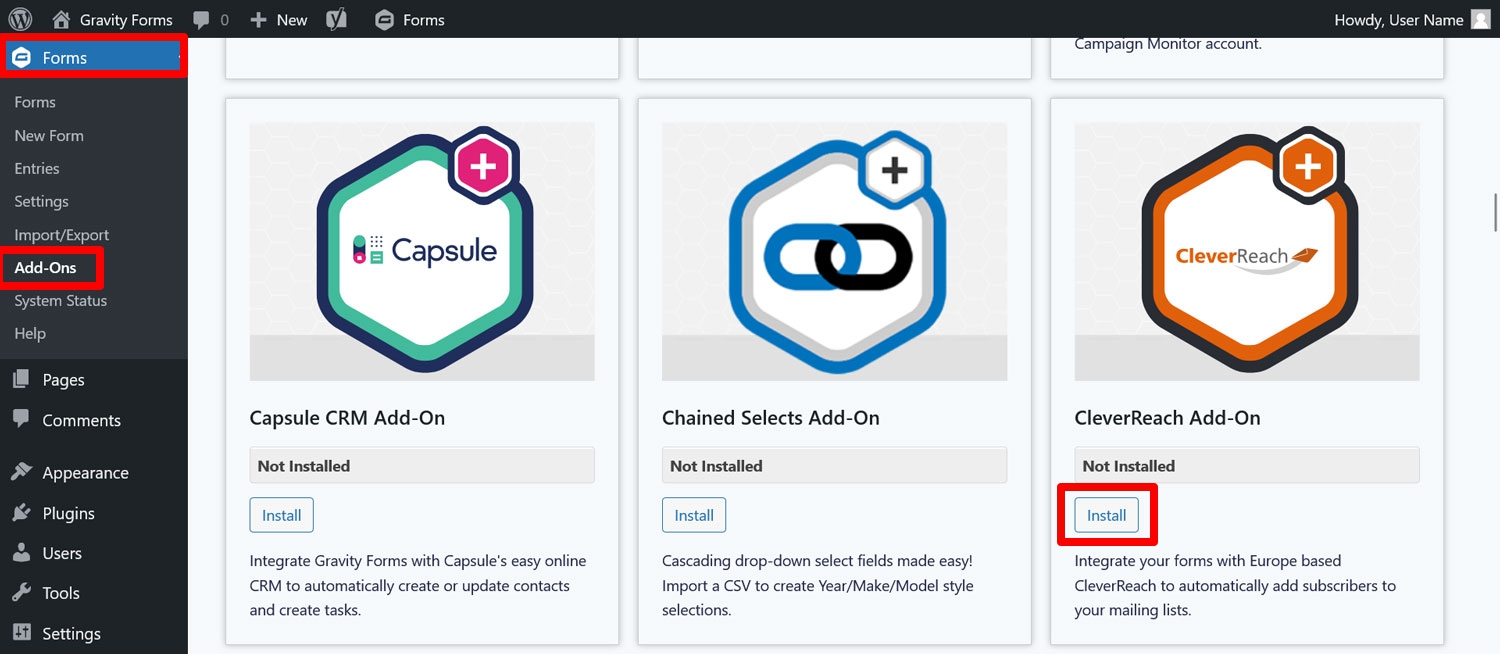
The next task happens on your WordPress website. Here, head on over to Forms → Add-Ons and find the CleverReach Add-On. Once you have located it, click on Install Now.
When it has been downloaded, make sure to activate it.
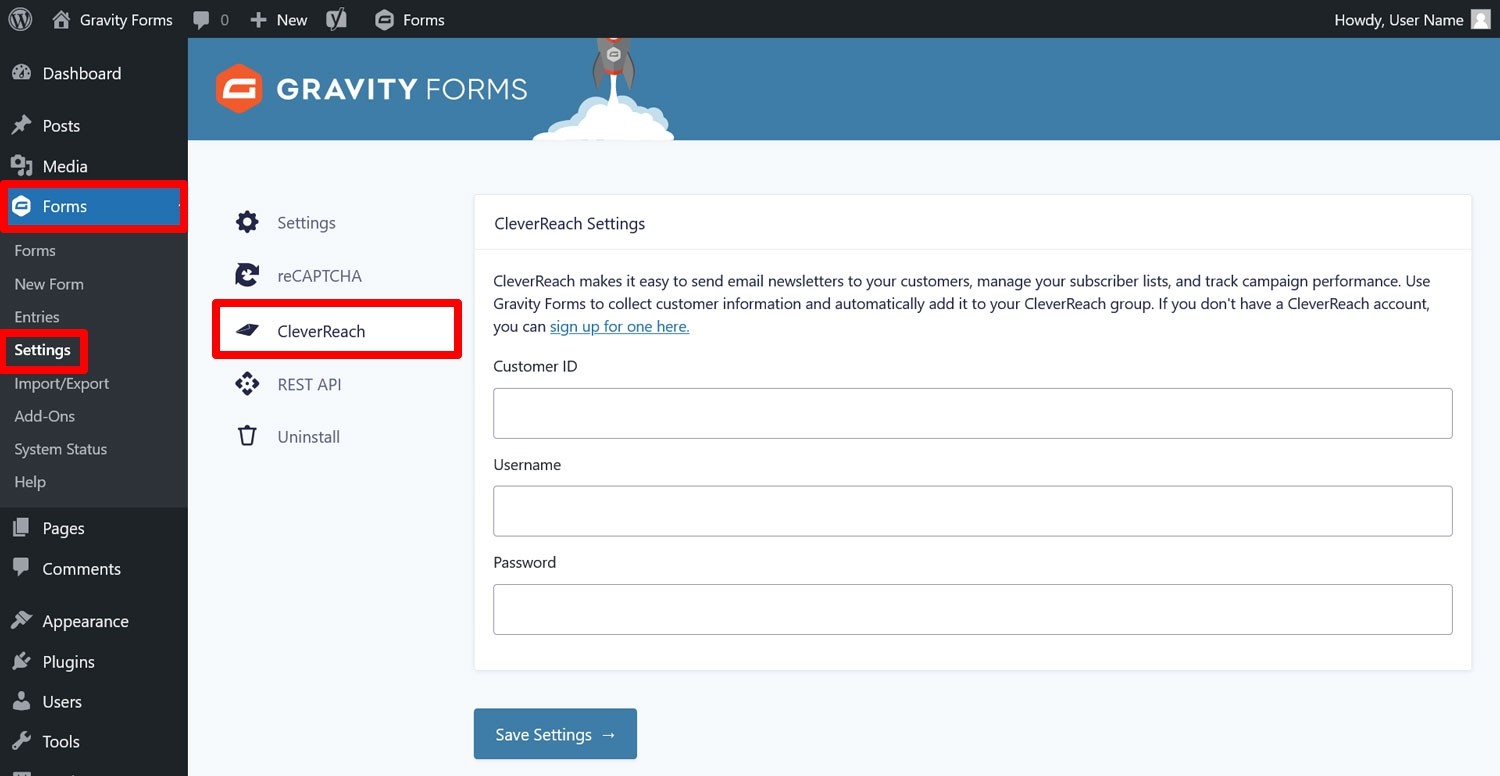
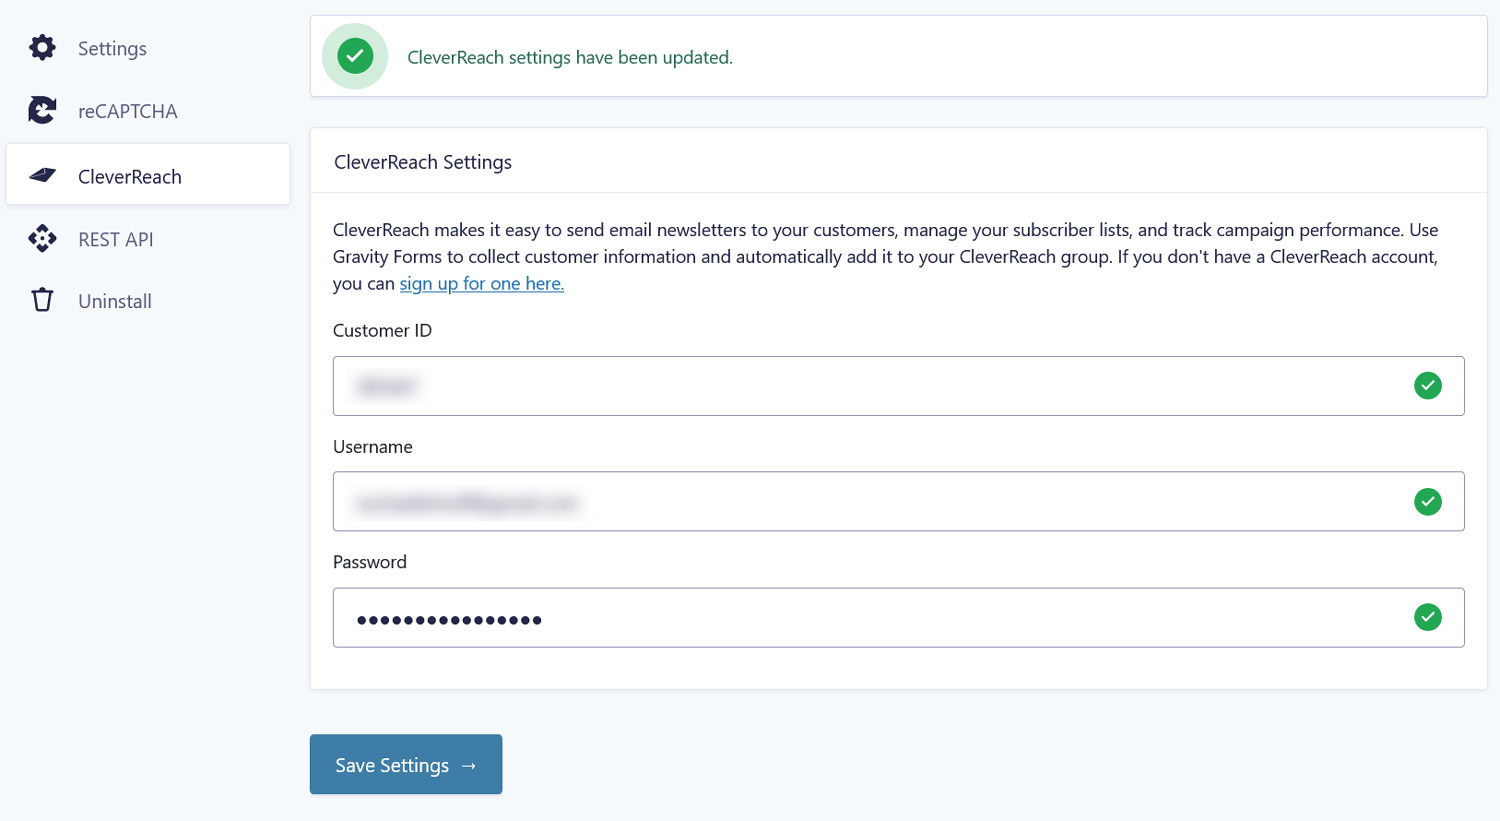
After that, you have to establish a connection with CleverReach. You do that under Forms → Settings → CleverReach.
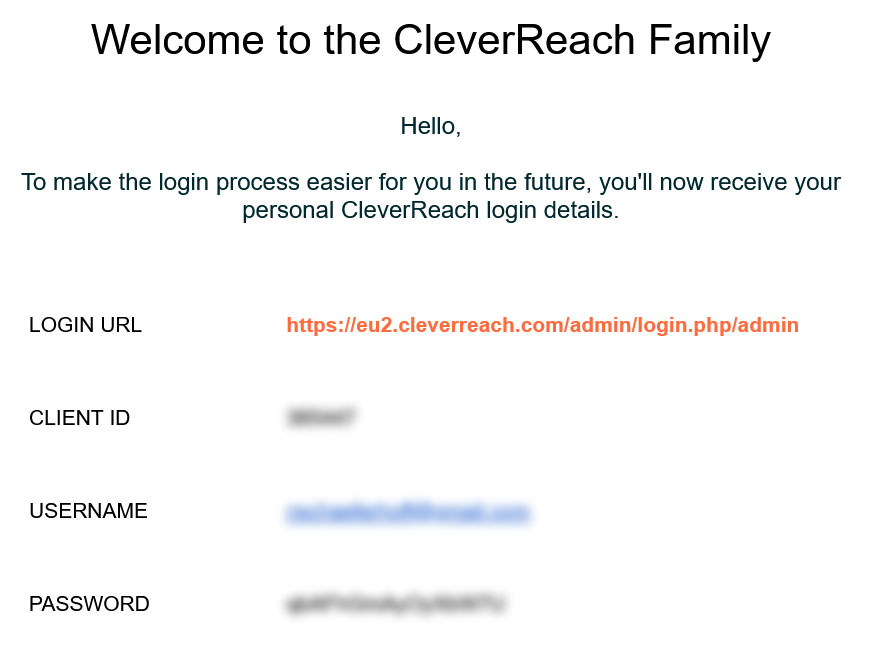
As you can see from the screenshot, you need a customer ID, username, and password for that. CleverReach will actually send those to you in an email when you sign up and you also use them to sign in to your account.
Copy and paste all of this information over to the Gravity Forms menu and save the settings at the bottom. You should receive a green checkmark at the top when everything works.
Boom, another step finished. You’re killing it!
3. Create an Email Sign-Up Form
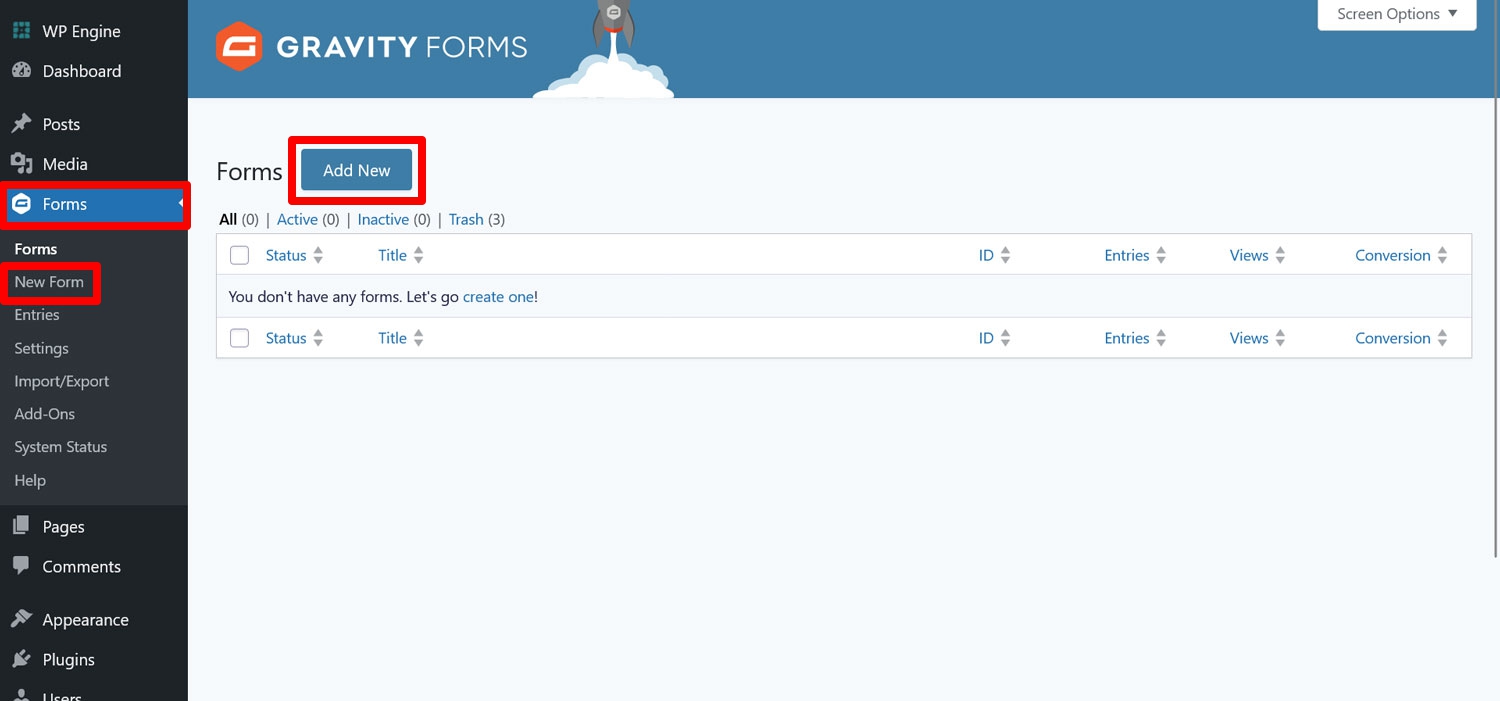
The next stop on our journey to use Gravity Forms and CleverReach together is creating a form. Because, otherwise, how are you going to allow your visitors to sign up for your class-A newsletter? You do that under Forms → New Form.
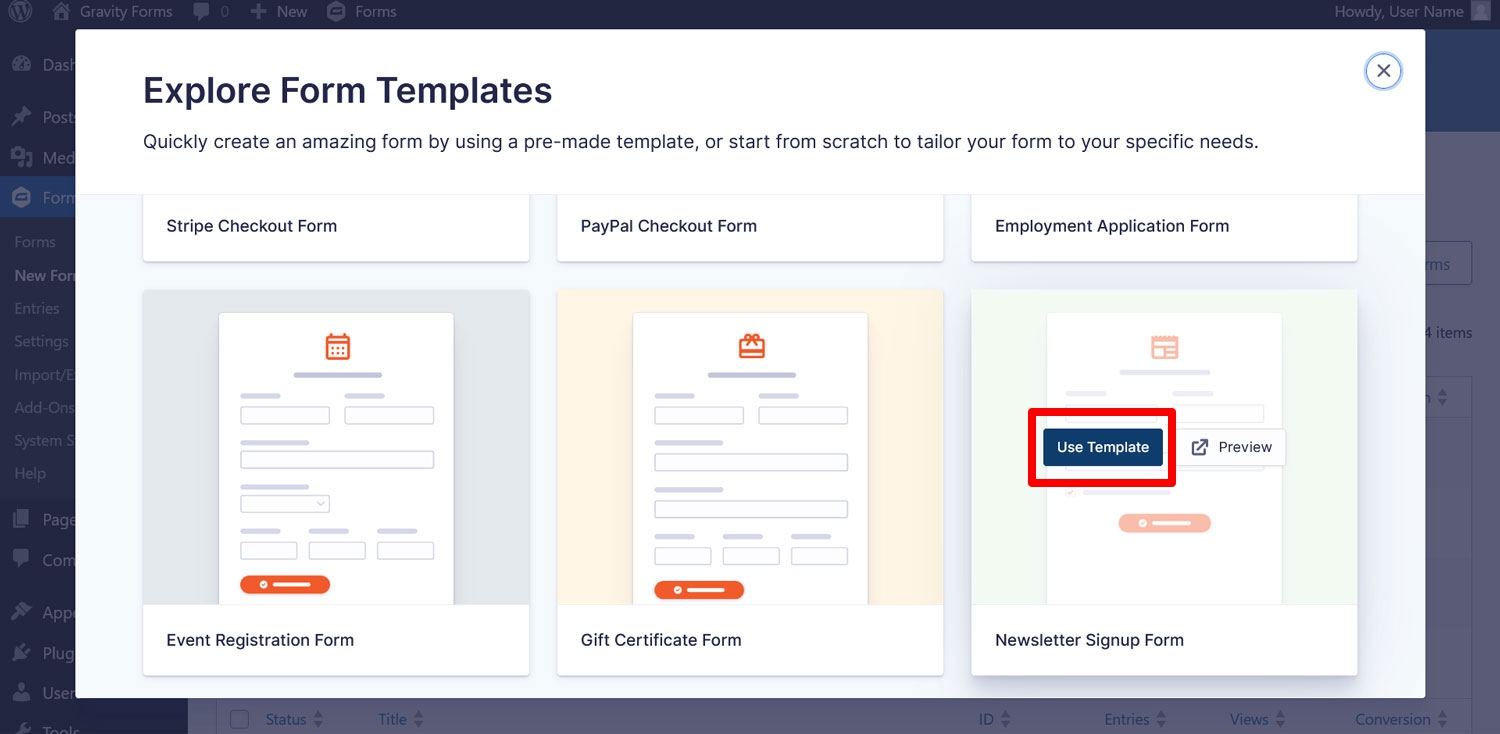
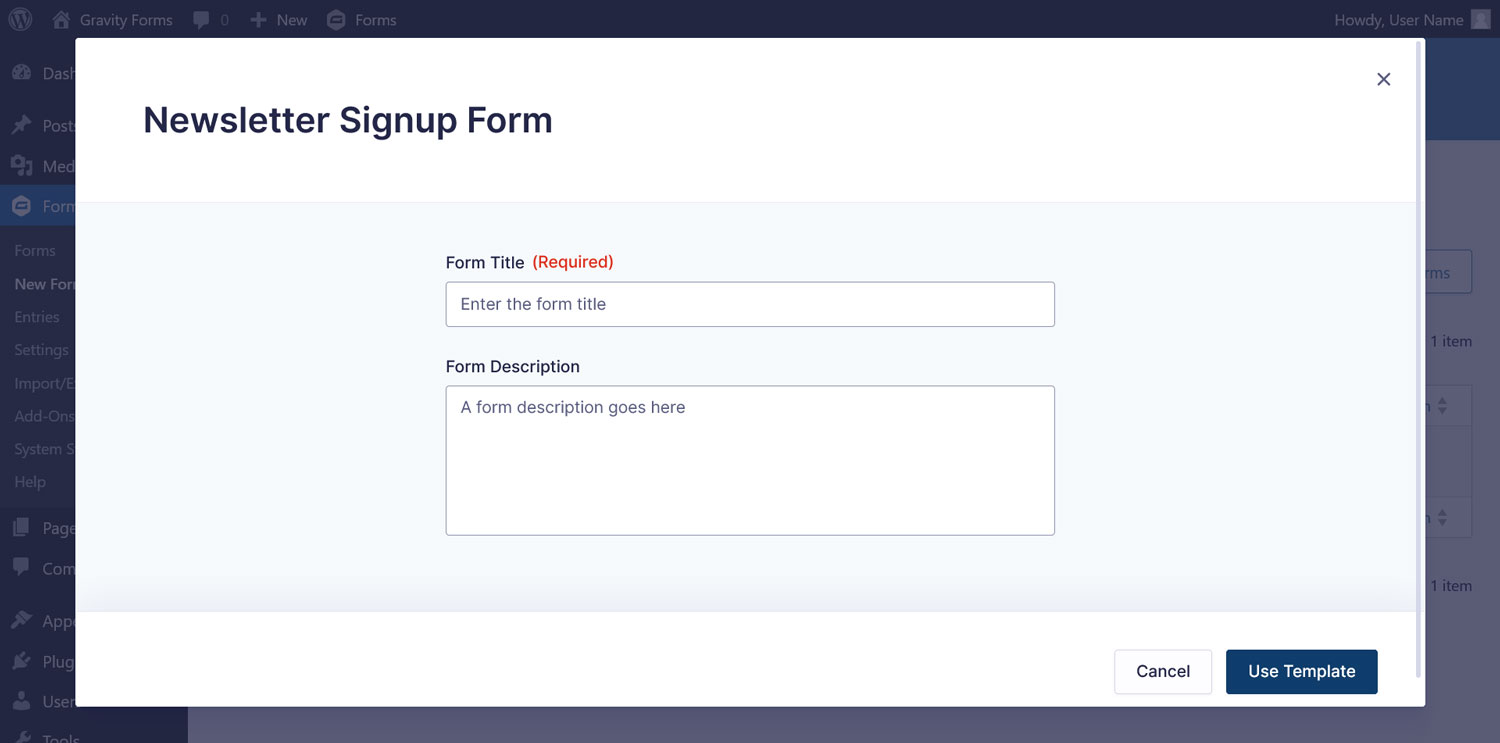
In the pop-up that appears, you either have the choice to start with a blank form or use one of the existing templates. In this case, it makes sense to go with our Newsletter Signup Form template. Hover over it and click Use Template to get started.
You will encounter an intermittent step in which you are asked to name the form.
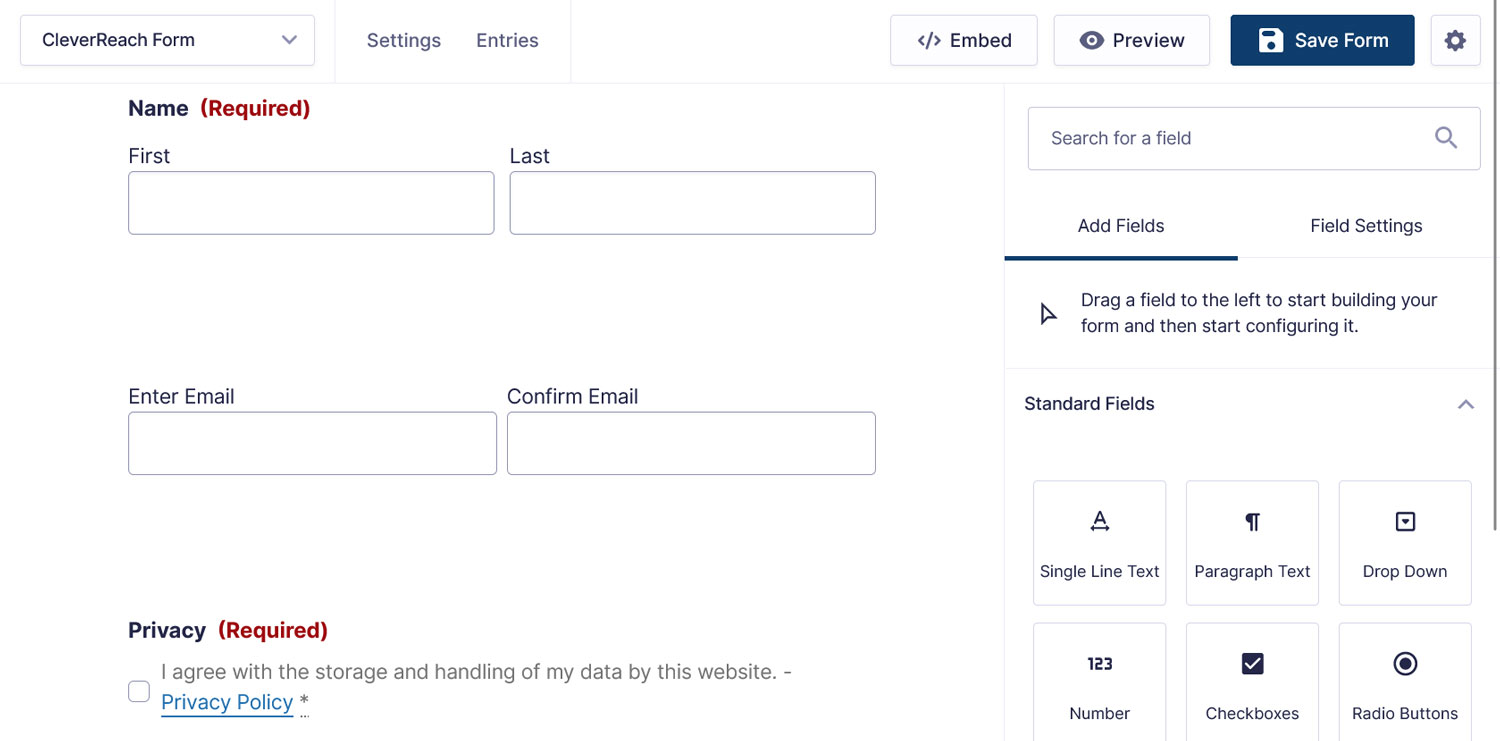
After you continue, you land on the form editor screen.
Because we are using a template, it already has fields for entering a subscriber’s first name, last name, email address, and a consent field. You can add new fields from the right sidebar, move around or delete existing fields, or click on them to customize.
4. Set Up Custom Fields in CleverReach
Once you have created your form and decided what kind of information you want to collect, it’s important that you set it up in CleverReach as well.
Why is that?
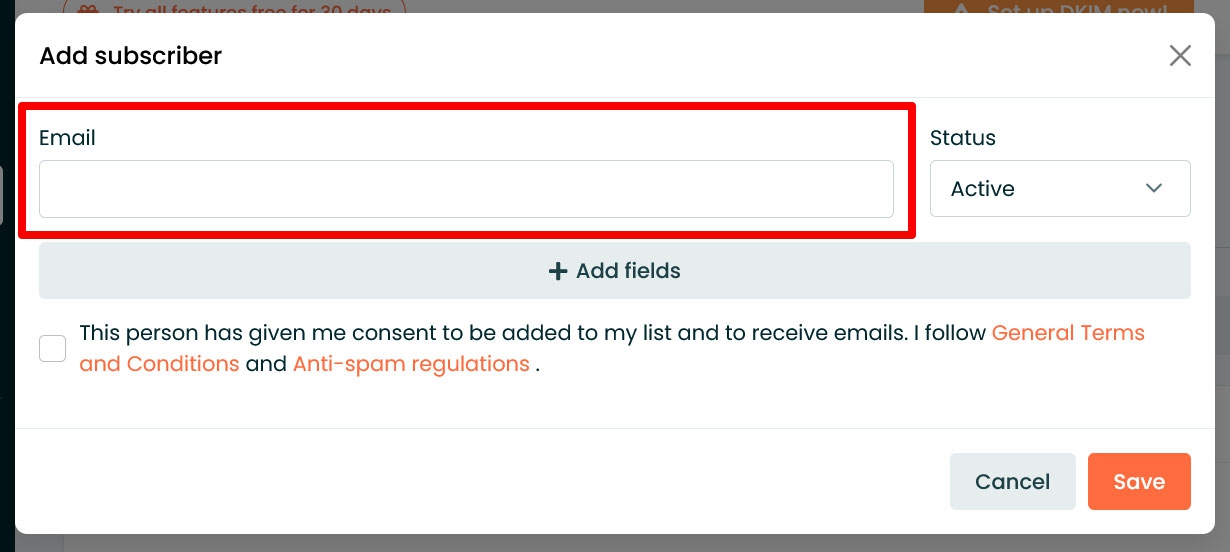
Because, by default, the only subscriber information that it will save is the email address. You can see that when you try to add one to your list under Recipients.
If you want anything else, even just the first first and last name, you need to set that up beforehand. Otherwise, you won’t be able to configure to receive this information from Gravity Forms in the next step.
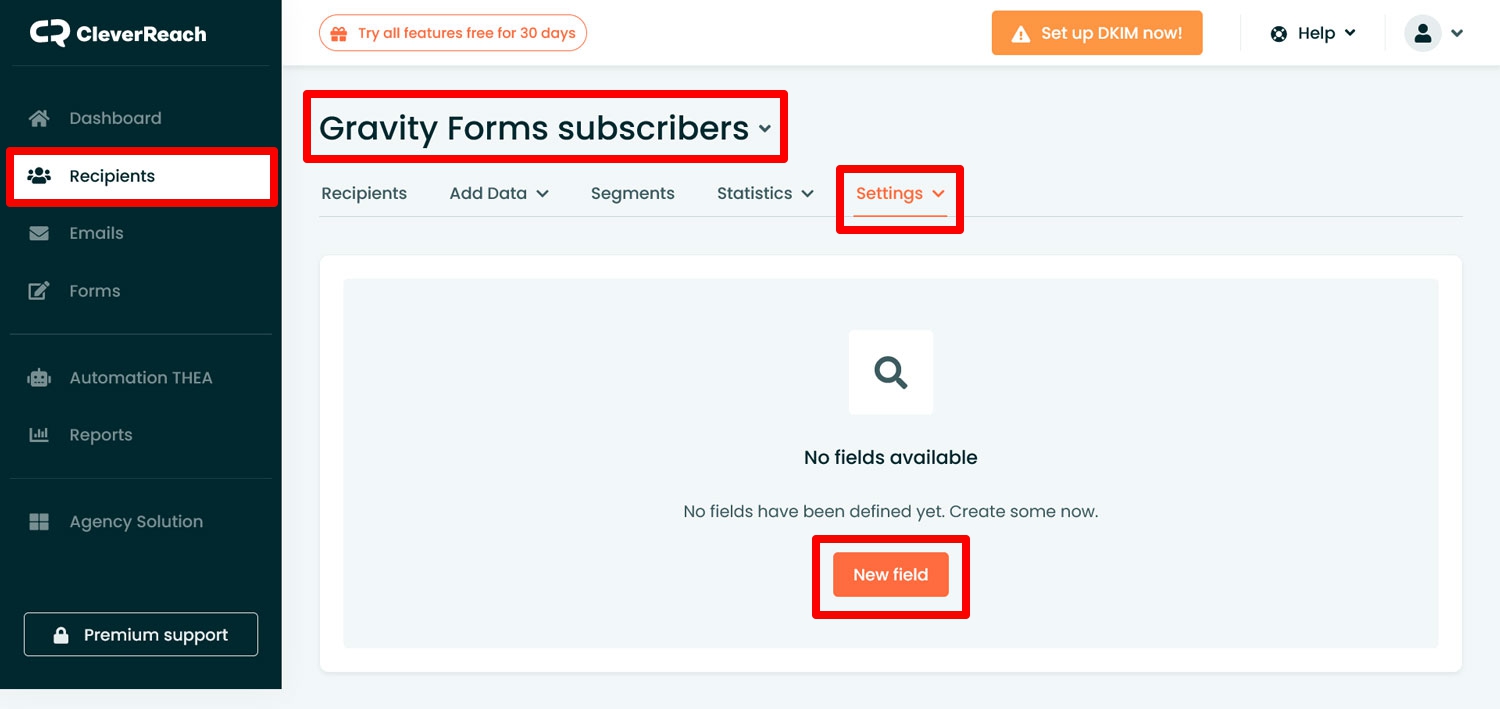
In CleverReach, you find the option to create custom fields under Recipients → Your List → Settings → Fields (you have to create a list first, if you haven’t already).
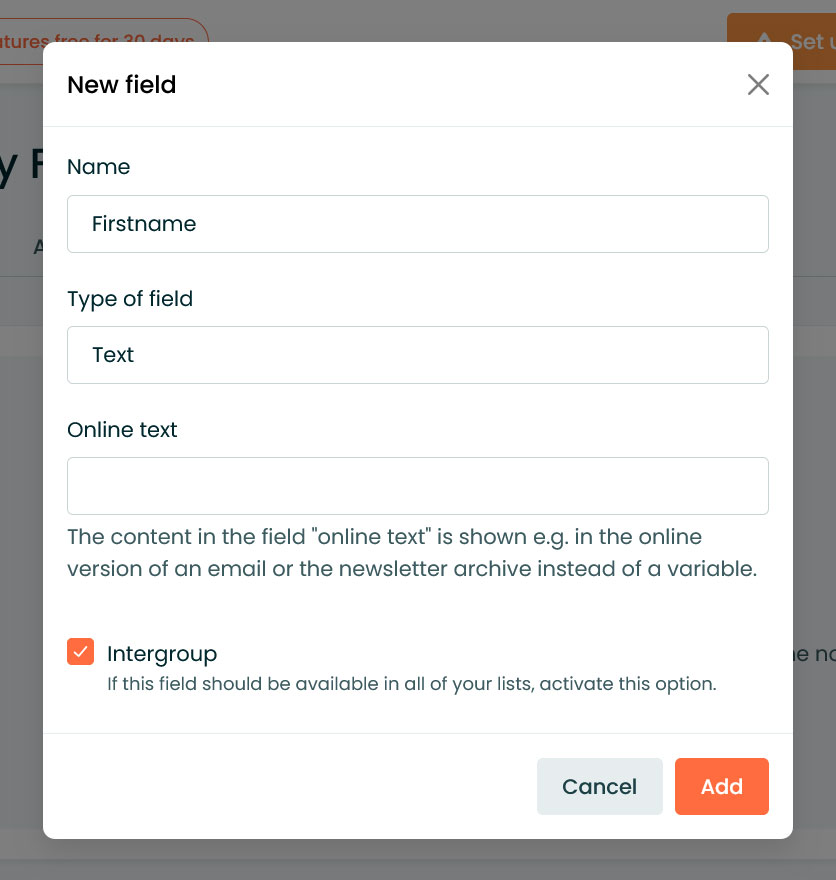
Click New field. This opens up a window that you have to fill in with the following information:
- Name — Naturally, this is so you understand what it is later on.
- Type of field — This can be text, number, date, or salutation. For things like a subscriber’s first or last name, text is the correct choice.
- Online text — This is a placeholder value for another view. It is not important here and can be empty.
- Intergroup — Determine whether this field should also be available for other recipient lists.
Here’s what it looks like on our end for a first name field:
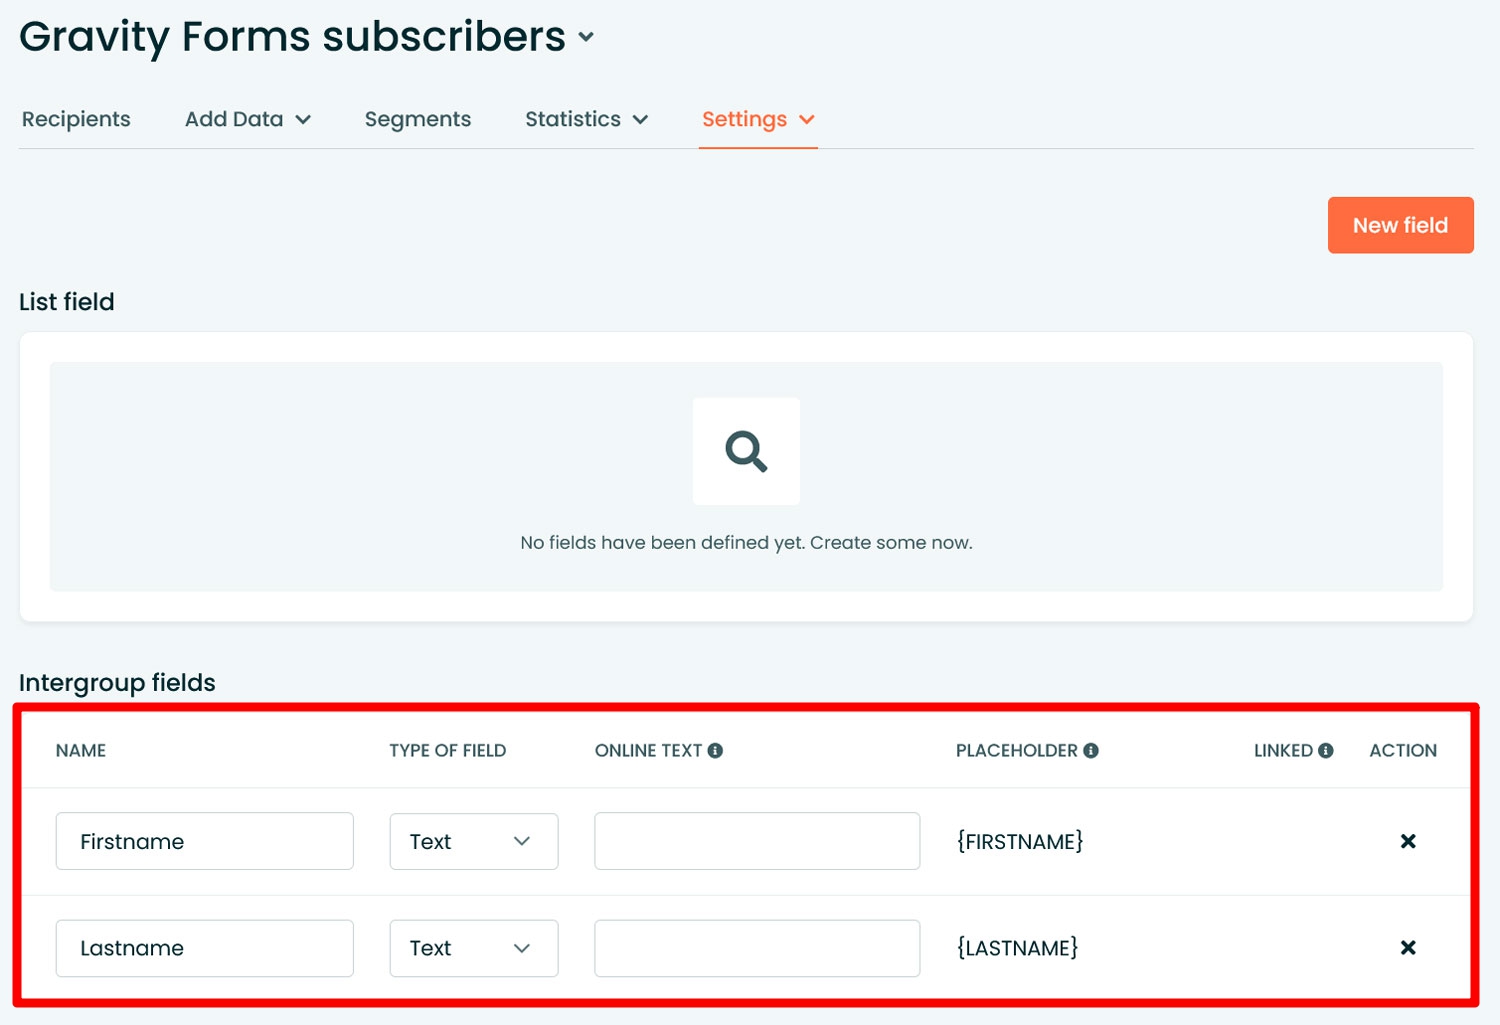
If you want more than that, simply create additional fields.
5. Configure Your CleverReach Feed
With the form ready, it’s now time to configure its feed. The “feed” defines what happens with the form data after it has been submitted. In this case, we want it to be sent on to CleverReach.
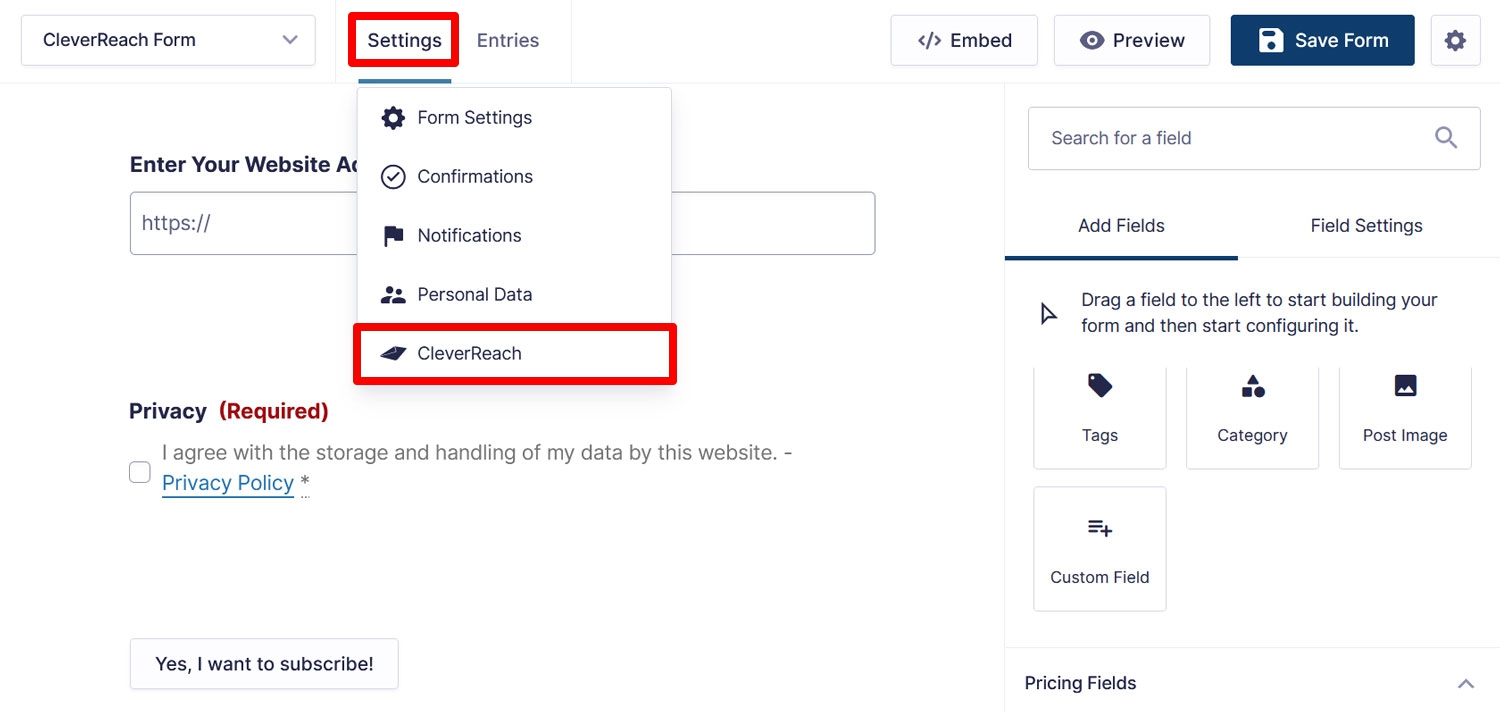
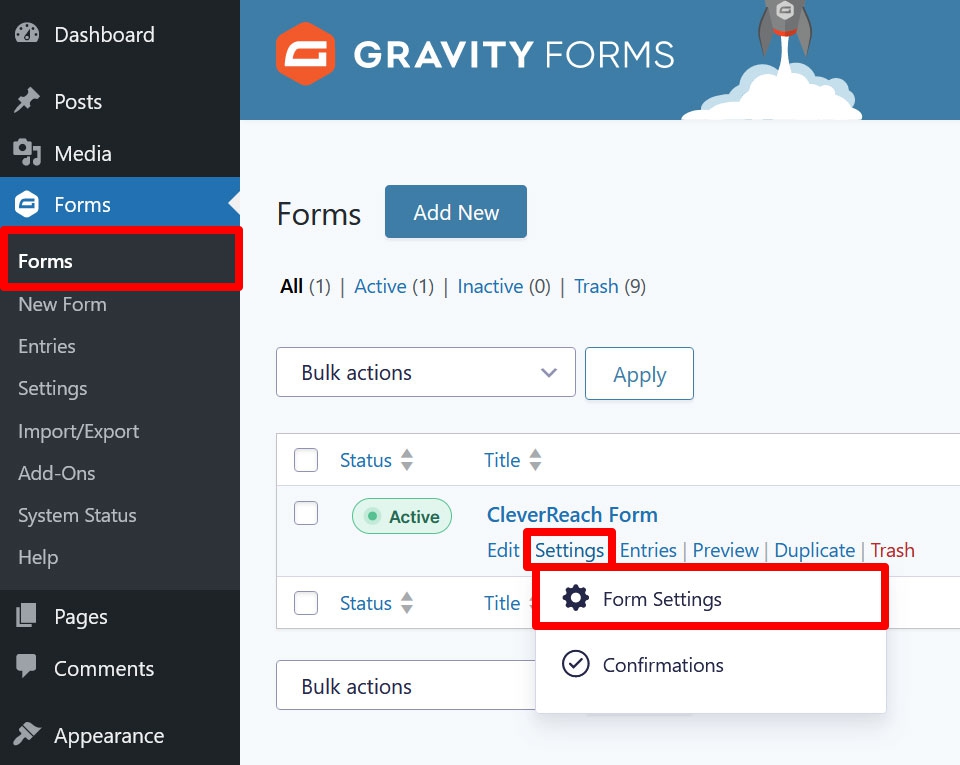
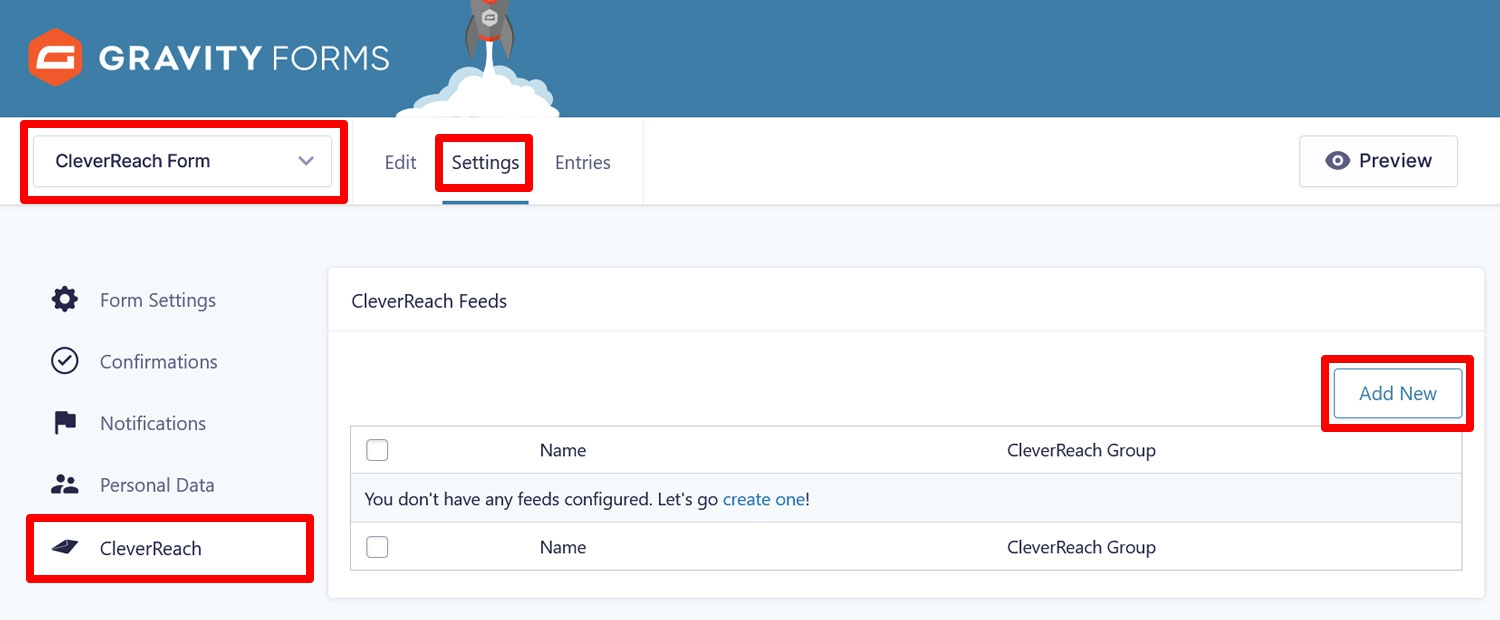
To achieve that, hover over Settings in the form editor and then click on CleverReach.
You can also get to this place via the form settings under Forms.
In the screen that follows, click on Add New to create a new feed.
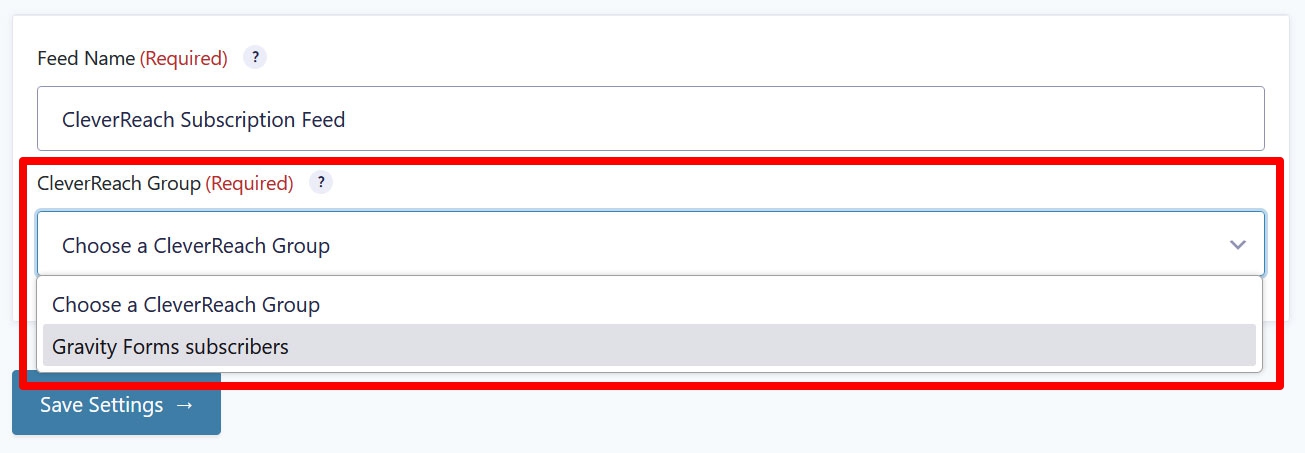
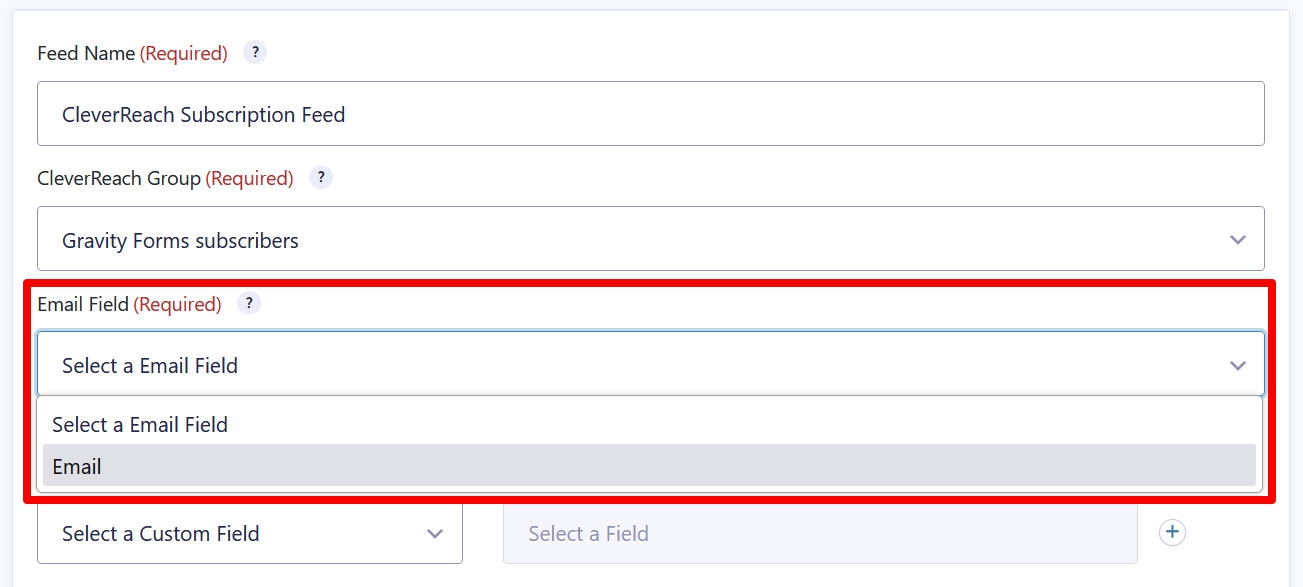
In the next screen, you first need to provide a feed name and pick a CleverReach Group. That’s simply the recipient list you want to use for this form, so pick the one you created earlier.
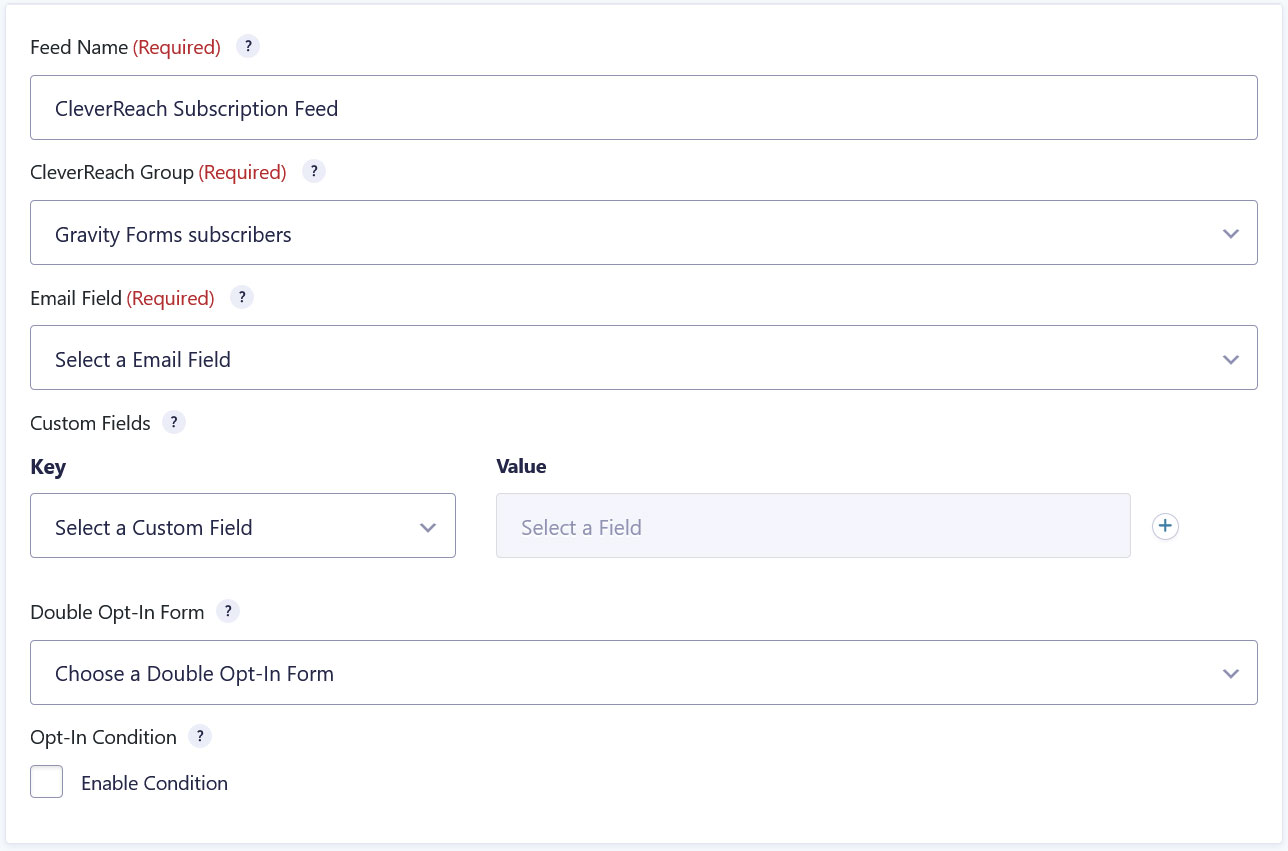
Once you do, it opens up additional settings where you can map your web form fields to the information in CleverReach.
This will ensure that whatever your visitors enter in the form will be saved in the right place in your email marketing software. The one that is automatically present is the email field. Use the drop-down menu to choose your field for email addresses on the web form.
If you want to collect any additional information, use the Key and Value fields. The first one includes your CleverReach custom fields, the second you can use to map your web form fields to them. You can add more fields with the plus button and do this until all the information you want to collect has been successfully mapped.
There is also a field to enable double opt-in. To do so, you simply need to select the form your created earlier and assigned to your recipient list from the drop-down menu.
Save at the bottom when you are done.
6. (Optionally) Use Conditional Logic
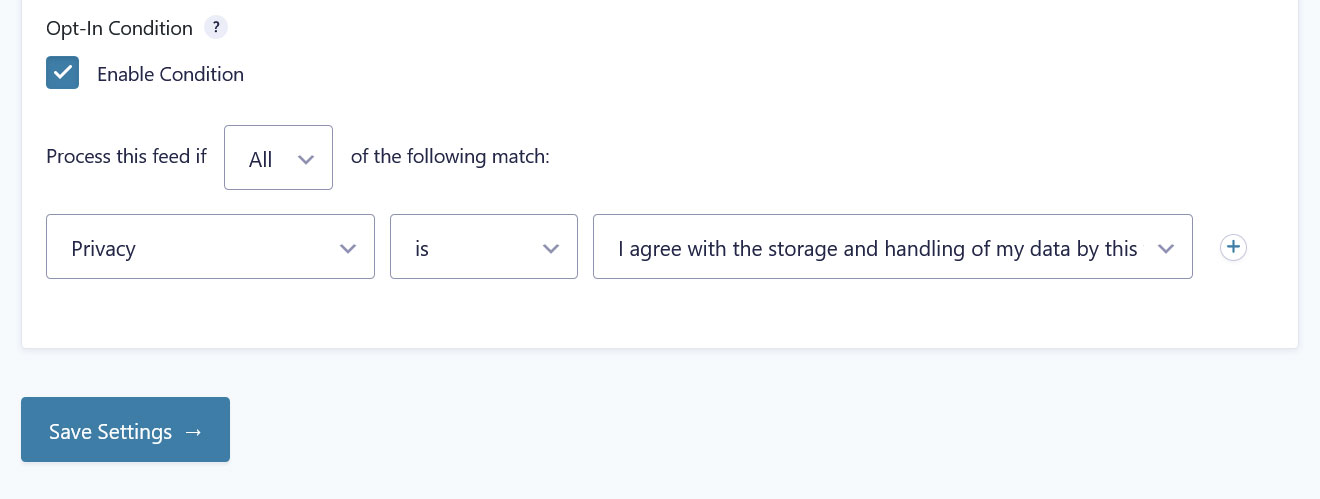
Keen observer that you are, you have probably noticed the checkbox to Enable condition under Opt-In Condition. When enabled, you can use it to specify when your form data should be processed and sent to CleverReach.
Choose the field on your form and define the conditions that it needs to fulfill for a subscriber to go through. You can also set several conditions that need to either be met completely or at least one of them. You an use this, for example, to:
- Process a form only when a certain field is filled out (e.g. consent field)
- Create separate feeds that send subscribers to different subscriber lists depending on certain information they provide (e.g. job title, interests)
If you want to learn more about this, we have a video tutorial for conditional logic.
7. Embed and Test Your Form
Once you have set everything up to your liking, the last step is to embed the form and make sure your subscribers and all desired information end up in your CleverReach account when it is used.
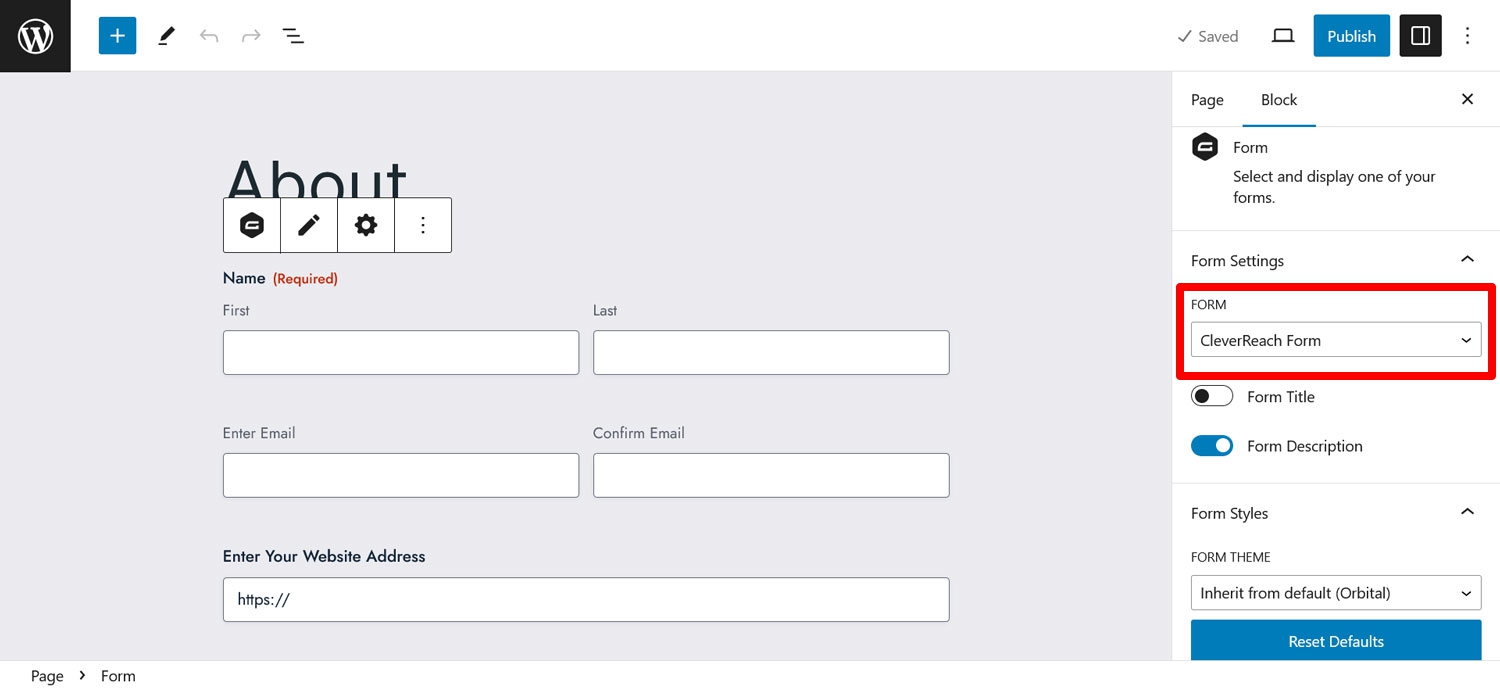
For that, create a page and input form the using the Gravity Forms block or shortcode.
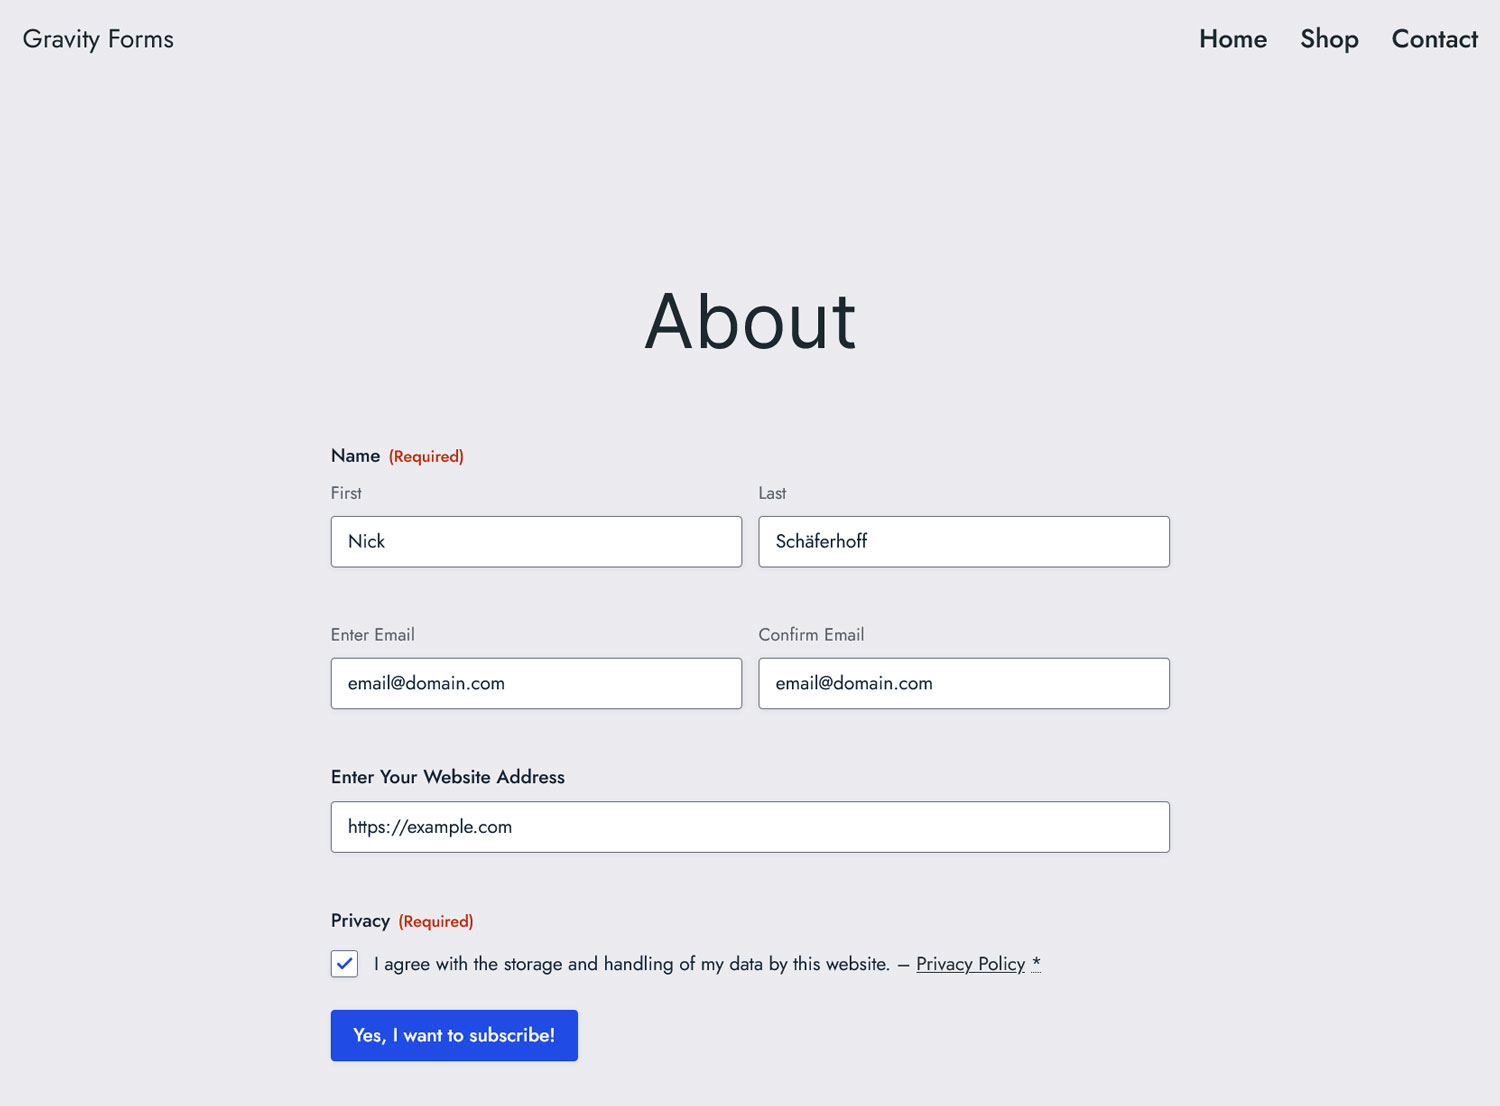
After that, either publish the page or preview it (if you simply connected an existing form to CleverReach, you can also go to its page). Then, fill it in with information and submit it.
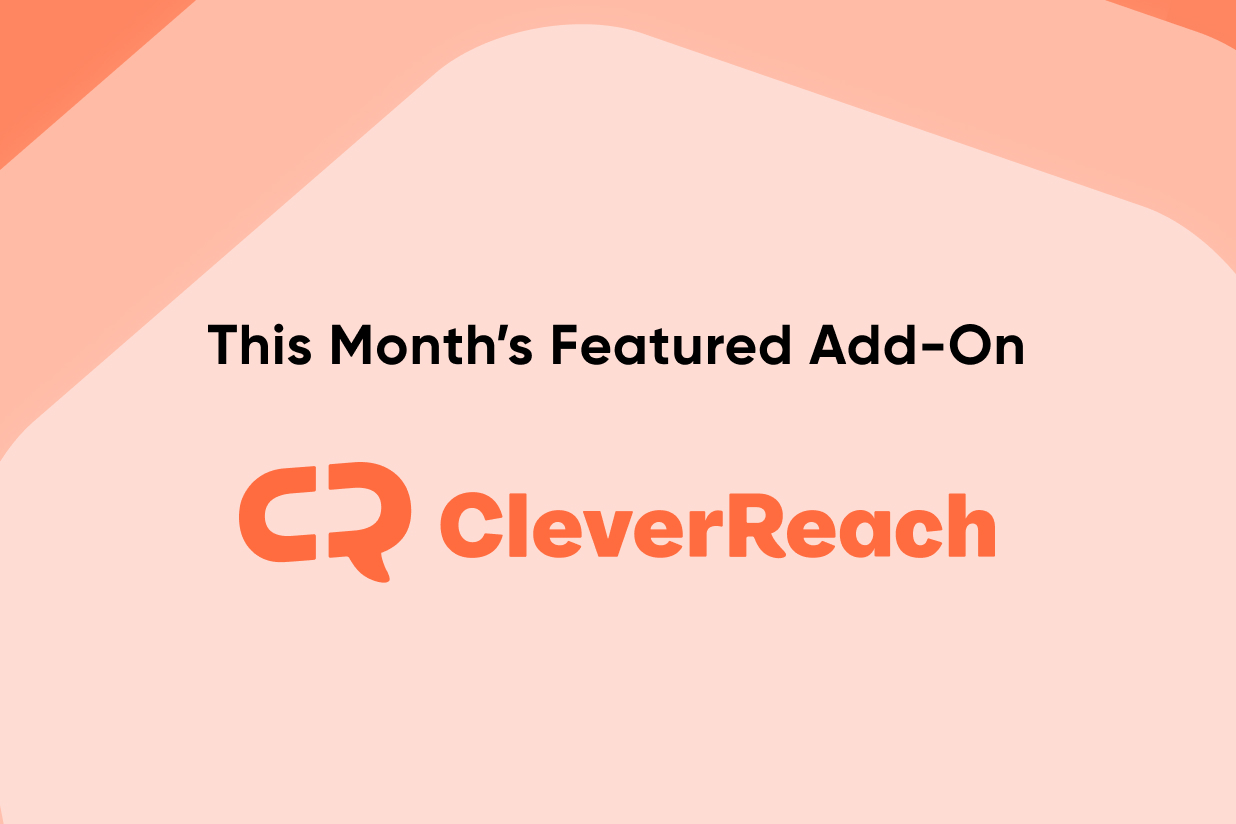
If everything is set up correctly, your new subscriber and all desired information should appear in the list in your CleverReach account.
Well done, you did it! One last thing, you can further customize your forms via confirmations and notifications.
Gravity Forms and CleverReach: Use Them Together Today
When collecting email subscriber information via Gravity Forms, it’s great to combine it with an email marketing service that provides the muscle and functionality to take advantage of your audience. CleverReach is an excellent solution for that.
Thanks to the Gravity Forms CleverReach Add-On, it is easier than ever to allow these two applications to join forces. All you need is to install it, provide credentials, and make sure the information you want to collect is available on both ends. After that, simply embed the form where you need it and the rest happens by itself.
Quick reminder, the CleverReach add-on is available with all Gravity Forms licenses. Get yours now and start growing your email subscriber list.
