How to Translate Gravity Forms to Create a Multilingual WordPress Form
With Gravity Forms, you have the ability to create flexible WordPress forms for everything, from contact and purchase forms, to front-end post submission forms, and lots more.
If your WordPress site has a multilingual audience, which a lot of sites do, taking the time to translate Gravity Forms into different languages can pay dividends when it comes to improving the user experience on your WordPress site and connecting with new audiences.
In this post, you’ll learn more about the benefits of creating a multilingual WordPress site as well as how to easily translate Gravity Forms (and the rest of your WordPress site) into different languages.
3 Big Benefits of Creating a Multilingual WordPress Site
When you translate WordPress and Gravity Forms, you unlock three big benefits for your website:
- Improved user experience
- Access to a wider audience
- Improved eCommerce (if using Gravity Forms for payment forms)
Improved User Experience on Your Site
The first benefit of translating your WordPress site is improving the user experience of people who are already visiting your website.
As you’d expect, most people prefer to browse the web in their native language whenever possible. The European Union commissioned a survey from Gallup which found that 90% of respondents prefer browsing in their own language and 45% of respondents just will not browse a website in any language but their own.
We live in a multilingual world, so even if your website only targets a specific geographic area, you still might have a multilingual audience. For example, according to the US Census Bureau, 21.6% of people age 5+ in the USA speak a language other than English when at home, and that number jumps to 44.6% when you look at California alone.
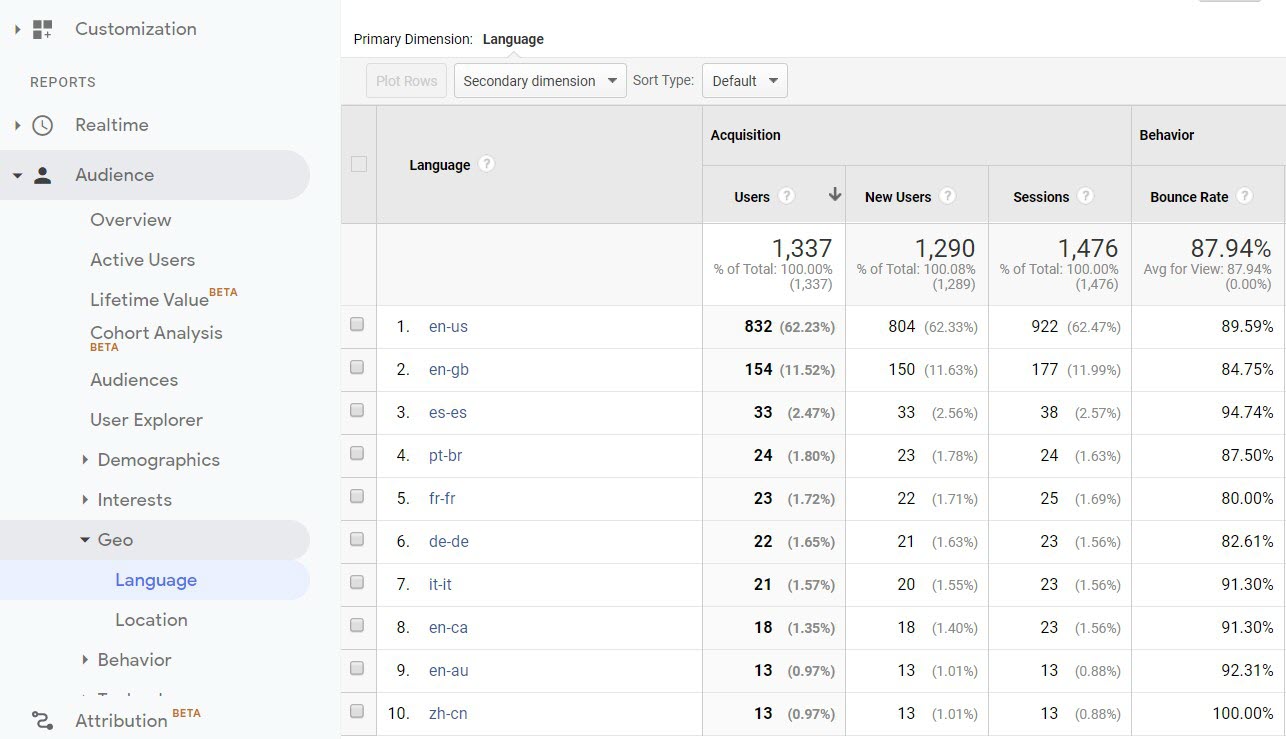
If you want to get an idea of which languages your visitors prefer, you can use the Language report in the Audience → Geo section of Google Analytics:
Access to a Wider Audience
Beyond creating a better user experience, translating your WordPress site can also help you reach more users in the first place.
You already know that most people are browsing (and searching) the web in their own native language whenever possible. So if you want to reach those people, you need to be where they are — which is browsing the web in their own languages.
The area where this is most relevant is search engine optimization. There are people who are searching Google for the exact content that you offer…just in different languages.
When you translate your site, you can start ranking for those queries and reaching a whole new audience in Google Search.
For example, Neil Patel has one of the most popular digital marketing blogs on the Internet. But after translating his website into new languages, Neil experienced a 47% increase in traffic, with new users shooting up even higher by 60%. Basically, he not only increased his traffic, but he also expanded his audience even more. Today, Neill offers his website in five languages:
- English
- Portuguese
- German
- Spanish
- Italian
Improved eCommerce
If you’re using Gravity Forms as an eCommerce solution, you can also benefit from translating your forms into new languages.
In that same Gallup survey above, Gallup also asked respondents about their eCommerce behavior on the Internet and found a similar preference:
42% of respondents never buy products from websites in different languages.
When you combine this fact with opening the doors to a larger audience, going multilingual can boost your site’s sales.
For example, La Machine Cycle Club increased its sales by 25% after translating its site into three new languages.
How to Translate Gravity Forms and WordPress
To translate any type of form that you’ve created with Gravity Forms, you can use the Weglot plugin.
Weglot integrates with Gravity Forms out of the box — there’s no need to mess around with any configuration settings.
As soon as you set up Weglot, it will use automatic machine translation to translate all of your WordPress site’s content, including your forms. Then, you can go back and manually edit those translations as needed using the Weglot cloud dashboard.
Here’s how to translate Gravity Forms with Weglot…
1. Create the Form That You Want to Translate
If you haven’t already, you’ll want to start out by using Gravity Forms to create a form that you want to translate.
Weglot will work with all field types and Gravity Forms features (including conditional logic), so you don’t need to worry about how you create your form.
For this example, we’ll create a simple eCommerce order form, but you can create contact forms, post submission forms, etc — it’s your choice:
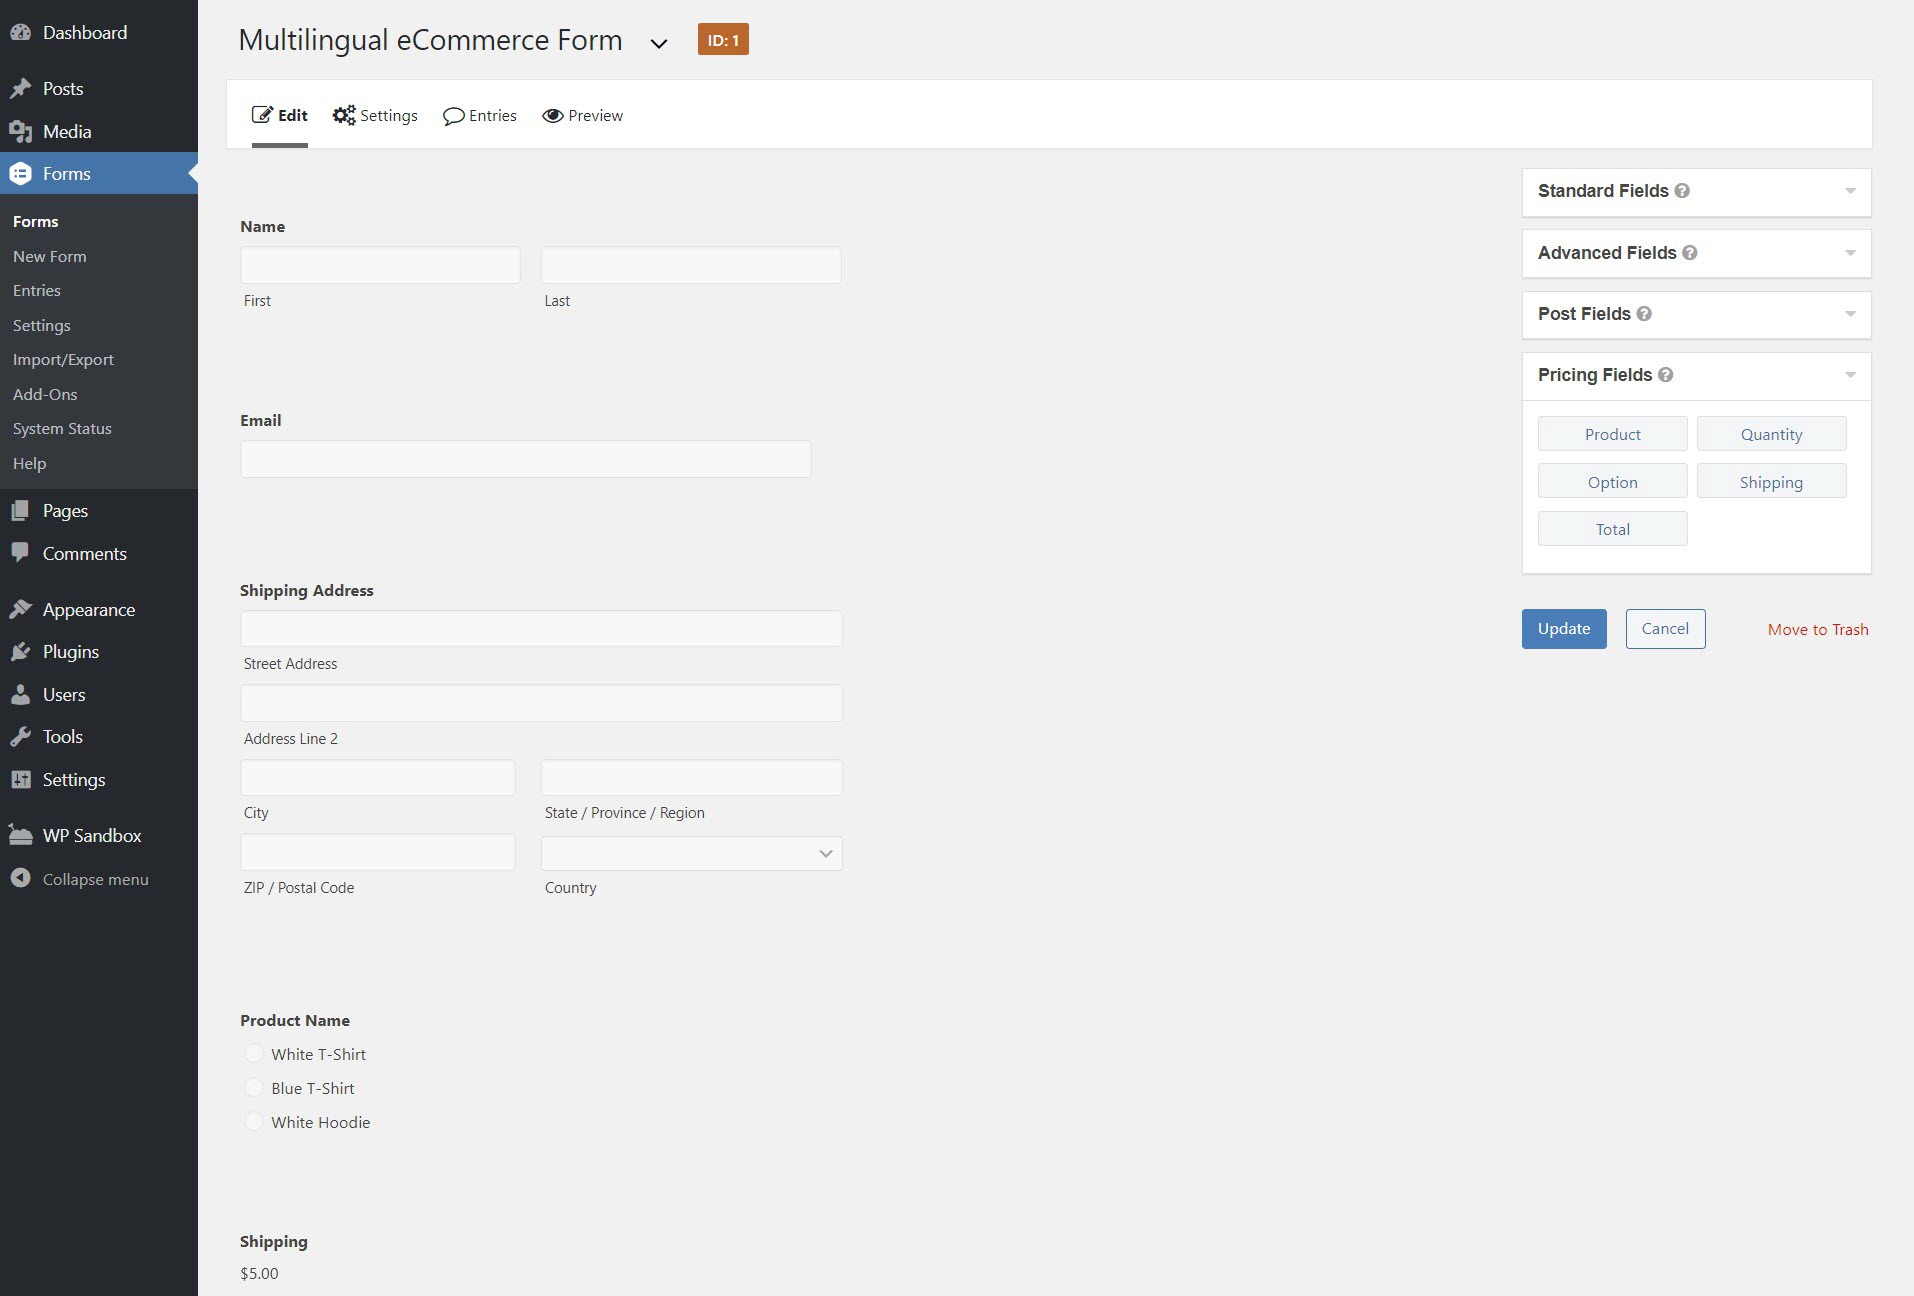
Once you’ve set up your form, make sure to use the Gravity Forms block to display it on the front-end of your site.
2. Set Up Weglot and Choose Languages
Once you have your form ready, it’s time to translate it. By the end of this step, you’ll have a working multilingual form.
To get started, install and activate the Weglot plugin from WordPress.org. Then, head to the Weglot signup page and register for a Weglot account to obtain your Weglot API key.
Once you have your Weglot API Key, you can:
- Go to the new Weglot menu in your WordPress dashboard.
- Paste your API key into the API Key box.
- Choose your Original language, which is the language that your site (and its forms) currently exists in.
- Choose your Destination languages, which are one or more languages into which you want to translate your forms and the rest of your site’s content.
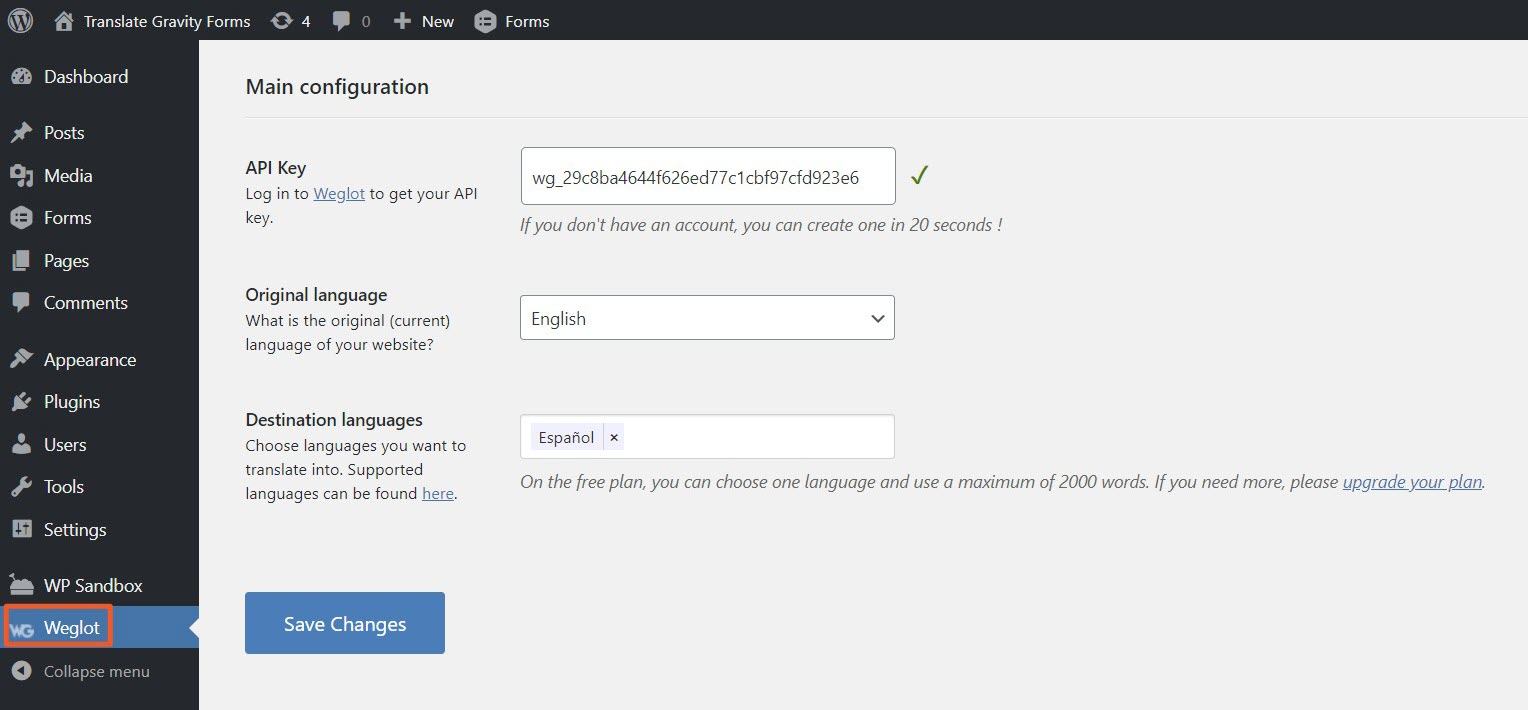
As soon as you click Save Changes, Weglot will automatically translate your site’s content into your destination languages and add a front-end language switcher for your visitors to choose their preferred languages.
Here’s the original form:
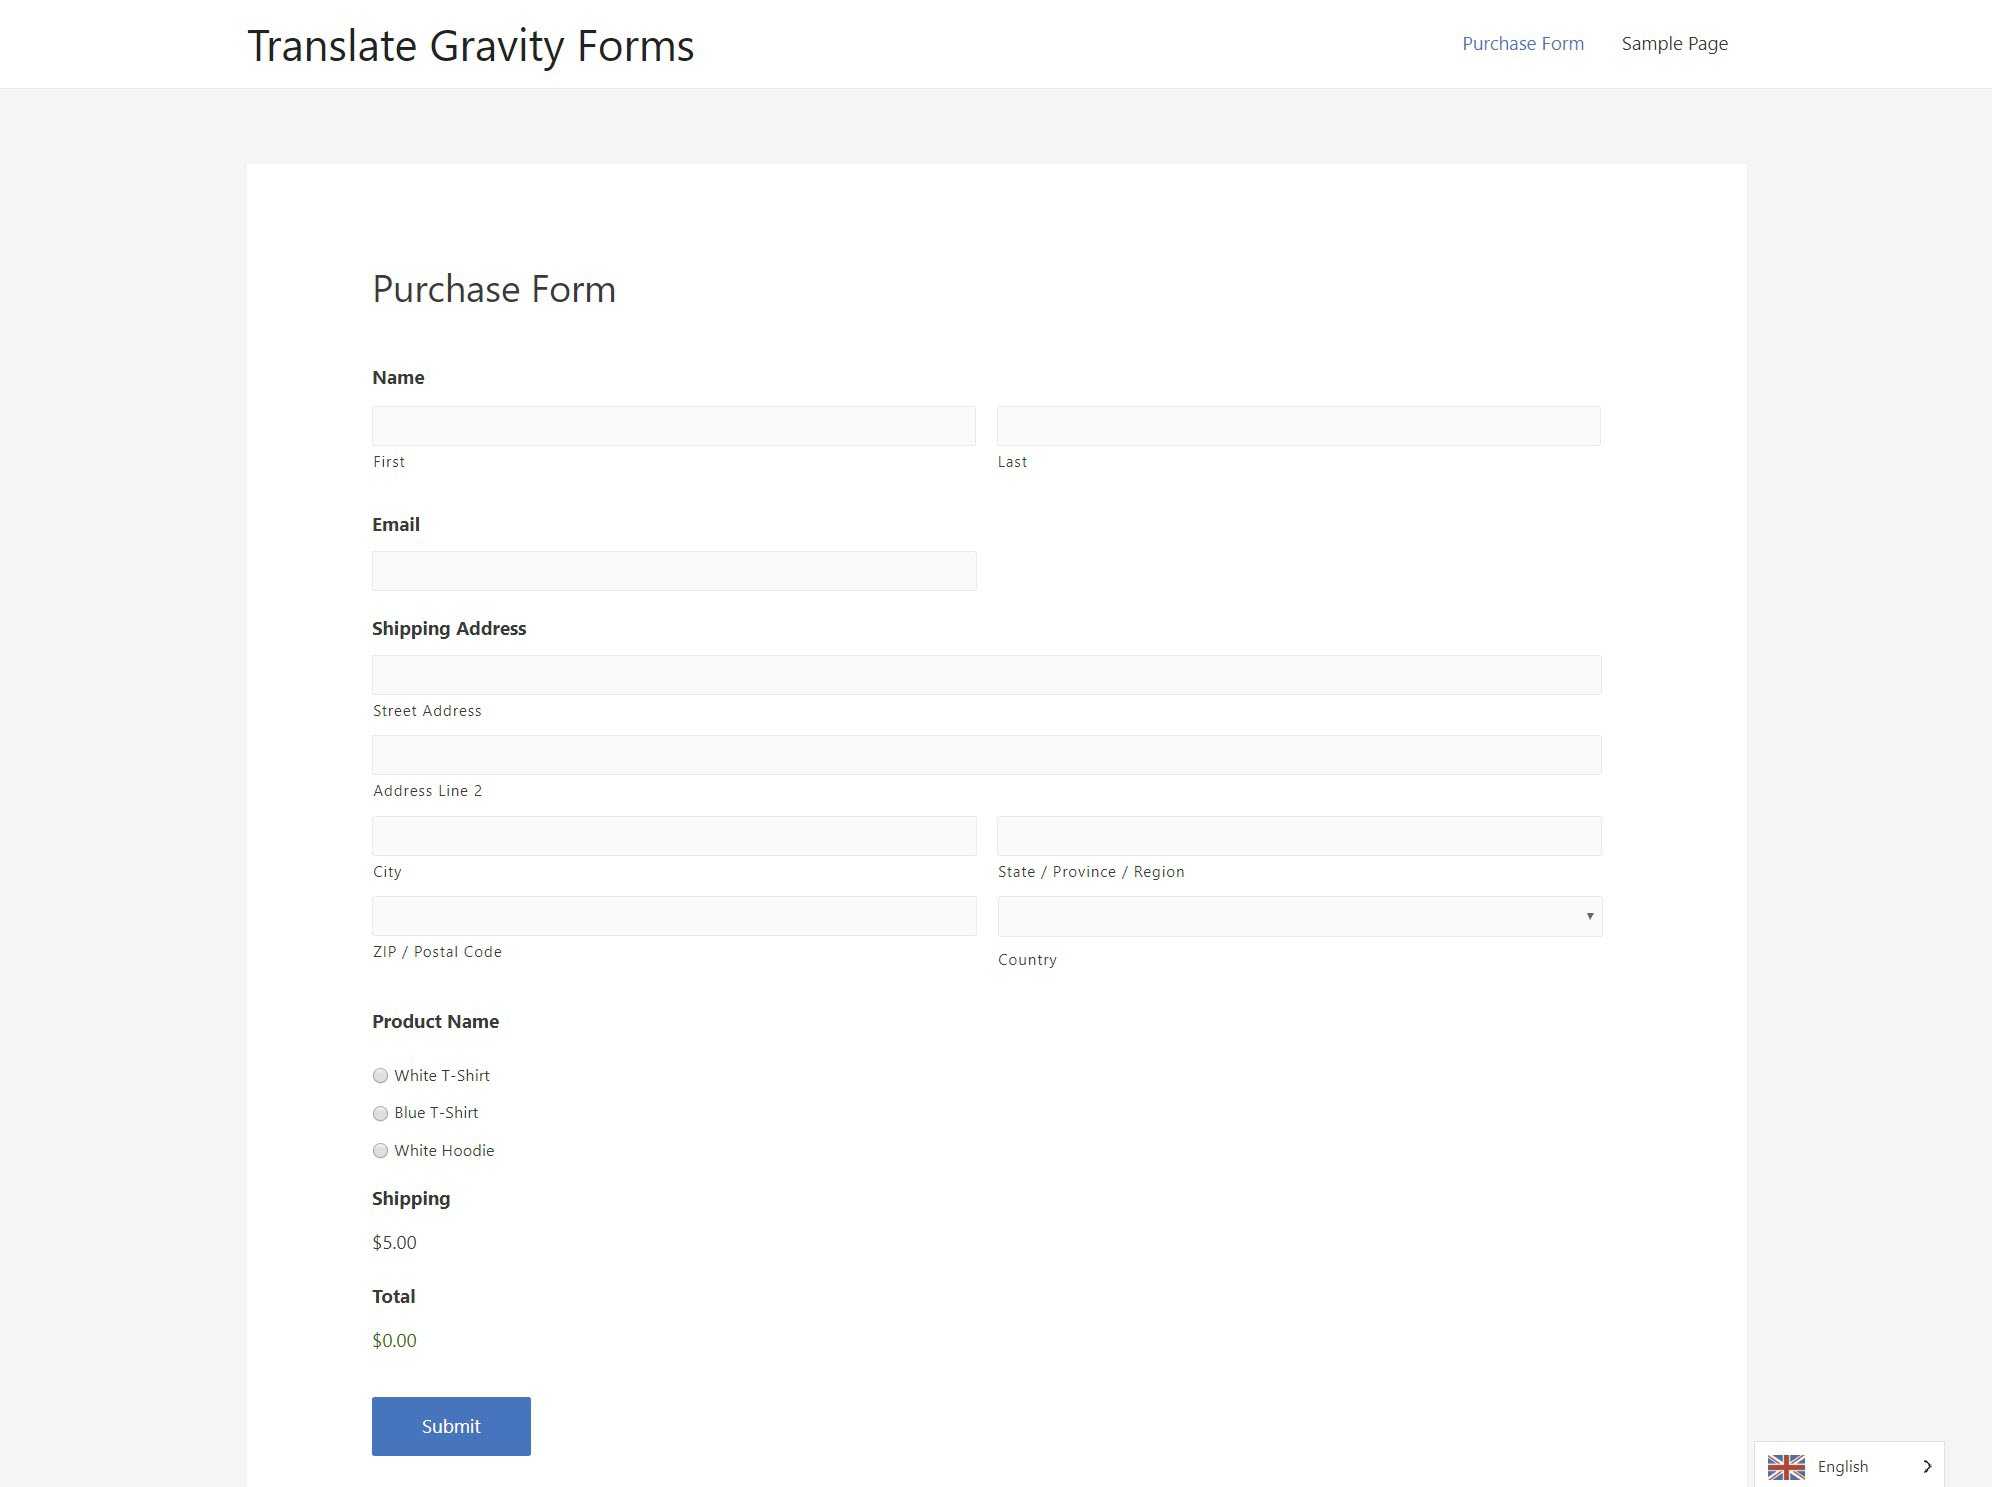
And here’s the form after Weglot automatically translates it into Spanish:
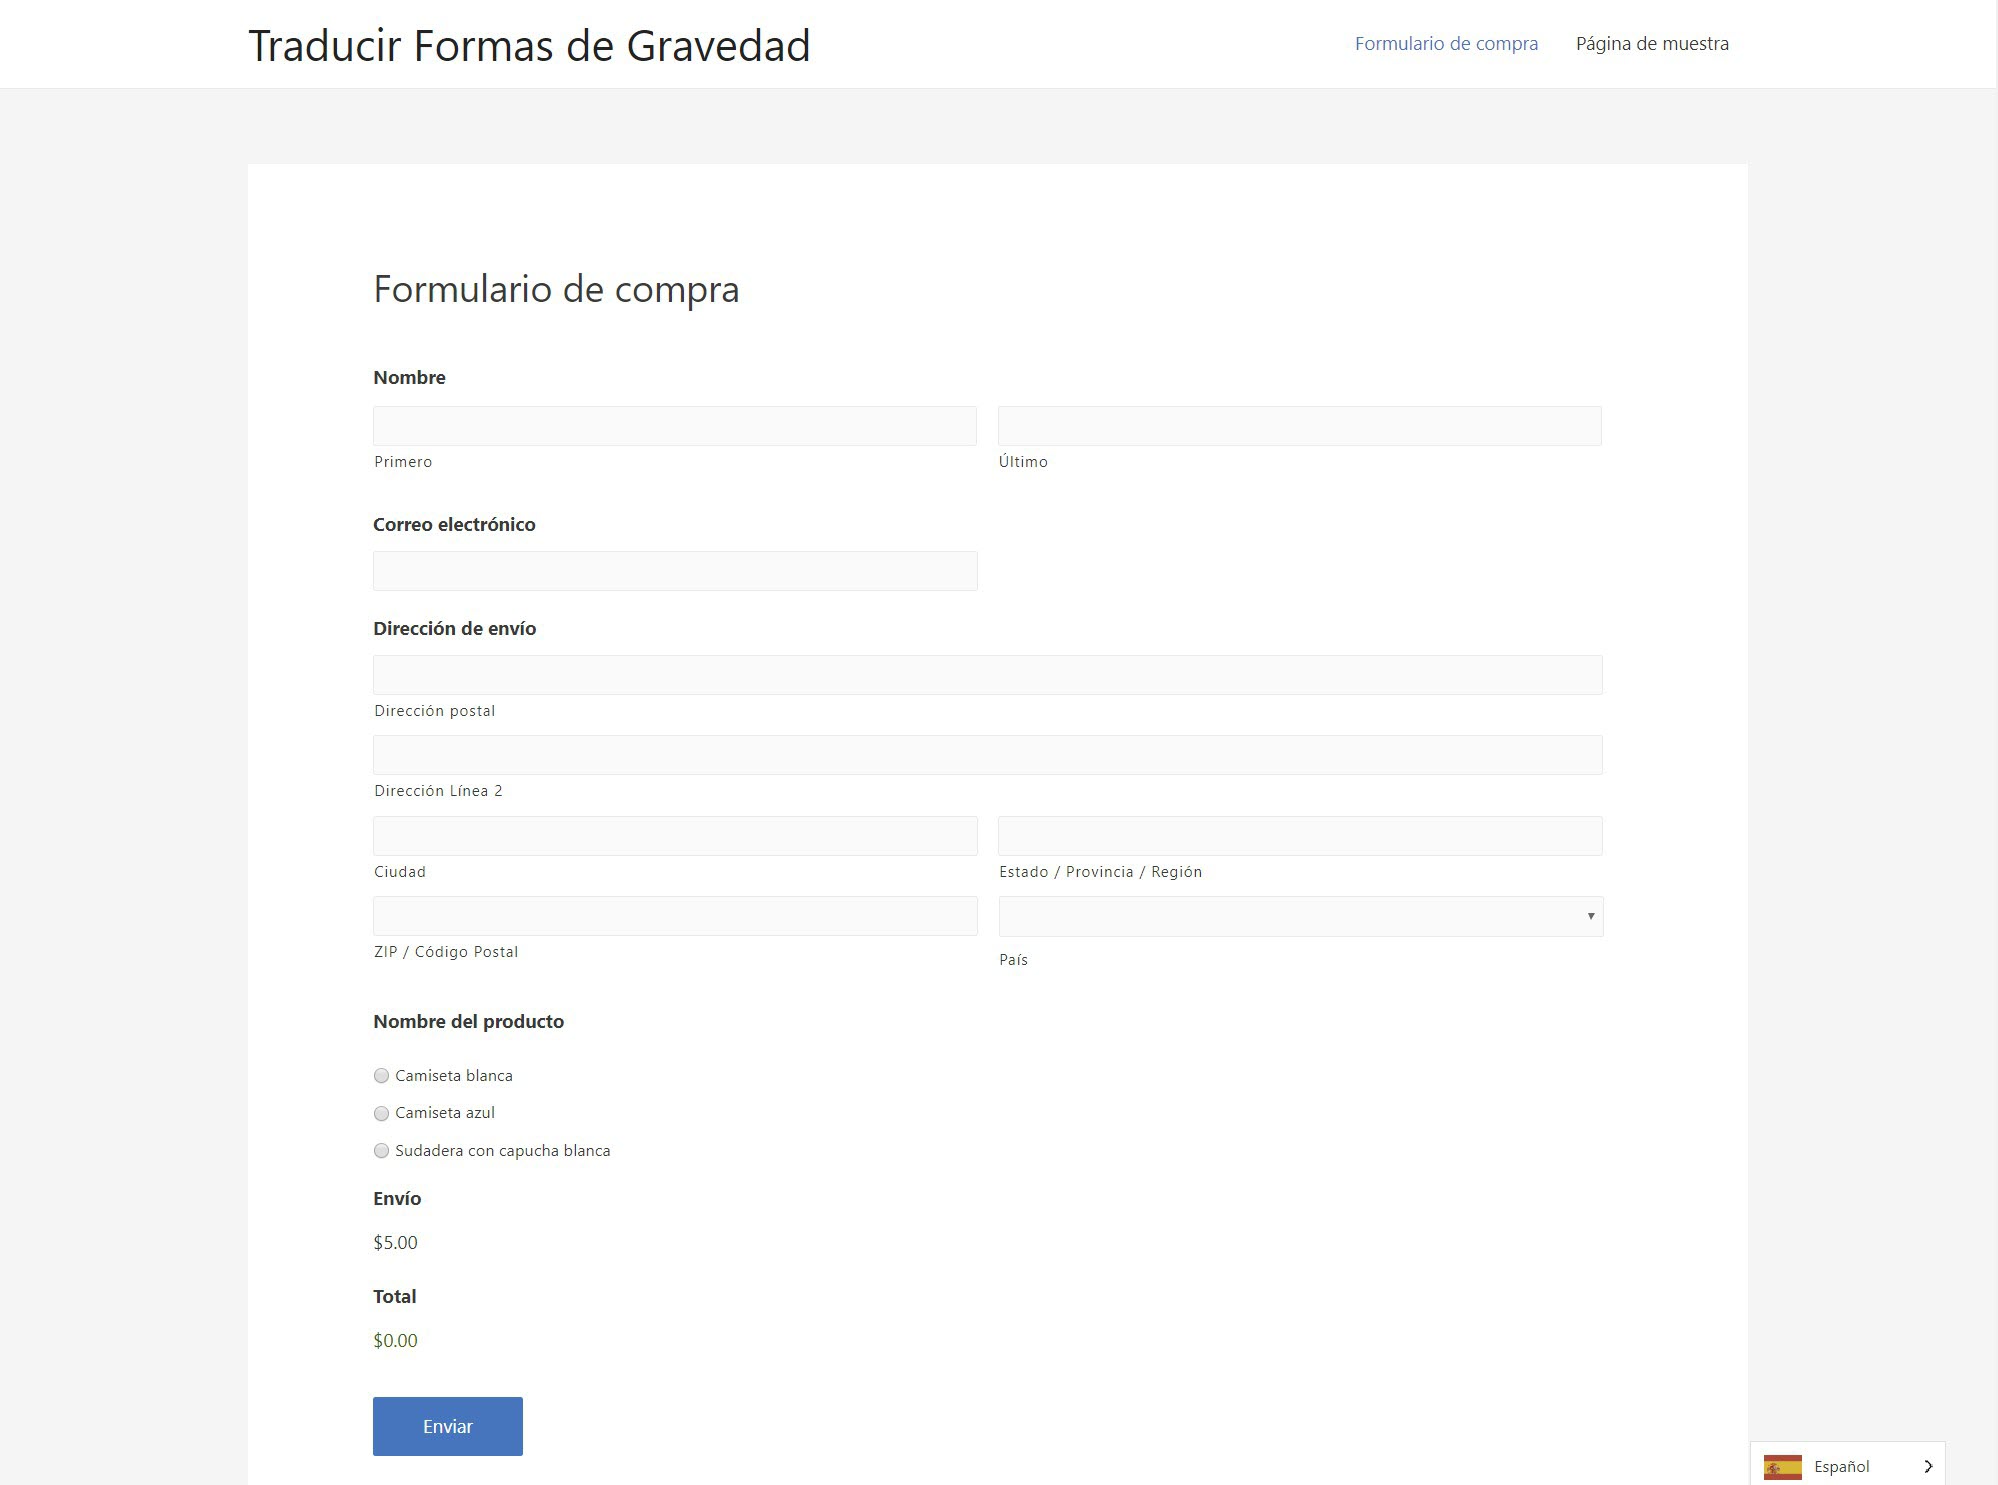
As you can see, Weglot translates everything, from the form labels to the product names in the Product field.
If you display a confirmation message after a person submits your form, Weglot will automatically translate that message as well:

So with that, you already have a working multilingual form.
3. Manually Refine Your Translations If Needed
At first, Weglot uses machine translation to automatically generate translations for your site. If you want, you can then manually edit those translations or outsource translations to professional translation services.
To manage your translations, Weglot gives you two interfaces.
If you prefer a visual approach, you can use the visual editor to manage your translations from a live preview of your site.
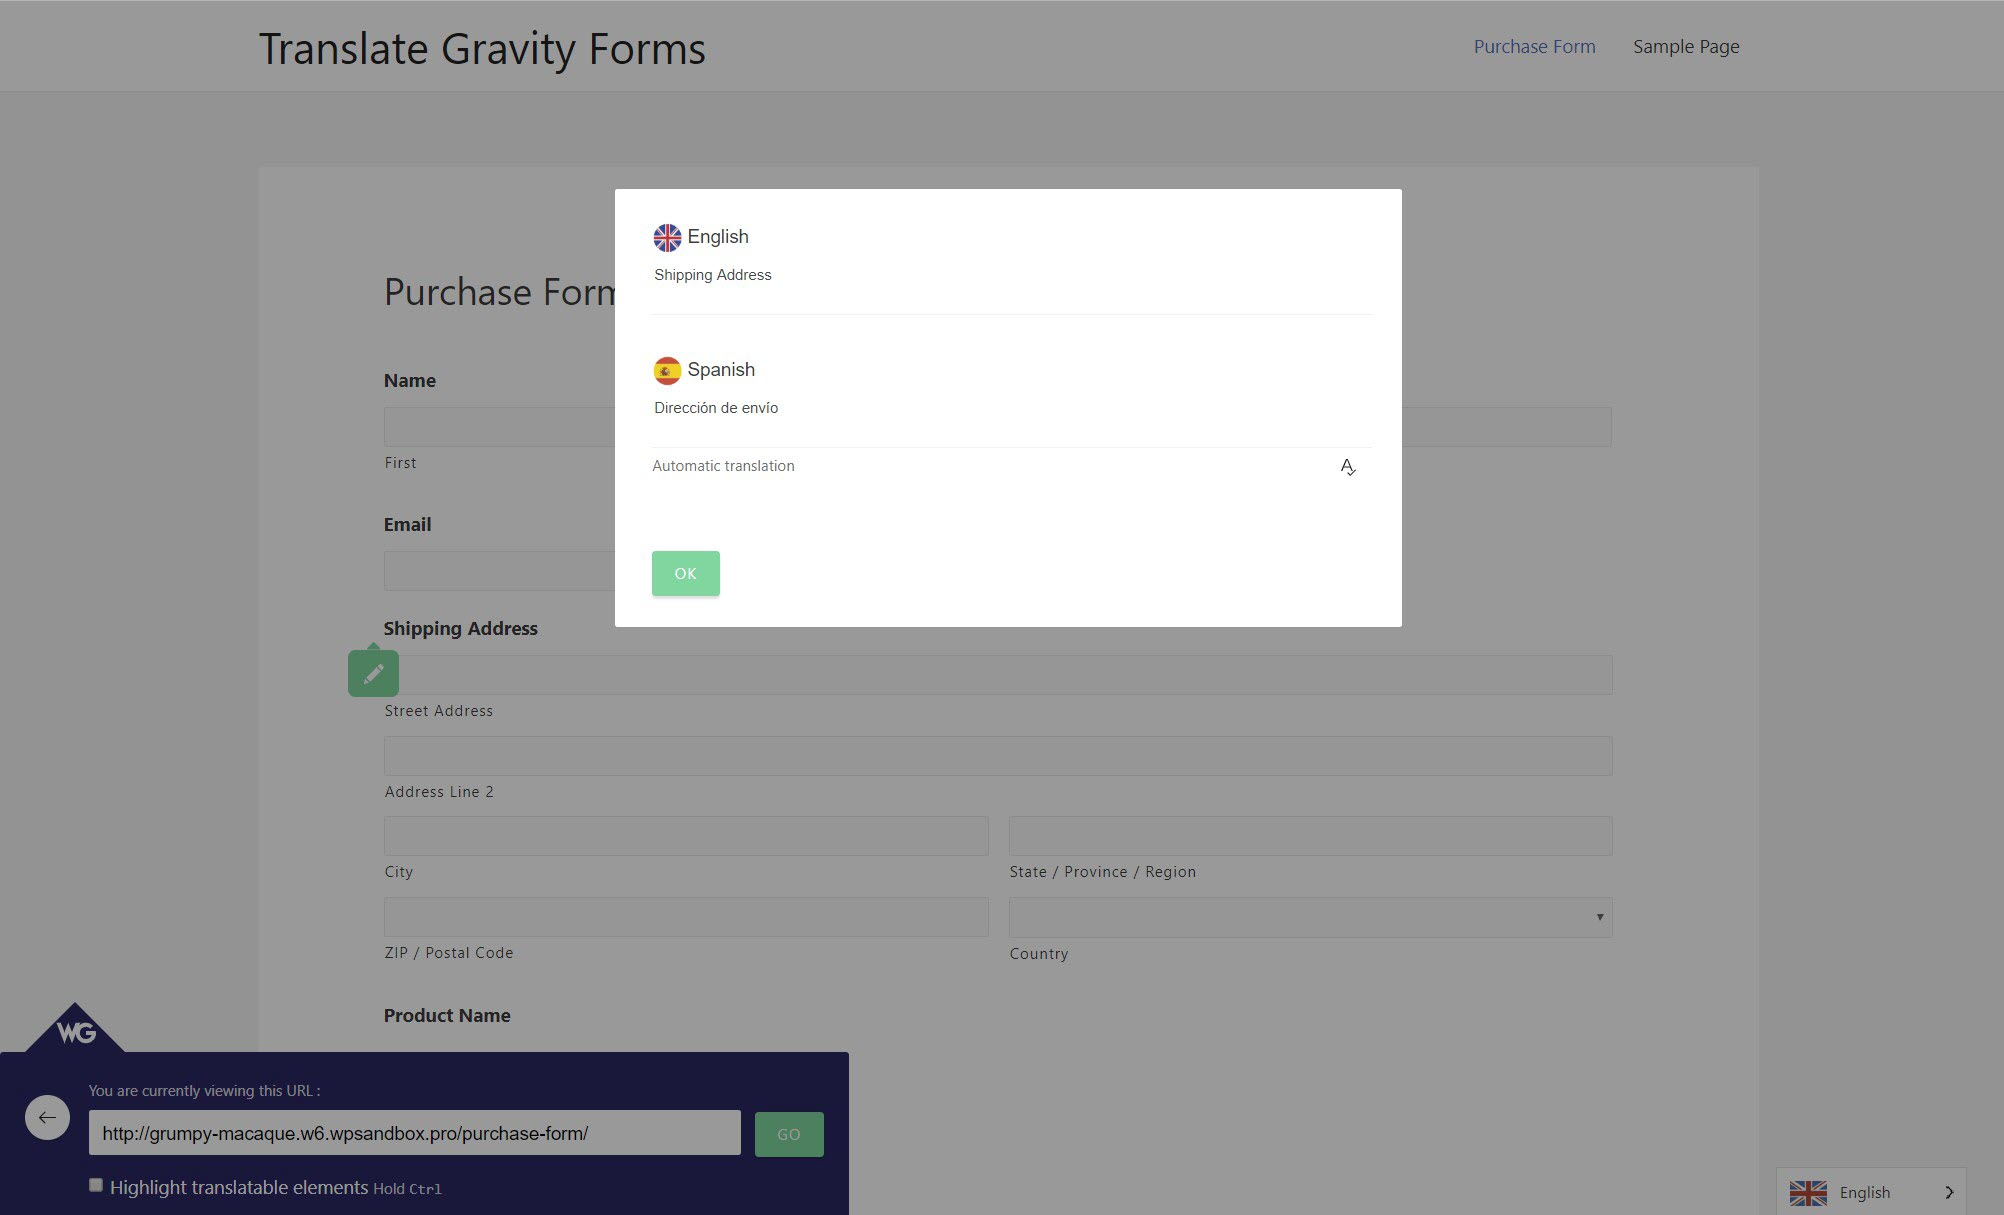
In the visual editor, you’ll see your site as if you were browsing normally. Only now, when you hover over a form field or any other text, you get the option to click a green pencil icon to open that text string’s translation:
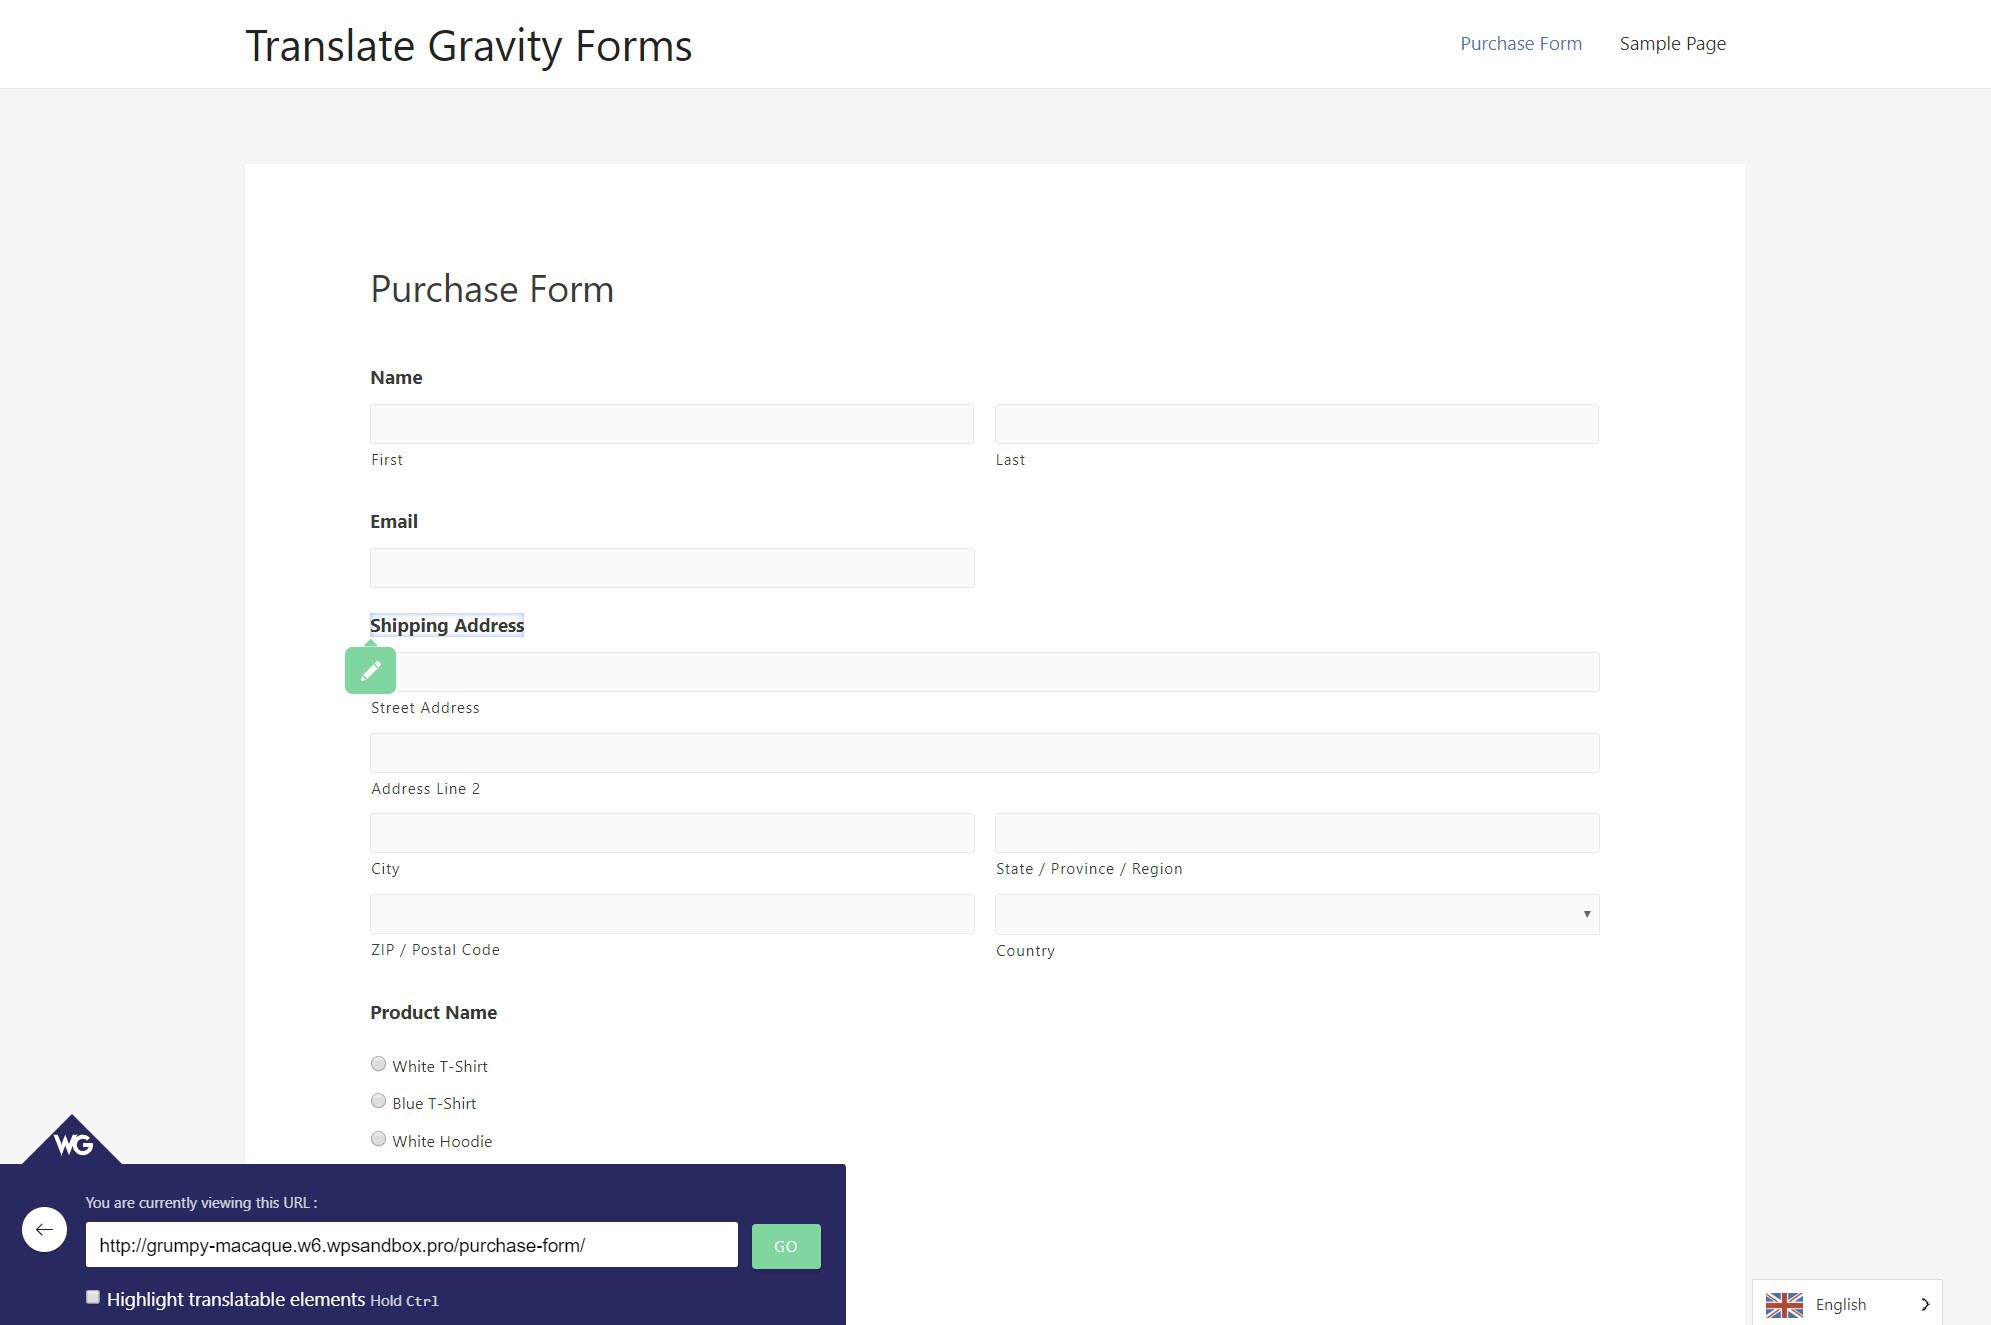
When you click that translation, you can edit the translation in a popup:
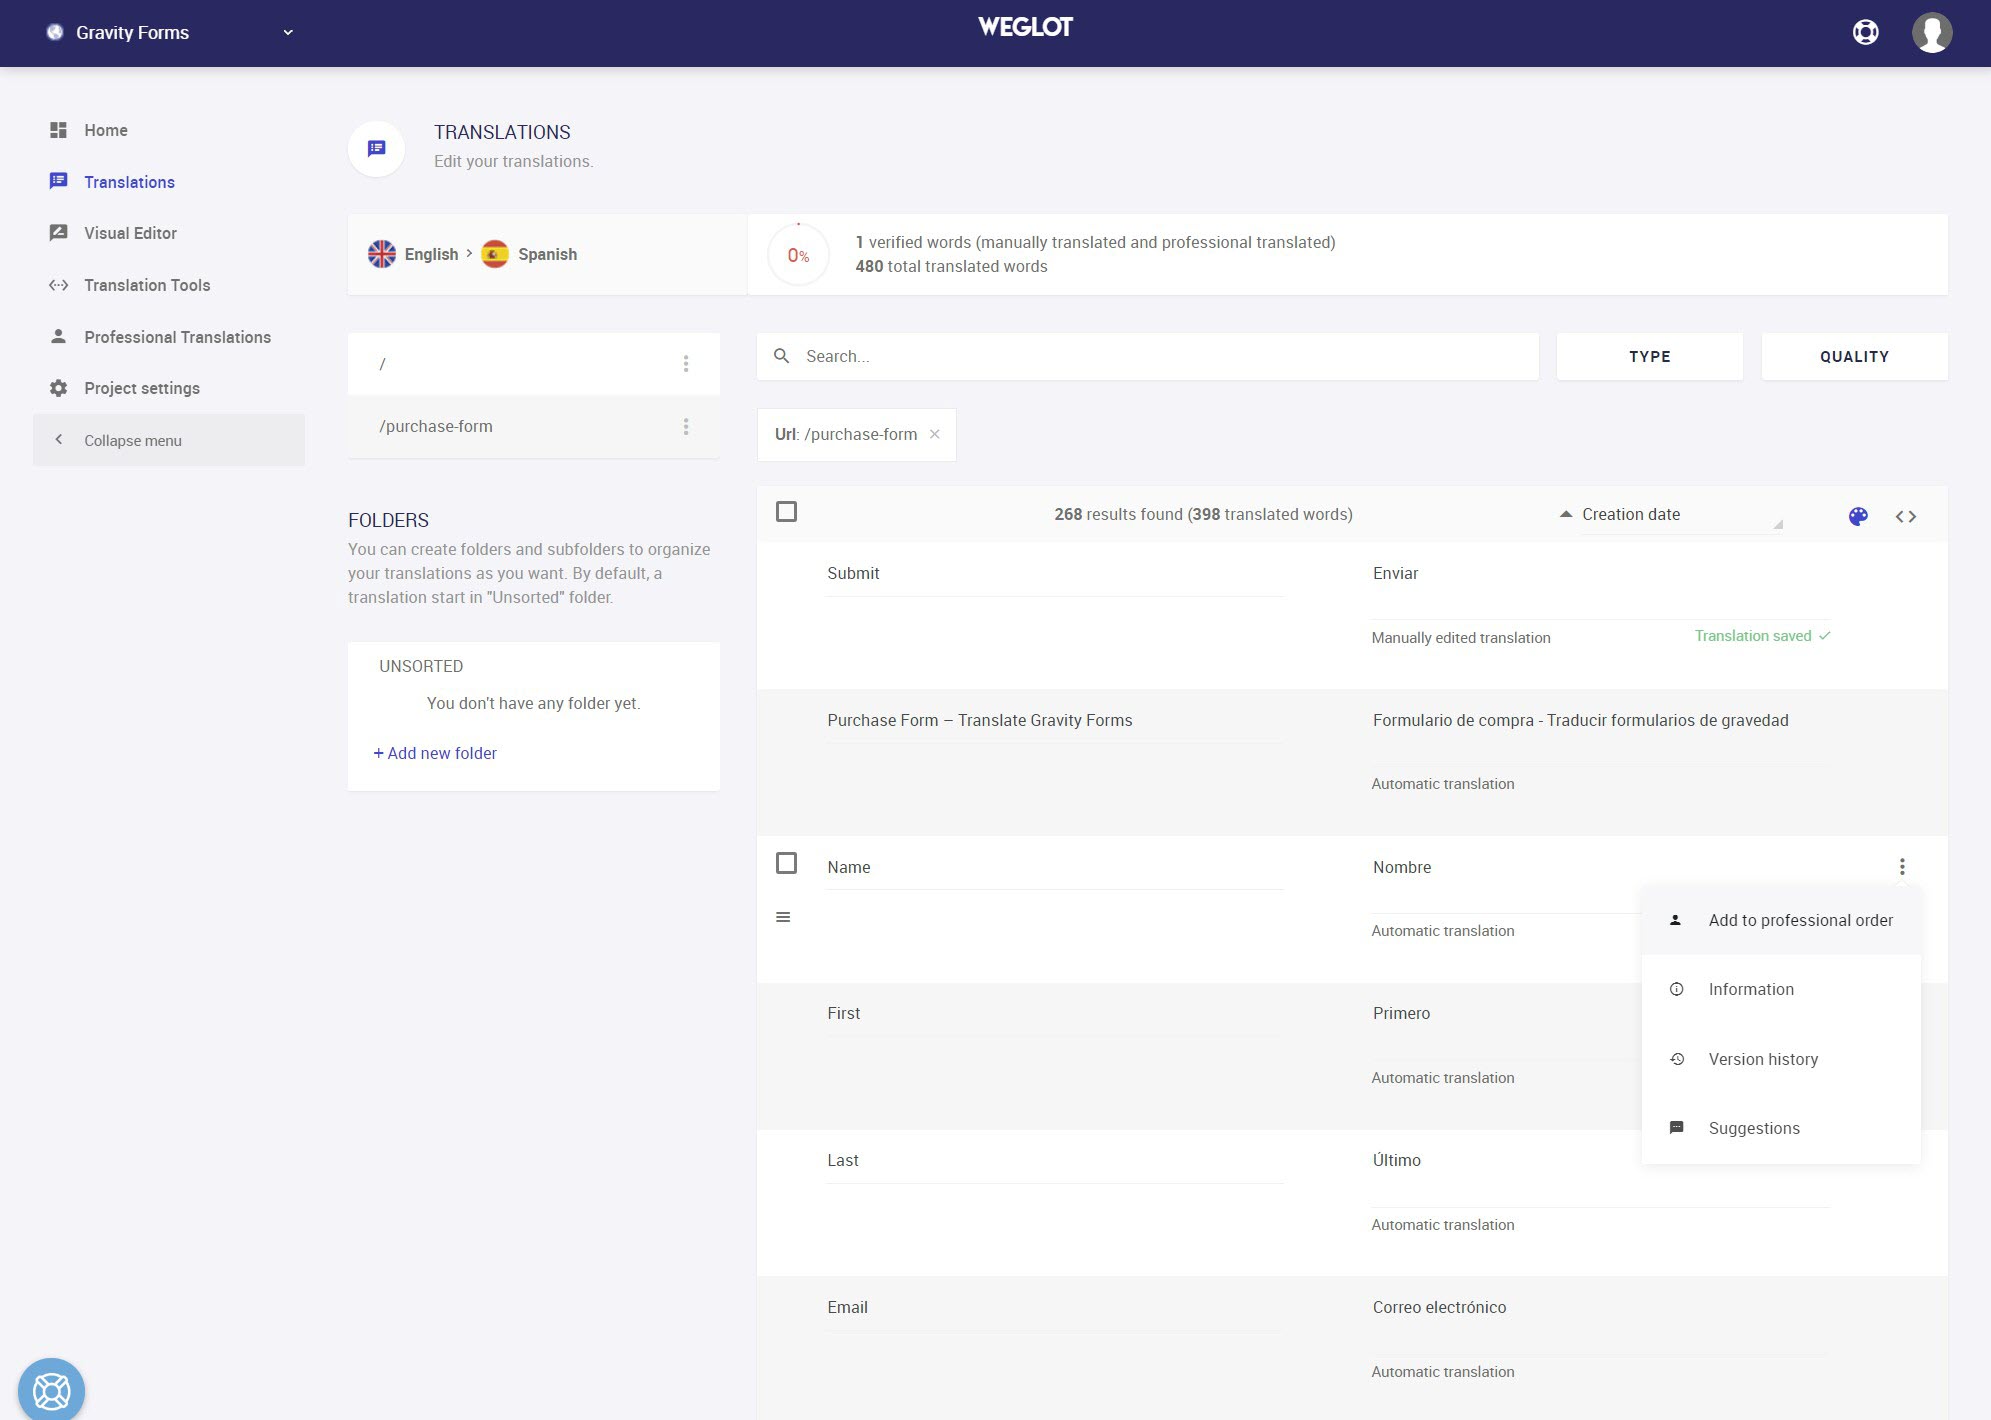
If you want to manage your translations on the backend, you can also use the side-by-side list editor.
There, you’ll see the original text on the left and the translated version on the right. To edit a translation, all you do is click and type.
You can also use the drop-down to outsource translations directly to professional translation services:
Final Thoughts on How to Create a Multilingual WordPress Form
With Gravity Forms, you can create powerful, flexible WordPress forms for nearly any use case.
Then, you can use Weglot to make those powerful forms available to visitors in different languages.
By translating your WordPress website and forms, you’ll be able to:
- Offer an improved experience for your multilingual visitors.
- Reach more visitors by ranking for new queries in Google.
- Improve your sales numbers if you’re using Gravity Forms to sell online.
Ready to get started? Make your WordPress site multilingual and start connecting with new visitors today.

If you want to keep up-to-date with what’s happening on the blog sign up for the Gravity Forms newsletter!
