This Month’s Featured Add-On… Help Scout

No matter how good your products or services are, one thing is certain – if your customer support is non-existent or lackluster, you will end up losing customers. That’s why investing in great customer service is a key strategy when it comes to ensuring continual growth for your business.
Great customer service not only helps you to retain existing customers, but it can also help you bring in new customers via word-of-mouth marketing. But how can you deliver high-quality customer service and, more importantly, how can Gravity Forms help you in that endeavor?
That’s what we’ll go over in this post…
How to Deliver High Quality Customer Service
There are many ways to deliver high-quality customer service to your customers. Here are our top five tips that will help you delight your customers.
1. Respond In A Timely Fashion
Customers don’t like to wait. That’s why it’s important to respond to their support requests as soon as possible. It’s a good idea to set up an automatic response that notifies them that their support request has been received and let them know when they can expect a reply.
2. Know Your Customers
Part of providing great customer service involves knowing your customers and what they want. This allows you to provide personalized support which in turn results in happy customers. A few ways to get to know your customers better include:
- Engaging in a conversation with them on social media
- Listening to their feedback
- Conducting customer surveys
3. Know Your Product
Aside from knowing your customers, you also need to know your product. This will allow you to quickly find answers, point your customers to the right resources, and provide answers and solutions to their requests faster.
4. Have A Positive Attitude
A friendly, positive attitude will go a long way towards making your customers feel appreciated. While it’s important to be professional, don’t be afraid to use a more personal tone in your communications. If the conversation is getting tense, or more explanation is needed than appropriate for an email, you can also consider offering video call to put your customers at ease.
5. Use A Top Notch Customer Service Solution
Our last tip is to use an effective customer service solution to manage and process your customer support requests. A platform like Help Scout can help you organize your customer information and provide users with a timely response and resources to help resolve their issues.
What Is Help Scout?

Help Scout is an all-in-one customer service platform that streamlines your customer support requests. It allows you to manage all your customer support tickets in a shared inbox as well as configure separate mailboxes for different teams or issues.
Top features include:
- See all customer data, previous conversations, and app activity alongside every support request for more personalized support.
- Keep track of your team’s volume by channel, busiest hours, and trending topics among your customers.
- Provide live chat support to your customers straight from your website.
- The ability to create a knowledge base for your customers to help reduce your customer support requests.
- Integrate Help Scout with other tools you use in your business such as Slack, Jira, HubSpot, MailChimp, and, importantly, Gravity Forms.
Help Scout is, without a doubt, one of the best customer service platforms for small businesses, fast-growing startups and non-profit organizations that have a customer-centric approach. Let’s now find out about Gravity Forms integration with this popular solution…
Gravity Forms Help Scout Add-On
The Help Scout Add-On for Gravity Forms makes it easy to integrate your Help Scout account with your WordPress website and Gravity Forms. Once activated, you can accept a customer support request on your website through the appropriate form and then create a corresponding customer support ticket directly in Help Scout.
Key features include:
- Automatically assign each new ticket to a specific mailbox in Help Scout.
- Assign each ticket to a specific user in Help Scout automatically.
- Define and customize the content used to create each ticket using merge tags.
- Update customer information in the customer’s Help Scout profile when a form is submitted based on the email address.
All of these features can help you improve your customer workflows once the ticket arrives in Help Scout. You won’t have to manually create each support ticket and the tickets will get assigned to correct mailboxes and users. Consequently, your support team can get straight to work instead of wasting time hunting down relevant information.
In addition to that, you can make use of the built-in conditional logic feature within Gravity Forms, allowing you to define conditions on form submissions and create a new Help Scout ticket only if those conditions are met. This gives you more control over the data that’s sent to Help Scout and ensures only legit submissions are added to your support queue.
How To Set Up Help Scout Add-On
Now that you know what features the Help Scout Add-On offers, let’s take a look at how you can set it up to improve and streamline your online customer service. If you don’t already have Gravity Forms installed, keep in mind that the Help Scout Add-On is available with both Pro and Elite licenses.
1. Create Your Form
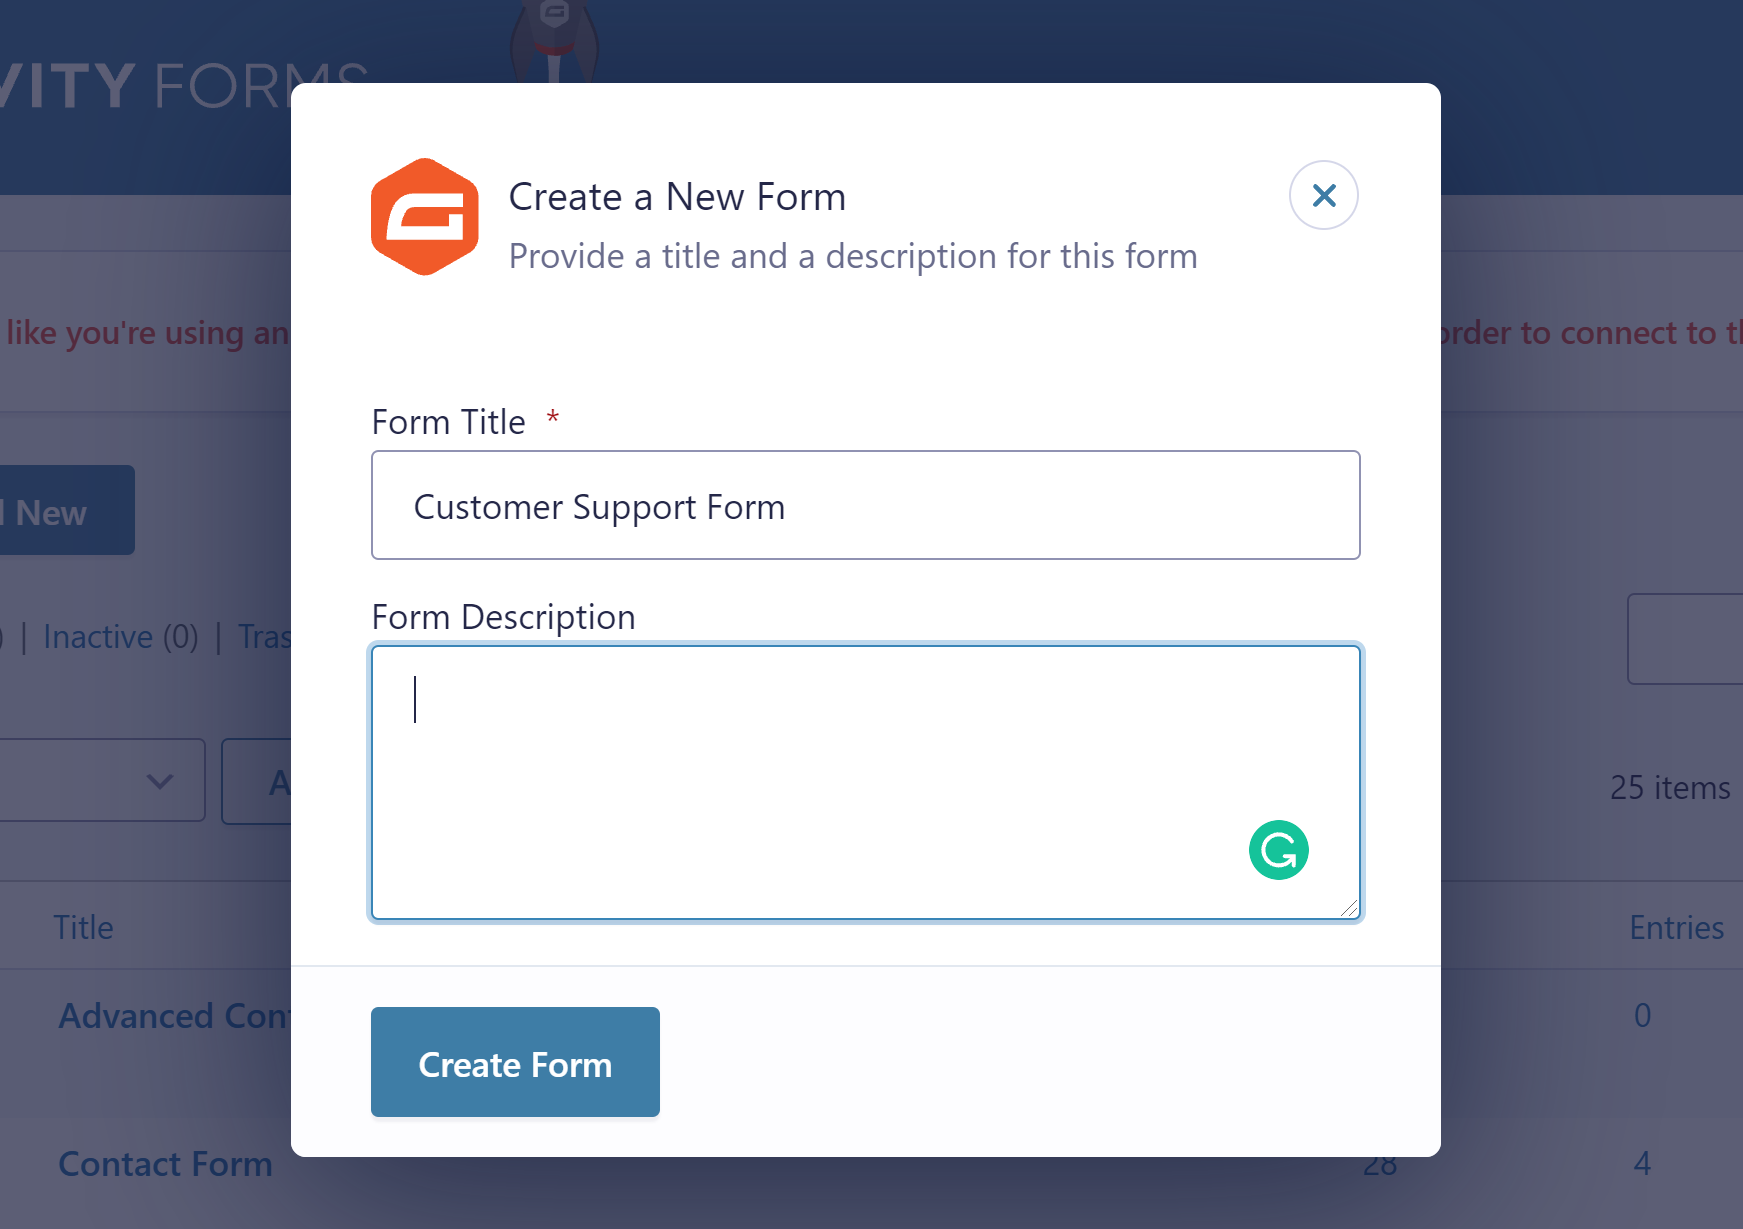
The first step is to create a form for your customer service requests. In your WordPress dashboard, go to Forms > New Form. Give it a name and press Create Form.
Then, add the necessary form fields to your form. In this example, we’ll add the following fields:
- Name and Email — so you know which customer it is, can process their request by finding relevant information, and update customer profile if necessary.
- Paragraph Text — so they can describe their request.
- File Upload Field — so they attach necessary documents, screenshots, etc. It’s a good idea to allow multiple file uploads so they can upload multiple files at once.
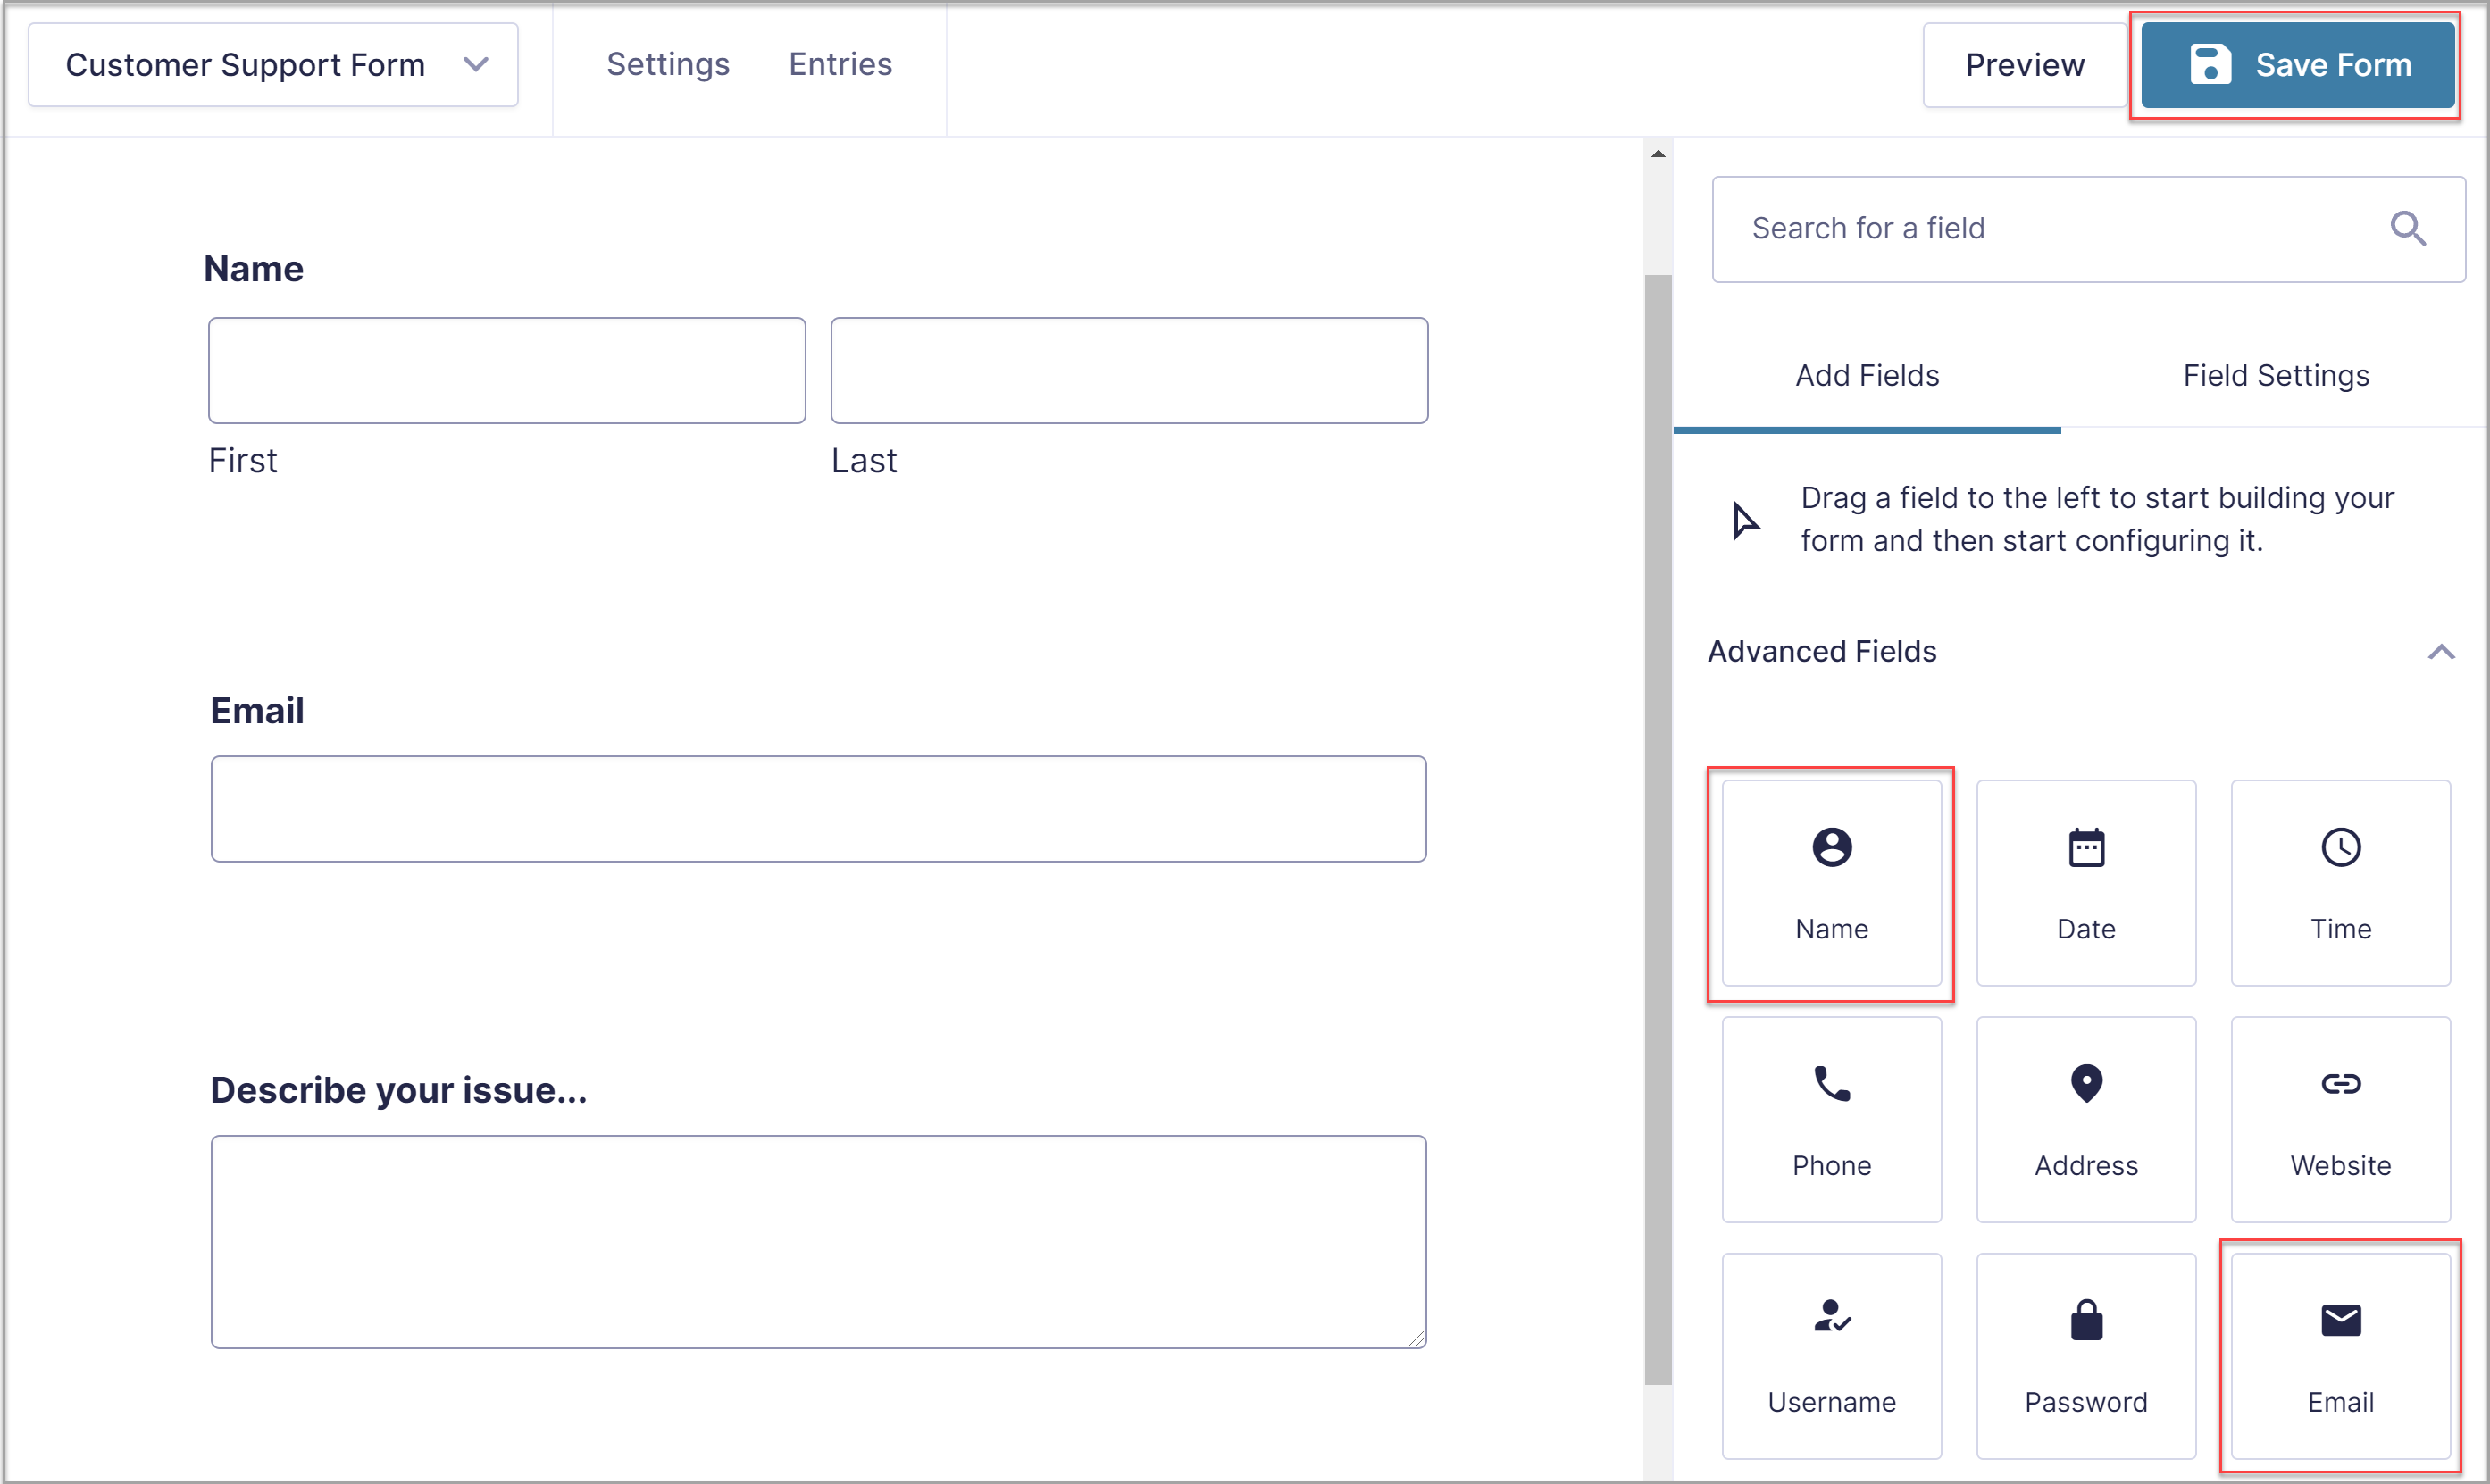
When you’re done adding the fields to your form, hit the Save Form button.
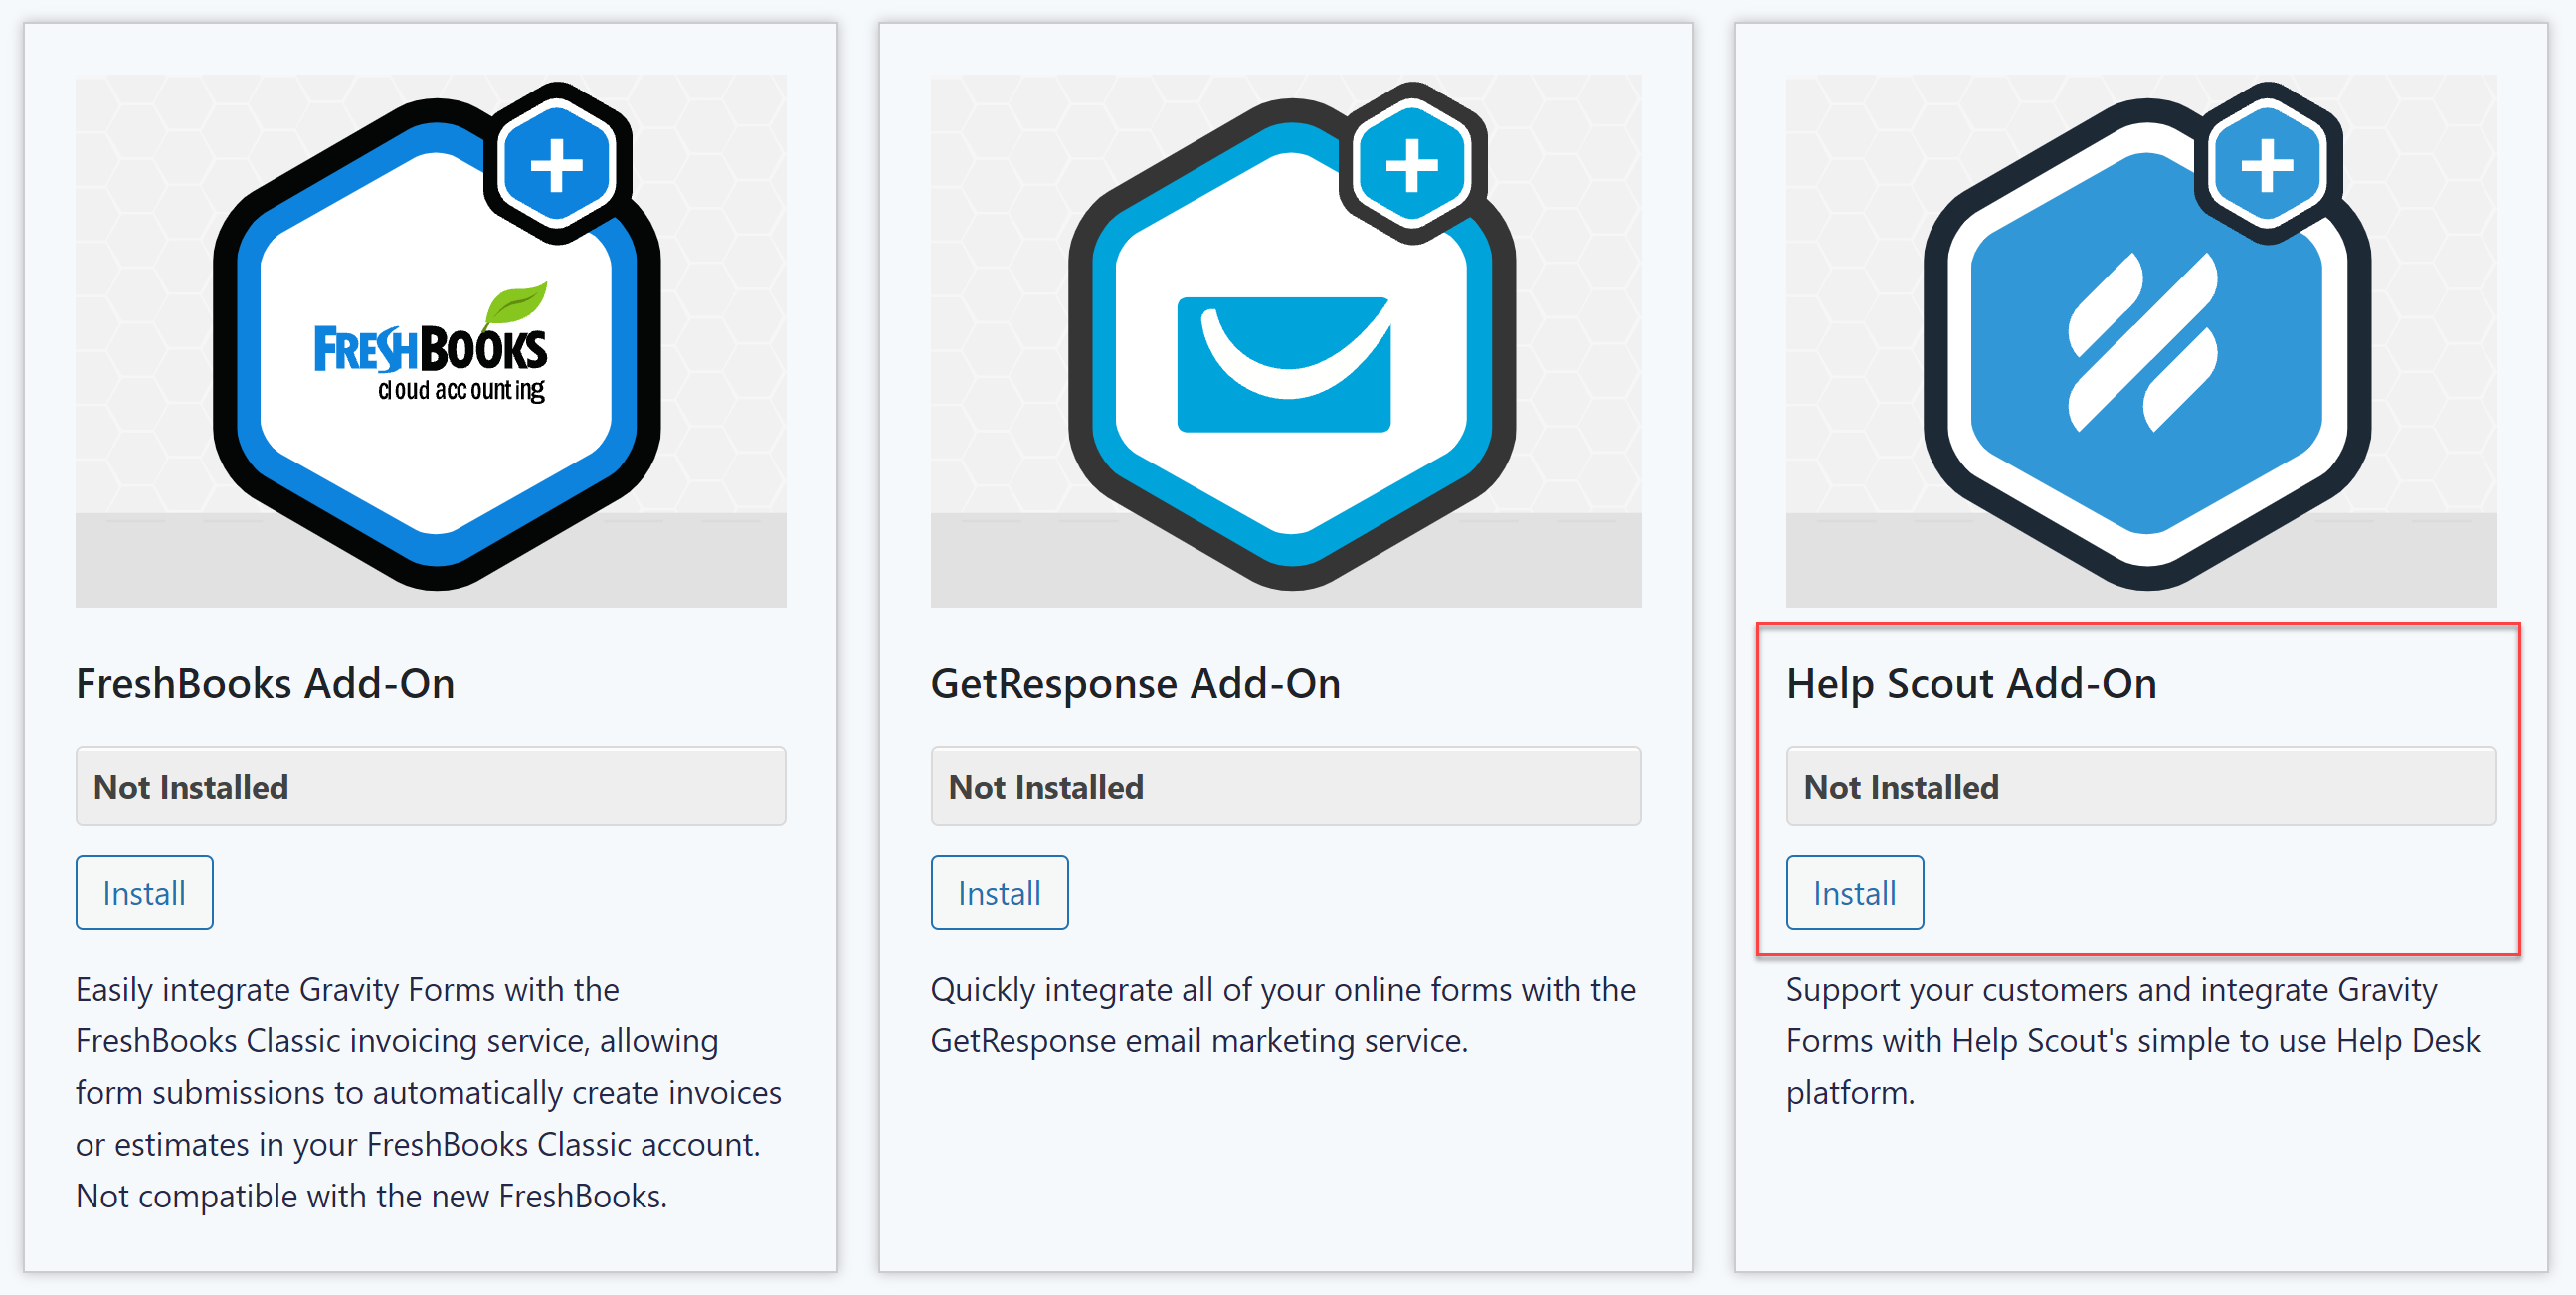
2. Install the Help Scout Add-On
Once you’ve created the form, go to Forms > Add-Ons. Scroll down to locate the Help Scout Add-On and press on Install > Activate.
Then, go to Forms > Settings > Help Scout. You’ll need to connect your Help Scout account so on the Help Scout page, click the Authorize button to authorize the connection.
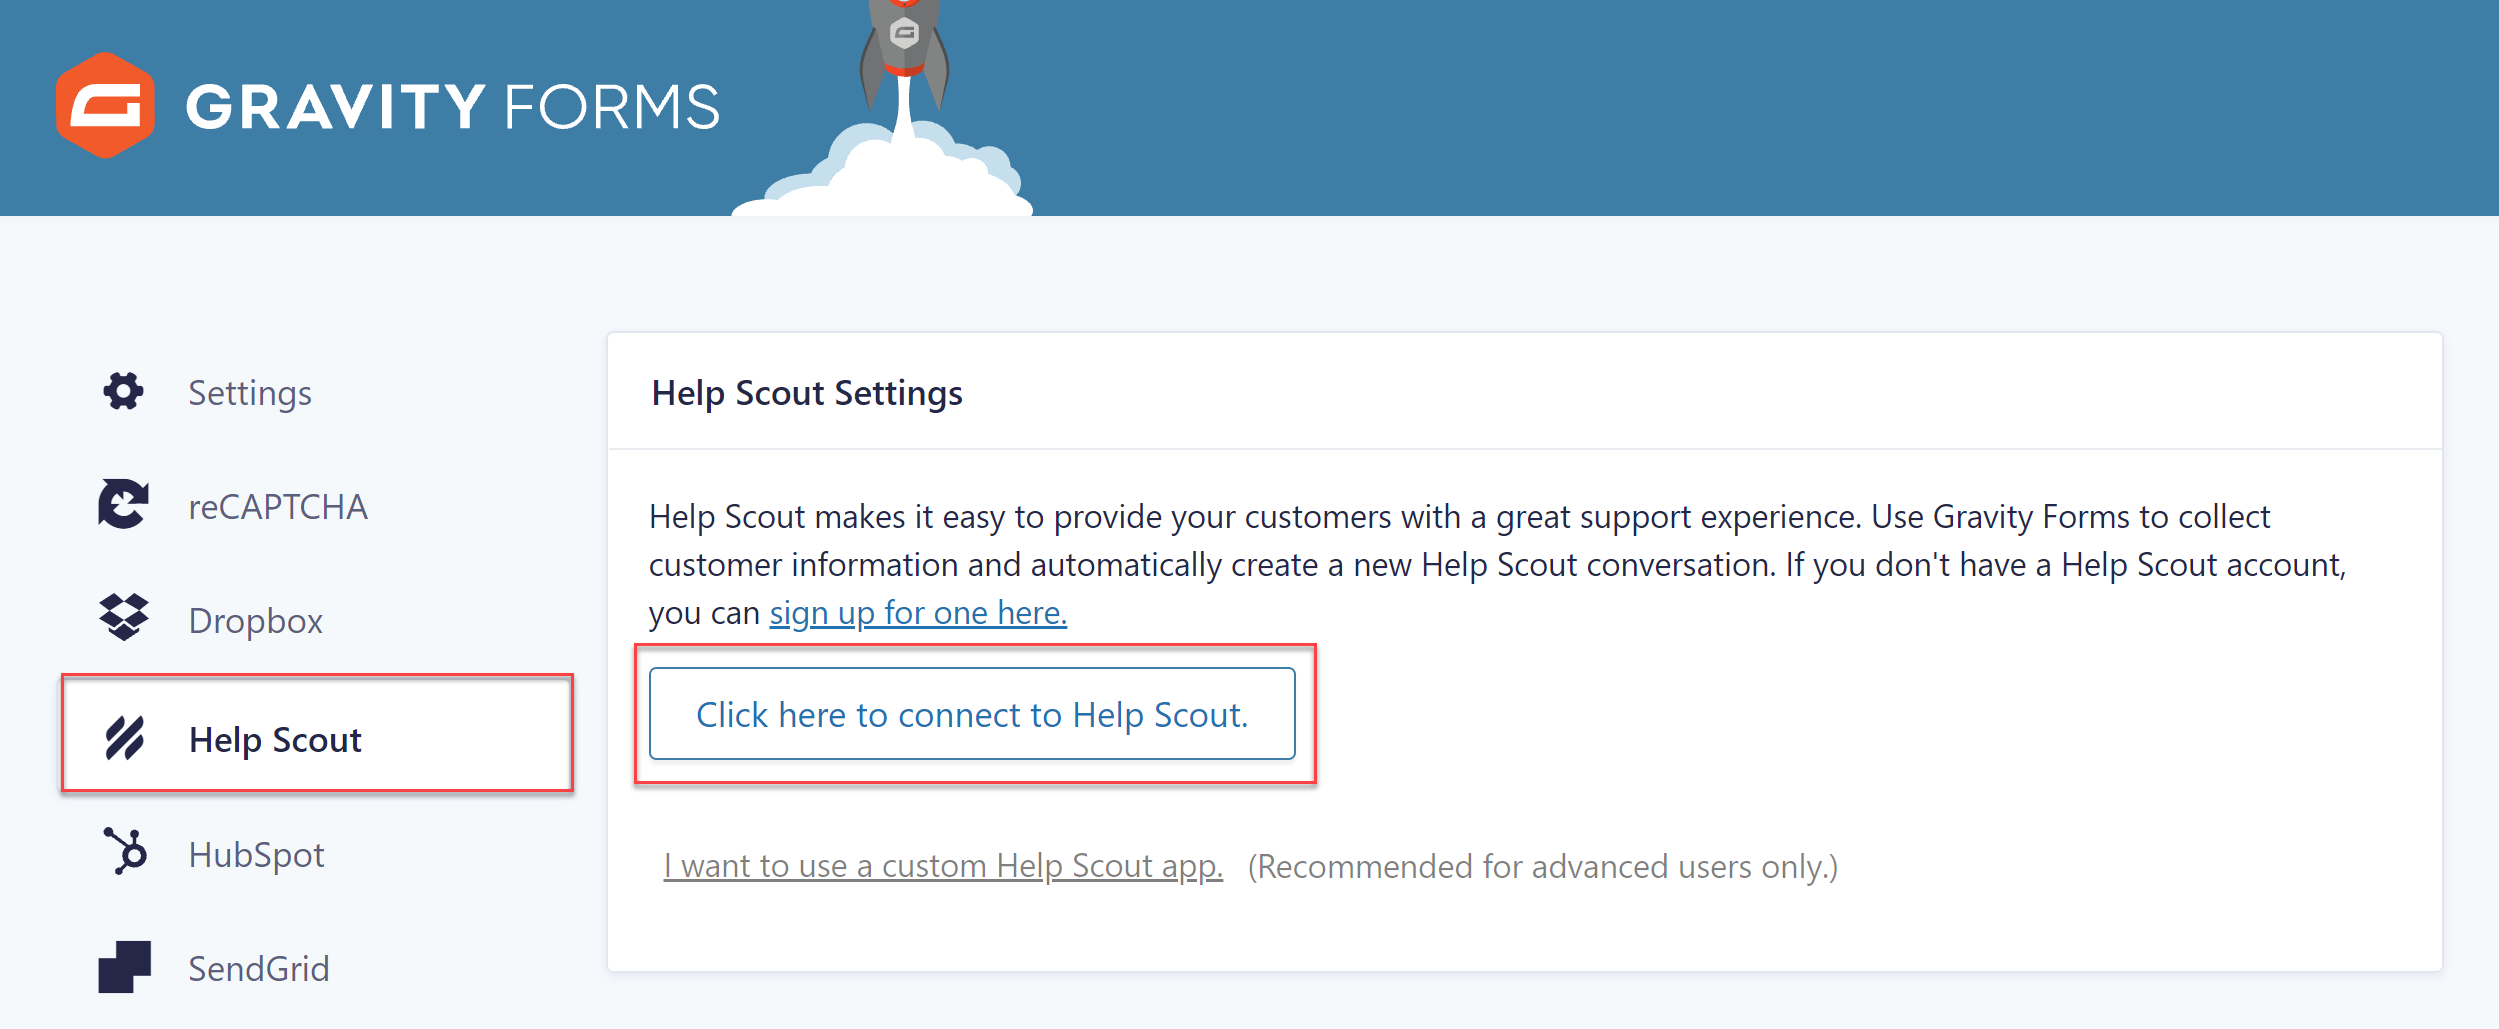
Once you have successfully authenticated your account, you will see a green checkmark next to Authenticated with Help Scout. You can then proceed to the next step.
3. Create and Configure a Help Scout Feed
Go to Forms and select the Customer Support form you created in Step 1. Hover over Settings and click on Help Scout. Then click Add New to create a new feed – you’ll now see the Help Scout feed settings screen where you can configure the behavior of the feed.
You’ll need to enter a name for your feed and then select the destination mailbox within your Help Scout account where you’d like the form submissions to be sent. You can also assign a specific Help Scout user to manage the tickets as well as map out the form fields to the customer information in Help Scout.
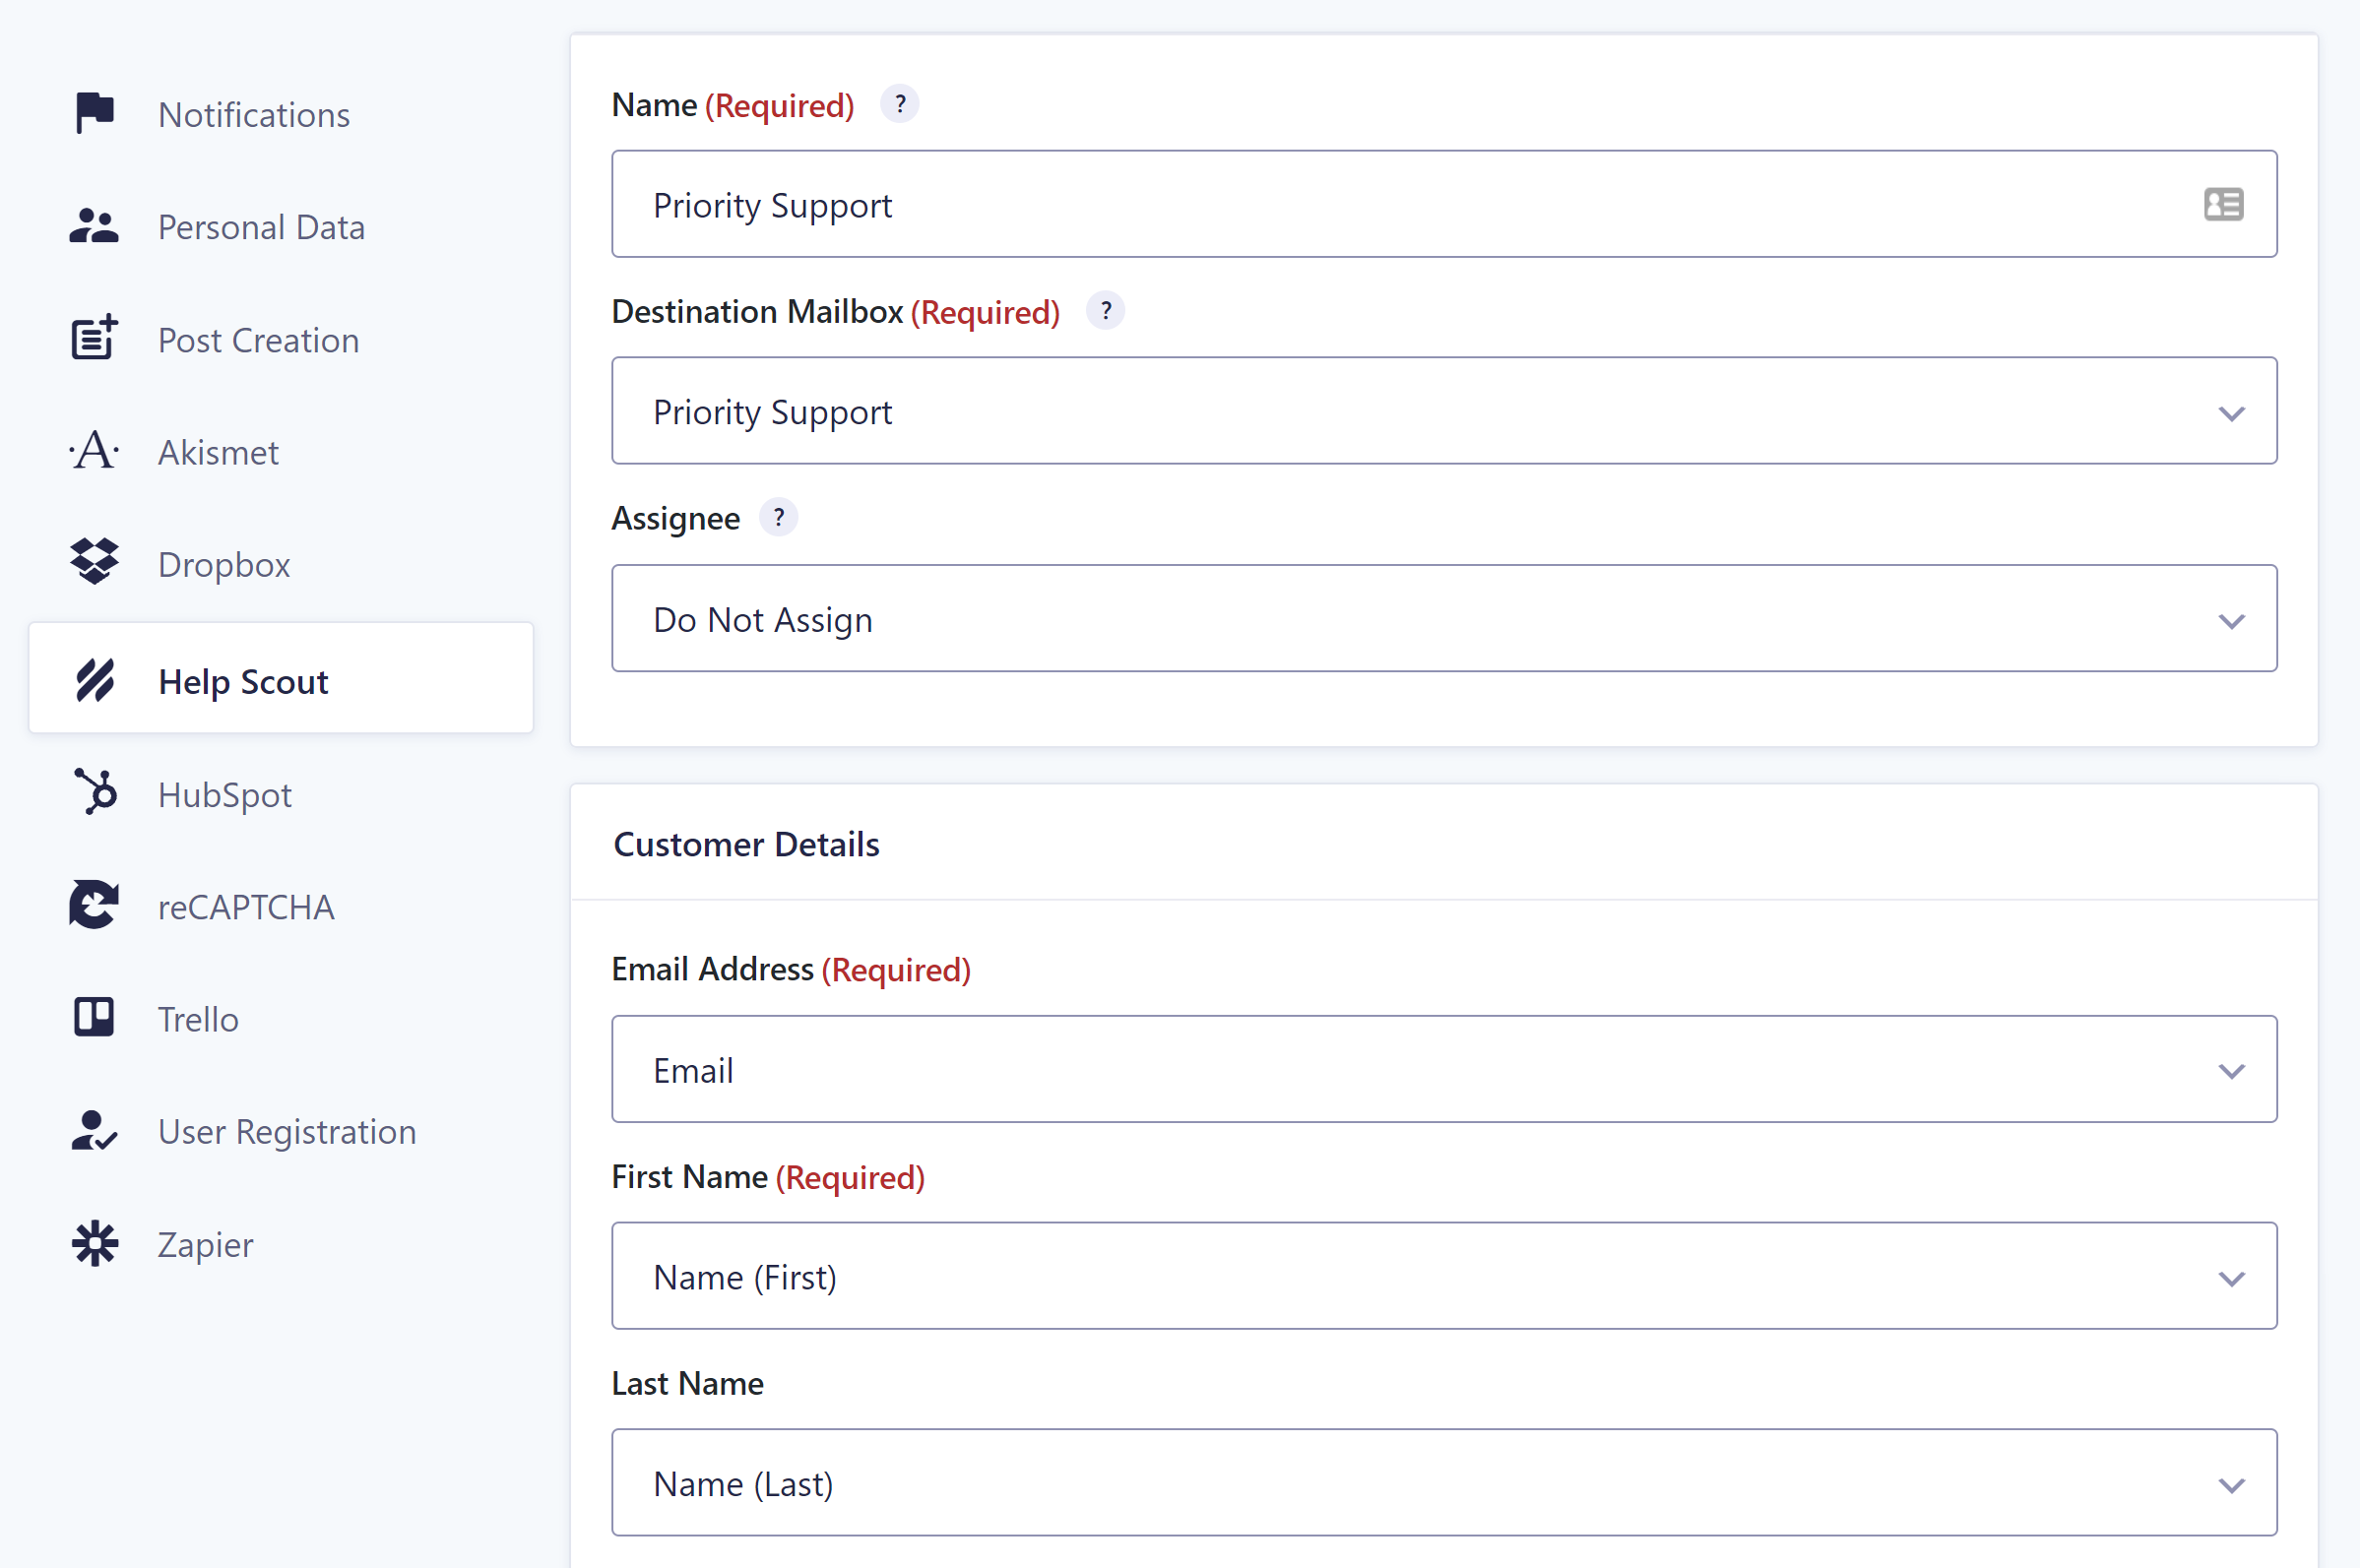
Use the Message Details section to format the conversation that will be created in Help Scout. You can use merge tags, include a CC, and add any attachments uploaded to the form.
The Help Scout Add-On also supports updating customer information based on the email address in the email field. For example, you can replace the first name/last name with any new value for a customer match as well as append a phone number if you added the phone number field.
Lastly, within the feed settings you can configure conditional logic settings. For example, you can configure the form to pass information only if a certain field is filled out. You can set multiple conditions and configure the add-on to send the data if any or all of the conditions are true.
When you’re done configuring the add-on, click Save Settings. Your form is now ready to go live!
Ready To Improve Your Customer Service With Gravity Forms and the Help Scout Add-On?
Stellar customer service is crucial if you want to maintain a good brand reputation as well as keep customer churn to a minimum. If you want to learn more about the Help Scout Add-On, the following resources will be helpful:
- Grvaity Forms Help Scout Add-On
- Help Scout Add-On Documentaiton
- Creating a Feed for the Help Scout Add-On
Don’t have Gravity Forms or the Help Scout Add-On yet? No worries! Simply start with a free personalized demo of Gravity Forms and explore all the features our plugin has to offer.
Use the drag and drop builder to create a form from scratch or take advantage of one of our premade form templates to see what kind of forms can be built with Gravity Forms. And don’t forget to check out all the Gravity Forms Add-Ons to see how you can extend your forms even more.
Already sold on using Gravity Forms? Purchase our premium WordPress form plugin today!

If you want to keep up-to-date with what’s happening on the blog sign up for the Gravity Forms newsletter!