Top Tips for Developers: Save Time, Become More Productive

As web developers, we spend much of our time doing tasks that can’t be labeled as “development”, things that could be automated or can be done in a much easier way with the help of a few useful tools.
In this article, I’ll share some tips and tricks that will make you more productive, and reduce the time you spend on repetitive boring tasks.
Let’s jump in…
You don’t need to use console.log to debug your JS!
If you are familiar with the concept of debugging, skip this paragraph.
If you’re not, debugging involves the pausing of the execution of your app at a certain point (called a breakpoint) where you can evaluate the state of the code in runtime, evaluate all the variables’ values, and see the timeline of execution from the app’s starting point until the set breakpoint. This is much better than logging your variables because it gives you a detailed overview of the whole process at this exact point, not just the value of some variables.
We all know that moment of “what in the world are you doing JavaScript?!”. Your code is perfect but it is not doing what is supposed to! So you go through some of the console.log here and there to follow what is going on – the end result is polluted code, slow debugging, forgotten console.log in production, etc. It’s a pain!
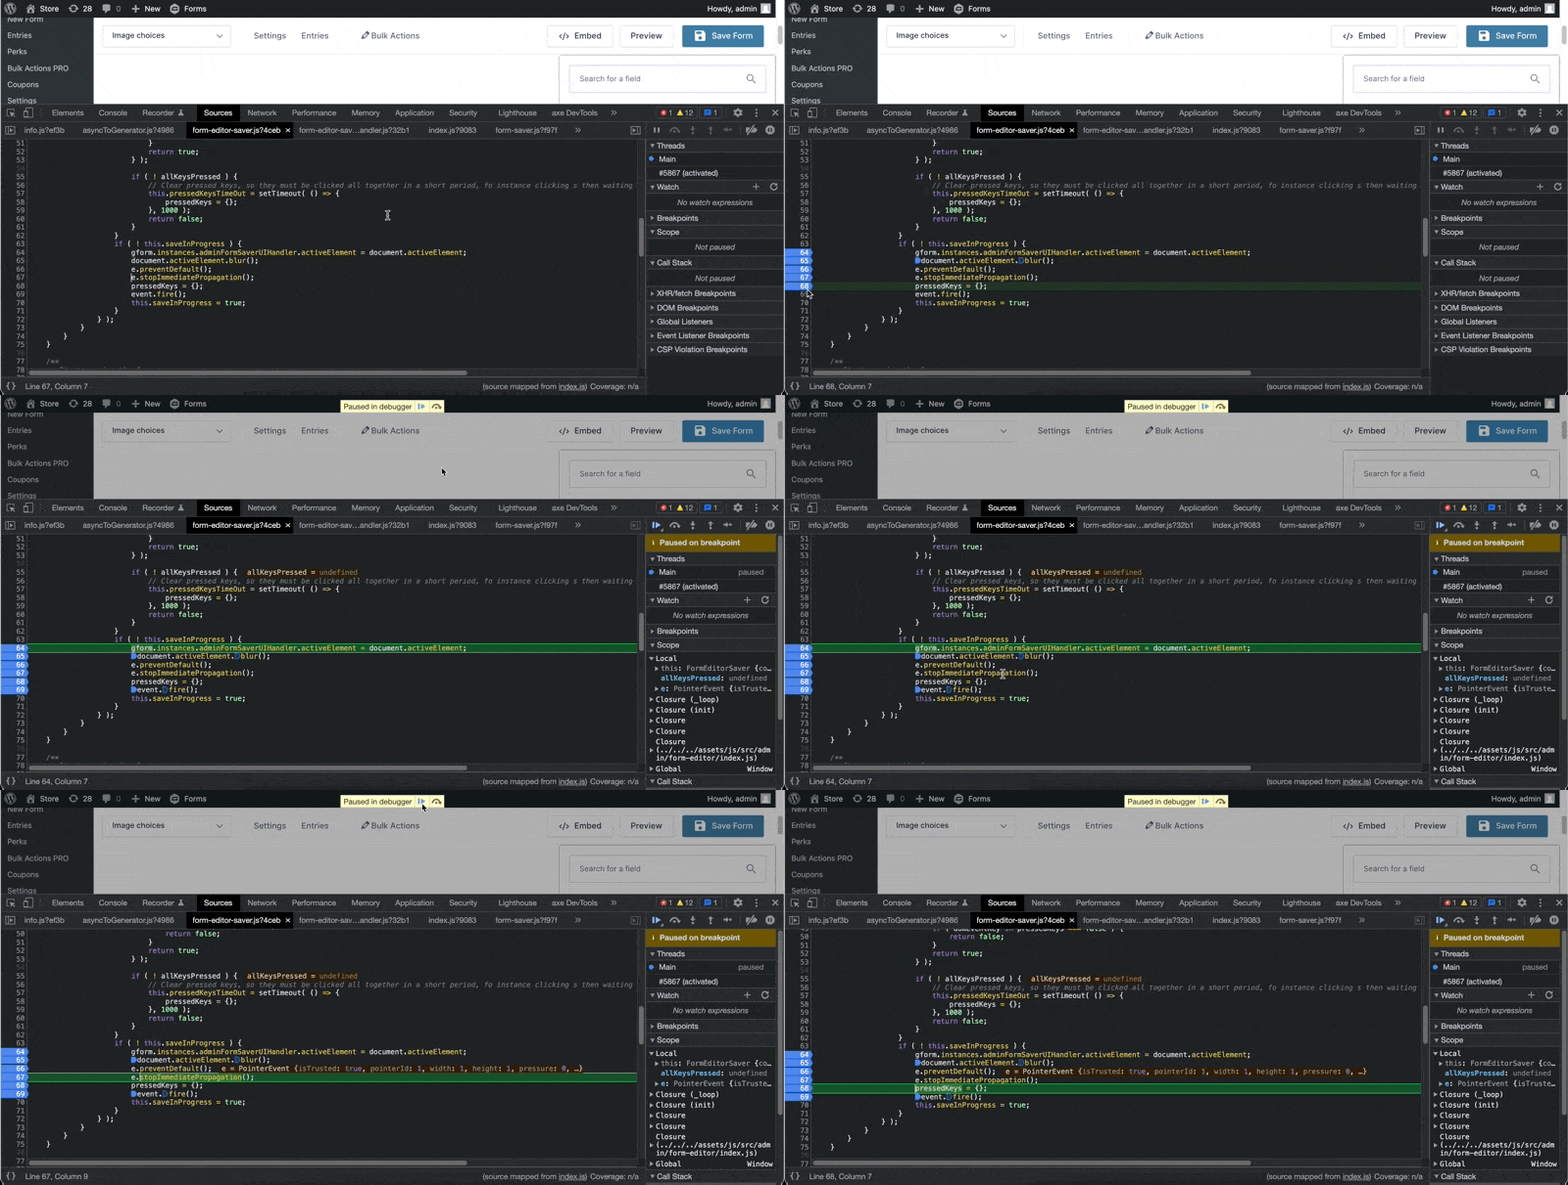
Instead of all this hassle, you can use your browser’s developer tools to debug your JS code in the same way as you use Xdebug and your IDE to debug PHP. Let’s take a look at this process…
- Open your app in the browser, press f12 to open the developer tools, for Chrome click on sources, for Firefox click on the debugger.
- Find your script in the files tree at the left and click on it.
- Choose where you want to add a breakpoint. To add one, click on the line number.
- Refresh the page.
- You can now see that the code pauses at each breakpoint you set, and on the right side, you will find information about the current state of the code, you can also pause your pointer at any variable and all its information will be displayed.

You don’t need to set up anything special to debug your JS, just set breakpoints and run your app!
Git is really your friend!
What if you made a few changes to one of your files, but decided that you want to commit only a couple of them, and reset the rest?
If you don’t know about “git add -p” you probably will show the diff, and manually delete/undo the changes you don’t want to commit, but this is far from ideal, and is prone to many mistakes.
git add -p comes to the rescue.
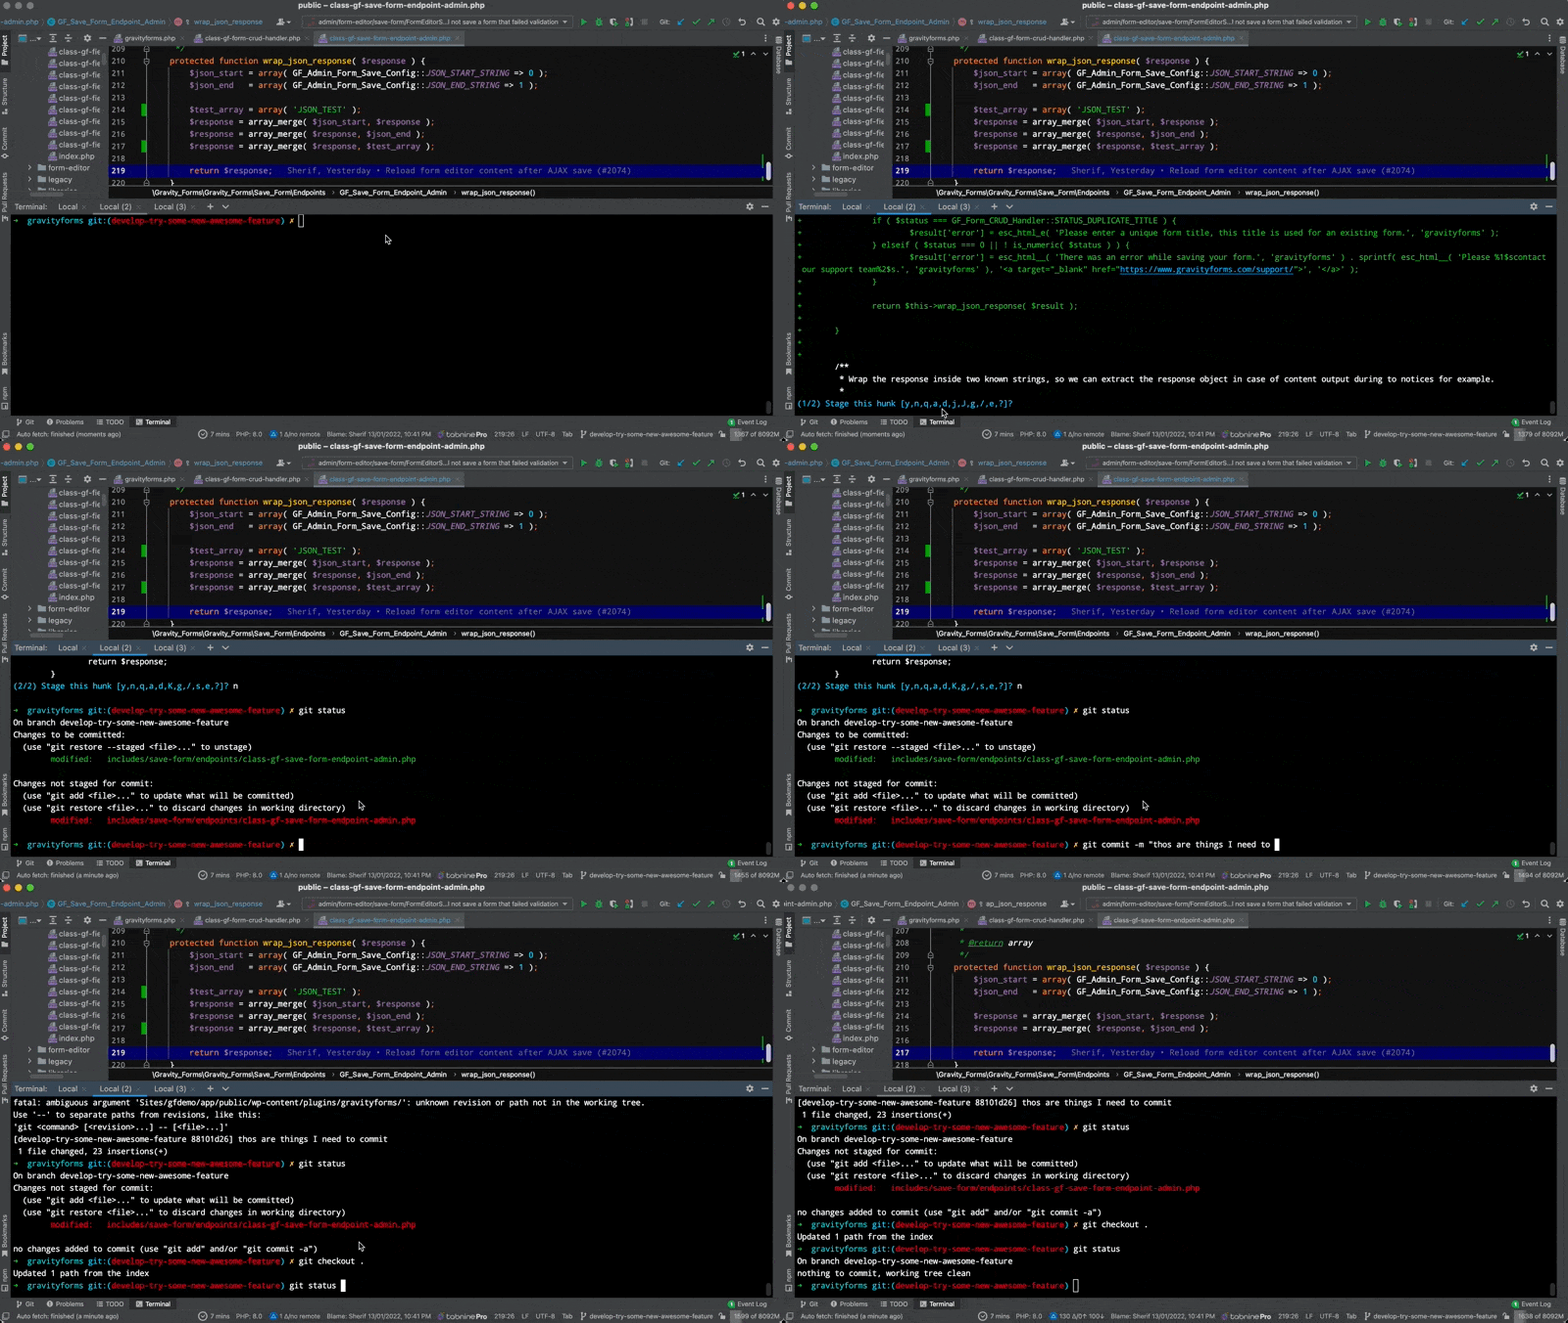
The add parameter lets you add only the changes you want to the stage, even if all the changes are within one file – it basically shows a prompt that displays each change on its own and asks you if you want to add it or not.

See what happened? Git showed me each change and asked me to commit or skip, I added only what I needed, then reset all the other unnecessary changes – sweet!
Conflicts, we all hate them – IDEs don’t!
Now is the time to combine the awesomeness of your work with the craziness of another developer’s work. Git failed you, and your life is full of conflicts, and you are about to break down in tears, thinking that fixing these conflicts, is, on its own, a huge task. We have all been there!
I used to go through conflicted files, one by one, and try to fix things manually.
Because you have three versions of the same conflicted file – your version, the other developer’s version, and the final version which is the combination of the previous two versions – it is very hard to visualize all three versions mentally.
Most modern IDEs have a resolve conflict tool, that puts all three versions in 3 columns in one window, yours on the left, the other developers on the right, and in the middle the version where you will combine both, highlighting the differences between both versions. Here you can remove, edit and add blocks of code, using mouse clicks, without writing anything.
Yes, it is that simple, don’t overload your brain with visualizing everything anymore, and most importantly, don’t break down in tears!
Stay focused with Pomodoro
This one has nothing to do with coding, but it has a massive positive effect on your productivity – it is a tool that helps you stay focused for as long as you can. The Pomodoro technique, which is backed by scientific evidence, helps you organize your time into blocks. 25 minutes of focus, 5 minutes break, and after a number of 25 minute blocks, you get a long break of 15 minutes.
You can find Pomodoro timers by just looking up “Pomodoro timer”. Here is how it works…
- You start the timer, cut all the distractions around you, and focus only on the task at hand for 25 minutes.
- Once the timer is up, take a 5 minute break. During this break don’t use your phone for endless scrolling, just try to relax and maybe stretch your back.
- Once the timer is up for the 5 minutes, start another 25 minutes block.
- If you wanted to stay focused on a task for more than 25 minutes, reset the timer, then take a long break of 15 minutes.
This technique might look very simple, but once you get used to it, your productivity will skyrocket.
Take your terminal to the next level with Oh My Zsh
This handy tool is a framework for managing your Zsh configuration. It is basically your terminal on steroids, you will be amazed by how much time you will save by using this tool!
It comes with a myriad of plugins that will make your terminal experience much faster and smoother. Here are some examples…
- Autocomplete anything, you don’t have to remember the exact name of a branch to switch to, just type some letters, press tab and it will show you the branch.
- Shorthands for most commands you regularly type, things like “gl” instead of git pull. You can find the full list of git shorthands here.
- Color themes – your terminal won’t look boring anymore, Oh My Zh has many color themes that you can use.
- Move between recently visited directories with a few keystrokes.
These are just some of the features that I use regularly but you can find many other features here.
Finally, some quick tips and tricks that will save you even more time!
Use GitToolBox to get instant information about the code you are viewing.
If PHPStorm is your IDE of choice then you can install an amazing plugin called GitToolBox. It gives you instant Git information about the code you are working on, for example, it shows the current line blame, so you can easily know which commit and by which user was this line changed.
It also gives you many great features that will make anything Git related much easier.
Use Git auto-correct.
It is such an annoyance when you write a long Git command just to find out that you missed or misplaced a letter. But did you know that Git has an auto correct setting? Simply type:
git config –global help.autoCorrect 1
In your terminal, this will make Git auto-correct your misspelled commands. For example, try writing git stats instead of git status – it will automatically assume that you wanted to write the right command and will execute it.
Use localhost as site domain in Local by Flywheel.
Did you know that you can create a site in Local by Flywheel and use “localhost” as its domain name?
You can use this trick when working with APIs that won’t work locally on domains that are not ‘localhost’ for example when testing Google OAuth.
Quickly switch between different PHP versions.
If you’re using the most recent version of PHP but then want to work on a legacy project, that won’t work unless you change your system’s PHP version (it is easy to switch PHP versions if you are using a tool like local by flywheel, but still you would want to change your system’s PHP version say for example to run tests).
You can use PHPBrew, which gives you an easy way to do that without having to uninstall your current version and install a new one every time.
Final Thoughts
Being a good web developer is not measured by how much quality code you write, but also by how efficient and productive you are.
As promised at the beginning of this article, saving your time is guaranteed once you use some or all of the tips covered above. Head on over to Twitter to let us know how you get on!

If you want to keep up-to-date with what’s happening on the blog sign up for the Gravity Forms newsletter!
