Send Alternative Form Notification Emails Based on User Input with Conditional Logic
Form notification emails are important, not only to your business from an administrative perspective, but to your customers from an engagement perspective. With Gravity Forms, you can set conditions to determine which notifications are sent, and where they are sent to, based on user inputs.
By enabling conditional logic with form notifications on your WordPress site, you can streamline your communication and boost your site’s efficiency.
In this post, we’ll show you how to set up two alternative notification emails with conditional logic – one to be sent to an internal team member, and one to be sent to the customer.
Let’s dive in!
When Do You Need Additional Form Notification Emails?
Form notifications are automated emails, sent to designated recipients when a form is submitted. With Gravity Forms, you can customize these notifications, providing flexibility for different scenarios.
By default, notifications will be sent to the site admin, but there are several scenarios in which you should consider enabling additional, alternative notification emails on your forms:
- Lead generation – Follow up quickly and convert prospects while they’re still interested by letting them know you’ve received their inquiry, while also notifying your sales team.
- Customer support requests – Improve user experience and satisfaction by letting a customer know you’re working on their issue, while sending a notification to your support team.
- Order forms or service requests – Help customers keep track of their orders, service bookings, and event registrations, while notifying your internal team who can process these requests more efficiently.
- Team collaboration – When different team members handle different types of form submissions (e.g., sales, customer support, or feedback), alternative notifications can improve internal communication and response time.
- Time sensitive submissions – Some form submissions, like job applications, contest entries, or RSVP forms, require urgent action. Setting up alternative notifications can help the right person on your team respond in a timely manner.
- Data monitoring – Even if your form responses don’t require immediate action, additional notifications can improve visibility on new data like survey responses and customer feedback.
With Gravity Forms, your site can accommodate all of these scenarios and more when you create alternative form notifications with conditional logic enabled.
How to Use Conditional Logic to Enhance Form Notifications
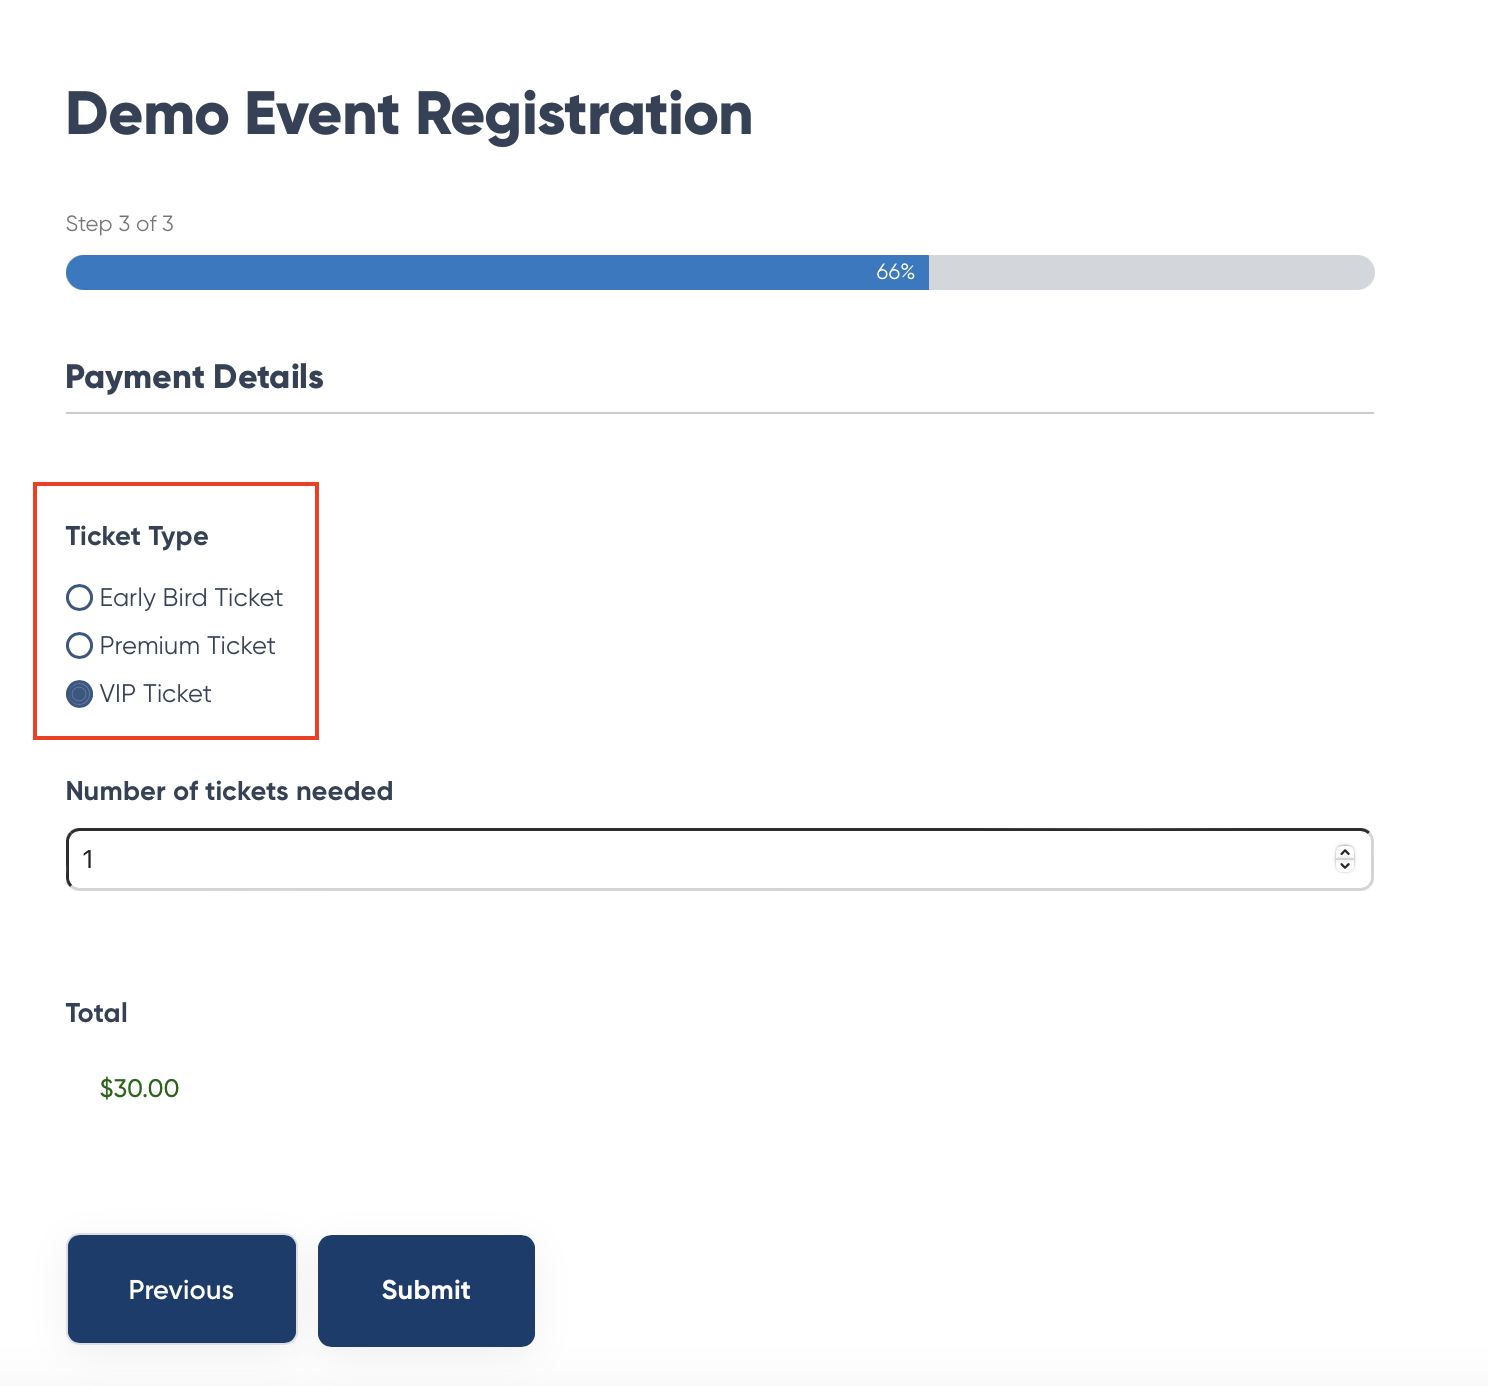
In this tutorial, we’ll use the example of an event registration form and set it up to send two alternative form notification emails, each with conditional logic based on the ‘Ticket Type’ form field:
- Send an email to the VIP coordinator, notifying them of a new VIP registration.
- Send an email to the customer, confirming we’ve locked in their spot at our event and including additional event instructions that are unique to VIPs.
Form Notification 1
The first form notification will send an email to our VIP coordinator, letting them know a new VIP-level customer has RSVP’d to our event.
To get started, navigate to your form in the forms list.
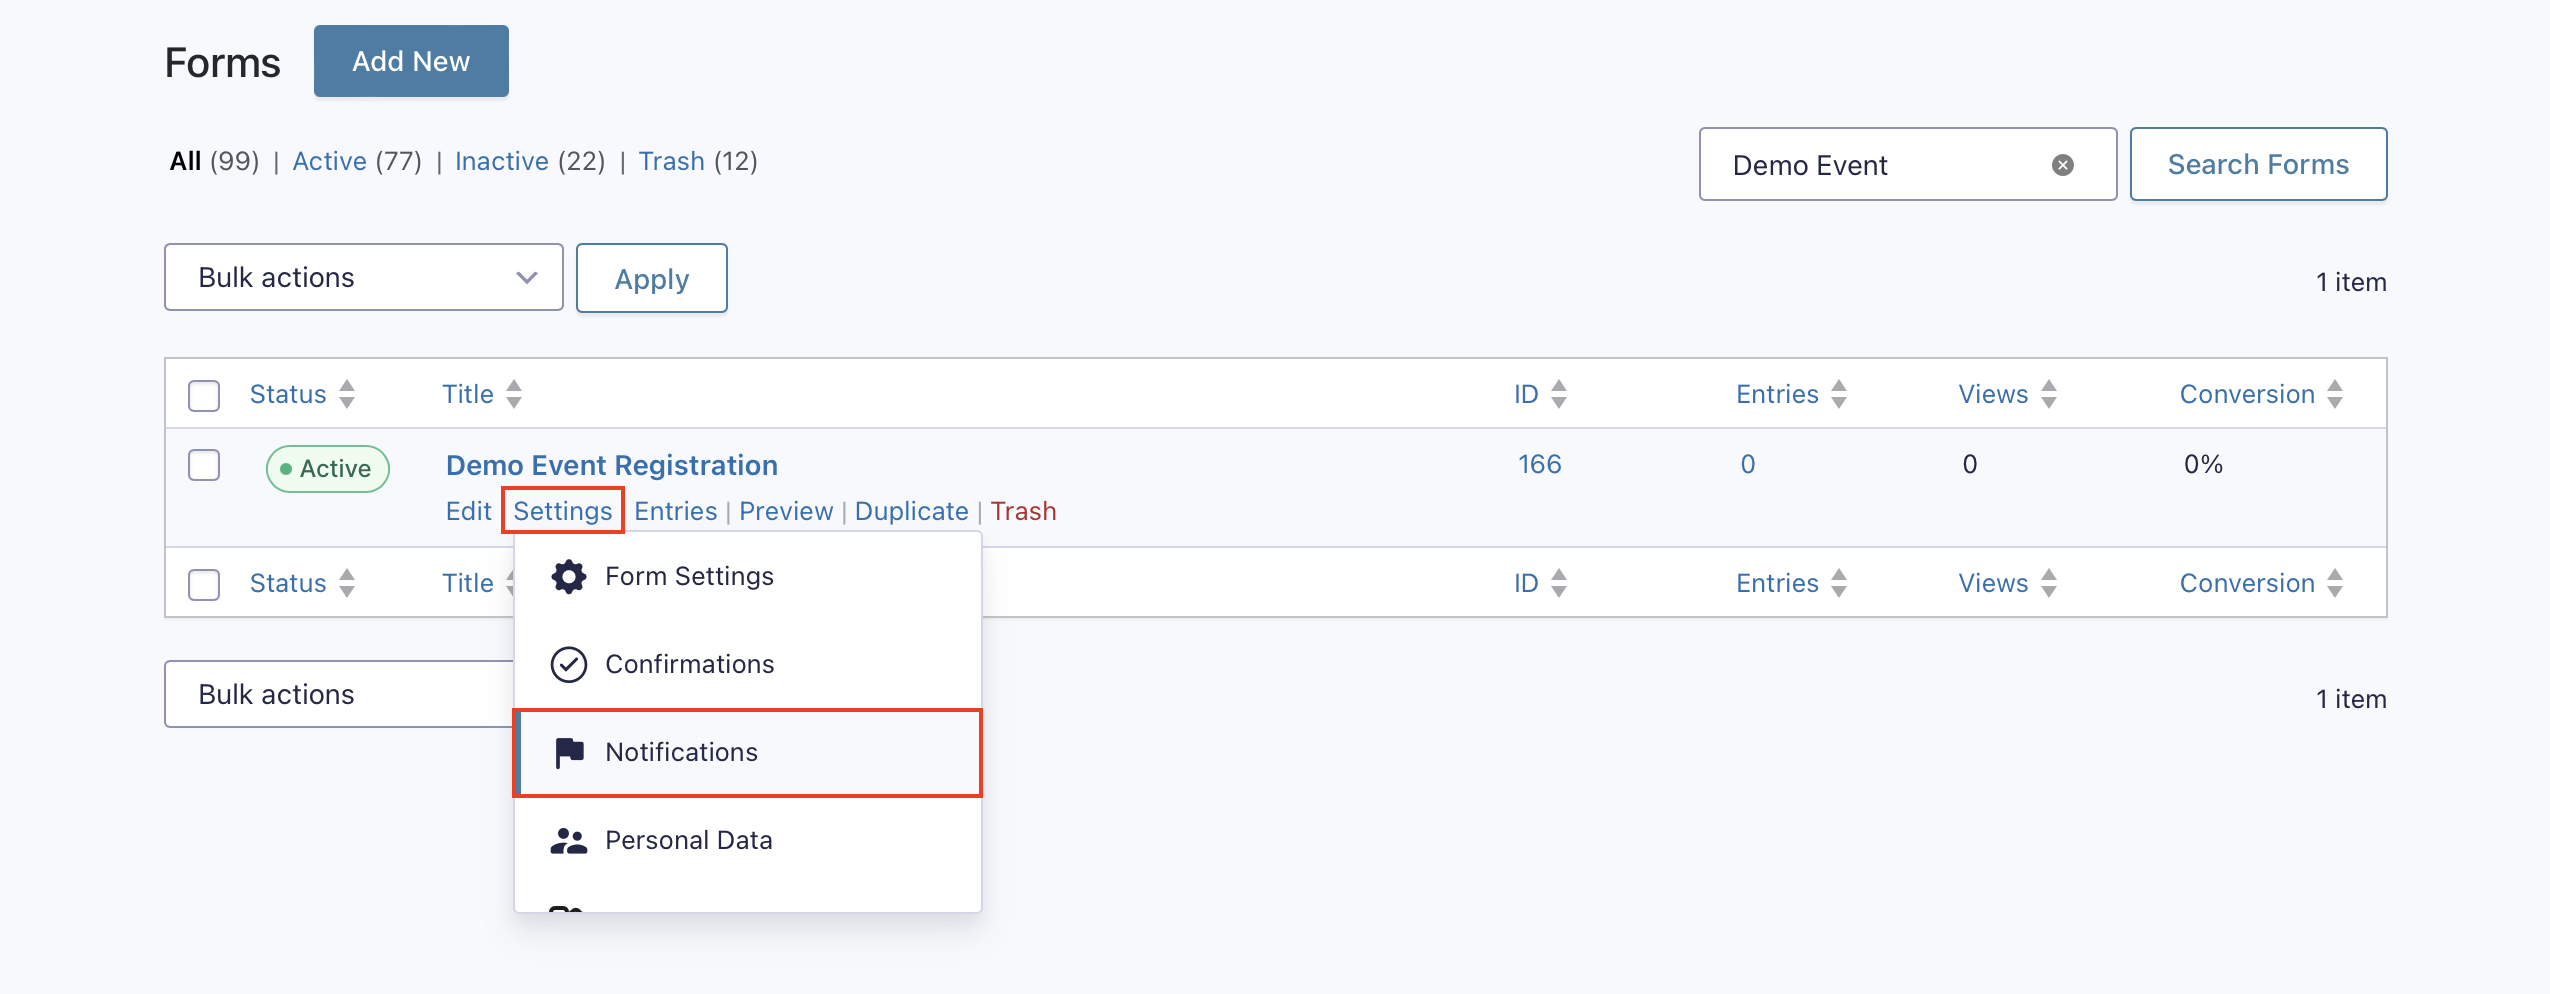
1. Hover over the form title, then hover over Settings, and click Notifications.
By default, there will already be an active notification in this list. This notification will be sent to the site admin, and will include data from all of the fields in the form submission. If you want to turn this off, simply click on the green status button to change the status from Active to Inactive.
2. To create a new form notification, click Add New.
3. Fill out the Name and Event fields, and enter a Send To Email. In this scenario, we will change the Send To Email to include the email address of our VIP coordinator.
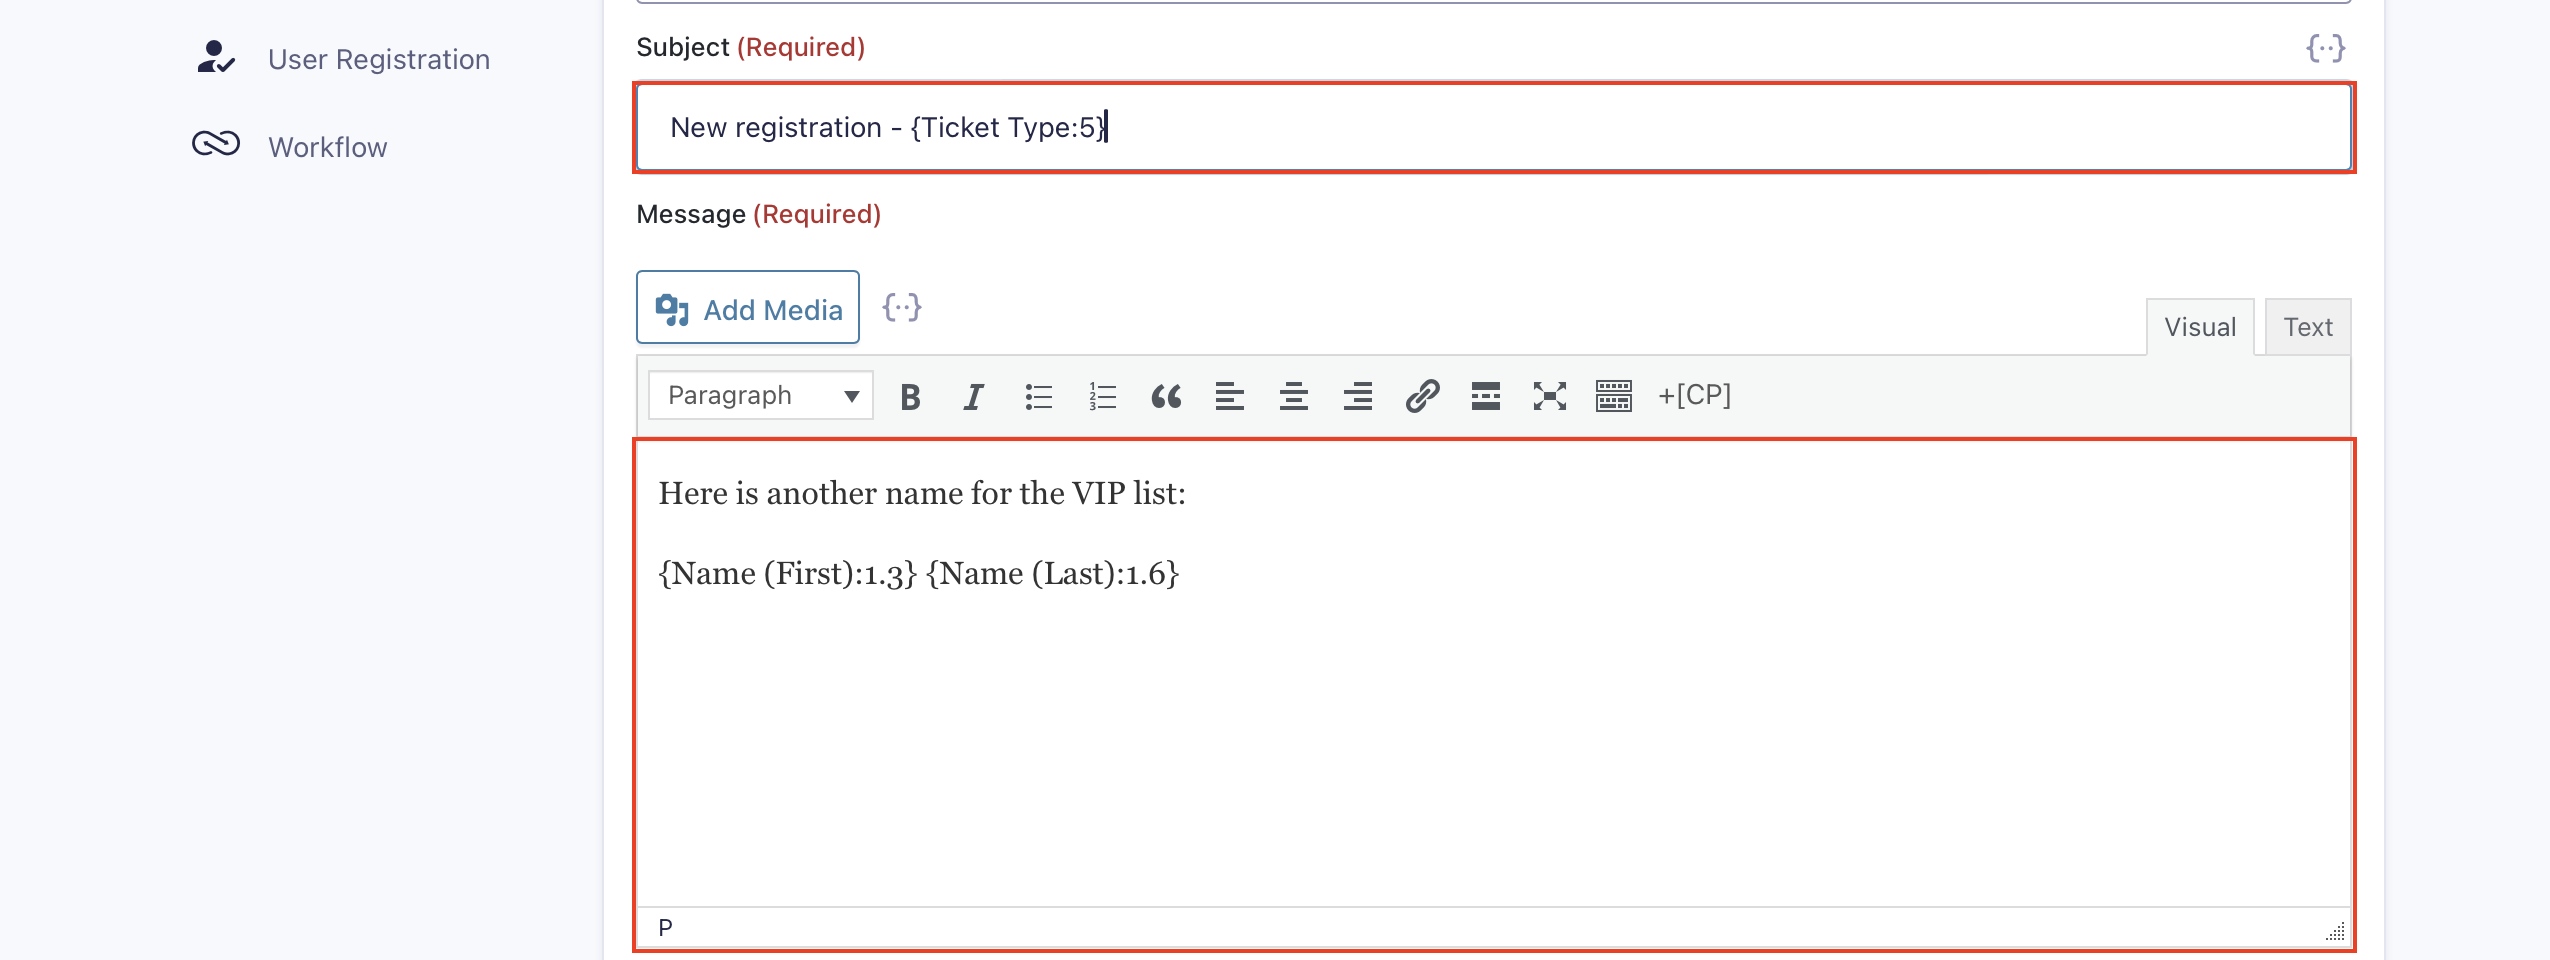
4. Give the message a Subject and customize the message if required. Using a merge tag here can help differentiate this event registration when it lands in your inbox. The Gravity Forms documentation section covers merge tags, plus lots of tips and tricks for configuring form notifications and creating customized form notification emails.
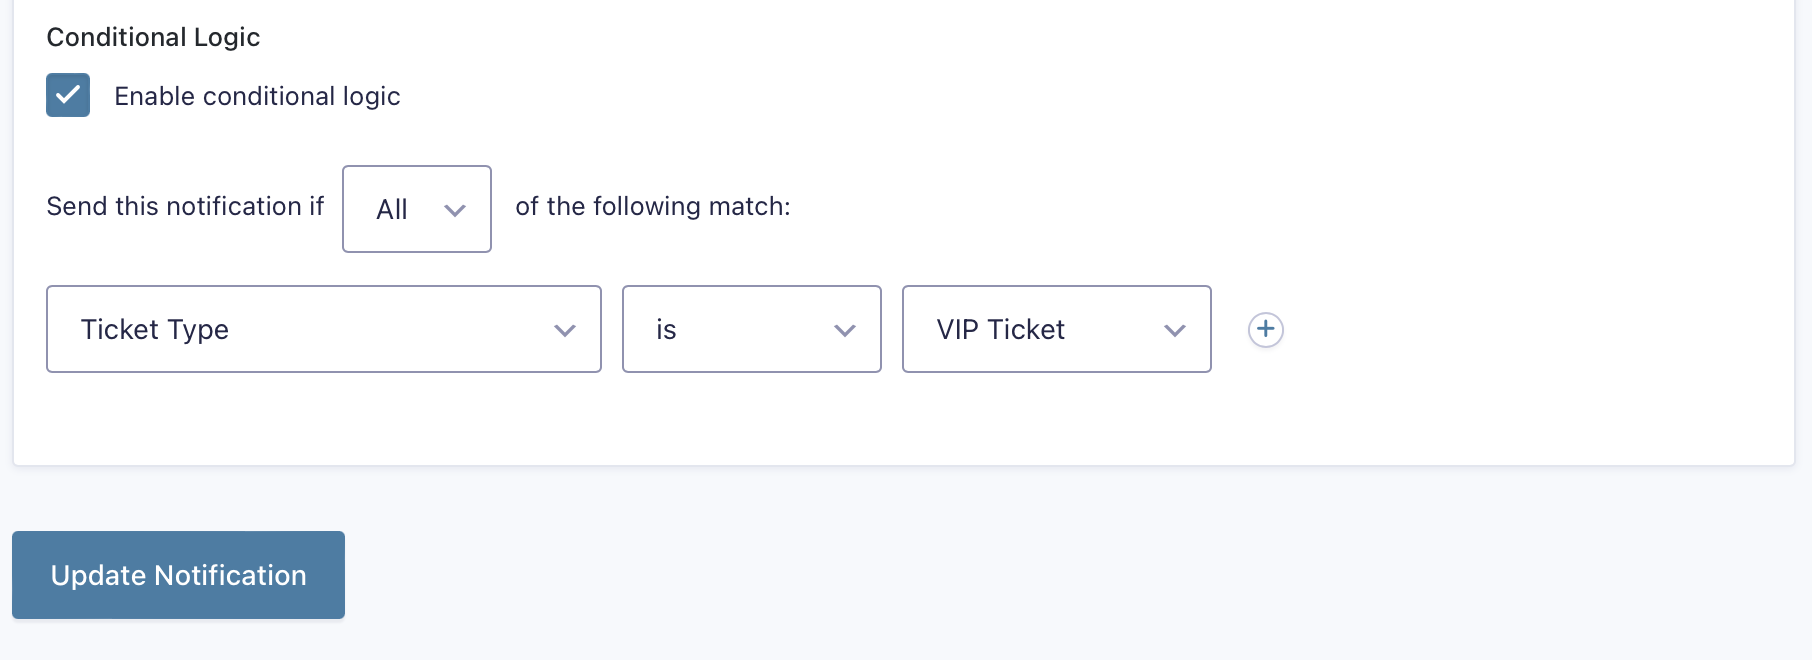
5. Scroll down and check the box to Enable conditional logic.
6. Set the condition to All, then set the field to Ticket Type and choose VIP Ticket. This will ensure that this notification only gets sent to the VIP coordinator when there is a VIP ticket signup.
7. Finally, click Update Notification.
You’ll now find the new form notification displayed in the Notifications list.
Next we need to configure a second form notification which will send an email to our VIP customer, letting them know we’ve received their RSVP and look forward to seeing them at our event.
Form Notification 2
To configure another form notification, go back to form Notifications.
1. Click Add New.
2. Fill out the Name and Event fields.
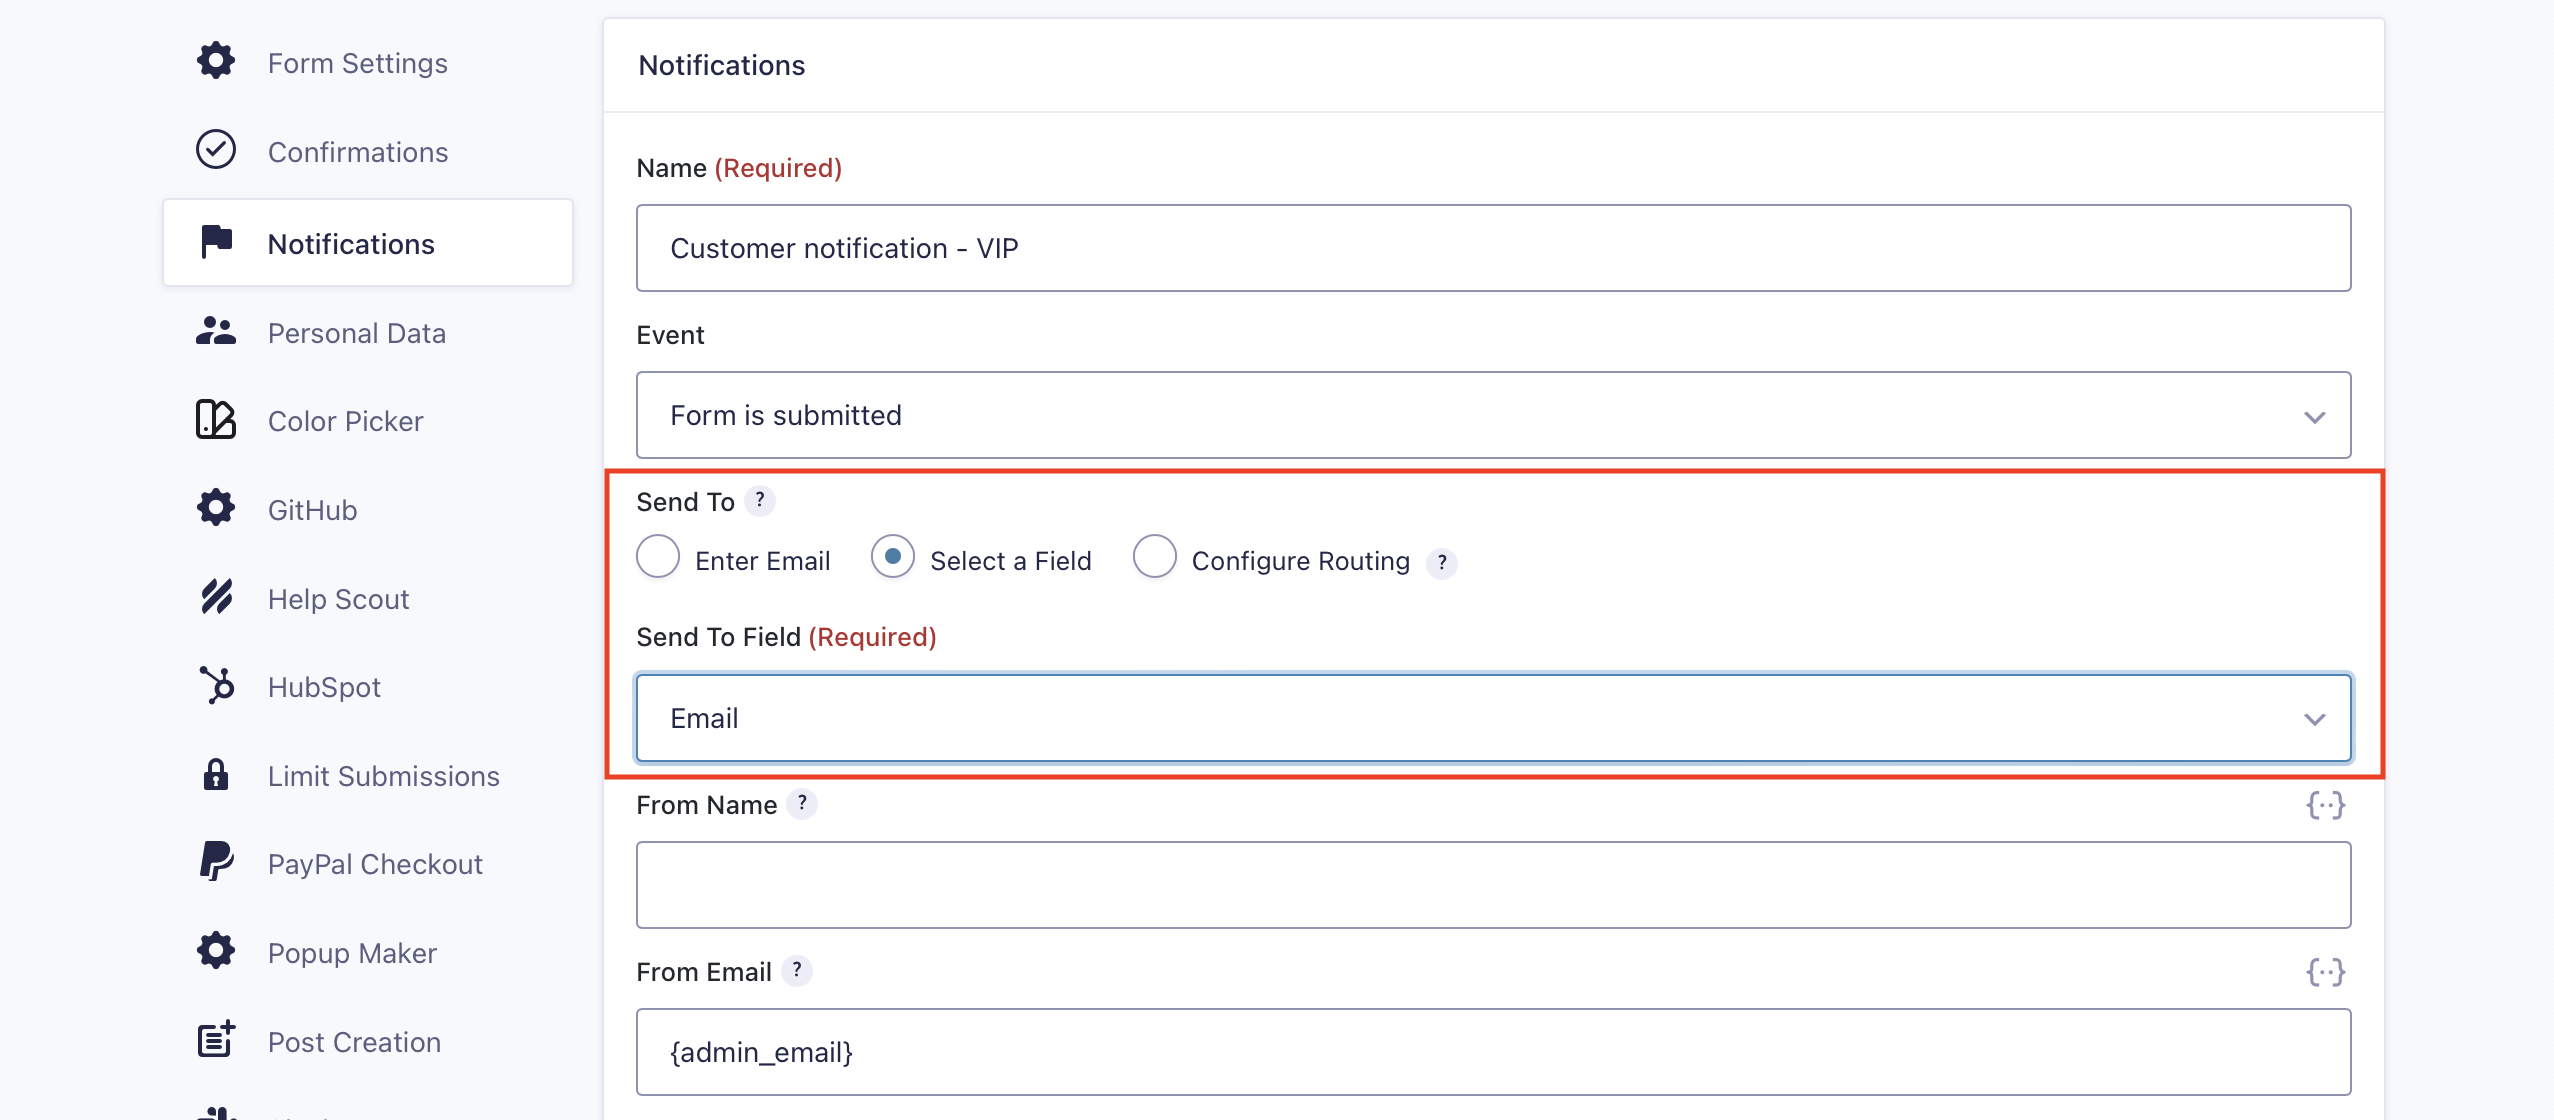
3. Under the Send To section, choose Select a Field, then select Email.
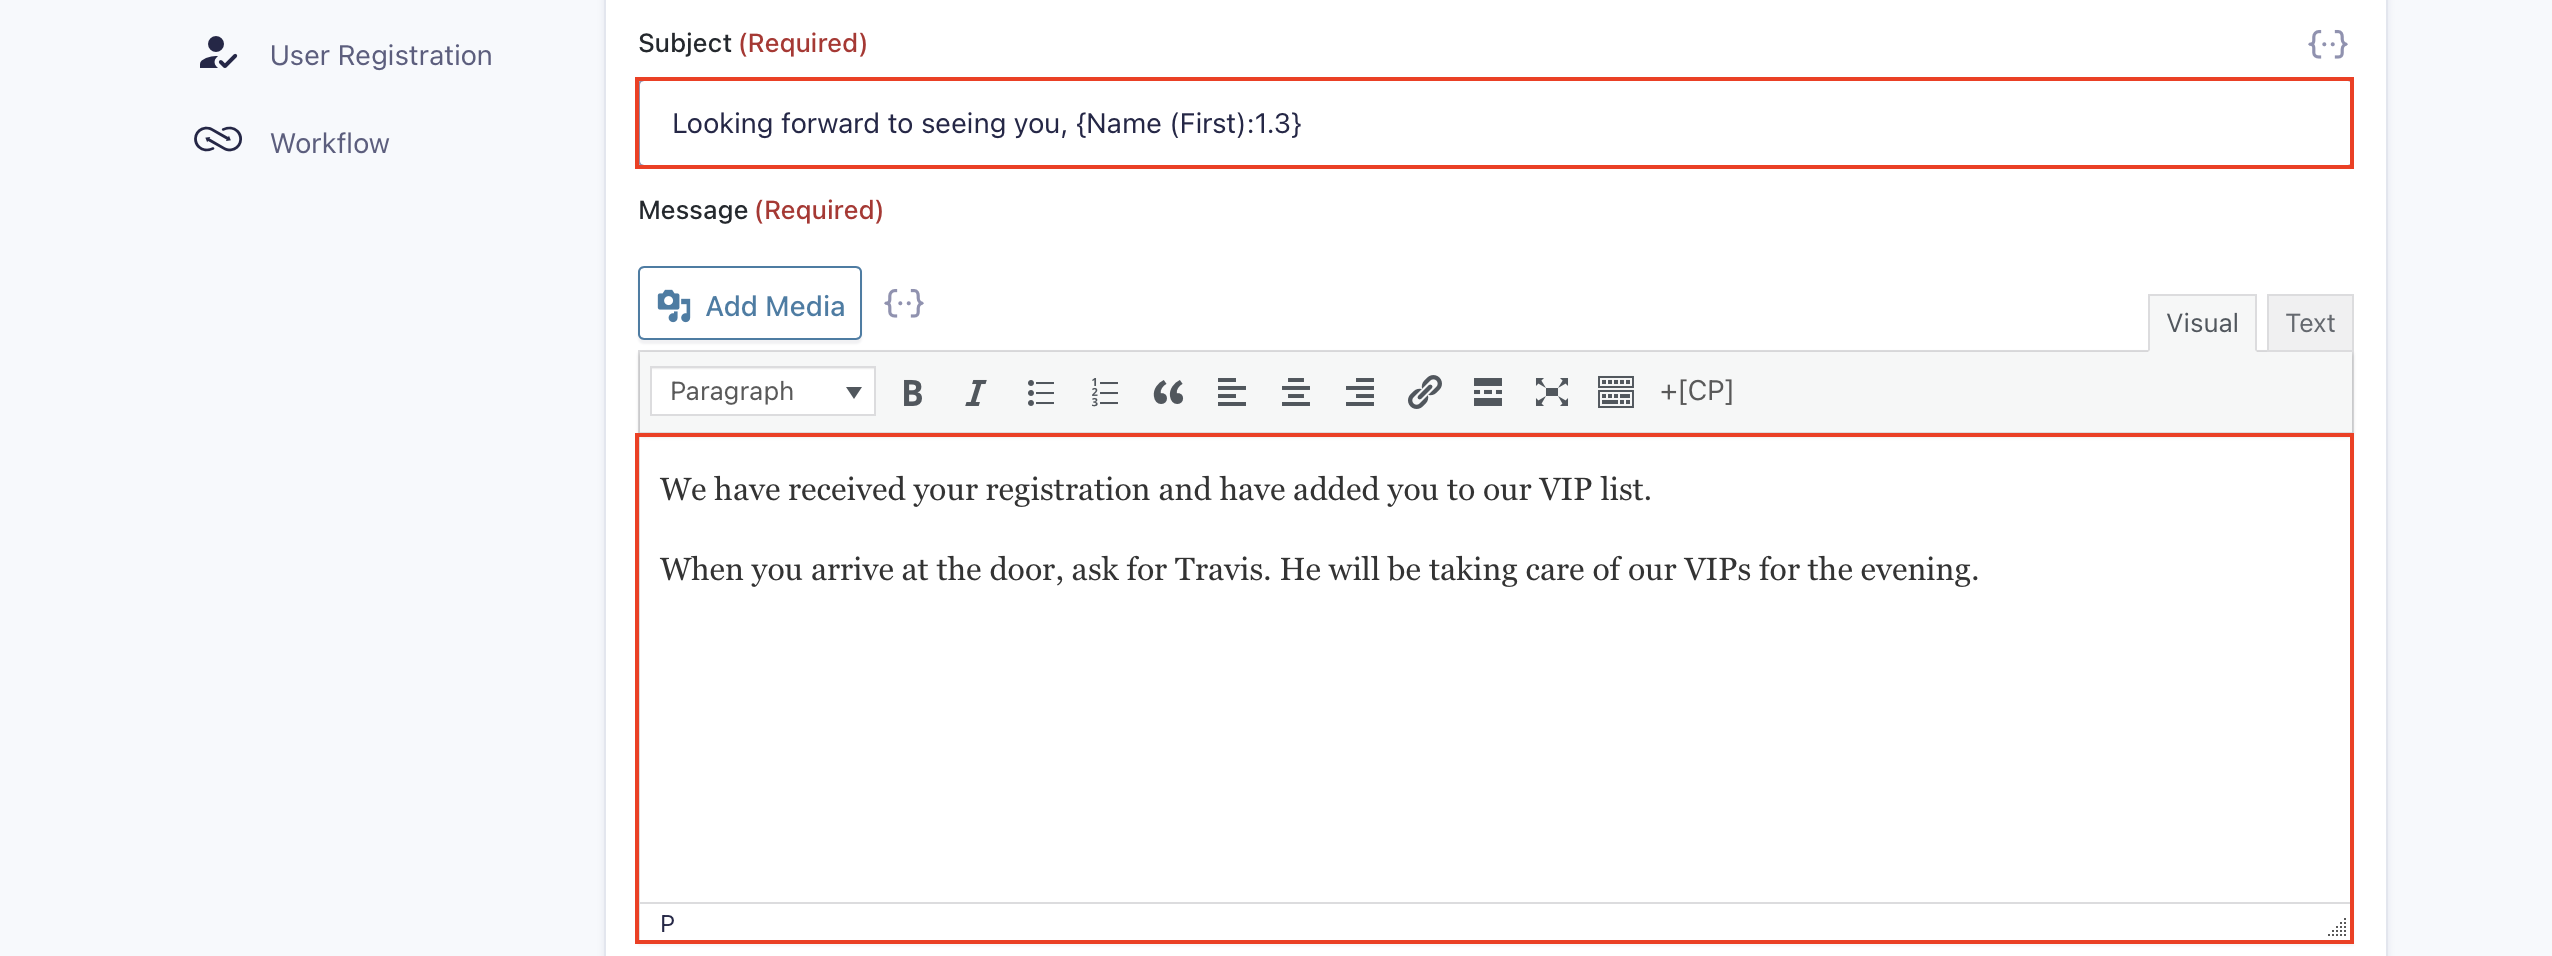
4. Enter a Subject and Message specific to this VIP customer.
5. Scroll down and check the box to Enable conditional logic.
6. Set the condition to All, then set the field to Ticket Type and choose VIP Ticket.
7. Finally, click Update Notification.
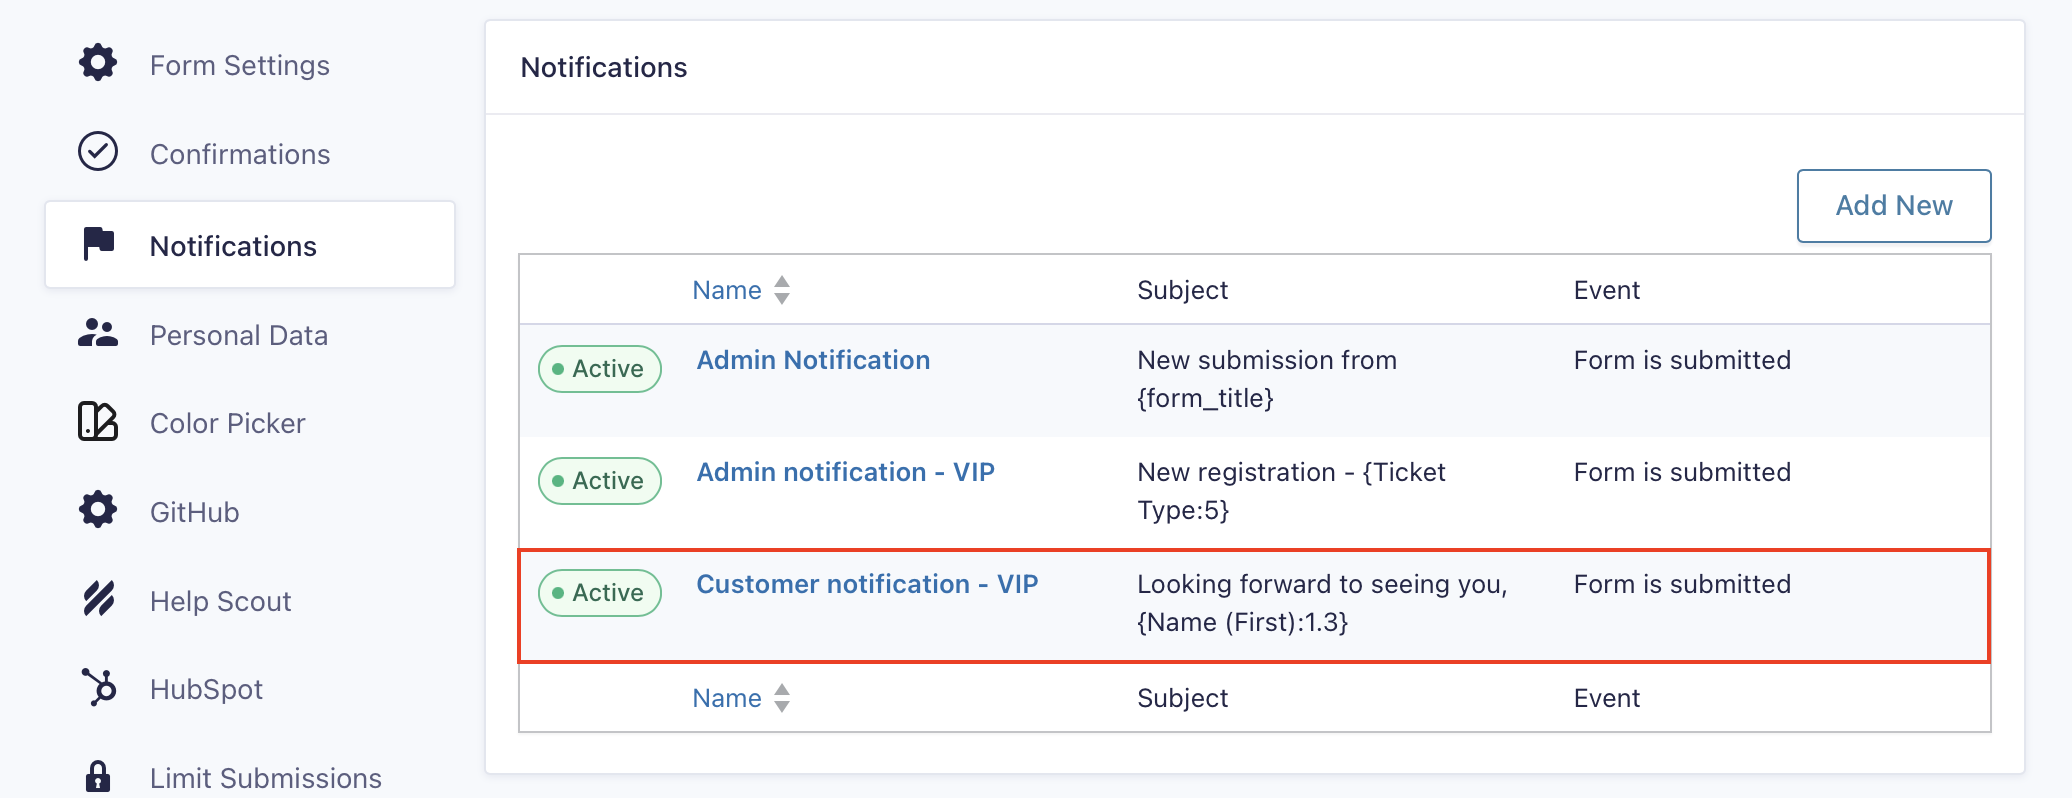
Again, you’ll find the form notification available when you view the Notifications list.
Note: Some forms may call for many different notification emails. For this reason, we recommend being clear and specific when naming each notification.
For more information on setting up notifications, check out our documentation.
Ready to Streamline Your Form Notifications Emails?
Notifications and conditional logic are both available with all Gravity Forms licenses, so if you hold an active license you can get started with these features today!
Not a Gravity Forms customer yet? No problem! Sign up for a free, personalized demo and experience the power of Gravity Forms for yourself, and then head over to our pricing page and choose the plan that fits your needs!

If you want to keep up-to-date with what’s happening on the blog sign up for the Gravity Forms newsletter!

