This Month’s Featured Add-On: Square!

Gravity Forms integrates with numerous payment providers, so whatever your requirements we have a service that will work with your business. Whether you run an ecommerce store or a nonprofit website, need to take payments for courses or events, or have other online payment requirements, Gravity Forms can help you achieve your goals.
The Square Add-On is one of our most popular add-ons. It lets you seamlessly integrate Square with your forms, enabling you to set up payment capture in minutes.
In this article we discuss the types of businesses that can benefit from using Square as their payment processor, as well as look in-depth at what Square has to offer, top tips for using it, and how to get started with the Gravity Forms Square Add-On.
We also share an awesome Square promotion available for all Gravity Forms customers new to Square.
Read on to find out more…
Square: An Introduction

If you are looking to monetize your website then Square is the perfect solution for the job. With a focus on simplicity, Square’s user-friendly technology and software empower businesses across the globe to thrive and grow.
Here are just some of Square’s top features…
- Ease of Use – Square has an extremely quick and easy registration process, and equally the process of integrating it with Gravity Forms consists of just a few clicks. Once set up, Square automatically captures payments, securely handles customer data, seamlessly transfers payments, and much more, all with minimal input from yourself.
- Accepts All Major Credit Cards – Square helps millions of sellers globally, accepting all major credit cards with the same rates across the board for Visa, Mastercard, and American Express.
- Transparent Fees – With Square you’ll find no extra hidden fees. There’s no setup fees, monthly fees, refund fees, or monthly reporting fees. Simply pay when you make a sale.
- Intuitive Dashboard and In-depth Analytics – Square’s intuitive dashboard provides an overview of all transactions, quick real-time insights, and advanced sales reports, so you always know what’s going on with your business.
- Robust Security – Square provides ground-up security, following industry requirements to ensure all data is kept safe and secure.
- Extensive Support – Square offers both phone and email support for when you need to speak to an expert. The Square Support Center is also packed full of useful articles and video tutorials to help you get the best out of their platform.
Gravity Forms Square Add-On Features
Gravity Forms is a must-have for any professional service or business. Not only can you create unique forms tailored to your exact business needs, but due to our extensive list of integrations you can easily take payments directly on your WordPress website.
Ans as mentioned, with the Gravity Forms Square Add-On it’s very easy to integrate your WordPress website with this popular payment service.
When it comes to functionality, the Gravity Forms Square Add-On lets you access many of the great features Square provides and makes them available to your users. Some examples include:
- Accept One-time Payments and Subscriptions – Whether you want to collect one-time or recurring subscriptions, the Square Add-On can handle both.
- Authorize and Capture – If you want to process payment after a product has been shipped or after work has been completed, the ability to authorize a payment but not withdraw the funds until a later date will be of interest.
- Process Refunds – The Square Add-On includes a refund button that allows you to quickly and easily refund payments and update the entry as needed directly from your WordPress dashboard, enabling you to deliver responsive and effective customer service.
You can also use the Square Add-On with a number of other Gravity Forms Add-Ons and third-party integrations.
This includes the Advanced Post Creation Add-On that lets you build a form that both creates a blog post and collects a payment. The post is then only created if the payment is approved.
You can also use the Square Add-On with the User Registration Add-On. This gives you a way to register new users on your site and charge a registration fee at the same time or set up a recurring subscription, all via one form.
Is Square a Best Fit for Your Business?
Whatever type of business you run, you can take payments online with Gravity Forms and Square.
Whether you are looking to turn your hobby into a small business, want to move your brick-and-mortar store online, or are running a large online services company or nonprofit website, accepting payments through your website has never been easier with Square and Gravity Forms.
Here are just some of the payment forms you can create with Gravity Forms…
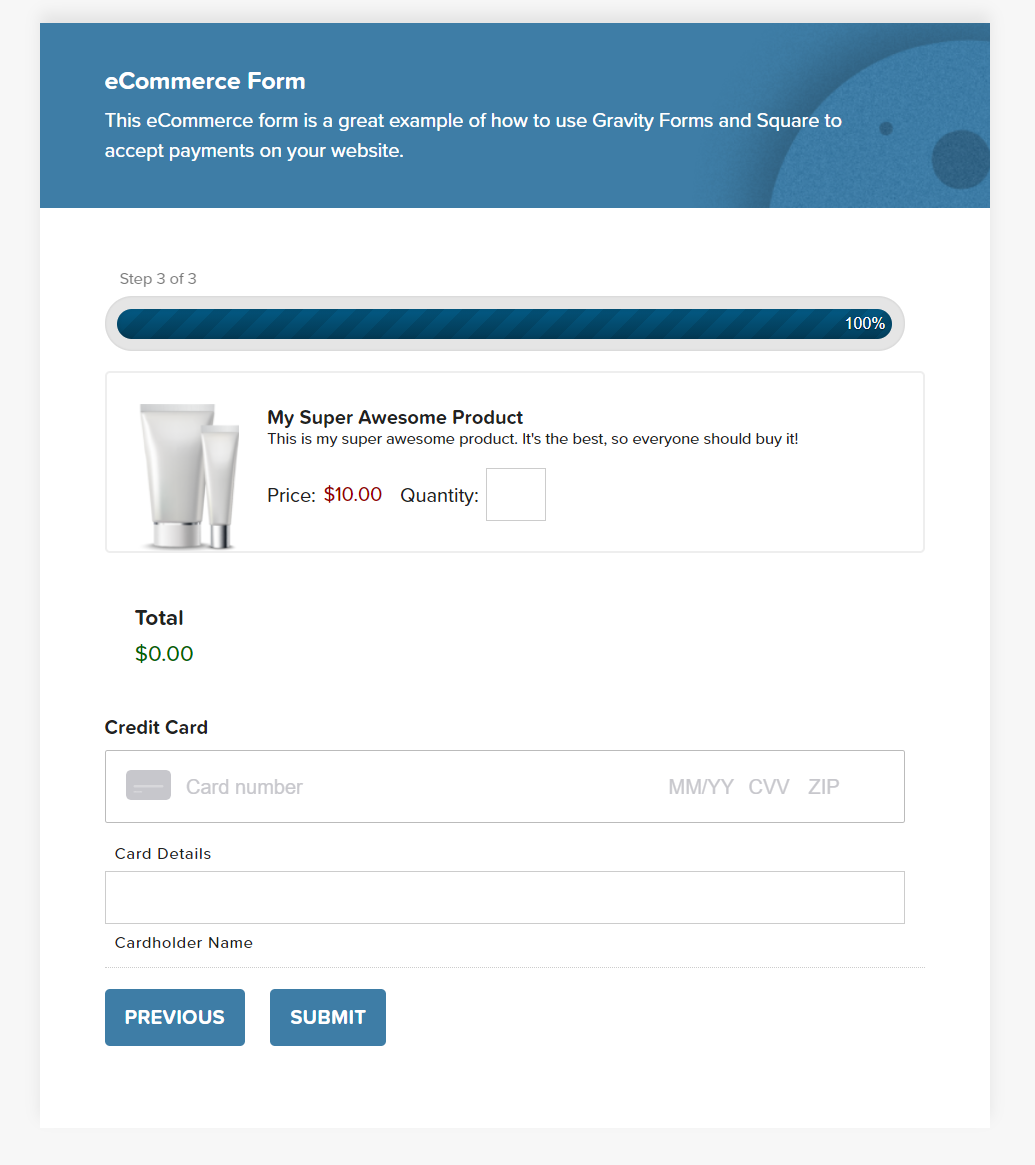
- Ecommerce Form (take payments for physical products)
- Digital ecommerce Form (take payments for online digital products)
- Service Payment Form (take payments for an online service)
- Event Registration and Payment Form
- Restaurant Order Form
- Donation Form
Get Started with the Gravity Forms Square Add-On
As we mentioned, getting started with Square and Gravity Forms is a very quick and easy process. Let’s take a look at how to start accepting payments on your website…
1. Sign Up for a Square Account
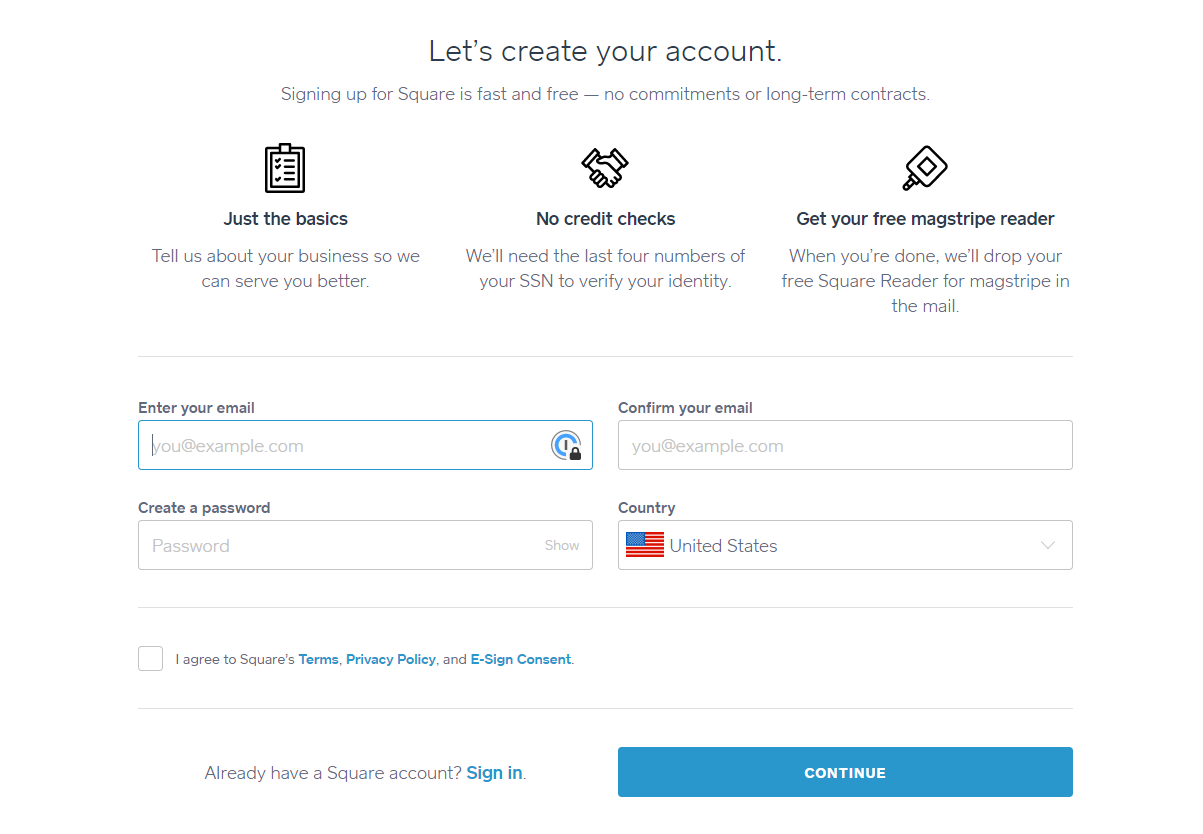
Signing up for a Square account will take just a few minutes. Simply follow Square’s instructions, entering your personal details, and agreeing to their terms and conditions.
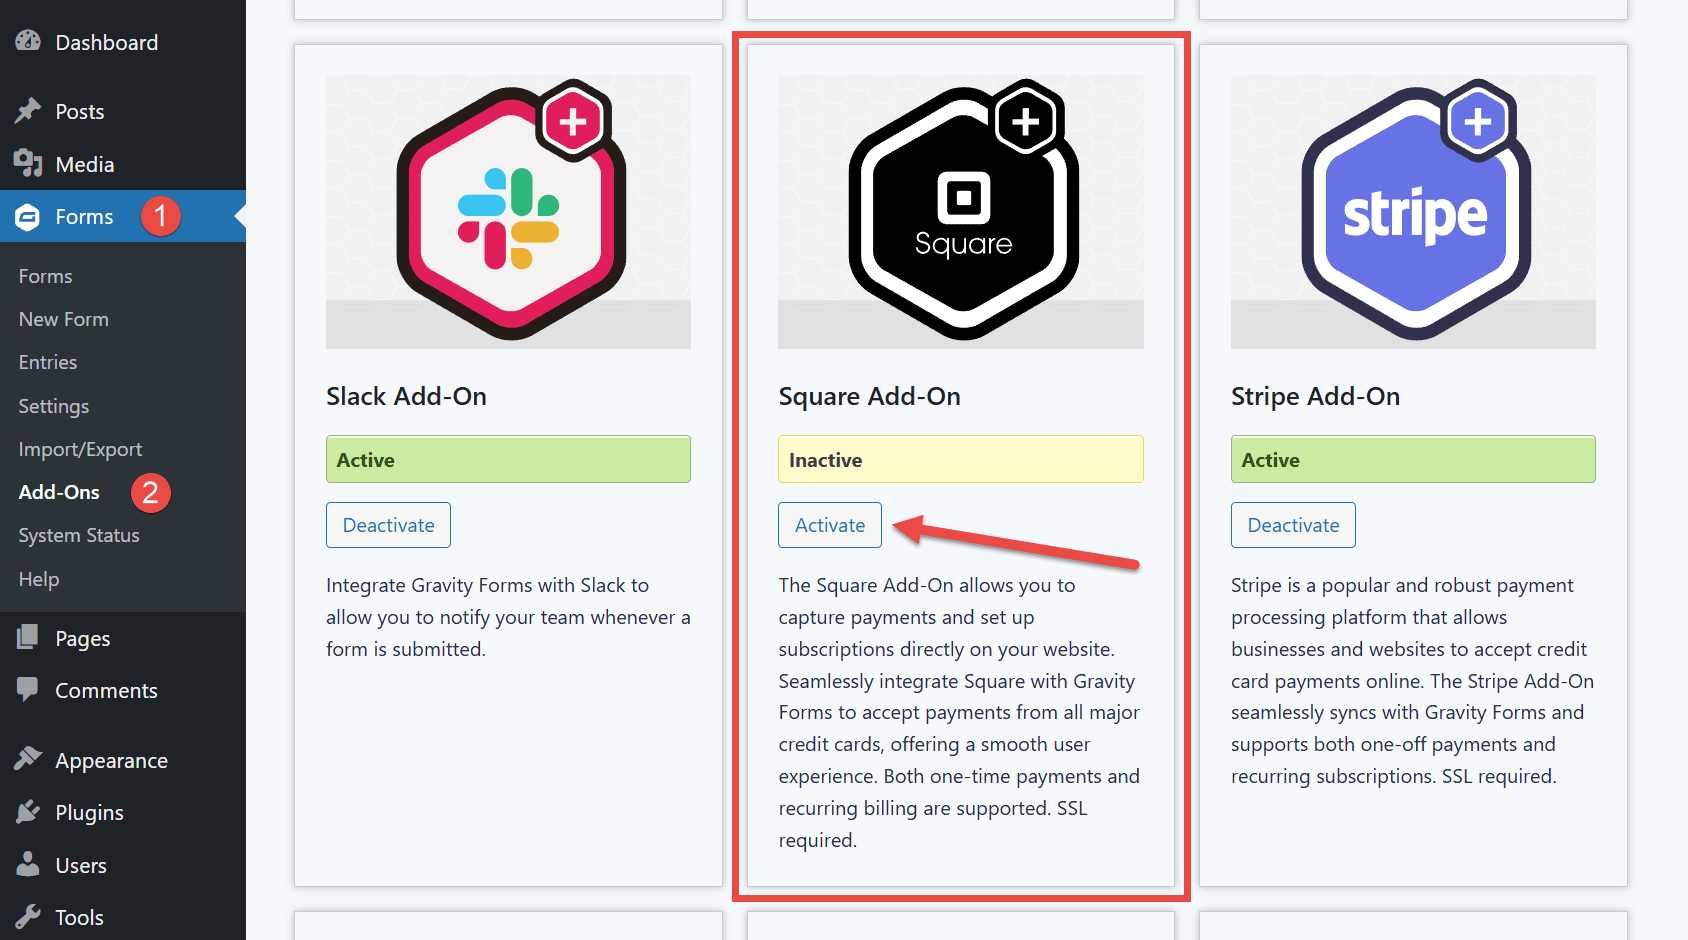
2. Install the Gravity Forms Square Add-On
Open your WordPress dashboard and select Forms > Add-Ons. Then, locate the Square Add-on and click the Activate button.
3. Connect Gravity Forms and Square
Next you will need to connect Gravity Forms and Square, to do so, select Forms > Settings > Square, and then click on Connect with Square.
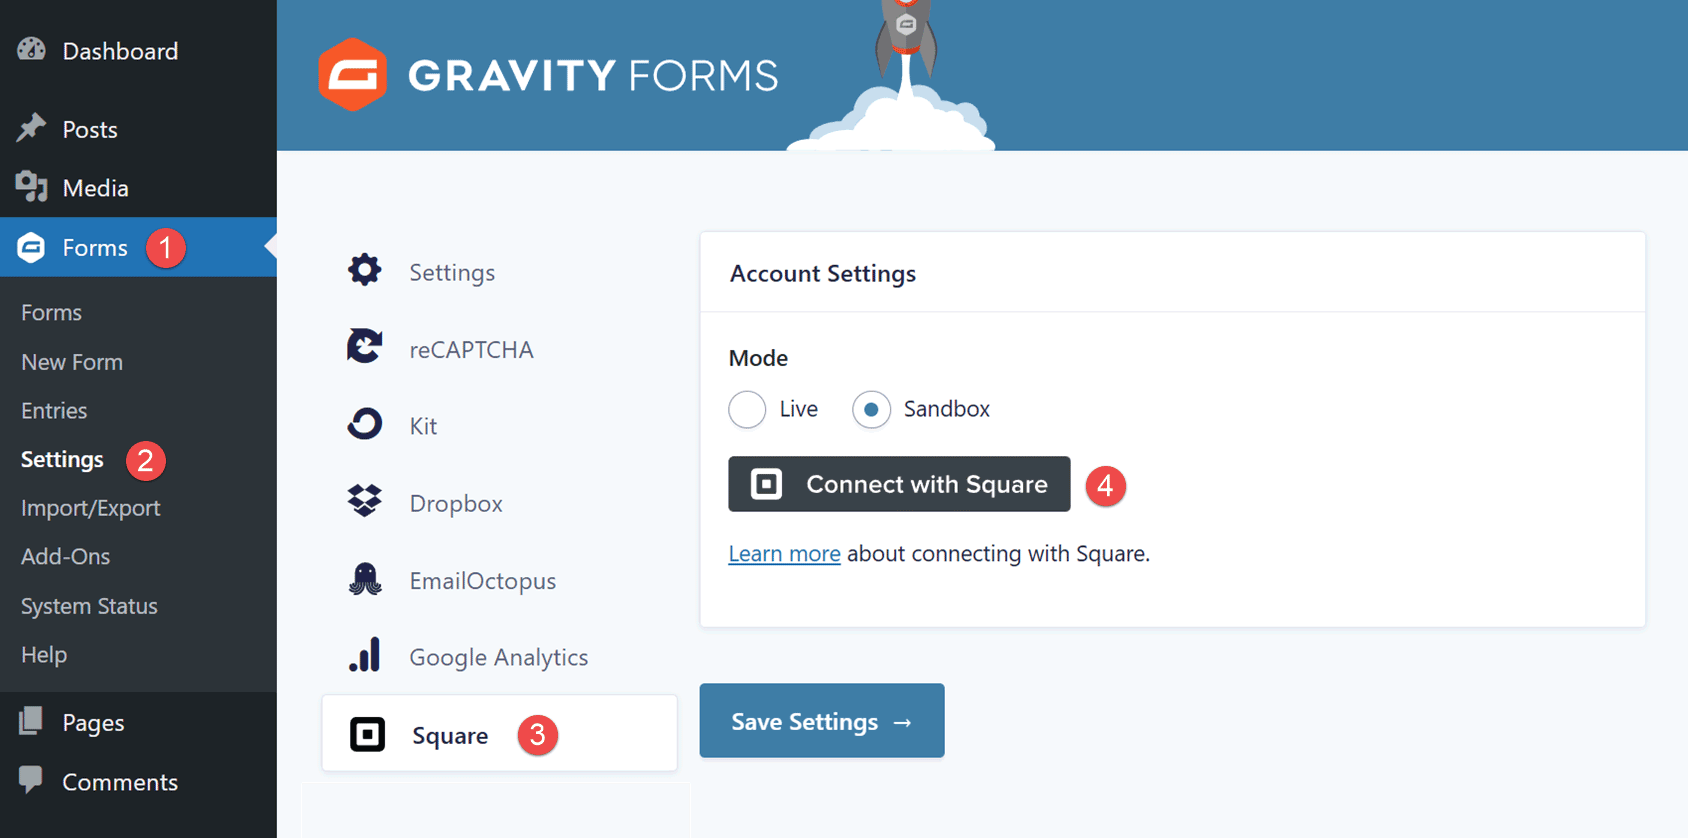
You will then be asked to log into your Square account – simply follow the instructions to sync Square with Gravity Forms.
For any extra help on integrating the Square Add-On with Gravity Forms, check out this Square set up article from the docs.
4. Create a New Form
Using the Ecommerce option from the Gravity Forms template library gives you a quick way to add a new form to your site. However, you can also start with a blank form and build one to your own specifications.
Either way, to get started, click on Forms > New Form from the sidebar menu in your WordPress dashboard.
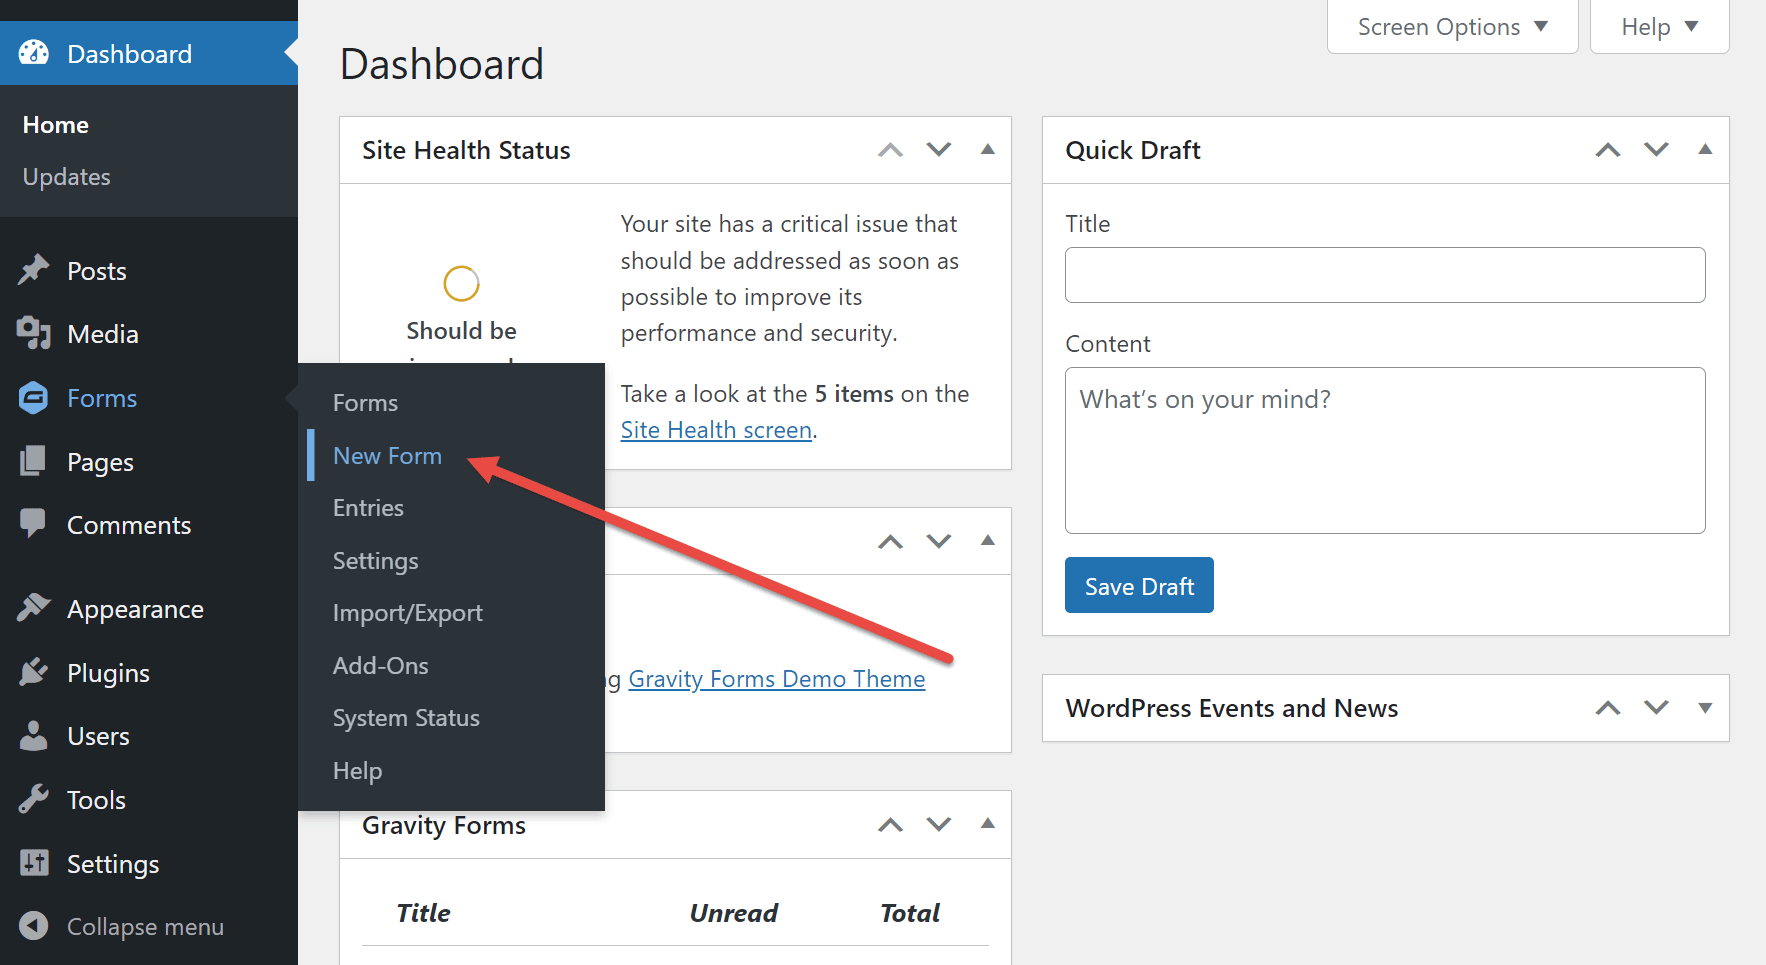
You can then either click the Blank Form option or choose the Ecommerce Form template.

Once you’ve made a selection, the Form Editor will be displayed with either a blank canvas or the template contents, depending on your previous choice.
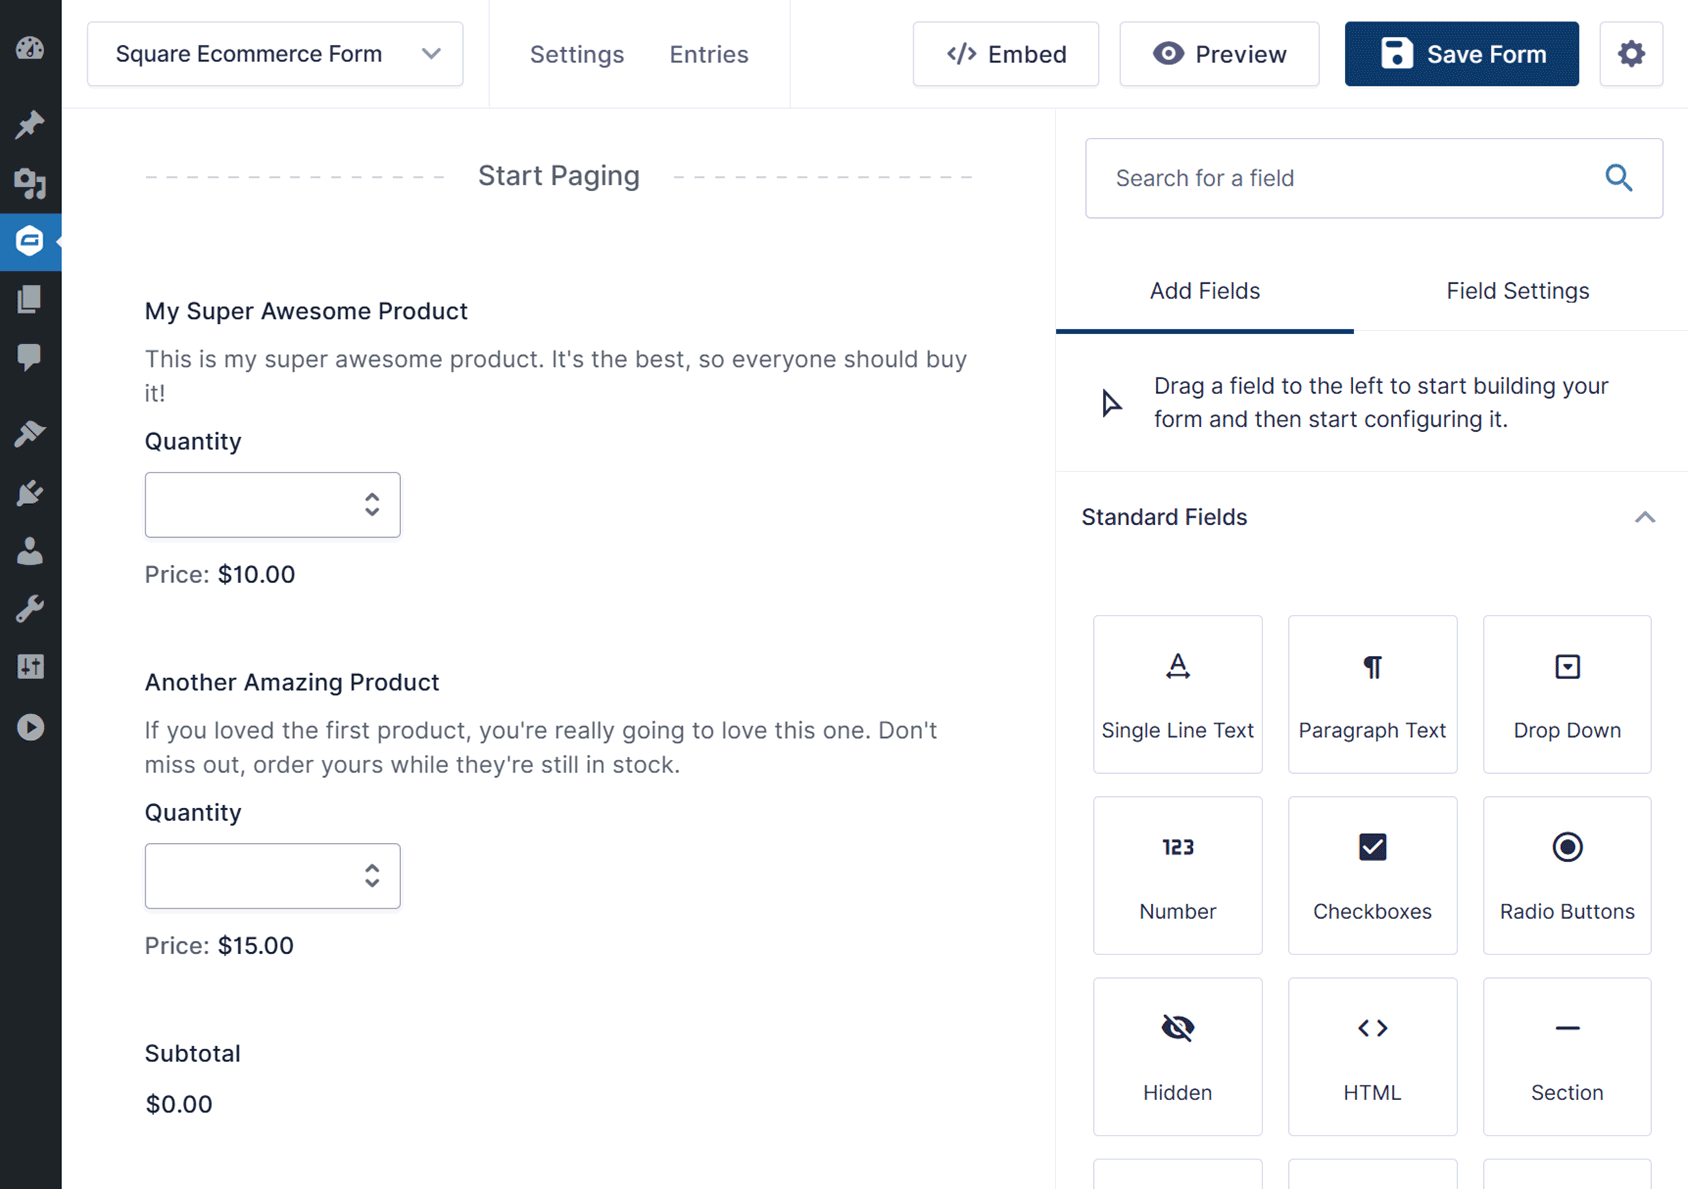
You can then add, edit, and delete fields as appropriate using the drag-and-drop interface.
5. Add the Square Field to the From
Importantly, to take payments using Square, you will need to delete the placeholder payment field shown on the template and add the Square field to your form, which you will find under Payment Fields.
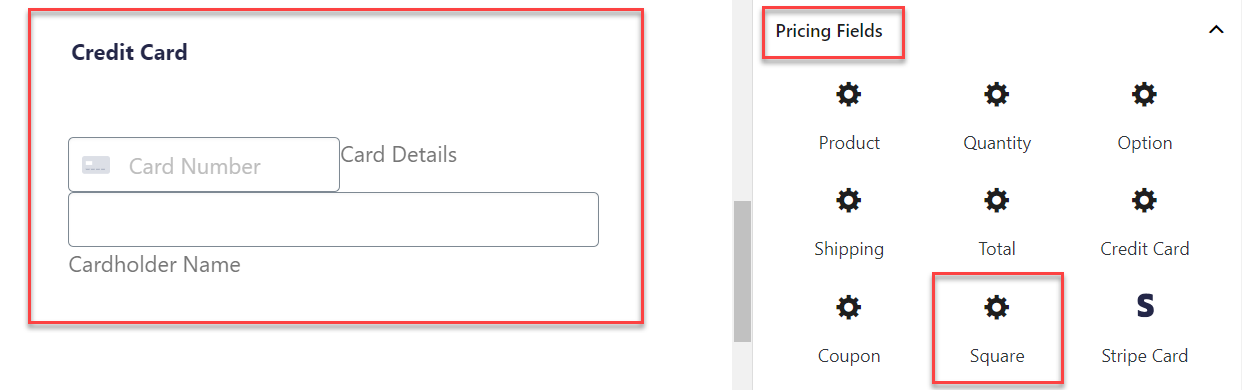
Once you’re happy with your customized form, click Update to save the changes.
6. Create a Square Feed for Your Form
The last step is to integrate your form with Square by creating a Square feed. To do so, select Settings > Square > Square Settings.
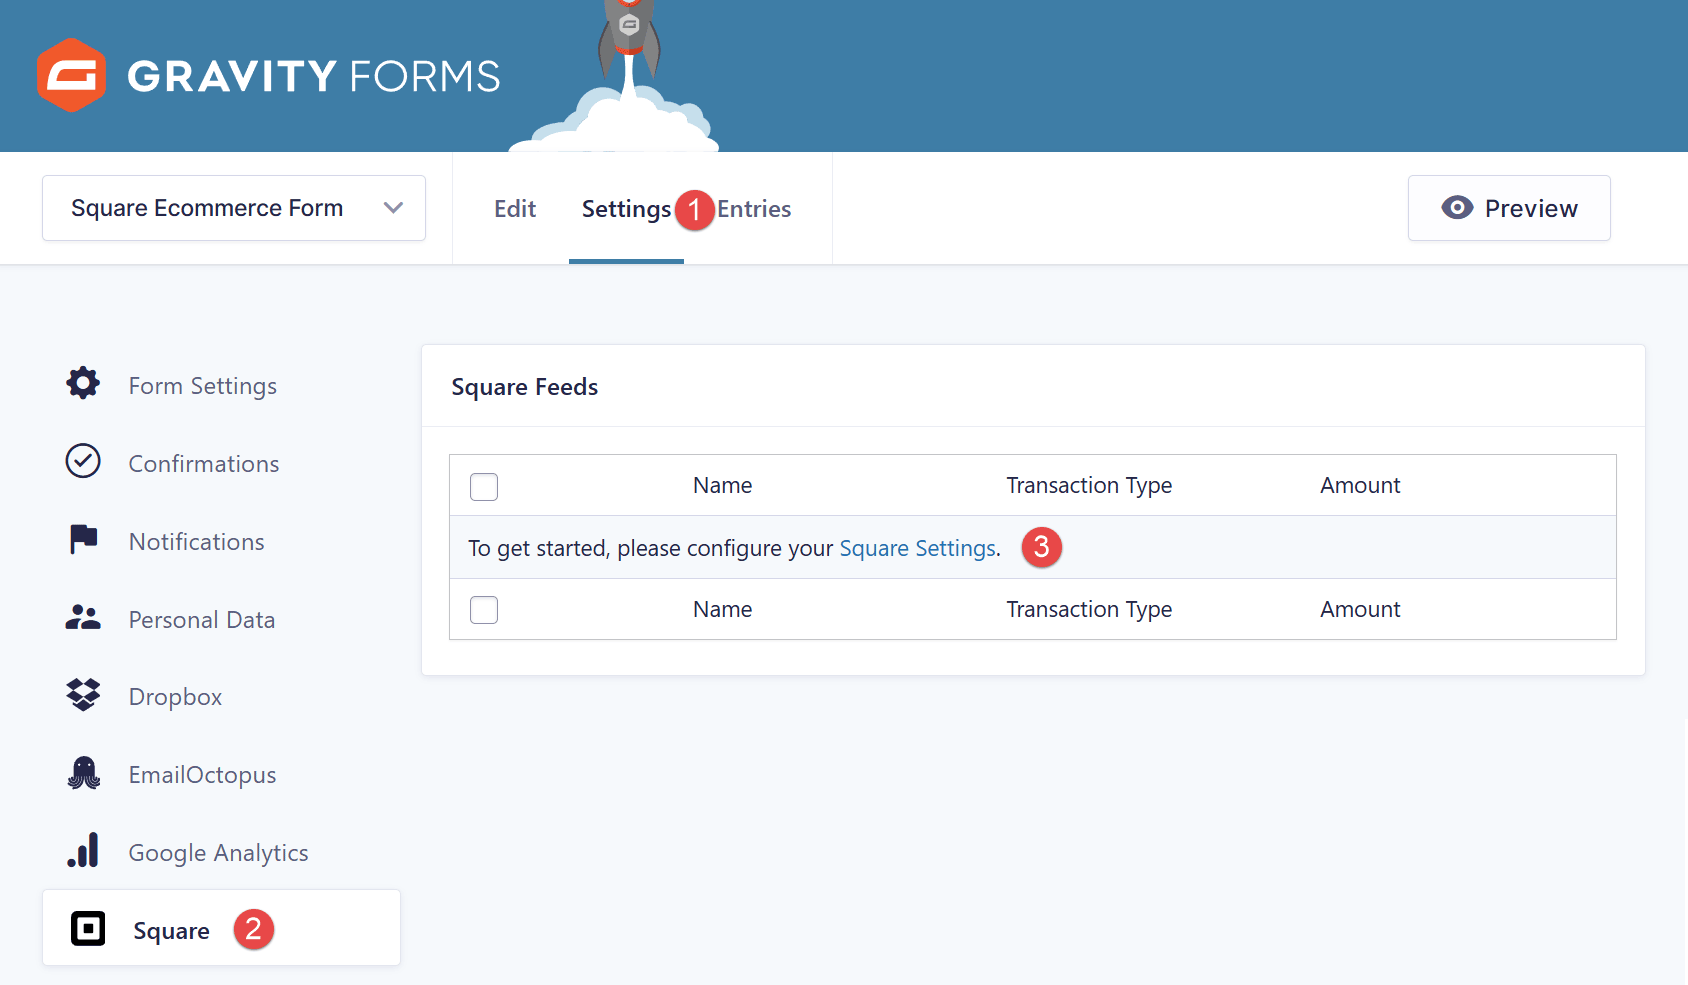
To set up the Square feed, give the feed a name and under Transaction Type select Products and Services. You will then need to map the form fields for Payment Amount and Billing Information – once completed click Update Settings.
For more information on how to configure a Square Feed, check out this doc – Creating a Feed for the Square Add-On.
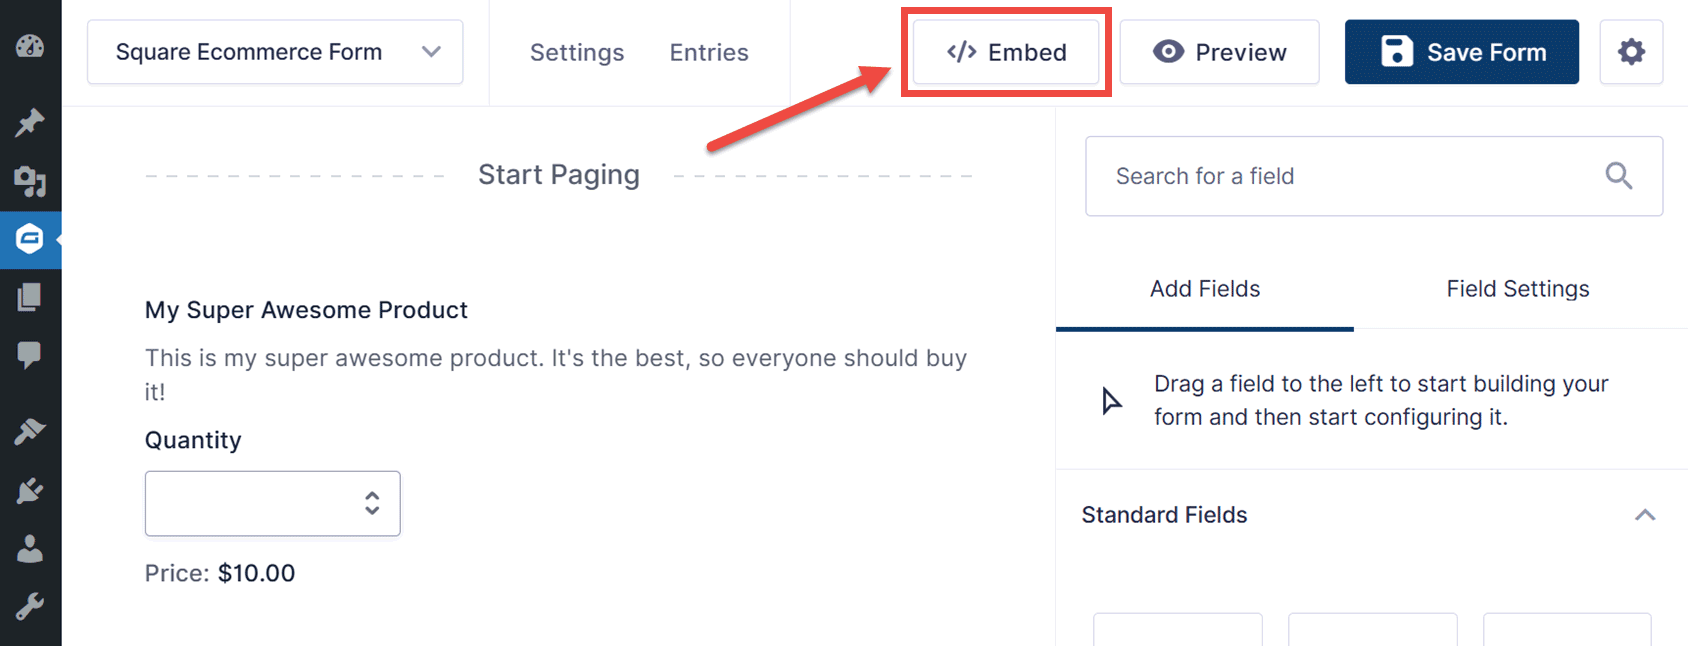
7. Embed and Publish Your Form
Now that you’ve created the form and set up the Square integration, it’s time to publish your form on your site so that visitors can access it.
There are a few ways to do this. One is to use the Gravity Forms block in the Gutenberg editor (recommended) to embed the form in any page or post on your site. The other is to add the shortcode in the Classic Editor.
Our guide to Adding a Form to Your Site includes step-by-step instructions on these options.
When it comes to styling your form, if you’re using Gutenberg, you’ll find styling options built into the Gravity Forms block. For more information on how to style your forms, check out this ultimate guide – How to Style Forms in Gravity Forms.
Make sure you test your form to check that it is working and payments are being processed. Check to ensure that payments are arriving in your Square account!
When Using Square…
When using Square there are a couple of points to keep in mind…
- SSL Certificate – Due to the sensitive nature of the data being transferred, Square requires an SSL certificate to be installed on your site. If you don’t have an SSL Certificate, or if there are issues with configuration, you will need to contact your hosting provider.
- Square for Developers – The Square Add-On provides hooks that can be used to modify the default functionality of the add-on or further extend it.
- Further Square Documentation – For any extra information you may need to help get started with Square, check out our extensive Square documentation.
Square Promotion – Free Processing for up to 180 Days
 Gravity Forms and Square are offering a great promotion for all new Square customers – free processing fees for up to 180 days.
As part of the ‘Free Processing Promotion’ with Square, all new Square customers will receive free processing on up to $3,000 in credit card transactions for the first 180 days. (Afterwards, you will pay the standard Square fees for all transactions).
Square is also offering $20 off Square hardware once you’ve signed up.
To take advantage of this promotion, simply sign up for a Square account using this link.
Don’t Have Gravity Forms Yet?
If you don’t have Gravity Forms or the Square Add-On, don’t worry. You can still test out everything in this article for free inside your own personalized Gravity Forms demo and see why Gravity Forms is the top choice for WordPress sites worldwide.
Already in love? Purchase our premium WordPress form plugin today!

If you want to keep up-to-date with what’s happening on the blog sign up for the Gravity Forms newsletter!